Table of Contents
Advertisement
Advertisement
Table of Contents

Related Manuals for Exerpeutic Workfit 1030


Summary of Contents for Exerpeutic Workfit 1030
- Page 1 Treadmill OWNER’S MANUAL Item #1030...
-
Page 2: Table Of Contents
TABLE OF CONTENTS SERVICE ------------------------------------------------------------------------ 2 IMPORTANT LABELS -------------------------------------------------------- 3 PRODUCT SAFETY ---------------------------------------------------------- 4 PART DRAWING -------------------------------------------------------------- 8 HARDWARE PACKING LIST & TOOLS --------------------------------- 9 PART LIST ---------------------------------------------------------------------- 10 ASSEMBLY --------------------------------------------------------------------- 12 COMPUTER -------------------------------------------------------------------- 16 ADJUSTMENT ----------------------------------------------------------------- 22 STORAGE ----------------------------------------------------------------------- 23 MAINTENANCE &... -
Page 3: Service
SERVICE IMPORTANT: FOR NORTH AMERICA ONLY To request product service and order replacement parts, please call our customer service department at: 1-866-924-1688 Monday through Friday, 8:00 AM-5:00 PM Pacific Standard Time, service@paradigmhw.com or email us at: Please visit our website at www.paradigmhw.com. Please have the following information ready when requesting for service: Your name Phone number... -
Page 4: Important Labels
IMPORTANT LABELS... -
Page 5: Product Safety
PRODUCT SAFETY Basic precautions should always be followed, including the following safety instructions when using this treadmill: Read all instructions before using this treadmill. DANGER: To reduce the risk of electric shock, please read the following: Always unplug the treadmill from the electrical outlet immediately after using and before cleaning, assembling, or servicing. - Page 6 PRODUCT SAFETY Keep the treadmill on a solid, level surface with the minimum safety area clearance of 6ft x 3ft around the treadmill. Be sure the area around the treadmill remains clear during use and has adequate clearance. This treadmill is for household use only.
-
Page 7: Grounding Instructions
PRODUCT SAFETY GROUNDING INSTRUCTIONS This product must be grounded. If it should malfunction or break down, grounding provides a path of least resistance for electric current, reducing the risk of electric shock. * This treadmill is equipped with a grounded cord and a grounded plug. - Page 8 PRODUCT SAFETY WARNING: Before beginning any exercise program consult your physician. This is especially important for the persons who are over 35 years old or who have pre-existing health problems. Read all instructions before using any fitness equipment. We assume no responsibility for personal injury or property damage sustained by or through the use of this product.
-
Page 9: Part Drawing
PART DRAWING... -
Page 10: Hardware Packing List & Tools
HARDWARE PACKING LIST & TOOLS (32) Bolt (M8x16mm) (73) Spring Washer (M8) (86) Hexagon Socket Head 10 PCS 10 PCS Cap Bolt (M6x16mm) 4 PCS (88) Washer M4 (89) Self Tapping Screw 4 PCS (M4x25mm) 4 PCS Allen Wrench with Allen Wrench 6M Phillips Screwdriver 5M 1 PC... -
Page 11: Part List
PART LIST Description Qty No. Description 001 Main Frame 1 027 Bolt (M8x60mm) Rear Roller Adjustment Bolt 2 028 Adjustable Leveler (M10xØ28x40) (M8x70mm) 003R Rear Right End Cap 1 029 Sensor Cable I (550mm) 003L Rear Left End Cap 1 030 Sensor Cable II (1650mm) 004 Wheel (Ø50xØ8.2x24t) 2 031R Right Stabilizer Tube (Ø50.8x450) 005 Self-Tapping Screw (ST3x20mm) 4 031L Left Stabilizer Tube (Ø50.8x450) - Page 12 PART LIST Description Qty No. Description 052 Bolt (M8x45mm) 1 078 M8 Nut Cap 053 Motor Bracket 1 079R Right Table Hinge 054 Bolt (M8x12mm) 2 079L Left Table Hinge 055 Rear Roller (Ø40x599) 1 080 Binding Wire Plate 20x20x7 Hexagon Socket Head Cap Bolt 1 081 Gas Spring (M10x45mm)
-
Page 13: Assembly
ASSEMBLY Step 1 Connect the Sensor Cable I (29) from inside the Stabilizer (57) to the Sensor Cable II (30) from inside the right side of the Handlebar Support Tube Frame (75). Then connect the Handlebar Support Tube Frame (75) to the Stabilizer (57) by inserting the Handlebar Support Tube Frame (75) onto the Stabilizer (57), using six M8x16mm Bolts (32) and six M8 Spring Washers (73). - Page 14 ASSEMBLY Step 2 Attach both Right/Left Handlebar Support Tube Covers (76R, 76L) onto the Stabilizer (57) and both Right/Left Stabilizer Tubes (31R, 31L) with four M4 Washers (88) and four M4x25mm Self Tapping Screws (89). Tighten screws with 5M Allen Wrench with Phillips Screwdriver provided. 88 89 89 88 Tool:...
- Page 15 ASSEMBLY Step 3 Connect the Incline Buttons and Hand Pulse Sensor with Wires (62) from the Right Handlebar (85R) to the Pulse Extension Wire (100) and Control Button Extension Wire (101) from the right side of the Handlebar Support Tube Frame (75).
- Page 16 ASSEMBLY Step 4 Install both Right/Left Table Hinges (79R/79L) to the right and left sides of the Handlebar Support Tube Frame (75) by sliding both Right/Left Table Hinges (79R/79L) onto the right and left tubes on the sides of the Handlebar Support Tube Frame (75).
-
Page 17: Computer
COMPUTER Quick Start: Flip the Master Power Switch that is located at the front of the treadmill to the ON position. The treadmill will self-test for 2 seconds on startup and then the speed setting will show up after a 2 second long beep. Before beginning a workout session ensure that the Safety Tether Key is properly placed onto the Computer Console and the Safety Clip is securely attached to an article of your clothing. - Page 18 COMPUTER INSTANT SPEED (1 / 2 / 3 / 4): Press one of the INSTANT SPEED buttons (1 / 2 / 3 / 4) on the computer console and the computer sub-window SPEED will display the speed that you have pressed and the running speed will change to 1 MPH, 2 MPH, 3 MPH, or 4 MPH respectively.
- Page 19 COMPUTER DISTANCE: Displays the cumulative distance traveled during your workout. You may also pre-set target distance in STOP mode before training. To set DISTANCE press the MODE button until you see the DISTANCE sub-window begin blinking. Press the SPEED UP or SPEED DOWN button to change the distance, each time you press the SPEED UP or SPEED DOWN button DISTANCE should change in 0.1 mile increments.
- Page 20 COMPUTER Training In Program Mode: This computer offers 5 different pre-set programs for exercising. Press the PROGRAM button to select one of five programs. The TIME sub-window will begin blinking for pre-setting training program time. The initial pre-set training program time is 30:00 minutes. Press the SPEED UP or SPEED DOWN button to increase or decrease the training program time.
- Page 21 COMPUTER INTERVAL SPEED (MPH) 0.6 1.3 1.3 1.3 1.9 1.9 1.9 2.5 INTERVAL SPEED (MPH) 3.1 3.1 3.1 3.1 2.5 1.9 1.3 0.6 P3 PROGRAM PROFILE INTERVAL SPEED (MPH) 2.5 3.1 2.5 1.9 0.6 1.9 2.5 3.1 INTERVAL SPEED (MPH) 0.6 1.9 2.5 3.1 2.5 1.9 1.3 0.6 P4 PROGRAM PROFILE INTERVAL...
- Page 22 COMPUTER Training In USER Program Mode: This computer offers 2 USER programs for people so they can set up their own customized exercise routine. Press the PROGRAM button to select training program USER1 or USER2. Time setting: The sub-window of TIME will begin blinking for pre-setting training program time. The initial pre-set training program time is 30:00 minutes.
-
Page 23: Adjustment
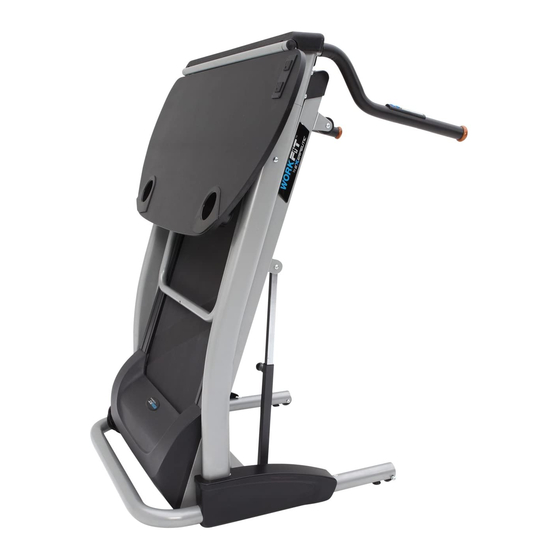
ADJUSTMENT Adjusting the Angle of the Table The table has 4 different angles of incline that can be set. Please make sure the knob is always securely tightened to prevent accidental collapse of the desk and damage to any objects on top of it. NOTE: While desk top completely folded down, the treadmill can be used as a regular treadmill without impeding functionality. -
Page 24: Storage
STORAGE FOLDING UP THE TREADMILL Firmly grasp the back end of the treadmill. Carefully lift the end of the treadmill up into the upright position until the Spring Knob "pops" down into the locked position. Remove the Knob from the Table Angle Adjustment Tube. Hold the Table Angle Adjustment Tube with one hand and the other hand to lift the Table up until the Table Angle Adjustment Tube can be lowered down. - Page 25 STORAGE SETTING DOWN THE TREADMILL Remove the Knob from the back of the Table. Lift both Table and Table Angle Adjustment Tube up. Then slot the Table Angle Adjustment Tube into the Table Angle Adjuster which is under the Table. Screw the removed Knob into the holes on the Table Angle Adjustment Tube and Table to lock the Table in place.
-
Page 26: Maintenance & Trouble Shooting
MAINTENCE & TROUBLE SHOOTING WARNING: To prevent electrical shock, please turn off and unplug the treadmill before cleaning or performing routine maintenance. Remove everything on the table before adjusting the table to different angle. Ensure the knob is secured before placing anything on the table. CLEANING The treadmill can be cleaned with a soft cloth and mild detergent. -
Page 27: Belt Adjustment & Lubrication
BELT ADJUSTMENT & LUBRICATION Belt Adjustment: Aw the belt is adjusted at the factory; it may come loose during transportation and/or from use. After prolong use of the treadmill, the belt will stretch out. If the belt begins shifting to the left, turn on the main power switch of treadmill and let the belt run at a speed of 1-1.5 MPH. -
Page 28: Warm Up
WARM UP Quadriceps Stretch With one hand against a wall for balance, reach behind you and pull your right foot up. Bring your heel as close to your buttocks as possible. Hold for 15 counts and repeat with left foot up. Inner Thigh Stretch Sit with the soles of your feet together with your knees pointing outward. -
Page 29: Warranty
WARRANTY Paradigm Health & Wellness, Inc. warrants to the original purchaser that this product is free from defects in material and workmanship when used for the purpose intended, under the conditions that it has been installed and operated in according to Paradigm Health &... -
Page 30: Fax Form
FAX FORM Paradigm Health & Wellness, Inc. PARTS REQUEST FAX FORM Please fax this form to (1-626-810-2166) OR YOU CAN EMAIL CUSTOMER SERVICE REQUESTS TO service@paradigmhw.com NAME: _______________________________________________________ ADDRESS: ____________________________________________________ CITY ______________ STATE ______________ ZIP ___________________ TELEPHONE: (Day) _____________________________________________ (Night) ____________________________________________ (Email Address) ____________________________________ SERIAL#: __________________________________________ MODEL#: __________________________________________...
Need help?
Do you have a question about the Workfit 1030 and is the answer not in the manual?
Questions and answers