
Related Manuals for Exerpeutic 97670


Summary of Contents for Exerpeutic 97670
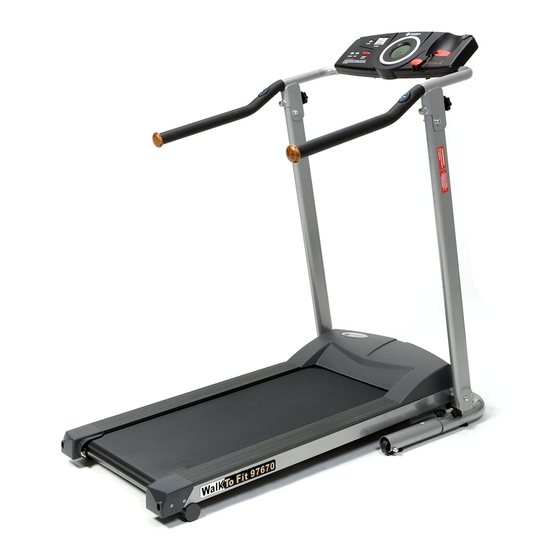
- Page 1 WALK TO FIT MOTORIZED TREADMILL OWNER'S MANUAL MODEL#97670 E-mail: service@paradigmh w .com...
-
Page 2: Important Safety Instructions
IMPORTANT SAFETY PRECAUTIONS Basic precautions should always be followed, including the following safety instructions when using this treadmill: Read all instructions before using this treadmill. DANGER: To reduce the risk of electric shock, please read the following: Always unplug the treadmill from the electrical outlet immediately after using and before cleaning, assembling, or servicing. -
Page 3: Important Safety Precautions
IMPORTANT SAFETY PRECAUTIONS Keep the treadmill on a solid, level surface with sides at least eight feet from behind and two feet around. Be sure the area around the treadmill remains clear during use and has adequate clearance, see illustration below. - Page 4 IMPORTANT SAFETY PRECAUTIONS This product is for use on a nominal 120-volt circuit and has a grounding plug that looks like the plug illustrated in sketch A in Figure 1. Make sure that the product is connected to an outlet having the same configuration as the plug.
-
Page 5: Table Of Contents
TABLE OF CONTENTS IMPORTANT SAFETY INSTRUCTIONS WARRANTY OVERVIEW DRAWING PARTS LIST ASSEMBLY INSTRUCTIONS CAUTION COMPUTER OPERATION FOLDING UP AND SETTING DOWN THE TREADMILL LUBRICATION AND RUNNING BELT ADJUSTMENT CARE, MAINTENANCE & TROUBLE SHOOTING GUIDE... -
Page 6: Warranty
ONE YEAR LIMITED WARRANTY Paradigm Health & Wellness, Inc. warrants to the original purchaser that this product is free from defects in material and workmanship when used for the purpose intended, under the conditions that it has been installed and operated in according to Paradigm’s Owner’s Manual. -
Page 7: Overview Drawing
OVERVIEW DRAWING... -
Page 8: Parts List
PARTS LIST Most of the components of the following parts list have already been assembled for your convenience.Please use the following list as a reference for ordering parts only. Description Qty. Description Qty. Main Frame Motor Bolt (M6X60mm) Power Control Board Right Rear Cap Wire Cap Left Rear Cap... -
Page 9: Assembly Instructions
ASSEMBLY INSTRUCTIONS Step A: Turn the Spring Knob (23) in a counterclockwise direction and then pull it to set down the Main Frame (1) on the floor. Turn the Spring Knob (23) clockwise to secure the treadmill in the folding down position. First remove four Stabilizer Knobs (32) and Washers (74) from the right and left sides of Stabilizer (57). -
Page 10: Caution
CAUTION Before beginning a workout session ensure that the Safety Tether Key is properly inserted into the Computer Console and the Safety Clip is securely attached to an article of your clothing. Always begin the treadmill standing on the side rails, not on the running belt. -
Page 11: Computer Operation
COMPUTER OPERATION Manual Process Step 1: AC power on: Segments test for 2 seconds (figure 1), the speed setting shows up after a long beep for 2 seconds (figure 2). The monitor display then switches to CLOCK setting in 1 second. To set "Hour", first press MODE to enter setting. Then, follow same process to set up "Minute". - Page 12 COMPUTER OPERATION Step 3: When the exercise has stopped, and all buttons have not been operated for over 4 minutes, the monitor display shows the clock time and room temperature, this is the sleep mode. At this moment, other functions are off. (figure All previous preset data and training data are kept, and will show up when any buttons are pressed or the exercising starts up again in the sleep mode.
-
Page 13: Folding Up And Setting Down The Treadmill
FOLDING UP AND SETTING DOWN THE TREADMILL Folding Up the Treadmill Step A: Turn the Spring Knob (23) in a counterclockwise direction and pull it to lift the Main Frame (1) all the way up until the Spring Knob (23) "pops" down into the locked position and then turn the Spring Knob (23) in clockwise direction to secure the treadmill in the folding up position. -
Page 14: Lubrication And Running Belt Adjustment
The treadmill has already been spread with "Silicone Oil" in advance before leaving the manufacturing plant. Silicone oil is without volatility and has gradually permeated through the running belt. There will be no need to re-spread the oil in normal circumstances. -
Page 15: Care, Maintenance & Trouble Shooting Guide
CARE, MAINTENANCE & TROUBLE SHOOTING GUIDE WARNING: To prevent electrical shock, please turn off and unplugged the treadmill before cleaning or routine maintenance. CLEANING The treadmill can be cleaned with a soft cloth and mild detergent. Do not use abrasives or solvents. Be careful not to get excessive moisture on the display panel as this might cause a electrical hazard or the electronics to fail.
Need help?
Do you have a question about the 97670 and is the answer not in the manual?
Questions and answers
What is the weight limit?
The maximum weight capacity for the Exerpeutic 97670 treadmill is 350 lbs.
This answer is automatically generated
How do I change the fuse?
To change the fuse on the Exerpeutic 97670:
1. Locate the fuse box (part number 40).
2. Disconnect the treadmill from the AC power.
3. Open the fuse box carefully.
4. Remove the old fuse.
5. Replace it with a new fuse of the same type.
6. Ensure the new fuse is properly seated.
7. Close the fuse box and reconnect the power.
Only use the correct fuse type recommended for the equipment.
This answer is automatically generated
How do I change the fuse? The belt will not move.