
Related Manuals for Pioneer ANH-P10MP


Summary of Contents for Pioneer ANH-P10MP
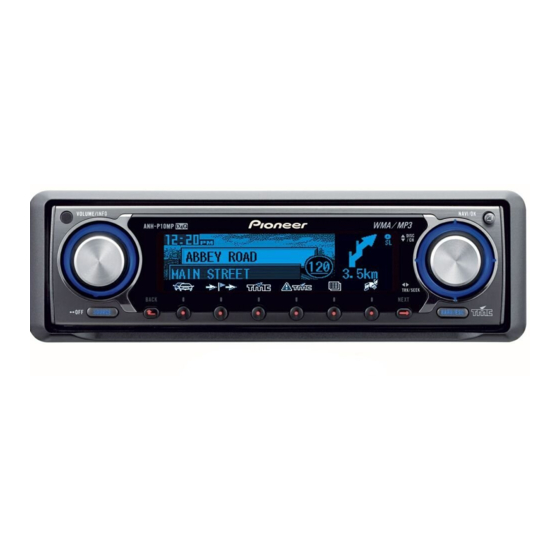
- Page 1 Operation Manual Navigation CD Tuner with MP3 ANH-P10MP Before using navigation Before using the navigation, perform calibration and language definition referring to the “Installation Manual”.
-
Page 2: Table Of Contents
Contents Thank you for buying this Pioneer product. Please read through these operating instructions so you will know how to operate your model properly. After you have finished reading the instructions, put them away in a safe place for future reference. - Page 3 Contents – Hearing the current guidance again 35 – Switching the function of the multi- – Selecting route guidance via display function buttons 45 only 35 The difference between the BAND/ESC – Displaying the direction of travel 35 button and the BACK button 46 –...
- Page 4 Contents Advanced multi-CD player operation 70 Built-in CD Player Playing a disc 56 – Multi-CD player function menu 70 Repeating play 71 Advanced built-in CD player operation 57 Playing tracks in a random order 71 – Function menu 57 Repeating play 58 Scanning CDs and tracks 71 Playing tracks in a random order 58 Selecting tracks from the track title list 72...
- Page 5 Contents Selecting services from the preset service list Initial Settings Adjusting initial settings 91 Selecting services from the available service – Initial settings menu operation 91 Using the reverse mode 91 list 81 Using the feature demo 92 Switching the auxiliary setting 92 TV Tuner Switching the guide animation setting 92 Using the TV tuner 82...
- Page 6 Contents Additional Information Understanding built-in CD player error messages 100 CD player and care 100 CD-R/CD-RW discs 101 MP3, WMA and WAV files 101 – MP3 additional information 102 – WMA additional information 102 – WAV additional information 102 About folders and MP3/WMA/WAV files 103 Terms 104 About traffic information (RDS-TMC) 105 Copyright 106...
-
Page 7: Before You Start
TO THIS AGREEMENT. IF YOU DO NOT AGREE The Software and related documentation are WITH ALL OF THESE TERMS, PLEASE RETURN provided to you “AS IS”. PIONEER AND ITS LI- THE PIONEER PRODUCTS (INCLUDING THE CENSOR(S) (for the purpose of provisions 2... - Page 8 FOR ANY REASON WHATSOEVER BE HELD change in this Agreement shall be effective UNENFORCEABLE OR INAPPLICABLE, YOU unless agreed to in writing by Pioneer. If any AGREE THAT PIONEER’S LIABILITY SHALL provision of this Agreement is declared invalid NOT EXCEED FIFTY PERCENT (50%) OF THE...
-
Page 9: Important Safety Information
Up- instructions. date CD-ROMs are available through your local • Never use this Navigation System to route to Pioneer dealer. hospitals, police stations, or similar facilities in • Never use headphones while driving. an emergency. Please call the appropriate emergency number. -
Page 10: About The Multi Language Display
93 for how it set it. This manual uses English displays in the explanations for audio source. • The Pioneer CarStereo-Pass is for use only in Germany. • Protect this product from moisture. • If the battery is disconnected or dis-... -
Page 11: Features
You can play back WAV files recorded on CD- ROM/CD-R/CD-RW (Linear PCM (LPCM)/MS Update CD-ROM ADPCM recordings). Updated Navigation CD-ROMs are available for purchase from your local Pioneer dealer that includes the most current map and point of interest information. Contact your local Pio- neer dealer for details... -
Page 12: Protecting Your Unit From Theft
Section Before You Start Protecting your unit from theft The front panel can be detached from this product and stored in the protective case pro- vided to discourage theft. Important • Never use force or grip the display and the buttons tightly when removing or attaching. -
Page 13: Resetting The Microprocessor
Section Before You Start 6 numbered button again to start the feature Refer to Attaching the front panel on mode. Remember that if the feature demo page 12. continues operating when the vehicle engine is turned off, it may drain battery power. Resetting the Microprocessor When the ignition switch is turned OFF, press-... -
Page 14: What's What
Section Before You Start What’s What Navigation unit BAND/ESC button • With the NAVIGATION function Not used. VOLUME, INFO button • With the AUDIO function • With the NAVIGATION function Press to select among three FM or MW/LW Rotary: Lets you adjust guidance volume bands and cancel the control mode of func- level while navigation announcements are tions. -
Page 15: Optional Remote Control
Before You Start Optional remote control Note The steering remote control CD-SR100 is sold Navigation operations of the ANH-P10MP cannot separately. be performed even if the CD-SR100 is switched Operation is the same as when using the but- to the navigation mode. -
Page 16: Using Navigation
Section Before You Start Using navigation These are the basic steps necessary to oper- ate the navigation. For more details and vari- ous functions, refer to Section 02: Navigation starting on page 20. Select “DESTINATION” by moving the Press OPEN to open the front panel. rotary stick. -
Page 17: Playing An Audio Cd
Section Before You Start Rotate VOLUME to increase or de- Playing an audio CD crease the volume. This section describes how to use the built-in You can adjust the volume of the guidance CD player. For details or audio-related func- voice of the Navigation System while naviga- tions, refer to each section (section 03 to sec- tion announcement are being made. - Page 18 Section Before You Start • Moving to the right: 3 3 3 3 Ex.) To skip back or forward to another track, 3 3 3 3 press ≠ ≠ ≠ ≠ Navigation screen Rotate VOLUME to increase or de- crease the volume. Audio screen By pressing SOURCE, you can select the source you want to listen to.
-
Page 19: Using Navigation And Audio Sources Simultaneously
Section Before You Start Using navigation and SOFT KEY operation audio sources SOFT KEY operation means that the function simultaneously of a button changes as indicated on the dis- play. The multi-function buttons provide SOFT KEY operation; the functions performed by the buttons change according to the function or On the audio screen setting that has been selected. -
Page 20: Navigation
Section Navigation Safety instructions Basic operation for navigation • The requirements of the Road Traffic Regu- lations (RTR) apply. This section describes how to use the Naviga- • Observation of traffic signs and local traffic tion System. More advanced navigation opera- regulations always takes priority. -
Page 21: Main Navigation Menu
Section Navigation Main navigation menu Entering texts You can start using the Navigation from the main navigation menu. Select an operation in the main navigation menu, then proceed to the next stage. When the text input display appears while op- erating the navigation, follow the procedures below. -
Page 22: When A List Appears
Section Navigation To enter other letters, repeat step 1 When a list appears and 2. If the text entry is ambiguous, a list is dis- played. The scroll marks 5 5 5 5 and ∞ ∞ ∞ ∞ indicate that more options are available for selection in alphabetical order. -
Page 23: Entering The Destination Information
Section Navigation Entering the destination The following items will become selectable af- ter entering a place-name for the first time af- information ter purchase. ROAD: enter the name of the road which Display the destination menu, select a meth- passes by the currently selected location to nar- od of choosing a destination, then proceed to row down the destination. -
Page 24: Entering The Place-Name For Your Destination
Section Navigation Entering the place-name for city or town centre as the destination on page 25. your destination Enter the place-name to narrow down the search. Entering the road name You can narrow down the search by specify- ing the road name. The last place-name entered On the destination menu, select “TOWN”... -
Page 25: Selecting The City Or Town Centre As The Destination
Section Navigation Selecting the city or town cen- Selecting a special destination tre as the destination as destination You can specify the city or town centre situat- Menu for selecting special points of interest ed within the specified place as your destina- (or P.O.I) from a specified list. -
Page 26: Selecting A Destination From The Memory
Section Navigation Select a category and press NAVI/OK. Selecting a destination from the memory Select the location where you want to go from the locations stored in the destination memo- ry (“DEST. MEMORY”) or from the list of last destinations (“LAST DESTINATIONS”). About destination memory, refer to Storing a Points of interest are listed according to prox- specified destination in the destination memo-... -
Page 27: Entering Post Code For The Destination
Section Navigation Entering post code for the des- Entering longitude and lati- tination tude of the destination Specify the country you want to On the destination menu, select “CO- search. ORDINATES” and press NAVI/OK. Refer to Selecting a country on page 23. Enter the latitude of the destination. -
Page 28: Setting The Route
Section Navigation Setting the route Note The route menu appears when you specify in- If the coordinates entered are located beyond the formation on your destination such as a boundaries of the digital map, a message will ap- place-name or road-name. On the route pear notifying you of this. -
Page 29: Entering The House Number For The Destination
Section Navigation HOUSE NUMBER Selecting the intersection for the destination The house number in the specified road can be entered here. Refer to Entering the house number for the destination on this page. On the route menu, select “CROSSING” and press NAVI/OK. CROSSING A list of roads that intersect with the currently specified road appears. -
Page 30: Specifying The Types Of Road
Section Navigation Select a desired option, and then press Specifying the types of road NAVI/OK. The selected route calculation conditions are On the route menu, select “ROUTE set and the screen returns to the route menu. SETTINGS” and press NAVI/OK. Route settings menu appears. -
Page 31: Route Guidance
Section Navigation Route guidance When you select “START-” on the route menu, When a route is calculated, the route and the route calculation starts. When the calcula- voice guidance for the route is automatically tion ends, the navigation system starts giving set. -
Page 32: Screen During Route Guidance
Section Navigation Screen during route guidance On this display, you can use following multi- function buttons. The driving guidance is given by voice mes- sages and displays on the screen. Calculates a bypass on the route in order to avoid traffic jams or road blocks. Refer to Avoiding a traffic jam on page 38. -
Page 33: Example Of Navigation By Displays On The Screen And Voice Messages
Section Navigation Example of navigation by dis- “Prepare to turn left” or “Please move into the left-hand lane”. plays on the screen and voice This recommendation prepares you for the messages next turning. For clarification, there follows a selection of However, “move into the left-hand lane”... -
Page 34: Dynamic Navigation With Tmc
Section Navigation “Please follow the direction arrows”. Dynamic navigation with TMC This display tells you that you are in a non-dig- Dynamic route guidance is used to calculate itised street (e.g. vehicle park, garage), which the route, taking current traffic announce- is not included in the digital street map. -
Page 35: Hearing The Current Guidance Again
Section Navigation Hearing the current guidance Adjusting the sound level of again navigation announcement Press INFO. Rotating the VOLUME while naviga- You can also see various information on the tion announcements are being made. display. Refer to Viewing information during Refer to Using navigation on page 16. -
Page 36: Viewing Information During Route Guidance
Section Navigation Viewing information during Requesting current position route guidance During route guidance, you can check the current position. If you want to check information about the route or current location, use the information Press menu. The current position with road name (if availa- ble), degrees of longitude and latitude and the number of satellites received are displayed. -
Page 37: Using Traffic Information
Section Navigation Notes • After destination entry, there is a short delay ≠ ≠ ≠ ≠ until the route list is created. • If the vehicle is “OFF ROAD” at the moment of destination entry, the route list cannot be created until a stored road is reached. -
Page 38: Avoiding A Traffic Jam
Section Navigation Avoiding a traffic jam Stopover This function allows you to block the ap- This function enables a stopover to be entered proaching route sections as from the next when route guidance is active. junction and calculate a bypass route when a traffic jam or road block is directly ahead. -
Page 39: Deleting A Stopover
Section Navigation To start route calculation to the stop- Storing a specified over, select “START” and then press NAVI/ destination in the destination memory The route is calculated and route guidance begins. Destination memory saves repeated manual entry, if the destination is required at a later date. -
Page 40: Deleting Stored Destinations
Section Navigation To store the place, select System settings for press NAVI/OK briefly. navigation Destination memory list is displayed. If you want to change the various settings for Select the desired place in the list by the items displayed in the navigation screen using the rotary stick and then press or for performing navigation, use the system NAVI/OK. -
Page 41: Setting The Time
Section Navigation Saving the position Note You cannot perform any operation during route guidance. First delete the route, or wait until you have reached your destination. Setting the time In the system settings menu, select “SAVE POSITION” and then press NAVI/ In order to achieve correct navigation on routes requiring guidance under time restric- tions and to calculate the estimated time of... -
Page 42: Setting The Language For Navigation
Section Navigation Setting the language for navi- Selecting the measuring unit gation In the system settings menu, select “MEASURING UNIT” and press NAVI/OK. In the system settings menu, select “LANGUAGE*” and press NAVI/OK. Select the desired option and then The language selection list appears. press NAVI/OK. -
Page 43: Average Speed
Section Navigation Average speed In the system settings menu, select “SPEEDLIMITS” and press NAVI/OK. To select between SPEEDLIMITS “ON” and “OFF”, press NAVI/OK briefly. Press and hold NAVI/OK. The setting is accepted and the system re- In the system settings menu, select turns to the system settings menu. -
Page 44: Using Audio Source
With the switch to the function menu, the Notes functions of the multi-function buttons also • External unit refers to a Pioneer product change simultaneously. (such as one available in the future) that, al- though incompatible as a source, enables control of basic functions by this product. -
Page 45: Key Guidance Indicator
Section Using Audio Source Press RDM to turn random play on. Note In this manual, operation for each mode is given mainly in terms of the multi-function buttons. However, in each mode, when the key guidance indicators are lit it is also possible to use / / / to operate the mode. -
Page 46: The Difference Between The Band/Esc Button And The Back Button
Section Using Audio Source The difference between the BAND/ESC button and the BACK button BAND/ESC button Pressing BAND/ESC immediately cancels the current menu or mode, and returns to the ba- sic displays. BACK button Pressing BACK cancels the current menu or mode and returns to the previously selected menu or mode. -
Page 47: Tuner
Section Tuner Listening to the radio Operation Press SOURCE until “Tuner” appears. Use VOLUME to adjust the sound level. Rotate to increase or decrease the volume. Press BAND/ESC to select a band. Press BAND/ESC until the desired band is displayed, FM–1, FM–2, FM–3 for FM or MW/ These are the basic steps necessary to oper- ate the radio. -
Page 48: Advanced Tuner Operation
Section Tuner Advanced tuner operation Storing and recalling broadcast frequencies You can easily store up to six broadcast fre- Tuner function menu quencies for later recall with the touch of a The tuner function menu has the following button. functions: BSM (best stations memory) Find a frequency that you want to LOC (local seek tuning) -
Page 49: Tuning In Strong Signals
Section Tuner Tuning in strong signals Note Local seek tuning lets you tune in only those Storing broadcast frequencies with BSM may re- radio stations with sufficiently strong signals place broadcast frequencies you have saved us- for good reception. ing 1 – 6. Press FUNC and then press LOC to se- lect the local mode. -
Page 50: Using Rds
Section Using RDS RDS tuner function menu The RDS tuner function menu has the follow- ing functions: BSM (best stations memory) LOC (local seek tuning) AF (alternative frequencies search) PTY (programme type selection) REG (regional) RDS (radio data system) is a system for pro- viding information along with FM broadcasts. -
Page 51: Switching The Rds Display
Section Switching the RDS display Selecting alternative frequencies When you tune in an RDS station its pro- gramme service name is displayed. If you If you are listening to a broadcast and the re- want to know the frequency you can. ception becomes weak or there are other problems, the unit will automatically search Press DISP. -
Page 52: Using Auto Pi Seek For Preset Stations
Section Using Auto PI Seek for preset Receiving traffic stations announcements When preset stations cannot be recalled, as TA (traffic announcement standby) lets you re- when travelling long distances, the unit can ceive traffic announcements automatically, be set to perform PI Seek during preset recall. no matter what source you are listening to. -
Page 53: Using Pty Functions
Section displayed for about two seconds and then the Notes tuner returns to the original station. • You can also turn the TA function on or off in the menu that appears with the pressing of Using news programme inter- FUNC. -
Page 54: Using Radio Text
Section Using radio text Storing and recalling radio text This tuner can display radio text data trans- You can store data from up to six radio text mitted by RDS stations, such as station infor- transmissions at buttons MEMO1–MEMO6. mation, the name of the currently broadcast song and the name of the artist. -
Page 55: Pty List
Section PTY list General Specific Type of programme News&Inf News News Affairs Current affairs Info General information and advice Sport Sports Weather Weather reports/meteorological information Finance Stock market reports, commerce, trading, etc. Popular Pop Mus Popular music Rock Mus Contemporary modern music Easy Mus Easy listening music Oth Mus... -
Page 56: Built-In Cd Player
Section Built-in CD Player Playing a disc After a CD has been inserted, press SOURCE to select the built-in CD player. The navigation CD must be inserted to start the route calculation. During the calculation, the prompt CD flashes on the display. Once the cal- culation has been completed, the prompt CD ex- tinguishes, the navigation CD can be removed and an audio CD can be inserted. -
Page 57: Advanced Built-In Cd Player Operation
Section Built-in CD Player Advanced built-in CD Notes player operation • When the front panel is open, multi-function buttons are not available. • The built-in CD player plays one, standard, 12- Function menu cm or 8-cm (single) CD at a time. Do not use an adapter when playing 8-cm CDs. -
Page 58: Repeating Play
Section Built-in CD Player Repeating play Scanning tracks of a CD Repeat play lets you hear the same track over Scan play lets you hear the first 10 seconds of again. each track on the CD. Press FUNC to select the repeat mode. Press FUNC and then press SCAN to se- lect the scan mode. -
Page 59: Selecting Tracks From The Track Title List
Section Built-in CD Player Selecting tracks from the Pausing CD playback track title list Pause lets you temporarily stop playback of the CD. The track title list lets you see the list of track titles on a CD TEXT disc and select one of Press FUNC and then press PAUSE to them for playback. -
Page 60: Selecting The Search Method
Section Built-in CD Player Press COMP to select your favourite Press and hold to search every setting. 10 track in a disc. Press COMP repeatedly to switch between the If a disc contains less than 10 tracks, press- following settings: ing and holding recalls the last track of a disc. -
Page 61: Switching And Scrolling The Title
Section Built-in CD Player Press ABC to select the desired charac- Switching and scrolling the ter type. title Press ABC repeatedly to switch between the When playing a CD TEXT disc, you can switch following character type: text display such as artist name and track ti- Alphabet (upper case)—Alphabet (lower tle. -
Page 62: Mp3/Wma/Wav Player
Section MP3/WMA/WAV Player Playing MP3/WMA/WAV If a navigation CD is in the loading slot, press button and remove it. After a CD has been inserted, press SOURCE to select the built-in CD player. The navigation CD must be inserted to start the route calculation. - Page 63 Section MP3/WMA/WAV Player To skip back or forward to another Press to eject the disc, and check the disc track, press for damage before inserting the disc again. • If the built-in CD player does not operate Pressing skips to the start of the next track. properly, an error message such as “ERROR- Pressing once skips to the start of the cur-...
-
Page 64: Advanced Built-In Cd Player (Mp3/Wma/Wav) Operation
Section MP3/WMA/WAV Player Advanced built-in CD Repeating play player (MP3/WMA/WAV) For MP3/WMA/WAV playback, there are three operation repeat play ranges: Folder repeat (folder re- peat), Track repeat (one-track repeat) and Disc repeat (repeat all tracks). MP3/WMA/WAV function menu Press FUNC to select the repeat mode. The MP3/WMA/WAV function menu has the following functions: Press RPT to select the repeat range. -
Page 65: Playing Tracks In A Random Order
Section MP3/WMA/WAV Player Playing tracks in a random When you find the desired track (or folder), press SCAN to turn scan play off. order The light goes off. The track (or folder) will continue to play. Random play lets you play back tracks in a If the scan mode is automatically cancelled, random order within the repeat range, Folder select the scan mode again. -
Page 66: Pausing Mp3/Wma/Wav Playback
Section MP3/WMA/WAV Player Using compression and the files included in that folder will be displayed. Please search for the file you want to play by re- peating steps 2 and 3. Using the COMP (compression) and BMX You can return to the previous level by press- functions let you adjust the sound playback ing BACK. -
Page 67: Searching Every 10 Track In The Current Folder
Section MP3/WMA/WAV Player Searching every 10 track in Button Operation the current folder F+FIL Displays folder name and file name. If the current folder contains over 10 tracks, FIL+T Displays file name and track title. you can search every 10 track. When the one ALB+T Displays album title and track title. -
Page 68: Switching The Tag Display
Section MP3/WMA/WAV Player Switching the tag display It is possible to turn the tag display on or off, if MP3 disc contains text information such as track title and artist name. • If you turn the tag display off, time to play- back will be shorter than when this func- tion is turned on. -
Page 69: Multi-Cd Player
Section Multi-CD Player Playing a CD To perform fast forward or reverse, press and hold To skip back or forward to another track, press Pressing skips to the start of the next track. Pressing once skips to the start of the cur- rent track. -
Page 70: Selecting A Disc Directly
Section Multi-CD Player Selecting a disc directly Advanced multi-CD player operation You can use the buttons 1 – 6 (or 7 – 12) to se- lect a disc directly. Multi-CD player function menu Press NEXT until “1” – “6” (or “7” – “12”) appears. -
Page 71: Repeating Play
Section Multi-CD Player Repeating play Playing tracks in a random order There are three repeat play ranges for the mul- ti-CD player: Magazine repeat (multi-CD Random play lets you play back tracks in a player repeat), Track repeat (one-track re- random order within the repeat range, Disc peat) and Disc repeat (disc repeat). -
Page 72: Selecting Tracks From The Track Title List
Section Multi-CD Player When you find the desired track (or • Only when playing a CD TEXT disc on a CD disc), press SCAN to turn scan play off. TEXT compatible multi-CD player, you can switch to this mode. The light goes off. The track (or disc) will con- tinue to play. -
Page 73: Pausing Cd Playback
Section Multi-CD Player Pausing CD playback Press TTLin. When playing a CD TEXT disc on a CD TEXT Pause lets you temporarily stop playback of compatible multi-CD player, if you switch to the CD. this mode, “Can’t input” is displayed and you cannot input the title. -
Page 74: Switching And Scrolling The Title
Section Multi-CD Player • After the titles for 100 discs have been en- switch off Ever-scroll completely, set Ever- tered, the data for a new disc will overwrite scroll to “OFF” at the initial setting. To turn the oldest one. Ever-scroll setting on or off, refer to Switching the Ever-scroll on page 96. -
Page 75: Using Its Playlists
Section Multi-CD Player Using ITS playlists Playback from your ITS playlist ITS play lets you listen to the tracks that you ITS (instant track selection) lets you make a have entered into your ITS playlist. When you playlist of favourite tracks from those in the turn on ITS play, tracks from your ITS playlist multi-CD player magazine. -
Page 76: Erasing A Cd From Your Its Playlist
Section Multi-CD Player The currently playing selection is erased from your ITS playlist and playback of the next track from your ITS playlist begins. You can also use to erase a track currently playing from ITS playlist. If there are no tracks from your playlist in the current range, “ITS empty”... -
Page 77: Dab Tuner
Section DAB Tuner Listening to the DAB Band indicator Shows which band the DAB tuner is tuned WTHR indicator Shows when area weather flash is received. Service label indicator Shows the service the DAB tuner is tuned You can use this product to control a DAB tuner Service component label indicator (GEX-P700DAB), which is sold separately. -
Page 78: Storing And Recalling The Service
Section DAB Tuner Press and hold for one second play will be blank when you switch to service and release to select an ensemble. component label and dynamic label. Receiving the road traffic Storing and recalling the flash and transport flash service Press TA to turn road traffic flash and Press NEXT until “1”... -
Page 79: Displaying Dynamic Label
Section DAB Tuner Displaying dynamic label Advanced DAB tuner operation Press NEXT until “D.TEXT” appears. Press D.TEXT to switch to the dynamic DAB tuner function menu label mode. The DAB tuner function menu has the follow- Press to recall the three most ing functions: AS (announce support) recent dynamic labels. -
Page 80: Setting The Announcement Support Interruption
Section DAB Tuner Setting the announcement Switching primary or support interruption secondary service component Press FUNC and then press AS to select the announcement support mode. Press FUNC and then press P/2ND. Press the corresponding button to turn Press P/2ND repeatedly until the de- the desired announcement support on. -
Page 81: Selecting Services From The Preset Service List
Section DAB Tuner Selecting services from the Notes available service list • The PTY method displayed is narrow. The The available service list lets you see the list of wide method cannot be selected when using DAB as source. (Refer to PTY list on page 55.) available services and select one of them to •... -
Page 82: Tv Tuner
Section TV Tuner Using the TV tuner To perform seek tuning, press and hold for about one second and release. You can cancel seek tuning by pressing either briefly. Storing and recalling broadcast stations If you press any of the buttons 1 – 6 (or 7 – You can use this product to control a TV tuner, 12), you can easily store up to 12 broadcast which is sold separately. -
Page 83: Advanced Tv Tuner Operation
Section TV Tuner Advanced TV tuner Selecting channels from operation the preset channel list The preset channel list lets you see the list of preset channels and select one of them to re- TV tuner function menu ceive. The TV tuner function menu has the following Press FUNC and then press ch LIST to functions: select the preset channel list mode. -
Page 84: Audio Adjustments
Section Audio Adjustments Using the equaliser Note The equaliser lets you adjust the equalisation You can also use to select the desired to match vehicle interior acoustic characteris- equaliser curve. tics as desired. Recalling equaliser curves Introduction of audio There are six stored equaliser curves which adjustments you can easily recall at any time. -
Page 85: Compensating For Equaliser Curves (Eq-Ex)
Section Audio Adjustments Setting the sound focus equal- Only when the subwoofer controller setting is “FULL Preout :FULL”, you can switch to the non- iser (SFEQ) fading output on/off setting. (Refer to Setting the Clarifying the sound image of vocals and in- rear output and subwoofer controller on page 94.) struments allows the simple staging of a natu- You can select the nonfading output setting... -
Page 86: Adjusting Equaliser Curves
Section Audio Adjustments • If you switch the SFEQ setting, the HPF func- Press until the desired centre frequen- tion is automatically turned off. By turning the cy appears in the display. HPF function on after selecting the SFEQ set- Low: 40—80—100—160 (Hz) ting, you can combine HPF function with Mid: 200—500—1k—2k (Hz) -
Page 87: Adjusting Bass And Treble
Section Audio Adjustments Setting the rear output and subwoofer controller Press to adjust the bass level. on page 94. Each press of increases or decreases the bass level. “+6” – “–6” is displayed as the Press to adjust left/right speak- level is increased or decreased. -
Page 88: Using Subwoofer Output
Section Audio Adjustments Press LOUD to turn the loudness on. Adjusting subwoofer settings “LOUDNESS ON” appears in the display. When the subwoofer output is on, you can ad- Press LOUD again to turn loudness off. just the cut-off frequency and the output level of the subwoofer. -
Page 89: Adjusting Nonfading Output Level
Section Audio Adjustments Press NoFAD1 to turn nonfading out- Press to select cut-off frequen- put on. “NON FAD ON” appears in the display. Each press of selects cut-off frequen- Press NoFAD1 again to turn nonfading out- cies in the following order: 50—80—125 (Hz) put off. -
Page 90: Using Automatic Sound Leveliser
Section Audio Adjustments Press to select the desired ASL Notes level. Each press of selects ASL level in the • The MW/LW tuner volume level can also be following order: adjusted with source level adjustments. Low (low)—Mid-Low (mid-low)—Mid • The built-in CD player and the multi-CD player are set to the same source level adjustment (mid)—Mid-High (mid-high)—High (high) volume automatically. -
Page 91: Initial Settings
Section Initial Settings Adjusting initial settings The initial settings menu has the following functions: REV (reverse demo) F.DEMO (feature demo) AUX (auxiliary input) G.ANI (guide animation) Note MUTE.S (mute setting) Press BAND/ESC to cancel the initial settings M.LAN (multi language setting) mode. -
Page 92: Using The Feature Demo
Section Initial Settings Using the feature demo Switching the guide animation setting The feature demo automatically starts when power to this product is switched off while the Navigation guide animation can be switched ignition switch is set to ACC or ON. on and off. -
Page 93: Selecting The Display Language
Section Initial Settings MUTE (muting)—ATT (attenuation)—NOR- Setting the FM tuning step MAL (no attenuation) Normally the FM tuning step employed by seek tuning is 50 kHz. When AF or TA is on, the tuning step automatically changes to 100 kHz. It may be preferable to set the tuning Selecting the display step to 50 kHz when AF is on. -
Page 94: Switching The Guidance Display For Intersection
Section Initial Settings Switching the guidance Press NEXT and then press REAR to se- lect the rear output setting mode. display for intersection Press SW or FULL to select the desired The display can be magnified around an inter- output setting. section to facilitate navigation (only when the Pressing SW or FULL will switch between source is turned off). -
Page 95: Selecting The Illumination Colour
Section Initial Settings Selecting the illumination Switching the hands free colour telephoning This product is equipped with two illumination You can turn the hands free telephoning on or colours, green and red. You can select the de- off in accordance with the connection of the sired illumination colour. -
Page 96: Switching The Telephone Standby
Section Initial Settings Switching the telephone Press SCROLL again to turn the Ever-scroll off. standby If you want to use the hands free telephone unit without playing other audio source of this product, activate the telephone standby mode. • When the hands free telephoning is on, you can operate this function. -
Page 97: Other Functions
Section Other Functions Attenuating audio volume Note The attenuator lets you lower the volume level If you do not operate the function within about 30 quickly (by about 90%). seconds, the display is automatically returned. Press NEXT to until “ATT” appears. Off clock display Press ATT to turn the attenuator on. -
Page 98: Selecting The Wall Paper Pattern
Section Other Functions Press DMMER to turn the dimmer on. After you have selected AUX as the source, press FUNC. “ON” appears on the display. Press DMMER again to turn the dimmer off. Press TTLin to select the AUX title in- put mode. -
Page 99: Using The Muting/Attenuation And Hands Free Telephoning Function
Section Other Functions Using the muting/ • The guidance voice of navigation isn’t mut- ed or attenuated when a call is made or re- attenuation and hands free ceived. telephoning function Hands free telephoning func- Navigation guidance muting/ tion attenuation function When a call is made or received using a When the navigation outputs the guidance hands free telephone unit, the source chang-... -
Page 100: Additional Information
If the error cannot be corrected, con- • Check all CDs for cracks, scratches or tact your dealer or your nearest Pioneer Serv- warped discs before playing. CDs that have ice Centre. -
Page 101: Cd-R/Cd-Rw Discs
Appendix Additional Information CD-R/CD-RW discs nology that is developed by Microsoft Cor- poration. WMA data can be encoded by • When CD-R/CD-RW discs are used, play- using Windows Media Player version 7 or back is possible only for discs which have later. -
Page 102: Mp3 Additional Information
Appendix Additional Information WMA additional information • Some audio CDs contain tracks that merge into one another without a pause. When • This product plays back WMA files encod- these discs are converted to MP3/WMA/ ed by Windows Media Player version 7.7.1, WAV files and burned to a CD-R/CD-RW/ 8 and 9. -
Page 103: About Folders And Mp3/Wma/Wav Files
Appendix Additional Information About folders and MP3/ • MP3/WMA/WAV files in up to 8 tiers of fold- ers can be played back. However, there is a WMA/WAV files delay in the start of playback on discs with numerous tiers. For this reason we recom- •... -
Page 104: Terms
Appendix Additional Information Terms Linear PCM (LPCM)/Pulse code mod- ulation Bit rate This stands for linear pulse code modulation, which is the signal recording system used for This expresses data volume per second, or music CDs and DVDs. bps units (bits per second). The higher the rate, the more information is available to re- produce the sound. -
Page 105: About Traffic Information (Rds-Tmc)
WAV is short for waveform. It is a standard au- ® dio file format for Windows • Pioneer does not bear responsibility for the accuracy of the information trans- mitted. • Pioneer does not bear responsibility for... -
Page 106: Copyright
Appendix Additional Information Copyright ©1993-2003 Navigation Technologies B. V. All rights reserved France: ® Sourcé: Géoroùte ® IGN France & BD Carto IGN France Germany: Die Grundlagendaten wurden mit Genehmi- gung der zuständigen Behörden entnommen. Great Britain: Based upon Ordnance Survey electronic data and used with the permission of the Controller of Her Majesty’s Stationary Office ©... -
Page 107: Specifications
Appendix Additional Information Specifications Frequency..... 200/500/1k/2k Hz Q Factor ....0.35/0.59/0.95/1.15 (+6 dB General when boosted) Power source ....... 14.4 V DC Gain....... ±12dB (10.8 – 15.1 V allowable) High Earthing system....Negative type Frequency..... 3.15k/8k/10k/12.5k Hz Max. current consumption Q Factor .... - Page 108 Appendix Additional Information 50 dB quieting sensitivity..10 dBf (0.9 µV/75 Ω, mono) Signal-to-noise ratio .... 75 dB (IEC-A network) Distortion ......0.3 % (at 65 dBf, 1 kHz, stereo) 0.1 % (at 65 dBf, 1 kHz, mono) Frequency response.... 30 – 15,000 Hz (±3 dB) Stereo separation ....
- Page 109 TEL: (03) 9586-6300 PIONEER ELECTRONICS OF CANADA, INC. 300 Allstate Parkway, Markham, Ontario L3R OP2, Canada TEL: 1-877-283-5901 PIONEER ELECTRONICS DE MEXICO, S.A. de C.V. Blvd.Manuel Avila Camacho 138 10 piso Col.Lomas de Chapultepec, Mexico, D.F. 11000 TEL:55-9178-4270 Published by Pioneer Corporation.
Need help?
Do you have a question about the ANH-P10MP and is the answer not in the manual?
Questions and answers