Lexmark Dot Matrix User Manual
Forms printer 2500+ series
Hide thumbs
Also See for Dot Matrix:
- Tech note (3 pages) ,
- Technical reference (227 pages) ,
- User manual (168 pages)
Table of Contents
Advertisement
Quick Links
Advertisement
Table of Contents

Related Manuals for Lexmark Dot Matrix


Summary of Contents for Lexmark Dot Matrix
- Page 1 Forms Printer 2500+ Series User's Guide January 2012 www.lexmark.com...
-
Page 2: Table Of Contents
Contents Contents Safety information..................6 Learning about the printer................7 Printer overview............................7 Applying control panel overlays........................8 Understanding the printer features and functions...................9 Printing a demonstration page........................11 Printing a network setup page........................13 Printing from Windows or DOS.......................13 Using IBM emulation mode........................14 Using Epson emulation mode.........................14 Using Okidata MICROLINE emulation mode...................15 Using the control panel................16 Understanding the control panel buttons....................16... - Page 3 Forms Macro options............................51 Data options ..............................52 Control options ..............................53 Emulation options.............................55 Interface options...............................55 Maintaining the printer................57 Ordering supplies............................57 Removing the ribbon cartridge.......................57 Cleaning the printer..........................57 Recycling Lexmark products........................58 Administrative support................59 Restoring the factory default settings.....................59 Supporting IPSec.............................60 Supporting SNMPv3..........................60 Using 802.1x authentication........................61...
- Page 4 Contents Troubleshooting..................62 Checking an unresponsive printer......................62 Testing the printer...........................62 Checking the printer status........................63 Adjusting character (bidirectional) alignment..................65 Solving printing problems........................67 Printer test works, but the printer does not print when attached to the computer........67 Printer is noisy ..............................67 Printer sounds like it is printing, but does not print ..................67 Printer alarm sounds ............................67 Printer goes to the Tear Off position before the print job finishes ..............67 Buttons do not work, except for Start/Stop, FormFeed, Tear Off, and Load/Unload ........68...
- Page 5 Contents Notices.......................76 Edition notice............................76 Power consumption..........................79 Index......................83...
-
Page 6: Safety Information
This product is designed, tested, and approved to meet strict global safety standards with the use of specific Lexmark components. The safety features of some parts may not always be obvious. Lexmark is not responsible for the use of other replacement parts. -
Page 7: Learning About The Printer
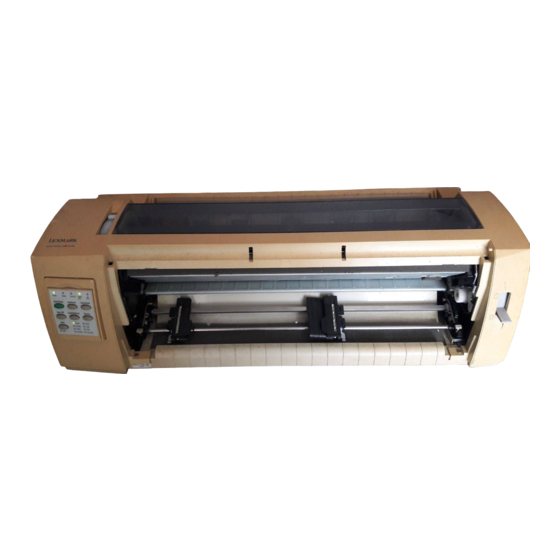
Learning about the printer Printer overview The Lexmark Forms Printer 2500+ Series printers are available in 9‑ and 24‑wire narrow‑ and wide‑carriage models. Depending on the model you have chosen, your printer may look slightly different from the printer in the illustration. -
Page 8: Applying Control Panel Overlays
Applying control panel overlays The Lexmark Forms Printer 2500+ Series printers have control panel overlays available in different languages. Note: There is an overlay label for layer 1 of the control panel and a different overlay label for layer 2 of the control panel. -
Page 9: Understanding The Printer Features And Functions
Learning about the printer Understanding the printer features and functions Printer features by model Feature or function 2580+ or 2581+ 2590+ or 2591+ Multi‑speed printing FastDft (Fast Draft) • • 532 characters per second (cps) 479 cps • 10 characters per inch (cpi) •... - Page 10 Learning about the printer Printer features of all models Feature or function Description Control panel This is the button control for Load/Unload, Tear Off, Font, Setup, Pitch, Macro, and paper movement functions. Control panel lights indicate current status. Font lock •...
-
Page 11: Printing A Demonstration Page
• EAN 13 • PostNet Note: For more information on the Bar code function, see the Technical Reference at www.lexmark.com. Software compatibility • The printer is compatible with all programs that support IBM emulation or Epson emulation. • The printer is compatible with Okidata MICROLINE emulation (with the M320 turbo), which is standard on the 9‑wire printer and 2580+ or 2581+ printer models. - Page 12 Learning about the printer Plug the printer power cord to a properly grounded electrical outlet. Note: The Power light comes on and turns solid green, the Paper Out light is blinking, and the current default font light is solid green. For more information on the control panel lights, see “Understanding the control panel lights”...
-
Page 13: Printing A Network Setup Page
When printing from a Windows application, use the Windows Forms Printer 2500 Series driver available from the Lexmark Web site at www.lexmark.com. Follow the instructions that came with your DOS application to see what printer drivers are supported for your level of DOS. -
Page 14: Using Ibm Emulation Mode
Using IBM emulation mode If the printer is in IBM mode (the factory default setting), then select a printer from your program in the following order: For Lexmark Forms Printer 2580+ or 2581+ users Forms Printer 2580+ or 2581+ Forms Printer 2480+ or 2481+... -
Page 15: Using Okidata Microline Emulation Mode
Learning about the printer For Forms Printer 2580+ or 2581+ users Epson FX850 Epson FX 1050 For Forms Printer 2590+ or 2591+ users Epson LQ850 LQ 1050 Note: The printer driver you select in your application must match the emulation mode you select for your printer. Printer drivers other than the 2500+ series support most, but not all, of the printer capabilities. -
Page 16: Using The Control Panel
Using the control panel Using the control panel Understanding the control panel buttons The control panel has two layers of functionality: • Layer 1, with the control panel cover closed, contains basic functions like FormFeed, Tear Off, and taking the printer online or offline. - Page 17 Using the control panel Button Description Tear Off This alternates the paper between Tear Off and Top‑Of‑Form. Start/Stop This communicates the on or off status of the printer and places the printer in low power mode. Power Set TOF LineFeed Macro Micro Micro...
-
Page 18: Understanding The Control Panel Lights
One of the printer resident pitches is selected. Pitch Lock Pitch Lock is active. Printer resident fonts are locked. Using the Start/Stop button The Lexmark Forms Printer 2500+ Series printers use the Start/Stop button to turn on the printer or enter Off mode. -
Page 19: Setting The Printer Online Or Offline
Using the control panel Turning on the printer Plug the printer power cord to a properly grounded electrical outlet. Press Start/Stop. Note: The Power light turns solid green. Entering Off mode Press and hold Start/Stop for five seconds. Notes: • The Power light turns orange. -
Page 20: Using The Load/Unload Function
Using the control panel Using the Load/Unload function Use the Load/Unload button to unload continuous forms from the printer to allow printing on either a cut form or an envelope. The Load/Unload function works only when the tractor unit is in the push position. You can also use the Load/Unload button to load continuous forms into the printer when the paper path is clear, or to change one type of pre‑printed form to another. -
Page 21: Selecting And Locking A Font
Using the control panel Selecting and locking a font The printer data stream may contain control codes which select a particular font. To override the codes, you can select and lock a particular font of your choice. To select a font, press Font repeatedly until you see the font light on next to the selection you want. Power Ready Tractor 2... -
Page 22: Selecting And Locking A Pitch
Using the control panel Selecting and locking a pitch The printer data stream may contain control codes which select a particular pitch. To override the codes, you can select and lock a particular pitch of your choice. To select a pitch, open the control panel to layer 2. Power Set TOF LineFeed... -
Page 23: Loading Paper
Loading paper Loading paper This section explains how to load continuous forms, cut sheet forms, labels and envelopes. It also includes information about paper orientation, setting the forms thickness lever, and using the push and pull tractors for different paper paths. - Page 24 Loading paper Forms thickness for 2580+ or 2581+ Paper type Paper thickness Paper weight Forms thickness lever setting Single forms (cut or continuous) Thin 56 g/m (15 lb) 65 g/m (16 lb) Normal 1 or 2 68 g/m (18 lb) 75 g/m (20 lb) Thick...
-
Page 25: Paper Paths
Loading paper Paper paths Paper paths for the push tractor In these examples, the tractor pushes the paper from the front or the rear of the printer. Front loading paper Rear loading paper Paper paths for the pull tractor In these examples, the tractor pulls the paper from the front or the bottom of the printer. Front loading paper Bottom loading paper Using the Tear Off function... -
Page 26: Loading Continuous Paper
Loading paper Setting the Tear Off position When Auto Tear Off is set to On, it moves the top perforation of a continuous form to the Tear Off position when all of the following are true: • The printer has finished printing. •... - Page 27 Loading paper Set the forms thickness lever to a setting corresponding with the paper thickness you are using. Pull up the front cover. Move down the paper select lever to the position. Pull up the left and right tractor locking levers to unlock the tractors.
- Page 28 Loading paper Open the left and right tractor doors, and then place the paper holes over the second or third pins of the tractor unit. Notes: • If necessary, move the left or right tractor to adjust the tractors to the paper width. •...
-
Page 29: Front Loading Continuous Forms Using The Pull Tractor
Loading paper Close the front cover. Press Start/Stop to load the paper to Top‑Of‑Form, and then put the printer online. Notes: • If Auto Tear Off is set to On, then the printer moves the paper to the Tear Off bar. •... - Page 30 Loading paper Move the paper select lever down to the position. Pull up the left and right tractor locking levers to unlock the tractors. Open the left and right tractor doors. Open the front cover. Insert paper into the front of the printer, between the metal and plastic plates. Note: Push or pull the paper through the paper path until it passes the printhead.
- Page 31 Loading paper Close the front cover. Place the paper holes over the tractor pins. Notes: • If necessary, move the left or right tractor to adjust the tractors to the paper width. • If you have trouble moving the right tractor to the paper width, then roll the rubber tractor stop out of the seated position.
-
Page 32: Bottom Loading Continuous Forms Using The Pull Tractor
Loading paper Remove slack from the paper, and then lock the right locking lever. Open the control panel cover to access layer 2. Press Micro , Micro , or LineFeed to move the paper to the Top‑Of‑Form you want to use. Note: Use the second form to set Top‑Of‑Form alignment. - Page 33 Loading paper Plug the printer power cord to a properly grounded electrical outlet, and then press Start/Stop. Make sure the paper path is clear. Note: If a cut form or envelope is loaded in the printer, then press FormFeed to remove it. Set the forms thickness lever to 7.
- Page 34 Loading paper Pull up the left and right tractor locking levers to unlock the tractors. Open the left and right tractor doors. Insert the paper through the bottom slot of the printer. Note: Push or pull the paper through the paper path until it passes the printhead.
- Page 35 Loading paper Place the paper holes over the tractor pins. Notes: • If necessary, move the left or right tractor to adjust the tractors to the paper width. • If you have trouble moving the right tractor to the paper width, then roll the rubber tractor stop out of the seated position.
-
Page 36: Loading Cut Forms
Loading paper Push down the left tractor locking lever to lock the tractor in place. Remove slack from the paper, and then lock the right locking lever. Open the control panel cover to access layer 2. Press Micro , Micro , or LineFeed to move the paper to the Top‑Of‑Form you want to use. Press Set TOF to set the Top‑Of‑Form. - Page 37 Loading paper Move the paper select lever up to the position. Open the manual feeder. Move the left paper guide so that the print start position you want aligns with the [A symbol printed on the margin guide. Note: The distance from the left paper guide to the [A symbol determines the width of the left margin. Place a cut form or an envelope against the left paper guide.
- Page 38 Loading paper Move the right paper guide so that the guide aligns with the right edge of the cut form or envelope. Left paper guide Cut form or envelope Right paper guide Insert the cut form or envelope into the printer until the Paper Out light stops blinking. Notes: •...
-
Page 39: Aligning The Left Margin
Loading paper Aligning the left margin You can manually change the first print position at the left margin. The first print position is indicated by the [A symbol. You can also set the left margin in your program. Notes: • Setting the left margin in your program adds that amount to the left margin setting on the printer. -
Page 40: Setting Top-Of-Form
Loading paper Setting Top-Of-Form Top-Of-Form sets the first line of print. Use the control panel to save your Top-Of-Form settings for continuous forms, cut forms, and for each macro enabled. Setting Top‑Of‑Form for continuous forms in push mode Clear the paper path. The Paper Out light blinks if no paper is loaded. -
Page 41: Setting Top-Of-Form For Continuous Forms In Pull Mode
Loading paper Setting Top‑Of‑Form for continuous forms in pull mode Plug the printer power cord to a properly grounded electrical outlet, and then press Start/Stop. Note: The Paper Out light blinks if no paper is loaded. Move the paper select lever down to the position. -
Page 42: Setting Top-Of-Form In A Macro
Loading paper Open the control panel cover to access layer 2. Power Set TOF LineFeed Macro Micro Micro Setup Pitch Lock Press any paper movement button (Micro , Micro , LineFeed) to align the horizontal lines located on the platen with the Top‑Of‑Form you want. -
Page 43: Paper And Specialty Media Guide
Paper and specialty media guide Paper and specialty media guide Paper types and sizes supported by the printer The printer supports paper weights of 56–90 g/m (15–24 lb) and envelope weights of 75–90 g/m (20–24 lb). Width Paper types Single Multiple part Envelopes Cut Forms... -
Page 44: Changing Tractor Positions
Changing tractor positions Changing tractor positions The tractor unit can be installed in the push tractor position or the pull tractor position. This section describes how to change the tractor unit position. Push tractor position The printer comes with the tractor unit installed in the push tractor position, at the front of the printer. Using the front push tractor is the most convenient way to load continuous forms, and allows you to use the Tear Off feature of the printer. -
Page 45: Converting The Push Tractor To Pull Tractor Position
Changing tractor positions Converting the push tractor to pull tractor position Make sure the printer is unplugged from the electrical outlet. Make sure paper is not loaded in the printer. Pull the front cover up and out of the way. Hold down the latching levers while you lift and pull out the tractor unit from the printer. -
Page 46: Converting The Pull Tractor To Push Tractor Position
Changing tractor positions To slide the tractor feeder into the printer: Hold down the latching levers, and then gently push the tractor feeder into the printer until it stops. Continue holding down the latching levers, and then tilt the tractor feeder toward the front of the printer until the hooks at the end of the latching levers fit around the posts on the printer frame. - Page 47 Changing tractor positions Make sure the paper select lever is set to the position. While holding down the latching levers, fit the left and right locks into the posts in the printer. Release the latching levers. Close the front cover.
-
Page 48: Understanding Setup Mode And Menu Options
Understanding Setup mode and menu options Understanding Setup mode and menu options The printer is preset at the factory for font, pitch, form length, and other settings. These are called factory default settings. This chapter describes how to change the factory default settings, how to set up macros, and how to set form length. -
Page 49: Changing Menu Settings (An Example)
Understanding Setup mode and menu options To Select Press Forms Macro Options Macro Data Options Micro Control Options Micro Emulation Options Setup Interface Options Pitch Select any option from the Main menu by pressing the corresponding button. Note: A new menu will print each time you press a button, displaying the new selection. After you make all your selections, the printer will print a page with your changes reflected. -
Page 50: Setup Mode - Main Menu
Understanding Setup mode and menu options Control Options Current Press TOF Read Micro Quiet Micro Press the button that corresponds to the language you want, or press Setup to print more Menu Language options. For this example, press Macro to select French. Menu Language To Select Press... -
Page 51: Forms Macro Options
Eastern European, Baltic, and Middle Eastern language code page configurations can be selected by holding down specific key combinations when the printer is turned on. For more information, see the Technical Reference available on the Lexmark Web site at www.lexmark.com. –... -
Page 52: Data Options
Understanding Setup mode and menu options Paper Handling Options Use the following options to select paper handling option changes, as detailed: • Auto Tear Off – On—Continuous forms automatically advance to the Tear Off bar position. – Off—You can manually advance the perforation of a continuous form to the Tear Off bar position. Note: On is the factory default setting. -
Page 53: Control Options
Understanding Setup mode and menu options Auto LF Requires a line feed to occur. • On—A line feed is performed for each Carrier Return (CR) code received. • Off—A line feed does not occur when a CR code is received. Note: Off is the factory default setting. -
Page 54: Paper Out Alarm
Understanding Setup mode and menu options Uni‑Dir Printing • On—The printer prints unidirectionally by line (in NLQ mode). • Off—The printer prints one line and a return line of print bidirectionally. Proportional Spacing is an exception; when this pitch is selected, the printer still prints unidirectionally. Note: Off is the factory default setting. -
Page 55: Emulation Options
48. To print a list of all default settings, press LineFeed from the Main menu. Make Emulation option selections from IBM (the factory default setting), Epson, or OKI mode. For more information regarding data stream changes, see the Technical Reference at www.lexmark.com. IBM mode Proprinter III, available only on 2580+ or 2581+ printers, enables compatibility with Proprinter III. -
Page 56: Interface Selection
Understanding Setup mode and menu options Interface Selection Unless turned off, the Auto setting automatically selects the printer interface from the available connection cables. The following connection cables are available: parallel cable, USB cable, serial cable (only available when an optional serial interface is installed), and network cable (only available on network models). -
Page 57: Maintaining The Printer
3070166 (2400/2500/250 series standard re‑inking ribbon) • 3070169 (2500/2500+ series high yield re‑inking ribbon) Note: Printer ribbons can be ordered at www.lexmark.com. Removing the ribbon cartridge Unplug the printer power cord from the electrical outlet. Lift the left and right release latches on the ribbon access cover to remove it. -
Page 58: Recycling Lexmark Products
Use a commercial mechanic's hand cleaner for ink stains on the outside of the printer. Recycling Lexmark products To return Lexmark products to Lexmark for recycling: Visit our Web site at www.lexmark.com/recycle. Find the product type you want to recycle, and then select your country from the list. -
Page 59: Administrative Support
Administrative support Administrative support Restoring the factory default settings Restoring the US factory default settings The factory default settings for the United States are: • Code pages: 437 • Character Set: 1 • Form length: 11 inches To restore the factory default settings: Make sure the ribbon cartridge is installed and paper is loaded. -
Page 60: Supporting Ipsec
Administrative support Notes: • The control panel lights blink on and off several times. • The factory default settings have been restored when the carrier moves. Supporting IPSec Internet Protocol Security (IPSec) provides authentication and encryption at the network layer allowing all application and network connections over the IP protocol to be secure. -
Page 61: Using 802.1X Authentication
Administrative support Using 802.1x authentication 802.1x authentication allows the printer to join networks that require authentication before allowing access. Support for 802.1x requires the establishment of credentials for the printer, such as certificates. Certificates provide a way for the printer to be known to the Authentication Server (AS). The AS allows network access to print servers presenting a valid set of credentials. -
Page 62: Troubleshooting
Troubleshooting Troubleshooting Checking an unresponsive printer If your printer is not responding, then make sure: • The power cord is plugged into the printer and a properly grounded electrical outlet. • The electrical outlet is not turned off by any switch or breaker. •... -
Page 63: Checking The Printer Status
Troubleshooting Using Hex Trace mode Hex Trace mode prints the control codes that are sent to the printer. Use this mode to help diagnose software/driver problems. Make sure the paper is loaded and the ribbon cartridge is installed. Press and hold Start/Stop for five seconds. Press and hold Tractor, and then press Start/Stop. - Page 64 Troubleshooting Control panel lights Status Action required Power Check for a paper or ribbon jam. Ready Blinking Unplug the printer power cord from the electrical outlet. Paper Out Blinking Remove the ribbon cartridge, and then check for Panel Lock Blinking paper dust or bits of paper.
-
Page 65: Adjusting Character (Bidirectional) Alignment
If the control panel light sequence returns, then contact Customer Support. All lights on solid • If you need help locating the nearest service Panel Lock Blinking representative, then visit www.lexmark.com. Power Ready Blinking Tractor 2 Blinking Paper Out Blinking... - Page 66 Troubleshooting Notes: • The draft alignment bars print. • The current value is the number printed below the bars. To set Draft, select the best row of alignment bars from the 01–07 printout. Press Micro or Micro to select the best alignment by number, or keep the current value. Press Set TOF to save your selection.
-
Page 67: Solving Printing Problems
See the documentation that came with the program to make sure you have selected the correct printer driver. • If you are using Windows, then use the Windows Forms Printer 2500 Series driver available at www.lexmark.com. • If you are using DOS, then follow the instructions that came with the application. -
Page 68: Buttons Do Not Work, Except For Start/Stop, Formfeed, Tear Off, And Load/Unload
Troubleshooting Press Micro or Micro to move the paper to the desired position. Close the control panel. The printer beeps twice and the paper rolls backward and then advances to the new Top‑Of‑Form position. Press Start/Stop. The paper remains at the new Top‑Of‑Form position until another job is initiated. Send the print job again. -
Page 69: Incorrect Characters Print, Left Margin Changes, Or Printing Stops
• Select the correct driver. – If you are using Windows, use the Windows Forms Printer 2500 Series driver available from the Lexmark Web site at www.lexmark.com. – If you are using DOS, follow the instructions that came with your DOS application. -
Page 70: Paper Is Jammed In The Auto Sheet Feeder
Troubleshooting To clear a cut form paper jam: Unplug the printer power cord from the electrical outlet. Set the forms thickness lever to position 7. Push the paper select lever down to the position. Gently pull the sheet of paper from the front of the printer. Remove the ribbon access cover to clear any torn pieces of paper. -
Page 71: Printer Does Not Feed From The Optional Tractor 2 Feeder
Troubleshooting • Make sure the forms thickness lever is set correctly for the paper type being used. • Press Load/Unload to release the continuous form paper from a parked status. • Make sure the right paper guide is set correctly for the paper width being used. •... -
Page 72: The Auto Sheet Feeder Places Paper At The Wrong Top-Of-Form Position
Troubleshooting • Remove the Auto Sheet Feeder, move the continuous forms to the park position using the Load/Unload button, and then reinstall the Auto Sheet Feeder. • Adjust the forms thickness lever to correspond with the paper thickness being used. The Auto Sheet Feeder places paper at the wrong Top‑Of‑Form position These are possible solutions. -
Page 73: Solving Print Quality Problems
Troubleshooting Solving print quality problems The information in the following topics may help you solve print quality problems. If these suggestions do not correct the problem, contact Customer Support. You may have a printer part that requires adjustment or replacement. Print is too light These are possible solutions. -
Page 74: Characters Are Wrong Or Missing
Troubleshooting Press Start/Stop to stop or interrupt the printer test. Press Start/Stop again if you want to resume the printer test. Note: Printing continues until you stop the printer. If the print quality does not improve, then contact Customer Support. Characters are wrong or missing Run a printer test. -
Page 75: Incorrect Line Spacing Or Overprinting Occurs
You need to know your printer model type and serial number. For more information, see the label on the inside top front cover of the printer. The serial number is also listed on the menu settings page. In the U.S. or Canada, call (1‑800‑539‑6275). For other countries/regions, visit the Lexmark Web site at www.lexmark.com. -
Page 76: Notices
The following paragraph does not apply to any country where such provisions are inconsistent with local law: LEXMARK INTERNATIONAL, INC., PROVIDES THIS PUBLICATION “AS IS” WITHOUT WARRANTY OF ANY KIND, EITHER EXPRESS OR IMPLIED, INCLUDING, BUT NOT LIMITED TO, THE IMPLIED WARRANTIES OF MERCHANTABILITY OR FITNESS FOR A PARTICULAR PURPOSE. -
Page 77: Government End Users
Note: To assure compliance with FCC regulations on electromagnetic interference for a Class B computing device, use a properly shielded and grounded cable such as Lexmark part number 1021294 for USB attach. Use of a substitute cable not properly shielded and grounded may result in a violation of FCC regulations. -
Page 78: Industry Canada Compliance Statement
The manufacturer of this product is: Lexmark International, Inc., 740 West New Circle Road, Lexington, KY, 40550 USA. The authorized representative is: Lexmark International Technology Hungária Kft., 8 Lechner Ödön fasor, Millennium Tower III, 1095 Budapest HUNGARY, A declaration of conformity to the requirements of the Directives is available upon request from the Authorized Representative. -
Page 79: Power Consumption
Lexmark Web site at www.lexmark.com for your local sales office phone number. ENERGY STAR Any Lexmark product bearing the ENERGY STAR emblem on the product or on a start-up screen is certified to comply with Environmental Protection Agency (EPA) ENERGY STAR requirements as configured when shipped by Lexmark. -
Page 80: Limited Warranty
Remarketer or Lexmark, or ship it prepaid and suitably packaged to a Lexmark designated location. You are responsible for loss of, or damage to, a product in transit to the Remarketer or the Lexmark designated location. -
Page 81: Limitation Of Liability
As part of your warranty service and/or replacement, Lexmark may update the firmware in your printer to the latest version. Firmware updates may modify printer settings and cause counterfeit and/or unauthorized products, supplies, parts, materials (such as toners and inks), software, or interfaces to stop working. - Page 82 ANY LOST PROFITS, LOST SAVINGS, INCIDENTAL DAMAGE, OR OTHER ECONOMIC OR CONSEQUENTIAL DAMAGES. This is true even if you advise Lexmark or a Remarketer of the possibility of such damages. Lexmark is not liable for any claim by you based on a third party claim.
-
Page 83: Index
Index Index Numerics printing from 13 802.1x authentication 61 left margin aligning 39 lights Embedded Web Server control panel 18 aligning supporting IPSec 60 Load/Unload function left margin 39 supporting SNMPv3 60 using 20 using 802.1x authentication 61 loading emission notices 77, 78 continuous forms 26 bidirectional alignment emulation mode 14... - Page 84 Tear Off position recycling Auto Sheet Feeder feeds at before job finishes 67 Lexmark products 58 incorrect rate 71 smudged forms or print too WEEE statement 78 Auto Sheet Feeder feeds multiple dark 74...
- Page 85 Index paper fed from Auto Sheet Feeder is skewed 72 Windows paper fed in Auto Sheet Feeder printing from 13 jams at printer entrance 70 paper jammed in Auto Sheet Feeder 70 printer does not feed from Auto Sheet Feeder 71 printer does not feed paper 70 troubleshooting, print buttons do not work 68...
Need help?
Do you have a question about the Dot Matrix and is the answer not in the manual?
Questions and answers