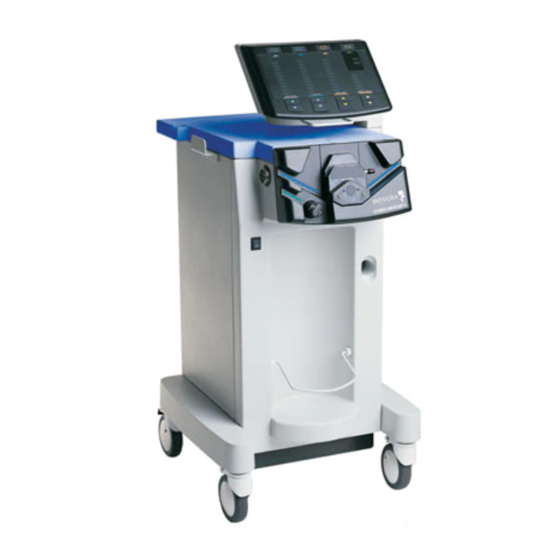
Integra cusa excel User Manual
Ultrasonic surgical aspirator system
Hide thumbs
Also See for cusa excel:
- Service manual (213 pages) ,
- Instructions for use manual (28 pages) ,
- Manual (43 pages)
Table of Contents
Advertisement
Quick Links
Advertisement
Table of Contents
Troubleshooting

Related Manuals for Integra cusa excel


Summary of Contents for Integra cusa excel
- Page 1 USER’S GUIDE Distributed By: Integra LifeSciences Corporation Plainsboro, NJ 08536 USA Integra LifeSciences (Ireland) Limited IDA Business and Technology Park Sragh Tullamore, County Offaly, Ireland © 2007 Integra LifeSciences. All Rights Reserved. Printed in USA 945102217ILS...
- Page 2 User’s Guide CUSA EXcel™ Ultrasonic Surgical Aspirator System...
-
Page 3: Cusa Excel™ Ultrasonic Surgical Aspirator System User's Guide
Caution Federal (USA) law restricts this device to sale by or on the order of a physician. Equipment Covered in this Manual CUSA EXcel™ ultrasonic surgical aspirator with 23 kHz and 36 kHz handpieces. Trademark Acknowledgements CUSA EXcel™, TissueSelect™, MacroTip™, MicroTip™, PrecisionTip™, CEM™... -
Page 4: Preface
User’s Guide Features The user’s guide is one of several tools you may employ while learning how to use the CUSA EXcel system. We have tried to make this guide as easy to read and to use as possible: • Different sections present different tasks: We realize that different... -
Page 5: Organization
It also includes guidelines on using the TISSUE Select feature. Section 5: Setting Up the CUSA EXcel System tells you how to prepare the console and its subsystems for use in surgery. It includes instructions on how to complete handpiece assembly, prepare the console for startup, connect and test the handpiece, connect the irrigation and suction systems, prime the system, adjust settings, and switch to the run mode. -
Page 6: Intended Uses
Field, describes how to attach or change sterile tips on the sterile field. Intended Uses When you receive your CUSA EXcel system, we strongly suggest that you read and understand all of this user’s guide before using the system. However, it also has other uses: •... -
Page 7: Conventions Used In This Guide
Indicates a hazardous situation that, if not avoided, could result in minor or moderate injury. Important Indicates an operating tip or Notice maintenance suggestion. Indicates a hazard that may result in product damage. CUSA Excel Ultrasonic Surgical Aspirator System User’s Guide... -
Page 8: List Of Figures
Figure 4. Sterilizable tip torquing base Figure 5. Sterile torque wrench (23 kHz or 36 kHz) Figure 6. Sterile manifold tubing Figure 7. The handpiece and connector secured into the sterilizer tray S-17 CUSA Excel Ultrasonic Surgical Aspirator System User’s Guide... - Page 9 Notes CUSA Excel Ultrasonic Surgical Aspirator System User’s Guide...
-
Page 10: Table Of Contents
Table of Contents CUSA Excel™ Ultrasonic Surgical Aspirator System User’s Guide Preface System Features User’s Guide Features Organization Intended Uses Conventions Used in this Guide List of Figures Part 1. Safety Section 1. Patient and Operating Room Safety Safety Information... - Page 11 Console Body – Rear Panel 3-12 Speaker 3-13 Volume Control 3-13 Footswitch Connector Receptacle 3-13 AC Main Switch 3-13 Fuses 3-13 Footswitch 3-13 AC Power Cord 3-15 Equipotential Grounding Lug 3-15 Labels 3-15 viii CUSA Excel Ultrasonic Surgical Aspirator System User’s Guide...
- Page 12 Using TISSUE Select 4-12 Inherent Tissue Selectivity 4-13 Increasing Tissue Selectivity 4-13 TissueSelect Reduces Reserve Power to the Tip 4-14 Benefits of TissueSelect 4-16 A Common Misunderstanding of the Amplitude Setting 4-17 CUSA Excel Ultrasonic Surgical Aspirator System User’s Guide...
- Page 13 Section 5. Setting Up the CUSA Excel System For Your Information Quick Reference – Setup Handpiece Assembly Console Assembly Complete the Handpiece Assembly Items Needed Attach a Nosecone Clip the Manifold Tubing to the Handpiece Cable Prepare the System for Startup...
- Page 14 Quick Reference – Setup 11-2 Handpiece Assembly 11-2 Complete the Handpiece Assembly 11-3 Items Needed 11-3 Attach a Nosecone 11-4 Clip the Manifold Tubing to the Handpiece Cable 11-6 Cover the CEM Nosecone 11-9 CUSA Excel Ultrasonic Surgical Aspirator System User’s Guide...
- Page 15 14-4 Footswitch 14-4 CEM Nosecone 14-4 Return Equipment for Service 14-4 Obtaining a Return Authorization Number 14-5 Returning the Console 14-5 Returning Handpieces 14-5 Ordering Replacement Parts 14-5 Integra Service Centers 14-6 CUSA Excel Ultrasonic Surgical Aspirator System User’s Guide...
- Page 16 Pinch Point in the Suction Pinch Valve Fuse Replacement Footswitch Symbols Voluntary Standards Statutory and Regulatory Requirements EMC Compatibility Handpieces Nominal Frequencies Dimensions Tip Specifications 23 kHz 36 kHz Appendix B. Warranty CUSA Excel Ultrasonic Surgical Aspirator System User’s Guide xiii...
- Page 17 Clean the Handpiece S-15 Reprocess the Sterilizable Torque Base S-16 Clean the Base S-16 Package the Handpiece for Sterilization S-17 Package the Base for Sterilization S-18 Sterilize the Handpiece and Base S-18 CUSA Excel Ultrasonic Surgical Aspirator System User’s Guide...
-
Page 18: Part 1. Safety
Part 1 Safety... -
Page 19: Section 1. Patient And Operating Room Safety
• Safety information • Warnings, Cautions, and Notices, organized by section. Indications for Use The CUSA EXcel Ultrasonic Surgical Aspirator System is indicated for use in surgical procedures where fragmentation, emulsification and aspiration of soft and hard tissue is desirable, including Neurosurgery,... -
Page 20: Warnings, Cautions, And Notices
Warnings, Cautions, and Notices Warnings, Cautions, and Notices To promote the safe use of the CUSA EXcel ultrasonic surgical aspirator, this section presents the warnings, cautions, and notices that appear throughout this user’s guide. So that you can operate this equipment with maximum safety, it is important that you read, understand, and follow the instructions in these warnings, cautions, and notices. -
Page 21: Shutting Down The Cusa Excel System
Handpiece tip damage will result. Shutting Down the CUSA EXcel System Warning Electric Shock Hazard – Always unplug the CUSA EXcel system before cleaning. Notice Do not disconnect the handpiece until the control panel goes completely blank. -
Page 22: Assembling The Handpiece In A Nonsterile Area
Do not clean the sterilizer case with abrasives. Product damage will result. To avoid product damage, use proper packaging materials and packing procedures when preparing the console for shipment. Failure to return product in this manner may void the warranty. CUSA Excel Ultrasonic Surgical Aspirator System User’s Guide... -
Page 23: Appendix A. Technical Specifications
Warnings, Cautions, and Notices Appendix A. Technical Specifications Warning Explosion Hazard – Do not use the CUSA EXcel system in the presence of flammable anesthetics or any potentially explosive or flammable atmosphere. Caution To avoid injury to surgical personnel, keep fingers away from the suction pinch valve while powering the unit on or off, activating vibration, or using fast flush. - Page 24 Notes CUSA Excel Ultrasonic Surgical Aspirator System User’s Guide...
-
Page 25: Part 2. Console
Part 2 Console... -
Page 27: Section 2. Introduction To The Console
• Intended uses. For Your Information Caution Read the instructions, cautions, and warnings provided with the CUSA EXcel system before using. Otherwise, injury to the patient, injury to surgical personnel, or equipment damage may result. This section presents the CUSA EXcel system general information; what it is, what it does, and how it works. -
Page 28: Overview
Overview Overview The CUSA EXcel system is an ultrasonic surgical aspirator that allows a surgeon to remove tissue – selectively and with precise control. It performs three functions: • Fragmentation • Irrigation • Aspiration (Suction). All three functions may occur at the same time. -
Page 29: Cooling
• The pump can also accelerate to a Fast Flush speed, pumping at 25 to 30 cc/min. The Fast Flush pedal on the CUSA EXcel system footswitch activates the Fast Flush feature. -
Page 30: Aspiration (Suction)
When the System Power Switch is off, the suction pump remains off and the suction pinch valve remains closed. A button on the front of the suction pinch valve allows you to open the valve manually. CUSA Excel Ultrasonic Surgical Aspirator System User’s Guide... -
Page 31: Handpieces
Angled Wide Variety of Tips You can use a wide variety of tips with the CUSA EXcel handpieces. Tips vary in inside and outside diameter, length, and shape (straight or curved). For complete information on the tips that are available for each handpiece, contact your Integra representative. -
Page 32: Intended Uses
Intended Uses Intended Uses You can use the CUSA EXcel Ultrasonic Surgical Aspirator in surgical procedures where fragmentation, emulsification, and aspiration of tissue is desirable. They include the following areas: • Neurosurgery • Gastrointestinal and affiliated organ surgery • Urological surgery •... -
Page 33: Section 3. Console Components
• Symbols on the control panel. For Your Information This section presents the CUSA EXcel console. It begins with an overview of the console, then describes each major console subsystem and its components. The description includes an illustration and a brief sketch of the function each subsystem or component serves. -
Page 34: Console Overview And Structural Features
Console Overview and Structural Features Console Overview and Structural Features This drawing presents the front view of the CUSA EXcel console, with structural features called out. I.V. pole Control Panel Housing for Irrigation Pump Head and Suction Pinch Valve Arm Housing... -
Page 35: I.v. Pole
Unlocked, both front and rear casters roll easily and rotate freely. • Front casters have brake locks that stop the wheels from rolling. • Rear casters have direction locks; when locked, casters remain fixed in one direction. CUSA Excel Ultrasonic Surgical Aspirator System User’s Guide... -
Page 36: Control Panel
Lap Mode button (light green) Lap On indicator Alerts (Red): Vibration Footswitch Test button (orange) Handpiece Prime button (blue) Cooling Water Status button (green) Displays (Green LED columns and values) CUSA Excel Ultrasonic Surgical Aspirator System User’s Guide... -
Page 37: Alerts
• Not Activated: One LED illuminates to show the setpoint value • Activated: All LEDs up to and including the setpoint value light up. For TISSUE Select, “Std” (standard) is the first setpoint value; “++++” is the highest setpoint value. CUSA Excel Ultrasonic Surgical Aspirator System User’s Guide... - Page 38 Control Panel Status Indicators: Run (Green) Standby (Amber) Wait/Cooling Water (Amber) Setpoint Adjustment buttons (Up/Down Arrows): Aspiration (Green) Irrigation (Blue) Amplitude (Orange) TISSUE Select (Yellow) CUSA Excel Ultrasonic Surgical Aspirator System User’s Guide...
-
Page 39: Status Indicators
Push a button once for a single change in setpoint value. Holding down the button changes a setpoint value by only one setting (you get no additional setpoint value changes by holding down the button). CUSA Excel Ultrasonic Surgical Aspirator System User’s Guide... -
Page 40: Console Body - Front Panel
Console Body – Front Panel Console Body – Front Panel Handpiece Connector Receptacle Suction Pinch Valve Irrigation Pump Head System Power Switch Contamination Guard Retaining Bail for Suction Canister CUSA Excel Ultrasonic Surgical Aspirator System User’s Guide... -
Page 41: Irrigation Pump Head
It is necessary to replace the contamination guard every six months or when it becomes blocked. Retaining Bail for Suction Canister The bail holds the suction canister in place on the shelf. CUSA Excel Ultrasonic Surgical Aspirator System User’s Guide... -
Page 42: Console Body - Side Panel
Control Panel Rotation Lock Handle I.V. Pole Release Housing (Black) for Irrigation Button Pump Head and Suction Pinch Valve Arm Housing Arm Release Tab Cooling Water Reservoir Release Button Cooling Water Reservoir 3-10 CUSA Excel Ultrasonic Surgical Aspirator System User’s Guide... -
Page 43: Rotation Lock Handle
The reservoir also includes fittings that snap into receptacles inside the Arm Housing on the console side panel. The fittings and receptacles automatically connect the reservoir to the cooling water system. CUSA Excel Ultrasonic Surgical Aspirator System User’s Guide 3-11... -
Page 44: Console Body - Rear Panel
Console Body – Rear Panel Console Body – Rear Panel Speaker Volume Control Footswitch Connector Receptacle AC Main Switch Fuses (2) Footswitch 3-12 CUSA Excel Ultrasonic Surgical Aspirator System User’s Guide... -
Page 45: Fuses
This receptacle allows you to connect the footswitch to the console. AC Main Switch This switch controls the flow of AC power to the CUSA EXcel system. It does not activate the system; instead, it allows power to flow from the wall receptacle to the System Power Switch. - Page 46 Console Body – Rear Panel Storage Compartment Cord Wrap Equipotential Serial Number Label and AC Power Cord Grounding Lug Agency Approval Labels 3-14 CUSA Excel Ultrasonic Surgical Aspirator System User’s Guide...
-
Page 47: Ac Power Cord
Connects power to the system from the wall receptacle. Equipotential Grounding Lug If you are using a CEM generator, the grounding lug allows you to connect ground from the CEM generator to the CUSA EXcel console. This is a biomedical function. Labels The labels show the console serial number and agency approvals. -
Page 48: Symbols On The Control Panel
(red, left side of the control panel) – failure Wait (amber, right side of the control panel) – system is circulating cooling water through the handpiece or draining the handpiece On/selected Laparoscopic mode 3-16 CUSA Excel Ultrasonic Surgical Aspirator System User’s Guide... -
Page 49: Section 4. Using Cusa Excel Console Controls
This section describes how to use the buttons and indicators on the control panel. It also describes how to use some of the mechanical features on the CUSA EXcel console. The section ends with a description of the TISSUE Select feature, and gives guidelines for using it. -
Page 50: Using Power Switches
Located on the rear panel, this switch controls the flow of AC power to the CUSA EXcel system. It does not activate the system; instead, it allows power to be available so that you can activate the system with the System Power Switch (on the front panel). -
Page 51: Understanding The Control Panel
Understanding the Control Panel Understanding the Control Panel When you turn on ( | ) the System Power Switch, it activates CUSA EXcel system components. This section presents the control panel features in the order in which you will encounter them as you set up, test, and use the CUSA EXcel system. -
Page 52: Wait/Cooling Water
• Remove the pinch or kink. • For an air leak or an o-ring problem, connect a new handpiece. While the red Cooling Water Alert remains lit, you cannot use other control panel features or the footswitch. CUSA Excel Ultrasonic Surgical Aspirator System User’s Guide... -
Page 53: Test
• Push the Test button again. • Verify proper tip torquing. • If the problem persists, perform more complete troubleshooting (refer to Section 13, Troubleshooting the CUSA EXcel System). Vibration Alert If the handpiece is not working properly, the system illuminates the red Vibration Alert (left side of the control panel) and emits an audible tone. -
Page 54: Standby Status
Aspiration 100% Irrigation 3 cc/min Amplitude TISSUE Select Before using the CUSA EXcel system at the surgical site, adjust setpoint values, then select Laparoscopic mode (if desired) and Run status. CUSA Excel Ultrasonic Surgical Aspirator System User’s Guide... -
Page 55: Adjusting Setpoint Values
TISSUE Select feature and its settings, refer to Using TISSUE Select later in this section.) The default value is Std (Standard). Yellow up/down arrows mark the TISSUE Select adjustment buttons. CUSA Excel Ultrasonic Surgical Aspirator System User’s Guide... -
Page 56: Changing Functions
Changing Functions Changing Functions When starting the CUSA EXcel system, switch to the Run status by pressing the green Status button. Run Status To select the Run status, press the Status button (green box on a black button at the top right of the control panel). The system changes from Standby to Run, turning off the amber LED for Standby and turning on the green LED for Run. -
Page 57: Using Other Features
It is possible to raise the arm that supports the control panel to allow a CEM unit to sit on top of the CUSA EXcel console or to see the control panel more easily over obstacles. A locking mechanism holds the arm at one of three positions: normal (lowest position), 7.6 cm (3 in.) above... -
Page 58: Rotating The Control Panel
Continue to rotate the control panel. At its next locking position, it will automatically lock into place. Adjusting the Tone Volume The CUSA EXcel system includes an audible tone that sounds in two circumstances: • When you press the Ultrasonics pedal on the footswitch to activate tip vibration •... -
Page 59: Adjusting The I.v. Pole
Gently lower the pole. As the pole clears its upper locking position, release the button. Continue to move the pole downward until it locks into position. After the pole has locked into its lower position, you can rotate it to position A. CUSA Excel Ultrasonic Surgical Aspirator System User’s Guide 4-11... -
Page 60: Using Tissue Select
• Tip acceleration – produces the peak forces and pressures that fragment tissue. • Tip cross-sectional area at the tip-tissue contact site. These variables also affect tactile feedback—what the surgeon’s hand feels when using the handpiece. 4-12 CUSA Excel Ultrasonic Surgical Aspirator System User’s Guide... -
Page 61: Inherent Tissue Selectivity
Fortunately, the CUSA EXcel system can help the surgeon avoid these problems when dissecting near vital structures. -
Page 62: Tissueselect Reduces Reserve Power To The Tip
Using TISSUE Select Remember: The CUSA EXcel ultrasonic generator delivers electrical power (which is directly related to the acoustic power present at the tip, which results in fragmentation) to the handpiece. You can think of the power delivered to the handpiece in three terms: •... - Page 63 • The tip fragments “soft” tissue easily. • The tip fragments “strong” tissue, but with more difficulty (slower, requires more surgeon pressure). CUSA Excel Ultrasonic Surgical Aspirator System User’s Guide 4-15...
-
Page 64: Benefits Of Tissueselect
• Maintains fragmentation ability. • Reduces (automatically) fragmentation rate. • Provides maximum tissue selectivity. • Gives surgeon superior tactile feedback. • Gives surgeon greater control and precision when dissecting near delicate structures. 4-16 CUSA Excel Ultrasonic Surgical Aspirator System User’s Guide... -
Page 65: A Common Misunderstanding Of The Amplitude Setting
Therefore, decreasing the amplitude setting gives the following results: • Reduced fragmentation ability • Reduced fragmentation rate • Little increase in selectivity • Little reduction in reserve power. CUSA Excel Ultrasonic Surgical Aspirator System User’s Guide 4-17... - Page 66 Notes 4-18 CUSA Excel Ultrasonic Surgical Aspirator System User’s Guide...
-
Page 67: Section 5. Setting Up The Cusa Excel System
• When the surgeon is ready. For Your Information This section describes how to set up the CUSA EXcel system for surgery. It begins with the arrival of the sterilized handpiece and accessories in the operating room. It ends with the CUSA EXcel system set up, handpiece tested, irrigation primed, settings adjusted, and the console in the Run mode. - Page 68 Quick Reference – Setup If you are a knowledgeable user who needs only a reminder of the steps to set up the CUSA EXcel system, this list is for you. Handpiece Assembly Attach a nosecone, either standard or CEM, onto the handpiece.
-
Page 69: Complete The Handpiece Assembly
CUSA EXcel console. Therefore, you will find the procedures for completing the handpiece in this section. Items Needed You need the following items to set up the CUSA EXcel handpiece for surgery: • Standard nosecone or sterile CEM nosecone •... -
Page 70: Attach A Nosecone
Make sure to push the flue base completely over the nosecone base, and that the end of the flue lines up with the pre-aspiration holes. CUSA Excel Ultrasonic Surgical Aspirator System User’s Guide... -
Page 71: Clip The Manifold Tubing To The Handpiece Cable
Connect the manifold irrigation tubing to the Luer fitting on the handpiece flue: Connect the Luer fitting. Twist the knob clockwise to lock the fitting. CUSA Excel Ultrasonic Surgical Aspirator System User’s Guide... - Page 72 Note: It is only necessary to attach one to three clips, but you can attach all five clips in the package. Hand off the remaining manifold tubing, handpiece cable, and handpiece electrical connector to the circulator. CUSA Excel Ultrasonic Surgical Aspirator System User’s Guide...
-
Page 73: Prepare The System For Startup
Plug the CUSA EXcel system power cord into a wall receptacle. Confirm that the AC Main Switch on the rear panel is on ( | ). Verify that the CUSA EXcel system footswitch is connected to the rear of the console. -
Page 74: On The Front Panel: Suction
Verify that the contamination guard is in place in the console. Attach the green L-shaped connector from the contamination guard to the VACUUM port on the suction canister lid. Secure the canister with the retaining bail. CUSA Excel Ultrasonic Surgical Aspirator System User’s Guide... -
Page 75: On The Front Panel: Handpiece
Gently push the handpiece connector onto the console connector. Turn the connecting ring in the clockwise direction until the yellow dot on the handpiece aligns with the yellow dot on the console. CUSA Excel Ultrasonic Surgical Aspirator System User’s Guide... -
Page 76: Turn On The Cusa Excel System
This takes about one minute, during which the CUSA EXcel system turns on the Wait and Cooling Water indicators. The Wait indicator flashes. When the CUSA EXcel system successfully fills the cooling system with water, it turns the Wait and Cooling Water indicators off. - Page 77 PATIENT port on the suction canister lid. The following figure shows the suction system as it looks after successful setup. Figure 5-1. The assembled suction system CUSA Excel Ultrasonic Surgical Aspirator System User’s Guide 5-11...
-
Page 78: Connect The Irrigation Tubing
Connect the Irrigation Tubing Prepare a standard I.V. administration set and sterile irrigation solution and put it on the I.V. pole located next to the adjustable arm. Connect the irrigation tubing (from the handpiece) to the CUSA EXcel system. To open the pump... - Page 79 Open the roller clamp on the I.V. tubing. The following figure shows the irrigation system as it looks after successful setup. Figure 5-2. The assembled irrigation system CUSA Excel Ultrasonic Surgical Aspirator System User’s Guide 5-13...
-
Page 80: Test The Handpiece
To troubleshoot, ! Push the Test button again. ! Verify proper tip torquing. ! If the problem persists, perform more complete troubleshooting (refer to Section 13, Troubleshooting the CUSA EXcel System). 5-14 CUSA Excel Ultrasonic Surgical Aspirator System User’s Guide... -
Page 81: Test The Cem Nosecone
Coag indicator illuminates. If not, do not use the handpiece for surgery. Important Force FX CEM output is limited to Adjust the settings on the generator control panel to the surgeon’s 100 watts in Cut or 70 watts in requirements. Coag. CUSA Excel Ultrasonic Surgical Aspirator System User’s Guide 5-15... -
Page 82: When The Surgeon Is Ready
Press the Status button (green box on a black button at the upper right of the control panel) to put the system into the Run mode (green light). The CUSA EXcel system is now ready. Vibration will activate when the surgeon presses the Vibration pedal on the footswitch. - Page 83 Notes 5-17 CUSA Excel Ultrasonic Surgical Aspirator System User’s Guide...
-
Page 84: Section 6. Shutting Down The Cusa Excel System
SECTION Shutting Down the CUSA EXcel System In this section: • Shut down the CUSA EXcel system • Disconnect suction tubing, irrigation tubing, and the handpiece • Clean the console. CUSA Excel Ultrasonic Surgical Aspirator System User’s Guide... -
Page 85: Shut Down The Cusa Excel System
While you are waiting, you can disconnect other things. Notice Do not disconnect the handpiece until the control panel goes completely blank. Otherwise, product damage may result. CUSA Excel Ultrasonic Surgical Aspirator System User’s Guide... -
Page 86: Disconnect Suction Tubing, Irrigation Tubing, And The Handpiece
Do not discard the contamination guard. Close the roller clamp on the I.V. tubing. Disconnect the I.V. tubing from the irrigation tubing. Open the irrigation pump latch. CUSA Excel Ultrasonic Surgical Aspirator System User’s Guide... - Page 87 Discard all of these items in the patient’s biohazard waste container. Empty cooling water from the cooling water reservoir: Press the button (just above the reservoir) on the Arm Housing to release the fittings inside the housing. CUSA Excel Ultrasonic Surgical Aspirator System User’s Guide...
- Page 88 Gently close the black rubber lid. Slide the empty reservoir back into the slot at the base of the adjustable arm until it snaps into place. DO NOT DISCARD THE COOLING WATER RESERVOIR. CUSA Excel Ultrasonic Surgical Aspirator System User’s Guide...
-
Page 89: Clean The Console
Clean the Console Clean the Console Clean the CUSA EXcel surfaces and power cord. Use a mild cleaning solution or disinfectant and a soft cloth. Warning Electric Shock Hazard – Always unplug the CUSA EXcel system before cleaning. Notice Do not rub, press, or touch any panels with solvents; caustic, corrosive, or abrasive cleaning or disinfectant compounds;... -
Page 90: Part 3. Handpieces And Accessories
Part 3 Handpieces and Accessories... -
Page 91: Section 7. Introduction To Handpieces
For Your Information Caution Read the instructions, warnings, cautions, and notices provided with the CUSA EXcel system before use. Otherwise injury to the patient, injury to surgical personnel, or equipment damage may result. This section presents general information about CUSA EXcel handpieces;... -
Page 92: Description
Description Description A CUSA EXcel handpiece is a handheld surgical device. It houses a transducer that vibrates at an ultrasonic frequency, transferring the vibrations to a hollow titanium tip. The following figure shows the direction of vibration. When applied to patient tissue, the vibrating tip provides the desired surgical effect –... -
Page 93: Configurations
Angled Wide Variety of Tips You can use a wide variety of tips with the CUSA EXcel handpieces. Tips vary in inside and outside diameter, length, and shape (straight or curved). For complete information on the tips that are available for each handpiece, contact your Integra representative. - Page 94 Notes CUSA Excel Ultrasonic Surgical Aspirator System User’s Guide...
-
Page 95: Section 8. Handpiece Components
This section also presents items that, although not a part of the handpiece itself, are essential in assembling a handpiece or preparing it for sterilization. CUSA Excel Ultrasonic Surgical Aspirator System User’s Guide... -
Page 96: Components Of Assembled Handpieces
The handpiece consists of a connector, a cable, a handpiece body, and a connecting body (refer to Figure 8-1). The connector attaches the cable to the CUSA EXcel console. The inside of the cable contains cooling water tubes and electric wires, allowing the console to supply water to cool the handpiece and electric power to drive the handpiece. -
Page 97: O-Rings
You can use one of two nosecones: • Standard nosecone – nonsterile, reusable • CUSA EXcel Electrosurgical Module (CEM) nosecone – sterile, single use only. If you use a CEM nosecone, you need to cover it with a switchcover. A large red o-ring holds the switchcover in place. -
Page 98: Tip
Threads on one end allow you to attach the tip to the connecting body on the handpiece. For more information on various tip diameters and lengths, please refer to Appendix A, Technical Specifications, in this guide. CUSA Excel Ultrasonic Surgical Aspirator System User’s Guide... -
Page 99: Flue
• Attach the manifold tubing before sterilization. • Attach the manifold tubing on the sterile field. Whether you attach the tubing before or after sterilization, discard it after one use. CUSA Excel Ultrasonic Surgical Aspirator System User’s Guide... -
Page 100: Additional Components
23 kHz green 36 kHz blue Notice Do not sterilize the tip torquing base or the torque wrench with steam. Steam destroys the lubrication in the torquing mechanism, resulting in product damage. CUSA Excel Ultrasonic Surgical Aspirator System User’s Guide... -
Page 101: Sterilizable Torque Bases
You can use one wrench to remove and re- install as many as five tips in one surgical procedure. However, do not sterilize the wrench, and do not use the wrench for more than one surgical procedure. CUSA Excel Ultrasonic Surgical Aspirator System User’s Guide... -
Page 102: Sterilizer Cases
The sterilizer cases hold the handpiece and accessories during sterilization. The CUSA EXcel system offers separate sterilizer cases for 23 kHz and 36 kHz handpieces. The case for the 23 kHz handpiece is gray; for the 36 kHz handpiece, white. The dimensions for both cases are the following: •... - Page 103 Additional Components The sterilizer case may be wrapped in hospital approved materials. Figure 8-5. The 23 kHz CUSA EXcel sterilizer case CUSA Excel Ultrasonic Surgical Aspirator System User’s Guide...
- Page 104 Notes 8-10 CUSA Excel Ultrasonic Surgical Aspirator System User’s Guide...
-
Page 105: Section 9. Assembling The Handpiece In A Nonsterile Area
Assembling or Changing Tips on the Sterile Field. Here is some information that may help as you assemble handpieces: • Use the same procedure to assemble the 23 kHz straight, 23 kHz angled, and 36 kHz straight handpieces. CUSA Excel Ultrasonic Surgical Aspirator System User’s Guide... -
Page 106: Items Needed
The items you need to assemble a Cable handpiece: handpiece, nosecone, and tip pack Connecting body Handpiece body Standard 36 kHz CEM, 23 kHz CEM, coag only coag O-rings Flue Tip cleaner (shipped inside the flue) CUSA Excel Ultrasonic Surgical Aspirator System User’s Guide... - Page 107 Manifold tubing is sterile, single use only. You have two options for attaching the tubing to the handpiece: • Attach the manifold tubing before sterilization. • Attach the manifold tubing on the sterile field. Figure 9-3. Manifold tubing CUSA Excel Ultrasonic Surgical Aspirator System User’s Guide...
-
Page 108: Attach The Tip To The Connecting Body
Hold the handpiece in place in the tip torquing base. Notice To avoid product damage, NEVER hold the handpiece in your hand while using the torque wrench to tighten or loosen the tip. CUSA Excel Ultrasonic Surgical Aspirator System User’s Guide... - Page 109 First Click and hear a click. Rotate again until you feel and hear a second click. Remove the wrench from the tip. Remove the handpiece from the tip torquing base. CUSA Excel Ultrasonic Surgical Aspirator System User’s Guide...
-
Page 110: Put On The O-Rings
Slide the smaller o-ring into the groove in the metal connecting body. Caution Do not put a nosecone of any type onto the handpiece before sterilization. Surfaces covered by the nosecone may not be sterile. CUSA Excel Ultrasonic Surgical Aspirator System User’s Guide... -
Page 111: Clip The Manifold Tubing To The Handpiece Cable (Optional)
Push one to three manifold tubing clips onto the handpiece cable. Note: It is only necessary to attach one to three clips, but you can attach all five clips in the package. CUSA Excel Ultrasonic Surgical Aspirator System User’s Guide... -
Page 112: Package The Handpiece For Sterilization
Package the Handpiece for Sterilization After you have assembled the handpiece, prepare it for sterilization. Integra provides sterilizer cases for steam sterilization of the CUSA EXcel handpieces. They protect the handpieces during sterilization and during transfer to the sterile field. The case for the 23 kHz handpiece is gray; for the 36 kHz handpiece is, white. - Page 113 Put the handpiece connector in the center compartment and secure it in place. Put on the lid. Close and latch the case. Figure 9-5. The handpiece and connector secured into the sterilizer tray CUSA Excel Ultrasonic Surgical Aspirator System User’s Guide...
- Page 114 Notes 9-10 CUSA Excel Ultrasonic Surgical Aspirator System User’s Guide...
-
Page 115: Section 10. Sterilizing Handpieces And Accessories
After preparing the handpiece, sterilize it using steam. After steam sterilization, the handpiece cable may appear collapsed. This is normal. The cable regains its shape in about one hour. This does not affect the handpiece performance or safety. CUSA Excel Ultrasonic Surgical Aspirator System User’s Guide 10-1... -
Page 116: Sterilization Parameters
Sterilization Parameters Sterilization Parameters Sterilize CUSA EXcel handpieces and accessories with steam. Sterilizing manifold tubing with the handpiece increases the required sterilization times. The following table gives the minimum parameters: Handpieces without Manifold Tubing Prevac or Wrapping Temp Gravity Time... -
Page 117: Sterilize The Handpiece
– Cycles that do not include the CUSA EXcel Manifold Tubing contained three BIs (spore sutures) in each of three CUSA EXcel handpieces for a total of nine BIs per run. The locations were in the center of an unattached tip, in the center of an unattached flue tubing with tip cleaner inserted into the flue, and under the front o-ring of the handpiece. - Page 118 • Under the front o-ring of the handpiece (spore suture). Acceptance Criteria In order for the CUSA EXcel handpiece to be considered validated, none of the biological indicators demonstrated growth of the indicator organism. A 6-log reduction at the half cycle exposure time indicates that...
-
Page 119: Section 11. Completing Handpiece Setup On The Sterile Field
This section describes how to complete the handpiece setup on the sterile field. It begins with the arrival of the sterilized handpiece and accessories in the operating room. It ends with the handpiece ready to be connected to the console. CUSA Excel Ultrasonic Surgical Aspirator System User’s Guide 11-1... -
Page 120: Quick Reference - Setup
Quick Reference – Setup If you are a knowledgeable user who needs only a reminder of the steps to set up the CUSA EXcel system, this list is for you. Handpiece Assembly Attach a nosecone, either standard or CEM, onto the handpiece. -
Page 121: Complete The Handpiece Assembly
Complete the Handpiece Assembly Complete the Handpiece Assembly You have the option of using a standard nosecone or a CUSA EXcel Electrosurgical Module (CEM) nosecone with the CUSA EXcel handpiece. If you are using a CEM generator, you must attach a CEM nosecone to the handpiece. -
Page 122: Attach A Nosecone
Align the dot on the nosecone with the dot on the neck of the handpiece. Push the nosecone onto the handpiece so that the dots are on top of each other. 11-4 CUSA Excel Ultrasonic Surgical Aspirator System User’s Guide... - Page 123 Make sure to push the flue base completely over the nosecone base, and that the end of the flue lines up with the pre-aspiration holes. CUSA Excel Ultrasonic Surgical Aspirator System User’s Guide 11-5...
-
Page 124: Clip The Manifold Tubing To The Handpiece Cable
Remove the manifold tubing with clips from the packaging. Uncoil some of the tubing. Snap the handpiece clip in place on the handpiece housing. Insert the irrigation tube from the flue into the handpiece clip. 11-6 CUSA Excel Ultrasonic Surgical Aspirator System User’s Guide... - Page 125 Complete the Handpiece Assembly Connect the manifold irrigation tubing to the Luer fitting on the handpiece flue: Connect the Luer fitting. Twist the knob clockwise to lock the fitting. CUSA Excel Ultrasonic Surgical Aspirator System User’s Guide 11-7...
- Page 126 Hand off the remaining manifold tubing, handpiece cable, and handpiece electrical connector to the circulator. 11-8 CUSA Excel Ultrasonic Surgical Aspirator System User’s Guide...
- Page 127 Notes 11-9 CUSA Excel Ultrasonic Surgical Aspirator System User’s Guide...
-
Page 128: Section 12. Disassembling Handpieces
• Handpiece cable connectors, tip pack packaging, manifold tubing packaging, CEM nosecone packaging, slots in the tip torquing base, torque wrench heads, and sterilizer tray lids are color coded: 23 kHz green 36 kHz blue CUSA Excel Ultrasonic Surgical Aspirator System User’s Guide 12-1... -
Page 129: Disassemble The Handpiece
Using a soft cloth moistened with a germicidal solution, wipe the handpiece to remove gross contaminants. Remove the flue, if not already removed. 12-2 CUSA Excel Ultrasonic Surgical Aspirator System User’s Guide... - Page 130 Hold the handpiece in place in the tip torquing base. Notice To avoid product damage, NEVER hold the handpiece in your hand while using the torque wrench to tighten or loosen the tip. CUSA Excel Ultrasonic Surgical Aspirator System User’s Guide 12-3...
- Page 131 Remove the handpiece from the tip torquing base. Unscrew the tip. When you have disassembled the handpiece, you need to clean the handpiece, the tip torquing base, and the torque wrench. 12-4 CUSA Excel Ultrasonic Surgical Aspirator System User’s Guide...
-
Page 132: Clean The Handpiece
Manually wipe the handpiece electrical connector with a cloth moistened with water. Using a soft cloth, dry the nosecone, connecting body, handpiece housing, handpiece cable, and handpiece electrical connector. CUSA Excel Ultrasonic Surgical Aspirator System User’s Guide 12-5... -
Page 133: Clean The Tip Torquing Set
Rinse the tip torquing base and torque wrench thoroughly with water. Using a soft cloth, dry the tip torquing base and torque wrench. 12-6 CUSA Excel Ultrasonic Surgical Aspirator System User’s Guide... -
Page 134: Part 4. Troubleshooting And Maintenance
Part 4 Troubleshooting and Maintenance... -
Page 135: Section 13. Troubleshooting The Cusa Excel System
• General troubleshooting. For Your Information The CUSA EXcel system runs nearly trouble free. However, on occasion, a problem may arise. This section describes some conditions that may occur before or during the normal course of surgery. They are easy to diagnose and to fix. -
Page 136: Responding To Alerts
Damaged, misaligned, or missing o-rings in Connect a new handpiece to the CUSA EXcel the handpiece connector system, and test it for proper function. If the alert persists after you connect the new handpiece to the console, call Integra for assistance. - Page 137 1. Use the sterilizable torque base and a disposable sterile wrench to tighten the tip. (Refer to the Supplement, Assembling or Changing Tips on the Sterile Field, which is part 2 of the CUSA EXcel System User’s Guide.) 2. Test the tip. Tip contacting another object Remove the contact with any other object.
- Page 138 1. Use the sterilizable torque base and a disposable sterile wrench to replace the tip. (Refer to the Supplement, Assembling or Changing Tips on the Sterile Field, which is part 2 of the CUSA EXcel System User’s Guide.) 2. Test the tip. 13-4...
-
Page 139: General Troubleshooting
Prime button to make sure the irrigation system is ready to use. 5. Adjust the Aspiration, Irrigation, Amplitude, and TISSUE Select settings. 6. Push the Status button to change to Run mode. CUSA Excel Ultrasonic Surgical Aspirator System User’s Guide 13-5... - Page 140 Low or no suction due to suction tubing Verify that the manifold suction tube connects improperly connected to handpiece properly to the nosecone by disconnecting, then reconnecting, the tubing and its clip. 13-6 CUSA Excel Ultrasonic Surgical Aspirator System User’s Guide...
- Page 141 2. Squeeze the blocked area to loosen it. 3. Immerse the handpiece tip in sterile irrigation fluid briefly. This may clear the blockage. Suction canister full Replace the suction canister. CUSA Excel Ultrasonic Surgical Aspirator System User’s Guide 13-7...
- Page 142 • If Lap mode is on, in Run mode the pinch valve should be open only when you activate vibration. If these conditions do not exist, call Integra for assistance. No green LEDs (other than setpoints) System in Standby mode Press the Status button to switch the system illuminate when you activate vibration.
- Page 143 5. Immerse the handpiece tip in sterile irrigation fluid briefly. This may clear the suction tubing. Incorrect flue installed Install the correct flue. CUSA Excel Ultrasonic Surgical Aspirator System User’s Guide 13-9...
- Page 144 (Refer to the Supplement, Assembling or Changing Tips on the Sterile Field, which is part 2 of the CUSA EXcel System User’s Guide.) b. Test the tip. 13-10 CUSA Excel Ultrasonic Surgical Aspirator System User’s Guide...
- Page 145 Suction tube won’t assemble correctly to Nosecone not assembled to handpiece Align the dot on the nosecone with the dot on handpiece nosecone correctly the handpiece. Transducer is twisted inside handpiece Replace the handpiece. housing CUSA Excel Ultrasonic Surgical Aspirator System User’s Guide 13-11...
- Page 146 A pinch or kink in the suction tubing Straighten the tubing to remove a kink, or remove anything that might pinch the tube. 13-12 CUSA Excel Ultrasonic Surgical Aspirator System User’s Guide...
- Page 147 • If Lap mode is on, in Run mode the pinch valve should be open only when you activate vibration. If these conditions do not exist, call Integra for assistance. The handpiece gets hot Surgeon holding handpiece at tip and flue Hold the handpiece at the nosecone.
- Page 148 Notes 13-14 CUSA Excel Ultrasonic Surgical Aspirator System User’s Guide...
-
Page 150: Section 14. Maintaining The Cusa Excel System
• Integra service centers. For Your Information Routinely performing a few simple maintenance tasks keeps your CUSA EXcel system and handpieces operating at maximum safety and performance. Biomedical Engineering at your facility should perform these tasks. CUSA Excel Ultrasonic Surgical Aspirator System User’s Guide... -
Page 151: Quick Reference
Every month or 80 hours Handpiece Apply a high viscosity lubricant to the of use handpiece connector o-rings. Every 6 months or 500 hours Handpiece Replace the handpiece connector o-rings. of use 14-2 CUSA Excel Ultrasonic Surgical Aspirator System User’s Guide... -
Page 152: Clean The Sterilizer Case
Items needed: O-Ring maintenance kit, which includes o-rings, an insertion tool, and instructions. Items to be replaced: The four o-rings on the handpiece connector water prongs. Figure 14-1. Replacing o-rings on the handpiece connector water prongs Insertion Tool CUSA Excel Ultrasonic Surgical Aspirator System User’s Guide 14-3... -
Page 153: Recalibrate The Handpiece
Store the CUSA EXcel System and Accessories CUSA EXcel Console Drain all liquids. Store the CUSA EXcel system in a low traffic area that is free of dirt, blood, water, and other contaminants. Store the system at an temperature between -34° C (-29° F) and 65° C (149° F). -
Page 154: Obtaining A Return Authorization Number
To protect the console from damage during shipping, use the original packaging materials. For instructions on packing the console properly, refer to the CUSA EXcel System Service Manual or contact your Integra representative for help. Returning Handpieces Clean, disinfect, and sterilize a handpiece before you package it for shipping. -
Page 155: Integra Service Centers
Integra Service Center Integra Service Center Integra LifeSciences Plainsboro, NJ, 08536 Ph: 303-530-2300 Toll Free: 800-654-2873 14-6 CUSA Excel Ultrasonic Surgical Aspirator System User’s Guide... -
Page 156: Part 5. Appendix
Width 55.88 cm (22 in.) Depth 71.12 cm (28 in.) Weight 95.3 kg (210 lb.) Footswitch Height 5.08 cm (2 in.) Width 30.48 cm (12 in.) Cable length 4.575 m (15 ft) CUSA Excel Ultrasonic Surgical Aspirator System User’s Guide... -
Page 157: Console Subsystems
1 – 10 cc/min., normal; 25 – 30 cc/min., Fast Flush Suction System Up to 660 mm (26 inches) mercury at the pump intake at sea level The suction level will be lower at higher altitudes. CUSA Excel Ultrasonic Surgical Aspirator System User’s Guide... -
Page 158: Electrical Requirements
Hospital grade, three-prong, 95-120 Van connector If a facility intends to use the CUSA EXcel system in an operating room with another type of receptacle, the facility is responsible for replacing the connector on the power cord. The replacement connector must be properly grounded. -
Page 159: Environment
To reduce the risk of electric shock, do not remove the cover. Refer servicing to qualified service personnel. Classified with respect to electrical shock, fire, mechanical, and other specified hazards only in accordance with UL60601-1 and CAN/CSA C22.2 No. 601.1. CUSA Excel Ultrasonic Surgical Aspirator System User’s Guide... -
Page 160: Class I Equipment (Iec 601-1
Type BF Applied Part Equipment (IEC 601-1) The CUSA EXcel console provides a high degree of protection against electric shock, particularly regarding allowable leakage currents. It is type BF isolated (floating) output. -
Page 161: Footswitch Symbols
ISTA EMC Compatibility Notice The CUSA EXcel requires special precautions regarding EMC and needs to be installed and put into service according to the EMC information provided in the CUSA EXcel Service Manual. Portable and mobile RF communications equipment can affect the CUSA EXcel. -
Page 162: Handpieces
The table on pages A8 shows specifications for tips that attach to the 23 kHz handpiece. The table on pages A9 shows specifications for tips that attach to the 36 kHz handpiece. CUSA Excel Ultrasonic Surgical Aspirator System User’s Guide... -
Page 163: 23 Khz
254 to 307 [0.0100 to 0.0121] Angled Handpiece: 102 to 142 [0.0040 to 0.0056] Laparoscopic Tip 30.14 [11.865] 1.98 [0.078] 2.54 [0.100] Straight Handpiece: 32.13 178 to 229 [0.007 to 0.009] Not compatible with angled handpiece CUSA Excel Ultrasonic Surgical Aspirator System User’s Guide... -
Page 164: 36 Khz
11.44 [4.504] 1.98 [0.078] 2.54 [0.100] 137 to 155 [0.0054 to 0.0061] 7.48 Standard Tip Curved Extended 11.44 [4.504] 1.98 [0.078] 2.54 [0.100] 137 to 155 [0.0054 to 0.0061] 7.48 Standard Tip CUSA Excel Ultrasonic Surgical Aspirator System User’s Guide... - Page 165 Notes A-10 CUSA Excel Ultrasonic Surgical Aspirator System User’s Guide...
- Page 166 Part 5 Appendix...
-
Page 168: Appendix B. Warranty
1.2. Coverage. During the Warranty Period, Integra shall provide free-of-charge ser- vice and maintenance consistent with the provisions of Section 3 of this Warranty, so that the Equipment conforms with the Specifications defined in the Cusa EXcel Ultrasonic Surgical Aspirator Operator’s Manual, as such Operator’s Manual may be modified by Integra from time to time. - Page 169 (at the discretion of Integra), as the case may be, and where not possible Integra shall arrange and pay to ship the affected Equipment to the designated repair facility, and shall repair the affected Equipment.
- Page 170 FOR PURPOSES OF THE PARTICULAR TREATMENT THAT CUSTOMER UNDERTAKES TO PERFORM FOR THIRD PARTIES. Moreover, Customer shall not make any claim against Integra or any of its affi liates, assignees or representatives with respect to the efficacy of the Equipment or of said technical assistance or with respect to any claims by third parties related to any treatment undertaken by Customer.
- Page 171 Integra or Customer, then and in that event Integra or Customer, as the case may be, shall promptly notify the other party hereto of the resulting difficulties therefrom, and any of the foregoing events shall excuse any performance required under the Warranty.
-
Page 172: For Your Information
NOT Changing Tips on the Sterile Field – If assembling the tip to the handpiece in a nonsterile area before sterilization, refer to the following instructions in the CUSA EXcel System User’s Guide: • Section 9, Assembling the Handpiece in a Nonsterile Area •... -
Page 173: Items Needed
Figure 1. Connector The sterilized handpiece Cable Connecting body Handpiece body Figure 2. Standard The sterilized standard nosecone and the sterile CEM nosecones 23 kHz CEM, 36 kHz CEM, coag coag only Supplement: CUSA Excel Ultrasonic Surgical Aspirator System User’s Guide... - Page 174 Sterile tip/flue pack contents. The tip cleaner is inside the flue. O-rings Flue Tip cleaner Steam sterilize the tip torquing base before each surgical procedure in which you change tips on the sterile field. Supplement: CUSA Excel Ultrasonic Surgical Aspirator System User’s Guide...
- Page 175 You have two options for attaching the tubing to the handpiece: • Attach the manifold tubing on the sterile field. • Attach the manifold tubing before sterilizing the handpiece. Figure 6. Sterile manifold tubing Supplement: CUSA Excel Ultrasonic Surgical Aspirator System User’s Guide...
-
Page 176: Assembly
Put the handpiece in the torque base so that the metal connecting body fits snugly in the metal slot at the end of the support. Supplement: CUSA Excel Ultrasonic Surgical Aspirator System User’s Guide... - Page 177 Carefully remove the sterile wrench from the tip. Remove the handpiece from the tip torquing base. Locate the o-rings for the handpiece you are assembling: 23 kHz 36 kHz Large o-ring black white Small o-ring green blue Supplement: CUSA Excel Ultrasonic Surgical Aspirator System User’s Guide...
-
Page 178: Attach A Nosecone And Flue
Wet surfaces may result in electric shock to the patient, the surgeon, or the operating room staff. Holding the handpiece, insert the tip into the nosecone. Supplement: CUSA Excel Ultrasonic Surgical Aspirator System User’s Guide... - Page 179 MicroTip Micro TIp Plus PrecisionTip MacroTip Make sure to push the flue base completely over the nosecone base, and that the end of the flue lines up with the pre-aspiration holes. Supplement: CUSA Excel Ultrasonic Surgical Aspirator System User’s Guide...
-
Page 180: Attach The Manifold Tubing
Snap the handpiece clip in place on the handpiece housing. Insert the irrigation tube from the flue into the handpiece clip. Connect the manifold irrigation tubing to the Luer fitting on the handpiece flue. Supplement: CUSA Excel Ultrasonic Surgical Aspirator System User’s Guide... -
Page 181: Disassembly To Change Tips On The Sterile Field
If you are disassembling the handpiece at the end of the surgical procedure, refer to Section 12, Disassembling Handpieces in the CUSA EXcel System User’s Guide. S-10 Supplement: CUSA Excel Ultrasonic Surgical Aspirator System User’s Guide... -
Page 182: Disconnect The Manifold Tubing
Disassembly to Change Tips on the Sterile Field Press the Status button to Status button put the system in Standby. Disconnect the Manifold Tubing Disconnect the irrigation tubing from the handpiece flue. Supplement: CUSA Excel Ultrasonic Surgical Aspirator System User’s Guide S-11... -
Page 183: Remove The Nosecone, O-Rings, And Tip
(23 kHz – green; 36 kHz – blue). Put the handpiece in the torque base so that the metal connecting body fits snugly in the metal slot at the end of the support. S-12 Supplement: CUSA Excel Ultrasonic Surgical Aspirator System User’s Guide... - Page 184 Unscrew the used tip. Set the tip and flue aside for further use or disposal at the end of the surgical procedure. If using a CEM nosecone, set aside the o-rings. Supplement: CUSA Excel Ultrasonic Surgical Aspirator System User’s Guide S-13...
-
Page 185: Disassembly After The Surgical Procedure
Do not discard these items: • Handpiece • Standard nosecone • Sterilizable torque base. When you have disassembled the tip from the handpiece, clean the handpiece and the sterilizable torque base. S-14 Supplement: CUSA Excel Ultrasonic Surgical Aspirator System User’s Guide... -
Page 186: Reprocess The Handpiece
Manually wipe the handpiece electrical connector with a cloth moistened with water. Using a soft cloth, dry the nosecone, connecting body, handpiece housing, handpiece cable, and handpiece electrical connector. Supplement: CUSA Excel Ultrasonic Surgical Aspirator System User’s Guide S-15... -
Page 187: Reprocess The Sterilizable Torque Base
Soak at least two minutes in an enzymatic cleaning agent (for ® example, Klenzyme or Enzol™) according to the manufacturer's instructions. Scrub all surfaces with a small soft brush. Rinse thoroughly with water. Dry with a clean soft cloth. S-16 Supplement: CUSA Excel Ultrasonic Surgical Aspirator System User’s Guide... -
Page 188: Package The Handpiece For Sterilization
Package the Handpiece for Sterilization After you have cleaned the disassembled handpiece, prepare it for sterilization. Integra provides sterilizer cases for steam sterilization of the CUSA EXcel handpieces. They protect the handpieces during sterilization and during transfer to the sterile field. The case for the 23 kHz handpiece is gray;... -
Page 189: Package The Base For Sterilization
Package the Base for Sterilization Package the Base for Sterilization Load the sterilizable torque base into the CUSA EXcel sterilizer tray and secure it with the silicone strap. 36 kHz 23 kHz Put on the lid. Close and latch the sterilizer case.
Need help?
Do you have a question about the cusa excel and is the answer not in the manual?
Questions and answers