Omron K3HB - MANUAL 2 Manual
Digital indicators
Hide thumbs
Also See for K3HB - MANUAL 2:
- Applications manual (150 pages) ,
- Datasheet (33 pages) ,
- Manual (33 pages)
Table of Contents
Advertisement
Quick Links
Cat. No. N129-E1-03
Note: Specifications subject to change without notice.
OMRON Corporation
Industrial Automation Company
Industrial Devices and Components Division H.Q.
Measuring Components Department
Shiokoji Horikawa, Shimogyo-ku,
Kyoto, 600-8530 Japan
Tel: (81)75-344-7080/Fax: (81)75-344-7189
Regional Headquarters
OMRON EUROPE B.V.
Wegalaan 67-69, NL-2132 JD Hoofddorp
The Netherlands
Tel: (31)2356-81-300/Fax: (31)2356-81-388
OMRON ELECTRONICS LLC
1 East Commerce Drive, Schaumburg, IL 60173
U.S.A.
Tel: (1)847-843-7900/Fax: (1)847-843-8568
OMRON ASIA PACIFIC PTE. LTD.
83 Clemenceau Avenue,
#11-01, UE Square,
239920 Singapore
Tel: (65)6835-3011/Fax: (65)6835-2711
OMRON CHINA CO., LTD. BEIJING OFFICE
Room 1028, Office Building,
Beijing Capital Times Square,
No. 88 West Chang'an Road,
Beijing, 100031 China
Tel: (86)10-8391-3005/Fax: (86)10-8391-3688
Authorized Distributor:
Printed in Japan
0305
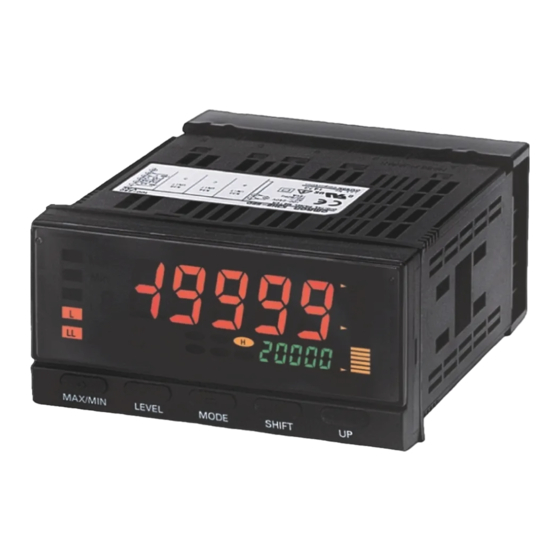
Digital Indicators
K3HB
Communications User's Manual
Cat. No. N129-E1-03
Advertisement
Chapters
Table of Contents

Related Manuals for Omron K3HB - MANUAL 2


Summary of Contents for Omron K3HB - MANUAL 2
- Page 1 Regional Headquarters OMRON EUROPE B.V. Wegalaan 67-69, NL-2132 JD Hoofddorp The Netherlands Tel: (31)2356-81-300/Fax: (31)2356-81-388 OMRON ELECTRONICS LLC 1 East Commerce Drive, Schaumburg, IL 60173 U.S.A. Tel: (1)847-843-7900/Fax: (1)847-843-8568 OMRON ASIA PACIFIC PTE. LTD. 83 Clemenceau Avenue, #11-01, UE Square,...
- Page 2 K3HB Digital Indicators Communications User’s Manual Revised March 2005...
- Page 4 OMRON, 2004 All rights reserved. No part of this publication may be reproduced, stored in a retrieval system, or transmitted, in any form, or by any means, mechanical, electronic, photocopying, recording, or otherwise, without the prior written permission of OMRON.
- Page 5 The following are some examples of applications for which particular attention must be given. This is not intended to be an exhaustive list of all possible uses of the products, nor is it intended to imply that the uses listed may be suitable for the products.
- Page 6 PERFORMANCE DATA Performance data given in this manual is provided as a guide for the user in determining suitability and does not constitute a warranty. It may represent the result of OMRON's test conditions, and the users must correlate it to actual application requirements.
- Page 7 Safety Precautions ■ Definition of Precautionary Information The following notation is used in this manual to provide precautions required to ensure safe usage of the product. The safety precautions that are provided are extremely important to safety. Always read and heed the information provided in all safety precautions.
- Page 8 Do not use the equipment for measurements within Measurement Categories III and IV for K3HB-X and II, III, and IV for K3HB-S, K3HB-V, K3HB-H, K3HB-R, K3HB-P, and K3HB-C (according to IEC61010-1). Doing so may occasionally cause unexpected operation, resulting in minor or moderate injury, or damage to the equipment.
- Page 9 CAUTION Make sure that the product will not be adversely affected if the DeviceNet cycle time is lengthened as a result of changing the program with online editing. Extending the cycle time may cause unexpected operation, occasionally resulting in minor or moderate injury, or damage to the equipment.
- Page 10 (10) Ensure that the rated voltage is achieved no longer than 2 s after turning the power ON. (11) Allow the product to operate without load for at least 15 minutes after the power is turned ON. (12) Do not install the product near devices generating strong high-frequency waves or surges.
- Page 11 (15) Use the product within the noted supply voltage and rated load. (16) Do not connect anything to unused terminals. (17) Output turns OFF when the mode is changed or settings are initialized. Take this into consideration when setting up the control system.
- Page 12 EMC Directives OMRON devices that comply with EC Directives also conform to the related EMC standards so that they can be more easily built into other devices or the overall machine. The actual products have been checked for conformity to EMC standards.
- Page 13 Complying with Safety Standards For the DeviceNet power supply, always use a power supply with reinforced or double insulation, that complies with EN/IEC standards. Conformance to the standards is for indoor applications only.
- Page 14 Describes the configuration and connection forms for a DeviceNet network. Also describes connection methods and specifications for devices used to connect to the network, such as cables and connectors, as well as meth- ods for supplying communications power. When using DeviceNet, obtain this manual in advance and be sure you understand its contents.
-
Page 16: Table Of Contents
List of Settings ........2-1... - Page 17 Remote I/O Communications Performance........
- Page 18 Section 5 describes how to send explicit messages to the K3HB-DRT Digital Indicator, including how to send CompoWay/F commands using explicit messages. Section 6 provides information on the time required for a complete communications cycle, for an out- put response to be made to an input, to start the system, and to send messages.
- Page 20 Communications Method ..........Frames (CompoWay/F Communications)........
- Page 21 Part 1: CompoWay/F...
-
Page 22: Compoway/F Communications
1-1-2 Communications Specifications ........ -
Page 23: Communications Method
Supplement The communications function is used by creating a program on the host com- puter. As such, the explanations in this chapter are from the perspective of the host computer. For example, “Read/Write” refers to the host computer reading or writing to the K3HB. - Page 24 After a receiving a response from the Digital Indicator, have the host computer wait at least 50 ms before sending the next command. When writing multiple sets of setting data in a row, such as when writing to the variable area or performing a compound write, controllability may be affected.
- Page 25 • Use terminals B1 through B3 to communicate with the host. • Wiring is configured 1:1. • The maximum cable length is 15 m. Use OMRON’s Z3RN RS-232C Opti- cal Interface to extend the wiring path. • Use shielded, twisted-pair wires of at least AWG28 to AWG16 for all cables.
-
Page 26: Frames (Compoway/F Communications)
02H 30H 30H 30H 30H 30H 30H 35H 30H 30H 03H 36H BCC = 30H + 30H + 30H + 30H + 30H + 30H + 35H + 30H + 30H + 03H = 36H +: XOR (exclusive OR) operation... -
Page 27: Fins-Mini Text
FINS command error Could not execute the specified FINS command “10” Parity error Sum of bits that are “1” in received data does not agree with the set communications parity value. “11” Framing error Stop bit of command frame characters is “0”. - Page 28 FINS-mini Text Section 1-3 Response text FINS-mini response text consists of the MRC and SRC, followed by an MRES (main response code) and SRES (sub response code), and then the required data. Node Sub- FINS-mini address ETX BCC End code Response text "00"...
-
Page 29: Variable Areas
See 1-9 Commands and Responses (CompoWay/F Communications) (page 1-13) for more information. For example, if the number of elements is 0010, the first 16 elements of data (H'10) from the address are specified. Set Values... -
Page 30: Reading The Variable Area
Reading the Variable Area Section 1-5 For example, if the PV of the K3HB is 105.0, it will be read as H'0000041A (105.0 → 1050 → H'0000041A). Reading the Variable Area The data area is read by setting the required data in the following FINS-mini command text format. -
Page 31: Writing To The Variable Area
Writing to the Variable Area Section 1-6 Writing to the Variable Area Write to the data area by setting the required data in the following FINS-mini command text format. Command FINS-mini Command Text Starting Variable address Number of position type... -
Page 32: Operation Commands (Compoway/F Communications)
Specify the FINS-mini operation command. Operation code Specify an operation code. Related information Specify information related to the command. Operation commands for the K3HB are shown in the following table. Operation code Description Related information Write via communications 00: OFF (Disabled) -
Page 33: Setting Areas
When the power is turned on, setting area 0 is selected. To access setting area 1, use the “Move to setting area 1” operation command. To return to set- ting area 0 from setting area 1, turn off the power or use the “Software reset” operation command. -
Page 34: Commands And Responses (Compoway/F Communications)
“CB” Advanced function setting level This command is used to read setting data. The number of elements can be set from 0002 to 0019 to allow successive reading of 2 to 25 items of setting data in contiguous addresses. 1-13... -
Page 35: Monitor Value/Setting Data Compound Read (Compoway/F Communications)
(page 2-1). The upper limit of an address will vary depending on the variable type. This command can be used in both setting area 0 and setting area 1. If an area type error or a setting data error occurs in any of the data being read, no data will be read. Response... -
Page 36: Protect Level Setting Data Write
“0004” MAX/MIN protect This command writes protect level setting data. This command is used in setting area 0. An error will result if used in setting area 1. To use this command, use the “Write via communications” operation com- mand to enable “Write via communications,” and then use the “Move to pro- tect level”... -
Page 37: Setting Data Compound Write (Compoway/F Communications)
To specify the variable type or address, see SECTION 2 List of Settings (page 2-1). Setting data of setting area 1 is written in setting area 1. An error will result if written in setting area 0. To use this command, “Write via communications” must be enabled using the “Write via communications”... -
Page 38: Monitor Value/Setting Data Compound Read Store Check (Read)
(write).” This command can be used in both setting area 0 and setting area 1. If an area type error or a setting data error occurs in any of the data being read, no data will be read. -
Page 39: 1-9-10 Write Via Communications
When write via communications is disabled, communications cannot be used to write setting data or send operation commands. The initial setting is “disabled.” This command can be used in both setting area 0 and setting area 1. Response Response code "30"... -
Page 40: 1-9-13 Zero Execute/Cancel
“01” Zero execute This command is used to execute/cancel the forced zero and tare zero func- tions. The results of the command will depend on the status of the tare zero setting, as shown below. Tare Commands executed in order left to right. -
Page 41: Move To Setting Area 1
"00" Use this command to move to protect level. This command is used in setting area 0. If used in setting area 1, an operation error will result. To use this command, “Write via communications” must be enabled using the “Write via communications”... -
Page 42: 1-9-18 Read Machine Attributes
Section 1-9 Response Response code "30" "05" "0000" Response codes: The above indicates a normal end. For the response codes, see 1-7 Operation Commands (CompoWay/F Communications) (page 1-11). 1-9-18 Read Machine Attributes Command "05" "03" This command reads the K3HB model and communications buffer size. -
Page 43: 1-9-20 Echo Back Test
Measurement outside the dis- play range No-measurement status Note (1) The bit will be ON (1) or when an error occurs and otherwise will be OFF (0). (2) Information is in the same order as status information. 1-9-20 Echo Back Test... -
Page 44: 1-10 Program Example
Section 1-10 1-10 Program Example N88Basic This program displays the response from the K3HB on the screen when com- mand data is entered from the keyboard. Command data from the unit number to the number of elements must be entered. - Page 45 Program Example Section 1-10 Operation Example Reading the present value of Unit No.01. SEND DATA:010000101C00002000001 RESPONSE:010000010100000000014F SEND DATA: [STX] 01 00 0 0101 C0 0002 00 0001 [ETX] [BCC] Number of elements Bit position Read start address Variable type MRC/SRC Sub-address Node No.
-
Page 46: List Of Settings
SECTION 2 List of Settings This list of settings shows addresses for CompoWay/F communications. Refer to the address for the communications pro- tocol that is used. - Page 47 Forced zero Tare zero Note The output status turns ON and OFF whether or not an Output Unit is mounted. The output status is undefined if there is no output terminal when Unit 3 outputs a two-relay comparative output pattern. If the output is a two-relay plus one-relay comparative output pattern, LL turns ON when PASS turns ON (output and display colors are not changed in communications status).
- Page 48 ( − 19,999 to 99,999) 0004 MIN value H’FFFFB1E1 to H’0001869F ( − 19,999 to 99,999) Note The values beginning with H’ in the Monitor/Setting range column are used when setting or monitoring data via communications. Protect Level Variable Address Parameter...
- Page 49 J(4), H’00000005: 5-J(5), H’00000006: 6-T(6), H’00000007: 7-E(7), H’00000008: 8-L(8), H’00000009: 9- V(9), H’0000000A: 10-N(10), H’0000000B: 11-R(11), H’0000000C: 12-S(12), H’0000000D: 13-B(13), H’0000000E: 14-W(14) fre H’00000000: 50(0), H’00000001: 60(1) 50, 60 0002 Power sup- ply fre- quency inp . a1 H’FFFFB1E1 to H’0001869F :9999 to...
- Page 50 H’00000001: F(1) out-p H’00000000: standard output(0), nomal, nomal 000E Compara- zone, level tive output H’00000001: zone output(1), pattern H’00000002: zone output(2) Note The values beginning with H’ in the Monitor/Setting range column are used when setting or monitoring data via communications.
- Page 51 99 . 999 value 2 H’0001869F (− 199.99 to 99.999) memo H’00000000: OFF(0), off, on 0010 Power interrup- tion memory H’00000001: ON(1) Note The values beginning with H’ in the Monitor/Setting range column are used when setting or monitoring data via communications.
- Page 52 H’00000000: OFF(0) off, on 0008 PV decimal point indica- H’00000001: ON(1) tion Note The values beginning with H’ in the Monitor/Setting range column are used when setting or monitoring data via communications. Comparative Set Value Level Variable Address Parameter Character...
- Page 53 H’FFFFB1E1 to :9999 to 99999 0004 Compara- According to 99999 tive set H’0001869F the decimal ( − 19,999 to 99,999) value 1 HH position set- ting sv1.h H’FFFFB1E1 to :9999 to 99999 0005 Compara- According to 99999 tive set H’0001869F...
- Page 54 H’0001869F the decimal ( − 19,999 to 99,999) value 7 LL position set- ting Note The values beginning with H’ in the Monitor/Setting range column are used when setting or monitoring data via communications. Linear Output Level Variable Address Parameter...
- Page 55 Note (1) The values beginning with H’ in the Monitor/Setting range column are used when setting or monitoring data via communications. (2) If the event connector is provided as a standard feature or an event connector is added, use EV for the “bank selection” setting.
- Page 56 0003 Max. value Same as above 0004 Min. value Same as above Note The values beginning with H' in the Monitor/Setting range column are used when setting or monitor- ing data via communications. Protect Level Variable Address Parameter Charac- Monitor/Setting range...
- Page 57 H’00000000: Standard outputs (0) level output pattern H’00000001: Zone outputs (1) H’00000002: Level outputs (2) Note The values beginning with H' in the Monitor/Setting range column are used when setting or monitor- ing data via communications. Input Adjustment Level Variable Address Parameter...
- Page 58 R: :9999 0007 Position meter Same as above Same as above Same as above P: 0 lower limit Note The values beginning with H' in the Monitor/Setting range column are used when setting or monitor- ing data via communications. 2-13...
- Page 59 \\\\\ 0027 Decimal point H’00000000 to H’00000004: (0 to 4) \\\. \\, \\. \\\, position 7 \. \\\\ Note The values beginning with H' in the Monitor/Setting range column are used when setting or monitor- ing data via communications. 2-14...
- Page 60 :9999 to 99999 99999 According to the 0. 00. 00 to 99999 value 0HH (Time limit is OFF. Lower limit of P is 0.) decimal position 0. 00. 00 to H’00000000 to H’0001869F: 0 to 99999 setting. The time 9. 59. 59 (Time unit is min.)
- Page 61 Note (1) If the event connector is provided as a standard feature or an event connector is added, use EV for the “bank selection” set. (2) The values beginning with H' in the Monitor/Setting range column are used when setting or moni- toring data via communications.
- Page 62 H’FFFFB1E1 to H’0001869F: (−19999 to 99999) 0004 Min. value H’FFFFB1E1 to H’0001869F: (−19999 to 99999) Note The values beginning with H' in the Monitor/Setting range column are used when setting or monitor- ing data via communications. Protect Level Variable Address...
- Page 63 000E Comparative H’00000001: Zone outputs (1), output pattern H’00000002: Level outputs (2) Note The values beginning with H' in the Monitor/Setting range column are used when setting or monitor- ing data via communications. Input Adjustment Level Variable Address Parameter Charac-...
- Page 64 \\\\\ 0027 Decimal point H’00000000 to H’00000004: (0 to 4) \\\. \\, \\. \\\, position 7 \. \\\\ Note The values beginning with H' in the Monitor/Setting range column are used when setting or monitor- ing data via communications. 2-19...
- Page 65 Monitor/Setting range Character Default Decimal point Unit type name setting 0000 Comparative set s?0.o5 H’FFFFB1E1 to H’0001869F (−19999 to 99999) :9999 to 99999 99999 According to the value 05 decimal position setting. s?0.o4 :9999 to 99999 99999 0001 Comparative set H’FFFFB1E1 to H’0001869F (−19999 to 99999)
- Page 66 H’FFFFB1E1 to H’0001869F (−19999 to 99999) According to the value 71 decimal position setting. Note The values beginning with H' in the Monitor/Setting range column are used when setting or monitor- ing data via communications. Linear Output Level Variable Address Parameter...
- Page 67 (1) The values beginning with H' in the Monitor/Setting range column are used when setting or moni- toring data via communications. (2) If the event connector is provided as a standard feature or an event connector is added, use EV for the "bank selection" setting.
-
Page 68: Part 2: Devicenet
Introduction ............Functions Supported Only by the K3HB-DRT ....... . . - Page 69 Part 2: DeviceNet...
-
Page 70: Overview
1-1-4 Default Communications Settings ........1-1-5 Data Allocation. -
Page 71: Features
Remote I/O communications allow the master and the K3HB-DRT to automat- ically share data via high-speed I/O without any special programming of the master. Remote I/O communications are particularly suited to operation con- trol, error warnings, and monitoring applications. - Page 72 Monitor value settings, parameters Operation commands Status Refer to the DeviceNet Operation Manual (Cat. No. W267) for information such as the order for turning ON power to the master and slaves and master I/ O tables. 1-1-5 Data Allocation K3HB-DRT communications data must be allocated for the Read and Write Areas for communications with the master.
- Page 73 The Communications Write setting must be set to ON to write data from the master to the K3HB-DRT. Data will not be written to the Digital Indicator if the Communications Write setting is OFF. The following diagram shows com- munications with the default data allocation parameters.
-
Page 74: Specifications
Indicator variable area. • Up to 2 blocks for the IN Area, up to a total of 60 words (See note 1.) • One block for the OUT Area, up to 29 words (The first word is always allocated to Output Enable Bits.) (See note 2.) - Page 75 Acceleration: 50 m/s Shock resistance 150 m/s max. 3 times each in 3 axes, 6 directions Dielectric strength 2,300 VAC for 1 min. between all the external terminals and case Insulation resistance 20 MΩ min. (at 500 VDC) − Ambient temperature 10 to 55°C (with no condensation or icing)
-
Page 76: Operating Procedures
Setting Node Addresses ......... . . Functions Supported Only by the K3HB-DRT ....... . . -
Page 77: Introduction
Manual (W267) for information on related connection devices. Note Up to 30 items can be allocated in the IN Area and up to 15 items can be allo- cated in the OUT Area for remote I/O communications. To read and write larger amounts of data, use explicit messages. - Page 78 The node address will be 0 if an address between 64 and 99 is set. Setting Parameters A. Press the LEVEL Key for at least 3 s to move to the input initial setting level. At least 3 s • The initial setting level is indicated by 0 being displayed in the level/bank is displayed.
-
Page 79: Functions Supported Only By The K3Hb-Drt
• The SV will flash to indicate that it can be changed. u-no D. Press the UP and SHIFT Keys to change the Unit No. (DeviceNet node address) setting. The number of words allocated will depend on the K3HB-DRT communica- tions data allocations. -
Page 80: Parts, Installation, And Wiring
MS and NS Indicators..........DeviceNet Communications Cables Wiring ........ -
Page 81: Part Names And Functions
The DeviceNet communications connector is used to connect the communica- Communications tions cable to the DeviceNet network. The DeviceNet communications power is also supplied through this connector. The connector provided with the Digi- Connector tal Indicator is a HR31-5.08P-5SC(01) (Hirose Electric). The provided connec- tor crimp terminals are HR31-SC-121 (Hirose Electric) and are for Thin DeviceNet Communications Cables. -
Page 82: Ms And Ns Indicators
• Waiting for completion of the master’s node address duplication check. • DeviceNet communications power is not being sup- plied. Flashing Not lit Normal Indicator Display The MS and NS indicators are both lit green when the status of the Digital Indicator and the Network are normal. -
Page 83: Devicenet Communications Cables Wiring
Approx. 30 to 80 mm (Remove as little as possible.) 2. Carefully peel back the shield mesh to reveal the signal lines, power lines, and the shield wire. The shield wire is slightly harder to the touch than the mesh. Shield wire 3. -
Page 84: Devicenet Communications Cables Wiring
The crimp terminals can be crimped using a crimp tool that conforms to JIS C9711. The following crimp tool is also available: HR31-TC-01 (Hirose Electric) If wiring is not correct, use an extraction tool to extract the wires using the fol- lowing procedure. 1,2,3... -
Page 85: Attaching The Devicenet Communications Unit Connector
Align the DeviceNet Communications Unit connector (marked with a C) with the cable connector, and insert the cable connector fully into the DeviceNet Communications Unit connector. Tighten the set screws to a torque between 0.18 and 0.22 N·m to secure the connector. Align the connector with the black wire at the top. -
Page 86: Remote I/O Communications
Allocation Default Values........ -
Page 87: Overview
Section 4-1 Overview I/O memory in the master can be allocated to data from the K3HB-DRT Digital Indicator, such as data from the Digital Indicator’s variable area, merely by specifying what Digital Indicator data is to be transferred to where. -
Page 88: Allocation Area Sizes (In Data Size And Out Data Size)
I/O Allocation Section 4-2 4-2-1 Allocation Area Sizes (IN Data Size and OUT Data Size) The size of allocated data in each of the IN and OUT Areas is shown in the fol- lowing table. I/O memory Words Bytes Setting... -
Page 89: Allocation Default Values
When Output Enable Bits are allocated in the IN Area, they are always set to 0 (OFF). Note If data allocated to the IN or OUT Area is changed, use a software reset or cycle the power to enable the new settings. 4-2-3 Allocation Default Values The default values for I/O allocations are listed in the following table. -
Page 90: Input Data
SP has already been set. If the Output Enable Bits are set to 1 and then set to 0, no SP will be writ- ten even if one is accidentally allocated. (However, care must be taken because writing is enabled if Output Enable Bits are set to 1.) -
Page 91: Operation Commands
Lower byte Related information Bit 15 is strobe 2 and bit 14 is strobe 1. A logical OR is taken between the two leftmost bits of the command code and bits 15 and 14, and the result is attached as the strobe to the operation command. The command code for K3HB-DRT operation commands is 0@ hex, so when the logical OR is 8@ hex, the strobe is ON. -
Page 92: Ladder Programming Examples
• The contents of D1000 (= 0300 hex) is copied to CIO 3202, where the operation command is allocated. • The strobe is turned ON (strobe 1 = 0 and strobe 2 = 1) and the operation command is executed. -
Page 93: Ladder Programming Examples
Ladder Programming Examples Section 4-3 Note When using this type of ladder programming, do not use the timer method used in this example. Instead, allocate the status and confirm that the value has changed and then disable the strobe, specifically: a. - Page 94 Copies the contents of D1000 (000004) to CIO 3202. D1000 Execution condition 3202 ASL (025) Shifts the contents of CIO 0000 one bit to the left. 0.01 000002 RSET Sets strobe 1 = 0. (000007) 3202.14 Shifts the contents of CIO 0000 ASL (025) one bit to the left.
- Page 95 Ladder Programming Examples Section 4-3 6-10...
-
Page 96: Explicit Message Communications
Explicit Messages Basic Format........ -
Page 97: Overview Of Explicit Message Communications
Explicit message communications can be used to send and receive data that is not allocated in the IN and OUT Areas due to word size restrictions, and data that does not require the frequent refreshing used by the IN Area and OUT Area. -
Page 98: Overview Of Explicit Message Communications
The Attribute ID does not need to be specified for some commands. Data Specifies the details of the commands, set values, etc. The data section is not required for read commands. Response Block The following format is used when a normal response is returned for the sent explicit message. -
Page 99: Sending Compoway/F Commands To The Digital Indicator
(bit 07) turned ON is returned. (For example, when the service code of the command is 0E hex, the service code of the response will be 8E hex.) When an error response is returned for the explicit message, the service code is always 94 hex. -
Page 100: Compoway/F Binary Commands
CompoWay/F Binary Commands CompoWay/F binary commands use hexadecimal values for the CompoWay/ F frames, and not ASCII. Therefore, the data volume is about half of Compo- Way/F ASCII commands. The following restrictions apply. • Read Controller Attribute (05 03), which includes ASCII in the Compo- Way/F frame, cannot be used. -
Page 101: Explicit Messages Specific To Devicenet-Compatible Digital Indicators
For details on sending explicit messages from an OMRON Master PLC, refer to the DeviceNet Master Unit operation manual. Note The number of digits used for the Class ID, Instance ID, and Attribute ID depends on the master used. When sending parameters from an OMRON... -
Page 102: Reading General Status
Explicit Messages Specific to DeviceNet-compatible Digital Indicators Section 5-3 5-3-1 Reading General Status Explicit Read/ Function Command Response message write Service Class Instance Attribute Data code size General Read Reads the DeviceNet-com- 0E hex 95 hex 01 hex 65 hex... - Page 103 Explicit Messages Specific to DeviceNet-compatible Digital Indicators Section 5-3...
-
Page 104: Communications Performance
Remote I/O Communications Performance ........ -
Page 105: Remote I/O Communications Performance
I/O Response Time The I/O response time is the time required from when the master is notified of an input on an input slave until an output is made on an output slave (includ- ing ladder diagram processing in the PLC). -
Page 106: Communications Cycle Time And Refresh Processing Time
■ IN Communications Cycle Time IN communications cycle time = (39 ms + 8 ms x number of allocated data) + (6 ms × total allocated words in IN Areas 1 and 2) ■ OUT Communications Cycle Time OUT communications cycle time = (29 ms + 27 ms x number of allocated data) + (7 ms ×... -
Page 107: Networks With More Than One Master
Remote I/O Communications Performance Section 6-1 Refresh Processing The refresh processing time is the time required for the CPU Unit of the PLC Time and the DeviceNet Master Unit to pass I/O information back and forth. The cycle time of the PLC is affected as described below when a DeviceNet Unit is mounted. - Page 108 I/O communications are set to start automatically at startup. The system startup time is the delay from the time that the Master Unit is turned ON or restarted until the time remote I/O com- munications begin.
-
Page 109: Message Communications Performance
If a send or receive message is corrupted, a record will be stored in the error log in the Master Unit. Use a FINS command to read the error record or use the Configurator to monitor the error log. -
Page 110: Message Communications Performance
Message Communications Performance Section 6-2 Only Message Communications cycle time = 2 (see note) + 0.11 x TB + 0.6 ms Communications TB depends on the baud range as follows: (Remote I/O 500 KB/s: 2, 250 KB/s: 4, 125 KB/s: 8... - Page 111 Message Communications Performance Section 6-2...
-
Page 112: Troubleshooting And Maintenance
Replacing Digital Indicators ........ -
Page 113: Indicators And Error Processing
Indicators and Error Processing Section 7-1 Indicators and Error Processing The following table lists the indicator status when errors occur, the probable causes and processing. Indicator status Probable cause Remedy MS: OFF The power is not being Supply communications power from supplied to the Digital the DeviceNet connector. -
Page 114: Maintenance
• Wipe the Digital Indicator with a dry, soft cloth for regular cleaning. • When dust or dirt cannot be removed with a dry cloth, dampen the cloth with a neutral cleanser (2%), wring out the cloth, and wipe the Digital Indi- cator. - Page 115 Replacing Digital Indicators The Network consists of the DeviceNet Master Unit and Slave Units. The entire network is affected when a Unit is faulty, so a faulty Unit must be repaired or replaced quickly. We recommend having spare Units available to restore Network operation as quickly as possible.
-
Page 116: Additional Information For Devicenet
Detailed DeviceNet Specifications ........ -
Page 117: Detailed Devicenet Specifications
Detailed DeviceNet Specifications Data Size and Connection Types If the connection type can be set when another company’s configurator is being used, select a connection sup- ported by the DeviceNet Communications Unit. The following table shows the connection types and data sizes for OMRON DeviceNet Communications Units. -
Page 118: Mounted Objects
Mounted Objects Section 8-2 Device Profiles The following device profiles contain more detailed DeviceNet specifications for DeviceNet communications if more information needs to be registered in the scan list. General data Compatible DeviceNet Specifications Volume I - Release 2.0 Volume II - Release 2.0... - Page 119 Not supported Service Not supported Object instance Attribute Contents Get (read) Set (write) Value 100: IN Area 1 Number of members in list 101: IN Area 2 Member list 110: OUT Area 1 Data Service DeviceNet service Parameter option Get_Attribute_Single None...
- Page 120 Mounted Objects Section 8-2 Connection Object (0x05) Object class Attribute Not supported Service Not supported Maximum number of active connections Object Section Information Maximum number of instances instance 1 Instance type Explicit Message Production Cyclic trigger Transport type Server Transport...
- Page 121 Mounted Objects Section 8-2 Object Section Information Maximum number of instances instance 2 Instance type Polled I/O Production Cyclic trigger Transport type Server Transport class Attribute Contents Get (read) Set (write) Value State Instance type 01 (hexadecimal) Transport class trigger...
-
Page 122: Devicenet Connection Hardware
IN Area 2: 20_04_24_65_30_03 DeviceNet Connection Hardware DeviceNet Communications Cables Model Specifications Manufacturer DCA1-5C10 Thin Cable: 5 wires, 100 m OMRON DVN24-10G Thin Cable: 5 wires, 10 m Nihon Wire & Cable (See note 1.) DVN24-30G Thin Cable: 5 wires, 30 m Nihon Wire &... - Page 123 Shielded Terminating Resistor (male plug), micro-size (M12) DRS2-2 Shielded Terminating Resistor (female socket), micro-size (M12) DRS3-1 Shielded Terminating Resistor (male plug), mini-size A Terminating Resistor can also be connected to a T-branch Tap or a one-branch Power Supply Tap. 10-8...
- Page 124 Manufacturer DCN1-1C Includes three XW4B-05C1-H1-D parallel connectors with screws OMRON (When used on a trunk line, one branch line can be connected.) Connector insertion direction: Horizontal A Terminating Resistor (included as standard) can be connected. DCN1-2C Includes three XW4B-05C1-H1-D parallel connectors with screws OMRON (When used on a trunk line, one branch line can be connected.)
-
Page 125: Glossary
Master/Slave A node can be either a master, which collects and distributes data, or a slave, which out- puts and inputs data according to the instructions received from the master. OMRON’s DeviceNet products are already provided with either master or slave functions in a pre- defined master/slave connection set. -
Page 126: Part 3: Bcd Output
11-7 Programming Example 1: Connecting to a PLC....... . 11-7 Programming Example 2: Connecting to a PLC. - Page 127 Part 3: BCD Output...
-
Page 128: Bcd Communications
11-7 Programming Example 1: Connecting to a PLC....... . 11-7 1-5-1 I/O Allocations . -
Page 129: Features
Features 1-1-1 Overview Measurement values (display values) output from Digital Indicators with a BCD output can be read by devices such as a PLC, a large sized display device (e.g., the M7E), or other devices. 1-1-2 Connection Example PLC Connection... -
Page 130: Specifications
RD5-1 Output Read data 10 digit RD5-2 Output Read data 10 digit RD5-4 Output Read data 10 digit RD5-8 Output Read data 10 digit OVER Output Data overflow, data underflow D·V Output Data valid signal Output RUN signal 11-3... -
Page 131: Pin Wiring Diagram
HH(OUT5) H(OUT4) Note (1) Either of the BCD common pins can be used for any of the signals. (2) Pins shown as blank in the diagram (@) have been removed. (3) OUT1 to OUT3 and COMPENSATION are for the K3HB-C. -
Page 132: Timing Chart
Outputting Sampling Data Data becomes valid and the Data Valid (D.V.) signal turns ON approximately 30 ms after the rising edge of the REQ signal. Read the data while the D.V. signal is ON. The D.V. signal turns OFF after 40 ms, and then the DATA turns OFF after another 16 ms. -
Page 133: Accessories
Permissible span Underflow OVER • In Test Mode, the display value that is currently keyed in is output for the REQ signal, MAX signal, or MIN signal. • The REQ signals from two or more Digital Indicators cannot be input at the same time. -
Page 134: Precautions For Bcd Programming
1. With models with a BCD output, only the measurement value, maximum value, or minimum value can be read out. 2. The "+" and " − " polarity correspond to low and high of the POL signal. 3. Read data while the D.V. is ON. -
Page 135: Dm (Data Memory) Area
(1) I/O allocations marked with an asterisk are not used in this programming example. (2) The pin numbers shown in the above table are the pin numbers of the D- sub connector on the special BCD output cable (sold separately). -
Page 136: Ladder Programming
Programming Example 1: Connecting to a PLC Section 1-5 1-5-5 Ladder Programming 00106 00113 DIFU 00000 00500 P.V.REQ UEST 00500 KEEP 00003 00400 START DI 00501 D.V.DIF 00400 00200 00006 KEEP REL P.V.REQ 00105 DIFU 00008 00501 D.V. 00501 00010 D.V.DIF... -
Page 137: Programming Example 2: Connecting To A Plc
Programming Example 2: Connecting to a PLC Section 1-6 Programming Example 2: Connecting to a PLC The following programming example shows three Digital Indicators connected to the SYSMAC C500 (OMRON). 1-6-1 I/O Allocations Pin number Signal Signal Meaning I/O allocation... -
Page 138: Dm (Data Memory) Area
(1) I/O allocations marked with an asterisk are not used in this programming example. (2) The pin numbers shown in the above table are the pin numbers of the D- sub connector on the special BCD output cable (sold separately). -
Page 139: Timing Chart
Programming Example 2: Connecting to a PLC Section 1-6 1-6-4 Timing Chart START DU (START) Upward differentiation of START signal REQ-A D.V.-A DU (D.V.-A) Upward differentiation of A DATA VALID signal DD (D.V.-A) Downward differentiation of A DATA VALID signal REQ-B D.V.-B... -
Page 140: Ladder Programming
Programming Example 2: Connecting to a PLC Section 1-6 1-6-5 Ladder Programming 00106 00110 00112 00113 DIFU 00000 00500 A-RUN REQUEST B-RUN C-RUN 00500 00002 #0001 START DI 0004 00502 00004 A-D.V.D 00504 B-D.V.D 00506 C-D.V.D 00400 00200 00008 DPM SELE... - Page 141 Programming Example 2: Connecting to a PLC Section 1-6 00503 00032 B-D.V.D D0010 00002 FUN83 00004 #0000 D 0011 FUN82 00008 #0007 D 0012 00402 00202 00036 C-PVREQ DPM SELE CT BIT 00105 00109 00111 DIFU 00505 A-D.V. B-D.V. C-D.V.
-
Page 142: Index
Index Monitor Value Read (CompoWay/F communications) 1-13 Monitor Value/Setting Data Compound Read (Compo- accessories Way/F communications) 1-14 BCD communications 11-6 Monitor Value/Setting Data Compound Read Store addresses (CompoWay/F communications) (Write) 1-16 advanced function setting level 2-10 Monitor Value/Setting Data Compound Store Read... - Page 143 General Status Read Maintenance Counter Save sending maintenance specific to DeviceNet replacing Units types MAX.REQ signal Unit Conduction Time or Total RUN Time Read BCD communications 11-5 message communications time MIN.REQ signal BCD communications 11-5 FINS-mini service commands...
- Page 144 1-13 replacing Digital Indicators Monitor Value/Setting Data Compound Read (Compo- Way/F communications) 1-14 programming samples Monitor Value/Setting Data Compound Read Store (Write) 1-16 protect level Monitor Value/Setting Data Compound Read Store Check Protect Level Setting Data Write 1-15 (Read) 1-17...
- Page 145 10-8 test mode BCD communications 11-5 Three-branch Taps 10-9 timing charts BCD communications 11-5 11-8 11-12 transfer protocol (CompoWay/F communications) troubleshooting Unit conduction time monitor Unit Maintenance Flag variable areas wiring wiring diagrams Write via Communications 1-18 Zero Execute/Cancel 1-19...
-
Page 146: Revision History
Revision History A manual revision code appears as a suffix to the catalog number on the front cover of the manual. Cat. No. N129-E1-03 Revision code The following table outlines the changes made to the manual during each revision. Page numbers refer to the previous version.
Need help?
Do you have a question about the K3HB - MANUAL 2 and is the answer not in the manual?
Questions and answers