
Related Manuals for Taurus ROW-X PLUS


Summary of Contents for Taurus ROW-X PLUS
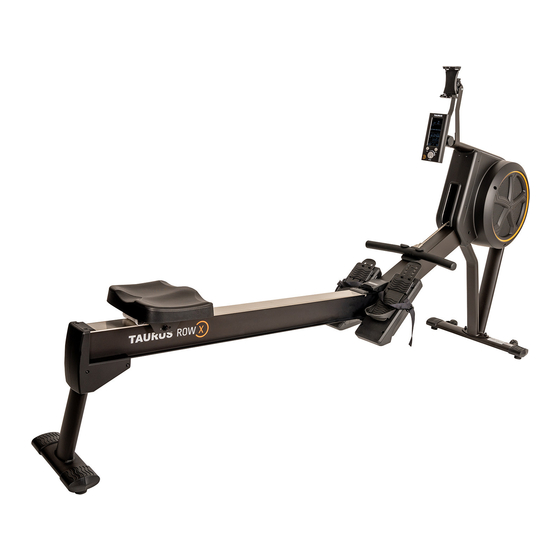
- Page 1 Assembly and Operating Instructions max. 150 kg ~30-60 Min. 47 kg L 250 | W 63 | H 145 FSTFROWXPLUS.01.01 Art. No. TF-ROW-X-PLUS Rowing Machine ROW-X PLUS...
- Page 2 ROW-X PLUS...
-
Page 3: Table Of Contents
Content GENERAL INFORMATION Technical Data Personal Safety Electrical Safety Set-Up Place ASSEMBLY General Instructions Scope of Delivery Assembly Settings/Adjusting the Rowing Machine OPERATING INSTRUCTIONS Console Display Button Functions Operations Programmes 3.4.1 Quick Start 3.4.2 P1 - Manueller Modus (Manual Mode) 3.4.3 P2 - Zeitvorgabe (Goal Time) 3.4.4 P3 - Kalorienvorgabe (Goal Calorie) 3.4.5 P4 - Distanzvorgabe (Goal Distance) - Page 4 TROUBLESHOOTING, CARE AND MAINTENANCE General Instructions Faults and Fault Diagnosis Maintenance and Inspection Calendar DISPOSAL RECOMMENDED ACCESSORIES ORDERING SPARE PARTS Serial Number and Model Name Parts List Exploded Drawing WARRANTY CONTACT ROW-X PLUS...
- Page 5 European VAT Number: DE813211547 Disclaimer © TAURUS is a registered brand of the company Fitshop GmbH. All rights reserved. Any use of this trademark without the explicit written permission of Fitshop is prohibited. Product and manual are subject to change. Technical data can be changed without advance notice.
- Page 6 (person with legal responsibility). Class H (home use): use at home. These stationary training devices are intended for the use in private homes where access to the training device is regulated by the owner (person with legal responsibility). ROW-X PLUS...
- Page 7 Please pay close attention to the safety and maintenance instructions given here. The contract partner cannot be held liable for damage to health, accidents or damage to the equipment when it is not used in accordance with these instructions. The following safety instructions may appear in this manual: ATTENTION This notice indicates potentially hazardous situations which, if not avoided, may result in property damage.
-
Page 8: General Information
Packaging dimensions (L x W x H): approx. 1245 mm x 1055 mm x 420 mm Set-up dimensions (L x W x H): approx. 2500 mm x 628 mm x 1450 mm User weight: 150 kg/330 lbs Use class: Brake system: speed-dependent ROW-X PLUS... -
Page 9: Personal Safety
Personal Safety ⚠ DANGER Before you start using the equipment, you should consult your physician that this type of exercise is suitable for you from a health perspective. Particularly aff ected are persons who: have a hereditary disposition to high blood pressure or heart disease, are over the age of 45, smoke, have high cholesterol values, are overweight and/or have not exercised regularly in the past year. -
Page 10: Electrical Safety
Do not make any changes to the mains cable or the mains plug. Keep the mains cable away from water, heat, oil and sharp edges. Do not route the mains cable underneath the equipment or under a carpet or rug, and do not place any objects on top of it. ROW-X PLUS... -
Page 11: Set-Up Place
Set-Up Place ⚠ WARNING Do not place the equipment in main corridors or escape routes. ⚠ CAUTION Choose a location in which to place the equipment such that there is enough free space/ clearance to the front, the rear and to the sides of the equipment. Make sure that you leave at least 30 cm on each side of the equipment and at least 15 cm in front of and behind the equipment as a training zone. -
Page 12: Assembly
In the event of complaints, the contractual partner must be contacted directly. ⚠ CAUTION If parts of the scope of delivery are missing or damaged, the assembly must not be carried out. ROW-X PLUS... - Page 13 SCREWDRIVER/MULTI-TOOL 2.5mm ALLEN WRENCH 4mm ALLEN WRENCH...
-
Page 14: Assembly
Mount the bumper (47) on the mono rail (2) with two M6 X 16L hexagon screws (80). Please pay attention to that the left (30L) & right rear cover (30R) are correctly positioned (see fi g. A4). Then tighten all screws. ROW-X PLUS... - Page 15 Step 2: Assembly of Front Base Mount the front base (5) on the front frame (4) with two 3/8“ spring washers (94) and two 3/8“ caps for nuts (103) (see fi g. B1). Tighten all screws. Step 3: Assembly of Computer und Tablet Stand Attach the plastic bracket (113) to the tablet stand (109).
- Page 16 Adjust the tablet stand (109) to a comfortable angle. Tighten the knob (A). Adjust your tablet stand (109) according to the size of your device. ROW-X PLUS...
- Page 17 Step 4: Connecting the Equipment to the Mains Supply ATTENTION The equipment must not be connected to a multiple socket, otherwise it cannot be guaranteed that the equipment will be supplied with suffi cient power. Technical errors can result. Plug the power plug into a wall outlet that complies with the instructions in the chapter on electrical safety.
-
Page 18: Settings/Adjusting The Rowing Machine
Settings/Adjusting the Rowing Machine Get on safely Stand centrally to the aluminium rail and position the seat. Adjust the seat in a comfortable position and sit down slowly. Adjust the view to the computer by moving it up or down. ROW-X PLUS... - Page 19 Adjusting the Heel Rest and the Straps There are several adjustments for the heel rest. Before you start exercising, adjust the heel rest correctly. Pull the loop upwards so that your heel is supported and the foot strap is above the widest point of your foot.
-
Page 20: Operating Instructions
Have the proper use of this product explained to you by a specialist. Always start your training with low intensity and increase evenly and gently. End your training with a cool-down phase. If you are unsure, please consult your physician. Console Display ROW-X PLUS... -
Page 21: Button Functions
Stroke Rate In the HIIT programme, it shows the ideal stroke rate for the High Intensity Interval Training. In all other programmes, only the stroke rate is displayed here. Exercise Diff erent graphic illustrations of the training, i. e., strength curve or bar (2nd big window) chart - change the views by pressing the button MODE. -
Page 22: Operations
Operations Display rotation Training Strength curve Bar chart The training display shows you one of four evaluations of your stroke: No stroke Slow stroke rate Moderate stroke rate High stroke rate ROW-X PLUS... -
Page 23: Programmes
Programmes 3.4.1 Quick Start When you start rowing in the start menu, the Quick Start programme starts automatically. You can change the basic resistance with the control knob throughout the training at any time. Press the button Mode to change the display options. Press RESET to return to the programme selection at any time. -
Page 24: P6 - P9 - High Intensity Interval Training (Hiit)
P8 is a 30 minutes standard programme. P9 (HIIT) P9 is a 30 minutes programme with high stroke rates during the pace phase for advanced users. Minimum target stroke rate Current performance Time: countdown Cool-Down phase Warm-Up phase ROW-X PLUS... - Page 25 During a one minute countdown, you row as quickly as you can in the HIIT programme, so that you achieve the top of the pyramid. Minimum target stroke rate Current performance Error: Not in the target zone Time: countdown During the two-minutes recovery phase, you reduce the stroke rate to take a breath and to get prepared for the next pace unit.
- Page 26 Build a pyramid Programme target Stroke rate in real time You train in the target zone Time: countdown Excellent, you train at a You have done the pyramid and performance above average. train at a professional level. ROW-X PLUS...
-
Page 27: Bluetooth And Fitness Apps
Bluetooth and Fitness Apps This console is equipped with a bluetooth interface. Please take note that your mobile device needs to be compatible with the bluetooth interface of the fi tness equipment (bluetooth 4.0). To use training apps you will have to activate the bluetooth function on your mobile device (tablet or smart phone) and start the fi tness app. -
Page 28: Notes On Correct Rowing
Do squats by slowly squatting down and then straightening up again. Make sure that your knees do not extend beyond your toes. ⚠ CAUTION Do not exercise with sore muscles or take it easy on the aff ected muscles, as this can lead to injuries. ROW-X PLUS... - Page 29 3.6.3 Medication If you regularly take medication and want to exercise, it is important to be aware of possible side eff ects. Ask your doctor whether your medication aff ects your workout. 3.6.4 Used muscle groups Rowing uses the following muscle groups: Back muscles Shoulder muscles Arm muscles...
- Page 30 = (220 - age) x 0.9. Heart rate diagram for training intensity Maximum pulse (220-age) 90% of maximum pulse - anaerobic (maximum) intensity training 75% of maximum pulse - cardiovascular training (cardio training) 55% of maximum pulse - fat burning (weight control) ROW-X PLUS...
-
Page 31: Storage And Transport
STORAGE AND TRANSPORT General Instructions ATTENTION Make sure that the equipment is protected from moisture, dust and dirt in the selected storage location. The storage location should be dry and well ventilated and have a constant ambient temperature between 5°C and 45°C. ⚠... -
Page 32: Folding Up The Rowing Machine
Make sure that the tubes (circled areas in the picture below) are locked in before releasing the plastic clasp. Release the plastic clasp. 4.2.2 Unfolding the Rowing Machine Push the plastic clasp to unlock the rail and hold the foot strap. Slowly pull up the monorail to detach the rowing machine. ROW-X PLUS... -
Page 33: Disconnect And Connect The Monorail
Disconnect and Connect the Monorail ⚠ WARNING Disconnect or connect the monorail to at least two people. Do not attempt to lift the main frame if you have limitations in the musculoskeletal system. To prevent injury, keep fi ngers and hands away from the folding mechanism. -
Page 34: Connect The Monorail To The Rowing Machine
4.3.2 Connect the Monorail to the Rowing Machine Lift the main frame by the foot straps and carefully guide the monorail onto the connector. Snap the connections fi rmly into place. ROW-X PLUS... -
Page 35: Troubleshooting, Care And Maintenance
TROUBLESHOOTING, CARE AND MAINTENANCE General Instructions ⚠ WARNING Do not make any improper changes to the equipment. To maintain the safety level of the equipment, it must be checked regularly for damage and wear - especially on the foot straps, fasteners, handle hoses and seat. ⚠... -
Page 36: Maintenance And Inspection Calendar
The materials can be recycled as per their symbols. Through the reuse, recycling of materials or other forms of recovery of old equipment, you make an important contribution to the protection of the environment. ROW-X PLUS... -
Page 37: Recommended Accessories
RECOMMENDED ACCESSORIES To make your training experience even more effi cient and pleasant, we recommend that you add suiting accessories to your fi tness equipment. For rowing machines this could for example be a fl oor mat, which makes your fi tness equipment stand more securely and also protects the fl oor from sweat or silicone spray to keep moving parts in good shape. -
Page 38: Ordering Spare Parts
The exact position of this sticker is shown in the following illustration. Enter the serial number in the appropriate fi eld. Serial number: Brand / Category: Taurus / rowing machine Model Name: ROW-X PLUS Article Number: TF-ROW-X-PLUS... -
Page 39: Parts List
Parts List Name Qty. REAR STABILIZER MONORAIL MAIN FRAME FRONT FRAME FRONT STABILIZER LEFT BELLY FOOT STRETCHER RIGHT BELLY FOOT STRETCHER MONORAIL COVER HANDLE HANDLE HOOK TRAVELING PULLEY BRACKET CABLE RETAINER PLATE BELT SHAFT AXLE L PLATE LOWER HANGER PLATE UPPER HANGER PLATE MONORAIL BOLT SUPPORT LEFT SEAT CARRIAGE... - Page 40 8 PINS UPPER CABLE POWER ADAPTER UPPER PLASTIC HANGER BUMPER LEFT FOOT END CAP RIGHT FOOT END CAP HEIGHT ADJUSTER PULLEY IDLER PULLEY FRONT STABILIZER WHEEL SEAT ROLLER HOUSING φ8mm SPACER φ10mm X 8.5L SPACER φ10mm X 10L SPACER ROW-X PLUS...
- Page 41 TUBE FOR IDLER PULLEY AXLE FOR HANDLE AXLE FOR PLASTIC HANGER AXLE FOR PULLEY AXLE FOR SEAT PAD TUBE FOR FOOT STRETCHER COVER SPRING OB6203LB BEARING OB6000Z BEARING OB6900 BEARING OB608 BEARING CHAIN CONNECTOR BALANCE CLIP MAGNET BLANCER MAGNET 3/8" X 5" HEX BOLT M10 X 110 HEX BOLT M8 X 100L BOLT M8 X 50L BOLT...
- Page 42 M6 NYLON NUT (6m/m H) 3/8" NUT 3/8" CAP FOR NUT M8 CAP FOR NUT M6 NYLON NUT (8m/m H) 22mm OD. BUMPER NON-SLIP COVER FOR CHAIN TABLET STAND STEEL SUPPORT M6 X 40L SCREW PLASTIC TUBE PLASTIC BRACKET ROW-X PLUS...
-
Page 43: Exploded Drawing
Exploded Drawing... -
Page 44: Warranty
WARRANTY Products from TAURUS® are subject to strict quality control. However, if a fi tness equipment purchased from us does not work perfectly, we take it very seriously and ask you to contact our customer service as indicated. We are happy to help you by phone via our service hotline. - Page 45 Warranty Conditions For the warranty to be valid, the following steps must be taken: Please contact our customer service by email or phone. If the product under warranty has to be sent in for repair, the seller bears costs. After expiry of the warranty, the buyer bears the costs of transport and insurance.
-
Page 46: Contact
Sie unserer Homepage: Sie unserer Homepage: https://stg.fi t/statit6 https://stg.fi t/statitb https://stg.fi t/statit9 Please fi nd a detailed overview including address and opening hours for all stores of the Fitshop Group in Germany and abroad on the following website: www.fi tshop.com/en/stores ROW-X PLUS... - Page 47 LIVE FITNESS WEBSHOP AND SOCIAL MEDIA Fitshop is Europe’s largest specialist store for www.fi tshop.co.uk home fi tness equipment with currently over 70 www.fi tshop.de/blog stores and one of the world’s most renowned online mail order companies for fi tness equipment.
- Page 48 Notes ROW-X PLUS...
- Page 49 Notes...
- Page 50 Notes ROW-X PLUS...
- Page 51 Notes...
- Page 52 Rowing Machine ROW-X PLUS...
Need help?
Do you have a question about the ROW-X PLUS and is the answer not in the manual?
Questions and answers