
Subscribe to Our Youtube Channel
Related Manuals for Taurus Universal Smith Machine


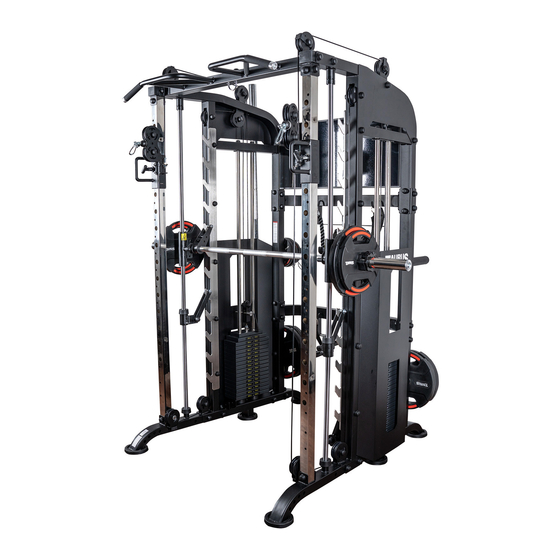
Summary of Contents for Taurus Universal Smith Machine
- Page 1 Assembly and Operating Instructions ~ 330 Min. 445 kg L 147 | W 188 | H 219 TFS118.01.01 Art. No. TF-S118 Taurus Universal Smith Machine...
- Page 2 Universal Smith Machine...
-
Page 3: Table Of Contents
Content GENERAL INFORMATION Technical Data Personal Safety Set-Up Place ASSEMBLY General Instructions Scope of Delivery Assembly STORAGE AND TRANSPORT General Instructions TROUBLESHOOTING, CARE AND MAINTENANCE General Instructions Faults and Fault Diagnosis Maintenance and Inspection Calendar DISPOSAL RECOMMENDED ACCESSORIES ORDERING SPARE PARTS Serial Number and Model Name Parts List Exploded Drawing... - Page 4 Universal Smith Machine...
- Page 5 With Taurus® fitness equipment, the focus is on what sport is all about: maximum performance! Therefore, the equipment is developed in close consultation with athletes and sports scientists.
- Page 6 This notice indicates potentially hazardous situations which, if not avoided, will result in death or serious injuries! NOTICE This notice indicates further useful information. Retain these instructions in a safe place for future reference, maintenance or when ordering replacement parts. Universal Smith Machine...
-
Page 7: General Information
GENERAL INFORMATION Technical Data Weight and Dimensions: Packaging dimensions (L x W x H) and article weight (gross, incl. packaging) approx.: Box 1: 212 cm x 105 cm x 36 cm 309.38 kg Box 2: 62 cm x 51 cm x 22 cm 210 kg Article weight (net, without packaging): 445 kg... -
Page 8: Personal Safety
Make sure that nobody is within the range of motion of the equipment during training so as not to endanger you or other persons. ࣑ ATTENTION Do not insert any objects of any kind into the openings of the device. Universal Smith Machine... -
Page 9: Set-Up Place
Set-Up Place ⚠ WARNING Do not place the equipment in main corridors or escape routes. CAUTION ⚠ Choose a location in which to place the equipment such that there is enough free space/ clearance to the front, the rear and to the sides of the equipment. The training room should be well ventilated during training and not be exposed to any draughts. -
Page 10: Assembly
In the event of complaints, the contractual partner must be contacted directly. CAUTION ⚠ If parts of the scope of delivery are missing or damaged, the assembly must not be carried out. Universal Smith Machine... - Page 11 (1) Left base frame 1x (8) Front connection tube 2x (2) Right frame 1x (14) Plastic cover 160x (3) Left frame 1x (15) Hanging ring 1x (4) Right base frame 1x (18) L shape plate 2x (5) Back connection tube 2x (21) Left upright frame 1x (6) Reinforcing plate (big) 6x (7) Reinforcing plate (small) 2x...
- Page 12 (26) Left bearing frame 1x (34) Guide rod lock sleeve 2x (35) Safety hook left 1x (27) Barbell rod 1x (36) Safety hook right 1x (28) Barbell rod ring 2x (29) Barbell rod end tube 2x (37) bearing frame 2x Universal Smith Machine...
- Page 13 (44) Rubber cushion 4x (47) Rubber cushion 4x (58) Shield 2x (48) guide rod 4x (59) Barbell plate holder 4x (45) weight plate 28x (45+46+49) top weight plate pre-assembled with weight plate and selector rod 2x (60) Hook 6x (52) Cable 2x (62) T shape pin 10x (54) Pulley (big) 12x (55) Pulley (small) 2x...
- Page 14 (66) J hook left 1x (72) Dip bar left 1x (73 & 99) Pulley handle with chain 2x (67) Barbell rod storage 1x (74) Footplate 1x (68) Spotting arm left 1x (75) Triceps rope handle 1x (76) Function training bar 1x Universal Smith Machine...
- Page 15 (77) Ankle cuff 1x (85) Board 1x (78) V bar 1x (87) Spring collar 8x (79) Close grip rowing handle 1x (88) Selector rod with barbell holder 2x (89) Push rod 1x (80) Straight bar 1x (81) Lat pull bar 2x (90) Connection part 2x (91) Upright frame right 1x (82) Abdominal harness 1x...
- Page 16 (94) Footplate small 1x (95) Shaft 2x (98) Iron handle 2x (100) Pulley bracket 2x (101) Weight stack pin 2x Universal Smith Machine...
-
Page 17: Assembly
Assembly Before assembly, take a close look at the individual assembly steps shown and carry out the assembly in the order given. NOTICE First loosely screw all parts together and check that they fit properly. Tighten the screws using the tool only when you are instructed to do so. If you have difficulty recognising the graphics, we recommend that you open and/or download the PDF instructions stored in the webshop on your end device (e.g. - Page 18 (14) each [fig. B]. 1.3. Horizontally: with two bolts (12), four washers (11), one big reinforcing plate (6), two nuts (10) and four plastic covers (14) each [fig. A]. Assembly step 1 Fig. B Fig. A Universal Smith Machine...
- Page 19 Step 2: Assembly of the Main Frame, Part 2 NOTICE Do not tighten the bolts and nuts yet. Otherwise the components might not fit. Once tightened, each bolt connection must be capped with plastic covers (14) like shown. Attach the upper back link tube (5) to the rear struts of the left and right frames (3 & 2): 1.1.
- Page 20 (14). Now tighten all bolts and nuts from the assembly steps 1, 2 and 3 and cap each connection with one plastic cover (14) like shown in the drawings. Assembly step 1 10 14 Universal Smith Machine...
- Page 22 (12), eight washers (11), four nuts (10) and eight plastic covers (14). Tighten the bolts (12) and nuts (10) and attach the plastic covers (14). Repeat the steps 6 and 7 with the right upright board (24). Universal Smith Machine...
- Page 23 Assembly step 2...
- Page 24 Slide the rod end tubes (29) onto each end of the barbell rod (27) and secure with one bolt (43), one spring washer (42) and one washer (41) each. Attach the barbell rod rings (28) to the rod end tubes (29). Universal Smith Machine...
- Page 25 Assembly step 3...
- Page 26 The pulley bracket (100) serves as a cable adjustment point. The pulley bracket (100) does not have to be completely screwed in, but always at least 1/3. Screw the selector rod with barbell holders (88) into the thread of the selector rod (49). Universal Smith Machine...
- Page 27 For added weight, install the optional selector with barbell holders (88) instead of the regular pulley bracket (100).
- Page 28 10. Repeat the steps 1 to 9 on the left side. NOTICE If the cable is too tight or too loose, it needs adjustment. There are several points at which the cable length can be adjusted. Please refer to the next step for further instructions. Universal Smith Machine...
- Page 29 Assembly step 5 Assembly step 5 Assembly st (shown on left bearing frame) Descrip�on Note Qty. lock nut big gasket Φ10 Descrip�on Note Qty. hexagon bolt M10*90 lock nut plas�c cover big gasket Φ10 hexagon bolt M10*50 hexagon bolt M10*90 cover Remove the plastic covers, bolt, nut and washers.
- Page 30 If already attached, first remove the pulley as it will otherwise rotate when adjusting. To loosen the cable, turn counterclockwise. To tighten the cable, turn clockwise. Option 2: Bolt End of the Cable Loosen the nuts. Screw or unscrew the bolt end to the desired length. Tighten the nuts. Universal Smith Machine...
- Page 31 Once the cable tension is correctly adjusted, make sure to tighten the pulley in the pulley bracket (100 or 88).
- Page 32 (3 & 2) with one bolt (9), two washers (11) and one nut (10) each. Tighten and cap with two plastic covers (14) each. Slide one spring collar (87) onto each barbell plate holder (59). Universal Smith Machine...
- Page 34 First attach the board (85) loosely to the rear struts of the left and right frames (3 & 2) with a total of four bolts (86) and four washers (17). Then tighten und cap each bolt connection with one plastic cover (14). Universal Smith Machine...
- Page 35 bly step 6 Fig. B 86 17 Assembly step 6 86 17...
- Page 36 Step 11: Assembly of the Accessories, Part 1 This Universal Smith Machine offers a wide variety of accessories for an ambitious training. The accessories can be used interchangeable and as required. Attach the barbell rod storage (67) to the left base frame (1) in the rearmost two holes with two bolts (12), four washers (11) and two nuts (10).
- Page 38 Assembly of the Accessories, Part 2 NOTICE The footplate (74) has a recess on the bottom side. This is intended for the barbell rod. Attach the footplate (74) to the barbell rod (27) with a total of four T-shaped pins (62). Universal Smith Machine...
- Page 39 Step 13: Assembly of the Accessories, Part 3 Insert the four L-shaped pins (83) into the holes on the base frames (1 & 4). The following accesorries can either be attached to the cable end with snap hooks when training or hung from the hooks for space-saving storage: 75: triceps rope 76: function training bar...
- Page 40 Make sure the handle tube (93) leads completely through the hole and engages with the small pin. Attach the pushing rod (89) to the lowest holes of the upright frames (91 & 92) with two T-shaped pins (62). Universal Smith Machine...
- Page 42 If needed, adjust the cable. If you have installed the regular pulley holder, you can now attach the shields (58), see assembly step 9 for further instructions. Universal Smith Machine Remove selector rod-49 and shield-58, fix selector rod with barbell holder-88...
- Page 43 Selector rod replacement instruc�on Step 16: Lubricating the Guide Rods No. Descrip�on Note Qty. Before you start exercising, you must lubricate the guide rods for the weight stacks. You can use a selector rod with barbell holder grease-free silicone spray. Take a lint-free cloth such as kitchen paper and hold it in your hand behind the guide rods.
-
Page 44: Storage And Transport
࣑ ATTENTION Make sure that the equipment is protected from moisture, dust and dirt in the selected storage location. The storage location should be dry and well ventilated and have a constant ambient temperature between 10°C and 35°C. Universal Smith Machine... -
Page 45: Troubleshooting, Care And Maintenance
TROUBLESHOOTING, CARE AND MAINTENANCE General Instructions ⚠ WARNING Do not make any improper changes to the equipment. CAUTION ⚠ Damaged or worn components may affect your safety and the life of the equipment. Therefore, immediately replace damaged or worn components. In such a case, contact the contract partner. -
Page 46: Maintenance And Inspection Calendar
The materials can be recycled as per their symbols. Through the reuse, recycling of materials or other forms of recovery of old equipment, you make an important contribution to the protection of the environment. Universal Smith Machine... -
Page 47: Recommended Accessories
RECOMMENDED ACCESSORIES To make your training experience even more efficient and pleasant, we recommend that you add suiting accessories to your fitness equipment. For training equipment like smith machines, weight benches or racks this could for example be a floor mat, which makes your fitness equipment stand more securely and also protects the floor from sweat but it could be also additional weights, handles, foot straps for leg exercises or triceps ropes. -
Page 48: Ordering Spare Parts
Enter the serial number in the appropriate field. Serial number: Remove selector rod-49 and shield-58, fix selector rod with barbell holder-88 Brand / Category: Taurus / multi gym Model Name: Universal Smith Machine Article Number: TF-S118... -
Page 49: Parts List
Parts List Name Specification Qty. left base frame right frame left frame right base frame back connection tube reinforcing plate t4.0*50*140 reinforcing plate t3.0*50*110 front connection tube hexagon bolt M10*70 lock nut big gasket Φ10 hexagon bolt M10*90 hexagon bolt M10*65 plastic cover hanging ring... - Page 50 M10*45 shield barbell plate holder hook T shape pin Φ10*85 core trainer lat pull down roller J hook right J hook left barbell rod storage spotting arm left spotting arm right T shape pin Φ10*100 Universal Smith Machine...
- Page 51 dip bar right dip bar left pulley handle footplate triceps rope handle function training bar ankle cuff v bar close grip rowing handle straight bar lat pull bar abdominal harness L shape pin hexagon bolt M10*20 board hexagon bolt M8*20 spring collar selector rod with barbell holder push rod...
-
Page 52: Exploded Drawing
Exploded Drawing Universal Smith Machine... -
Page 53: Warranty
WARRANTY Training equipment from Taurus® is subject to strict quality control. However, if a fitness equipment purchased from us does not work perfectly, we take it very seriously and ask you to contact our customer service as indicated. We are happy to help you by phone via our service hotline. - Page 54 For that reason, we also want to resolve your queries quickly and in a straightforward manner. Thus, please always keep your customer number and the serial number of the faulty equipment handy. Universal Smith Machine...
-
Page 55: Contact
CONTACT TECHNIK TEKNIK OG SERVICE TECHNIQUE & SERVICE �� �� �� +49 4621 4210-900 80 90 16 50 +33 (0) 189 530984 +49 4621 4210-945 +49 4621 42 10 933 �� +49 4621 4210-698 �� �� info@fitshop.dk info@fitshop.fr �� technik@sport-tiedje.de ��... - Page 56 The company employs numerous sports scientists, fitness trainers and competitive athletes. Visit us also on our social media platforms or our blog! Universal Smith Machine...
- Page 57 Notes...
- Page 58 Notes Universal Smith Machine...
- Page 60 Universal Smith Machine...
Need help?
Do you have a question about the Universal Smith Machine and is the answer not in the manual?
Questions and answers