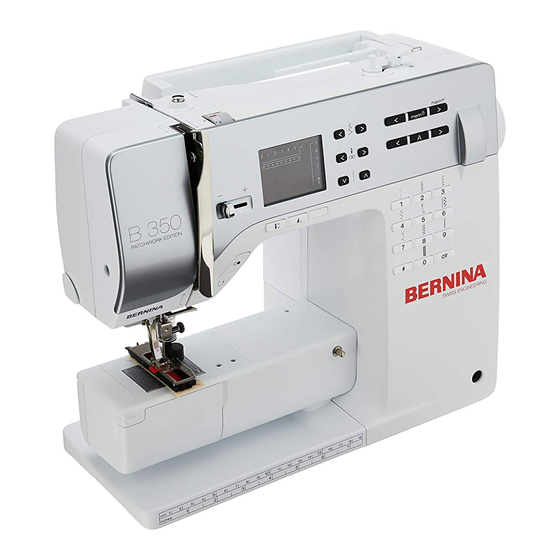
Bernina 330 Service And Maintenance Manual

Bernina 330 Service And Maintenance Manual

Hide thumbs Also See for 330:
Table of Contents

Advertisement

Quick Links

Service- and Maintenance Manual
BERNINA 330, 350 (PE), 380
1
BERNINA International AG · Seestrasse 161 · CH-8266 Steckborn · Switzerland

Advertisement

Table of Contents
loading

Summary of Contents for Bernina 330

  • Page 1 Service- and Maintenance Manual BERNINA 330, 350 (PE), 380 BERNINA International AG · Seestrasse 161 · CH-8266 Steckborn · Switzerland...
  • Page 2: Table Of Contents

    5.3.3 Presser foot fixation ........................32 5.4 Needle settings............................33 5.4.1 Distance between needle bar and presser foot bar............... 33 5.4.2 Needle distribution ......................... 34 5.4.3 Zigzag stitch width limiter....................... 34 BERNINA International AG · Seestrasse 161 · CH-8266 Steckborn · Switzerland...
  • Page 3 8.2 Explanatory notes on the stitch- and hour counter ................60 8.3 Maintenance intervals ........................... 60 8.4 Wear-and-Tear-Parts Definition ......................61 8.4.1 Non-hour-related parts........................61 8.4.2 Hour-related parts .......................... 62 BERNINA International AG · Seestrasse 161 · CH-8266 Steckborn · Switzerland...
  • Page 4 8.5.2 Measures to be taken after the service..................62 8.5.3 Functional check ..........................63 8.5.4 Service check liste BERNINA ......................64 Document Revision History ....................66 Appendix – Document list....................66 BERNINA International AG · Seestrasse 161 · CH-8266 Steckborn · Switzerland...
  • Page 5: Chapter 1 - General Information

    This service manual is only available in electronic format. It can be downloaded from BERNINA Infogate at http://infogate.bernina.com under 'Service Manual' in the 'Tech. Service' register. If you don't have access to Infogate, contact your local BERNINA importer. They'll be glad to be of assistance. Masthead Author: Jürg Tobler...
  • Page 6: Cleaning

    The capacitors require 30 seconds to discharge after the power supply has been switched off. We recommend waiting for the complete discharging of the capacitors before starting any servicing work on the PCBs. BERNINA International AG · Seestrasse 161 · CH-8266 Steckborn · Switzerland...
  • Page 7: Esd-Related Note: Electrostatic Discharge (Esd)

    4. Only use conductive ESD-capable plastic/foil pouches and ESD transport boxes for dispatching electronic components – even if the components might be faulty. 5. To prevent consequential damage or harm, treat faulty PCBs in the same manner as new ones. BERNINA International AG · Seestrasse 161 · CH-8266 Steckborn · Switzerland...
  • Page 8: Technical Details

    *optional FHS unit for retrofitting/ **optional knee-operated lever for retrofitting available Hook system BERNINA-CB BERNINA-CB BERNINA-CB Neddle system 130/705H 130/705H 130/705H Weight (without accessories) approx. 9,6 kg approx. 9,6 kg approx. 9,6 kg BERNINA International AG · Seestrasse 161 · CH-8266 Steckborn · Switzerland...
  • Page 9: Tools And Gauges

    1.6 Tools and gauges Commercially available (not available from BERNINA): TORX-screwdriver: Nr. 6, 8, 10, 15, 20, 25 Presser feet: Reverse pattern foot no.1 5.5mm 008445.72.00, darning foot no. 9 008454.7200 Adjusting tool Pinning tool, short Pinning tool, long Darning foot height gauge 030349.70.00...
  • Page 10: Service Panel

    1.7 Service panel 033442.50.00 BERNINA International AG · Seestrasse 161 · CH-8266 Steckborn · Switzerland...
  • Page 11: Chapter 2 - Electronics

    Chapter 2 – Electronics Electronics The electronics of the BERNINA 330, 350 and 380 are for the most part housed on three PCBAs (printed circuit board assemblies). Do not remove or plug in any connections when the sewing computer is switched on or connected to the power supply.
  • Page 12: Pcba-Base

    Interface Stepping Motor Stitch Width e) Interface Stepping Motor Stitch Length Interface Main Motor g) Connection cable connector to PCBA-Power h) Interface PCBA-RET Light prism for synchronization disc Microprocessor BERNINA International AG · Seestrasse 161 · CH-8266 Steckborn · Switzerland...
  • Page 13: Block Diagram

    Electronic components that have been manipulated or repaired by oneself are excluded from the repair- /replacement process. They will be disposed of. BERNINA International AG reserves the right to charge the original price (of the new component) for electronic components that have been manipulated, repaired by oneself or improperly packaged.
  • Page 14: Chapter 3 - Troubleshooting

    Chapter 3 – Troubleshooting The troubleshooting routines can be found in Chapter 6 – Service Programm, in the Repair Notes of each of the units to be tested. BERNINA International AG · Seestrasse 161 · CH-8266 Steckborn · Switzerland...
  • Page 15: Chapter 4 - Replacing Of Components

    Swing power supply unit out at top and disconnect power cable. Assembly: • Reconnect power cable to power supply unit and reposition power supply unit. • Retighten screw 10 BERNINA International AG · Seestrasse 161 · CH-8266 Steckborn · Switzerland...
  • Page 16: Rear Cover

    In a slightly raised position, slide bobbin door back onto the right lug. 25° • Using a screwdriver, slightly raise the left flap of the door to engage it. • Close bobbin door BERNINA International AG · Seestrasse 161 · CH-8266 Steckborn · Switzerland...
  • Page 17: Front Cover

    Put feed-dog drop button into sewing position. • Turn the handwheel until the toothed rack sits at the far right (handwheel end). • Refit and tighten five screws 23. • Refit balance button 1. BERNINA International AG · Seestrasse 161 · CH-8266 Steckborn · Switzerland...
  • Page 18: Electronics And Sensors

    Test the balance (Chapter 6 test 2 Balance (adjusting forward/reverse feed). • Adjust buttonhole foot (Chapter 6 Item III. Calibrating buttonhole foot with slide 3A). • Functional check and sewing-off. BERNINA International AG · Seestrasse 161 · CH-8266 Steckborn · Switzerland...
  • Page 19: Pcba-Ret

    • Place ribbon cable in such way that it won't touch moving parts. • Refit thread take-up lever. • Refit covers. • Calibrate buttonhole. • Functional check. • Sewing-off. BERNINA International AG · Seestrasse 161 · CH-8266 Steckborn · Switzerland...
  • Page 20: Pcba-Power

    Remove PCBA-power Assembly: • Refit PCBA-power. • Retighten two screws 4 (T10 30X8). • Reattach power-supply unit cover using the four screws 8 (T10 30X10). • Refit power supply unit. BERNINA International AG · Seestrasse 161 · CH-8266 Steckborn · Switzerland...
  • Page 21: Mechanical Components

    Remove screw 14 (T20 M4X10). • Replace winder Assembly: • Reattach winder with fastening screw 14 (T20 M4X10). • Refit covers. • Check winder unit setting (Chapter 5 Item 5.11 Winder). BERNINA International AG · Seestrasse 161 · CH-8266 Steckborn · Switzerland...
  • Page 22: Stitch Width Stepping Motor (Sb)

    Release springs 18 and 20 and remove carrier plate. • Loosen setscrew 13 (T6 3X4) and remove gear pinion. • Loosen two screws 14 (T10 M3X6), remove stepping motor. BERNINA International AG · Seestrasse 161 · CH-8266 Steckborn · Switzerland...
  • Page 23 • Refit covers. • Fine-adjust balance (Chapter 6 Test 2 Balance (adjusting forward/reverse feed). • Calibrate speed (Chapter 6 Item II. Speed control calibration). • Functional check. • Sewing-off. BERNINA International AG · Seestrasse 161 · CH-8266 Steckborn · Switzerland...
  • Page 24: Base Shaft

    • Refit covers. • Fine-adjust balance (Chapter 6 Test 2 Balance (adjusting forward/reverse feed). • Calibrate speed (Chapter 6 Item II. Speed control calibration). • Functional check. • Sewing-off BERNINA International AG · Seestrasse 161 · CH-8266 Steckborn · Switzerland...
  • Page 25: Hook Race Ring

    • Refit covers. • Fine-adjust balance (Chapter 6 Test 2 Balance (adjusting forward/reverse feed). • Calibrate speed (Chapter 6 Item II. Speed control calibration). • Functional check. • Sewing-off. BERNINA International AG · Seestrasse 161 · CH-8266 Steckborn · Switzerland...
  • Page 26: Thread Take-Up Lever Cover

    Refit and sligthtly tighten screw 17 (T10 M3X5). • Adjust thread regulator spring (Chapter 5 Item 5.10.2 Thread regulator spring). • Retighten screw 17 (T10 M3X5). • Refit head cover. BERNINA International AG · Seestrasse 161 · CH-8266 Steckborn · Switzerland...
  • Page 27: Needle Bar Support And Take-Up Lever

    Adjust needle tolerance (Chapter 5 Item 5.4.2 Needle distribution). • Adjust stith-width stop (Chapter 5 Item 5.4.3 Zigzag stitch width limiter). • Refit covers. • Functional check. • Sewing-off. BERNINA International AG · Seestrasse 161 · CH-8266 Steckborn · Switzerland...
  • Page 28: Main Shaft And Synchronizing Disc

    Adjust synchronization disc (Chapter 5 Item 5.7.1 Position of synchronizing disc). • Refit covers. • Calibrate speed (Chapter 6 Item II. Speed control calibration). • Functional check. • Sewing-off. BERNINA International AG · Seestrasse 161 · CH-8266 Steckborn · Switzerland...
  • Page 29: Chapter 5 - Settings

    For servicing, we recommend that you always use the accessories included with the machine or purchased specifically for it. These are the following: Main cable, Foot control unit, Buttonhole foot and other accessories. BERNINA International AG · Seestrasse 161 · CH-8266 Steckborn · Switzerland...
  • Page 30: Belt Tensions

    5.1.2 Base-shaft belt tension The belt is tensioned automatically by belt tensioner and tension spring. Correction: • Slightly loosen screw 9 (T20). Correct tension is produced automatically. • Retighten screw 9 (T20). BERNINA International AG · Seestrasse 161 · CH-8266 Steckborn · Switzerland...
  • Page 31: Position Of Head Frame Plate/Stitch Plate In X- And Y-Direction

    Loosen presser-foot bar guide screw 15 (T8). • Place presser foot onto presser-foot adjusting gauge 398031.13.3+ (keeping it parallel to markings). • Lower presser-foot bar guide by hand. • Retighten screw 15 (T8). BERNINA International AG · Seestrasse 161 · CH-8266 Steckborn · Switzerland...
  • Page 32: Darning Foot Height

    Loosen clamp screw 9 (T20). • Adjust clamp height until correct clamping position is reached. • Align presser-foot sole with markings on stitch plate. • Retighten screw 9 (T20). BERNINA International AG · Seestrasse 161 · CH-8266 Steckborn · Switzerland...
  • Page 33: Needle Settings

    It mustn't be used for the setting of the needle-/hook distance! 0.6mm 0.4mm For needle-/hook distance adjustment refer to Chapter 5 item 5.5.7 Needle/hook distance. BERNINA International AG · Seestrasse 161 · CH-8266 Steckborn · Switzerland...
  • Page 34: Needle Distribution

    Loosen screw 6 (T10). • Select test 7 – stitch-width stepping motor test (Chapter 6 Test 7 Stitch-width stepping motor test). • Position limiter. • Retighten screw 6 (T10). BERNINA International AG · Seestrasse 161 · CH-8266 Steckborn · Switzerland...
  • Page 35: Hook, Needle Drive And Feed-Dog Movement Synchronization

    • Align thead-guiding plate and thread- positioning plate in such way that the distances are within the mentioned tolerances. • Retighten two screws 13 (T8). 0.7mm 0.3 - 0.5mm BERNINA International AG · Seestrasse 161 · CH-8266 Steckborn · Switzerland...
  • Page 36: Hook Driver Position

    The clearance between hook and hook driver must be 0.3mm. Correction: • If the clearance is too wide or too narrow, adjust the short driver arm with the adjusting tool 001357.70.00. 001357.70.00 BERNINA International AG · Seestrasse 161 · CH-8266 Steckborn · Switzerland...
  • Page 37: Loop Lift

    0.01mm to 0.05mm. 0.01-0.05mm Correction: • Turn screw 24 (T20 M4X10) in or out to adjust the distance between needle scarf and hook to 0.01- 0.05mm. Rear view BERNINA International AG · Seestrasse 161 · CH-8266 Steckborn · Switzerland...
  • Page 38: Stitch Plate Needle Penetration In Y-Direction

    9 o'clock position. Correction: • Drive gear and lift-/advance eccentric are press-fixed. • For correction, proceed as described under 'mounting of base shaft' (Chapter 4 Item 4.3.5 Base shaft). BERNINA International AG · Seestrasse 161 · CH-8266 Steckborn · Switzerland...
  • Page 39: Feed-Dog Position In Stitch Plate

    • Use a 5.5mm open-end wrench to turn eccentric pin 16 until it reaches 0.9mm level. • Retighten screw 14 (T8). • Check position again after retightening the screws. BERNINA International AG · Seestrasse 161 · CH-8266 Steckborn · Switzerland...
  • Page 40: Synchronising Disc

    18. Use pinning tool 001356.50.00 to pin balance 030349.70.00 adjusting cam, applying the tool from handwheel side. 19. Stitch-length crank 2 should now be in pinning position. 001356.50.00 BERNINA International AG · Seestrasse 161 · CH-8266 Steckborn · Switzerland...
  • Page 41: Threader

    Loosen needle-bar guide adjusting screw 19. • The threader head can be adjusted by moving it up or down, as appropriate. • Retighten needle-bar guide adjusting screw 19. 030883.50.00 BERNINA International AG · Seestrasse 161 · CH-8266 Steckborn · Switzerland...
  • Page 42: Basic Setting Of Knee-Operated Presser-Foot Lifter (Fhs)

    Set upper-thread tension adjustment wheel to 0.3mm • Loosen lock nut 7. • Use adjusting screw 8 to set pressure piece distance to minimum 0.3mm. • Retighten lock nut 7. BERNINA International AG · Seestrasse 161 · CH-8266 Steckborn · Switzerland...
  • Page 43: Thread Regulator Spring

    1.6mm Correction of position: • Slightly loosen screw 6 (T10). • Adjust regulator spring stop as appropriate until a distance of 1.6mm is reached. • Retighten screw 6. BERNINA International AG · Seestrasse 161 · CH-8266 Steckborn · Switzerland...
  • Page 44: Lower Thread Tension (Basic Settings)

    Hold clamp lever 1 down (adjusting wheel is now unlocked). • Turn adjusting wheel until red bar mark is in line with mark on housing. • Engage clamp lever 1 as appropriate. 3gr + 5gr. BERNINA International AG · Seestrasse 161 · CH-8266 Steckborn · Switzerland...
  • Page 45: Winder

    Correction if unevenly filled: • Turn screw 10 (T20) in or out as appropriate. Correction if under-/overfilled: • Turn screw 17 (T20) in or out as appropriate. BERNINA International AG · Seestrasse 161 · CH-8266 Steckborn · Switzerland...
  • Page 46: Chapter 6 - Service Program

    0 = B330 1 = B350 2 = B380 What to adjust: • Simultaneously press buttons «config» and either «config+» or «config–» in order to change the displayed number code. BERNINA International AG · Seestrasse 161 · CH-8266 Steckborn · Switzerland...
  • Page 47: Speed Control Calibration

    Press clr button to save the value and to return to basic menu. • The machine cancels calibration if carried out unsuccessfully, and F (for 'Fehler' [error]) appears. • The procedure must be repeated. BERNINA International AG · Seestrasse 161 · CH-8266 Steckborn · Switzerland...
  • Page 48: Checking Of Ld Display Functioning

    • Replace PCBA-Base (Chapter 2 Item 2.3 PCBA-Base). Do not remove or plug in any connections when the sewing computer is switched on or connected to the power supply. BERNINA International AG · Seestrasse 161 · CH-8266 Steckborn · Switzerland...
  • Page 49: Checking Of Foot-Control Functioning

    • Replace PCBA-Base (Chapter 2 Item 2.3 PCBA-Base). Do not remove or plug in any connections when the sewing computer is switched on or connected to the power supply. BERNINA International AG · Seestrasse 161 · CH-8266 Steckborn · Switzerland...
  • Page 50: Checking Of Synchronizing Disc Signals

    • Replace PCBA-Base (Chapter 2 item 2.3 PCBA-Base). Do not remove or plug in any connections when the sewing computer is switched on or connected to the power supply. BERNINA International AG · Seestrasse 161 · CH-8266 Steckborn · Switzerland...
  • Page 51: Checking Of Start-/ Stop Button Ssu

    • Replace PCBA-Base (Chapter 2 item 2.3 PCBA-Base). Do not remove or plug in any connections when the sewing computer is switched on or connected to the power supply. BERNINA International AG · Seestrasse 161 · CH-8266 Steckborn · Switzerland...
  • Page 52: Tests 1-12

    • Neutral position is at value 3. • Press clr to save the value and to return to service program basic position. • Mechanical fine-tuning will complete balance adjustment. BERNINA International AG · Seestrasse 161 · CH-8266 Steckborn · Switzerland...
  • Page 53: Test 3 Automatic Darning Program

    What to test: • Firmware version number appears in display. • For example: Version V 3.0. Press clr to exit test and to return to service program basic position. BERNINA International AG · Seestrasse 161 · CH-8266 Steckborn · Switzerland...
  • Page 54: Test 5 Hour Counter

    Adjusting maximum RPM. Target state: • Machine will stop on own accord at test end. «ok» appears. Press clr to exit test and to return to service program basic position. BERNINA International AG · Seestrasse 161 · CH-8266 Steckborn · Switzerland...
  • Page 55: Test 7 Stitch-Width Stepping Motor Test

    «P» appears in the display. Press clr to exit test and to return to service program basic position. Note: This test is only used on stepping motors out of the machine. BERNINA International AG · Seestrasse 161 · CH-8266 Steckborn · Switzerland...
  • Page 56: Test 9 Stitch-Length Stepping Motor Test

    Sollzustand: • Active RPM appears in the display. (e.g. 5/2/8 = 528 stitches per minute). Press clr to exit test and to return to service program basic position. BERNINA International AG · Seestrasse 161 · CH-8266 Steckborn · Switzerland...
  • Page 57: Test 11 Display Of Rpm Calibration Factor

    Endurance-test machine. Target state: • Machine alternates between approx. 7 seconds running and approx. 7 seconds halt. Press clr to exit test and to return to service program basic position. BERNINA International AG · Seestrasse 161 · CH-8266 Steckborn · Switzerland...
  • Page 58: Chapter 7 - Lubrication Plan

    Chapter 7 – Lubrication Plan = Klüber OY 100 (Art. # 007779.70.01) = Klübersynth UH1 14-1600 (Art. # 007779.72.02) BERNINA International AG · Seestrasse 161 · CH-8266 Steckborn · Switzerland...
  • Page 59 = Klüber OY 100 (Art. # 007779.70.01) = Klübersynth UH1 14-1600 (Art. # 007779.72.02) BERNINA International AG · Seestrasse 161 · CH-8266 Steckborn · Switzerland...
  • Page 60: Chapter 8 - Maintenance Guidelines

    To calculate the Maintenance intervals, an average sewing speed of about 500 S.P.M. is assumed. Maintenance Stitch counter Year interval 1'000’000 2'000’000 3'000’000 4'000’000 5'000’000 6'000’000 7'000’000 8'000'000 9'000’000 10'000’000 11'000’000 12'000’000 13'000’000 14'000’000 15'000’000 16'000’000 17'000’000 18'000’000 19'000'000 20'000’000 BERNINA International AG · Seestrasse 161 · CH-8266 Steckborn · Switzerland...
  • Page 61: Wear-And-Tear-Parts Definition

    • In the case of intensive use for which the machine was not designed, increased wear-and-tear of parts cannot be ruled out. • In order to ensure continuously defect-free operation of the sewing machine, BERNINA recommends replacing the parts according to the table (Item 8.4.2), once the sixth Maintenance interval is reached.
  • Page 62: Hour-Related Parts

    Customer and machine data, standard accessories (supplied with the machine), stitch and hour counter, report number, Maintenance interval, complaint, work carried out, time and material input, date when next Maintenance is due, name of technician. BERNINA International AG · Seestrasse 161 · CH-8266 Steckborn · Switzerland...
  • Page 63: Functional Check

    Smooth running of the machine • Needle bar support / needle bar – mechanical ease of • Bevel gears movement • Bobbin carrier / hook • Drive belt tensions BERNINA International AG · Seestrasse 161 · CH-8266 Steckborn · Switzerland...
  • Page 64: Service Check Liste Bernina

    Needle bar / needle bar support Thread take-up crank Spherical bearing Oiling / lubrication according to Hook drive crank lubrication diagram in Service Hook race Manual Idler pulley Shafts / axes Eccentric / cams BERNINA International AG · Seestrasse 161 · CH-8266 Steckborn · Switzerland...
  • Page 65 Buttenhole calibration (only use presser foot 3A that has come with the machine). Sewing-off according to sewing-off guideline Service Info Ref-#: 5508. Cleaning Covers Final check Does the machine run, are the accessories complete? BERNINA International AG · Seestrasse 161 · CH-8266 Steckborn · Switzerland...
  • Page 66: Document Revision History

    Date Version Description Author Jan. 2010 First Release J. Tobler Appendix – Document list Chapter Titel Ref-#: Type The listed documents and information can be accessed online at http://infogate.bernina.com. BERNINA International AG · Seestrasse 161 · CH-8266 Steckborn · Switzerland...

This manual is also suitable for:

350350 pe380

Table of Contents