Bernina 325 Manual
Hide thumbs Also See for 325:
Table of Contents

Advertisement

BERNINA 325 | 335

Advertisement

Table of Contents
loading
Need help?

Need help?

Do you have a question about the 325 and is the answer not in the manual?

Questions and answers

Subscribe to Our Youtube Channel

Summary of Contents for Bernina 325

  • Page 1 BERNINA 325 | 335...
  • Page 2 Swiss precision at the height of perfection, future-oriented sewing technology, and a comprehensive customer service. The BERNINA 325 and 335 are primarily aimed at the occasional sewer who puts great stock in design and customer benefit. These sewing computers are very ergonomically built and therefore even easier to operate, to help you, our esteemed customers, on your journey to even greater sewing pleasure and perfect results.
  • Page 3 3. LED radiation. Do not view directly with break. optical instruments. LED class 1M 10. Do not use bent needles. 11. Always use the BERNINA original stitch plate. The wrong stitch plate can cause WARNING! needle breakage. 12. To disconnect, turn power switch to «0»...
  • Page 4 Replacement parts for a Environmental Protection double-insulated product must be identical to the BERNINA is committed to the protection original parts in the product. of the environment. We strive to mini- A double insulated product is marked with the mize the environmental impact of our words: «Double-Insulation»...
  • Page 5: Table Of Contents

    Thread tension ..............17 Balance ................. 18 Stitch-Pattern Summary Feed dog ................19 ⦁ Feed-dog drop ..............19 BERNINA 325............... 45 ⦁ Feed-dog and fabric feed ..........19 BERNINA 335............... 45 Height Compensation of Uneven Layers ......20 Index Sewing Corners ..............20 Important Facts about Sewing Needles......
  • Page 6: Key To The Symbols

    Glossary Key to the symbols DANGER! Very important! Risk of injury! WARNING! Very important! Risk of damage! Supplementary information! Glossary Balance Correcting abnormalities in stitch formation due to the fabric Deleting settings or data Sewing light system Free-Hand System = Knee-operated presser-foot lifter Memory = Longterm data store Bartack Buttonhole-bead cross-connections...
  • Page 7: Scope Of Delivery

    Scope of delivery Scope of delivery ope of del Scope of delivery Standard accessory 1 Dust cover (B 335 only) 2 Accessory box 3 Foot control 4 Power cable 5 Slide-on table 6 Stitch pattern summary card 1 3 bobbins (one of them in the bobbin case) 2 Selection of needles 3 Height compensating tool 4 Seam ripper...
  • Page 8: Presser Feet - Snap-On

    2 No. 2 Overlock sole 3 No. 3A Buttonhole foot with slide (B 335 only) 4 No. 3 Buttonhole sole (B 325 olnly) 5 No. 4 Zipper sole 6 No. 5 Blindstitch sole 7 No. 20 Open embroidery sole (B 335...
  • Page 9: 
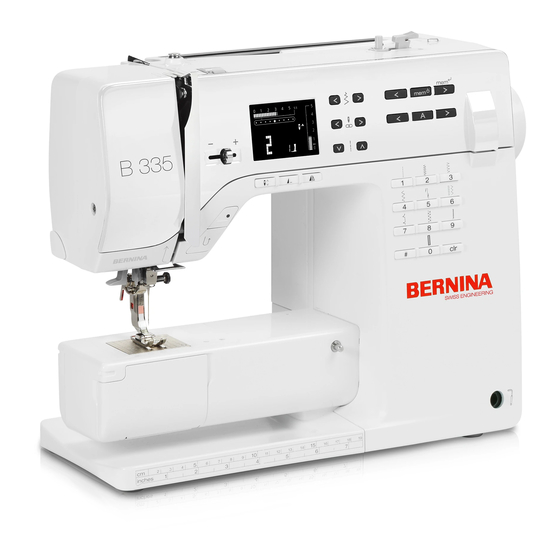
Sewing Computer Overview

    Sewing computer overview Sewing computer overview Front View Detail View...
  • Page 10: Side View

    Sewing computer overview Side view 1 Bobbin cover 2 Stitch plate 3 Attachment base for special accessory 4 LED sewing light 5 Quick reverse button 6 Start/Stop button 7 Thread take-up cover 8 Thread take-up lever 9 Bobbin winder pre-tension stud 10 Speed control 11 Screen 12 Needle stop up/down button...
  • Page 11: Sewing Preparations

    The LED sewing light illuminates the sewing area and has a long product life. DANGER! Please note that a defective sewing light must ONLY be replaced by an authorized technician. The sewing computer must be taken to an authorized BERNINA dealer! Slide-on table The slide-on table increases the sewing surface.
  • Page 12: Fhs (Free Hand System) (Optional Accessory For B 335 Only)

    Sewing preparations Sewing preparations FHS (Free Hand System) (optional accessory for B 335 only) The FHS raises and lowers the presser foot. Attaching the lifter ⦁ insert into the opening; you should be able to operate the FHS with your knee in your normal sitting position Raising and lowering the presser foot ⦁...
  • Page 13: Winding A Bobbin

    Sewing preparations Sewing preparations prepar Winding a Bobbin ⦁ turn power switch on (to «I») ⦁ place empty bobbin on spindle ⦁ place thread on spool pin ⦁ attach appropriate spool disc; diameter of thread spool determines disc size ⦁ following the direction of the arrow take thread through the rear guide and round the pre-tension stud ⦁...
  • Page 14: Bobbin Case

    Sewing preparations Sewing preparations Bobbin Case To remove the bobbin case ⦁ raise needle ⦁ power switch to «0» (off) ⦁ open the bobbin cover ⦁ grasp the latch of the bobbin case ⦁ remove bobbin case To insert the bobbin case ⦁...
  • Page 15: Needle Threader

    Sewing preparations Sewing preparations prepar Needle threader 1 Press lever down ⦁ raise needle ⦁ lower the presser foot ⦁ hold thread to the left and back ⦁ press lever A down and simultaneously guide the thread around hook B to the right to the needle 2 Guide thread to front of the needle ⦁...
  • Page 16: Threading The Double Needle

    Sewing preparations Sewing preparations Threading the Double Needle Threading the First Thread ⦁ place thread spool on horizontal spool pin and thread ⦁ guide the thread to the front in the slit and past the tension disc A on the right side ⦁...
  • Page 17: Thread Cutter

    Sewing preparations Sewing preparations prepar Thread cutter On the left of the head frame ⦁ pull both threads from front to back over the cutter ⦁ the threads release automatically as soon as the first stitch is sewn Changing the Needle Removing the needle ⦁...
  • Page 18: Stitch Plate

    Sewing preparations Sewing preparations Stitch plate Stitch Plate Markings ⦁ the stitch plate is marked with vertical, horizontal and diagonal lines in mm and inches ⦁ the lines help to guide the fabric for sewing seams and precise topstitching, etc. ⦁...
  • Page 19: Balance

    Sewing preparations Sewing preparations prepar Balance Different fabrics, threads and stabilizers can naturally affect the stitch balance so that the stitch patterns are sewn too close together or not close enough. This can be remedied with Balance to suit the fabric and produce perfect results.
  • Page 20: Feed Dog

    Sewing preparations Sewing preparations Feed dog Feed-dog drop Button flush with housing = sewing position. Button depressed = feed-dog is lowered. for free-motion sewing (darning, embroidery, quilting, etc.) █ Feed-dog and fabric feed With each stitch the feed dog moves forward by one step. The length of this step is determined by the stitch length selected.
  • Page 21: Height Compensation Of Uneven Layers

    Sewing preparations Sewing preparations prepar Height Compensation of Uneven Layers The feed dog works accurately when the foot is level. If the foot is at an angle, e.g. when sewing over thick to thin or vice-versa, the feed dog cannot grip and feed the fabric. The fabric might jam. To solve this problem, place one, two or three compensating plates as required behind the needle under the presser foot to level it.
  • Page 22: Important Facts About Sewing Needles

    Sewing preparations Sewing preparations Important Facts about Sewing Needles Thread The thread is chosen according to use. For a perfect sewing result, thread and fabric quality play an important role. It is recommended to use quality brands. Cotton thread ̶ cotton thread has the advantage of being a natural fiber and therefore is especially suitable for sewing cotton fabrics ̶...
  • Page 23: Overview Needles

    Sewing preparations Sewing preparations prepar Overview Needles Universal Metafil 130/705 H/60–100 130/705 H-MET/75-90 Normal point, slightly rounded Large eye For nearly all natural and synthetic Sewing with metallic threads fabrics (woven and knitted) Jersey/Stretch Cordonnet (Topstitching) 130/705 H-S, H-SES, H-SUK/70-90 130/705 H-N/80-100 Ball point Small ball point, long eye...
  • Page 24: Functions

    ⦁ press «0» to select stitch number 10 (standard buttonhole) ⦁ for stitch patterns 1-99 (B 335) / 1-40 (B 325): press #-button and enter desired stitch number ⦁ for stitch patterns 100 and beyond (B 335):...
  • Page 25 ⦁ press «clr» button twice to clear altered basic Application: settings of the auto-length buttonhole ⦁ programs buttonholes Letters, numbers and characters (B 325 ⦁ programs darning length block alphabet only) ⦁ for switching when in the straight stitch securing program ⦁...
  • Page 26: Details Of The Screen

    Functions Functions Details of the Screen 1 Stitch width (basic setting always visible - blinks) 2 Stitch length (basic setting always visible - blinks) 3 Needle position (9 possibilities) 4 Needle stop up/down 5 Number of stitch pattern 6 Number of presser foot (for selected stitch pattern) 7 Satin stitch: dense, short zig-zag stitch Memory Stitch patterns, letters, and numbers can be combined and stored in memory...
  • Page 27: Programming Practical And Decorative Stitches

    ⦁ select Pattern End as well = the sewing computer stops automatically at the end of a stitch pattern combination The following special programs cannot be saved in memory: 325: No. 5 Securing program No. 10 Buttonhole No.
  • Page 28: Programming Alphabets And Numbers

    Functions Functions Programming Alphabets and Numbers Opening the memory ⦁ press the button 2 ⦁ the cursor and the available number of empty memory spaces (e.g. 30) start to blink, and «mem» appears ⦁ press the Alphabet button 5 to select the alphabet of your choice ⦁...
  • Page 29: Corrections In Memory

    Functions Functions Functions Corrections in Memory The contents of the Memory remain saved even when the sewing computer is disconnected from the electrical supply. They can be recalled at any time. The contents of the memory will be lost if the sewing computer is switched off without pressing the button 2 before closing the memory.
  • Page 30: Stitch Overview

    Stitch overview Stitch overview Practical stitches Straight stitch Gathering stitch All non-stretch fabrics; all straight-stitch Most types of fabric. Gathering with work shirring elastic. Butted seams = butting two pressed edges and sewing together Zig-zag stitch Stretch overlock Most fabric types; all simple zig-zag such Mediumweight knits, toweling and firm as overcasting edges.
  • Page 31: Examples Of Application

    Examples of Application Examples of Application ples of Ap Examples of Application Zippers Zipper sole no. 4 Straight stitch Preparation ⦁ baste seam closed and clean finish the seam allowance ⦁ baste or pin zipper in place so that fabric folded edges meet over the center of the zipper Sewing in the zipper ⦁...
  • Page 32: Darning

    Examples of Application Examples of Application Darning Reverse pattern sole no. 1 Buttonhole foot with slide no. 3A Darning program Quick darning of holes or worn areas Replaces threads along the lengthwise grain in all fabrics. Darning with Reverse pattern sole no. 1 (auto stitch counter) ⦁...
  • Page 33: Vari Overlock

    Examples of Application Examples of Application ples of Ap Vari overlock Overlock sole no. 2 Reverse pattern sole no. 1 Vari-overlock stitch The Overlock sole no. 2 is specifically designed for overlock stitching. The pin on the foot allows for more thread in each stitch so that the elasticity of the seam is maintained.
  • Page 34: Ribbing With Overlock Stitch

    Examples of Application Examples of Application Ribbing with Overlock Stitch Overlock sole no. 2 Reverse pattern sole no. 1 Vari-overlock stitch For all fine cotton, synthetic and mixed fiber jersey. Preparation ⦁ fold ribbing in half and press Wrong side of fabric ⦁...
  • Page 35: Blind Hem

    Examples of Application Examples of Application ples of Ap Blind hem Blindstitch sole no. 5 Blindstitch For invisible hems in medium to heavy cotton, wool and blended fabrics. Preparation ⦁ finish raw edges ⦁ fold the hem and baste or pin in place ⦁...
  • Page 36: Buttonholes

    Buttonholes Buttonholes Buttonholes Buttonhole Summary Standard buttonhole Straight-stitch buttonhole (B 335 only) For fine to mediumweight woven Stay-stitch program for bound buttonholes (foot fabrics, blouses, shirts, trousers, no. 3A) or pocket openings (foot no. 3) bedlinens, etc. Button sewing-on program Stretch buttonhole (B 335 only) For buttons with 2 and 4 holes All stretch fabrics made from cotton,...
  • Page 37 Buttonholes Buttonhole Buttonholes Marking the length of manual buttonholes ⦁ mark the buttonhole length in the desired position ⦁ use Buttonhole sole no. 3 Marking the length of automatic buttonholes (with buttonhole foot with slide no. 3A only) ⦁ mark the length of just one buttonhole ⦁...
  • Page 38: Corded Buttonhole

    Buttonholes Buttonholes Corded Buttonhole Cording ⦁ use cording to reinforce buttonholes and enhance their appearance ⦁ the loop of the cord should be at the end of the buttonhole that is most subject to wear = where button is sewn on ⦁...
  • Page 39: Automatic Standard Buttonhole With Auto-Length

    Buttonholes Buttonhole Buttonholes Automatic standard buttonhole with auto-length Buttonhole foot with slide no. 3A Automatic standard buttonhole The lens on Buttonhole foot with slide no. 3A automatically registers the length of the buttonhole for exact duplication. ► the active step blinks on the screen When any automatic buttonhole is selected, presser foot no.
  • Page 40: Automatic Keyhole Buttonhole With Auto-Length

    Buttonholes Buttonholes Automatic keyhole buttonhole with auto-length Buttonhole foot with slide no. 3A Automatic keyhole buttonhole Programming the buttonhole 1. sew the straight stitch forward, stop the sewing computer ⦁ press the Quick reverse button ► «auto» and presser foot no. 3A appears on the screen = buttonhole length is programmed 2.
  • Page 41: Manual Buttonhole (All Types)

    Buttonholes Buttonhole Buttonholes Manual buttonhole (all types) Sewing buttonholes manually is ideal if you only need to sew one; also for repairing existing buttonholes. The number of steps depends on the type of buttonhole. Manual buttonholes cannot be saved. Buttonhole sole no. 3 Preparation ⦁...
  • Page 42: Buttonhole In Long-Term Memory

    Buttonholes Buttonholes Buttonhole in Long-Term Memory With Buttonhole foot with slide no. 3A only Saving programmed buttonholes in long-term memory ⦁ after programming press the button 3 ⦁ the buttonhole is now saved in long term memory Recalling saved buttonhole Programmed saved buttonholes can be opened for re-use even after the sewing computer has been disconnected.
  • Page 43: More Stitches

    More stitches More stitch More stitches More stitches Basting stitch Darning foot no. 9 (optional accessory) Basting stitch ⦁ for all work which requires a very long stitch ⦁ for basting seams, hems, quilts, etc. ⦁ temporary joining ⦁ easy to remove Preparation ⦁...
  • Page 44: Cleaning, Maintenance

    Cleaning, maintenance Cleaning, maintenance Cleaning, maintenance Cleaning the screen and the sewing computer Wipe with a damp cloth. Feed-dog area Clean the sewing computer after every use - remove any lint from under the stitch plate and in the hook area. ⦁...
  • Page 45: Troubleshooting

    Upper thread too tight/too slack Reduce/increase upper thread tension ⦁ ⦁ formation Needle blunt or bent, poor-quality Use new, high-quality needle (BERNINA) needle ⦁ ⦁ Needle inserted incorrectly The flat side of the shank must be to the back ⦁...
  • Page 46: Stitch-Pattern Summary

    Stitch-Pattern Summary Stitch-Pattern Summary BERNINA 325 Button sewing-on program Gathering stitch Stretch overlock Universal stitch Lycra stitch Darning program Honeycomb stitch 18-37 Decorative stitches 38-40 Quilting stitches BERNINA 335 Stretch buttonhole Keyhole buttonhole Straight-stitch buttonhole Button sewing-on program Straight-stitch eyelet...
  • Page 47: Index

    Index Index Change ● Lettering size Accessory ● Programmed buttonhole ● Scope of delivery ● Sewing speed 10, 24 ● Standard accessory ● Stitch pattern ● Stitch width and lenght Alphabet contents ● Thread tension 17, 35 Alphabets/characters Cleaning ● Changing the size ●...
  • Page 48 Index Foot control ● Needle summary ● ● Connection Needle/thread combination ● Position buttons Function Buttons on the Sewing Computer ● Threading Needle clamp Handwheel Needle stop 9, 24 Height compensating tool 6, 20 Needle threader Height Compensation of Uneven Layers Numbers ●...
  • Page 49 Index ● Quilt stitches ● Summary Safety instructions Stitch pattern selection Saving ● By number ● Button ● Combinations 26, 27 Stitch plate ● Attaching/removing Scope of delivery ● Display Screen Stitch width and lenght ● Cleaning ● Summary Straight stitch Select Summary ●...
  • Page 50 Index Zig-zag stitch 29, 31 Zippers ● Inserting a zipper ● Sole...
  • Page 51: Imprint

    Fotos Patrice Heilmann, CH-Winterthur Copyright 2018 BERNINA International AG, CH-Steckborn All rights reserved For technical and product improvement reasons, the sewing computer's features, parts and accessory are subject to unannounced changes and alterations at any time. The accessory included can differ from country to country.

This manual is also suitable for:

335

Table of Contents

Save PDF