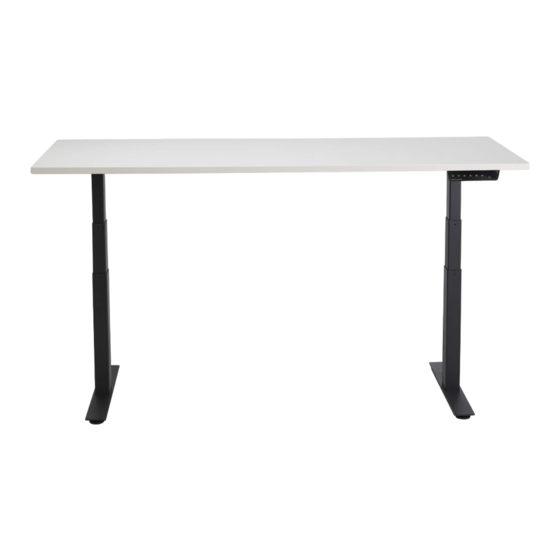
UpDown Desk PRO Series Install Manual
Hide thumbs
Also See for PRO Series:
- Set up and operation manual (34 pages) ,
- Setup and operation manual (23 pages) ,
- Install manual (22 pages)

Subscribe to Our Youtube Channel
Related Manuals for UpDown Desk PRO Series


Summary of Contents for UpDown Desk PRO Series
- Page 2 TABLE OF CONTENTS page Introduction Box Contents Tool Requirements Frame Assembly Desktop Installation Electrical Components Installation Control Panel Operation Troubleshooting Packaging Recycling and Disposal...
- Page 3 Confirm all the items you received are correct in regards to colour, size, etc. Put the desktop aside. Unpack Frame Box 1 and Box 2. These boxes contain all the parts needed to put your frame together. We suggest laying all parts out in an open area, preferably close to where the desk is going to stay.
- Page 4 Take the 2x Sliding Rails (d), and loosen off every grub screw using the Allen Key. There is no need to remove the grub screw completely. Dismantle into individual components. Outer Tubes Inner Rails You will need the following parts for this step: 1x Leg (a) 1x Wing (b) 2x outer tubes from the same...
- Page 5 Aligning the back plate on the leg with the two centralized holes in the wing. Using the M8 x 10mm screws provided, fasten the Leg (a) to the Wing (b). Then fasten the two Outer Rails from the Sliding Rails to either side of the Leg. Make sure the anchor points are facing out.
- Page 6 Take one of the constructed leg pieces and position it over one side of the threaded insert holes of the desktop. Using M6 x 12 screws and the smaller Allen Key with the ball on the end, loosely tighten the screws into the insert (not too tight just yet). M6 x 12mm Take the two inner rails that you removed from the sliding rails...
- Page 7 Line up the threaded insert holes and fasten this leg into the desktop with the remaining M6 x 12mm screws and smaller Allen Key. PLEASE ENSURE THAT YOU ALIGN THE INNER RAIL IN A CENTRAL POSITION, THIS CAN BE DETERMINED BY ALIGNING THE MIDPOINT OF THE SLIDING RAIL WITH THE MIDDLE OF THE DESKTOP.
- Page 8 We will now attach the Feet (c) to the ends of the legs. Using 4 of the M8 x 20mm screws, install the Feet by loosely tightening the screws. Once all 4 screws are in, then tighten them off with the large Allen Key.
- Page 9 You will now install the Control Box (f) and Control Panel (e). Installing the Control Box (f), it is advised that you plug it into the leg that is on the same side as you are wanting the Control Panel (e) to be. Please ensure that the Control Panel Port is facing that same Leg.
- Page 10 Choosing which side you want your Control Panel (e), plug it into the Control Box (f) and align the Control Panel with the edge of the desk. THIS STEP MAY BE EASIER IF YOU SCREW THE CONTROL PANEL TO THE POINT YOU CAN STILL SLIDE ENOUGH SO IT WILL STAY IN PLACE, BUT LOOSE ENOUGH THAT YOU CAN MOVE IT...
- Page 11 We advise to not bundle and tie up the excess of the power cord, as this excess cord is required when raising and lowering your desk. The most important step of all - ENJOY YOUR PREMIUM UPDOWN DESK.
- Page 12 Memory Display Screen The PRO Series desk can be raised manually by pressing the Up/Down buttons or alternatively by pressing pre-set heights using the M1 – M4 buttons. To set a height on any given ‘M’ button, use the Up/Down buttons to achieve your desired position.
- Page 13 ADVANCED FUNCTION SETTINGS This control panel has a number of function setting capabilities to customize the display and operation of the desk: Setting a Min/Max Height - If you have an obstruction in the area that you are looking to place your desk, such as drawers or CPU underneath, or a window or shelf above the desk.
- Page 14 S-1 - Unit Displayed Change - Changes the number display from ‘cm’ to ‘inch’. When S-1 is showing on screen Click ‘M4’ From there you can use the arrows to select either of the following 0 - Cm 1 - Inch Clicking ‘M4’...
- Page 15 TROUBLESHOOTING Error Code Fault Cause Solution Turn power off at power point, E01, E06, E07 Power Fault 2. Unplug Power Cable from power point. 3. Plug Power Cable back into power point. 4. Turn power back on. Turn power off at power point. Handset Fault 2.
- Page 16 PACKAGING RECYCLING AND DISPOSAL Your UpDown Desk products come packaged in cardboard boxes and lined with EPE foam (nontoxic) of various shapes/sizes. The cardboard is 100% recyclable and can be placed (with foam removed) into your local Council recycle bins or any carboard recycling station. At this time, there are currently no official recycling stations accepting EPE foam and it is not accepted in local Council recycle bins.
Need help?
Do you have a question about the PRO Series and is the answer not in the manual?
Questions and answers