
Subscribe to Our Youtube Channel
Related Manuals for UpDown Desk KLIK Series


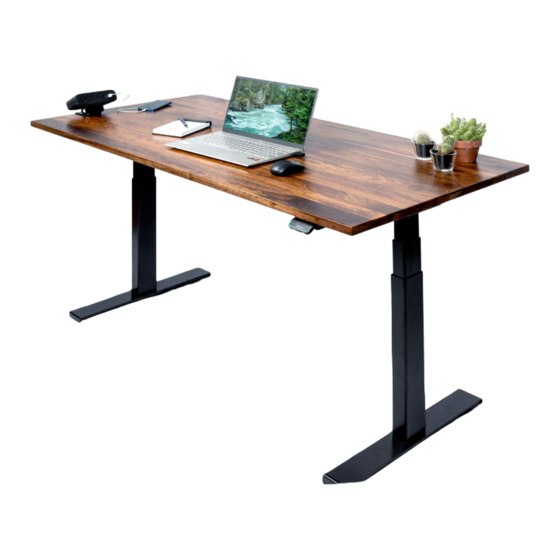
Summary of Contents for UpDown Desk KLIK Series
- Page 1 KLIK Series Install Manual Congratulations on the purchase of your KLIK Series UpDown Desk! You’ve made a significant investment into your health and wellbeing and your body will thank you for it.
-
Page 2: Table Of Contents
TABLE OF CONTENTS Page Package Contents Frame Installation Desktop Installation Toggle Controller Installation Cable Relief Attaching Accessories Cable Management Tray Installation Setting Up Your Workstation Toggle Controller Operation 11-17 Desk Control™ App Troubleshooting... -
Page 3: Package Contents
PACKAGE CONTENTS 1. Confirm all the items you received are correct in regards to colour, size, etc. 2. Unpack Frame Box 1 and Box 2. These boxes contain all the parts needed to put your frame together. We suggest laying all parts out in an open area, preferably close to where the desk is going to stay. Frame Contents: 2 x Legs 2 x Feet... -
Page 4: Frame Installation
FRAME INSTALLATION 4. Unpack your desktop and lie it face down. We recommend you put a protective cloth or towel between the ground and your desktop. ● Your desktop will have pre-drilled holes, to make alignment of the frame easier. ●... - Page 5 7. Attaching the Cantilevers (c) to the frame. Position the Cantilever so the flat part of it ● with the holes on either end sits on the desktop and faces the centre of the desktop. Align the two points on the Cantilever with the ●...
-
Page 6: Desktop Installation
DESKTOP INSTALLATION 9. Attaching your Desktop to the Frame. Threaded Insert Carefully slide the frame to one side of the desk, and line up the frame with ● - M4 x 16mm the pre-drilled holes. Ignore any other pre-drilled holes that do not match the frame’s alignment. ●... -
Page 7: Toggle Controller Installation
13. Attaching accessories to your Desk. To complete your desk setup, we suggest attaching accessories while the desk is still upside ● down. For specific details on installing each accessory, you might refer to setup guides available on ● UpDown Desk setup guide page. -
Page 8: Cable Management Tray Installation
CABLE MANAGEMENT TRAY INSTALLATION One of the key features of this Cable Management Tray is its flexibility, allowing it to hang on one half of the bracket and make it simple for you to access the cradle tray to connect in and arrange your cables. Depending on the placement of power points, monitor cables, computer cables etc, the Cable Management Tray can be installed so that the cradle opens towards the front of the desk or the back of the desk. - Page 9 Mark Installation Points: Position the Template (a) centred and approx 10cm from the back ○ edge of the desktop and mark the 4x holes. Please note that if you have a Monitor Arm/Mount, you may need ○ to move the template a little further inwards, so the clamp can Back edge of desk attach to your desktop.
-
Page 10: Setting Up Your Workstation
Keep the cord loose and allow it to move freely to prevent any interference with the desk's operation. After connecting the power, test the desk's height adjustment functions to ensure everything is ● working correctly. The most important step of all - ENJOY YOUR PREMIUM UPDOWN DESK! -
Page 11: Toggle Controller Operation
TOGGLE CONTROLLER OPERATION Page Symbol and Display Adjusting the displayed height Changing the measurement unit Operate the Toggle Control by tilting it Desk height limits Favourite positions 14-15 Key lock Reminder 16-17 Desk Control™ App Troubleshooting... -
Page 12: Symbol And Display
Symbol Description Function Reminder Setting reminders Bluetooth Connecting the Desk Control App via Bluetooth ® ® wireless technology Favourite Saving favourite positions Display The Toggle Controller has an OLED display, which shows the height during drive of the desk and many other texts to guide the users. Adjusting the displayed height of the desk If the height shown in the display is not correct, it can be adjusted. -
Page 13: Operate The Toggle Control By Tilting It
Operate the Toggle Control by tilting it 1. Tilt and hold up the Controller to drive desk up, press and hold down Controller to drive desk down. 2. Release Controller when you have reached your required position. Tilt and hold up to drive the desk up Press and hold down to drive the desk down Desk height limits In case the desk cannot be operated in its entire span (e.g. -
Page 14: Favourite Positions
Favourite positions Saving favourite positions 1 and 2 1. Adjust desk to a preferred position. 2. Press button for two seconds. The light strip flashes white two times to indicate that saving the position is in progress. Not until the light strip becomes static white, has the position been saved. -
Page 15: Key Lock
Automatic driving to favourite positions When you have at least 2 favourite positions pre set; 1. Double-tap Controller to let desk adjust automatically to first position in direction of double-tap. 2. To stop driving of desk between two favourite positions, simply tap Controller once. -
Page 16: Reminder
Reminder The reminder LED lights through the surface of the Controller. The light is intended to indicate the position of the desk (sitting or standing height). The indication depends on the reminder interval chosen. Heartbeat (light strip) The heartbeat reminder is shown as a thin LED light strip. While the user is sitting for an appropriate amount of time according to the set interval, the light strip calmly pulsates green symbolising a heartbeat. - Page 17 Adjusting the reminder interval 1. Press button to adjust interval of getting reminded to change position. 2. Toggle through intervals by pressing button. 3. Release button when desired interval is indicated. When no white blocks are lit up, the reminder is turned off. Through the app, it is possible to personalise the three intervals to custom values.
-
Page 18: Desk Control™ App
Desk Control™ App The Desk Control™ App is developed for users of sit-stand desks, who want to come one step closer to changing the prolonged sitting behaviour. The app is connected to the desk via Bluetooth ® wireless technology. It offers the user extra features for their desk, but please note that the desk is fully functional without the app. -
Page 19: Troubleshooting
TROUBLESHOOTING Error codes The Controller will loop between the error code and the error text. Below are the codes and the cause; Error codes Name Potential Cause Troubleshooting E53-E64 COLLISION ~ The anti-collision ~ Remove any obstacles sensor was triggered causing the desk drive to stop ~ Adjust the desk height...
Need help?
Do you have a question about the KLIK Series and is the answer not in the manual?
Questions and answers