
Related Manuals for Aerotech VascuLathe ACS Series


Summary of Contents for Aerotech VascuLathe ACS Series
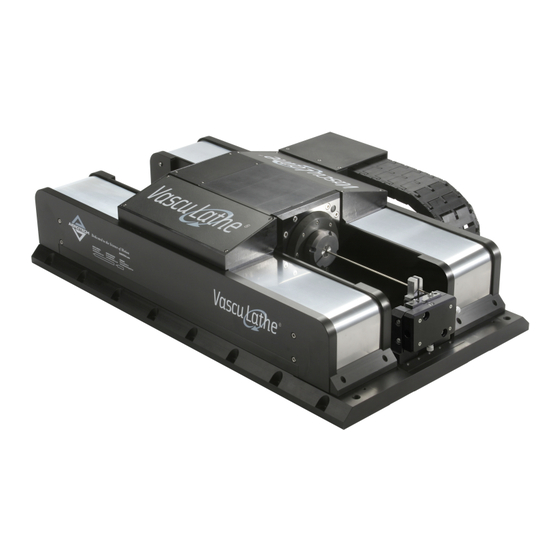
- Page 1 ® VascuLathe -ACS Series Stage User’s Manual P/N: EDS116 (Revision 1.05.00) Dedicated to the Science of Motion Aerotech, Inc. 101 Zeta Drive, Pittsburgh, PA, 15238 Phone: 412-963-7470 Fax: 412-963-7459 www.aerotech.com...
- Page 2 1.01.00 October 16, 2008 1.00.00 October 19, 2006 1.00.00 October 19, 2006 Product names mentioned herein are used for identification purposes only and may be trademarks of their respective companies. Copyright © 2006 - 2011. Aerotech, Inc. All Rights Reserved.
-
Page 3: Table Of Contents
4.3.1. Piston Seal Change Procedure 4.3.2. Ringseal O-Ring Replacement 4.3.3. Wet Cut Rotary Union Seal Replacement 4.4. Wet Cut Rotary Union Removal 4.5. Linear Lubrication and Cleaning Process 4.6. Linear Spar Cover Removal Appendix A: Warranty and Field Service www.aerotech.com... -
Page 4: Table Of Contents
® Table of Contents VascuLathe -ACS Hardware Manual Appendix B: Technical Changes Index Reader's Comments www.aerotech.com... -
Page 5: List Of Figures
Removing the Inside Spar Cover Figure 4-17: Removing the Outer Spar Cover Figure 4-18: Removing the Carriage Side Cover Figure 4-19: Removing M4 MHCS Screws Figure 4-20: Releasing Tension on the Belt Figure 4-21: VascuLathe®-ACS with Belts Folded Back www.aerotech.com... - Page 6 ® List of Figures VascuLathe -ACS Hardware Manual www.aerotech.com...
-
Page 7: List Of Tables
Table 1-1: Model Numbering System Table 3-1: Environmental Specifications Table 3-2: VascuLathe®-ACS Series Specifications Table 3-3: VascuLathe®-ACS Rotary Motor Specifications Table 3-4: VascuLathe®-ACS Linear Motor Specifications Table 4-1: Recommended Lubricants Table B-1: Current Changes (1.05.00) Table B-2: Archived Changes www.aerotech.com... - Page 8 ® List of Tables VascuLathe -ACS Hardware Manual viii www.aerotech.com...
-
Page 9: Chapter 1: Overview
-ACS Series Positioning Stage N O T E : Aerotech continually improves its product offerings; listed options may be superseded at any time. Refer to the most recent edition of the Aerotech Motion Control Product Guide for the most current product information at www.aerotech.com. -
Page 10: Standard Features
If the stage is driven beyond these electrical limits, a mechanical hard stop is in place slightly past each limit switch. ® The VascuLathe -ACS is offered with a non-contacting linear encoder with an achievable resolution of .001 µm, and accuracies of ±1.0 µm. Travels available are 200 mm to 300 mm. Chapter 1 www.aerotech.com... -
Page 11: Rotary Axis
15.5 mm to 30 mm.The collet is retained with a threaded collet nut enabling quick changeover. It is configured in a “fail-safe” normally-closed mode where full clamping force is applied when no air pressure is present. N O T E : Aerotech recommends using only electro-polished collets manufactured to DIN6499 spec- ifications. ®... -
Page 12: Optional Features
N O T E : The purchase of a ringseal will also be required based on the tube diameter used in the cutting application. Consult Aerotech for more information. 1.2.3. Tooling Options ®... -
Page 13: Pneumatics Option
® The VascuLathe -ACS stage can be purchased as part of a complete Aerotech motion control system, which is adjusted at the factory for optimum performance. If bought as a complete system, setup usually involves connecting a stage to the appropriate drives with the cables provided. Refer to your electrical doc- umentation package for further information. -
Page 14: Model Numbers
Gripper jaws for tube diameters ranging from 24 mm –34 mm -J32-40 Gripper jaws for tube diameters ranging from 32 mm –40 mm Pneumatics -PNG Pneumatics kit for ER collet and optional gripper Pneumatics kit for ER collet Pneumatics kit, filter/dryer assembly only Chapter 1 www.aerotech.com... -
Page 15: Dimensions
® VascuLathe -ACS Hardware Manual Overview 1.4. Dimensions ® Figure 1-3: VascuLathe -ACS Dimensions www.aerotech.com Chapter 1... -
Page 16: Safety Procedures And Warnings
-ACS for unintended applications can result in injury and damage to the equipment. ® W A R N I N G : Before using this VascuLathe -ACS, perform an operator risk assessment to determine the needed safety requirements. Chapter 1 www.aerotech.com... -
Page 17: Ec Declaration Of Incorporation
101 Zeta Drive Pittsburgh, PA 15238 herewith declares that the product: ® Aerotech, Inc. VascuLathe -ACS Stage is intended to be incorporated into machinery to constitute machinery covered by the Directive 2006/42/EC as amended; does therefore not in every respect comply with the provisions of this directive;... - Page 18 ® Overview VascuLathe -ACS Hardware Manual Chapter 1 www.aerotech.com...
-
Page 19: Chapter 2: Installation
Allowing the VascuLathe -ACS to stabilize to room temperature will ensure that all of the alignments, preloads, and tolerances are the same as they were when tested at Aerotech. Use compressed nitrogen or ® clean, dry, oil-less air to remove any dust or debris that has collected during shipping. Set the VascuLathe ACS on a smooth, flat, and clean surface. -
Page 20: Securing The Stage To The Mounting Surface
W A R N I N G : Do not attempt to move the VascuLathe -ACS's carriage (or table top) until the lifting brackets and shipping brackets have been removed. Moving the carriage with the lifting ® brackets and shipping brackets installed can cause permanent damage to the VascuLathe ACS. Chapter 2 www.aerotech.com... -
Page 21: Attaching The Payload To The Stage
Requirements). The one-touch air inlet fitting accepts 4 mm or 5/32" OD plastic air line. Simply push the air line into the fitting and supply air to the stage. Depending on the pneumatics kit option chosen, Aerotech provides valves, fittings, and airlines in the kit to connect the collet system. -
Page 22: Changing Acs Workholding Devices
-ACS stages are equipped with ER25 or ER40 style collets. It is important that only the collets designed for a particular collet holder are used. Contact the factory for more details. N O T E : Aerotech recommends using only electro-polished collets manufactured to DIN6499 spec- ifications. - Page 23 ® VascuLathe -ACS Hardware Manual Installation Figure 2-2: Schematic of Collet Insertion Into and Removal From Collet Nut Figure 2-3: Installation Procedure for Collet www.aerotech.com Chapter 2...
-
Page 24: Changing Collet Chucks
Step 2: Apply air pressure to loosen the collet chuck. Step 3: Remove the collet nut by turning it counterclockwise. If necessary, use a spanner wrench (available from Aerotech). Step 4: Remove air pressure from the stage. This will allow the internal springs to relax slightly and ease fur- ther disassembly. - Page 25 Step 16: Apply air pressure to the stage in order to install the collet. Step 17: Install the new collet and collet nut as described in Section 2.5.1. Collet Installation and Removal Procedure Step 18: Restore the air supply to the original settings and restore power to the stage. www.aerotech.com Chapter 2...
-
Page 26: Ag) Alignment / Gripper Operation
Step 8: Align bushing’s vertical and horizontal position using the provided adjustment knobs. Step 9: Secure the [QTY-2] M5 socket head cap screws that were loosened in Step 6. Step 10: Connect the provided pneumatics kit to the gripper and adjust the operating pressure for desired grip force. Chapter 2 www.aerotech.com... - Page 27 N O T E : Do not exceed 87 psi to gripper on either the open or closing cycle. N O T E : Refer to pneumatics layout drawing which is included with the documentation for assembly instructions. www.aerotech.com Chapter 2...
-
Page 28: G) Gripper Operation
N O T E : Do not exceed 87 psi to gripper on either the open or closing cycle. N O T E : Refer to pneumatics layout drawing which is included with the documentation for assembly instructions. Chapter 2 www.aerotech.com... -
Page 29: Electrical Installation
W A R N I N G : Never connect or disconnect any electrical component or connecting cable while power is applied, or serious damage can result. W A R N I N G : Use only the cables provided by Aerotech as part of the complete motion control system. - Page 30 ® Installation VascuLathe -ACS Hardware Manual Chapter 2 www.aerotech.com...
-
Page 31: Chapter 3: Operating Specifications
Altitude Operating: 0 m to 2,000 m (0 ft to 6,562 ft) above sea level Contact Aerotech if your specific application involves use above 2,000 m or below sea level. Vibration Use the system in a low vibration environment. Excessive floor or acoustical vibration can affect stage and system performance. -
Page 32: Basic Specifications
(3) Measured TIR of precision gage pin chucked with an ultra precision ER collet (DIN6499) 10 mm away from collet face. (4) Maximum loads are mutually exclusive. Loading limits are due to the collet chuck mechanism. Contact Aerotech directly if part load requirement exceeds specifications. -
Page 33: Table 3-3: Vasculathe®-Acs Rotary Motor Specifications
(7) Maximum winding temperature is 100 °C (8) Ambient operating temperature range: 0 °C - 25 °C, consult Aerotech for performance in elevated ambient temperatures (9) All Aerotech amplifiers are rated Apk; use torque constant in N-m / Apk when sizing www.aerotech.com... -
Page 34: Table 3-4: Vasculathe®-Acs Linear Motor Specifications
(6) Maximum winding temperature is 125 °C (7) Ambient operating temperature range: 0 °C - 25 °C, consult Aerotech for performance in elevated ambient temperatures (8) All Aerotech amplifiers are rated Apk; use torque constant in N-m / Apk when sizing Chapter 3 www.aerotech.com... -
Page 35: Load Capability
To prevent damage or performance degradation of the stage, the unsupported length and weight of the attached pressure vessel is limited. N O T E : Aerotech recommends the following limitations on the size and weight of an unsupported pressure vessel: Length past end of rotary union (L): <250 mm... - Page 36 ® Operating Specifications VascuLathe -ACS Hardware Manual Chapter 3 www.aerotech.com...
-
Page 37: Chapter 4: Maintenance
As part of this inspection interval, the seals should be examined for excessive air or water leakage. The application will determine the required replacement interval for the seals. The bearings, motor, ® and encoder for the VascuLathe -ACS series require no preventative maintenance. www.aerotech.com Chapter 4... -
Page 38: Lubrication And Cleaning
Any metal parts may be cleaned with either acetone or isopropyl alcohol. Seals and o-rings may be wiped with a small amount of isopropyl alcohol if necessary. W A R N I N G : Acetone should never be used to clean the o-rings or seals. Chapter 4 www.aerotech.com... -
Page 39: Collet & Collet Chuck Lubrication And Cleaning
Contact Aerotech Customer Service for more information. After inspection and cleaning, grease the chuck taper and collet taper with a small amount of lubricant and insert the collet. -
Page 40: Seal Replacement
D A N G E R : To minimize the possibility of bodily injury or death, disconnect all electrical power prior to making any mechanical adjustments. Figure 4-1: Piston Seal Change Exploded View Chapter 4 www.aerotech.com... - Page 41 Step 3: Remove the collet nut by turning it counterclockwise. Spanner wrenches may be necessary for removal and are available from Aerotech. Step 4: Remove air pressure from the stage. This will allow the internal springs to relax slightly and ease fur- ther disassembly.
- Page 42 Step 20: Apply air pressure to the stage in order to install the collet. Step 21: Install the new collet as described in Section 2.5.1. Collet Installation and Removal Procedure Step 22: Restore the air supply to the original settings and restore power to the stage. Chapter 4 www.aerotech.com...
- Page 43 ® VascuLathe -ACS Hardware Manual Maintenance Figure 4-2: Piston Seal Installation Procedure Figure 4-3: Cross-Section View of Piston Showing Seal Orientation www.aerotech.com Chapter 4...
-
Page 44: Ringseal O-Ring Replacement
Step 3: Once the collet has been released, unscrew the collet nut. If necessary, use a spanner wrench avail- able from Aerotech. Step 4: With the collet and collet nut removed, the ringseal will now be exposed. Using a tool dimensioned Figure 4-5, unscrew the ringseal from the collet sleeve. - Page 45 ® VascuLathe -ACS Hardware Manual Maintenance Figure 4-5: Ringseal Removal Tool Dimensions Figure 4-6: Cross-Section View of Ringseal Showing O-Ring www.aerotech.com Chapter 4...
-
Page 46: Wet Cut Rotary Union Seal Replacement
VascuLathe -ACS Hardware Manual 4.3.3. Wet Cut Rotary Union Seal Replacement The rotary seal in the wet cut rotary union requires periodic replacement. Contact Aerotech for obtaining appropriate replacement seals. Figure 4-7 shows a cross section of the rotary union assembly. - Page 47 (see Figure 4-8). Figure 4-8: Carriage Cover Removal Step 3: Remove the six end cap mounting screws from the rear end of the rotary union (see Figure 4-9). Figure 4-9: End Cap Mounting Screw Location www.aerotech.com Chapter 4...
- Page 48 If the shaft and seal retainer sealing surface are undamaged, clean both the shaft and seal assembly surfaces with a lint-free rag and isopropyl alcohol. If the shaft or sealing surface is scratched (you can feel it with your fingernail), contact Aerotech customer service.
- Page 49 Step 8: Press the seal assembly back over the rotary union shaft onto the housing. Use care so that damage does not occur to the newly installed seal. Step 9: Tighten the seal assembly screws and reattach covers. Step 10: Restore power to the stage. www.aerotech.com Chapter 4...
-
Page 50: Wet Cut Rotary Union Removal
Step 1: Remove power to the stage. Step 2: Remove the rear carriage cover and top carriage cover located on the backside of the carriage (see Section 4.3.3. Wet Cut Rotary Union Seal Replacement for the removal procedure). Chapter 4 www.aerotech.com... - Page 51 Step 5: Install a new rotary union assembly by attaching it to the rear of the VascuLathe -ACS shaft. Tighten to 10 ft-lbs. Step 6: Tighten the shoulder bolt and bushing. Step 7: Reattach all covers. Step 8: Restore power to the stage. www.aerotech.com Chapter 4...
-
Page 52: Linear Lubrication And Cleaning Process
Step 9: Repeat steps 3 through 7 for any areas covered by the original table position. Step 10: Refasten the spar belt covers. Step 11: Restore power to the stage and drive the stage table back to its original position to redistribute lubri- cants. Figure 4-15: Linear Bearing Grease Nipple Chapter 4 www.aerotech.com... -
Page 53: Linear Spar Cover Removal
4.6. Linear Spar Cover Removal The procedure outlined below details how to remove the linear spar covers. Step 1: Remove the inside spar cover as shown below and lean against inside of carriage. Figure 4-16: Removing the Inside Spar Cover www.aerotech.com Chapter 4... - Page 54 ® Maintenance VascuLathe -ACS Hardware Manual Step 2: Remove the outer spar cover mounting screws and remove the cover. Figure 4-17: Removing the Outer Spar Cover Chapter 4 www.aerotech.com...
- Page 55 ® VascuLathe -ACS Hardware Manual Maintenance Step 3: Remove the carriage side cover on the side of the spar cover being serviced. Figure 4-18: Removing the Carriage Side Cover www.aerotech.com Chapter 4...
- Page 56 ® Maintenance VascuLathe -ACS Hardware Manual Step 4: Loosen and remove the (Qty-2) M4 SHCS through the top of the carriage on the front side. Figure 4-19: Removing M4 MHCS Screws Chapter 4 www.aerotech.com...
- Page 57 Step 5: Carefully pull the cover clamps down off of the dowel pins and remove tension from the belt. Figure 4-20: Releasing Tension on the Belt Step 6: Carefully fold each side of the belt back using care not to damage the belt. ® Figure 4-21: VascuLathe -ACS with Belts Folded Back www.aerotech.com Chapter 4...
- Page 58 ® Maintenance VascuLathe -ACS Hardware Manual Chapter 4 www.aerotech.com...
-
Page 59: Appendix A: Warranty And Field Service
Aerotech makes no warranty that its products are fit for the use or purpose to which they may be put by the buyer, where or not such use or purpose has been disclosed to Aero-... - Page 60 VascuLathe -ACS Hardware Manual On-site Warranty Repair If an Aerotech product cannot be made functional by telephone assistance or by send- ing and having the customer install replacement parts, and cannot be returned to the Aerotech service center for repair, and if Aerotech determines the problem could be war-...
-
Page 61: Table B-1: Current Changes (1.05.00)
® VascuLathe -ACS Hardware Manual Technical Changes Appendix B: Technical Changes Table B-1: Current Changes (1.05.00) Section(s) Affected General Information General Edit (non-technical) www.aerotech.com Appendix B... -
Page 62: Table B-2: Archived Changes
Added safety information and warnings Unpacking and Handling the Stage, Section 2.3. Securing the Stage to the Mounting Surface, Section 2.9. Elec- trical Installation, and Section 1.5. Safety Procedures and Warnings Section 3.2. Basic Specifications Added motor specifications Appendix B www.aerotech.com... - Page 63 30, 44 linear maintenance metal spar cover removal stage linear axis 4, 6 linear motion guide collet installation lubrication collet removal linear tooling platforms collet type linear travel collet/collet chuck load capability cleaning rotary union lubrication compressed air www.aerotech.com Index...
- Page 64 Warnings wet cut 4, 6 piston seal replacement Wet Cut Fluid Requirements pneumatics wet cut rotary union removal preparing the mounting surface wet cut rotary union seal replacement pressure vessel length/weight limits workholding devices requirements ringseal o-ring replacement Index www.aerotech.com...
- Page 65 Stage/Product Details Name Model # Title Serial # Company Name Date Shipped Address Customer Order # Aerotech Subsidiary Email Order # Mail your comments to: Fax to: Aerotech, Inc. 412-967-6870 101 Zeta Drive Email: Pittsburgh, PA 15238...
Need help?
Do you have a question about the VascuLathe ACS Series and is the answer not in the manual?
Questions and answers