Spectra Logic Spectra 12000 User Manual
Library
Hide thumbs
Also See for Spectra 12000:
- User manual (60 pages) ,
- Supplementary manual (47 pages) ,
- Install manual (19 pages)
Table of Contents
Advertisement
Quick Links
Download this manual
See also:
Installation Manual
Spectra 12000
This Guide
This guide describes the installation and operation of the Spectra 12000
automated tape library, including troubleshooting information.
Related Publications
These publications are also available from Spectra Logic:
Š
Release Notes: Spectra 12000, Spectra 64000 (90910852): provides
last-minute information about the library.
Š
Developer Guide: Spectra 12000, Spectra 64000 (90910850): provides
SCSI reference material and other reference information useful to
application developers.
Copyright © 2001 Spectra Logic Corporation. All Rights Reserved.
P.N. 90910889 Revision C
December 2001
™
Library User Guide
Advertisement
Table of Contents
Troubleshooting

Related Manuals for Spectra Logic Spectra 12000


Summary of Contents for Spectra Logic Spectra 12000
- Page 1 Spectra 12000 This Guide This guide describes the installation and operation of the Spectra 12000 automated tape library, including troubleshooting information. Related Publications These publications are also available from Spectra Logic: Š Release Notes: Spectra 12000, Spectra 64000 (90910852): provides last-minute information about the library.
-
Page 2: Notices
Hewlett Packard License You have acquired a Spectra 12000 Library that includes software owned or licensed by Spectra Logic from one or more software licensors (“Software Suppliers”). Such software products, as well as associated media, printed materials and “online” or electronic documentation (“SOFTWARE”) are protected by copyright laws and international copyright treaties, as well as other intellectual property laws and treaties. - Page 3 Software transfer allowed with restrictions. You may permanently transfer rights under this EULA only as part of a permanent sale or transfer of the Spectra 12000 Library, and only if the recipient agrees to this EULA. If the SOFTWARE is an upgrade, any transfer must also include all prior versions of the SOFTWARE.
-
Page 4: Warranty
Warranty The Spectra 12000 library is warranted for one year from date of shipment from the factory. This warranty includes a Next Business Day (On-Site) service contract for sites located in North America and the European Union, and is explained as follows: Access to a Spectra Logic support representative any business day (not including evenings, weekends or holidays) from 8:00 a.m. - Page 5 Notices AC Power Warning: Risk of electrical shock. Do not remove the library cover. To remove AC power from the library, unplug the power cord from the power inlet. There are no user serviceable parts within the library.
- Page 6 Spectra 12000 User Guide...
-
Page 7: Table Of Contents
Option Enablement ........18 A Tour of the Spectra 12000 Library ......19 The Library Controller Stylus . - Page 8 Air Quality ........30 Unpacking the Spectra 12000 Library ......31 Connecting the SCSI Cables and Terminators .
- Page 9 Chapter 6. Configuring the Spectra 12000 Library F-QIP Displaying the Configuration Toolbar ......56 Configuring F-QIPs ........56 F-QIP Configure Controller Screen .
- Page 10 Configuring SCSI IDs, Emulation and Dip Switch Settings ..108 Chapter 9. Using the Spectra 12000 Library Checking Library Status ....... . . 114 Checking Robotics .
- Page 11 Adding QIPs ......... 149 Troubleshooting the Spectra 12000 Library ....151 Troubleshooting Library Initialization .
- Page 12 Power Requirements ........164 Spectra 12000 Library ......164 Operating Environment Limits .
- Page 13 Appendix E. Using the TAOS ITP Control Panel to View Settings Opening the TAOS ITP Configuration Control Panel ..171 Device Discovery ....... . 172 Installed Devices .
- Page 14 Spectra 12000 User Guide...
-
Page 15: Chapter 1. Introduction
1 Introduction This guide is written for Spectra 12000 library users and reviews the library’s installation and use. This chapter covers: Š Introduction Š About the Gator Architecture Š Option Enablement Š A Tour of the Spectra 12000 Library Š... -
Page 16: Introduction
Introduction The Spectra 12000 library provides a combination of high reliability, speed, large capacity, ease of use, and built-in redundancy to minimize or eliminate downtime. The Spectra 12000 library’s features include: Š Hot swappable tape drives—you can easily switch drives without tools and without interrupting other backups. -
Page 17: About The Gator Architecture
Both the Spectra 12000 and Spectra 64000 libraries utilize the Gator™ architecture for robotic tape libraries developed by Spectra Logic. Gator architecture in the Spectra 12000 library can be configured with 60 to 120 cartridges and from two to eight tape drives. Gator architecture in the Spectra 64000 library can be configured with up to 640 cartridges and 32 tape drives in a single rack. -
Page 18: Option Enablement
Spectra 12000 User Guide Option Enablement Spectra Logic has added a new feature to the Spectra 12000 library called Option Enablement. Option Enablement allows the user to add several functions to their library: CoD™ is a capacity on demand system that allows you to add library storage capacity in increments as small as 15 slots, virtually instantaneously. -
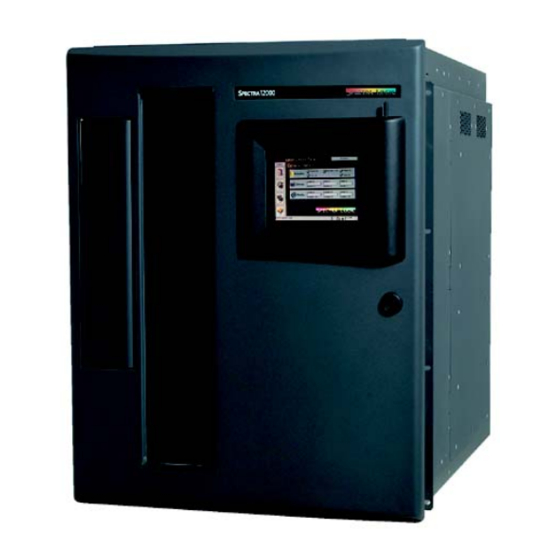
Page 19: A Tour Of The Spectra 12000 Library
Port Figure 1-1 Spectra 12000 library, front view. The illustration of the front of the Spectra 12000 library (Figure 1-1) shows the Entry/Exit (E/E) ports, through which you can insert and remove cartridges individually or using cartridge packs. Each pack holds up to 15 cartridges at a time. -
Page 20: The Library Controller Stylus
The Library Controller Stylus Figure 1-2 The Library Controller stylus. Stylus Use the stylus to navigate the Library Controller. Touch the screen with the stylus to make a selection. The stylus is designed for safe use with the Library Controller touchscreen. Store the stylus in the slot located on the top right-hand corner of the Library Controller. -
Page 21: A Tour Of The Library Controller
A Tour of the Library Controller Toolbars IP Address and User Figure 1-3 General Status screen. IP Address and User The IP Address and User at the bottom of the Library Controller displays the library’s IP address and the current user of the library. Exception... -
Page 22: Exception Bar
Exception Bar The Exception Bar contains the Exception, Home, Inventory and Trace Log icons. Exception Figure 1-4 Library Controller Exception Bar. Exception The Exception icon, a exclamation point, will appear with a yellow background only if the library experiences a problem. Tap the icon to bring up a window where you can view the problem. -
Page 23: General Toolbar
General Toolbar The General toolbar displays commonly used options, including: Inventory Shows transport locations: Use this to move tapes between slots and drives. Select the Inventory icon to access logical libraries and slot inventory information. Status Shows information about robotics, drives and media elements. -
Page 24: Configuration Toolbar
Configuration Toolbar Use the Configuration toolbar to configure the library: Partition Shows partition status. This lets you set up and alter library partitions, assign drives to each partition, assign the number of slots, and name the partition. Drive Config Shows drive configuration information, and lets you configure drives. -
Page 25: Maintenance Toolbar
Maintenance Toolbar Use the Maintenance toolbar to handle various library upkeep tasks, including: Diagnostics Field service engineers use diagnostics to identify possible system problems and run tests. Update Firmware Displays Firmware Update screen where you can update the front panel, front panel operating system, library robotics and controller firmware. -
Page 26: Security Toolbar
Security Toolbar Use the Security toolbar to handle various library upkeep tasks, including: Users Use the Users button to access the security screen. This allows the user to set up different users with different levels of access and delete users. Switch Users This button allows a new user to log on in place of the previous user. -
Page 27: Getting Started
Release Notes: Spectra 12000, Spectra 64000, as directed. On the back of the Spectra 12000 library, you’ll find the On/Off switch, power cable socket, and the ports for SCSI, Fibre Channel, or Ethernet cables. - Page 28 The LCM connects to the QIPs and robotics via the Controller Area Network (CAN) bus. CAN is a super-robust, low-noise bus technology. Spectra Logic’s CAN bus eliminates a QIP as a single point of failure. If a single QIP fails, other QIPs can be configured to take over.
-
Page 29: Chapter 2. Installing The Spectra 12000 Library
2 Installing the Spectra 12000 Library This chapter reviews: Š Preparing a Controlled Environment Š Unpacking the Spectra 12000 Library Š Connecting the SCSI Cables and Terminators Š Connecting the Fibre Channel Cables Š Connecting the Ethernet Cables Š Turning the Library On and Off... -
Page 30: Preparing A Controlled Environment
Environmental extremes cause erratic operation and possible failures. The Spectra 12000 library is typically mounted in a rack. Make sure the temperature in the rack does not exceed the maximum ambient operating temperature of the library and that the library is well ventilated with adequate air flow at all times. -
Page 31: Unpacking The Spectra 12000 Library
S-QIP or L-QIP. Š Optionally, up to eight drive sleds ordered with this library. Drives are boxed separately and shipped in the crate with the Spectra 12000 library. See Adding Drives on page 144 for more information. Number of Particles Particle Size per Cubic Foot 2.5 x 10... -
Page 32: Connecting The Scsi Cables And Terminators
Connecting the SCSI Cables and Terminators After you have placed the library carefully and prepared it for operation, you are ready to connect the Spectra 12000 library to the host bus. There are four 68-pin micro-SCSI connectors per S-QIP or L-QIP on the rear panel to connect the library to the system SCSI buses. -
Page 33: Connecting The Fibre Channel Cables
The GBIC ports are labeled Fibre Chnl A and Fibre Chnl B. The Spectra 12000 library has one of two different kinds of GBICs, either optical with an SC connector or copper wire with an HSSDC serial connector as specified when ordered. - Page 34 Figure 2-2 Optical cable for SC GBIC connector. Figure 2-4 SC GBIC connector. To attach the Fibre Channel cables: 1. Consult the documentation for your host operating systems and Fibre Channel adapter cards for information on adding new devices. In particular, look for details on creating and configuring device files or drivers, and whether your system must be restarted before using new devices.
-
Page 35: Connecting The Ethernet Cables
5. Connect the AC power cord supplied with the Spectra 12000 library to the AC connector on the rear of the library. Connect the other end to a 110V AC outlet. 6. Put in the drive sleds, if they are not already installed. See Adding Drives on page 144 for more information. -
Page 36: Turning The Library On And Off
Turning the Library On and Off The Spectra 12000 library power switch is in the lower, left corner of the library’s rear panel (Figure 2-6). Power Supply AC Power Cable Socket Figure 2-6 Spectra 12000 library, rear view. Host/ Network... -
Page 37: Chapter 3. Using Security
3 Using Security Before you begin to configure your library, you should set up the security feature of the Spectra 12000 library. The Spectra 12000 library has a security feature that allows for three types of users: Š Super User—A Super User is allowed ultimate control of the library and controls who has access to the library. - Page 38 2. Tap Users, to display the Security screen (Figure 3-1). Figure 3-1 The Security screen. 3. Select the type of user you want to create in the Group Permissions box. 4. Tap the white text box next to User Name to display the virtual keyboard.
-
Page 39: To Delete A User
7. Tap the Add/Edit User arrow, the confirmation window will confirm that your security settings have been saved (Figure 3-2). Tap OK. Figure 3-2 The confirmation window. Note: If this is the first time using your library, you should delete the default Super User (SU) from your library before continuing. - Page 40 Spectra 12000 User Guide...
-
Page 41: Chapter 4. Partitioning The Spectra 12000 Library
4 Partitioning the Spectra 12000 Library This chapter includes: Š Displaying the Configuration Toolbar Š Partitioning the Library... -
Page 42: Displaying The Configuration Toolbar
Displaying the Configuration Toolbar The Library Controller lets you configure the library through the Configuration toolbar. This toolbar provides buttons you can use to configure all aspects of the library: Š Partitioning the physical library into logical libraries. Š Configuring drives. Š... -
Page 43: Partitioning The Library
Partitioning the Library The Spectra 12000 library provides Shared Library Services (SLS). You may partition the library so that it performs and looks like more than one partition up to a total of four partitions. Each library can be dedicated for a specific host or application. - Page 44 4. You can partition the library by editing the default partition (Library 1), and/or creating a new partition. Figure 4-2 Shared Library Services screen. 5. To create a new partition, tap New. To edit an existing partition, select the library and tap Edit. This displays the Edit Partition Configuration window (Figure 4-3).
- Page 45 6. Create or edit a partition using this window. Name... Tap the Name... button and enter the name in the keyboard dialog. Slots Tap the +/- buttons to add/remove slots in increments of 15. As you add or remove slots, the number of slots in the partition will appear between the +/- buttons, while the Slots Remaining field displays the number of unassigned slots available.
- Page 46 (QIPs) you have assigned to the new partition. Š To configure the Spectra 12000 S-QIP, go to Configuring the Spectra 12000 S-QIP on page 47. You will then need to configure any drives assigned in Configuring the Drives on page 107.
-
Page 47: Chapter 5. Configuring The Spectra 12000 S-Qip
5 Configuring the Spectra 12000 S-QIP This chapter includes: Š Displaying the Configuration Toolbar Š Configuring S-QIPs Š S-QIP Configure Controller Screen... -
Page 48: Displaying The Configuration Toolbar
Displaying the Configuration Toolbar The Library Controller lets you configure the library through the Configuration toolbar. This toolbar provides buttons you can use to configure all aspects of the library: Š Partitioning the physical library into libraries. Š Configuring drives. Š... -
Page 49: Configuring S-Qips
Chapter 5. Configuring the Spectra 12000 S-QIP 49 Configuring S-QIPs The Library Controller allows the user to configure SCSI controllers (S- QIPs) in a number of ways. To configure S-QIPs: 1. From the Configuration toolbar, select the Partitions icon. This brings up the Shared Library Services screen. - Page 50 3. Tap Edit. The Edit Partition Configuration window appears (Figure 5-3). Figure 5-3 Edit Partition Configuration window. 4. In the Drives section, select the controller you would like to configure by tapping the drive it is connected to. Tap Configure Controller.
-
Page 51: S-Qip Configure Controller Screen
S-QIP Configure Controller Screen S-QIP Default ID Settings Note: Each S-QIP bus must have an ID unique to that bus. This allows the S-QIP to initiate commands to the drive. Each S-QIP uses two SCSI busses, and each bus must have a SCSI ID unique to that SCSI bus. - Page 52 Note: When configuring the Spectra 12000 library as one logical library, one bus on any QIP must have the option Exports a Logical Library enabled to provide the robotics control interface to a host. The Exports a Logical Library check box indicates that this bus is the one that will be...
- Page 53 You can also use the Controller Configuration screen to configure the QIPs. To do this, tap Controllers on the Configuration Toolbar. This opens the Controller Configuration screen (Figure 5-5). Figure 5-5 Controller Configuration screen. The Controller Configuration screen displays the following information: Š...
- Page 54 Spectra 12000 User Guide...
-
Page 55: Chapter 6. Configuring The Spectra 12000 Library F-Qip
6 Configuring the Spectra 12000 Library F-QIP This chapter includes: Š Displaying the Configuration Toolbar Š Configuring F-QIPs Š F-QIP Configure Controller Screen Š About Serverless Backup Š Configuring the F-QIP for Serverless Backup... -
Page 56: Displaying The Configuration Toolbar
Displaying the Configuration Toolbar The Library Controller lets you configure the library through the Configuration toolbar. This toolbar provides buttons you can use to configure all aspects of the library: Š Partitioning the physical library into logical libraries. Š Configuring drives. Š... - Page 57 2. From Configuration toolbar, select the Partitions icon. This brings up the Shared Library Services screen. Figure 6-2 Shared Library Services screen. 3. Select the partition that contains the controller you want to configure. 4. Tap Edit. The Edit Partition Configuration window appears (Figure 6-3).
-
Page 58: F-Qip Configure Controller Screen
5. In the Drives window, select the controller you want to configure by tapping the drive it is connected to. 6. Tap Configure Controller. This brings up the Controller Configuration window. F-QIP Configure Controller Screen In the F-QIP Configure Controller window (Figure 6-4), you can implement the following options. - Page 59 Exports a Logical Library Check here to configure a bus on the F-QIP to export a logical library. Note: When configuring the Spectra 12000 library as one logical library, one bus on any QIP must have the option Exports a Logical Library enabled to provide the robotics control interface to a host.
- Page 60 Spectra 12000 User Guide GBIC Ports Tap GBIC Ports to configure the GBIC ports. The Configure GBIC Ports window appears (Figure 6-5). Figure 6-5 Controller GBIC Ports window. This determines which drives and libraries are available from each GBIC. Side A includes Library 1 and you can assign any or all of the four available drives by checking them.
-
Page 61: About Serverless Backup
Xcopy commands as specified in the SCSI protocol. The Xcopy command set allows a device to read blocks of data from another compliant device. In a Serverless backup environment the Spectra Logic library reads data from the disk device and writes it directly to tape. -
Page 62: Enabling Serverless Backup
Figure 6-6 The System Setup screen. 2. To enable Serverless Backup, you will need to obtain an activation key from Spectra Logic. Contact Spectra Logic with the serial number of the device, as displayed in the Serial # field, to obtain the activation key. - Page 63 1. Open the Configuration toolbar and tap Controller. The Configure Controller screen appears 2. Select the F-QIP you want to enable Serverless Backup on. The Configure Controller window appears Figure 6-7 The Configure Controller window. 3. Tap the box next to Disable Initiator to uncheck it. Go to Configuring the Drives on page 107 to complete the configuration procedure.
- Page 64 Spectra 12000 User Guide...
-
Page 65: Chapter 7. Configuring The Spectra 12000 E-Qip
7 Configuring the Spectra 12000 E-QIP This chapter includes: Š About TAOS™ Š TAOS User Interfaces Š Connecting to the Serial Port Š Setting Up the E-QIP Š Setting Up TAOS ITP Š Setting Up NDMP Enabled by TAOS... -
Page 66: About Taos
The Spectra Logic TAOS operating system architecture is an innovative approach to sharing tape backup resources among hosts. The TAOS enabled Spectra 12000 E-QIP has an ethernet interface and the ability to enable one of two components: TAOS ITP or TAOS NDMP. -
Page 67: Sharing Tape Devices
Access to TAOS NDMP functionality is also password protected--any NAS host wishing to write to the Spectra 12000 library must authenticate themselves with the correct username and password. This is also generally set up in the backup software. -
Page 68: Connecting To The Serial Port
This chapter will guide you through the installation process for TAOS ITP and TAOS NDMP, using both interfaces. Both are described in further detail in the appendices. Connecting to the Serial Port Connect a serial cable to the E-QIP diagnostic port, labeled DIAG 1, with a serial port terminal emulation application like HyperTerminal running on a host computer. -
Page 69: Setting Up The E-Qip
Chapter 7. Configuring the Spectra 12000 E-QIP 69 The TAOS Configuration menu displays: Figure 7-2 The TAOS Configuration menu. Setting Up the E-QIP Password Configuration As shipped, the serial port configuration menu is not password protected. To prevent unauthorized users from changing the E-QIP’s... -
Page 70: Ethernet Configuration
Spectra 12000 User Guide configuration settings, you should enable a password. To launch the Password Configuration menu, select 1 . Figure 7-3 The Password Configuration menu. [1] Set Password: Select to set or change the password. If changing the password, you will be prompted to enter your password, then prompted to enter it again. - Page 71 these to values appropriate to your site before attaching the E-QIP to your network. To launch the Ethernet Configuration menu, select 3 . Figure 7-4 The Ethernet Configuration menu. To configure the ethernet port, use the following commands: [1] DHCP: Either enabled or disabled. Make sure to provide a hostname when DHCP is enabled;...
-
Page 72: Setting Up Taos Itp
Spectra 12000 User Guide [4] IP subnet mask: IP network mask (standard IP parameter). [5] IP gateway: Gateway address (standard IP parameter). [?] Help: Displays help for this menu. [Esc] Returns you to the main menu Setting Up TAOS ITP... -
Page 73: Taos Itp Driver Installation
[2] Add secured IP range: If you have set ITP security, use this option to add a secured IP range. If security is turned on, the E-QIP will only respond to hosts in the secured IP address range(s). [3] Delete secured IP range: Use this option to delete a secured IP range. [4] Clear all secured IP ranges: Use this to clear all IP ranges you have secured. - Page 74 Spectra 12000 User Guide Installing TAOS ITP on Windows NT To install TAOS ITP on Windows NT: 1. Insert the TAOS ITP disk into your CD-ROM drive and browse to the NT folder on your CD-ROM drive. 2. Double-click on setup to start the InstallShield Wizard.
- Page 75 4. Read the License Agreement. If you accept the terms of agreement, check the box labeled I accept the terms in the license agreement and click Next. (Figure 7-7) Figure 7-7 The TAOS ITP License Agreement, click Next. Note: You must accept the terms of the License Agreement to continue with the installation.
- Page 76 Spectra 12000 User Guide 5. Click Next to install to C:\Program Files\Spectra Logic\TAOS\. Click to install to a different destination (Figure 7-8). Change Figure 7-8 The Destination folder window.
- Page 77 Chapter 7. Configuring the Spectra 12000 E-QIP 77 to insta 6. Click Install ll the TAOS ITP control panel and driver. Click Back to review or change installation settings (Figure 7-9). Figure 7-9 The Install the Control Panel and Driver Window, click...
- Page 78 7. The TAOS ITP Configuration window appears (Figure 7-10). Figure 7-10 Device Discovery on the TAOS ITP Configuration control panel. Note: Your library host name will appear instead of deneciah. As long your Windows NT system and TAOS enabled device are on the same subnet system, the TAOS enabled device will be listed on the Device Discovery window.
- Page 79 8. click on the square box next to the TAOS enabled device to check- mark each TAOS enabled device you want installed (Figure 7-11). Figure 7-11 Device Discovery on the TAOS ITP Configuration control panel, with the device selected. 9. Click on the + symbol to display all the devices located within the TAOS enabled device and verify all devices are checked.
- Page 80 Spectra 12000 User Guide 13. Click Finish to complete the installation (Figure 7-12). Figure 7-12 Click Finish. 14. Click Yes to reboot the system (Figure 7-13). Figure 7-13 Click Yes. Any TAOS devices you have installed are now configured and ready.
- Page 81 Chapter 7. Configuring the Spectra 12000 E-QIP 81 Installing TAOS ITP on Windows 2000 1. Insert the TAOS ITP disk into your CD-ROM drive. 2. Click on My Computer., and open the 2000 folder on your CD. 3. Double-click on setup.
- Page 82 5. Read the License Agreement. If you accept the terms of the agreement, check the box labeled I accept the terms in the license agreement and click Next Figure 7-15 The License Agreement window. Note: You must accept the terms of the License Agreement to continue with the installation.
- Page 83 Chapter 7. Configuring the Spectra 12000 E-QIP 83 6. Click Next to install to C:\Program Files\Spectra Logic\TAOS\. Click Change to install to a different destination Figure 7-16 The Destination folder window.
- Page 84 7. Click Install to install the TAOS ITP control panel and driver. Click Back to review or change installation settings Figure 7-17 The Install the TAOS ITP control panel and driver Window, click Install. 8. Wait for the TAOS ITP installation to complete.
- Page 85 9. The TAOS ITP Configuration window appears (Figure 7-18). Figure 7-18 Device Discovery on the TAOS ITP Configuration control panel. Note: Your library host name will appear instead of deneciah. As long your Windows NT system and TAOS enabled device are on the same subnet system, the TAOS enabled device will be listed in the Device Discovery window.
- Page 86 10. Click on the square box next to the TAOS enabled device to check- mark each TAOS enabled device you want installed (Figure 7-19). Figure 7-19 Device Discovery on the TAOS ITP Configuration control panel, with the device selected. 11. Click on the + symbol to display all the devices located within the TAOS enabled device and verify all devices are checked.
- Page 87 Chapter 7. Configuring the Spectra 12000 E-QIP 87 16. Select Add/Troubleshoot a device and click Next (Figure 7-20). Figure 7-20 Install the TAOS ITP control panel and driver. and click 17. Select Add a new device Next (Figure 7-21) Figure 7-21 Install the TAOS ITP control panel and driver.
- Page 88 18. Select No, I want to select the hardware from a list and click Next (Figure 7-22). Figure 7-22 The Find New Hardware Window. 19. Highlight SCSI and RAID controllers from the list and click Next (Figure 7-23). Figure 7-23 The Hardware Type window.
- Page 89 Chapter 7. Configuring the Spectra 12000 E-QIP 89 20. Click the Have Disk… button (Figure 7-24). Figure 7-24 The Select a Device Driver window, click Have Disk. 21. Click Browse. 22. Navigate to the TAOSitp.inf file on your TAOS CD and click Open.
- Page 90 Spectra 12000 User Guide 24. Highlight TAOS ITP SCSI Adapter and click Next (Figure 7-25). Figure 7-25 The Select a Device Driver Window, click Next. 25. A dialog box appears. Click OK (Figure 7-26). Figure 7-26 An Add Remove Hardware dialog box, click OK.
- Page 91 26. Highlight Input/Output Range and click on Change Setting… (Figure 7-27). Figure 7-27 The Add New Hardware Wizard Properties window, click Change Setting. 27. The Edit Input/Output Range dialog box appears. Look in the Conflict information field to see if any device conflicts.
- Page 92 28. If no devices are conflicting, click OK. If another device does conflict, press the up arrow button to increment the value until no devices conflict, then click OK (Figure 7-28). Figure 7-28 The Edit Input/Output Range dialog box, click OK.
- Page 93 29. The Add New Hardware Wizard Properties dialog box reappears. Click OK. Figure 7-29 The Add New Hardware Wizard Properties window, click OK. 30. Click Yes in the Creating a Forced Configuration dialog box (Figure 7-30). Figure 7-30 The Creating a Forced Configuration dialog box, click Yes.
- Page 94 31. The Add/Remove Hardware Wizard is now ready to install the driver. Click Next (Figure 7-31). Figure 7-31 The Start Hardware Installation window, click Next. 32. When The Digital Signature Not Found dialog box appears, click Yes (Figure 7-32). Figure 7-32 The Digital Signature Not Found dialog box, click Yes.
- Page 95 33. Click Finish to complete the installation (Figure 7-33). Figure 7-33 The Completing the Add/Remove Hardware Wizard window, click Finish. 34. Click Yes to reboot the system. The TAOS ITP driver will be loaded when the system restarts (Figure 7-34). Figure 7-34 The Systems Settings Change dialog box, click Yes.
- Page 96 TAOS ITP is supported on Solaris versions 2.6 and later. Caution: TAOS ITP must be used with a software package that provides a Shared Storage Option (SSO) type arbitration between machines that backup to the library. If you do not have an SSO type option, the only valid configuration is one computer per library.
- Page 97 11. When satisfied with the device list, enter y to accept devices. After configuring the /devices and /dev directories, links will be created in the appropriate directories for the various target drivers. Each TAOS device requires a separate instance of the HBA device driver, and will appear as a separate SCSI adapter.
- Page 98 Installing TAOS ITP on Linux Caution: TAOS ITP must be used with a software package that provides a Shared Storage Option (SSO) type arbitration between machines that backup to the library. If you do not have an SSO type option, the only valid configuration is one computer per library.
- Page 99 Chapter 7. Configuring the Spectra 12000 E-QIP 99 To verify connectivity, load a tape to the drive and use the mt or the tar command. Use the mtx command to verify communication with the library. You are now ready to install the backup package of your choice.
-
Page 100: Setting Up Ndmp Enabled By Taos
Contact Spectra Logic with the identifier of the device, as displayed on this page, to obtain the activation key. [1] Change option code: Enter the option code from Spectra Logic to enable options. [?] Help: Displays help for this menu. -
Page 101: Configuring Ndmp Enabled By Taos
Chapter 7. Configuring the Spectra 12000 E-QIP 101 Configuring NDMP Enabled by TAOS You will need to assign a user name and password which will be used to gain access to the backup resources--drives and/or libraries--under the control of the TAOS NDMP agent. - Page 102 102 Spectra 12000 User Guide 2. To modify the password select Login password. The password will not be echoed. Figure 7-37 The TAOS NDMP Configuration menu, select [2] to login password.
- Page 103 Chapter 7. Configuring the Spectra 12000 E-QIP 103 3. Enter the password again to confirm. Figure 7-38 The TAOS NDMP Configuration menu. 4. Tap Esc to return to the main menu.
- Page 104 104 Spectra 12000 User Guide 5. Select Save changes to save the NDMP user name and password. Figure 7-39 The TAOS Configuration menu, select [7] to save changes.
- Page 105 Chapter 7. Configuring the Spectra 12000 E-QIP 105 6. Tap y to confirm changes. Figure 7-40 The TAOS Configuration menu. 7. Tap y to reboot. After a reboot the TAOS NDMP agent is ready for use.
- Page 106 106 Spectra 12000 User Guide...
-
Page 107: Chapter 8. Configuring The Drives
8 Configuring the Drives This chapter includes: Š Configuring SCSI IDs, Emulation and Dip Switch Settings... -
Page 108: Configuring Scsi Ids, Emulation And Dip Switch Settings
Configuring SCSI IDs, Emulation and Dip Switch Settings Note: Setting SCSI IDs applies to S-QIPs and L-QIPs only. F-QIP drive IDs are hard coded and cannot be modified. 1. Select Partitions from the Configuration toolbar. This brings up the Shared Library Services screen. Figure 8-1 Shared Library Services screen. - Page 109 3. Tap Edit. The Edit Partition Configuration window appears (Figure 8-2). Figure 8-2 Partition Configuration window. 4. In the Drive Configuration screen, select the drive you wish to configure. Tap Configure Drives. This brings up the Drive Configuration window (Figure 8-3). Figure 8-3 Drive Configuration window.
- Page 110 Step 6 through Step 11 are only necessary in special circumstances. Refer to the Spectra Logic Server Setup Guide to see if you need to set drive switch settings or drive emulation for your operating system.
- Page 111 Note: Do not set the drive switches manually unless one of the preset drive switch settings doesn’t work with your operating system. If you need to set drive switches manually, call Spectra Logic Technical Support at (800) 227-4637 for help. 8. Set the switches and tap OK to exit.
- Page 112 You can also configure the drives using the Drive Configuration screen. To do this: 1. Tap the Drives button on the Configuration Toolbar. This opens the Drive Configuration screen (Figure 8-6). Figure 8-6 Drive Configuration screen. 2. Tap the drive you want to configure and tap Configure. The Drive Configuration window appears, displaying the following: Š...
-
Page 113: Chapter 9. Using The Spectra 12000 Library
9 Using the Spectra 12000 Library This chapter reviews: Š Checking Library Status Š Checking Robotics Š Checking Inventory Š Checking Drives Š Checking Diagnostics Š Updating Firmware Š Viewing the F-QIP Configuration Š Checking Resources in Use Š Deleting a Partition Configuration... -
Page 114: Checking Library Status
114 Spectra 12000 User Guide Checking Library Status The General Status screen shows details about the library’s robotics, its media and its drives (Figure 9-1). Figure 9-1 General Status screen. -
Page 115: Checking Robotics
To Enable Keys To enable keys, you will first need to obtain an activation key from Spectra Logic. Contact Spectra Logic with the serial number of the device, as displayed in the Serial # field, to obtain the activation key. -
Page 116: To Set Ip Addresses
Inserting and Ejecting Cartridges We recommend you use the Inventory screen only for inserting new media or to remove ejected tapes from the E/E port. Use your backup software to move AIT cartridges and to eject backups for offsite and offline storage. -
Page 117: Insert New Media
Insert New Media To insert new media: 1. From the General Status screen, tap Inventory. This brings up the Inventory screen (Figure 9-3). Figure 9-3 Inventory screen. 2. Tap Partitions in the upper right-hand corner of the screen to display the pull-down menu (Figure 9-4). -
Page 118: Eject Media
5. Tap Open/Close. A window pops up asking Open Entry/Exit Port? Tap OK. This opens the E/E port. 6. Insert the new media into any slot. Take note of the slot number. 7. Tap Open/Close. A window pops up asking Close Entry/Exit Port? Tap OK. - Page 119 To eject media through the Library Controller: 1. From the General Status screen, tap Inventory. This brings up the Inventory screen (Figure 9-5). Figure 9-5 Inventory screen. 2. Tap Total Library in the upper right corner of the screen to display the pull-down menu (Figure 9-6).
- Page 120 5. Select the slot (from Tape Slots box) that holds the media you wish to eject. Then select a slot in the Entry/Exit Port box. 6. Tap Move. 7. Tap Open/Close. A window pops up asking Open Entry/Exit Port? Tap OK.
-
Page 121: Checking Drives
Chapter 9. Using the Spectra 12000 Library 121 Checking Drives To see more data about drives, and to configure or replace them: From the General status screen, tap Drives (Figure 9-7). Figure 9-7 Drive Configuration screen. Checking Drive Status Select a drive, then tap Configure. This takes you to the Drive Configuration screen. -
Page 122: The Maintenance Toolbar
The Maintenance Toolbar The Maintenance toolbar icons are: Š Diagnostics Š Update F/W (firmware) Š Traces Š Help Figure 9-8 Maintenance Toolbar... -
Page 123: Checking Diagnostics
For example, when loading picker firmware, the picker must not be in use. Updates to internal library software (i.e., firmware) are available from Spectra Logic. To view the minimum recommended firmware levels, go to: http://www.spectralogic.com/support/firmware_12k_64k.cfm. To update: 1. - Page 124 3. Select Local Directory in the File Locations section. This is where the firmware files will come from. 4. Tap Select Location. This will update the available updates list from the local firmware directory. 5. Select the component you want to update from the Components section.
-
Page 125: Accessing Firmware From A Remote Server
4. Go to Step 5 on page 124, to complete the update procedure. Accessing Firmware from an Alternate Location Some sites might not be able to access Spectra Logic’s Web site because of firewalls or proxy server configuration. In these instances, the updates can be placed on a local Web server. - Page 126 9. Select Spectra Logic Form the Firmware Servers list. 10. Select Select Location. This will update the Available Updates list from the Remote Server. 11. Go to Step 5 on page 124, to complete the update procedure. To Upgrade from Floppy Disks (Spectra Logic P.N. 90919021) If you prefer, you can update firmware from floppy disks.
-
Page 127: Reset Picker Parameters
5. The Library Controller alerts the user Configuration of QIP (X) Bus (X) Does Not Match Front Panel for each logical library. Tap OK. This message will not appear after all QIPs have been upgraded. 6. Once you have the firmware files added to the local directory, go to Updating Firmware on page 123. - Page 128 128 Spectra 12000 User Guide 9. Select Run Test. 10. After the test has completed, restart the library.
-
Page 129: Viewing The F-Qip Configuration
Viewing the F-QIP Configuration You can view the current F-QIP configurations from the Diagnostics screen. Follow these steps: 1. Go to the Library Controller. Pull down the Toolbars menu and select the Maintenance toolbar. 2. Tap the Diagnostics icon in the Maintenance toolbar and the Diagnostics screen appears (Figure 9-12). -
Page 130: Checking Resources In Use
3. Use the +/- buttons to select View F-QIP Configuration and tap Run Test. This brings up the View Diagnostic Trace window, showing the F-QIP configurations (Figure 9-13). Figure 9-13 F-QIP configuration. On this screen you can see the current settings for the F-QIP configurations, Loop Address, Disable Initiator settings, etc. - Page 131 3. Select the partition or All Partitions, then tap Resources. Figure 9-14 Partition Resources screen. 4. The Partition Resources screen appears, showing data about drive and controller cards, and their SCSI IDs. It also shows information about magazines in use. To edit partitions, follow the instructions in Partitioning the Spectra 12000 Library on page 41.
-
Page 132: Deleting A Partition Configuration
Deleting a Partition Configuration To delete a configured partition: 1. On the Library Controller, tap Toolbars, then tap Configuration. The Configuration toolbar displays. 2. Tap the Partition icon on the Configuration toolbar. The Shared Library Services screen displays. 3. Select the partition and click Delete. -
Page 133: Chapter 10. Using The Drive
10 Using the Drive This chapter reviews: Š Bar Code Labels Š Using AIT Data Cartridges Š Write-Protecting and Recording Š Storing Cartridges Outside the Library Š Caring for Data Cartridges Š Cleaning the AIT Drive Heads... -
Page 134: Bar Code Labels
Number of Characters Use labels with eight or fewer characters (including zeros). Checksums Bar code labels are available with or without checksum characters; the Spectra 12000 library accepts only bar code labels with a checksum character. Note: Use AIT Code 39 labels with checksum. -
Page 135: Using Ait Data Cartridges
Chapter 10. Using the Drive 135 of the cartridge as shown below. Numbers Bars Memory In Cassette (MIC) Read/Write protect switch Figure 10-1 Bar code label on AIT-2 cartridge. Using AIT Data Cartridges The AIT-2 and AIT-3 data cartridges are the only cartridge that incorporate the unique Memory In Cassette (MIC) feature. -
Page 136: Write-Protecting And Recording
Cartridge door Top of the AIT-2 cartridge indicated by the clear plastic window Bar code label Figure 10-2 Installing data cartridge into tape slot. Write-Protecting and Recording The write-protect tab on the cartridge prevents accidental data erasure. To use the write protect tab on the data cartridge: 1. -
Page 137: Storing Cartridges Outside The Library
Š Attach the clear plastic lid to the front of the cartridge pack to shield the data cartridges from dust and other debris while in storage. Š Follow the tape storage suggestions described in Caring for Data Cartridges on page 137. -
Page 138: Cleaning The Ait Drive Heads
Š Avoid rapid temperature changes. Figure 10-3 AIT-2 data cartridges. Cleaning the AIT Drive Heads The Sony AIT drives feature a built in cleaning function to prevent and recover from head contamination. However, occasional cleaning with approved SONY Cleaning Media may be required for excessive head contamination. - Page 139 scheduled automatic head cleaning of tape libraries. Scheduled cleaning should be considered in installations having high amounts of airborne particulates. Caution: Do not use the cleaning cartridge for more than the number of specified cleaning cycles indicated on the cartridge label. Mark the cleaning cartridge each time you use it, or use backup software to track cleaning cartridge usage.
- Page 140 6. Tap Move. The Confirm Move window appears: Figure 10-5 The Confirm Move window. 7. Tap Drive Clean. 8. The cleaning cartridge moves to the selected drive, and begins cleaning the heads automatically. The library moves the cartridge back to the slot you selected for it originally. 9.
-
Page 141: Chapter 11. Maintaining The Spectra 12000 Library
11 Maintaining the Spectra 12000 Library Spectra 12000 libraries are easy to maintain. This chapter reviews: Š Changing the Spectra 12000 Library Air Filters Š Adding Drives Š Adding QIPs Š Troubleshooting the Spectra 12000 Library Š Purchasing Additional Accessories Š... -
Page 142: Changing The Spectra 12000 Library Air Filters
Changing the Spectra 12000 Library Air Filters Spectra 12000 libraries have three replaceable filters inside the front door. Inspect filters every three to four months and replace as necessary. If a filter is contaminated, replace it with a new filter. A clogged air filter blocks air movement within the library, resulting in higher temperatures inside the library. - Page 143 7. Slide the filter assembly up and out from the door to disengage the four metal hooks. 8. Inspect the filter and replace it if necessary. 9. Remove the old filter by pulling it out from under the six tabs on the filter bracket.
-
Page 144: Adding Drives
Adding Drives The Spectra 12000 library readily accepts additional drives up to a maximum of eight drives. Although robotic operations are disabled when the front door is open, the library continues operation while you add or remove a drive. No tools are required. - Page 145 7. Use the door key to open the library door. 8. Slide the new drive into the appropriate slot for the QIP it will be attached to. Figure 11-3 Adding a drive. 9. Press the drive firmly inward until the LED lights and position it so it is flush with the right side of the library chassis.
- Page 146 13. The Drive Configuration window automatically pops up. Figure 11-4 The Drive Configuration window. The Drive Configuration screen displays the drive you added, as well as any other drive on the same bus. From the Drive Configuration screen, you can set emulation and SCSI IDs.
- Page 147 15. Tap Presets to select drive switch settings and emulation for your operating system (Figure 11-5). Select your operating system and tap OK. If the selections do not include your operating system, tap Cancel. Figure 11-5 The Drive Configuration Presets window. 16.
- Page 148 Note: Do not set the drive switches manually unless one of the preset drive switch settings doesn’t work with your operating system. If you need to set drive switches manually, call Spectra Logic Technical Support at (800) 227-4637 for help. 17.
-
Page 149: Adding Qips
Adding QIPs Power Supply AC Power Cable Socket Figure 11-7 Spectra 12000 library, rear view. 1. Make sure you have four feet of clearance at the back of the library. Host/ Network Cabling (QIPs, SCSI displayed) On/Off Switch... - Page 150 4. Connect cabling, as described in Connecting the SCSI Cables and Terminators on page 32. 5. Configure the QIPs: Š If an S-QIP turn to Configuring the Spectra 12000 S-QIP on page 47. Š If an F-QIP turn to Configuring the Spectra 12000 Library F-QIP on page 55.
-
Page 151: Troubleshooting The Spectra 12000 Library
Troubleshooting the Spectra 12000 Library The following procedures solve many common problems: Š Troubleshooting Library Initialization Š Troubleshooting SCSI Problems Š Troubleshooting Fibre Channel Device Problems Troubleshooting Library Initialization To troubleshoot problems with the library initialization: 1. Make sure the power cable is securely inserted in the library and the wall outlet. -
Page 152: Troubleshooting Fibre Channel Device Problems
4. Make sure the latest driver has been loaded from the Host Adapter manufacturer’s site. 5. Follow guidelines in the Spectra Logic Server Setup Guide located on the Spectra Logic Web site at: www.spectralogic.com. 6. Check if all devices attached to the loop are in our interoperability matrix. -
Page 153: Purchasing Additional Accessories
Spectra Logic accessories are available directly from Spectra Logic (including bar code labels numbered sequentially from 0000000 to 0000179 and from 0000000 to 0000719). To order approved Spectra Logic accessories, call toll free (800) 833- 1132, and ask for a sales representative. Accessory... -
Page 154: Purchasing Custom Bar Code Label Sequences
CoD is a capacity on demand feature that allows customers to activate additional capacity in their tape library as their storage needs grow. Spectra Logic’s CoD eliminates the need to estimate data growth curves and future storage needs, saving time and money. -
Page 155: To Enable Cod
Figure 11-9 The System Setup screen. 2. To enable CoD, you will need to obtain an enablement key from Spectra Logic. Contact Spectra Logic with the serial number of the device, as displayed in the Serial # field, to obtain the activation key. - Page 156 156 Spectra 12000 User Guide...
-
Page 157: Appendix A. Fibre Channel Cable Requirements
Appendix A. Fibre Channel Cable Requirements To operate correctly, the Spectra 12000 library must meet certain Fibre Channel Cable Requirements: Fibre Channel Cable Requirements All Fibre Channel cabling sho Signaling Interface - 3, (Fc-Ph-3), Rev 9.3. Cable Feature Standard Construction... - Page 158 158 Spectra 12000 User Guide...
-
Page 159: Appendix B. Scsi Cable And Terminator Requirements
Appendix B. SCSI Cable and Terminator Requirements To operate correctly, the Spectra 12000 library must meet certain requirements which are discussed in the following sections: Š SCSI Cable Requirements Š SCSI Terminator Requirements SCSI Cable Requirements The following table lists the recommended specifications for a SCSI... -
Page 160: Scsi Terminator Requirements
SCSI connector on the back of the library. The SCSI terminator must be the correct SCSI type, either Differential or LVD. Two terminators are provided for each QIP. Note: For best performance, use the terminator included with the Spectra 12000 library. -
Page 161: Appendix C. Specifications
Appendix C. Specifications This appendix contains the following information. Š Sony AIT Tape Specifications Š Sony AIT-2 Tape Drive Specifications Š Sony AIT-3 Tape Drive Specifications Š Power Requirements Š Operating Environment Limits Sony AIT Tape Specifications Sony is the only manufacturer of AIT-2 and AIT-3 tape cartridges. The table below lists the capacity of the AIT-2 or AIT-3 tape cartridge. -
Page 162: Sony Ait-2 Tape Drive Specifications
Burst transfer rate a. The upper limit applies to the drives themselves. The temperature limits for the Spectra 12000 library are given in Operating Environment Limits on page 165. Be sure there is adequate air flow around the library at all times. -
Page 163: Sony Ait-3 Tape Drive Specifications
Burst transfer rate a. The upper limit applies to the drives themselves. The temperature limits for the Spectra 12000 library are given in Operating Environment Limits on page 165. Be sure there is adequate air flow around the library at all times. -
Page 164: Power Requirements
Power Requirements Spectra 12000 Library Power requirements for the Spectra 12000 library are listed in the table below: Source Input Voltage Input Power Input Frequency Power Cable The power cable included with the Spectra 12000 library is a standard, three conductor cord safe for 120 volt use in the United States and Canada. -
Page 165: Operating Environment Limits
Place the library and media in a reasonably controlled environment that does not exceed the environment limits listed in the table below. Condition Operating Temperature (Ambient Outside Library) Storage Temperature Relative Humidity (non-condens- ing) Max. wet bulb temperature Altitude Acoustic Noise Limits The overall A-weighted sound power level (in decibels) for the library does not exceed the limits listed below. -
Page 166: Shock And Vibration Specifications
Shock and Vibration Specifications Load Shock (operating, no data loss) Shock (non-operating, no device damage) Vibration (operating) Vibration (non-operating) a. Half sine, 3 axis, 3 direction, 10 second interval. b. Swept sine 5 to 500 Hz, 1 Octave per minute, 3 axis, 3 directions. -
Page 167: Appendix D. Regulatory And Safety Standards
Appendix D. Regulatory and Safety Standards The Spectra 12000 library complies with the following regulatory and safety standards and is authorized to bear the mark of the corresponding agencies. Safety Standards Š UL-1950 Š C-UL (Tested to CSA 950 Standards) -
Page 168: Eu Declaration Of Conformity
1700 North 55th Street Boulder, Colorado 80301 USA declare under sole responsibility that Spectra Logic’s Spectra 12000 libraries to which this declaration relates, meets the essential health and safety requirements and is in conformity with the EU Directives listed below using the relevant section of the EU standards and other normative documents. -
Page 169: Japan Vcci Class A Statement
The Spectra 12000 library complies with all safety relevant provisions referring to: Š Protection against electrical hazards Š Protection against such hazards as: • Mechanical Hazards • Fire Hazards • Noise • Vibration The safety issues of this information technology equipment type have been evaluated by an accredited third party organization. - Page 170 170 Spectra 12000 User Guide...
-
Page 171: Appendix E. Using The Taos Itp Control Panel To View Settings
Appendix E. Using the TAOS ITP Control Panel to View Settings Opening the TAOS ITP Configuration Control Panel To open the TAOS ITP Configuration Control Panel: 1. Click on Start, Settings, then Control Panel. 2. Click on the TAOS ITP icon. The Device Discovery option on the TAOS ITP Configuration window displays (Figure 11-10). -
Page 172: Device Discovery
172 Spectra 12000 User Guide Device Discovery Use this screen to view the TAOS enabled new devices attached to the network. Installed Devices Use this screen to show installed devices. Ethernet Use this to view the standard IP address, the IP network mask, the IP gateway, and whether DHCP has been enabled or disabled. -
Page 173: Appendix F. Using The Serial Port Interface
Appendix F. Using the Serial Port Interface Connect a serial cable to the E-QIP diagnostic port, labeled DIAG 1, with a serial port terminal emulation application like HyperTerminal running on a host computer. The serial port settings are as follows: Figure 11-11 Serial port settings. - Page 174 174 Spectra 12000 User Guide The TAOS Configuration menu displays: Figure 11-12 The TAOS Configuration menu.
-
Page 175: Password Configuration
Appendix F 175 Password Configuration The Password Configuration menu allows you to set or change the configuration password. To launch the Password Configuration menu, select 1 . Figure 11-13 The Password Configuration menu. [1] Set Password: Select to set or change the password. If changing the password, you will be prompted to enter your password, then prompted to enter it again. -
Page 176: Fibre Configuration
176 Spectra 12000 User Guide Fibre Configuration The Fibre Configuration menu allows you to configure the fibre port. To launch the Fibre Port Configuration menu, select 2 . Figure 11-14 The Fibre Configuration menu. To configure the fibre port, use the following commands: [1] Loop ID Type: Toggles between hard and soft loop ID. -
Page 177: Ethernet Configuration
Appendix F 177 Ethernet Configuration The Ethernet Configuration menu allows you to configure the ethernet port. To launch the Ethernet Configuration menu, select 3 . Figure 11-15 The Ethernet Configuration menu. To configure the ethernet port, use the following commands: [1] DHCP: Either enabled or disabled. -
Page 178: Taos Itp Configuration
[2] Add secured IP range: If you have set ITP security, use this option to add a secured IP range. If security is turned on, the Spectra 12000 library will only respond to hosts in the secured IP address range(s). -
Page 179: Taos Ndmp Configuration
Options Enablement menu, select 6 . Figure 11-17 The Option Enablement menu. Contact Spectra Logic with the identifier of the device, as displayed on this page, to obtain an option code value that will enable options for this device. -
Page 180: Save Changes
180 Spectra 12000 User Guide [1] Change option code: Enter the option code from Spectra Logic to enable options. [?] Help: Displays help for this menu. [Esc] Returns you to the main menu Save Changes Select 7 to save all changes made during the configuration session. -
Page 181: Glossary Of Terms
Glossary of Terms 10BaseT 10-Mbps baseband Ethernet specification using two pairs of twisted-pair cabling, one pair for transmitting data and the other for receiving data. 10BaseT has a distance limit of approximately 328 feet or 100 meters (see Ethernet). 100BaseT 100-Mbps baseband Fast Ethernet specification using UTP wiring. - Page 182 Error correction code. E/E Port Entry/Exit Port. The port through which you insert and remove data tape cartridges into your Spectra 12000 or Spectra 64000 libraries. Ethernet Ethernet uses a bus or star topology and supports data transfer rates of 10 Mbps and is one of the most widely implemented LAN standards.
- Page 183 See LC. GIG E Gigabit Ethernet. The latest version of Ethernet, supporting data transfer rates of 1 Gigabit per second. Graphical User Interface. The GUI for the Spectra 12000 library and the Spectra 64000 library is the Library Controller (LC). Host Bus Adaptor.
- Page 184 Network Attached Storage. NAS is a type of network environment that uses a NAS device solely dedicated to file sharing. Storage is not an integral part of the server in a NAS environment. The server still processes the data, but the NAS device delivers the data to the user.
- Page 185 Partition A process used to assign specific slot addresses and drives of the physical Spectra 12000 library or Spectra 64000 library to one or more logical libraries. Physical Library The entire library, regardless of how it is viewed or used across the network (that is, it may be viewed as one or more logical, or virtual libraries).
- Page 186 See Logical Library. A type of tape drive developed by Ecrix with a native capacity of 66 GB and a data transfer rate of 6 MB/sec. Windows Windows is a Mircrosoft operating system. ™ . A feature of Spectra Logic...
-
Page 187: Index
Index about TAOS AC power warning accessories purchasing air filter replacing air quality AIT data cartridges bar code labels checksums custom sequences ordering information cabling connecting Fibre Channel connecting SCSI cautions and warnings checksums cleaning cartridge ordering using cleaning the AIT drive heads configuration drives ethernet... - Page 188 data cartridge caring for inserting and ejecting moving purchasing specifications write-protect tab data cartridge pack bulk loading ordering information storing device problems Fibre Channel SCSI drive adding checking drive status cleaning the drive heads configuring SCSI IDs specifications cleaning the AIT drive heads using to insert/eject cartridges entry/exit port (see E/E) environmental parameters...
- Page 189 labels ordering bar code ordering custom requirements for bar code location library troubleshooting troubleshooting initialization logical library creating L-QIP location maintenance cleaning drive heads data cartridges MIC, memory in cassette NDMP configuring no power operating environment partition deleting partitioning the library password configuration power...
- Page 190 SAFE position on tape SCSI cable requirements configure controller screen configuring drive SCSI IDs connecting the cables terminator requirements troubleshooting partitioning the library specifications environmental operating environment power tape Spectra 64000 parts shipped with S-QIP configuration location storing cartridges outside the library TAOS overview TAOS ITP...
Need help?
Do you have a question about the Spectra 12000 and is the answer not in the manual?
Questions and answers