
Subscribe to Our Youtube Channel
Related Manuals for THORLABS vytran PTR406


Summary of Contents for THORLABS vytran PTR406
- Page 1 PTR406 & PTR406B Manual Fiber Recoaters with Linear Proof Testers User Guide Mold Assembly Sold Separately...
-
Page 2: Table Of Contents
Fiber Recoaters with Linear Proof Testers Table of Contents Warning Symbol Definitions ..................... 1 Safety........................... 2 Description ......................... 3 3.1. Introduction ........................3 3.2. Parts Checklist ......................3 Device Selection ........................ 5 4.1. Automatic and Remote Manual Injection System ............5 4.2. - Page 3 Fiber Recoaters with Linear Proof Testers 7.4.4. Material Usage (PTR406 Only) ................... 23 7.4.5. Process Counters ........................ 24 7.4.6. Terminal ..........................24 7.4.7. Version ..........................25 7.4.8. Export Log File ........................25 7.4.9. User ............................. 25 7.5. Accidental Reboot ...................... 29 Priming the PTR406/PTR406B ..................
- Page 4 Fiber Recoaters with Linear Proof Testers Appendix ........................... 48 14.1. Process Parameters ....................48 14.2. Material Data Safety Sheet ..................49 Compliance ........................57 Regulatory ........................58 Thorlabs Worldwide Contacts ..................59...
-
Page 5: Warning Symbol Definitions
Fiber Recoaters with Linear Proof Testers Chapter 1: Warning Symbol Definitions Warning Symbol Definitions Below is a list of warning symbols you may encounter in this manual or on your device. Symbol Description Direct Current Alternating Current Both Direct and Alternating Current Earth Ground Terminal Protective Conductor Terminal Frame or Chassis Terminal... -
Page 6: Safety
Fiber Recoaters with Linear Proof Testers Chapter 2: Safety Safety All statements regarding safety of operation and technical data in this instruction manual will only apply when the unit is operated correctly. SHOCK WARNING Unplug the power cord before servicing the unit. Do not operate the unit without all covers and items properly installed. -
Page 7: Description
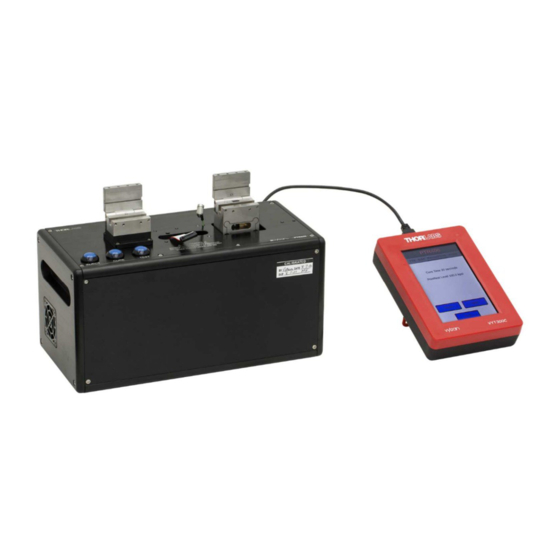
UV-Curable Acrylate Recoat Material (Purchased Separately) • For PTR406B Only: Manual Injector • If Ordered Separately: Injection Syringes and Cap If you are missing any of the above or need replacements, please contact Thorlabs. Rev A, September 14, 2020 Page 3... - Page 8 Fiber Recoaters with Linear Proof Testers Chapter 3: Description System Components Page 4 TTN176280-D02...
-
Page 9: Device Selection
Ø280 µm, Ø430 µm, or Ø600 µm fiber coatings. Custom mold sizes up to Ø900 µm are available; please contact Thorlabs for more information. Additional mold assemblies may also be purchased and swapped out by the user. The assembly simply screws to the top of the device, making the removal and installation simple and easy. -
Page 10: Setup
Fiber Recoaters with Linear Proof Testers Chapter 5: Setup Setup 5.1. Removing the Shipping Fixture Loosen the eight set screws in the bases of the fiber holding blocks. Open the lids. Remove the shipping fixture. Place it in a safe location. You may need it again, should you ever need to ship the unit back for service. 5.2. -
Page 11: Attaching The Recoat Mold Assembly
Fiber Recoaters with Linear Proof Testers Chapter 5: Setup Installing the Inserts 5.4. Attaching the Recoat Mold Assembly Make sure that the base plate and bottom of the mold assembly are cleaned of any dirt particles. Insert the pin assembly by inserting the long end into the recoat mold assembly. Verify that the pin assembly moves up and down freely. -
Page 12: Connecting The Cables
Fiber Recoaters with Linear Proof Testers Chapter 5: Setup Aligning the Recoat Mold Connect the green recoat material tube to the inject port on the top of the lid. 5.5. Connecting the Cables Plug in the AC power cord. The power supply accepts an AC input of 100 - 240 VAC;... -
Page 13: Priming The Mold
Fiber Recoaters with Linear Proof Testers Chapter 5: Setup Locate the USB Y-cable that is included with the unit. Locate the USB type A plug that is by itself on a long pigtail. Plug this USB plug into the top USB socket of the handset. -
Page 14: Controlling The Ptr406/Ptr406B
Fiber Recoaters with Linear Proof Testers Chapter 6: Controlling the PTR406/PTR406B Controlling the PTR406/PTR406B This device can be operated using either the three (3) buttons on the unit or with the Handset Controller. Handset Controller 6.1. Unit Control Buttons The PTR406/PTR406B has three Unit Control Buttons that enable the user to inject and cure recoat material as well as test the strength of a fusion splice. -
Page 15: Power Up
Fiber Recoaters with Linear Proof Testers Chapter 6: Controlling the PTR406/PTR406B 6.2. Power Up With the Handset Controller properly connected to the unit, turn on the PTR406/PTR406B using the switch located at the back of the unit. The system will go through an initialization process that takes from 15 to 90 seconds, during which time it will home and fill the internal recoat pump (if so equipped) and home the linear Proof Tester. - Page 16 Fiber Recoaters with Linear Proof Testers Chapter 6: Controlling the PTR406/PTR406B The main screen will also show the current status of any process that is running. Main Screen Showing Status To view and/or edit Inject, Cure, or Prooftest Parameters, touch “Edit” on the top toolbar (F) or swipe the screen to the right.
-
Page 17: Ptr406/Ptr406B Parameters
Fiber Recoaters with Linear Proof Testers Chapter 6: Controlling the PTR406/PTR406B Cure Parameter, Prooftest Parameters, and Inject Parameter Screens The On-Screen-Keyboard will allow entry of a new value for the selected parameter. Selecting “Ok” will close the Edit Screen and commit the new value to the PTR406/PTR406B. -
Page 18: Inject Parameters (Ptr406 Only)
Fiber Recoaters with Linear Proof Testers Chapter 6: Controlling the PTR406/PTR406B 6.4.1. Inject Parameters (PTR406 Only) The Inject parameters are defined as follows: Inject Quantity: The volume of recoat material in microliters (µl) injected into the mold. Inject Rate: The speed at which recoat material is injected into the mold in microliters per second (µl/sec). -
Page 19: Proof Test Parameters
Fiber Recoaters with Linear Proof Testers Chapter 6: Controlling the PTR406/PTR406B Warning Do not look directly at the recoat assembly while the recoat LEDs are on. The recoat LEDs emit ultra- violet radiation which can cause damage to the eyes. The mold must be closed during recoat LED operation. -
Page 20: Handset Controller Reference
Vytran LDC/PTR unit, the handset controller will turn on and will require approximately 1 minute of boot up time. At this time, the screen will display the Thorlabs logo, which may flash a few times. - Page 21 Fiber Recoaters with Linear Proof Testers Chapter 7: Handset Controller Reference The control buttons on the PTR406/406B Main Screen will perform the same function as the respective buttons on the PTR406/406B, invoking either Inject, Cure, or Test. Figure 14 PTR406 Main Screen – Action Buttons The parameter list provides an instant overview of the most relevant current parameters.
-
Page 22: File
Fiber Recoaters with Linear Proof Testers Chapter 7: Handset Controller Reference Runtime messages are displayed on the PTR Home screen when something important is happening such as curing and proof testing from the PTR. These messages are displayed between the parameter list and action buttons PTR406B Main Screen –... -
Page 23: Open File
Fiber Recoaters with Linear Proof Testers Chapter 7: Handset Controller Reference 7.2.1. Open File File Open Screen In File Open, Save File As screens, Delete File, Export Files, and Import Files, the existing files are listed in alphabetical order. Only files specific to a particular type of Vytran equipment are displayed in the list. E.g., if the User is working with a PTR406/406B, only files suitable for that machine are accessible. -
Page 24: Delete File
Fiber Recoaters with Linear Proof Testers Chapter 7: Handset Controller Reference Save File As allows custom fiber file names 7.2.4. Delete File Choose a file from a list of saved files to delete. 7.2.5. Export File Export a file from a list of saved files to an external USB flash drive. If no flash drive is detected, the handset will prompt the user to insert a flash drive. -
Page 25: Tools
Fiber Recoaters with Linear Proof Testers Chapter 7: Handset Controller Reference 7.4. Tools Each Vytran machine type has its own suite of tools designed to simplify certain tasks. Some of the tools are common to multiple machine types, others are unique to just one. Touching Tools brings up the Tool Selection Screen. -
Page 26: Purge (Ptr406 Only)
Fiber Recoaters with Linear Proof Testers Chapter 7: Handset Controller Reference 7.4.1. Purge (PTR406 Only) Allows the user to initiate a Purge sequence. Purging is a method of removing air bubbles or voids from the inject mechanism. The system should be purged whenever a new bottle of material is installed. Purge Screen 7.4.2. -
Page 27: Inject Calculator (Ptr406 Only)
Fiber Recoaters with Linear Proof Testers Chapter 7: Handset Controller Reference 7.4.3. Inject Calculator (PTR406 Only) The Inject Calculator will calculate the recommended Inject Quantity based upon the fiber and mold geometry. If you choose to use the recommended value, press the “Use Qty” button before closing this dialog window. Inject Calculator 7.4.4. -
Page 28: Process Counters
Fiber Recoaters with Linear Proof Testers Chapter 7: Handset Controller Reference 7.4.5. Process Counters The handset keeps a running counter for total elapsed cure time and, for the PTR406, the total number of Recoats performed. The handset must be connected to the unit at all times for these values to be accurate. These values can be cleared using the “Reset”... -
Page 29: Version
Fiber Recoaters with Linear Proof Testers Chapter 7: Handset Controller Reference 7.4.7. Version The Version screen will display the current module’s Firmware, Macro, and Setup versions. It will also display the Handset application version. In this screen, the user is able to update the Handset application via an external USB flash drive. - Page 30 Fiber Recoaters with Linear Proof Testers Chapter 7: Handset Controller Reference User Screen and Enter Password Screen If no password has been setup yet, the password is effectively an empty string. Touch the Enter Password button and press the Ok key to continue. If a password has been setup, enter the password. Passwords can be any characters, any length and are case sensitive.
- Page 31 Fiber Recoaters with Linear Proof Testers Chapter 7: Handset Controller Reference Change Password Screen The following User Access Levels can be set. • Full Access: allows full read-write access of parameters and files, the ability to change User Access Permissions. This is the default level and can be enabled by setting the password to an empty string. •...
- Page 32 Fiber Recoaters with Linear Proof Testers Chapter 7: Handset Controller Reference User- Three levels of user access displayed at the top of the screen File Menu with “No Read or Write” enabled Page 28 TTN176280-D02...
-
Page 33: Accidental Reboot
Fiber Recoaters with Linear Proof Testers Chapter 7: Handset Controller Reference To disable this feature • Select Enter Password and type in the current password • Select Change Password and then select Ok to save a blank password • Select Log Out 7.5. -
Page 34: Priming The Ptr406/Ptr406B
If the recoat mold does have an accumulation of cured recoat material stuck to the plates, allow the cleaning solution (preferably acetone) time (60-90 seconds) to soften and lift any cured material. The soft Thorlabs “toothbrush” provided can be used occasionally to clean the mold channels of any cured coating particles. - Page 35 Fiber Recoaters with Linear Proof Testers Chapter 8: Priming the PTR406/PTR406B Remote Manual Injector Prior to first use, the following steps must be followed to load the system with recoat material and purge all air from lines. Warning Prior to handling the UV acrylate material, be sure to read the Material Safety Data Sheet provided in Chapter 14.2: Material Data Safety Sheet.
-
Page 36: Automatic Injection System (Ptr406)
Fiber Recoaters with Linear Proof Testers Chapter 8: Priming the PTR406/PTR406B Leave the unit angled in this position for approximately 15 minutes. This will allow any air trapped in the syringe to rise towards the distribution valve such that it can be ejected out. 9. -
Page 37: Manual Injection System (Not Standard - Contact Factory For Information About This Option)
Fiber Recoaters with Linear Proof Testers Chapter 8: Priming the PTR406/PTR406B 9. After the pump has completed its Purge cycles, the Inject Tube that runs from the pump to the mold must also be filled with recoat material and purged of air. Raise the recoat mold top and make sure to have cotton swabs and cleaning solution (alcohol or acetone) available prior to proceeding. - Page 38 Fiber Recoaters with Linear Proof Testers Chapter 8: Priming the PTR406/PTR406B 6. Rotate the plunger clockwise until the threads just catch. 7. Raise the recoat top and wipe away any excess UV material that may have injected out through the top. Once the recoat port has been filled, it should contain enough UV material for several recoats.
-
Page 39: Recoat Process
Fiber Recoaters with Linear Proof Testers Chapter 9: Recoat Process Recoat Process The purpose of the recoat is to maintain the strength and flexibility of the fiber or fusion splice by protecting the glass surface from damage. It should be noted that recoating a splice does not make the splice stronger. To recoat a fusion splice, the section of exposed fiber is placed in a quartz recoat mold assembly. -
Page 40: Recoating (Ptr406B)
Fiber Recoaters with Linear Proof Testers Chapter 9: Recoat Process Care should therefore be taken when positioning the fiber in the holding blocks to avoid rubbing the exposed section of fiber against the mold assembly. If proper care is taken when positioning the fiber, the recoat process will not degrade the strength of the fiber. -
Page 41: Recoating Using The Manual Injection System
Fiber Recoaters with Linear Proof Testers Chapter 9: Recoat Process Automatic Recoat Injection 9.3.1. Recoating Using the Manual Injection System (Not Standard – Contact Factory for Information) Once the fiber has been captured in the recoat mold assembly, the injection plunger should be turned clockwise to inject the UV acrylate material into the mold cavity. - Page 42 Fiber Recoaters with Linear Proof Testers Chapter 9: Recoat Process 1. Make sure recoat material has been injected up to or beyond the coating interfaces. 2. Activate the cure process to turn on the UV LEDs. The recoat LEDs will shut off automatically after the set cure time.
-
Page 43: Proof Test Process
Fiber Recoaters with Linear Proof Testers Chapter 10: Proof Test Process Proof Test Process A predefined load is automatically applied to the fiber by pulling on the fiber with a predefined force of the right fiber holding block as shown in Figure 41. The peak value reached during a proof test should be identical to the preset “Peak Tension”... -
Page 44: Maintenance
Fiber Recoaters with Linear Proof Testers Chapter 11: Maintenance Maintenance The purpose of the maintenance section is to define the planned maintenance requirements of the PTR406/PTR406B. Where appropriate maintenance procedures are included. 11.1. Planned Maintenance The device is designed for a production environment to give trouble free operation provided normal planned maintenance is adhered to. -
Page 45: Recoat System Maintenance
11.3. Recoat System Maintenance 11.3.1. Recoat LEDs If the recoat LEDs need to be replaced, contact Thorlabs for service. 11.3.2. Empty the Manual Injection System If the recoat mold assembly is stored for any length of time, the acrylate injector port must be emptied, particularly if it is stored near a fluorescent light source. -
Page 46: Purge The Automatic Injection System
Fiber Recoaters with Linear Proof Testers Chapter 11: Maintenance Remote Injection System 11.3.4. Purge the Automatic Injection System The purge cycle is a process of emptying the recoat material of the Automatic Injector back into the recoat material bottle and refilling the pump with fresh recoat material drawn from the bottom of the bottle. If the Recoater is not used in a high-volume application (less than 200 recoats per month), it is recommended that the system be purged monthly in order to circulate fresh recoat material into the pump. -
Page 47: Replace Recoat Material
Fiber Recoaters with Linear Proof Testers Chapter 11: Maintenance 6. Make sure the recoat mold is open. 7. Run several inject 50 sequences until acetone runs clear from the mold inject port. Note: Make sure to collect material as it comes out of the inject port. -
Page 48: Proof Test System Maintenance
If the Proof Tester is applying a load less than expected, the proof tested section of the fiber may be weaker than required and could fail at a later time. Checking and recalibrating the Proof Tester requires special equipment and training. Contact Thorlabs to learn more about calibration options. -
Page 49: Specifications
Fiber Recoaters with Linear Proof Testers Chapter 12: Specifications Specifications Item # PTR406 PTR406B Recoat Mold Quartz Plates, Manual Open/Close (Hinged) Recoat Diameter 280 µm, 430 µm, or 600 µm (Depending on Mold Assembly) Maximum Recoat Length 50 mm High- or Low-Index UV Curable Recoat Material High index UV Curable Acrylate Acrylate... -
Page 50: Trouble Shooting
Refer to Chapter 11.3.7: Replace and to fiber. Align Mold Assembly for instructions on realigning the recoat mold assembly. Channels of recoat mold plate are Contact Thorlabs for Recoater misaligned. servicing. Material flows excessively Recoat mold plates are dirty. Dirt between quartz mold plates will... -
Page 51: Proof Test Diagnostics
Fiber Recoaters with Linear Proof Testers Chapter 13: Trouble Shooting 13.2. Proof Test Diagnostics Problem Possible Cause Solution Peak proof test value Fiber slipped in fiber holding block. Clean fiber holding block inserts as does not reach preset described in Chapter 11.2.2: Check/Clean value. -
Page 52: Appendix
Fiber Recoaters with Linear Proof Testers Chapter 14: Appendix Appendix 14.1. Process Parameters The following table gives the approximate injection quantity in micro liters for different length recoats and different mold sizes. A 125 µm fiber diameter is assumed for all mold sizes except 160 µm, which is calculated based on an 80 µm fiber diameter. -
Page 53: Material Data Safety Sheet
Fiber Recoaters with Linear Proof Testers Chapter 14: Appendix 14.2. Material Data Safety Sheet Rev A, September 14, 2020 Page 49... - Page 54 Fiber Recoaters with Linear Proof Testers Chapter 14: Appendix Page 50 TTN176280-D02...
- Page 55 Fiber Recoaters with Linear Proof Testers Chapter 14: Appendix Rev A, September 14, 2020 Page 51...
- Page 56 Fiber Recoaters with Linear Proof Testers Chapter 14: Appendix Page 52 TTN176280-D02...
- Page 57 Fiber Recoaters with Linear Proof Testers Chapter 14: Appendix Rev A, September 14, 2020 Page 53...
- Page 58 Fiber Recoaters with Linear Proof Testers Chapter 14: Appendix Page 54 TTN176280-D02...
- Page 59 Fiber Recoaters with Linear Proof Testers Chapter 14: Appendix Rev A, September 14, 2020 Page 55...
- Page 60 Fiber Recoaters with Linear Proof Testers Chapter 14: Appendix Page 56 TTN176280-D02...
-
Page 61: Compliance
Fiber Recoaters with Linear Proof Testers Chapter 15: Compliance Compliance Rev A, September 14, 2020 Page 57... -
Page 62: Regulatory
Waste Treatment is Your Own Responsibility If you do not return an “end of life” unit to Thorlabs, you must hand it to a company specialized in waste recovery. Do not dispose of the unit in a litter bin or at a public waste disposal site. -
Page 63: Thorlabs Worldwide Contacts
Fiber Recoaters with Linear Proof Testers Chapter 17: Thorlabs Worldwide Contacts Thorlabs Worldwide Contacts For technical support or sales inquiries, please visit us at www.thorlabs.com/contact for our most up-to-date contact information. USA, Canada, and South America UK and Ireland Thorlabs, Inc. - Page 64 www.thorlabs.com...
Need help?
Do you have a question about the vytran PTR406 and is the answer not in the manual?
Questions and answers