Table of Contents
Advertisement
Quick Links
Advertisement
Table of Contents

Subscribe to Our Youtube Channel
Related Manuals for THORLABS PM160T


Summary of Contents for THORLABS PM160T
- Page 1 USB and Bluetooth Optical Power Meter PM160, PM160T, PM160T-HP User Manual 2018...
- Page 2 Version: Date: 23-Mar-2018 Copyright © 2018 Thorlabs...
-
Page 3: Table Of Contents
4.1.2.3 4.1.2.4 Bluetooth Remote Operation (iOS) PM160 GUI (Windows® OS) 4.1.2.5 Appendix Technical Data PM160 Technical Data PM160T, PM160T-HP Energy Saving Dimensions Certifications and Compliances Warranty Copyright and Exclusion of Reliability Thorlabs 'End of Life' Policy (WEEE) Thorlabs Worldwide Contacts... -
Page 4: Foreword
Paragraphs preceded by this symbol explain hazards that could damage the instrument and the connected equipment or may cause loss of data. Note This manual also contains "NOTES" and "HINTS" written in this form. Please read this advice carefully! © 2018 Thorlabs... -
Page 5: General Information
The PM160T and PM160T-HP are capable to measure power of any light source due to their thermal sensor's flat absorption curve and for this reason well suited e.g. for LED, SLED and MidIR QCL. -
Page 6: Ordering Codes And Accessories
Thorlabs GmbH. The correction of interference caused by such unau- thorized modification, substitution or attachment will be the responsibility of the user. -
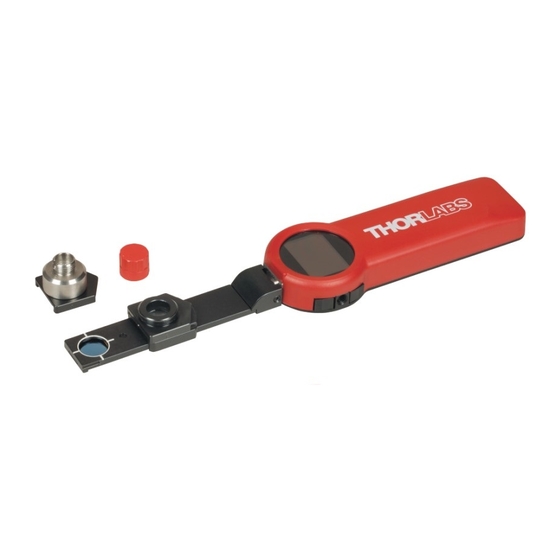
Page 7: Parts List
Verify that you have received the following items within the package: 1. PM160(T) Wireless Handheld Power Meter 2. USB cable, type ‘A’ to ‘micro USB’ 3. SM05 Adapter (PM160) / SM1 Adapter (PM160T, PM160T-HP) 4. Quick Start guide 5. USB memory stick with instrument drivers, user application and operation manual 6. -
Page 8: Operating Elements
The push buttons (8) to (11) are soft keys, their function is shown in the display. The functions as stated on the rear panel are the defaults when the PM160 is switched off. The SM05 adapter can accommodate a Thorlabs fiber adapter. © 2018 Thorlabs... - Page 9 Integrated bluetooth antenna The push buttons (8) to (11) are soft keys, their function is shown in the display. The functions as stated on the rear panel are the defaults when the PM160T is switched off. The SM1 adapter can accommodate a Thorlabs fiber adapter.
- Page 10 Integrated bluetooth antenna The push buttons (8) to (11) are soft keys, their function is shown in the display. The functions as stated on the rear panel are the defaults when the PM160T-HP is switched off. The SM1 adapter can accommodate a Thorlabs fiber adapter.
- Page 11 3 Operating Elements Rear Panel PM160(T) Rear View 8 to 11 Push buttons for local control USB connector RESET button © 2018 Thorlabs...
-
Page 12: Operating Instruction
Push the "ON/OFF" button (8) to switch on the PM160(T). A start-up screen is displayed for a moment then the standard measurement display comes up, indicating the measured op- tical power and wavelength: Additionally, in the header the connection type (USB or Bluetooth) and the battery status are shown. © 2018 Thorlabs... - Page 13 After the button is released, the MAX power is displayed to- gether with the "delta", the difference between the actual and the MAX value. Push the button to return to the normal measurement mode. © 2018 Thorlabs...
- Page 14 Menu "Zero Adjust" This function is used to compensate the photo diode's dark current (PM160) or the thermal sensor's offset voltage (PM160T, PM160T-HP). Cover the sensor aperture and press Run. If the zeroing was carried out successful, the PM160(T) returns to normal opera- tion, else the error screen appears: ©...
- Page 15 Note The control buttons are soft keys. When changing the display orientation, the soft keys, including the switch off button, rotate with the display orientation. Switch the PM160(T) on again by pressing button (8). © 2018 Thorlabs...
- Page 16 "Min.", the display will be switched off 7 sec after a button was pressed. Wake it up by pressing any button. Menu "Sound Output" Enable or disable the sound output. Menu "System Information" Displays the item name, serial number, firmware version and most recent calibra- tion date. © 2018 Thorlabs...
-
Page 17: Remote Operation
7 (32-bit, 64-bit) For operation of the PM160(T), also an NI-VISA™ (version 5.0.3 or higher) is re- quired. This NI-VISA™ engines comes with the Thorlabs PM160(T) installation CD, but can be downloaded also from National Instruments' website www.ni.com. © 2018 Thorlabs... - Page 18 PM160(T) Installing PM160(T) Application Software Insert the USB stick and run the 'setup.exe': Click 'Next' to continue. Click 'I accept...' if you do so, then 'Next' to continue. © 2018 Thorlabs...
- Page 19 4 Operating Instruction Click 'Next' to continue. Click 'Install' to continue. Click 'Next' to continue. © 2018 Thorlabs...
- Page 20 PM160(T) Click 'Finish' to exit the installation wizard. © 2018 Thorlabs...
-
Page 21: Usb Remote Operation (Windows® Os)
6. The GUI opens and automatically connects to the PM160(T). 7. If automatic connection fails, open the Device Menu and select "Open Device...": If no instruments are displayed, click to "Refresh", then select the desired in- strument and click "Connect": © 2018 Thorlabs... -
Page 22: Bluetooth Remote Operation (Windows® Os)
(COM port). When a device is added as de- scribed above, the link reserves an incoming and an outgoing COM port. The PM160(T) GUI uses only the outgoing COM port, typically the one with the higher number. © 2018 Thorlabs... - Page 23 9. If automatic connection fails, open the Device Menu and select "Open Device...": If no instruments are displayed, click to "Refresh", then select the desired COM port (port ASRL15 is equivalent to outgoing virtual COM15 port) and click "Con- nect": © 2018 Thorlabs...
-
Page 24: Bluetooth Remote Operation (Ios)
4. Switch on the iPad Bluetooth interface, using the slide button on the top right. 5. In the Devices List an entry “Thorlabs PM160(T) xxxxxxxxx” should be found, where xxxxxxxxx stands for PM160(T)’s serial number. Compare that number with the serial number printed on the PM160(T)’s back or in the PM160(T)’s System Information menu screen. - Page 25 App’s icon: 5. Click the Minus symbol. The App is stopped. 6. Click the Home button twice to leave. 7. Connect the PM160(T) with the iPad as described above to reestablish the setup. © 2018 Thorlabs...
-
Page 26: Pm160 Gui (Windows® Os)
Displays detailed information about the con- nected device Close Exits the application "Toolbars" The toolbars as described above can be enabled or disabled. "Options" Select the language (English or German) "Help" Displays detailed information about the application software. © 2018 Thorlabs... - Page 27 4 Operating Instruction Needle View This is the default start screen of the GUI with "Autoscale" enabled. When disable "Autoscale", two additional buttons "Scale Down" and "Scale Up" appear for manual scale range change. © 2018 Thorlabs...
- Page 28 Both values can be reset to the reference value by pressing the button. Zeroing Zeroing is useful to compensate the photo diode's dark current when measuring low power levels. · Cover the sensor's aperture carefully. · Press the button. · After successful execution a message appears. © 2018 Thorlabs...
- Page 29 Interval is the time between two samples and ranges from 0.1 to 6.000 sec with a min. step size of 0.1 sec. Advanced logging functions Zoom Home Save logging results to a *.csv file. Load logging results from a *.csv file © 2018 Thorlabs...
- Page 30 Release mouse button, the marked area is zoomed in: Using the light blue sliders, the zoomed in area can be panned. Return to the en- tire diagram area by right clicking on the diagram area or pressing the Zoom Home button. © 2018 Thorlabs...
-
Page 31: Appendix
) The appropriate range is chosen internally by the power meter to achieve the best accuracy. ) The battery is recharged through the USB connection. All technical data are valid at 23 ± 5°C and 45 ± 15% rel. humidity (non condensing). © 2018 Thorlabs... -
Page 32: Technical Data Pm160T, Pm160T-Hp
PM160(T) 5.2 Technical Data PM160T, PM160T-HP Specification PM160T PM160T-HP Wavelength Correction Range 190 to 10600 nm 190 to 20000 nm Optical Power Measurement 100 µW to 2 W 10 mW to 70 W Range Optical Power Resolution 10 µW 1 mW... -
Page 33: Energy Saving
Operation mode USB Cable Stand by Shut down never 20 sec Local Only 20 sec never local never 5 min USB or Bluetooth 5 min never never never remote control never when battery empty Bluetooth never never © 2018 Thorlabs... -
Page 34: Dimensions
PM160(T) 5.4 Dimensions PM160 © 2018 Thorlabs... - Page 35 5 Appendix PM160T © 2018 Thorlabs...
- Page 36 PM160(T) PM160T-HP © 2018 Thorlabs...
-
Page 37: Certifications And Compliances
Operation is subject to the following two conditions; (1) this device may not cause harmful interference, and (2) this device must accept any interference received, including interference that may cause un- desired operation. This device contains FCC ID: PVH0946 5325A-0946 © 2018 Thorlabs... -
Page 38: Warranty
Thorlabs warrants material and production of the PM160(T) for a period of 24 months starting with the date of shipment. During this warranty period Thorlabs will see to defaults by repair or by exchange if these are entitled to warranty. -
Page 39: Copyright And Exclusion Of Reliability
5 Appendix 5.7 Copyright and Exclusion of Reliability Thorlabs has taken every possible care in preparing this document. We however assume no li- ability for the content, completeness or quality of the information contained therein. The content of this document is regularly updated and adapted to reflect the current status of the hardware and/or software. -
Page 40: Thorlabs 'End Of Life' Policy (Weee)
Waste treatment on your own responsibility If you do not return an “end of life” unit to Thorlabs, you must hand it to a company specialized in waste recovery. Do not dispose of the unit in a litter bin or at a public waste disposal site. -
Page 41: Thorlabs Worldwide Contacts
Email: europe@thorlabs.com Email: scandinavia@thorlabs.com France Brazil Thorlabs SAS Thorlabs Vendas de Fotônicos Ltda. 109, rue des Côtes Rua Riachuelo, 171 78600 Maisons-Laffitte São Carlos, SP 13560-110 France Brazil Tel: +33-970 444 844 Tel: +55-16-3413 7062 Fax: +33-825 744 800 Fax: +55-16-3413 7064 www.thorlabs.com... - Page 42 www.thorlabs.com...
Need help?
Do you have a question about the PM160T and is the answer not in the manual?
Questions and answers