idp SMART-81 User Manual
Retransfer card printer
Hide thumbs
Also See for SMART-81:
- User manual (104 pages) ,
- Quick installation manual (9 pages) ,
- User manual (104 pages)
Table of Contents
Advertisement
Quick Links
Advertisement
Table of Contents

Related Manuals for idp SMART-81


Summary of Contents for idp SMART-81
- Page 1 SMART-81 Retransfer Card Printer User Manual...
- Page 2 IDP Reseller. The IDP partners will bear the costs of shipping and ensuring the printer from the repair location to the address from which the printer was shipped.
-
Page 3: Table Of Contents
Table of Contents 1. BASIC INFORMATION ....................10 1.1. Printer external features ........................10 1.2. Printer internal feature ........................13 1.3. Display & buttons ..........................16 2. PRINTER INSTALLATION ....................30 2.1. Connection power and USB cable ..................... 30 2.2. Fitting the Film, Ribbon, Cleaning roller .................. - Page 4 4.3. Card Printer Test ........................... 74 4.4. Firmware update ........................... 82 5. TROUBLESHOOTING ......................84 5.1. Error Messages ............................84 5.2. Cleaning and Replacement Printer air filter ..................88 5.3. Cleaning the printer ..........................90 5.4. TPH (Thermal Print Head) replacement ................... 93 5.5.
- Page 5 Figure 5 SMART-81 internal features ....................13 Figure 6 SMART-81 Display and buttons ..................16 Figure 7 SMART-81 Connection of power and USB cable ............30 Figure 8 Front cover open ........................31 Figure 9 Removal film cartridge ......................31 Figure 10 Removal Ribbon Cartridge ....................
- Page 6 Figure 24 Loading the card 1 ........................ 37 Figure 25 Loading the card 2 ........................ 37 Figure 26 Installation SMART-81 card stacker ................38 Figure 27 Install printer driver 1 ......................39 Figure 28 Install printer driver 2 ......................39 Figure 29 Install printer driver 3 ......................
- Page 7 Figure 60 CardPrinterConfig Start ......................57 Figure 61 CardPrinterConfig Basic setup ..................58 Figure 62 CardPrinterConfig – Advanced setup ................61 Figure 63 Rear view of SMART-81....................... 66 Figure 64 Running NetAdmin ........................ 66 Figure 65 Network printer is not found .................... 67 Figure 66 Connecting to USB Port ......................
- Page 8 Figure 68 USB port state .......................... 68 Figure 69 Rebooting network module....................69 Figure 70 Reset to default settings ....................69 Figure 71 Upgrade the firmware 1 ...................... 70 Figure 72 Upgrade the firmware 2 ...................... 70 Figure 73 Upgrade the firmware 3 ...................... 71 Figure 74 DHCP Dynamic IP configuration ..................
- Page 9 Figure 91 Printer cleaning step 4 ......................92 Figure 92 Printer cleaning step 5 ......................93 Figure 93 Print head ..........................93 Figure 94 Print head setup ........................94 Figure 95 Print head disassemble ......................94 Figure 96 Print head assemble ......................95 Figure 97 Print quality Issue 1 .......................
-
Page 10: Basic Information
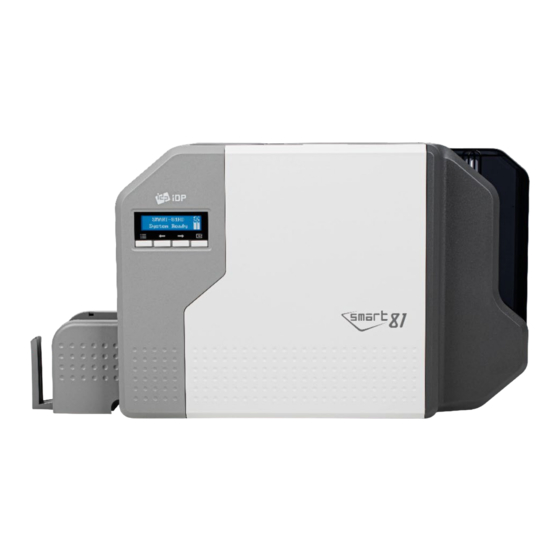
1. Basic Information 1.1. Printer external features For the user’s convenience, the SMART-81 status is displayed on the LCD. The printer can be controlled by four buttons under the LCD display. Communication with the computer (Windows or MAC) can be done using the USB or Ethernet ports. -
Page 11: Figure 2 Smart-81 Rear Features
(SMART-81D). An optional laminator can be added as a field upgrade to add durability and security to printed cards. (Figure. 3) shows the standard SMART-81 card printer. It features single-sided printing with optional upgrades to dual-sided printing, and magnetic or smart card encoding. -
Page 12: Figure 4 Smart-81 & Laminator
(Figure. 4) shows the SMART-81 with optional laminator module(81L). SMART-81 printer and Laminator can printer and laminate both sides of a card Figure 4 SMART-81 with Laminator... -
Page 13: Printer Internal Feature
1.2. Printer internal features In the SMART-81 printer, ribbon and transfer film are installed with a re-loadable cartridge. The following shows the internal features of your SMART-81 printer. ④ ① ② ⑥ ⑤ ③ Figure 5 SMART-81 internal features ①... - Page 14 ② Ribbon cartridge Shown is the cartridge to which the printer ribbon is mounted. The unit can be removed by holding and pulling the “Ribbon” handle. This re-loadable cartridge is a component of printer. Do not discard with spent film. The printer will not operate correctly if it is broken or damaged.
- Page 15 ⑥ Cleaning roller cartridge Shown is the cartridge to which the cleaning roller is mounted. It can be removed from the printer by holding and pulling the handle. With the cleaning roller installed into the cartridge, the cleaning roller will remove dust from the surface of the card before printing.
-
Page 16: Display & Buttons
1.3. Display & Buttons The SMART-81’s control panel consists of a 2-line LCD and 4 buttons. The LCD displays the status of the printer and guides you through settings changes. Figure 6 SMART-81 Display and Buttons During printer boot-up, the status of the SMART-81 will display ‘Initializing’. Once complete, the status will change to ‘System Ready’. - Page 17 The left side shows the remaining balance of the re-transfer film, and the right side shows the remaining balance of the ink ribbon. If an ‘X’ is displayed, it designates that no ribbon was found, or it was installed incorrectly. Figure 7 Film &...
- Page 18 - Laminator LED status by color When using the optional laminator with the SMART-81(Figure 7), you can see the status of laminator indicated by the LED’s color. ※ Laminator LED Location LED Status Description Blue (on) Normal standby ■ Green (on) Executing Printer’s command.
- Page 19 ‘+’ is displayed at the end of first line if there are more than two errors. SMART-81x Password Use Authentication authentication option on Smart-81 Unlock Please. Config utility, and printer is Lock with Root Password/User Password. SMART-81x Use Authentication authentication...
- Page 20 status. Heater Not Retransfer Retransfer head is not Found head connect installed, cable is not Check Heater check connected, or abnormal temperature. Power off and check Retransfer head status and temperature. BHeater Not Bend Bend retransfer head is Found Retransfer not installed, or cable is head connect not connected, or...
- Page 21 xxxxxxxxxxxxxxx Retry Cancel and Initial error Fail to search Ribbon or Initialization after closing detect card out while case initialization after Case Open Front Cov Closed. (Refer to Printer LCD Error Table) ‘+’ is displayed at the end of first line if there are more than two errors Card Out Error Retry...
- Page 22 Hop Card Empty No card in There are no cards in the hopper. input hopper. Hopper Plz Supply Card Cartridge Open takes priority if error occurs at the same time. >> *Cover Open Cancel Cover Cover Open Cover Open Cover open Use the left and right Menu Open...
- Page 23 Flip * Flipper state message: Top Side: Flipper Top state Bottom Side: Flipper Bottom state Top Side Err: error occurs while Flipper Top motion Bottom Side Err: error occurs while Flipper Bottom motion. MENU Select Cancel Menu - Menu + Select MENU Menu System Config (catagory menu)
- Page 24 Length Config Menu + Setting. Menu - >> Y B RT Cancel Print Print Config Setting Print Config Y Bottom Retransfer Length Config Menu + Length Setting. Menu - >>Total Density Setting Cancel Print Print Config Print Config Total Density Setting. Config Menu + Menu -...
- Page 25 >>PRN Serial Cancel Information Information Check Display printer serial Menu - Menu + Information number. >>LAM Serial Cancel Information Information Check Display Laminator serial Menu - Menu + Information number. >>PRN Cancel Information Information Check Display Printer firmware Firmware Menu - Menu + Information version.
- Page 26 recognize Ribbon Ribbon Ribbon recognize present, or installed recognize recognize recognize error incorrectly. Press key to Check Ribbon retry or check ribbon Ribbon Not Retry Ribbon Retry Retry Retry Ribbon If the ribbon and print Found recognize Ribbon Ribbon Ribbon recognize model don’t match.
- Page 27 Check Please. Ribbon & Ribbon & Ribbon & Ribbon & Ribbon zero Replace the ribbon Film research Film Film Film Ribbon Zero research research research Check Please. Ribbon & Ribbon & Ribbon & Ribbon & Film Zero Replace the film Film research Film Film...
- Page 28 Waiting HeatOff mode temperature to reduce. (Display only Line1) Cleaning Mode Cleaning Insert Long Cleaning Card mode Insert Cleaner Cleaning Mode Cleaning Cleaning mode Cleaning Cleaning Mode Cleaning Remove cleaning card mode Remove Cleaner...
- Page 29 The table below details LCD messages based on the laminator’s status and functions. Messages KEY0 KEY1 KEY2 KEY3 State Description Menu/Cancel Left/Down Right/Up Select/OK L Film Zero+ Laminator Laminator Film supply is Plz Error error empty. Install new Laminate film. A ‘+’ is displayed at Clear the end of first line if there are more than two errors...
-
Page 30: Printer Installation
2.1. Connect power and USB cable Connect the power and USB cable as the below picture and install the communication cable protection cover. Please refer to the ‘Network configuration’ if you use the LAN connection. Figure 7 SMART-81 Connection of power and USB cable... -
Page 31: Fitting The Film, Ribbon, Cleaning Roller
2.2. Install Retransfer Film, Ribbon, Cleaning roller Before you can print, you must install the printer’s consumables. Before you get started, prepare the related items such as cards, ribbon, retransfer film, and a cleaning roller. (Caution! Please turn off the printer) (1) Open the printer’s front cover Figure 8 Open front cover (2) Hold the Retransfer film... -
Page 32: Figure 10 Removal Ribbon Cartridge
(3) Hold the Ribbon cartridge handle and pull it out. Figure 10 Take out Ribbon Cartridge (4) Hold the disposable cleaning roller cartridge handle and pull it out. Figure 11 Take out cleaning roller Cartridge (5) Insert the film into the film cartridge. After inserting, tighten the film. (Caution! If the film is not tightened, a rolling up error might be happened) Figure 12 Loading film... -
Page 33: Figure 13 Loading The Ribbon
(6) Insert the ribbon into the film cartridge. After inserting, tighten the ribbon. (Caution! If the ribbon is not tightened, a rolling up error might be happened) Figure 13 Loading the ribbon (7) Insert the disposable cleaning roller into the cartridge Peel the protective wrapper from the cleaning roller. -
Page 34: Figure 15 Installing The Cleaning Roller Cartridge
(8) Install cleaning roller cartridge into the printer. Figure 15 Installing the cleaning roller cartridge (9) Install Film cartridge into printer. At this point, do not fully mount the cartridge to the printer as figure 16. Figure 16 Installing film cartridge (10) Install Ribbon cartridge into printer. -
Page 35: Figure 18 Installing Film Cartridge
(11) Press below the handle to fully mount and adhere the Film cartridge to printer. Figure 18 Installing Film cartridge (12) Close the front cover. Figure 19 Close cover... -
Page 36: Loading The Cards
2.3. Loading cards Open the Input hopper cover in the direction of the arrow. Figure 20 Remove hopper cover If necessary, loosen the card gate screw to adjust height of gate to match thickness of the card. Gate is optimized for standard 30mil/0.86mm cards. -
Page 37: Figure 22 Preparing The Card 1
Break the cards loose before loading. Do so, push a stack of cards back and forth to an angle about 45 degrees vertically. Figure 22 Preparing the cards 1 Figure 23 Preparing the cards 2 Stand the stack of cards vertically after separating. -
Page 38: Stacker Installation
2.4. Exit tacker Installation The exit stacker holds up to 100 printed cards. To install, simply align the hooks. Figure 26 Installation SMART-81 card stacker... -
Page 39: Driver Installation (Windows 7/8/10/11)
Scan the QR Code or Go to www.idp-corp.com and search for “Driver” in the “Support” “Download” menu. Download the “SMART-81 Printer Driver”. Extract the driver and all tis components from the ZIP file and save it on your PC. Note: Administrative rights are required to install drivers. -
Page 40: Figure 30 Install Printer Driver 4
Please click “Next”, when you click “Next”, older driver will be removed automatically. This process will take several minutes to remove any older SMART-81 drivers. You can select the languages by selecting the combo box as shown on Figure 30 Install printer driver 4 the left picture. -
Page 41: Figure 32 Install Printer Driver 6
(In case of USB connection, click “Next” and move to step (9). If you are planning on setting up the SMART-81 as a network device, please proceed to Step 3: Network (8). Figure 33 Install printer driver 7 STEP 3: Network Please select the printer that you want to install in the list and click “OK”. -
Page 42: Figure 35 Install Printer Driver 9
Right click “SMART-81 Card Printer” and select “Print Properties”.) Figure 36 Install printer driver 10 (11) Please select General” tab and click “Print Test page” in “IDP SMART-81 Card Printer Properties” window. Figure 37 Install printer driver 11... -
Page 43: Figure 38 Install Printer Driver 12
(12) Please check the test card to see if it is printed properly. If so, click “Close”. (If card is not printed or error occurs out, please refer to “Trouble Shooting”.) Figure 38 Install printer driver 12... -
Page 44: Option Installation (Ic, Rf)
2.6. Option installation (IC, RF) Step 1: Detach each module form main body’s front cover (1) Turn off Printer, open front cover, remove Film cartridge and reject card stacker, as shown in Figure 39. (2) Remove the two screws, then pull out encoder module mount them from the main body, as shown in Figure 39. -
Page 45: Figure 41 Install Module (Ic, Rf) 3
(3) Install the Film cartridge, error card stacker and close the cover. Figure 41 Install module (IC, RF) 3... -
Page 46: Option Installation (Laminator)
2.7. Option Installation (Laminator) Step 1: Mount module binding bracket to the bottom of the printer (1) Turn off Printer, open top cover, remove card stacker, and install the binding bracket under the printer as shown in Figure 42. Figure 42 Install Laminator Module 1 Step 2: Fitting module (Laminator) (1) Place the module to be installed (Laminator) to the binding bracket as shown in Figure 42. -
Page 47: Figure 44 Lcd Display (With Laminator)
Figure 44 LCD display (with Laminator) -
Page 48: Driver Configuration
3. Driver Configuration To check printer properties, you need to open the printer driver. Please open “Devices and Printers” and right-click “IDP SMART-81 Card Printer”. Click “Printer Properties”. 3.1. Printer Properties Printing Preferences Please click “Preferences…” Figure 45 Print Properties... -
Page 49: Figure 47 Input / Output Setting
Input / Output Supply Tray Supply: You can select “Auto” if SMART-81 has 1 input hopper. Please select the specific hopper if it has a multi-hopper. Tray: SMART-81 supports CR-80 card only. Figure 47 Input / Output Setting Printing Do Print: This option should be checked to print a card. -
Page 50: Figure 49 Laminating Setting
Dither: There are 3 possible selections, Threshold, Random, and Diffusion Dither. It is relevant for K and KO ribbon only. (Select “Diffusion Dither” for high quality) Ribbon Save: Select split function or not when using Monochrome ribbons. Anti-Aliasing: Set Anti-Aliasing level of printer image. -
Page 51: Figure 51 Encoding Advanced Settings
Repeat Count: if an encode fails, you can select the number of retries before ejecting the card. Encoding Advanced Option Card Stripe Side: the location of magnetic stripe [Bottom / Top] Before Flip: Do flipping before encoding [No / Yes] After Flip: Do flipping after encoding [No / Yes] Figure 51 Encoding Advanced Setting... -
Page 52: Advanced Options
Figure 52 Load/Save Setting 3.2. Advanced Options To change the detailed configuration located in the ‘Layout’ tab shown, please click “Advanced…” shown on the bottom of the ‘Layout’ tab of the ‘Preferences’. [ Graphic] Print Quality: You can select the print quality (DPI). [ Document option] ... - Page 53 - Resin Extraction: You can set the method to extract resin black when you use design programs. (If you use the Smart IDesigner, you don’t need to select this option.) It will be set automatically. > Black object: to extract resin black automatically for text, line, box, circle, binary images, etc.
-
Page 54: Other Settings
Default is unchecked “Share this printer.” Figure 53 Printer sharing Ports Port tab shows which port is connected to the SMART-81. USB ports are assigned dynamically by the printer drivers and should not be changed. Ethernet port addresses may be automatically selected by your network (DHCP) or predefined (Static IP). -
Page 55: Figure 55 Advanced Setting
Color Management In “Color management” tab, you can select color management profile fit to the printer. SMART-81 uses color profile to express optimal color. The driver selects color profile automatically to fit each ribbon. (IDP recommends not do change default... -
Page 56: Figure 57 Security
Security You can set the permission to use a printer. Depending on the permission, the certain group or user can print, manage the printer/documents or not. Contact your Network Administrator for more information. Figure 57 security Service This tab gives you a view of the printer, its vital information such as its serial number, driver, firmware versions, and more. -
Page 57: Utilities
This utility is used to optimize your printer settings. They are pre-set at the factory for optimal generic setting and typically these settings will not need to be changed. Please contact IDP or your Authorized IDP Service Center before making any changes. -
Page 58: Figure 61 Cardprinterconfig Basic Setup
To show connected printers. Device: You can select a printer using the pull-down menu. In Figure 61, the printer is “IDP SMART-81 Card Printer”. “SMART-81” is printer ID, “USB007” is connected port. If you connect the Network printer, please ②... - Page 59 ⑦ Color density adjustments The SMART-81 allows the user to set different density for each color, resin black and overlay. Set each density for high quality and optimize the quality by adjusting each value. Click the “Print” button or print a card from your application to view color-adjusted cards.
- Page 60 ⑧ Print calibration card. ⑨ Advanced setup. (These options should NOT be changed unless directed by IDP Support) ⑩ Save and Load Configuration Get Config.: Retrieve values from current printer. Set Config.: Set values to current printer.
-
Page 61: Figure 62 Cardprinterconfig - Advanced Setup
Card Printer Advanced Setup Advanced settings allow access to advanced features for the SMART-81 printer. Changes to these settings should only be made under the direction of IDP Support. ① ② ③ Figure 62 Cardprinterconfig – Advanced setup ①... - Page 62 SDK. You can encrypt magnetic stripe encoding data transmitted by USB. You can ② define and save the encryption key to SMART-81 using “Set Mag. Encrypt Key” Adjust printer’s detailed setting value. (Function tabs) Print: Tab showing specific printer setting values. These values should only be changed when directed by IDP Support.
- Page 63 Retransfer: Tab showing the retransfer setting value. These values should only be changed when directed by IDP Support. Retransfer: Front Card card position when start retransfer (Front) Position Retransfer: Back Card card position when start retransfer (back) Position Retransfer: Operation...
- Page 64 Extra: Tab showing other setting values. Card In Speed Card in speed Card Out Speed Card out speed Card Move Speed Card move speed (inside printer) DCL Mode DCL mode SBS Only Only SBS commend mode Dump Mode Dump mode Card Out Card out direction Error Card Out...
- Page 65 Count: Tab showing printer count history. “Total issue Count” is the number of cards printed in the printers life cycle, “User Issue Count” is number of cards printed after head has been replaced. “User Issue Count” is initialized by checking “Reset User Issue Count” when replacing the printer head.
-
Page 66: Network Configuration
(Network cable is not supplied. Please ask network administrator for more questions.) Figure 63 Rear view of SMART-81 The SMART printers support the ability to print in a variety of ways over the network. These settings require network expertise, any changes require the guidance of your Network Administrator. -
Page 67: Figure 65 Network Printer Is Not Found
Select network printer If there is no printer connected to the network, there will be no printer shown on the box. Please click “Refresh”. If, again, no printer is shown, please check as below. Please ensure the printer is turned on. ... -
Page 68: Figure 67 Netadmin Login
NetAdmin log-in Please select a proper printer and click “connect”. Please enter password and click “OK”. Default password is admin. Figure 67 NetAdmin Log-in (6) USB port state Click “Use Port State” to show devices connected to USB hub of network module. -
Page 69: Figure 69 Rebooting Network Module
Reboot network module Click Reboot Module, if desired Click “yes” when a pop-up window appears. It takes 1 minute to reboot. Please click “Refresh” after reboot. When proper printer appears, please connect printer by clicking “connect”. Figure 69 Rebooting network module “Reset to default”... -
Page 70: Figure 71 Upgrade The Firmware 1
Upgrade network module firmware Click Upgrade Firmware, if desired A dialog box opens where you can direct to the location of the firmware file (.bin). Note: Please be sure you are using netadmin firmware. Select and save firmware file that need ... -
Page 71: Figure 73 Upgrade The Firmware 3
IP address. Click “Set Configuration”, Save, and reboot the printer. We recommend using static IP because it is more stable for use with the SMART-81 network printer. Figure 74 DHCP / Static IP configuration... -
Page 72: Figure 75 Static Ip Configuration
(11) Wireless network configuration WiFi option must be installed in conjunction with a network module. Check “WiFi(option)” button to activate Enter the ESSID value in “WiFi ESSID” to access. Enter the Key value in “WiFi Key”. ... -
Page 73: Figure 77 Ocp Configuration
(13) OCP (Open Card Printer) Function This function is for sending print, encode and other commands through a network without the use of a local driver or other “Use Terminal Emulation” is communication between the printer and computing device. For security, it supports SSL and User Authentication. -
Page 74: Card Printer Test
① ② ③ ④ ⑤ ⑥ ⑦ Figure 79 CardPrinterTest ① Select Printer: select a printer to test. In the example, “IDP SMART-81 Card Printer” is the printer’s name, SMART is the printer ID, and USB003 is the connected port. - Page 75 “DoPrint”. It is the main difference between NORMAL mode and SBS mode. When you click “Start”, SMART-81 is operated in SBS mode, and existing spooled data will be eliminated. To exit SBS mode, click “End”.
- Page 76 Print test This test the printer capabilities using a CSD file which is created Smart IDesigner program. Following the steps in this section. 1. Click the “…” button and select the CSD file of the Smart Idesigner project. 2. Click “Open” button to select the CSD file to print. 3.
- Page 77 (4) Batch Batch allows repetition of encoding/reading testing. In the Repeat option, input the number of cycles you wish to perform and click “Batch Start”. If you select “Include Card In/Out”, the printer loads from the input hopper, performs an encoding test, and then ejects the card.
-
Page 78: Figure 80 Magnetic Stripe Encoding
An example batch process to repeat a magnetic encode test: Card “IN” Move “Mag” “Random Fill” “Write” “Read” Card “OUT” Figure 80 Magnetic stripe encoding IC(PC/SC): Contact Smartcard Encoding “ICH Contact” will bring the encoder head into contact with the IC chip contact smartcard “ICH Disconnect”... -
Page 79: Figure 81 Contact Smartcard Encoding
“Send APDU” will run the APDU commands. An example batch process to repeat the following steps, Card “IN” Move “IC” “ICH Contact” “Init” “Contact” “Reset” “ICH Dis-contact” Card “OUT”. Figure 81 Contact smartcard encoding RF(PC/SC): Contactless Smartcard Encoding “Contact”... -
Page 80: Figure 82 Contactless Smartcard Encoding
An example batch process to repeat the following steps, Card “IN” Move “RF” “Connect” Get UID “Disconnect” Card “OUT” Figure 82 Contactless smartcard encoding... - Page 81 “Get Temperature” displays the temperature of the thermal print head. When the “Realtime Check” is selected, it displays the current temperature of the thermal print head in real time. “Get Status” gives printers current status. Please refer to the ‘SMART SDK manual’ for the status code or contact IDP Support.
-
Page 82: Firmware Update
4.4. Firmware update The CardPrinterFirmware utility found on the Driver CD or in the Printer Properties > Service tab is used to update your printer or laminator’s firmware. To update your Ethernet option’s firmware, please use the NetAdmin utility tool. CardPrinterFirmware Menu Devices: Select the printer that you want to upgrade. -
Page 83: Figure 85 Update Firmware
Execute firmware update Click the “Update” button to upgrade the firmware automatically. Then the printer will show the status and reboot. In some instances, some conditions may prevent the automatic upgrade function. In those cases, use the Manual Update option and follow the on-screen steps Please reboot the printer after the ... -
Page 84: Troubleshooting
5. Troubleshooting 5.1. Error Message The SMART-81 printer shows error messages on the LCD display if they occur. You can press the Menu button to retry the print job, press the ‘select’ button to cancel the operator, or follow error specific instructions. - Page 85 Heater Error -. Pause printing for 10 minutes and print again. -. Lower the transfer temperature -. If error continues, contact IDP Support Bend Remedy heater is overheated. -. Check that the thermistor is properly attached to the heater Bheater Error -.
- Page 86 -. This message may disappear after printing all data has been sent to the printer Spool Full -. Reboot the printer -. Reboot the PC The password is not correct. Invalid Password -. Input the correct password. -. Contact IDP Support if you have forgotten or misplaced your password...
- Page 87 -. Verify that the card template configuration matches the printer’s configuration and consumables. Set Fail -. Ensure you are using a Genuine IDP USB cable. -. Change the USB port in the PC -. Reinstall the printer driver. Error occurs during LCD operation Lcd Con Error -.
-
Page 88: Cleaning And Replacement Printer Air Filter
Error downloading Laminator firmware 5.2. Cleaning and Replacement of the Printer’s air filter To print optimal cards, the SMART-81’s air filter must be cleaned regularly and more so if your printer is in a dusty environment. 1. As shown in the picture, you can remove the protect cover by pressing the locking snap in the direction shown and pulling up. - Page 89 3. After installing the filter, press the protective cover in the direction of the arrow to close it.
-
Page 90: Cleaning The Printer
To maintain the best operation of your SMART printer, you must clean the printer periodically. The SMART-81 will prompt you to do a cleaning cycle every 5000 prints. This is a general setting. If your printer is in a dusty environment and you see debris on your printed cards, you will need to clean your printer more frequently. -
Page 91: Figure 87 Printer Cleaning Start
Figure 87 Printer cleaning start Step 1: Connect the SMART printer to a PC, turn it on, and prepare the cleaning card. Click “Start cleaning” to move on to step 2. Figure 88 Printer cleaning step 1 Step 2: Check to be sure the printer is entering cleaning mode on the LCD. Open the cover, and remove the card cartridge, ribbon cartridge, and cleaning roller. -
Page 92: Figure 90 Printer Cleaning Step 3
Step 3: Insert the leading edge of the cleaning card about 2’ to 3” into the card exit slot as shown. Press any LCD button to display the printer’s temperature. When the temperature of printer heater drops below 50degrees, the cleaning card will automatically be pulled inside the printer and will move back and forth to clean. -
Page 93: Tph (Thermal Print Head) Replacement
Step 5: Remove cleaning card and install cleaning roller, ribbon cartridge, film cartridge, and close the cover. Click “finish” to exit. Figure 92 Printer cleaning step 5 5.4. TPH (Thermal Print Head) replacement 1. Check the serial number and the resistance of new TPH as figure 93. - Page 94 ③ ② ① ④ Figure 94 Printer head setup 3. Replacing a print head Step 1: Remove the old print head. (1) Turn off the printer and open the front cover. (2) Remove the ribbon cartridge, remove the retaining screws, hold the print head with one hand, and pull it out.
-
Page 95: Card Movement
Remove the cards, fan them, and reinstall. More information can be found in Section 2.2. Card Transfer Errors occur when the ribbon is wrapped around the transfer roller or printing roller. Open the front cover and remove card(s) and unwrap any ribbon from the SMART-81... - Page 96 Figure 97 Printing quality trouble 1 Non-standard cards or bad cards. Replace the cards with ISO CR-80 card (54mm x 86mm). IDP recommends 80/20 composite cards for optimal performance. Retransfer temperature setting does not match the card. ...
-
Page 97: Print Quality
Non-standard cards or bad cards. Replace the cards with an ISO CR-80 card (54mm x 86mm). IDP recommends 80/20 composite cards for optimal performance. Printer setting is changed or is not proper. Please contact the local supplier. The transfer roller or the printing roller is dirty. - Page 98 The card surface is uneven or contaminated with the dust and dirt. Replace the cards with ISO CR-80 card (54mm x 86mm). IDP recommends 80/20 composite cards for optimal performance. Retransfer temperature setting doesn’t match the card. Raise the retransfer temperature to use CardPrinterConfig.
- Page 99 Retransfer film or debris from the retransfer film is on the sides of cards (side of the card) Nonstandard card Replace the cards with ISO CR-80 card (54mm x 86mm). IDP recommends 80/20 composite cards for optimal performance. The card surface is uneven or contaminated with the dust and dirt.
- Page 100 The card side surface is uneven or contaminated with the dust and dirt. Replace the cards with ISO CR-80 card (54mm x 86mm). IDP recommends 80/20 composite cards for optimal performance. Retransfer temperature setting doesn’t match the card. ...
-
Page 101: Magnetic Stripe Encoding
5.7. Magnetic stripe encoding Magnetic encoding error. Please press front-left button to retry. The magnetic head is contaminated with the dust and dirt: Clean the magnetic head with the cleaning kit. The magnetic encoding data is not transmitted, or the wrong data is transmitted: ... - Page 102 Printer doesn’t operate even if the printing data has been transmitted. Check the following. Printer power off: Check the power. Turn on the printer power. Check the printer adaptor whether it is connected with a socket and the printer. Bad power adaptor: ...
-
Page 103: Specifications
6. Specification Model SMART-81S SMART-81D Printing Print Type Dye-Sublimation & Retransfer Print Area Edge to Edge Resolution 300dpi Dual Side Printing Option Card Card Feeding Automatic Card Size ISO CR80 Card Thickness 0.8mm ~ 1.6mm Card Type PVC, PET, Composite PVC Printing Speed Monochrome 20sec./card (180 cards/hour) - Page 104 <제품 사양 및 인증> 항목 내용 13.56 ㎒ 주파수범위 변조방식 전파형식 채널 2 CH 출력 10 M의 거리에서 47.544 ㎷/M이하 기자재 명칭(모델명): RFID용 무선기기(13.56MHz 주파수 대역) (SMART-81) 인증번호: R-R-IAS-SMART-81 인증 받은 자의 상호: 아이디피(주) 제조년월일: 제조자/제조국가: 아이디피(주) / 한국...
Need help?
Do you have a question about the SMART-81 and is the answer not in the manual?
Questions and answers