Table of Contents
Advertisement
Quick Links
Advertisement
Table of Contents

Related Manuals for Datasensing SH4 ADVANCED


Summary of Contents for Datasensing SH4 ADVANCED
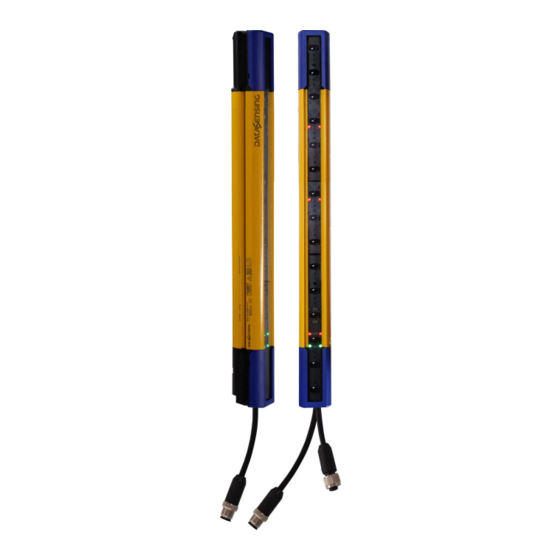
- Page 1 SH4 ADVANCED PRODUCT REFERENCE GUIDE Safety Light Curtains...
- Page 2 Datasensing website (www.datasensing.com). Disclaimer Datasensing has taken reasonable measures to provide information in this manual that is complete and accurate, however, Datasensing shall not be liable for technical or editorial errors or omissions contained herein, nor for incidental or consequential damages resulting from the use of this material. Datasensing reserves the right to change any specification at any time without prior notice.
-
Page 3: Table Of Contents
TABLE OF CONTENTS PREFACE .........................VII About this Manual ......................vii Manual Conventions .......................... vii Technical Support ......................vii Support Through the Website ......................vii Warranty ........................viii CHAPTER 1. GENERAL INFORMATION............... 1 General Description ......................1 Model Description ......................3 Compliance ........................ - Page 4 Muting enabling ..........................76 Muting inputs filter ..........................76 Muting signaling devices ........................77 Electrical Connection ........................ 78 Override ........................79 Blanking (SH4-XX-XXXX-X models only) .................81 Configuration: ............................ 82 External Teach-In Blanking (SH4-XX-XXXX-X models only) ............83 Blanking Signaling ..........................84 SH4 ADVANCED...
- Page 5 CONTENTS Reduced resolution (SH4-XX-XXXX-X models only) ............85 Muting+blanking (SH4-XX-XXXX-X models only) ............. 86 Configuration: ............................87 CHAPTER 8. USER INTERFACE DIALOGUE............... 88 SH4-14/30-XXXX-A-12-(5) models ................88 LED meanings ...........................88 RX Side dialogue ..........................89 TX Side dialogue ..........................92 SH4-2/3/4-XXXX-A-12-(5) Models ................. 93 LED meanings ...........................93 RX Side dialogue ..........................94 TX Side dialogue ..........................97...
- Page 6 Protected Area ......................133 Operation ........................133 User Interface Dialogue ....................134 LED meanings .........................134 RX Side dialogue ..........................135 TX Side dialogue ..........................136 Response Time ......................137 Recovery Time ......................137 ........................... 138 APPENDIX G. GLOSSARY ..................140 SH4 ADVANCED...
-
Page 7: Preface
TECHNICAL SUPPORT Support Through the Website Datasensing provides several services as well as technical support through its website. Log on to (www.datasensing.com). For quick access, from the home page click on the search icon , and type in the name of the product you’re looking for. -
Page 8: Warranty
Products once sold. The Warranty Period shall be three years from the date of shipment by Datasensing, unless otherwise agreed in an applicable writing by Datasensing. Datasensing will not be liable under the warranty if the Product has been exposed or subjected to any: (1) maintenance, repair, installation, handling, packaging, transportation, storage, operation or use that is improper or otherwise not in compliance with Datasensing’s instruction;... -
Page 9: Chapter 1. General Information
CHAPTER 1 GENERAL INFORMATION GENERAL DESCRIPTION The safety light curtains are optoelectronic multi-beam devices that are used to protect working areas that, in presence of machines, robots, and automatic systems in general, can become dangerous for operators that can get in touch, even accidentally, with mov- ing parts. - Page 10 As the required knowledge may not be completely included in this manual, we suggest the customer to contact Datasensing Technical Service for any necessary information relative to the functioning of the light curtains and the safety rules that regulate the correct installation.
-
Page 11: Model Description
MODEL DESCRIPTION MODEL DESCRIPTION SH4 safety light curtains are described by their model description which indicates the characteristics listed in the diagram below. Not all combinations are available. For a complete list of combinations see the Models tab on the Product page of the website. SH4 - xx - xxxx - x - x - x Detection Monitored... -
Page 12: Compliance
GENERAL INFORMATION COMPLIANCE European Declaration of Conformity Hereby, Datasensing S.r.l. declares that the full text of the European Declaration of Con- formity is available at: www.datasensing.com. Select the link from the downloads sec- tion of the product page. UKCA Declaration of Conformity Hereby, Datasensing S.r.l. - Page 13 COMPLIANCE PRODUCT REFERENCE GUIDE...
-
Page 14: Chapter 2 Installation
Emitter (TX) • Quick Guide of safety light curtain • Periodical checklist and maintenance schedule • 4 angled fixing brackets and specific fasteners • 2 additional angled fixing brackets for models with heights equal or greater than 1200 mm. SH4 ADVANCED... -
Page 15: Precautions To Be Observed For The Choice And Installation
The presence of intense electromagnetic disturbances could affect device’s cor- rect operation. • This condition shall be carefully assessed with the advice of Datasensing Technical Service. • The operating distance of the device can be reduced in presence of smog, fog or airborne dust. -
Page 16: How To Choose The Device
Operating distance Figure 2: Detection capability The resolution value is obtained applying the following formula: R = I + d where: I = Interaxes between two adjacent optics d = Lens diameter SH4 ADVANCED... -
Page 17: Height Of The Detection Zone
HOW TO CHOOSE THE DEVICE Height of the detection zone The controlled height is the height protected by the safety light curtain. In SH4-14/30 Protected Height is equal to ESPE total length: no dead zone is present. In SH4-2/3/4, first beam center is positioned at 130 mm from light curtain bottom, pro- tected height is defined as the distance between uppermost and lowermost beam centreline. -
Page 18: Minimum Installation Distance
When devices with > 40 mm resolution are used, the height of the top beam has to be ≥ 900 mm (H2) from machine supporting base while the height of the bottom beam has to be ≤ 300 mm (H1). SH4 ADVANCED... -
Page 19: Practical Examples
HOW TO CHOOSE THE DEVICE If the safety light curtain must be mounted in a horizontal position (see figure below) the distance between the dangerous area and the most distant optical beam must be equal to the value calculated using the following formula: S = 1600 mm/s (t1 + t2) + 1200 - 0.4 H where: •... -
Page 20: Typical Applications
The safety light curtain can be used in most bending operations thanks to its easy installation and compact dimensions. As well as offering excellent reliability, SH4 ensures increased plant productivity as it reduces the dead times necessary for machine accessing, adjustment and maintenance. SH4 ADVANCED... -
Page 21: Example 3: Paper Cutting Machines
TYPICAL APPLICATIONS Example 3: Paper cutting machines These machines typically cut paper to a specific size for newspapers or special applica- tions. The operator must be protected against abrasion or cuts by cutter blades. Solution: SH4 30mm safety light curtain is especially suitable for this kind of applica- tion, which require the installation of the device directly on the machine. -
Page 22: Safety Information
• The RESET/RESTART button must be located outside the dangerous zone because the operator must check the dangerous zone during Reset/Restart operations. NOTE: Please carefully read the instructions for the correct functioning before powering the light curtain on. SH4 ADVANCED... -
Page 23: General Information On Device Positioning
GENERAL INFORMATION ON DEVICE POSITIONING GENERAL INFORMATION ON DEVICE POSITIONING The safety light curtain should be carefully positioned in order to provide the necessary protection. Access to the dangerous area must only be possible by passing through the protecting safety light beams. CAUTION: The figure below shows some examples of possible access to the machine from the top and the bottom sides. -
Page 24: Minimum Distance From Reflecting Surface (Dsr)
Figure 11: Minimum distance from reflective surface The formula to get D is the following: (m) = 0.13 for operating distance < 3 m (m) = operating distance (m) x tan (2.5°) for operating distance ≥ 3 m SH4 ADVANCED... -
Page 25: Distance Between Homologous Devices
GENERAL INFORMATION ON DEVICE POSITIONING Distance between homologous devices The following graphic shows the distance from the interfering devices (Ddo) according to the operating distance (Dop) of the couple (TXA – RXA). If different safety devices have to be installed in adjacent areas, the emitter of one device must not interfere dangerously with the receiver of the other device. - Page 26 INSTALLATION The figure provides two examples: Figure 14: Recommended positioning for homologous devices CAUTION: If two light curtains have to be mounted near each other as reported in the first example of the figure above. SH4 ADVANCED...
-
Page 27: Emitter And Receiver Orientation
Even very small displacements of the mirror is enough to lose alignment. • The use of Datasensing laser pointer accessory is recommended under these con- ditions. • The minimum safety distance (S) must be respected for each single section of the beams. -
Page 28: Controls After First Installation
Normal Operation for at least 10-15 minutes, and placing the specific test piece in the protected area, in the Safe State for the same period. • Verify the correspondence of all the accessory functions, activating them in the different operating conditions. SH4 ADVANCED... - Page 29 GENERAL INFORMATION ON DEVICE POSITIONING PRODUCT REFERENCE GUIDE...
-
Page 30: Chapter 3 Mechanical Mounting
The next step is the fine alignment, as shown in the chapter “Alignment Procedure”. Outfit angled fixing brackets kit for units mounting must be used as described below (see Figure 18). Adjustable supports for adjusting unit inclinations around the axes are available on request (see appendix “Accessories”). SH4 ADVANCED... - Page 31 To mount the angled fixing brackets kit, place the threaded pins metallic insert into the dedicated side seat of the terminator cap side light curtain closing cap (1); slide the insert towards the metallic drawn profile groove (2). Fix the bracket against the profile by tightening the M5 hexagonal nuts (3-4). It's possi- ble to slide the bracket group along their dedicated rail and fix it once again just working on the above-mentioned nuts.
- Page 32 554.5 SH4-14-1650-x-x SH4-30-1650-x-x 1659 1209 604.5 SH4-14-1800-x-x SH4-30-1800-x-x 1809 1309 654.5 SH4-14-1950-x-x SH4-30-1950-x-x 1959 1409 704.5 SH4-14-2100-x-x SH4-30-2100-x-x 2109 1509 754.5 SH4-14-2250-x-x SH4-30-2250-x-x 2259 1609 804.5 MODEL BODY (mm) (mm) (mm) (mm) SH4-2-0500-x-x SH4-3-0800-x-x SH4-4-0900-x-x 1074 SH4-4-1200-x-x 1374 SH4 ADVANCED...
- Page 33 PRODUCT REFERENCE GUIDE...
-
Page 34: Chapter 4. Connections
4 - CODE (black) 5 - OSSD2 (pink) 5 - COM (grey) 6 - GP_IN3 (yellow) 7 - GP_IO1 (black) 8 - OSSD1 (grey) 9 - GP_IN4 (red) 10 - GP_IO2 (violet) 11 - OVR2 (grey-pink) 12 - GP_IN5 (red-blue) SH4 ADVANCED... - Page 35 ELECTRICAL CONNECTION RECEIVER EMITTER DUAL CONNECTOR DUAL CONNECTOR RX M12 MALE 12 PIN TX M12 MALE 5 PIN 1 - 24V (brown) 1 - 24V (brown) 2 - 0V (blue) 2 - TEST/(AIMER) (white) 3 - GP_IN1 (white) 3 - 0V (blue) 4 - GP_IN2 (green) 4 - CODE (black) 5 - OSSD2 (pink)
-
Page 36: I/O Configuration
• Align • Restart • Reset • Muting 1 • Muting 2 • Muting 3 • Muting 4 • Muting Enable • Teach-in • Override Status SH4 ADVANCED... -
Page 37: Notes On Connections
ELECTRICAL CONNECTION Notes on connections For the correct operation of the safety light curtains, the following precautions regard- ing the electrical connections have to be respected: • Do not place connection cables in contact with or near high-voltage cables and/or cable undergoing high current variations (e.g. - Page 38 µpA control by µpA OSSD1 OSSD2 OSSD1 24Vdc 24Vdc control by µpB control by µpB OSSD2 Figure 23: OSSDs connection 24Vdc OSSD1 0Vdc 24Vdc OSSD2 0Vdc 115 µs 500 ms 1000ms Figure 24: Behavior of OSSDs SH4 ADVANCED...
- Page 39 ELECTRICAL CONNECTION PRODUCT REFERENCE GUIDE...
-
Page 40: Chapter 5. Sh4 Designer
Serial Number and Model. If the light curtain is set to access a different access point, the user connects to the same, then select one ESPE to configure choosing between devices on the net- work identified by a unique Serial Number. SH4 ADVANCED... -
Page 41: Get The App
GET THE APP 2. Parameters selection: user set required ESPE configuration. After selection user send configuration command, ESPE switch to SAFE state, a “configuration in progress” indication is shown on ESPE led interface, old configu- ration on ESPE is erased. 3. -
Page 42: How To Connect To The Espe
NOTE: Internet on your device may not be available in this case. 1. Connect the device to the Wi-Fi generated by the ESPE 2. Insert the password (datasensing) 3. Launch the SH4 Designer The picture below shows the main window of SH4 Designer when you access it:... -
Page 43: User Interface
USER INTERFACE USER INTERFACE The picture below shows the home page window of SH4 Designer when you access it: AREA DESCRIPTION Menu toolbar icon: Click the icon to open the menu toolbar Status: Shows the device and network connection status BUTTON DESCRIPTION Configuration... -
Page 44: Menu Toolbar
Language Note that by default, the language is set to Autodetect, meaning that it depends upon the language of your operating system. User Manual Opens the Product Reference Guide Help Opens the search windows to help the user SH4 ADVANCED... -
Page 45: Configuration
USER INTERFACE Configuration AREA DESCRIPTION Device info: Shows the model of the safety light curtain connected, the parameters version and the SSID Standard button: This toolbar shows the open\save buttons and the configuration updates. There is also a share button for mobile devices. Safety function toolbar: This toolbar shows the safety configuration buttons Configuration area:... -
Page 46: Standard Button
It allows to configure the Input and Output signals Configuration area Here you can view the system topology and configure: • " Basic functions" on page 39 • " Advanced functions" on page 39 • " Input Output Manager" on page 41 SH4 ADVANCED... - Page 47 USER INTERFACE Basic functions In this configuration area it is possible to set the Restart mode, the Anti Interference coding and enable/disable EDM. Advanced functions In this configuration area it is possible to set the advanced function (muting, blanking and muting+blanking) and the reduced resolution. Depending on the muting function selected, some parameters are displayed: PARAMETER DESCRIPTION...
- Page 48 When one or more zones are configured, it is possible to change the parameters using the icon This icon allows to choose the beams numbering order. Press the icon to delete the entire configuration. SH4 ADVANCED...
- Page 49 USER INTERFACE Input Output Manager In order to use the available functions it is necessary to make some electrical connec- tions that must be set on this configuration area. Figure 26: Input Output Manager windows In this window the connections already set up will be visible while the connections to be made will be highlighted by an alert circle NOTE: Only for some functions it is possible to select the type of signal (HIGH or LOW).
-
Page 50: Monitoring
SH4 DESIGNER Monitoring Allows to receive the device status in real time. Information More information about the connected device. INFO DESCRIPTION Firmware version Firmware version Wifi version Wifi version SH4 ADVANCED... -
Page 51: Change Device Password
USER INTERFACE Change device password Change Wi-Fi settings If Wi-Fi password is forgot user can contact Technical Support and ask for a “Wi-Fi unlock password” communicating the light curtain receiver serial number visible on the product label. Serial Number Firmware update Allows to update the device firmware. -
Page 52: Offline Configuration
Select device parameters for offline configuration: Choose the Device type, Model, Version and Device connector. Topology: Choose the system topology and individual devices. Once the system has been defined, press “OK” button to move on the configuring the functions. SH4 ADVANCED... -
Page 53: Report Check
USER INTERFACE Report Check The SH4 Designer App produces a printable Safety System Configuration Report with all safety related information about configuration in progress (see button in “Standard button” on page 38). Safety system configuration report SH4-30-300-A-12-5 Created by: User Created on: 26/08/2022, 10:45:42 Firmware version MIB: 1.0.37.0... - Page 54 + Advanced Function + Advanced Function Muting Muting Reduced resolution ATTENTION: this is a safety system configuration report. Check safety system behaviour is coherent with information contained in this document. Figure 28: Example of Safety System Configuration Report with differences SH4 ADVANCED...
- Page 55 USER INTERFACE PRODUCT REFERENCE GUIDE...
-
Page 56: Chapter 6 Alignment Procedure
The figure shows that the first beam is located at the bottom edge of the light curtain, near to connections. The last beam is at the opposite side. These two beams are the synchronization beams too. Last SYNC beam beam First SYNC beam Figure 29: Physical beams position SH4 ADVANCED... -
Page 57: Alignment Procedure
ALIGNMENT Alignment Procedure NOTE: In order to use this function, the ESPE must be configured via SH4 Designer App (a pin must be configured for alignment signal). See “I/O Configuration” on page 28. The ALIGNMENT function can be activated at power up keeping active the ALIGN input for at least 0.5 seconds, as shown in the following timing diagram. -
Page 58: User Interface Indication With Light Curtain In Alignment Mode
INDICATION LED CONFIGURATION Not aligned Not aligned Only first sync aligned Not aligned Only last sync aligned Aligned Minimum Signal Level Aligned Medium Signal Level Maximum Signal Level Table 1: User interface display in alignment mode SH4 ADVANCED... - Page 59 ALIGNMENT NOTE: In normal operation signal level is reported by the same LEDs used in alignment mode but the F/L LED will lit Green/Red depending on the sta- tus of optics on the second module. OSSD STATUS RESULT IN INDICATION LED CONFIGURATION NORMAL OPERATION...
-
Page 60: Sh4-2/3/4-Xxxx-A-X-X Models
NOTE: Alignment level can also be remotely checked with SH4 Designer in monitoring panel. INDICATION LED CONFIGURATION Not aligned Not aligned First module Only first sync aligned Not aligned Last module Only last sync aligned Table 4: User interface display in alignment mode (body) SH4 ADVANCED... -
Page 61: Integrated Laser Aimer (Sh4-14/30-Xxxx-A-X-X Models Only)
INTEGRATED LASER AIMER (SH4-14/30-XXXX-A-X-X MODELS ONLY) INTEGRATED LASER AIMER (SH4-14/30-XXXX-A-X-X MODELS ONLY) A class 2 laser aimer can be used to verify the alignment of the light curtain in long dis- tance, or with several deviating mirror. The aimer is positioned on the front of the Emitter light curtain (see “Overall Dimen- sions”... -
Page 62: Chapter 7 Functions
(OSSDs) shall go to the OFF- state. SH4 performs this detection function according to IEC EN 61496-2. SH4 ADVANCED... -
Page 63: Restart Mode
RESTART MODE RESTART MODE An opaque object detected by the beams causes the switching of the OSSD outputs (i.e. the opening of the safety contacts - SAFE condition). The restart of the ESPE (i.e. the closing of the OSSD safety contacts - NORMAL OPERA- TION) can be carried-out in two different ways: •... -
Page 64: Manual Restart
In this case, the manual reset or, for example, the manual reset of the SE- SR2 relay (see “Safety Units” on page 123) is necessary. NOTE: Please carefully read the instructions for the correct functioning before powering the light curtain on. SH4 ADVANCED... -
Page 65: Configuration Of Restart Mode
RESTART MODE Configuration of Restart mode 1. In “Configuration” tab, choose the “Restart” mode by checking the “Automatic” or “Manual” box. 2. If “Manual” mode is selected, an alert pop-up will be displayed under “Input Out- put Manager” because the wiring must be set 3. -
Page 66: Reset
Figure 32: Reset function timing If the error is not removed, the light curtain goes in failure lockout again. Also a pin must be configured via software SH4 Designer (see “Input Output Manager” on page 41). Figure 33: Example of pin configuration SH4 ADVANCED... -
Page 67: Edm
The External Device Monitoring (EDM) function controls external devices by verifying the OSSDs status. To correctly use this function user must connect EDM input to a N.C. to 24V contact of the device to control (forced guide relay). 24Vdc OSSD_1 OSSD_1 OSSD_2 OSSD_2... -
Page 68: Configuration
2. An alert pop-up will be displayed under “Input Output Manager” because the wir- ing must be set. 3. Choose “Input Output Manager” and provide the wiring indications for the EDM function (see “Input Output Manager” on page 41). SH4 ADVANCED... -
Page 69: Anti Interference Coding
ANTI INTERFERENCE CODING ANTI INTERFERENCE CODING Anti-Interference Coding function implemented in SH4 devices allows the user to install two light curtains very close each other without that an interference occurs; this allows the devices to remain in normal operation condition. NOTE: For correct light curtain operation both emitter and receiver unit must be configured with the same Coding setting. -
Page 70: Test
CAUTION: At runtime keep TEST input connected to 24Vdc for more than 2s and less than 5s to change range setting from Long to Short or vice versa. Emission Range setting is kept also after a power cycle. Refer to the next paragraph for more information. SH4 ADVANCED... -
Page 71: Emission Range Selection (Sh4-X-Xxxx-X Models Only)
EMISSION RANGE SELECTION (SH4-X-XXXX-X MODELS ONLY) EMISSION RANGE SELECTION (SH4-X-XXXX-X models only) On Body models only (SH4-X-XXXX-X), TEST input (Pin 2 on transmitter unit) may be used to set the Emission Range. By default, SHORT Range is selected. To toggle between SHORT and LONG range, follow- ing procedure must be followed: at runtime keep pin 2 input connected to 24V for more than 2s and less than 5s to change range setting from Long to Short or viceversa. -
Page 72: Muting
Muting bidirectional Muting • On SH4 Advanced up to 4 muting inputs can be configured for the activation of muting function according to the current Standards. • This function is particularly suitable when an object, but not a person, has to pass through the dangerous area, under certain conditions. -
Page 73: Configuration
MUTING Configuration: 1. In “Configuration” tab, choose “Advanced Functions” 2. In the “Advanced Functions” window choose “Muting” by clicking on the “Advanced Functions” box. 3. An alert pop-up will be displayed under “Input Output Manager” because the wir- ing must be set. 4. -
Page 74: Typical Muting Application And Safety Light Curtain Connection
Then, a muting request is accepted only if signals at MUTING inputs follow the timings shown in next paragraphs depending on selected muting sensor configuration. Four different muting behavior are possible and 2 or 4 separate signals can be used to trigger muting function. SH4 ADVANCED... -
Page 75: L Muting (2 Signals/2 Sensors)
MUTING L muting (2 signals/2 sensors) As reported in figure below T activation delay between MUTING1 and MUTING2 must be greater than zero and less than T Max. is measured and then multiplied by a N factor to calculate the muting timer. Muting operations is ceased when NxT timer expires, starting from inactivation of the MUT- ING1 signal. - Page 76 Override Restart At the end of the Override, the ESPE (when the Manual Restart is selected) Manual goes into Interlock state and waits for a manual restart signal. SH4 ADVANCED...
-
Page 77: T Muting (2 Signals/4 Sensors)
MUTING T muting (2 signals/4 sensors) The activation of the Muting function occurs as a result of the activation of MUTING1 and MUTING2 signals (the order depends on material direction) within a time T 1÷16s. NOTE: Muting operations is ceased as soon as the signal on MUTING1 or MUTING2 goes inactive. - Page 78 Override Restart At the end of the Override, the ESPE (when the Manual Restart is selected) Manual goes into Interlock state and waits for a manual restart signal. SH4 ADVANCED...
-
Page 79: T Muting (4 Signals/4 Sensors; Time Or Sequence Monitoring)
MUTING T muting (4 signals/4 sensors; time or sequence monitoring) 24Vdc 24Vdc ESPE MUTING1 MUTING2 24Vdc 24Vdc MUTING3 MUTING4 ESPE Figure 46: Connection of 4 sensors on MUTING1-4 inputs in case of 4 signal/4 sensors muting T (bidirectional) muting timings with time monitoring The activation of the Muting function occurs as a result of the interruption of the sen- sors S1 and S2 (the order is not relevant) within a time of T max or S4 and S3 with... - Page 80 Override Restart At the end of the Override, the ESPE (when the Manual Restart is selected) Manual goes into Interlock state and waits for a manual restart signal. SH4 ADVANCED...
- Page 81 MUTING T (bidirectional) muting timings with sequence monitoring The activation of the Muting function occurs following the sequential interruption of the sensors S1 and S2, and the sensors S3 and S4. If the pallet proceeds in an opposite direction the correct sequence is: S4, S3, S2, S1. Thus contemporary activation of S1-S2 is not allowed, neither any sequence other than S1, S2, S3, S4 or S4, S3, S2, S1.
-
Page 82: Partial Muting
(Muting Zone). By default, all beams are affected by muting function (total muting). NOTE: Partial Muting may even be set together with Blanking but with some restrictions. MUTING zone MUTING zone MUTING Zone MUTING Zone Figure 49: Partial muting SH4 ADVANCED... -
Page 83: Auto-Dynamic Partial Muting
MUTING Auto-Dynamic Partial Muting Auto-Dynamic Partial Muting automatically configures a muting zone when muting is active and after moving goods has intercepted the light curtain for 2 seconds (configu- rable). Muting starts with full detection zone muted, then is restricted to the maximum num- ber of beams intercepted during the first 2 seconds of goods blocking the light curtain. -
Page 84: Muting Enabling
Two separate filters for signals activation and deactivation can be set from 0 (no filter) up to 1000 ms. Figure 53: SH4 Designer Muting inputs filter settings ACTIVE MUTING INPUT WIRE LEVEL INACTIVE MUTING INPUT ACTIVE LOGICAL LEVEL INACTIVE Deactivation Filter Activation Filter Figure 54: Muting inputs filter timings SH4 ADVANCED... -
Page 85: Muting Signaling Devices
MUTING Muting signaling devices In some application a mute indication shall be provided. When the light curtain receiver unit is visible from the dangerous access point, light curtain user interface can be used as signaling device, otherwise an external lamp must be connected to an auxiliary out- put (pin GP_IO1 or GP_IO2). -
Page 86: Electrical Connection
Lock-Out state and shows the related message on the display (refer to “Technical Data” on page 101 for information about the auxiliary output). Electrical Connection 24Vdc 24Vdc Lamp output Lamp output Figure 57: Muting Signaling Device connection SH4 ADVANCED... -
Page 87: Override
OVERRIDE OVERRIDE Override functions allows to force safety function deactivation whenever it's necessary to restart the machine despite one or more ESPE beams being intercepted. The aim is clearing protected area of any working materials blocked ahead of ESPE because of (i.e.) a cycle anomaly. - Page 88 Edge Trigger: override engaged on contacts closing until at least one muting sen- sor is intercepted. 24Vdc OVERRIDE 1 0Vdc 24Vdc OVERRIDE 2 0Vdc TRUE MUTING1 or MUTING2 FALSE NORMAL OPERATION OVERRIDE STATE SAFE STATE t < T t < 400ms Figure 60: Edge Triggered Override Timings SH4 ADVANCED...
-
Page 89: Blanking (Sh4-Xx-Xxxx-X Models Only)
BLANKING (SH4-XX-XXXX-X MODELS ONLY) BLANKING (SH4-XX-XXXX-X models only) Blanking is an auxiliary function of safety light curtains for which the introduction of an opaque object inside part of the light curtain’s protection field is allowed without going in OFF status. Blanking is only possible in the presence of determined safety conditions and in accordance with a configurable operating logic. -
Page 90: Configuration
Zone size: 3 Object size min: 0 Object size max: 2 Figure 62: Blanking zones examples Configuration: 1. In “Configuration” tab, choose “Advanced Functions” 2. In the “Advanced Functions” window choose “Blanking” by clicking on the “Advanced Functions” box. SH4 ADVANCED... -
Page 91: External Teach-In Blanking (Sh4-Xx-Xxxx-X Models Only)
BLANKING (SH4-XX-XXXX-X MODELS ONLY) External Teach-In Blanking (SH4-XX-XXXX-X models only) Blanking zones configured with SH4 Designer requires a re-parametrization from the software itself to change blanking zones. With External Teach-In Blanking it's possible to configure blanking zones from an exter- nal input at run-time. -
Page 92: Blanking Signaling
Blanking/ Partial Muting” on page 90). An external lamp can be added as a signaling device (LAMP output, “see “Electrical Connection” on page 78). In addition, the light curtain UI will signal (see “Blanking Active” on page 90) if the blanking function is active and the OSSDs are ON. SH4 ADVANCED... -
Page 93: Reduced Resolution (Sh4-Xx-Xxxx-X Models Only)
REDUCED RESOLUTION (SH4-XX-XXXX-X MODELS ONLY) REDUCED RESOLUTION (SH4-XX-XXXX-X models only) Reduced resolution can be used if Blanking is not configured. A reduced resolution can be set to allow objects smaller than a certain size to interrupt the light curtain without triggering safety function. -
Page 94: Muting+Blanking (Sh4-Xx-Xxxx-X Models Only)
Object size min: 0 Object size max: 1 or 2 MUTING ZONE BLANKING ZONE 1: Start beam: 3 BLANKING ZONE 1 End beam: 4 Object size min: 1 or 2 MUTING ZONE Object size max: 1 or 2 SH4 ADVANCED... -
Page 95: Configuration
MUTING+BLANKING (SH4-XX-XXXX-X MODELS ONLY) Configuration: 1. In “Configuration” tab, choose “Advanced Functions” 2. .In the “Advanced Functions” window choose “Muting+Blanking” by clicking on the “Advanced Functions” box. 3. An alert pop-up will be displayed under “Input Output Manager” because it is necessary to report the wirings. -
Page 96: Chapter 8. User Interface Dialogue
For each optical module on both RX and TX unit an RGB led will inform about single module status and light curtain operation. module module module Figure 64: Receiver LED interface module module module Figure 65: Emitter LED interface LED meanings = ON = INDIFFERENT = BLINK = OFF SH4 ADVANCED... -
Page 97: Rx Side Dialogue
SH4-14/30-XXXX-A-12-(5) MODELS RX Side dialogue module module module ESPE INDICATION LED CONFIGURATION WORKING MODE Not aligned Not aligned Only first sync aligned Alignment Not aligned NOTE: the LEDs F and L change color according to Only last sync aligned the anti-interference code set: Aligned BLUE: NO CODE... - Page 98 On models longer than 1200 only even modules blinking yellow Override allowed Minimum Signal Level Good Signal Level Maximum Signal Level Normal Operation OSSD ON Muting Active Override Active Blanking Active Wi-Fi connection Active Configuration GUI Configuration Pending SH4 ADVANCED...
- Page 99 SH4-14/30-XXXX-A-12-(5) MODELS Power Supply Failure OSSDs failure Microprocessor Failure Optics Failure EDM Failure Failure (Lockout) Restart Failure F1122 Cascade Failure F2233 Configuration Failure Lamp Failure F1133 Input Failure Override Failure Failure (NO Lockout) Teach in Failure TX Update Ongoing TX firmware update TX Update Completed PRODUCT REFERENCE GUIDE...
-
Page 100: Tx Side Dialogue
USER INTERFACE DIALOGUE TX Side dialogue ESPE INDICATION LED CONFIGURATION WORKING MODE NO CODE Normal Operation CODE1 Emission Active CODE2 Test, Test Emission OFF Failure on microprocessor Failure Failure on optics Cascade Failure Ongoing Update FW Update Update Completed SH4 ADVANCED... -
Page 101: Sh4-2/3/4-Xxxx-A-12-(5) Models
SH4-2/3/4-XXXX-A-12-(5) MODELS SH4-2/3/4-XXXX-A-12-(5) MODELS A user interface of 8 LEDs helps customer to control and check the state of the light cur- tain, for alignment mode, normal operation and for troubleshooting activity. For each optical module on both RX and TX unit an RGB led will inform about single module status and light curtain operation. -
Page 102: Rx Side Dialogue
Low Signal Level Normal Operation Single module on N optic Optic Good Signal Level module on N optic Manual Restart configured Normal Operation Manual Restart Only Interlock, free beams, restart required EDM Active CODE1 Normal Operation CODE2 NO CODE SH4 ADVANCED... - Page 103 SH4-2/3/4-XXXX-A-12-(5) MODELS At least one beam intercepted Override allowed Normal Operation OSSD OFF Partial Muting Not intercepted beams or intercepted beams Active. in muting zone. At least one beam Intercepted beams outside muting outside the muting zones intercepted zone. Muting Active beams Normal Operation OSSD ON...
- Page 104 USER INTERFACE DIALOGUE Failure (NO Lockout) Override Failure TX Update Ongoing TX firmware update TX Update Completed SH4 ADVANCED...
-
Page 105: Tx Side Dialogue
SH4-2/3/4-XXXX-A-12-(5) MODELS TX Side dialogue ESPE INDICATION LED CONFIGURATION WORKING MODE NO CODE CODE1 Normal Operation CODE2 Emission Active SHORT Range LONG Range Test Emission OFF Range Change Request Failure on microprocessor Failure Failure on optics Range setting failure Ongoing Update FW Update Update Completed PRODUCT REFERENCE GUIDE... -
Page 106: Chapter 9. Periodical Checks
Access to the dangerous area of the machine from any unprotected area is not possible • The ESPE and the external electrical connections are not damaged. The frequency of checks depends on the particular application and on the operating conditions of the safety light curtain. SH4 ADVANCED... -
Page 107: General Information And Useful Data
If you are not certain to have the expertise necessary to install the device in the correct way, Datasensing is at your disposal to carry out the installation. The device uses fuses that are not self-resetting. Consequently, in presence of short-cir- cuits causing the cut-off of these fuses, both safety light curtains (RX and TX) shall be sent to Datasensing Repair Service Department. -
Page 108: Chapter 10 Device Maintenance
PRODUCT DISPOSAL Under current Italian and European laws, Datasensing is not obliged to take care of product disposal at the end of its life. Datasensing recommends disposing of the product in compliance with local laws or con- tact authorized waste collection centers. -
Page 109: Appendix A. Technical Data
APPENDIX A TECHNICAL DATA SAFETY CATEGORY Type 4 (rif. EN 61496-1: 2020) SIL 3 (rif. EN 61508) SIL CL 3 (rif. EN 62061:2005/A2: 2015) PL e, Cat. 4 (rif. EN ISO 13849-1: 2015) PFHd [1/h] = 2.62*10 (ref. EN 61508) MTTFd [years] = 43 (ref. - Page 110 (EN 60068-2-27 / Class 3M7 IEC TR 60721-4-3) Housing material Painted aluminum (yellow RAL 1003) Caps material PBT Valox 553 black Caps cover material PBT 1403g3 blue (pantone 072C) Frontal cover material MAKROLON AR 7099 Clear Weight 1.4 Kg/mt (single bar - without packaged) SH4 ADVANCED...
- Page 111 PRODUCT REFERENCE GUIDE...
-
Page 112: Appendix B. Available Models And Response Times
957920211 1500 SH4-30-1650-A-12 957920198 SH4-30-1650-A-12-5 957920212 1650 SH4-30-1800-A-12 957920199 SH4-30-1800-A-12-5 957920213 1800 SH4-30-1950-A-12 957920200 SH4-30-1950-A-12-5 957920214 1950 SH4-30-2100-A-12 957920201 SH4-30-2100-A-12-5 957920215 2100 SH4-30-2250-A-12 957920202 SH4-30-2250-A-12-5 957920216 2250 BODY SH4-2-0500-A-12-5 957920231 PROTECTION SH4-3-0800-A-12-5 957920232 SH4-4-0900-A-12-5 957920233 SH4-4-1200-A-12-5 957920234 1200 SH4 ADVANCED... -
Page 113: Pairing Table
RESPONSE TIMES Pairing table PAIR MODEL RECEIVER MODEL EMITTER MODEL SH4-14-XXXX-A-12 SH4-14-XXXX-A-R-12 SH4-14-XXXX-TP-5 SH4-14-XXXX-A-12-5 SH4-14-XXXX-A-R-12-5 SH4-14-XXXX-TP-5-5 SH4-30-XXXX-A-12 SH4-30-XXXX-A-R-12 SH4-30-XXXX-TP-5 SH4-30-XXXX-A-12-5 SH4-30-XXXX-A-R-12-5 SH4-30-XXXX-TP-5-5 SH4-2/3/4-XXXX-A-12-5 SH4-2/3/4-XXXX-A-R-12-5 SH4-2/3/4-XXXX-TP-5-5 RESPONSE TIMES Next tables resumes the response time values of every SH4 models related to the num- ber of beams and the protected height. -
Page 114: Sh4-2/3/4-Xxxx-X-X Models
AIC DISABLE AIC ENABLE SH4-30-1500-x-x 1500 SH4-30-1650-x-x 1650 SH4-30-1800-x-x 1800 SH4-30-1950-x-x 1950 SH4-30-2100-x-x 2100 SH4-30-2250-x-x 2250 SH4-2/3/4-XXXX-X-X models RESPONSE TIME RESPONSE TIME CONTROLLED MODEL NO. BEAMS (ms) (ms) HEIGHT (mm) AIC DISABLE AIC ENABLE SH4-2-0500-x-x SH4-3-0800-x-x SH4-4-0900-x-x SH4-4-1200-x-x 1200 SH4 ADVANCED... - Page 115 PRODUCT REFERENCE GUIDE...
-
Page 116: Appendix C. Overall Dimensions
APPENDIX C OVERALL DIMENSIONS SSH4-14-XXXX-X-X * dimensions are in mm MODEL L (mm) SH4-14-0300-X-X SH4-14-0450-X-X SH4-14-0600-X-X SH4-14-0750-X-X SH4-14-0900-X-X SH4-14-1050-X-X 1059 1209 SH4-14-1200-X-X SH4-14-1350-X-X 1359 1509 SH4-14-1500-X-X SH4-14-1650-X-X 1659 1809 SH4-14-1800-X-X SH4-14-1950-X-X 1959 2109 SH4-14-2100-X-X SH4-14-2250-X-X 2259 SH4 ADVANCED... -
Page 117: Sh4-30-Xxxx-X-X
SH4-30-XXXX-X-X SH4-30-XXXX-X-X * dimensions are in mm MODEL L (mm) SH4-30-0300-X-X SH4-30-0450-X-X SH4-30-0600-X-X SH4-30-0750-X-X SH4-30-0900-X-X SH4-30-1050-X-X 1059 1209 SH4-30-1200-X-X SH4-30-1350-X-X 1359 1509 SH4-30-1500-X-X SH4-30-1650-X-X 1659 1809 SH4-30-1800-X-X SH4-30-1950-X-X 1959 2109 SH4-30-2100-X-X SH4-30-2250-X-X 2259 PRODUCT REFERENCE GUIDE... -
Page 118: Sh4-2/3/4-Xxxx-X-X
OVERALL DIMENSIONS SH4-2/3/4-XXXX-X-X * dimensions are in mm MODEL L (mm) SH4-2-0500-X-X SH4-3-0800-X-X 1074 SH4-4-0900-X-X SH4-4-1200-X-X 1374 SH4 ADVANCED... -
Page 119: Appendix D. Included Accessories
APPENDIX D INCLUDED ACCESSORIES METAL ANGLED FIXING BRACKET Figure 68 - Metal Angled fixing Bracket NOTE: Dimensions are in mm. PRODUCT REFERENCE GUIDE... - Page 120 INCLUDED ACCESSORIES SH4 ADVANCED...
-
Page 121: Appendix Eaccessories
APPENDIX E ACCESSORIES BRACKETS Metal Angled Fixing Bracket MODEL DESCRIPTION CODE ST-KSTD Angled fixing bracket (4 pcs kit) 95ACC1670 Figure 69 - ST-KSTD NOTE: Dimensions are in mm. PRODUCT REFERENCE GUIDE... -
Page 122: Angled Fixing Bracket Mounting With Orientable And Anti-Vibration Supports
Figure 70 - Angled fixing bracket Figure 71 - Angled fixing bracket + Orientable support Figure 72 - Angled fixing bracket + Anti-vibration support Figure 73 - Angled fixing bracket + Orientable support + Anti-vibration support NOTE: Dimensions are in mm. SH4 ADVANCED... -
Page 123: Rotating Bracket
Rotating Bracket MODEL DESCRIPTION CODE Metal top-bottom rotating fixing ST-K4ROT-SH brackes kit (4 brackets) for SH4 Figure 74 - ST-K4ROT-SH NOTE: Dimensions are in mm. PRODUCT REFERENCE GUIDE... -
Page 124: Protective Tubes And Stands
Figure 75 - Protective Stands NOTE: Dimensions are in mm. Mounting kit MODEL DESCRIPTION CODE ST-PS4-SG-SE Mounting kit (4 pcs kit) 95ASE1750 ST-PS6-SG-SE Mounting kit (6 pcs kit) 95ASE1760 Figure 76 - Mounting kit NOTE: Dimensions are in mm. SH4 ADVANCED... -
Page 125: Plate Kit For Protective Stands
PROTECTIVE TUBES AND STANDS Plate Kit for Protective Stands MODEL DESCRIPTION CODE SG-P Plate kit with springs 95ASE2290 Figure 77 - Plate kit NOTE: Dimensions are in mm. Mounting with SG-P SB Figure 78 - Mounting with SG-P SB NOTE: Dimensions are in mm. PRODUCT REFERENCE GUIDE... -
Page 126: Columns And Floor Stands
Column and floor stand H = 1200 mm 1200 30x30 95ACC1750 SE-S 1500 Column and floor stand H = 1500 mm 1500 45x45 95ACC1760 SE-S 1800 Column and floor stand H = 1800 mm 1800 45x45 95ACC1770 Figure 79 - Dimensions (mm) SH4 ADVANCED... -
Page 127: Mirrors
MIRRORS MIRRORS Deviating mirrors MODEL DESCRIPTION CODE (mm) (mm) (mm) SG-DM 600 Deviating mirror version 600 mm 95ASE1680 SG-DM 900 Deviating mirror version 900 mm 95ASE1690 SG-DM 1200 Deviating mirror version 1200 mm 1145 1180 95ASE1700 SG-DM 1650 Deviating mirror version 1650 mm 1595 1426 1630... -
Page 128: Mounting Kit For Sg-Dm With Se-S Column And Floor Stands
NOTE: For each SG-DM mirror order 1 mounting kit ST-DM. Mounting kit SG-DM on SG-PSB (ST-PS-DM) MODEL DESCRIPTION CODE ST-PS-DM Deviating mirror SG-DM mounting kit (2 T-units) 95ASE1770 Figure 83 - Mounting kit NOTE: For each SG-DM mirror order 1 mounting kit ST-PS-DM. SH4 ADVANCED... -
Page 129: Connection Cables
CONNECTION CABLES CONNECTION CABLES 12-poles M12 cables (Receiver main connector) MODEL DESCRIPTION CODE CS-A1-10-U-03 12-pole M12 cable (axial) 3 m UL2464 95A252720 CS-A1-10-U-05 12-pole M12 cable (axial) 5 m UL2464 95A252730 CS-A1-10-U-10 12-pole M12 cable (axial) 10 m UL2464 95A252740 CS-A1-10-U-15 12-pole M12 cable (axial) 15 m UL2464 95A252750... -
Page 130: (Sh-Lp) Laser Pointer
The laser pointer of the SH-LP series represents a valid alignment and installation sup- port for the safety light curtain series. The pointer can be moved along the light curtain profile to verify the complete device alignment (top and bottom). Figure 84 - Dimensions (mm) SH4 ADVANCED... -
Page 131: Safety Units
SAFETY UNITS SAFETY UNITS Safety unit MODEL DESCRIPTION CODE SE-SR2 Type 4 safety relay - 3 NQ 1 NC 95ACC6170 The drawing shows the connection between the safety light curtain and the Type 4 safety relay of the SE-SR2 series operating in the automatic Restart mode. Figure 85 - Safety relay EDM relay box MODEL... -
Page 132: Accessories For Muting
Basic support for LMS-1 95ACC2020 SU-LMS-1B Tower module for LMS-1 95ACC2030 Figure 87 - Lamp LMS Figure 88 - Lamp LMS-2 Figure 89 - Lamp LMS-3 Figure 90 - Module SU-LMS-1A + Figure 91 - Module SU-LMS-1B + LMS-1 LMS-1 SH4 ADVANCED... -
Page 133: Muting Cables
ACCESSORIES FOR MUTING Muting cables MODEL DESCRIPTION CODE CV-Y4-02-B-007 M12 4P T MUTING CABLE SH4 95ASE0037 CV-L2-02-B-007 M12 4P L MUTING CABLE SH4 95ASE0038 Couple arms MODEL DESCRIPTION CODE SH-T-ARMS T COUPLE ARMS 95ASE0035 SH-L-ARMS L COUPLE ARMS 95ASE0036 The following figures show respectively the dimensions of single active arms with fixing bracket mounted, of single passive arms with fixing bracket mounted, of double active arms with fixing bracket mounted, and of double passive arms with fixing bracket mounted. -
Page 134: Connection Box
Supply and switching voltage +24Vdc • M12 connection • Simple connection to safety light curtains Figure 92 - Connection box 1. For correct operation of LED indicators, it is mandatory to connect identical sensors to the four M12 sockets. SH4 ADVANCED... - Page 135 ACCESSORIES FOR MUTING MODEL DESCRIPTION CODE SH-M-CB Connection box 95ASE2500 SG-M-CB-KIT Mounting kit 95ASE2830 Figure 93 - Dimensions (mm) Power supply & Switching voltage +24 Vcc ± 20% Current load max. Insulating resistance > 10 Ω Mechanical protection IP 67 Operating temperature -10°...
- Page 136 ACCESSORIES SH4 ADVANCED...
-
Page 137: Appendix F. Cascade System
APPENDIX F CASCADE SYSTEM OVERVIEW This document describes the implementation of multiple light curtains in a system. The result of this system is defined as cascade. Up to three SH4 unit can be connected in series as a cascade system. Cascading is when two or more light curtains are connected to each other, resulting in one system that functions as a single light curtains. - Page 138 One MASTER unit with dual connector (can be chosen among SH4-XX-XXXX-SM-8-5 or SH4-XX-XXXX-A-12-5) • One LAST SLAVE unit (can be chosen among SH4-XX-XXXX-B-5 or SH4-XX-XXXX-C-5-5) • Optionally one MID SLAVE UNIT (must be a SH4-XX-XXXX-C-5-5 unit) SH4-XX-XXXX-SM-8-5 SH4-XX-XXXX-C-5-5 SH4-XX-XXXX-B-5 SH4-XX-XXXX-A-12-5 SH4-XX-XXXX-C-5-5 Figure 95: Cascade system SH4 ADVANCED...
-
Page 139: Connection
CONNECTION CONNECTION In order to connect SH4 units in a cascade system, follow the steps below: 1. Connect the M12-5 poles female connector of the MASTER unit to the M12-5 poles male connector of following slave unit. 2. Same way a LAST SLAVE can be connected to the MID SLAVE. NOTE: When the distance between units doesn't allow a direct connection an optional M12 male to M12 female 5 pole cable may be used up to 10 m cable length. -
Page 140: Tx Connection
M12 5 pin female or none M12 5 pin, male NOTE: See chapter “Connections” for consult the connector’s pin-out. NOTE: A safe auto-recognition procedure at startup is implemented; it automatically detects cascade topology and correctly address units. SH4 ADVANCED... -
Page 141: Protected Area
PROTECTED AREA PROTECTED AREA When installing a cascade system detection capability at the edge of each unit depends on how cascade units are linked with each other. If the proper cascade brackets are used detection capability at the edges can be calculated according to brackets documenta- tion. -
Page 142: User Interface Dialogue
For each optical module on both RX and TX unit an RGB led will inform about single module status and light curtain operation. module module module Figure 96: Receiver LED interface module module module Figure 97: Emitter LED interface LED meanings = ON = INDIFFERENT = BLINK = OFF SH4 ADVANCED... -
Page 143: Rx Side Dialogue
USER INTERFACE DIALOGUE RX Side dialogue module module module ESPE INDICATION LED CONFIGURATION WORKING MODE Good Signal on modules, no optics intercepted Low Signal on modules, no optics intercepted At least one optic intercepted on modules with blinking red light Normal Operation (eg.) Modules with different signal... -
Page 144: Tx Side Dialogue
CASCADE SYSTEM TX Side dialogue ESPE INDICATION LED CONFIGURATION WORKING MODE NO CODE Normal Operation CODE1 Emission Active CODE2 Failure on microprocessor Failure Failure on optics Cascade Failure SH4 ADVANCED... -
Page 145: Response Time
RESPONSE TIME RESPONSE TIME Cascade operation is composed by a serialized optic scanning of all cascade units, then the same post-Elaboration (optic scan analysis and self-testing) of single unit operation. Then response time can be calculated in the same way of single unit case considering Tscan as the time to scan all cascade units (comprehensive of communication messages for units sync purpose). - Page 146 CASCADE SYSTEM SH4 ADVANCED...
- Page 147 PRODUCT REFERENCE GUIDE...
-
Page 148: Appendix Gglossary
Device used by the ESPE to monitor the status of the external command devices. Emitter (TX) Unit emitting infrared beams, consisting of a set of optically-synchronized LEDs. The emitting unit, combined with the receiving unit (installed in the opposite position), gen- erates an optical “curtain”, i.e. the detecting area. SH4 ADVANCED... - Page 149 ESPE (Electro-sensitive protective equipment) Assembly of devices and/or components working together to activate the protective disabling function or to detect the presence of something and including at least: a sen- sor, command/control devices and output signal switching devices. Force-guided contacts Relay contacts are force guided when they are mechanically connected so that they must switch simultaneously on input change.
- Page 150 The classification and definition of the "type" (ex. type 2, type 4, according to EN 61496- 1: 2020) defines the minimum requirements needed for ESPE design, manufacturing and testing. Working point Machine position where the material or semi finished product is worked. SH4 ADVANCED...
- Page 152 © 2022 Datasensing S.r.l. • All rights reserved • Without limiting the rights under copyright, no part of this documentation may be reproduced, stored in or intro- duced into a retrieval system, or transmitted in any form or by any means, or for any purpose, without the express written permission of Datasensing S.r.l.
Need help?
Do you have a question about the SH4 ADVANCED and is the answer not in the manual?
Questions and answers