
Related Manuals for Thermo Scientific Sorvall LYNX 4000


Summary of Contents for Thermo Scientific Sorvall LYNX 4000
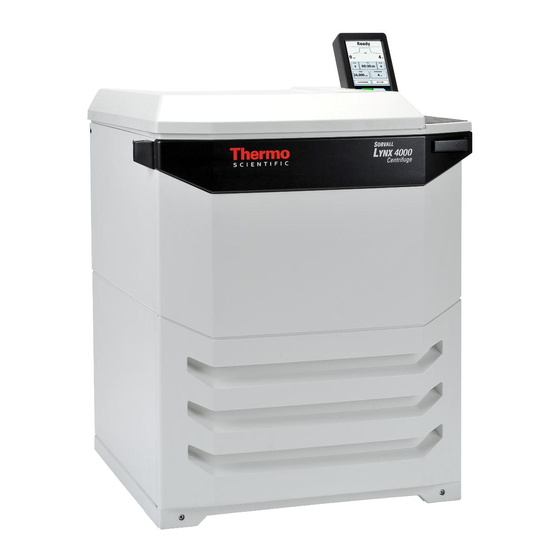
- Page 1 Thermo Scientific Sorvall LYNX 4000 / 6000 Superspeed Centrifuge Instruction Manual 50136519-h • 06 / 2021 Visit us online to register your warranty: thermofisher.com/labwarranty...
- Page 2 WEEE Conformity This product is subject to the regulations of the EU Waste Electrical & Electronic Equipment (WEEE) Directive 2012/19/EU. It is marked by the following symbol:...
-
Page 3: Table Of Contents
Introduction and Description ..........1 Characteristics of the Sorvall LYNX 4000 / 6000 Centrifuge ....2 Technical Data . - Page 4 Chemical Compatibility Chart ........53 Sorvall LYNX 4000 / 6000...
-
Page 5: Preface
Scope of Supply Article Number Description Quantity Check Centrifuge 75006580 Sorvall LYNX 4000, 200-240 V ±10 % 75006590 Sorvall LYNX 6000, 200-240 V ±10 % 75006581 Sorvall LYNX 4000, 380-415 V ±10 % 75006591 Sorvall LYNX 6000, 380-415 V ±10 %... -
Page 6: Intended Purpose
This symbol refers to information on hazards, described within the manual. This Symbol refers to check, if the rotor is installed correct by lifting it slightly at the handle. See “Rotor Installation” page Sorvall LYNX 4000 / 6000 Thermo Scientific... -
Page 7: Precautions
• If a hazardous situation occurs, turn off the power supply to the centrifuge and leave the area immediately. Note In order to ensure safe operation of the Sorvall LYNX 4000 / 6000 centrifuge, general safety regulations must be followed: Mind the accident prevention regulations in your country. - Page 8 Preface Precautions WARNING In order to ensure safe operation of the Sorvall LYNX 4000 / 6000 centrifuge , the following general safety regulations must be followed: • The centrifuge should be operated by trained specialists only. • The centrifuge is to be used for its intended use only.
- Page 9 • Highly corrosive substances which can cause material damage and impair the mechanical stability of the rotor, should only be centrifuged in corresponding protective tubes. WARNING In case of rotor failure the centrifuge is not aerosol-tight. Thermo Scientific Sorvall LYNX 4000 / 6000...
- Page 10 Always keep a distance of 20 cm between the rotor and the active implant, as the product generates permanent magnetic fields. The magnetic field strength at a distance of 20 cm is less than 0.1 mT, so there should be no interference. viii Sorvall LYNX 4000 / 6000 Thermo Scientific...
-
Page 11: Introduction And Description
Introduction and Description Contents “Characteristics of the Sorvall LYNX 4000 / 6000 Centrifuge” page 2 • • “Technical Data” page 3 “Directives, Standards and Guidelines” page 4 • • “Functions and Features” page 5 “Mains Supply” page 6 • •... -
Page 12: Characteristics Of The Sorvall Lynx 4000 / 6000 Centrifuge
• The Sorvall LYNX 4000 / 6000 centrifuge can be equipped with an optional HEPA filter (HEPA-Filter Kit 75000011). • The Sorvall LYNX 4000 / 6000 centrifuge can be bolted down to the floor (Optional Seismic Bolt-down Kit 75006500) optionally. -
Page 13: Technical Data
Introduction and Description Technical Data Technical Data The technical data of the Sorvall LYNX 4000 / 6000 centrifuge is listed in the following table. Table 1. Technical Data Feature Sorvall LYNX 4000 Sorvall LYNX 6000 Environmental Conditions -Use in interior Spaces -Altitudes of up to 2,000 m above Sea Level -Max. -
Page 14: Directives, Standards And Guidelines
Introduction and Description Directives, Standards and Guidelines Directives, Standards and Guidelines The Sorvall LYNX 4000 / 6000 centrifuge is produced and inspected according to the following standards and guidelines: Table 2. Directives, Standards and Guidelines Observed by the following Tension / Frequency... -
Page 15: Functions And Features
Introduction and Description Functions and Features Functions and Features The following table gives an overview of the important functional and performance characteristics of the Sorvall LYNX 4000 / 6000 centrifuge. Table 3. Functions and Features Component / Function Description / Features... -
Page 16: Mains Supply
Mains Supply The following table contains an overview on the electrical contact data of the Sorvall LYNX 4000 / 6000 centrifuge. This data is to be taken into consideration when selecting the mains connection socket. Table 4. Electrical Connection Data... -
Page 17: Rotor Selection
Introduction and Description Rotor Selection Rotor Selection The Sorvall LYNX 4000 / 6000 centrifuge is supplied without a rotor. Various Thermo Scientific rotors are available to choose from. BIOFlex HC 75003000 BIOFlex HS 75003002 TH13-6x50 75003010 F9-6x1000 LEX 096-061075 F10-4x1000 LEX... - Page 18 Introduction and Description Sorvall LYNX 4000 / 6000 Thermo Scientific...
-
Page 19: Before Use
“Location” “Setting Up” page 12 • • “Leveling the Centrifuge” page 14 “Mains Connection” page 16 • • “Storage” page 16 “Shipping the Centrifuge” page 17 • • “Transporting the Centrifuge” page 17 Thermo Scientific Sorvall LYNX 4000 / 6000... -
Page 20: Before Setting Up
• People and hazardous substances must be kept out of the safety zone while centrifuging. • The set-up location must be well-ventilated at all times. A clearance of at least 10 cm around the centrifuge is reuqired for ventilation. Sorvall LYNX 4000 / 6000 Thermo Scientific... -
Page 21: Bolting Down The Centrifuge (Optional)
If the centrifuge is bolted down to the floor the safety zone is reduced to 10 cm ( Seismic Bolt-down Kit 75006500). Contact a Thermo Scientific service technician if you wish to bolt down the centrifuge. Thermo Scientific... -
Page 22: Setting Up
Rails screwed onto the pallet for transport. 3. Screw the rails onto the pallet behind the centrifuge. Figure 3. Screw the rails onto the pallet for installation. 4. Remove the rear wooden protectors. Sorvall LYNX 4000 / 6000 Thermo Scientific... - Page 23 7. Once the centrifuge is in its final position screw the rubber feet entirely down. First use your hand then the wrench to lower the feet. The casters should be 5-15 mm off the ground. Thermo Scientific Sorvall LYNX 4000 / 6000...
-
Page 24: Leveling The Centrifuge
If 50 % of the bubble remains within the marked area, the leveling of the centrifuge is fine. If more than 50 % of the bubble leaves the circle marking, the centrifuge must be leveled again. acceptable very good level again Figure 6. Position of the bubble in the water level. Sorvall LYNX 4000 / 6000 Thermo Scientific... - Page 25 Figure 7. Fixating the centrifuge feet. CAUTION If the centrifuge is not leveled, imbalances can occur and the centrifuge can be damaged. Do not place anything under the centrifuge feet to level the centrifuge. Thermo Scientific Sorvall LYNX 4000 / 6000...
-
Page 26: Mains Connection
• Before storing the centrifuge and the accessories it must be cleaned and if necessary disinfected and decontaminated. • Store the centrifuge in a clean, dust-free location. • For safety, store the centrifuge on its rubber feet and not on its casters. • Avoid storing the centrifuge indirect sunlight. Sorvall LYNX 4000 / 6000 Thermo Scientific... -
Page 27: Shipping The Centrifuge
Note Store the centrifuge packaging. Contact a shipping company for the transport. Inform customer service. Always remove the rotor before moving the centrifuge. If you do not remove the rotor you might damage the centrifuge drive or centrifuge spindle. Thermo Scientific Sorvall LYNX 4000 / 6000... - Page 28 Before Use Sorvall LYNX 4000 / 6000 Thermo Scientific...
-
Page 29: Control Panel
Control Panel Contents page 20 “Control Panel” • page 21 • “Status” “Run Parameters” page 22 • • “Control and Configuration” page 23 Thermo Scientific Sorvall LYNX 4000 / 6000... -
Page 30: Control Panel
The control panel is a touchscreen that contains the centrifuge display. All parameters can be selected and changed during operation. The main screen is divided into the following sections: Status Parameters Control and Configuration Sorvall LYNX 4000 / 6000 Thermo Scientific... -
Page 31: Status
No rotor is being used in the centrifuge. Idle The centrifuge is in idle operation. Initialization The centrifuge is being prepared for operation. Timeout It was not possible to reach the target temperature for pretempering in the defined time period. Thermo Scientific Sorvall LYNX 4000 / 6000... -
Page 32: Run Parameters
Rotor: displayed initially. You can change the The rotor currently in use is displayed parameters once you have selected a program. here (in this case: F12-6x500 LEX). Sorvall LYNX 4000 / 6000 Thermo Scientific... -
Page 33: Control And Configuration
Tooltip mode a field selecting other options. is displayed with information about that particular element. If you press the Tooltip button again, this mode is canceled. Thermo Scientific Sorvall LYNX 4000 / 6000... - Page 34 Control Panel Sorvall LYNX 4000 / 6000 Thermo Scientific...
-
Page 35: Operation
“Programmed Operation” • page 32 • “Starting Centrifuge Program” page 32 “Stopping the Centrifugation Program” • page 33 • “Removing the Rotor” page 33 “Turning Off the Centrifuge” • page 33 • “Additional Features” Thermo Scientific Sorvall LYNX 4000 / 6000... -
Page 36: Switch On Centrifuge
CAUTION Do not reach into the gap between the centrifuge door and the housing. The centrifuge door is drawn shut automatically. Place you hands always on top of the centrifuge door. Use the emergency release only for malfunctions and power failures (see “Manual Door Release” page 44). Sorvall LYNX 4000 / 6000 Thermo Scientific... -
Page 37: Rotor Installation
“Manual Door Release” page 44). Rotor Installation The approved rotors for the Sorvall LYNX 4000 / 6000 centrifuge are listed in section “Rotor Selection” page 7. Use only the rotors and accessories from this list in the centrifuge. CAUTION Unapproved or incorrectly combined accessories can cause serious damage to the centrifuge. -
Page 38: Entering Parameters
There are 9 curves (1-9) for acceleration and 10 for deceleration(0-9). The acceleration / deceleration profile can be selected in the main screen. Enter Acceleration and Deceleration Profile Figure 10. Touch the desired field and a window will open. Sorvall LYNX 4000 / 6000 Thermo Scientific... - Page 39 The digits show in sequential order. 4. Confirm your entry by pressing Confirm. Note If an extremely low or high speed or RCF-value has been selected, a message will appear with the permissible values. Thermo Scientific Sorvall LYNX 4000 / 6000...
- Page 40 00:00:00 Z: Power (3 input field) Initial value: Defined duration hh:mm:00 Enter the desired value using the numeric pad. The digits show in sequential order. 2. Confirm your entry by pressing Confirm. Sorvall LYNX 4000 / 6000 Thermo Scientific...
- Page 41 Entering Parameters Preselecting the Temperature For the Sorvall LYNX 4000 centrifuge you can preselect temperatures between -10° C and +40 °C. For the Sorvall LYNX 6000 centrifuge you can preselect temperatures between -20 °C and +40 °C. To set the temperature, proceed as follows: 1.
-
Page 42: Programmed Operation
In the main screen you can then set the required target temperature. Programmed Operation The Sorvall LYNX 4000 / 6000 centrifuge can store up to 120 programs. In order to create and store programs refer to the separate manual. Starting Centrifuge Program Press the key on the touchscreen. -
Page 43: Removing The Rotor
Turn off the power supply switch located on right side (pull the switch handle towards the front of the centrifuge). Additional Features Rotor Landing Pad Rotor Lid Holder Additional Features of the Sorvall LYNX 4000 / 6000 Figure 15. Thermo Scientific Sorvall LYNX 4000 / 6000... - Page 44 Note Some rotors lids have a mandrel that is part of the Auto-Lock. Use the rotor lid holder to store the rotor lid. Auto-Lock Rotor Lid Figure 16. CAUTION Mind the Auto-Lock mandrel inside the rotor lid. Do not touch the mandrel. Sorvall LYNX 4000 / 6000 Thermo Scientific...
-
Page 45: Maintenance And Care
• “Cleaning the Condenser Filter” page 39 “Disinfection” • page 40 • “Decontamination” page 41 “Autoclaving” • page 41 • “Service of Thermo Fisher Scientific” page 42 “Shipping and Deposing of Accessories” • Thermo Scientific Sorvall LYNX 4000 / 6000... -
Page 46: Cleaning Intervals
• After cleaning, treat the entire surface of aluminum parts with corrosion protection oil (70009824). Also treat the cavities with oil. • Store the aluminum parts at room temperature or in a cold-storage room with the cavities pointing down. Sorvall LYNX 4000 / 6000 Thermo Scientific... - Page 47 Organic solvents break down the grease in the motor bearing. The drive shaft could freeze up. After some applications their might be ice in the rotor chamber. Let the ice melt and drain it off. Clean the rotor chamber as described above. Thermo Scientific Sorvall LYNX 4000 / 6000...
-
Page 48: Cleaning The Touchscreen
CAUTION The fins of the condenser are very sharp. Make sure to wear protective gloves when removing the filter mats. The Sorvall LYNX 4000 / 6000 centrifuge has two filter mats to prevent dust from entering the centrifuge. In order to clean them proceed as follows: 1. -
Page 49: Disinfection
10. Dry all of the rotors and accessories after cleaning with a cloth or in a warm air cabinet at a maximum temperature of 50 °C. 11. After cleaning, treat the entire surface of aluminum parts with corrosion protection oil (70009824). Also treat the cavities with oil. Thermo Scientific Sorvall LYNX 4000 / 6000... -
Page 50: Decontamination
10. Dry all of the rotors and accessories after cleaning with a cloth or in a warm air cabinet at a maximum temperature of 50 °C. 11. After cleaning, treat the entire surface of aluminum parts with corrosion protection oil (70009824). Also treat the cavities with oil. Sorvall LYNX 4000 / 6000 Thermo Scientific... -
Page 51: Autoclaving
Thermo Fisher Scientific offers inspection and service contracts for this work. Any necessary repairs are performed for free during the warranty period and afterwards for a charge. This is only valid if the centrifuge has only been maintained by a Thermo Scientific service technician. Thermo Scientific... -
Page 52: Shipping And Deposing Of Accessories
Shipping and Deposing of Accessories Shipping and Deposing of Accessories Contact the Thermo Scientific customer service before returning any item. You will receive a Return Materials Authorization (RMA) that must be used for the shipping. When you have questions regarding the deposing the customer service will help you as well. -
Page 53: Troubleshooting
Troubleshooting Contents • “Manual Door Release” page 44 “Troubleshooting by User” page 45 • “When to contact a Service Technician” page 46 • Thermo Scientific Sorvall LYNX 4000 / 6000... -
Page 54: Manual Door Release
Pull the release cords attached to it at the same time to trigger the mechanical centrifuge door release. The centrifuge door will open and the samples can be removed. Emergency Door Release Figure 18. Emergency Door Release Sorvall LYNX 4000 / 6000 Thermo Scientific... -
Page 55: Troubleshooting By User
Check that the bolts of the rotor are well greased. Restart the centrifuge. If the message appears again, inform a service technician. E- 99 Restart the centrifuge. If the message appears again, inform a service technician. Thermo Scientific Sorvall LYNX 4000 / 6000... -
Page 56: When To Contact A Service Technician
Sorvall LYNX 6000 centrifuge displays an error message. Contact a service technician. Until the problem has been solved you can operate the Sorvall LYNX 6000 centrifuge at lower speeds. Confirm with the speeds given for the Sorvall LYNX 4000 centrifuge in the rotor manual. -
Page 57: Rotor Care Guide
“Missing Paint and Anodization” page 49 • “Dropped Rotors” page 49 • “Overheating” page 49 • “Rotor Maintenance” page 49 • page 51 “Maintenance and Care” • page 51 “Storage” • page 52 “Decontamination” • Thermo Scientific Sorvall LYNX 4000 / 6000... -
Page 58: Routine Evaluation And Care Of Your Rotor
In addition, ensure that all tubes, bottles and adapters are being used within their specified limits and according to the manufacturer's directions. Tube or bottle failures during centrifugation can result in minor to severe damage to rotors and centrifuges. Sorvall LYNX 4000 / 6000 Thermo Scientific... -
Page 59: Rotor Maintenance
• Use care when removing o-rings. • Clean with non-abrasive cloth and mild detergent. Damage to biocontainment • Use care when removing o-rings. Replace sealing lid to ensure sealing lid proper containment • Inspect and replace o-rings regularly. Thermo Scientific Sorvall LYNX 4000 / 6000... - Page 60 • Clean and lubricate regularly. Rotor bucket damage • Avoid banging or dropping Replace rotor buckets or return bucket set for rebalancing. • Do not exceed rotor's maximum compartment mass. • Ensure buckets are free of debris. Sorvall LYNX 4000 / 6000 Thermo Scientific...
- Page 61 • Remove all adapters from rotor cavities when not in use. • Dry and store upside-down Use a PTFE-coated or plastic matting to allow for airflow or a ventilated shelf to avoid gathering condensation in the cavity or bucket bottom. Thermo Scientific Sorvall LYNX 4000 / 6000...
- Page 62 • Rinse with ethanol, followed by water and dry with a soft cloth. • Do not immerse Thermo Scientific Fiberlite rotors; spin rotor to remove liquid. • Fiberlite composite rotors are not compatible with ethylene oxide.
-
Page 63: Chemical Compatibility Chart
U S S M S S U S S S S S S S S S U S S S S S S S S S S Boric Acid Cesium Acetate S S S - S S S S - S S - S S S S S S M S S S Thermo Scientific Sorvall LYNX 4000 / 6000... - Page 64 S M U S S S S M S U U U - Hydrofluoric Acid (50 %) U U U U - U U U U S U U U S S M M S U U U - Sorvall LYNX 4000 / 6000 Thermo Scientific...
- Page 65 S S - S S S S S S M S S S Lactic Acid (100 %) M S U - S S S M S S - M S M S S - Thermo Scientific Sorvall LYNX 4000 / 6000...
- Page 66 S S S S S S M S S S Rubidium Chloride Sucrose M S S - S S S S S S S S S S S S S S S S S S S S S S S Sorvall LYNX 4000 / 6000 Thermo Scientific...
- Page 67 Citric Acid (10 %) M S S M S S M S S S S S S S S S M S S S S S S S S S S Polyethyleneterephthalate Thermo Scientific Sorvall LYNX 4000 / 6000 57...
- Page 68 Chemical resistance data is included only as a guide to product use. No organized chemical resistance data exists for materials under the stress of centrifugation. When in doubt we recommend pretesting sample lots. Sorvall LYNX 4000 / 6000 Thermo Scientific...
- Page 69 Entering Parameters ......... 28 Removing the Rotor ......... 33 Error Message ........... 45, 46 Explanation of RCF Value ....... 30 Rotor Installation ..........27 Rotor Landing Pad ........... 34 Rotor Lid Holder ..........34 Thermo Scientific Sorvall LYNX 4000 / 6000...
- Page 70 Starting Centrifuge Program ......32 Status ............... 21 Stopping the Centrifugation Program ....32 Storage ............. 16 Switch on ............26 Technical Data ........... 3 Transport ............17 Troubleshooting ..........43 Turning off the Centrifuge ....... 33 Sorvall LYNX 4000 / 6000 Thermo Scientific...
- Page 71 Index Thermo Scientific Sorvall LYNX 4000 / 6000...
- Page 72 Thermo Electron LED GmbH Zweigniederlassung Osterode Am Kalkberg, 37520 Osterode am Harz Germany thermofisher.com/centrifuge © 2021 Thermo Fisher Scientific Inc. All rights reserved. All trademarks are the property of Thermo Fisher Scientific Inc. and its subsidiaries unless otherwise indicated. Delrin is a registered trademark of Dupont Polymers, Inc. TEFLON and Viton are registered trademarks of The Chemours Company FC. Noryl and Valox are registered trademarks of Sabic Global Technologies.
Need help?
Do you have a question about the Sorvall LYNX 4000 and is the answer not in the manual?
Questions and answers