Compaq StorageWorks ESL9000 Series Installation Manual
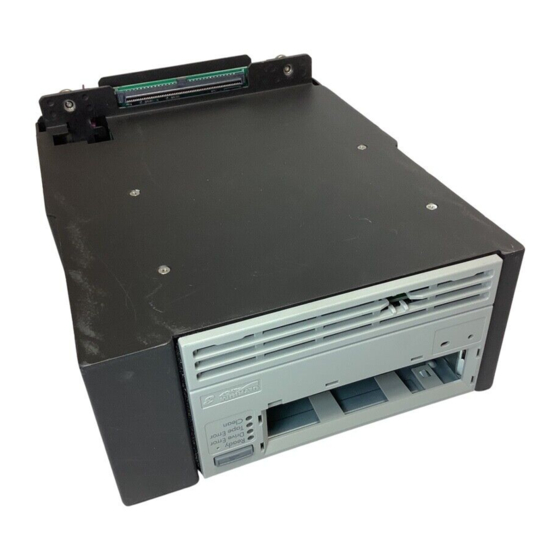
Pass-through mechanism
Hide thumbs
Also See for StorageWorks ESL9000 Series:
- Installation manual (62 pages) ,
- Reference manual (157 pages)

Related Manuals for Compaq StorageWorks ESL9000 Series


Summary of Contents for Compaq StorageWorks ESL9000 Series
- Page 1 Pass-Through Mechanism Installation Guide First Edition (February 2000) Part Number 175383-001 Compaq Computer Corporation...
- Page 2 © 2000 Compaq Computer Corporation. Printed in the U.S.A. Compaq and the Compaq logo Registered in U. S. Patent and Trademark Office. StorageWorks is a service mark of Compaq Information Technologies Group, L.P. in the United States and/or other countries. Motorola is a registered trademark of Motorola, Inc. in the United States and/or other countries.
-
Page 3: Table Of Contents
Contents About This Guide Text Conventions.......................vii Symbols in Text....................... viii Symbols on Equipment.................... viii Cabinet Stability ......................ix Getting Help ........................x Compaq Technical Support ..................x Compaq Website ....................x Compaq Authorized Reseller................xi Chapter 1 PTM Installation Preparation Introduction ......................1-1 Presteps........................1-2 Preparing for the PTM Installation ................ - Page 4 Compaq StorageWorks Pass-Through Mechanism Installation Guide Chapter 4 Cabling the PTM Introduction......................4-1 QSPI Bus........................4-1 Cabling Instructions ....................4-2 Chapter 5 PTM Configuration and Calibration Introduction......................5-1 Configuration and Firmware Check................. 5-2 Multi-Unit Commands ..................... 5-2 Opening the Multi-Unit Screen................. 5-2 Configure Multi-Units ..................
- Page 5 About This Guide v Figure 5-2. Enter password screen................5-4 Figure 5-3. Configure multi-unit screen ..............5-6 Figure 5-4. Library numbering (front view from control panel)......5-8 Figure 5-5. Library numbering (from diagnostic port) ......... 5-11 Figure 5-6. Five-tape library configuration ............5-13 List of Tables Table 1-1 PTM Upgrade Parts .................
-
Page 6: About This Guide
About This Guide This guide is designed to be used as step-by-step instructions for installing the Compaq StorageWorks Pass-Through Mechanism. Text Conventions This document uses the following conventions to distinguish elements of text: Keys Keys appear in boldface. A plus sign (+) between two keys indicates that they should be pressed simultaneously. -
Page 7: Symbols In Text
Compaq StorageWorks Pass-Through Mechanism Installation Guide Symbols in Text These symbols may be found in the text of this guide. They have the following meanings. WARNING: Text set off in this manner indicates that failure to follow directions in the warning could result in bodily harm or loss of life. -
Page 8: Cabinet Stability
About This Guide ix Any surface or area of the equipment marked with these symbols indicates the presence of a hot surface or hot component. If this surface is contacted, the potential for injury exists. WARNING: To reduce the risk of injury from a hot component, allow the surface to cool before touching. -
Page 9: Getting Help
Compaq Technical Support In North America, call the Compaq Technical Phone Support Center at 1-800-OK-COMPAQ. This service is available 24 hours a day, 7 days a week. For continuous quality improvement, calls may be recorded or monitored. Outside North America, call the nearest Compaq Technical Support Phone Center. -
Page 10: Compaq Authorized Reseller
About This Guide xi Compaq Authorized Reseller For the name of your nearest Compaq authorized reseller: In the United States, call 1-800-345-1518. In Canada, call 1-800-263-5868. Elsewhere, see the Compaq website for locations and telephone numbers. -
Page 11: Ptm Installation Preparation
NOTE: These instructions address tape libraries with a serial number of 2G99CZN11001 or higher. Tape libraries with a serial number lower than 2G99CZN11001 might require additional hardware upgrades to support the PTM. Contact your Compaq service representative for further information. -
Page 12: Presteps
1-2 Compaq StorageWorks Pass-Through Mechanism Installation Guide Presteps 1. Verify the packing slip for all required parts. 2. Make sure the tape library is functional by running SysTest from the Operator control panel. 3. Perform a calibration and inventory using the Operator control panel. -
Page 13: Multi-Unit Trim Parts
PTM Installation Preparation 1-3 Table 1-1 PTM Upgrade Parts continued Part Number Quantity Description 0905057 Screws 10F x 0.625 0685023 Washers 0.203 x 0.438 x 0.032 0605060 Bushing 2-inch with nylon hole 175217-001 ESL9000 firmware upgrade kit 175218-000 ESL9000 firmware load instructions Multi-Unit Trim Parts The required Multi-Unit Trim Parts (P/N 161268-B22) for this procedure is: Table 1-2... -
Page 14: Ptm Required Tools
1-4 Compaq StorageWorks Pass-Through Mechanism Installation Guide PTM Required Tools The following tools are required to perform the PTM installation procedure: 12-inch straight edge ruler #2 Phillips screwdriver 5/16-inch open-end wrench Torque wrench capable of 30-in/lb with #2 Phillips bit, 5/16-inch... -
Page 15: Attaching Tape Libraries
Chapter Attaching Tape Libraries Introduction Up to five tape libraries can be attached using the PTM upgrade parts. All of the tape libraries must be physically attached to one another. Repeat the following procedure for all tape libraries in the configuration. Attaching Procedure To attach the first two tape libraries: WARNING: Two people are required to perform this procedure. -
Page 16: Table 2-1 Side Panel Removal
2-2 Compaq StorageWorks Pass-Through Mechanism Installation Guide Figure 2-1. Side panel removal Table 2-1 Side Panel Removal Figure Legend Description Screws Screws Left panel of right tape library Right panel of left tape library... -
Page 17: Table 2-2 Cosmetic Anchors (Left Tape Library Shown)
Attaching Tape Libraries 2-3 Figure 2-2. Cosmetic anchors Table 2-2 Cosmetic Anchors (Left Tape Library Shown) Figure Legend Description Screw Screw PTM cover 5. Install four screws (P/N 0615079) in place of the four previously removed screws. Do not tighten, leave one-quarter inch clearance between the SEM washer and the trim pieces. -
Page 18: Figure 2-3. Lower Cabinet Attachment Channel Installation On Left Tape
2-4 Compaq StorageWorks Pass-Through Mechanism Installation Guide Figure 2-3. Lower cabinet attachment channel installation on left tape library... -
Page 19: Figure 2-4. Attaching The Tape Library Cabinets
Attaching Tape Libraries 2-5 Table 2-3 Lower Cabinet Attachment Channel (Left Tape Library Figure Legend Description Lower cabinet attachment channel Lower cabinet mounting base (right side of tape library) Lower cabinet attachment channel Inside ribbon cable cover NOTE: Make sure that the ribbon cable is not pinched in the interior of the tape library when tightening the bolts. - Page 20 2-6 Compaq StorageWorks Pass-Through Mechanism Installation Guide 9. Attach the right tape library to the lower cabinet attachment channel with five bolts (P/N 0615113) and washers (P/N 0685521). Do not fully tighten and allow the lower cabinet attachment channel to float freely.
-
Page 21: Table 2-4 Upper Cabinet Attachment Plate And Spacers
Attaching Tape Libraries 2-7 Figure 2-5. Upper cabinet attachment plate and spacers Table 2-4 Upper Cabinet Attachment Plate and Spacers Figure Legend Description Upper cabinet attachment plate Spacers NOTE: The upper cabinet attachment plate might distort when the screws are tightened. This is normal. -
Page 22: Installing The Ptm
Chapter Installing the PTM Introduction This chapter describes how to install the PTM assembly. Also included are instructions for installing tape library cosmetics. -
Page 23: Installation Instructions
3-2 Compaq StorageWorks Pass-Through Mechanism Installation Guide Installation Instructions To install the PTM assembly: 1. Remove the top three tape cartridge bins from the left columns of the right tape library (see Figure 3-1). Save all hardware for reinstallation at a later time. -
Page 24: Figure 3-2. Cable Hole Location
Installing the PTM 3-3 2. Remove the cable hole plug on the right tape library as shown in Figure 3-2 and then install the supplied grommet into the hole. 3. Install one 2-inch bushing (P/N 0605060). 4. Reach through the hole (see Figure 3-2) and pull the pass-through cable through the hole, leaving approximately 18 inches of the cable on the front side of the bin wall. -
Page 25: Table 3-3 Screw Locations
3-4 Compaq StorageWorks Pass-Through Mechanism Installation Guide 5. Install two screws (P/N 0905057) with washers (P/N 0685023) in the locations shown in Figure 3-3, one in each tape library (second hole from the bottom towards the bins). Do not fully tighten, leave approximately 1/4-inch space in between the washer and the bin wall. -
Page 26: Table 3-4 Ptm Installation
Installing the PTM 3-5 6. Holding the PTM right side up, slide it through the right tape library pass-through cut out and into the left tape library (see Figure 3-4). Figure 3-4. PTM installation Table 3-4 PTM Installation Figure Legend Description Screw Screw... - Page 27 3-6 Compaq StorageWorks Pass-Through Mechanism Installation Guide 7. Slide the PTM mounting tabs onto the screws previously installed in Step 4. 8. Install the two screws (P/N 0905057) with washers (P/N 0685023) on the bottom mounting tabs of the PTM, one in each tape library.
-
Page 28: Table 3-5 Ptm Cable Connection
Installing the PTM 3-7 Table 3-5 PTM Cable Connection Figure Legend Description Connector (PTM shown outside of tape library for clarity) 10. Route the cable through the clips provided on the bottom of the PTM. Push the excess cable through the cable hole in the bin wall. 11. -
Page 29: Figure 3-6. Pass-Through Cable Cover
3-8 Compaq StorageWorks Pass-Through Mechanism Installation Guide Figure 3-6. Pass-through cable cover... -
Page 30: Table 3-6 Ptm Cable Cover
Installing the PTM 3-9 Table 3-6 PTM Cable Cover Figure Legend Description Screws PTM cable cover Screw 12. Reinstall the tape cartridge bins that were previously removed. Tighten the screws to a torque value of 12 ± 1-in/lb. 13. Center the PTM between the tape library bin shelves as shown in Figure 3-7. - Page 31 3-10 Compaq StorageWorks Pass-Through Mechanism Installation Guide Figure 3-7. Centering the PTM...
-
Page 32: Installing Library Cosmetics
Installing the PTM 3-11 Table 3-7 Centering the PTM Figure Legend Description Left tape library bin-to-PTM distance Right tape library bin-to-PTM distance Left tape library bin shelves Right tape library bin shelves The PTM installation is complete. Repeat the procedure for additional tape libraries. - Page 33 3-12 Compaq StorageWorks Pass-Through Mechanism Installation Guide Figure 3-8. Space between tape libraries...
-
Page 34: Table 3-8 Space Between Tape Libraries
Installing the PTM 3-13 Table 3-8 Space Between Tape Libraries Figure Legend Description Top measurement Bottom measurement 2. Loosely assemble the four front cosmetic panels as shown in Figure 3-9. Do not tighten the nuts at this time. Figure 3-9. Front cosmetic panel assembly Table 3-9 Front Cosmetic Panel Assembly Figure Legend... - Page 35 3-14 Compaq StorageWorks Pass-Through Mechanism Installation Guide 3. Adjust the width of the top of the assembly to be 1/16 of an inch less than the top measurement found in Step 1. This enables the cosmetic assembly to slide in between the tape libraries for installation.
-
Page 36: Table 3-10 Foam Gasket Installation
Installing the PTM 3-15 Figure 3-10. Foam gasket installation Table 3-10 Foam Gasket Installation Figure Legend Description Foam gasket (right side of assembly shown uninstalled for clarity) 9. Install the cosmetic panel assembly into the front gap between the tape libraries (see Figure 3-11). -
Page 37: Table 3-11 Front Cosmetic Panel Installation
3-16 Compaq StorageWorks Pass-Through Mechanism Installation Guide Figure 3-11. Front cosmetic panel installation Table 3-11 Front Cosmetic Panel Installation Figure Legend Description Front cosmetic panel installed... -
Page 38: Figure 3-12. Rear Cosmetic Panel Assembly
Installing the PTM 3-17 11. Assemble the male and female cosmetic panels as shown in Figure 3-12. Figure 3-12. Rear cosmetic panel assembly 12. Moving the two panels as a unit, install the two lower restraints into the mating slots in the lower cabinet attachment channel and lower the set of panels until the upper frames of the cosmetic panels rest on each of the two tape library frames. -
Page 39: Table 3-12 Rear Cosmetic Panel Installation
3-18 Compaq StorageWorks Pass-Through Mechanism Installation Guide 13. Install a 1/4-20 x 3/4-inch screw to fasten each cosmetic panel in place (see Figure 3-13). Figure 3-13. Rear cosmetic panel installation Table 3-12 Rear Cosmetic Panel Installation Figure Legend Description Screws (2) Rear cosmetic panel installed The rear cosmetic panel installation is complete. -
Page 40: Cabling The Ptm
Chapter Cabling the PTM Introduction This chapter provides the instructions for cabling a multi-unit tape library system. This chapter also includes a QSPI bus description. QSPI Bus The QSPI bus is a full-duplex synchronous serial interface for communicating with peripherals and other micro-controller units. The QSPI bus is a standard Motorola bus that ESL9000 multi-unit tape library systems use as a custom control language to communicate between master and slave tape libraries. -
Page 41: Cabling Instructions
4-2 Compaq StorageWorks Pass-Through Mechanism Installation Guide Cabling Instructions To cable the tape libraries: 1. Open the rear access doors of the tape libraries being connected. 2. Locate the Queued Serial Peripheral Interface (QSPI) connectors on the bottom of the PCI chassis (see Figure 4-1). - Page 42 Cabling the PTM 4-3 3. Install a QSPI terminator on the left QSPI connector for the left tape library. 4. Connect one end of the interconnect cable to the right QSPI connector on the left tape library. 5. Route the interconnect cable through the bottom of the tape library and then connect it to the left QSPI connector on the right tape library.
-
Page 43: Ptm Configuration And Calibration
Chapter PTM Configuration and Calibration Introduction After the PTM has been successfully installed, the tape libraries must be configured and calibrated to operate correctly. Following are the configuration and firmware check instructions and the multi- unit commands associated with configuring a multi-unit tape library system. Also included are instructions that must be completed on each one of the tape libraries connected using the PTM. -
Page 44: Configuration And Firmware Check
5-2 Compaq StorageWorks Pass-Through Mechanism Installation Guide Configuration and Firmware Check 1. Connect the AC power cords to the power source and power on the tape libraries. 2. Place the tape libraries in the Offline state by pressing the Standby tab on the Operator control panel. -
Page 45: Figure 5-1. Multi-Unit Screen
PTM Configuration and Calibration 5-3 Back Forward Home Multi Operator Service Unit System Multi-Unit Off-line Standby Configure Multi-Unit Load Port Calibrate All PTMs Stop Figure 5-1. Multi-unit screen... -
Page 46: Figure 5-2. Enter Password Screen
5-4 Compaq StorageWorks Pass-Through Mechanism Installation Guide Back Forward Home Multi Operator Service Unit System Enter Password Off-line Standby Load Port Operator Password: _ Enter Stop Figure 5-2. Enter password screen... -
Page 47: Configure Multi-Units
PTM Configuration and Calibration 5-5 Configure Multi-Units The Configure Multi-Unit command lets you set the following: Library Type—sets whether the tape library is single, slave, or master in the multi-unit configuration. Library Unit #—sets the number assigned to a particular tape library in the multi-unit configuration. -
Page 48: Figure 5-3. Configure Multi-Unit Screen
5-6 Compaq StorageWorks Pass-Through Mechanism Installation Guide Back Forward Home Multi Operator Service Unit System Configure: Multi-Unit Off-line Library Type: SINGLE Standby Library Unit #: Load Port # of Libraries: Select LUN Config: SINGLE LUN Change Stop Figure 5-3. Configure multi-unit screen 2. -
Page 49: Calibrating The Tape Library Pass-Through Elements
PTM Configuration and Calibration 5-7 Calibrating the Tape Library Pass-Through Elements The CALIBRATE ALL PTMs command lets you calibrate all PTMs in all of the tape libraries in the multi-unit configuration. Calibrate the tape libraries during the initial installation and after any maintenance procedure. To calibrate all PTM tape library elements: 1. -
Page 50: Ptm Configuration From The Control Panel
5-8 Compaq StorageWorks Pass-Through Mechanism Installation Guide PTM Configuration from the Control Panel To configure the tape library for the PTM from the control panel: 1. At the control panel, set each tape library to Off-Line. 2. Touch the Multi Unit Config tab. -
Page 51: Table 5-1 Tape Library Numbering (Front View From Control Panel)
PTM Configuration and Calibration 5-9 Table 5-1 Tape Library Numbering (Front View From Control Panel) Figure Legend Description Tape library 0 Tape library 1 Tape library 2 Tape library 3 Tape library 4 Left-hand side Right-hand side 6. Enter 1-5 for number of tape library units installed. 7. -
Page 52: Ptm Configuration Using The Diagnostic Port
5-10 Compaq StorageWorks Pass-Through Mechanism Installation Guide 10. After all tape libraries have completed the CALIBRATE ALL PTM’s command, set each tape library to On-Line starting with the slave units from right to left. Bring the master unit On-Line last. When the master tape library comes on-line, it issues a MODES SENSE command and retrieves configuration information from the slave tape libraries. -
Page 53: Figure 5-5. Library Numbering (From Diagnostic Port)
PTM Configuration and Calibration 5-11 Figure 5-5. Library numbering (from diagnostic port) Table 5-2 Tape Library Numbering (From Diagnostic Port) Figure Legend Description Tape library 0 Tape library 1 Tape library 2 Tape library 3 Tape library 4 Left-hand side Right-hand side 6. -
Page 54: Calibrating The Ptm
5-12 Compaq StorageWorks Pass-Through Mechanism Installation Guide 9. From the Multi Unit Config tab, touch the Calibrate all PTM’s button. All PTMs in all of the tape libraries are now calibrated. 10. After all tape libraries complete the CALIBRATE ALL PTM’s command, set each tape library to On-Line starting with the slave units from right to left. - Page 55 PTM Configuration and Calibration 5-13 0002 0080 0100 0088 0090 0246 0098 00A0 038C 00A8 00B0 04D2 00B8 00C0 0618 00C8 0087 008F 0097 009F 00A7 00AF 00B7 00BF 00C7 00CF 0040 004C 0058 0064 0070 0245 038B 04D1 0617 075D 008B 0057...
- Page 56 Index cabinet stability library cosmetics warning ix installing 3-11 cable hole locations, illustrated 3-3 Compaq authorized reseller xi Compaq website x multi-unit configuration calibrating tape libraries in 5-2 multi-unit trim parts 1-3 getting help x multi-units configuring 5-2 screen, opening 5-2...
- Page 57 2 Compaq StorageWorks Pass-Through Mechanism Installation Guide preparing for 1-2 symbols on equipment viii installation instructions 3-2 installation overview 1-1 multi-unit commands 5-2 pass-through cable cover, tape cartridge bins illustrated 3-6 locations 3-2 tape library rear cosmetic panel installation, numbering, illustrated 5-11...
Need help?
Do you have a question about the StorageWorks ESL9000 Series and is the answer not in the manual?
Questions and answers