Table of Contents
Advertisement
Quick Links
Download this manual
See also:
Reference Manual
Advertisement
Chapters
Table of Contents

Related Manuals for Intermec MaxiScan 2200


Summary of Contents for Intermec MaxiScan 2200
- Page 1 Installation Guide P/N 0-440049-01 MaxiScan 2200 Fixed-position Scanner...
-
Page 2: Regulatory Statements
Regulatory Statements Intermec hereby declares that the MaxiScan 2200 has been tested and found compliant with the below listed standards as required by the EMC Directive 89/336/EEC as amended by 92/31/EEC and by the Low Voltage Directive 73/23/EEC as amended by 93/68/EEC:... - Page 3 Veränderungen oder einer anderen Ausführung der Arbeitsabläufe entsteht gefährliches Laserlicht. CAUTION – L’utilisation de contrôles/commandes ou de réglages ou l’exécution de procédures autres que ceux précisés par le présent document provoquent une lumière laser dangereuse. MaxiScan 2200 - Installation Guide...
- Page 4 Laser warnings MaxiScan 2200 - Installation Guide...
-
Page 5: Table Of Contents
What you are going to do . . . This Installation Guide tells you how to install and set up your MaxiScan 2200 to operate successfully in most working situations. The present guide does not cover all the configuration capabilities of your MaxiScan 2200. Refer to the appendix for the complete list of configuration options provided with: the EasySet System scanner setup software—provided on the "Intermec products cd-rom"... - Page 6 What you are going to do . . . G MaxiScan 2200 operating parameters...99 H If you have a problem ..103 Test codes ... 105 Number codes ... 111 MaxiScan 2200 - Installation Guide...
-
Page 7: Check You Have Everything You Need
Check you have everything you need Checklist of items for your installation all systems the right MaxiScan 2200 model for your host system the right cable for your host system this MaxiScan 2200 Installation Guide MaxiScan 2200 user's leaflet if applicable... - Page 8 1 Check you have everything you need MaxiScan 2200 - Installation Guide...
-
Page 9: Install The Maxiscan 2200 In Its Operating Location
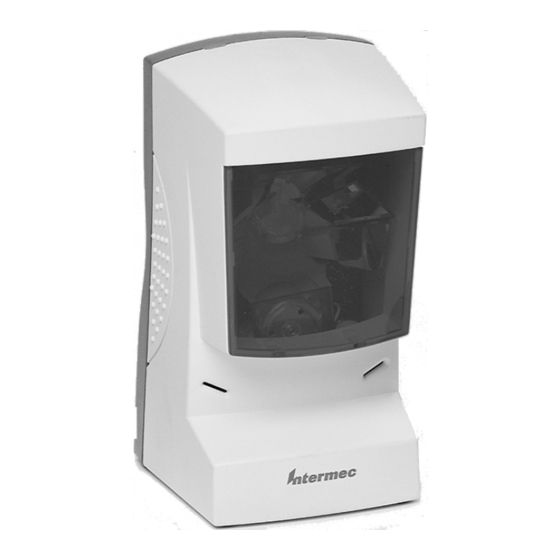
How do you want to use your MaxiScan 2200? Normal use For items that are too large or not easy to move, you can pick up the MaxiScan 2200 and use it as a hand scanner. MaxiScan 2200 - Installation Guide The MaxiScan 2200 is a self-standing scanner for “hands-free”... -
Page 10: Optional Adjustable Stand
MaxiScan 2200 directly to the work surface or use the special mounting plate provided in the MaxiScan 2200 product package. Appendix B tells you how to install the MaxiScan 2200 in a fixed reading position. If you use the optional adjustable stand or install your... -
Page 11: Switch Off The Host System And Connect Up Your Maxiscan 2200
IBM 46xx cash registers...15 OCIA cash registers ...16 Wand emulation ...17 keyboard wedge MaxiScan 2200 connected between a keyboard and the host system— data from the MaxiScan 2200 is transmitted in keyboard emulation mode to provide instant software compatibility (external power supply necessary) -
Page 12: Keyboard Wedge
1. Switch off the host system. 2. Disconnect the keyboard from the host computer. 3. Use the keyboard wedge cable to connect the MaxiScan 2200 between the keyboard and the host computer. Do not switch on the host computer. - Page 13 Õ host system 1. Switch off the host system. 2. Use the RS-232 cable to connect the MaxiScan 2200 to the host system. Do not switch on the host system. 3. If your host system requires an external power supply: Connect the power supply to the RS-232 cable.
- Page 14 DTE connector (to host) only. 1. Switch off the host system. 2. Disconnect the terminal from the host system. 3. Use the dual RS-232 cable to connect the MaxiScan 2200 between the terminal and the host system. Do not switch on the host system.
- Page 15 IBM 46xx cable 1. Switch off the host system. 2. Use the IBM 46xx cable to connect the MaxiScan 2200 to the host system. MaxiScan 2200 - Installation Guide 3 Switch off the host system and connect up your MaxiScan 2200 port 5x or 9x Ö...
-
Page 16: Ocia Cash Registers
Õ host system 1. Switch off the host system. 2. Use the OCIA cable to connect the MaxiScan 2200 to the host system. Do not switch on the host system. 3. If your host system requires an external power supply: Connect the power supply to the OCIA cable. -
Page 17: Wand Emulation
1. Switch off the host system. 2. Use the wand emulation cable to connect the MaxiScan 2200 to the host system. Do not switch on the host system. 3. If your host system requires an external power supply: Connect the power supply to the wand emulation cable. - Page 18 3 Switch off the host system and connect up your MaxiScan 2200 MaxiScan 2200 - Installation Guide...
-
Page 19: Switch On The Host System
What the beeps and LED flashes mean The red power-up LED of the MaxiScan 2200 will come on. The indicator LED of the MaxiScan 2200 will flash orange a number of times according to the interface configuration of your model:... - Page 20 4 Switch on the host system MaxiScan 2200 - Installation Guide...
-
Page 21: Using Your Maxiscan 2200
Reading configuration bar codes If you have any problems reading the configuration codes, refer to Appendix E for help. For full details on how to use your MaxiScan 2200, see the user's leaflet for your MaxiScan 2200 model if applicable. - Page 22 When you present the code to the MaxiScan 2200, make sure that you only present the corner or the side of the page where the code is located. The MaxiScan 2200 can read codes in any direction, so it doesn’t matter if you present the code upside-down or sideways:...
-
Page 23: Enter The Interface Number For Your System
1. Look on the next pages to see if there is a predefined interface number for your system hardware configuration. 2. If you find a number for your hardware configuration, use your MaxiScan 2200 to read the corresponding bar code. - Page 24 Predefined interface numbers—Keyboard wedge IBM PC AT and compatible N° 200 - QWERTY - English N° 201 - AZERTY - French N° 204 - QWERTZ - German N° 205 - QWERTY - Swedish / Finnish MaxiScan 2200 - Installation Guide...
- Page 25 6 Enter the interface number for your system Predefined interface numbers—Keyboard wedge IBM PC AT and compatible N° 207 - QWERTY - Norwegian N° 208 - QWERTY - Danish N° 2020 - QWERTZ - Swiss / French MaxiScan 2200 - Installation Guide...
- Page 26 6 Enter the interface number for your system Predefined interface numbers—RS-232 N° 100 - Standard RS-232 C (9600, 7, E, 2) N° 101 - RS-232 TTL Level N° 102 - RS-232 PC Term MaxiScan 2200 - Installation Guide...
- Page 27 6 Enter the interface number for your system Predefined interface numbers—Wand emulation N° 130 - Digital Wand Emulation N° 131 - Analog Wand Emulation MaxiScan 2200 - Installation Guide...
- Page 28 6 Enter the interface number for your system Predefined interface numbers—IBM 46xx cash registers N° 110 - IBM 46xx cash registers—Port 9x N° 111 - IBM 46xx cash registers—Port 5x MaxiScan 2200 - Installation Guide...
- Page 29 Predefined interface numbers—OCIA cash registers N° 120 - OCIA TEC cash registers N° 121 - OCIA TEC cash registers First Type Second Type N° 122 - OCIA NCR cash registers N° 123 - OCIA NCR 7052 cash registers MaxiScan 2200 - Installation Guide...
- Page 30 6 Enter the interface number for your system MaxiScan 2200 - Installation Guide...
-
Page 31: Set Up The Data Transmission Parameters
The full set of data transmission parameter options for all the interfaces supported is provided with the EasySet System scanner setup software and in the MaxiScan 2200 Reference Manual . Resetting the predefined data transmission settings If you want to reset all the predefined data transmission settings for your interface, rescan the appropriate interface number. - Page 32 7 Set up the data transmission parameters Keyboard wedge—Common data transmission parameters The predefined parameter settings for standard keyboard wedge configurations are indicated by an asterisk (*). Inter-character delay No Delay (*) 20 ms MaxiScan 2200 - Installation Guide...
- Page 33 7 Set up the data transmission parameters Keyboard wedge—Common data transmission parameters End-of-message control codes (postamble) Enter (*) Carriage Return MaxiScan 2200 - Installation Guide...
- Page 34 7 Set up the data transmission parameters Keyboard wedge—Common data transmission parameters End-of-message control codes (postamble) Field Advance Field Exit No Postamble MaxiScan 2200 - Installation Guide...
- Page 35 RS-232—Common data transmission parameters The predefined parameter settings for standard RS-232 systems (interface number 100) are indicated by an asterisk (*). Baud Rate 9600 (*) Data bits Seven (*) MaxiScan 2200 - Installation Guide 7 Set up the data transmission parameters 19200 Eight...
- Page 36 7 Set up the data transmission parameters RS-232—Common data transmission parameters Parity Even (*) None MaxiScan 2200 - Installation Guide...
- Page 37 7 Set up the data transmission parameters RS-232—Common data transmission parameters Stop bits Two (*) CTS/RTS (hardware) Not Active (*) Active MaxiScan 2200 - Installation Guide...
- Page 38 7 Set up the data transmission parameters RS-232—Common data transmission parameters Inter-character delay No Delay (*) 10 ms MaxiScan 2200 - Installation Guide...
- Page 39 7 Set up the data transmission parameters RS-232—Common data transmission parameters End-of-message control codes (postamble) Carriage Return + Line Feed (*) Carriage Return Line Feed No Postamble MaxiScan 2200 - Installation Guide...
- Page 40 7 Set up the data transmission parameters MaxiScan 2200 - Installation Guide...
-
Page 41: Set Up The Symbology Parameters
Appendix F provides the full list of parameter settings for all the symbologies supported and indicates the default settings for each symbology. The full set of parameter options for all the symbologies supported is provided with the EasySet System scanner setup software and in the MaxiScan 2200 Reference Manual . MaxiScan 2200 - Installation Guide... - Page 42 8 Set up the symbology parameters Resetting symbology default settings When you install and set up your MaxiScan 2200 for the first time, all the symbology parameters are set to their factory default settings (see Appendix F). The symbology default settings are global factory defaults—they are independent of the different symbology activation codes.
- Page 43 Symbology activation codes and common parameter settings To optimize the performance of your MaxiScan 2200 and to ensure trouble-free scanning, do not select symbologies that you do not need. If possible, do not select more than 2 symbologies at the same time—deactivate the Code 39 and UPC/EAN default symbologies if you do not need to use them.
-
Page 44: Codabar
8 Set up the symbology parameters Codabar Activation Not Active (*) Active Common parameter settings—Start/stop Not Transmitted (*) a, b, c, d MaxiScan 2200 - Installation Guide... - Page 45 The minimum length possible is 3 characters. For maximum security and to optimize reading performance, we recommend that you use one of the following parameters with the MaxiScan 2200: Compose 1 or 2 or 3 Fixed Lengths (the best configuration if the codes in your application have fixed lengths), Compose Minimum Length.
-
Page 46: Code 39
8 Set up the symbology parameters Code 39 (*) Activation Active (*) Standard 43 Characters (*) Not Active Full ASCII MaxiScan 2200 - Installation Guide... - Page 47 8 Set up the symbology parameters Code 39 (*) Common parameter settings—Start/stop Not Transmitted (*) Transmitted Common parameter settings—Check digit Not Used (*) MaxiScan 2200 - Installation Guide...
- Page 48 Code 39 (*) Common parameter settings—Check digit French CIP Check Digit Checked And Transmitted If the French CIP or Italian CPI check digits are used, the MaxiScan 2200 automatically performs code reconstruction to optimize reading. Italian CPI Check Digit Checked And Transmitted...
- Page 49 The minimum length possible is 3 characters. For maximum security and to optimize reading performance, we recommend that you use one of the following parameters with the MaxiScan 2200: Compose 1 or 2 or 3 Fixed Lengths (the best configuration if the codes in your application have fixed lengths), Compose Minimum Length.
-
Page 50: Code 93
8 Set up the symbology parameters Code 93 Activation Not Active (*) Active MaxiScan 2200 - Installation Guide... - Page 51 1 character. For maximum security and to optimize reading performance, we recommend that you use one of the following parameters with the MaxiScan 2200: Compose 1 or 2 or 3 Fixed Lengths (the best configuration if the codes in your application have fixed lengths), Compose Minimum Length.
-
Page 52: Code 128 / Ean 128
Code 128 (recognition of the FNC1 start character used). Common parameter settings—EAN 128 identifier The ]C1 AIM identifier for EAN 128 is automatically added by default in front of EAN 128 bar codes. Include ]C1 Identifier (*) Active Remove ]C1 Identifier MaxiScan 2200 - Installation Guide... - Page 53 Code 128 / EAN 128 Common parameter settings—CIP 128 French pharmaceutical codes embedded CIP 39 data fixed length 14 characters Code 128 character set C MaxiScan 2200 - Installation Guide 8 Set up the symbology parameters Not Active (*) Active...
- Page 54 Code 128 / EAN 128 does not use the same number of characters to code alphanumerical data and numerical data. If the MaxiScan 2200 does not read bar codes in your application, this may be due to unsuitable minimum or fixed lengths—try entering shorter lengths to get round this problem.
-
Page 55: Interleaved 2 Of 5
8 Set up the symbology parameters Interleaved 2 of 5 Activation Not Active (*) Active MaxiScan 2200 - Installation Guide... - Page 56 Interleaved 2 of 5 always encodes an even number of characters. To handle codes with an odd number of characters, the MaxiScan 2200 will accept a code with the last character printed as 5 narrow bars. In this case, all useful characters are transmitted.
-
Page 57: Matrix 2 Of 5
8 Set up the symbology parameters Matrix 2 of 5 Activation Not Active (*) Active MaxiScan 2200 - Installation Guide... - Page 58 3 characters. For maximum security and to optimize reading performance, we recommend that you use one of the following parameters with the MaxiScan 2200: Compose 1 or 2 or 3 Fixed Lengths (the best configuration if the codes in your application have fixed lengths), Compose Minimum Length.
-
Page 59: Msi Code
8 Set up the symbology parameters MSI Code Activation Not Active (*) Active MaxiScan 2200 - Installation Guide... - Page 60 8 Set up the symbology parameters MSI Code Common parameter settings—Check Digit Mod 10 Checked And Transmitted (*) Checked But Not Transmitted Common parameter settings—Check Digit Double Mod 10 Checked And Transmitted Checked But Not Transmitted MaxiScan 2200 - Installation Guide...
- Page 61 2 characters. For maximum security and to optimize reading performance, we recommend that you use one of the following parameters with the MaxiScan 2200: Compose 1 or 2 or 3 Fixed Lengths (the best configuration if the codes in your application have fixed lengths), Compose Minimum Length.
-
Page 62: Plessey Code
8 Set up the symbology parameters Plessey Code Activation Not Active (*) Active Common parameter settings—Check digit Transmitted (*) Not Transmitted MaxiScan 2200 - Installation Guide... - Page 63 For maximum security and to optimize reading performance, we recommend that you use one of the following parameters with the MaxiScan 2200: Compose 1 or 2 or 3 Fixed Lengths (the best configuration if the codes in your application have fixed lengths), Compose Minimum Length.
-
Page 64: Standard 2 Of 5
8 Set up the symbology parameters Standard 2 of 5 Activation Not Active (*) Standard 2 of 5 is also referred to as "Straight 2 of 5" and "Industrial 2 of 5". Active (default format = Identicon) MaxiScan 2200 - Installation Guide... - Page 65 The minimum length possible is 3 characters. For maximum security and to optimize reading performance, we recommend that you use one of the following parameters with the MaxiScan 2200: Compose 1 or 2 or 3 Fixed Lengths (the best configuration if the codes in your application have fixed lengths), Compose Minimum Length.
-
Page 66: Upc/Ean Code Families (Upc-A, Upc-E, Ean-8, Ean-13)
8 Set up the symbology parameters UPC/EAN code families (UPC-A, UPC-E, EAN-8, EAN-13) (*) Activation Active—UPC/EAN (*) Not Active—UPC/EAN UPC-A Transmitted as EAN-13 (*) UPC-A Transmitted as UPC-A MaxiScan 2200 - Installation Guide... - Page 67 8 Set up the symbology parameters UPC/EAN code families (UPC-A, UPC-E, EAN-8, EAN-13) (*) Common parameter settings—Add-on digits Not Required But Transmitted If Read (*) Required And Transmitted MaxiScan 2200 - Installation Guide...
- Page 68 8 Set up the symbology parameters UPC/EAN code families (UPC-A, UPC-E, EAN-8, EAN-13) (*) Common parameter settings—Add-on digits Add-On 2 Not Active (*) Add-On 5 Not Active (*) Add-On 2 Active Add-On 5 Active MaxiScan 2200 - Installation Guide...
- Page 69 Common parameter settings—Check digit UPC-A Check Digit—Transmitted (*) UPC/EAN code format: <leading character> <number system> <data> <check digit> UPC-E Check Digit—Transmitted (*) MaxiScan 2200 - Installation Guide 8 Set up the symbology parameters UPC-A Check Digit—Not Transmitted UPC-E Check Digit—Not Transmitted...
- Page 70 UPC/EAN code families (UPC-A, UPC-E, EAN-8, EAN-13) (*) Common parameter settings—Check digit EAN-8 Check Digit—Transmitted (*) EAN-8 Check Digit—Not Transmitted UPC/EAN code format: <leading character> <number system> <data> <check digit> EAN-13 Check Digit—Transmitted (*) EAN-13 Check Digit—Not Transmitted MaxiScan 2200 - Installation Guide...
- Page 71 A regular UPC-A has a transmitted number system equal to 0. To transmit the additional leading character (country code), select the parameter UPC-A Transmitted As EAN-13. UPC-E Number System—Transmitted (*) MaxiScan 2200 - Installation Guide 8 Set up the symbology parameters UPC-A Number System—Not Transmitted...
- Page 72 8 Set up the symbology parameters MaxiScan 2200 - Installation Guide...
-
Page 73: Set Up The Operating Parameters
Appendix G provides the full list of MaxiScan 2200 operating parameter settings. The full set of MaxiScan 2200 operating parameter options is provided with the EasySet System scanner setup software and in the MaxiScan 2200 Reference Manual . Resetting the default MaxiScan 2200 operating settings... - Page 74 Resolution adjustment (video channel selection) High-Resolution / Low-Resolution Video Channels (*) By default, the MaxiScan 2200 is set to switch continuously between the high- and low-resolution video channels. The video channel changes with each new scan and normal-quality medium-resolution bar codes such as standard EAN (100%) are read easily by both video channels.
-
Page 75: Reading Distance
Reading distance You can change the maximum reading distance of the MaxiScan 2200 to make sure that you only read codes within the specified range. The reading distances provided here are valid for normal-quality medium-resolution bar codes such as standard EAN (100% magnitude). -
Page 76: Scan Rate
UPC/EAN bar codes 1200 Scans Per Second 1400 Scans Per Second (*) 1400 Scans Per Second (*) 1200 Scans Per Second 1600 Scans Per Second MaxiScan 2200 - Installation Guide scan rate 1600 Scans Per Second... -
Page 77: Standby Mode
(T x 2)—and a total period of inactivity T x 3—the rotating mirror motor is switched off. The MaxiScan 2200 is reactivated when you try to read a new bar code. Wake-up is quicker after initial standby than after full standby. - Page 78 T x 3 = 45 minutes. Composing a different time before standby 1. Use your MaxiScan 2200 to read the Compose Time In Seconds Before Initial Standby bar code. 2. Read each digit of the new time before initial standby using the number codes provided at the end of this Installation Guide and scan the End Selection bar code—provided with the number codes—to finish.
- Page 79 9 Set up the operating parameters Beep characteristics Read the following codes to change the beeper volume and musical note (tone frequency). Beeper volume High Volume (*) Low Volume MaxiScan 2200 - Installation Guide...
- Page 80 9 Set up the operating parameters Beeper note High (2093.04 Hz, 478 µs) (*) Low (1318.52 Hz, 758 µs) Medium (1760 Hz, 568 µs) MaxiScan 2200 - Installation Guide...
-
Page 81: A Installing The Optional Adjustable Stand
The optional adjustable stand allows the MaxiScan 2200 to read items at a fixed reading angle. The MaxiScan 2200 is clipped in and out of the adjustable stand, so you can still use it as a hand scanner if required. - Page 82 A Installing the optional adjustable stand Adjustable stand—Installation examples double-sided adhesive = M3 MaxiScan 2200 - Installation Guide...
-
Page 83: B Installing The Maxiscan 2200 In A Fixed Reading Position
Important remarks For a fixed location, you can screw the MaxiScan 2200 directly to the work surface or use the special mounting plate provided in the MaxiScan 2200 product package Remember to take into account the length of the operating cables and power supply cable when you install the MaxiScan 2200. - Page 84 B Installing the MaxiScan 2200 in a fixed reading position Mounting plate—Installation examples = M3 MaxiScan 2200 - Installation Guide...
-
Page 85: C Changing The Cable Connector Position
Do not remove the protective film from the red reading window until you have finished installing the MaxiScan 2200. Do not try to dismount the MaxiScan 2200 except as specified in this Installation Guide and always use the scanner only as described in MaxiScan 2200 documentation. - Page 86 C Changing the cable connector position Horizontal to vertical MaxiScan 2200 - Installation Guide...
- Page 87 C Changing the cable connector position Vertical to horizontal MaxiScan 2200 - Installation Guide...
- Page 88 C Changing the cable connector position MaxiScan 2200 - Installation Guide...
-
Page 89: D Care And Replacement Of The Red Reading Window
MaxiScan 2200, do not touch any internal parts (silver mirrors, gold rotating mirror, etc.). Do not try to dismount the MaxiScan 2200 except as specified in this Installation Guide and always use the scanner only as described in MaxiScan 2200 documentation. -
Page 90: Window Replacement Procedure
D Care and replacement of the red reading window Window replacement procedure MaxiScan 2200 - Installation Guide... -
Page 91: E Data Transmission Parameters
E Data transmission parameters The full set of data transmission parameter options for all the interfaces supported is provided with the EasySet System scanner setup software and in the MaxiScan 2200 Reference Manual . Keyboard wedge An asterisk (*) indicates the predefined parameter settings for keyboard wedge interface N° 200 (QWERTY - English). - Page 92 - no preamble (*) - user-defined postamble - Carriage Return + Line Feed (*) - Carriage Return - Line Feed - user-defined - no postamble code marks - not transmitted (*) - transmitted - default / user-defined MaxiScan 2200 - Installation Guide...
-
Page 93: Ibm 46Xx Cash Registers
- bar = 1, space = 0, margin = 0 (*) logical signal state outside transmission - quiet zone = 0 (*) MaxiScan 2200 - Installation Guide E Data transmission parameters - 1 to 999 ms... - Page 94 - 0.19 ms (175 cm/s) - 0.26 ms (125 cm/s) - 0.44 ms (75 cm/s) - 0.66 ms (50 cm/s) - 1.32 ms (25 cm/s) - 2.64 ms (12.5 cm/s) - 6.60 ms (5 cm/s) MaxiScan 2200 - Installation Guide...
-
Page 95: F Symbology Parameters
An asterisk (*) indicates the factory default settings for each symbology. The full set of parameter options for all the symbologies supported is provided with the EasySet System scanner setup software and in the MaxiScan 2200 Reference Manual . Codabar... - Page 96 - not used (*) - checked but not transmitted - checked but not transmitted - return to current minimum length - user-defined minimum length - user-defined 1 or 2 or 3 fixed lengths MaxiScan 2200 - Installation Guide...
- Page 97 Standard 2 of 5 is also referred to as "Straight 2 of 5" and "Industrial 2 of 5". start/stop bars - Identicon (6 start / stop bars) (*) MaxiScan 2200 - Installation Guide activation - not active (*) - active...
- Page 98 - not transmitted - not transmitted - not transmitted - UPC-A transmitted as UPC-A - UPC-E transmitted as UPC-E (*) - UPC-E transmitted as UPC-A - EAN-8 transmitted as EAN 8 (*) - EAN-8 transmitted as EAN-13 MaxiScan 2200 - Installation Guide...
-
Page 99: G Maxiscan 2200 Operating Parameters
G MaxiScan 2200 operating parameters Factory default settings are indicated by an asterisk (*). The full set of MaxiScan 2200 operating parameter options is provided with the EasySet System scanner setup software and in the MaxiScan 2200 Reference Manual . -
Page 100: Configuration Modes
G MaxiScan 2200 operating parameters Standby mode - Standby Mode Enable (*) Beeps power-up beeps - on (*) good read beeps - 1beep (*) timing of good read beeps - before transmission (*) duration of good read beeps - 80 ms (*) Beeper volume - High Volume (*) Beeper note - High (2093.04 Hz, 478 µs) (*) -
Page 101: Data Decoding Security Parameters
- single read before transmission (*) time-out between identical consecutive codes - 500 ms (*) time-out between different consecutive codes - 500 ms (*) MaxiScan 2200 - Installation Guide G MaxiScan 2200 operating parameters - medium security level... - Page 102 G MaxiScan 2200 operating parameters Resetting the factory default settings Reset Factory Defaults resets all the MaxiScan 2200 operating parameters to their factory default settings: null interface (no interface driver selected—no transmission), default symbologies, default symbology settings, default MaxiScan 2200 operating settings (reading distance, scan rate, beep settings, etc.).
- Page 103 H If you have a problem . . . This appendix describes things you can check if you have problems with your MaxiScan 2200 during power-up, configuration and normal operation. If you can not solve the problem yourself, please contact your Intermec representative.
- Page 104 Your Intermec representative may ask you to provide the software version number for your MaxiScan 2200. If the MaxiScan 2200 is powered up, try to read the following code to display this information on your host system screen if applicable.
-
Page 105: I Test Codes
Test codes Codabar 123456 MaxiScan 2200 - Installation Guide... - Page 106 I Test codes Code 39 Code 93 CODE-39 CODE-93 Code 128 EAN 128 CODE-128 (]C1)EAN 128 MaxiScan 2200 - Installation Guide...
- Page 107 I Test codes EAN-8 EAN-13 12345670 1234567890128 UPC-A UPC-E 0 1 2 3 4 5 0 0 0 0 0 1 2 3 4 5 MaxiScan 2200 - Installation Guide...
- Page 108 I Test codes Interleaved 2 of 5 12345678901234 Matrix 2 of 5 Standard 2 of 5 012345 123456 MaxiScan 2200 - Installation Guide...
- Page 109 MaxiScan 2200 - Installation Guide MSI Code 12345666 Plessey Code 80001495050 I Test codes...
- Page 110 I Test codes MaxiScan 2200 - Installation Guide...
-
Page 111: J Number Codes
Number codes End Selection MaxiScan 2200 - Installation Guide... - Page 112 J Number codes End Selection MaxiScan 2200 - Installation Guide...
- Page 113 J Number codes End Selection MaxiScan 2200 - Installation Guide...
- Page 114 J Number codes End Selection MaxiScan 2200 - Installation Guide...
Need help?
Do you have a question about the MaxiScan 2200 and is the answer not in the manual?
Questions and answers