Maico ERO-SCAN Operation Manual
Screening and diagnostic version
Hide thumbs
Also See for ERO-SCAN:
- Operation manual (76 pages) ,
- Operating instructions manual (75 pages) ,
- Quick manual (4 pages)
Table of Contents
Advertisement
Quick Links
Advertisement
Table of Contents

Related Manuals for Maico ERO-SCAN


Summary of Contents for Maico ERO-SCAN
- Page 1 Operation Manual ERO•SCAN ® Screening and Diagnostic Version...
-
Page 3: Table Of Contents
Operation Manual ERO•SCAN ® Table of Contents Introduction ....................4 Intended Use Statement ..............4 Indications for Use Statement ............4 Contraindications of Use Statement ........... 4 Features ..................... 5 Description ..................6 For Your Safety .................... 7 Reading this Operation Manual ............7 Customer Responsibility .............. - Page 4 Operation Manual ERO•SCAN ® Main Menu ..................34 Testing Procedure ................34 Interpreting Test Results ..............40 Managing Test Results..............44 5.10 Settings ..................47 Technical Data ....................59 ERO•SCAN ® Hardware ..............59 Pin Assignment ................64 Electromagnetic Compatibility ............65 Electrical Safety, EMC and Associated Standards ......
- Page 5 Copyright © 2020 MAICO Diagnostics All rights reserved. No part of this publication may be reproduced or transmitted in any form or by any means without the prior written permission of MAICO. The information in this publication is proprietary to MAICO.
-
Page 6: Introduction
Operation Manual ERO•SCAN ® 1 Introduction This Section offers you important information about: ▪ the intended use of the device ▪ indications and contraindications of use ▪ features and benefits ▪ a description of the device 1.1 Intended Use Statement The ERO•SCAN ®... -
Page 7: Features
PC software: • MAICO Sessions Standalone • MAICO Sessions with OtoAccess ® Database • MAICO Sessions with Noah Database • MAICO Sessions with your existing Practice Management Software via GDT or XML interface • HearSIM Database (ERO•SCAN ® ®... -
Page 8: Description
Operation Manual ERO•SCAN ® 1.5 Description 1.5.1 General The purpose of the ERO•SCAN ® test system is to provide a rapid measurement and documentation of Distortion Product Otoacoustic Emissions (DPOAEs) or Transient Evoked Otoacoustic Emissions (TEOAEs) at several frequencies. The ERO•SCAN ®... -
Page 9: For Your Safety
Operation Manual ERO•SCAN ® 2 For Your Safety This Section offers you important information about: ▪ how to read the operation manual ▪ where to spend special attention ▪ the customer responsibility ▪ the explanation of all regulatory symbols used ▪... -
Page 10: Customer Responsibility
Manufacturer’s Liability Section 2.3 Section 3.1 Warranty NOTE: In the unlikely case of a serious incident, inform MAICO as well as the competent authority of the Member State in which the user and/or the patient is established. 2.3 Manufacturer’s Liability Usage of the device in a way deviant from the intended use will lead to a limitation or termination of the manufacturer’s liability in case of damage. -
Page 11: Regulatory Symbols
Operation Manual ERO•SCAN ® 2.4 Regulatory Symbols The following Table 1 gives an explanation of the symbols used on the device itself, on the packaging and the accompanying documents including the Operation Manual. Table 1 Regulatory Symbols REGULATORY SYMBOLS SYMBOL DESCRIPTION Serial number Date of manufacture Manufacturer... -
Page 12: General Precautions
WARNING performed by a qualified service representative only. No modifications of the equipment are allowed by anyone other than a qualified MAICO representative. Modification of the equipment could be hazardous. No parts of the equipment can be serviced or maintained while in use with the patient. - Page 13 Operation Manual ERO•SCAN ® In case of emergency, disconnect the device from power supply. WARNING Position the device in such a way that it can be easily disconnected from the USB cable at any time. In Case of Emergency Do not use the device if the mains cable and/or the plug is damaged.
-
Page 14: Electromagnetic Compatibility (Emc)
To avoid the risk of electric shock, this equipment must only WARNING be connected to the medical power supply originally delivered by MAICO. Using another power supply can also lead to electrical damage on the device. Prevent cable breakage: cables must not be bend or buckled. -
Page 15: Battery Safety
Operation Manual ERO•SCAN ® 2.8 Battery Safety and Capacity 2.8.1 Battery Safety Explosion hazard The internal battery must be only replaced by an authorized service representative. Damage to the electronics resulting WARNING from an attempt to change the battery by someone other than an authorized representative will not qualify for repair under the product warranty. -
Page 16: Warranty, Maintenance And After-Sales Service
The MAICO ERO•SCAN is guaranteed for at least one year. This warranty is extended to the original purchaser of the device by MAICO through the distributor from whom it was purchased and covers defects in material and workmanship for a period at least one year from date of delivery of the device to the original purchaser. -
Page 17: Cleaning And Disinfection Recommendations
Recommendations for cleaning and disinfection of MAICO device presented in this document are not intended to replace or contradict policies in effect or procedures required for infection control at the facility. -
Page 18: Disposables - Eartips
Operation Manual ERO•SCAN ® 3.3.2 Cleaning and Disinfecting the Screen Use a lens cleaning or microfiber cloth to clean the screen. Disinfect the screen of the device by wiping the surfaces with wet disinfection wipes. 3.4 Disposables – Eartips 3.4.1 Safe Use of Eartips ®... -
Page 19: Disposables - Probe Tubes
Operation Manual ERO•SCAN ® 3.4.2 Applying Eartips The ERO•SCAN ® comes with a box of disposable eartips that fit a variety of ear canal sizes. The probe tube must have an eartip attached before inserting it into an ear canal. NOTE: See Section 5.7.2 on how to properly insert a probe into the patient’s ear canal. -
Page 20: Troubleshooting
Figure 7 Figure 8 3.6 Troubleshooting ® If problems occur while working with your ERO-SCAN , you can usually easily solve them yourself. Follow the instructions in Table 2 for general problems or Table 3 if display messages are shown. - Page 21 Operation Manual ERO•SCAN ® Table 2 Troubleshooting Problem Explanation Device does not • Press the DOWN arrow for a full second (the yellow turn on LED (TEST) illuminates). • Connect the charger as shown in Figure 2 on page 37. Confirm that the blue LED (CHARGE) is illuminating in a slow blink pattern.
- Page 22 Indicates that the calibration of the device is recommended. Message appears upon the calibration due date set in the device. Message appears during device startup once per day. • Have the device calibrated by a service technician authorized by MAICO. 8106556 Rev. 11 13//08/2020...
- Page 23 Operation Manual ERO•SCAN ® Display Message Explanation Fit Error For a DP test, the desired level (L1 or L2) cannot be obtained Cannot Obtain L within allowable limits. • Refit the probe and retry the test. • Replace the probe tube. Fit Error For a DP test, the level of the calibration tone is too high.
-
Page 24: Recycling/Disposal
Within the European Union it is illegal to dispose of electric and electronic waste as unsorted municipal waste. According to this, all MAICO products sold after August 13, 2005, are marked with a crossed-out wheeled bin. Within the limits of Article (9) of DIRECTIVE 2002/96/EC on waste electrical and electronic equipment (WEEE), MAICO has changed their sales policy. -
Page 25: Unpacking And Hardware Orientation
Operation Manual ERO•SCAN ® 4 Unpacking and Hardware Orientation This section provides information on: ▪ unpacking the system ▪ becoming familiar with the hardware inclusive connections ▪ system assembly ▪ using the printer ▪ how to power the ERO•SCAN ® ▪... - Page 26 Operation Manual Quick Guide *Applied parts according to IEC 60601-1 Disposables supplied NOTE: MAICO strongly recommends to use Sanibel eartips for reliable results. Table 5 Disposables Disposables Eartip Kit (120 pc.) including 500 replacement probe tubes and removal tool 8106556 Rev. 11...
-
Page 27: Ero•Scan Hardware And Components
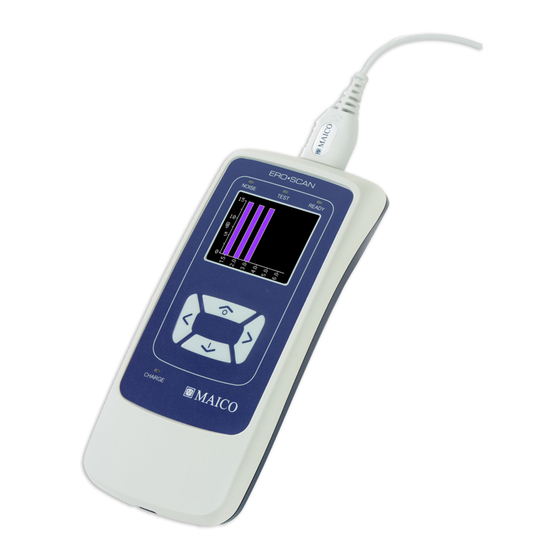
Operation Manual ERO•SCAN ® ® 4.2 ERO•SCAN Hardware and Components ® The ERO•SCAN system consists of the following components (configuration- dependent): ® 1. ERO•SCAN device 2. Micro-Probe, 3. single-use eartips (for single-use only) 4. probe tubes (for single-use only) 5. Micro-USB cable 6. -
Page 28: Handling The Micro-Probe
Micro-Probe connector into the socket on the top of the ERO•SCAN ® (Figure 11). The plug fits in only one direction. A MAICO logo is on the probe connector and aligns with the device control panel. NOTE: Misalignment of the plug and socket can cause Figure 11 damage. -
Page 29: Establishing A Pc-Connection
• prior to each installation of the charging cable. If damage Figure 13 is observed, contact MAICO Diagnostics. The blue LED (CHARGE) (Figure 14) provides a visual indication of the battery status during operation or charging. The status is indicated as follows: Two fast blinks Battery is low. -
Page 30: Using The Mpt-Iithermal Printer
Operation Manual ERO•SCAN ® Table 3 PC-Connections PC CONNECTIONS PC Connection 1: PC Connection 2: Medical device – Medical Device Medical device – Non-Medical Device PC Connection 3: PC Connection 4: Medical device – Non-Medical Device Medical device – Laptop (battery-driven) 4.6 Using the MPT-IIThermal Printer 4.6.1 Powering the Thermal Printer Battery pack insertion... - Page 31 Operation Manual ERO•SCAN ® Power on Push power button for two seconds in order to power on or off. One short beep will be heard at power on, two short beeps at power off. Green Power indicator is lit if printer is powered by battery (Figure 17).
-
Page 32: Storage
Paper feed When powered press paper feed button. Paper will feed as long as the button is pressed. NOTE: Reorder paper from MAICO or your local distributor. 4.6.3 Connecting the MPT-II Thermal Printer to ERO•SCAN ® The connection of the ERO•SCAN ®... -
Page 33: Operating The Device
Operation Manual ERO•SCAN ® 5 Operating the Device This Section provides information on: ▪ how to get started with the ERO•SCAN ® ▪ the device layout ▪ the function keys ▪ performing the measurement methods of Audiometry ▪ patient management ▪... -
Page 34: Indicator Lights
Operation Manual ERO•SCAN ® 5.2 Indicator Lights The device has 4 indicator lights (LED, Figure 21) that help you to know the actual state of the device. Table 8 give explanation to the indication lights. Figure 21 Table 8 Indicator Lights Indicator Light Explanation NOISE / Red... -
Page 35: Control Panel
Operation Manual ERO•SCAN ® 5.3 Control Panel The ERO•SCAN ® uses 4 buttons to control all functions of the device (Figure 22). These buttons are arranged in a directional cursor format. The arrows on the keypad (LEFT, RIGHT, UP, and DOWN) correspond to the arrows that are used on the screen. -
Page 36: Turning Off The Device
Operation Manual ERO•SCAN ® 5.5 Turning Off the Device Manual Turn-Off Press UP to turn off the device. Automatic Shutdown The ERO•SCAN ® has an automatic shutdown feature, designed to prolong battery life. The device automatically shut down after 1 minute (default) of inactivity. To turn it back on, press the DOWN key. - Page 37 Operation Manual ERO•SCAN ® The ERO•SCAN ® allows the user to select from two options for viewing the results: • the Graph SNR view • the Graph Value view. Graph SNR view The Graph SNR view (Figure 26) shows the signal-to-noise ratio for each DP test frequency or TE test band.
- Page 38 Operation Manual ERO•SCAN ® 5.7.3 Preparing the Patient Keep in mind the indications and contraindications of use given in WARNING Section 1.2 Indications for Use Statement Section 1.3 Contraindications of Use Statement During the testing process it is important that the patient is calm and relaxed. This is often difficult to achieve when testing babies.
- Page 39 ® Select an earplug that is appropriate for the patient's ear. Apply the eartip onto the OAE probe tip Figure 30 NOTE: Use MAICO’s special tools for attaching and/or removing the eartips and probe tubes: Disposables – Eartips Section 3.4 Disposables –...
- Page 40 Operation Manual ERO•SCAN ® Table 9 PROBE CHECK Screen Screen Explanation The ear canal volume of the patient is too large or the probe is not inserted into the ear or in place properly (Figure 32). Figure 32 Volume is too small for the test to begin or probe tip is blocked (Figure 33).
- Page 41 Operation Manual ERO•SCAN ® 5.7.6 Viewing Test Results When testing is complete, a result screen (e.g. Figure 36) appears. The result screen shows the tested ear as well as one of the following test results: Pass The patient passed the screening. No further action necessary.
-
Page 42: Interpreting Test Results
Operation Manual ERO•SCAN ® 5.8 Interpreting Test Results 5.8.1 Understanding the Test Result Screen The ERO•SCAN ® shows the test results as a graph. The screen is being generated and shown during the test and can be reviewed after the test is complete (see Section 5.7.6). - Page 43 Operation Manual ERO•SCAN ® Value Graph View Figure 39 shows the Value graph view for right ear. Red circle symbols represent the absolute emission levels at each DP test frequency or TE frequency band. For the left ear, dark blue symbols represent the absolute emission levels at each DP test frequency or TE frequency band.
- Page 44 Operation Manual ERO•SCAN ® 5.8.2.1 Understanding the Thermal Printout (DPOAE) The following information is provided for each test (Figure 15): 1. Manufacturer Logo 2. The software version number (e.g.: V105.05) 3. The time and date of the test, based on the setting of the internal clock;...
- Page 45 Operation Manual ERO•SCAN ® 5.8.2.2 Understanding the Thermal Printout (TEOAE) The following information is provided for each test (Figure 41 – TEOAE printout with Value Graph view, Figure 42 – TEOAE Printout with SNR Graph view. Section 5.10.2.8 Graph Style 1.
-
Page 46: Managing Test Results
Operation Manual ERO•SCAN ® 5.9 Managing Test Results 5.9.1 General Dependent on the configuration there are different possibilities to manage test results. It is possible to delete test results, print the session directly with the thermal printer or transfer the data to a PC for further processing. Users have the option of printing to the thermal printer or transferring results to the PC. - Page 47 • MAICO Sessions Standalone • MAICO Sessions with OtoAccess ® Database • MAICO Sessions with Noah Database • MAICO Sessions with your existing Practice Management Software via BDT/GDT interface • HearSIM ® Software with OtoAccess Database (only results of the test protocols TE 32s, TE 64s, DP 4s and DP 2s) Connecting the ERO•SCAN...
- Page 48 5.9.5.2 Printing After Data Transfer to PC The actual printing process from the PC software depends on the used Software product. Printing is possible directly from the following PC Software products. • MAICO Sessions • OtoAccess ® Database •...
-
Page 49: Settings
Operation Manual ERO•SCAN ® 5.10 Settings 5.10.1 Clock and Date Settings NOTE: For changing the Clock Mode see: Section 5.10.2.7 Clock Mode You may want to change the date and/or time • if you use your ERO•SCAN ® the first time. •... - Page 50 Operation Manual ERO•SCAN ® 5.10.2 General Device Settings 5.10.2.1 General The ERO•SCAN ® allows the user to change many of the device settings or functions. These settings include: • Wireless Device Pairings • Clearing Test Results • Auto Shutdown Time •...
- Page 51 Operation Manual ERO•SCAN ® 5.10.2.2 Wireless Device Pairing You can pair the ERO•SCAN ® with a thermal printer for printing the test results directly or with a PC to transfer the data to a PC software for further processing: Pairing with a Wireless Thermal Printer The WIRELESS DEVICE menu allows the user to pair the ERO•SCAN ®...
- Page 52 Operation Manual ERO•SCAN ® Pairing with a PC Activate the wireless connection on your PC (Figure 52). Figure 52 The WIRELESS DEVICE menu allows the user to pair the ERO•SCAN ® with a PC to transfer test results (Figure 53). DISCOVER...
- Page 53 Operation Manual ERO•SCAN ® 5.10.2.4 Auto Shutdown Time The POWER OFF Menu allows you to set a time after which the device shall switch off automatically to prolong battery life (Figure 57). NOTE: The device will immediately power off after printing regardless of this setting.
- Page 54 Operation Manual ERO•SCAN ® 5.10.2.6 Minimum Value (MIN VALUE) With the MIN VALUE setting (Figure 60) the user is allowed to include the minimum OAE response amplitude to the PASS/REFER criterion for a single frequency. When the MIN VALUE setting is set between -10 dB SPL and + 5 dB SPL the OAE response for the frequency under test needs to be at an equal or higher level than the MIN VALUE set to get a PASS result.
- Page 55 Operation Manual ERO•SCAN ® 5.10.2.9 Boys Town Norms The user can chose if the Boys Town will be displayed as comparative normative data if the Graph view setting is set to Value Graph (Figure 63). CHANGE to select NORMS ON or NORMS OFF. NEXT to proceed to the next screen.
- Page 56 Operation Manual ERO•SCAN ® 5.10.2.13 Reset to Default In the RESET TO DEFAULT menu, you can reset the device settings to the factory settings (Figure 67). NOTE: By resetting the device settings, you delete all existing test results and reset all system and protocol settings. This ®...
- Page 57 Operation Manual ERO•SCAN ® When a change is made within the Advanced Options menu to a default protocol, an * is place in the protocol name (Figure 68). Figure 68 To change a parameter of a DPOAE or TEOAE Test Protocol proceed as follows: CHANGE to enter the PROTOCOL menu.
- Page 58 Operation Manual ERO•SCAN ® Setting the Averaging Time A longer averaging time increase measurement duration and result quality. shorter averaging time decreases measurement duration and result quality (Figure 70). CHANGE to set the averaging time to 0.5 s, 1.0 s, 2.0 s or 4.0 s.
- Page 59 Operation Manual ERO•SCAN ® Reset Protocol This RESET TO DEFAULT menu allows you to reset the settings of the currently selected protocol to the factory settings (Figure 73). NOTE: If you use this function, you only reset the currently selected protocol. The device settings and settings of other protocols remain unaffected.
- Page 60 Operation Manual ERO•SCAN ® Setting the Number of Frequencies for PASS The user can adjust the number of frequencies that have to fulfill the SNR PASS criterion (and optionally the MIN VALUE criterion) in order to generate an overall PASS result on the screening measurement.
-
Page 61: Technical Data
General Information About Specifications The performance and specifications of the device can only be guaranteed if it is subject to technical maintenance at least once per year. MAICO Diagnostics puts diagrams and service manuals at the disposal of authorized service companies. STANDARDS... - Page 62 Operation Manual ERO•SCAN ® DEVICE SPECIFICATIONS Operation Temperature +15 °C to +35 °C / + 59 °F to +95 °F environment Relative 30 % to 90 % (non-condensating) Humidity 30 % to 80 % recommended Ambient 98 kPa to 104 kPa Pressure 0 C to 50C, 32 °F to 122°F Transport &...
- Page 63 Operation Manual ERO•SCAN ® DEVICE SPECIFICATIONS 15 hours on-time Memory 500 tests can be stored (each for left and right ear) Connectors / Integrated USB communication capability for Communications battery charging and communication with PC- based database programs HDMI Connector for connection to the Micro- Probe Integrated wireless Class 2 + EDR with SPP Protocol for communication with optional printer...
- Page 64 Operation Manual ERO•SCAN ® TEOAE Stimulus Stimulus type Non-Linear click (according to IEC 60645-3) Default level 80 dB peSPL (peak to peak calibrated), auto in-ear calibration Level tolerance ± 3 dB Click rate Approx. 61 /s Transducer OAE Probe Analysis Frequency range 700 Hz to 4000 Hz bands...
- Page 65 Operation Manual ERO•SCAN ® PRINTER Thermal dot matrix print Print mode Printing width: 48 mm (1.9 in) Resolution: 8 dots/mm (203 dots per in (dpi)) Dots per line: 384 dots Paper width = 56mm +/- 1 mm (2.2 in +/- 0.04 in) max. 40 mm Thermal paper (1.6 in) diameter 2-cell Li-Ion battery pack 7.4 V-1500 mAh...
-
Page 66: Pin Assignment
Operation Manual ERO•SCAN ® 6.2 Pin Assignment ERO•SCAN ® CONNECTOR MICRO USB B (IN) 1. +5 VDC 2. Data - 3. Data + 4. ID 5. Ground PROBE CONNECTOR TYPE A RECEPTACLE HDMI (FEMALE) Pin 1 Rcvr + Pin 11 Unused Pin 2 Rcvr Shield... -
Page 67: Electromagnetic Compatibility
Operation Manual ERO•SCAN ® 6.3 Electromagnetic Compatibility This device is suitable in hospital environments except for near active HF surgical equipment and RF shielded rooms of systems for magnetic resonance imaging, where the intensity of electromagnetic disturbance is high. ESSENTIAL PERFORMANCE for this device is defined by the manufacturer as: •... - Page 68 Operation Manual ERO•SCAN ® Recommended separation distances between portable and mobile RF communications equipment and the ERO•SCAN ® ® The ERO•SCAN is intended for use in an electromagnetic environment in which radiated RF disturbances are controlled. The ® customer or the user of the ERO•SCAN can help prevent electromagnetic interferences by maintaining a minimum distance ®...
- Page 69 To ensure compliance with the EMC requirements as specified in IEC 60601-1-2, it is essential to use only the following accessories (see Table 10). Table 10 EMC Requirements – Accessories ITEM MANUFACTURER MODEL OWA Probe MAICO 8106556 Rev. 11 13//08/2020...
-
Page 70: Electrical Safety, Emc And Associated Standards
Operation Manual ERO•SCAN ® 6.4 Electrical Safety, EMC and Associated Standards • IEC 60601-1:2005+A1:2012 Medical Electrical Equipment, Part 1 General Requirements for basic safety and essential performance • ANSI/AAMI ES60601-1:2005/(R)2012 Medical Electrical Equipment, Part 1 General Requirements • CAN/CSA-C22.2 No. 60601-1: 2014 Medical Electrical Equipment, Part 1 General Requirements for Safety Electrical Equipment for Laboratory Use •... -
Page 71: Configurations And Test Protocols
Operation Manual ERO•SCAN ® 6.5 Configurations and Test Protocols DPOAE Protocols NUM- AVERAGING NUMBER DEVICE F2 FREQ. L1/L2 PASS NAME TIME PER OF FREQ. VERSION [KHZ] [DB SPL] FREQ FOR PASS FREQ. DP 4s 2, 3, 4, 5 65/55 6 dB Screen- DP 2s 2, 3, 4, 5... -
Page 72: Flowcharts
Operation Manual ERO•SCAN ® 6.6 Flowcharts 6.6.1 Test Operation Flowchart 8106556 Rev.11 13/08/2020... - Page 73 Operation Manual ERO•SCAN ® 6.6.2 Setup Menu Flowchart NOTE: DPOAE/ TEOAE Menu are only accessible in the ERO•SCAN ® Diagnostic version. 8106556 Rev. 11 13//08/2020...
- Page 74 Specifications are subject to change without notice MAICO Diagnostics GmbH Sickingenstr. 70-71 10553 Berlin Germany Tel.: + 49 30 / 70 71 46-50 Fax: + 49 30 / 70 71 46-99 E-mail: sales@maico.biz Internet: www.maico.biz...
Need help?
Do you have a question about the ERO-SCAN and is the answer not in the manual?
Questions and answers