Novexx Solutions 64 Series User Manual
Hide thumbs
Also See for 64 Series:
- User manual (116 pages) ,
- Service manual (17 pages) ,
- User & service manual (15 pages)
Table of Contents
Advertisement
Quick Links
01/13 Rev. 5.05-01
Attachment, Setup
General Notes ................................................ 2
Intended Purpose ....................................... 2
Properties ................................................... 2
System requirements ..................................... 3
Printer type ................................................. 3
Preparation for peripheral devices ............. 3
Attaching the rewinder ................................... 4
printer ............................................................. 5
Direction of rotation .................................... 5
Dancer arm deflection ................................ 5
Rotation speed with 64-xx / AP 5.4 ............ 6
Setting up TTX 350 / TTK .............................. 7
Rotation Direction ....................................... 7
Setting the sensor current .......................... 8
Adjusting the sensor ................................... 9
USER MANUAL
Rewinder 2000
Setting up 64-xx / AP 5.4 / AP 7.t .................11
Activating the rewinder ..............................11
Selecting the direction of rotation ..............11
Checking the sensor current setting .........12
Setting the sensor current .........................12
Adjusting the sensor .................................13
Inserting material ..........................................15
Starting .........................................................17
Starting TTX 350 / TTK .............................17
Starting 64-xx / AP 5.4 / AP 7.t .................17
(AP 5.4) Run-in roller for narrow labels ........19
Technical Specifications ...............................20
Index .............................................................21
Advertisement
Table of Contents

Related Manuals for Novexx Solutions 64 Series


Summary of Contents for Novexx Solutions 64 Series
-
Page 1: Table Of Contents
01/13 Rev. 5.05-01 USER MANUAL Rewinder 2000 Attachment, Setup General Notes ..........2 Setting up 64-xx / AP 5.4 / AP 7.t ....11 Intended Purpose ........2 Activating the rewinder ......11 Properties ........... 2 Selecting the direction of rotation ....11 System requirements ........ -
Page 2: General Notes
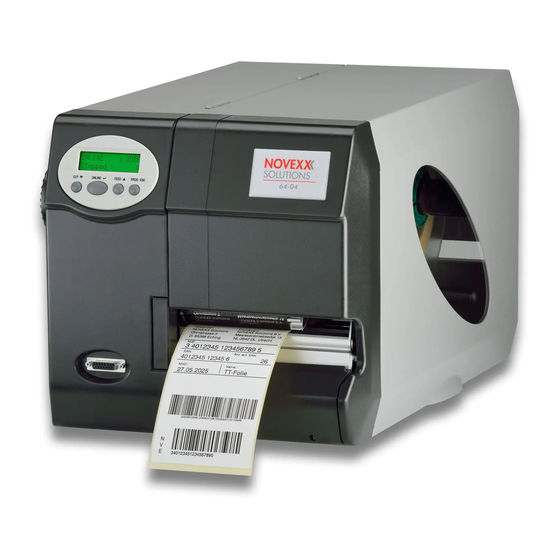
01/13 Rev. 5.05-01 USER MANUAL Attachment, Setup Rewinder 2000 General Notes Intended Purpose The rewinder option is a peripheral device for label printers of the types TTK, TTX 350, 64-xx, AP 5.4 and AP 7.t. The device is designed for winding up label material after it has been printed using one of the printer types named above. -
Page 3: System Requirements
01/13 Rev. 5.05-01 USER MANUAL Attachment, Setup Rewinder 2000 System requirements Printer type The rewinder can be operated with the following printer types: • TTX 350 • • 64-xx • AP 5.4 • AP 7.t Preparation for peripheral devices For using the printers with a rewinder, they must be especially equipped (see Tab. -
Page 4: Attaching The Rewinder
01/13 Rev. 5.05-01 USER MANUAL Attachment, Setup Rewinder 2000 Attaching the rewinder Before beginning service work, switch off the printer and pull out the mains power supply plug! Under no circumstances should you use the dancer arm as a carrying handle! A bent dancer arm will cause the device to malfunction! The rewinder (1) is attached to the front of the... -
Page 5: General Information About Setting Up The Printer
01/13 Rev. 5.05-01 USER MANUAL Attachment, Setup Rewinder 2000 General information about setting up the printer After mounting the rewinder you must set up the printer for operation with the new peripheral device. This is done by selecting the appropriate parameter in the parameter menu of the printer. -
Page 6: Rotation Speed With 64-Xx / Ap 5.4
01/13 Rev. 5.05-01 USER MANUAL Attachment, Setup Rewinder 2000 Rotation speed with 64-xx / AP 5.4 With printers of the types 64-xx / AP 5.4 / AP 7.t, the rewinder rotation speed depends on the print speed. A low print speed leads to a slower rewinder rotation as a high print speed. -
Page 7: Setting Up Ttx 350 / Ttk
01/13 Rev. 5.05-01 USER MANUAL Attachment, Setup Rewinder 2000 Setting up TTX 350 / TTK Setup the printer for rewinder-use by performing the three subsequently described steps: Activating the rewinder / Selecting the Rotation Direction on page 7. Setting the sensor current on page Adjusting the sensor on page 9. -
Page 8: Setting The Sensor Current
01/13 Rev. 5.05-01 USER MANUAL Attachment, Setup Rewinder 2000 Setting the sensor current Befor using the rewinder for the first time, the sensor current must be set by a potentiometer at the rewinder (see Fig. 1). Rewinder (section) Turn counter-clockwise => Sensor current decreases Pot. -
Page 9: Adjusting The Sensor
01/13 Rev. 5.05-01 USER MANUAL Attachment, Setup Rewinder 2000 Adjusting the sensor The bouncer arm controls the winding speed of the rewinder by means of a sensor. Bevor applying the rewinder for the first time, the bouncer arm has to be brought in both end positions to adjust the sensor. Fig. - Page 10 01/13 Rev. 5.05-01 USER MANUAL Attachment, Setup Rewinder 2000 CAUTION! - If programming is interrupted by pressing the CUT+FEED button, the printer uses preset values which may cause the device to malfunction! A complete description of the parameters can be found in the chapter "Info Printouts and Parameters"...
-
Page 11: Setting Up 64-Xx / Ap 5.4 / Ap 7.T
01/13 Rev. 5.05-01 USER MANUAL Attachment, Setup Rewinder 2000 Setting up 64-xx / AP 5.4 / AP 7.t Setup the printer for rewinder-use by performing the following steps: Activating the rewinder on page 11. Selecting the direction of rotation on page 11. Setting the sensor current on page 12. -
Page 12: Checking The Sensor Current Setting
01/13 Rev. 5.05-01 USER MANUAL Attachment, Setup Rewinder 2000 Checking the sensor current setting (Only for 64-xx and AP 5.4) SERVICE FUNCTION > Rewinder values. Call Rewinder Values xxx <--------------------> yyy • xxx = Sensor value in zero position •... -
Page 13: Adjusting The Sensor
01/13 Rev. 5.05-01 USER MANUAL Attachment, Setup Rewinder 2000 3. Set the rewinder pot. Sensor test Bouncer arm in zero (Fig. 1) so that a value position (Fig. 2); 27 = Sens: 4.01 between 20 and 30 is set value. displayed. - Page 14 01/13 Rev. 5.05-01 USER MANUAL Attachment, Setup Rewinder 2000 8. Move the bouncer arm up to rewinder adjust Mind the notes the stop plate i the direction following this table! of the support leg, and then back again by approx. 5 mm. Press the Enter button.
-
Page 15: Inserting Material
01/13 Rev. 5.05-01 USER MANUAL Attachment, Setup Rewinder 2000 Inserting material Direction of rotation The material – depending on the set direction of rotation – is wound around the core in a clockwise or anti-clockwise direction (see Fig. 5). Fig. 5 Left side: direction of rotation = left (labels outside); right side: direction of rotation = right (labels inside) Proceed as follows: 1. - Page 16 01/13 Rev. 5.05-01 USER MANUAL Attachment, Setup Rewinder 2000 3. Remount the guide disk. The recesses at the inner diameter of the guide disk (arrows) must be positioned over the clamping bar legs (5). 4. Push the guide disk up to the material edge (6).
-
Page 17: Starting
01/13 Rev. 5.05-01 USER MANUAL Attachment, Setup Rewinder 2000 Starting After securing the material end, proceed as follows to start printer and rewinder: The printer is set to off-line mode. Starting TTX 350 / TTK 1. Press the CUT button. The rewinder starts rewinding, until the bouncer arm reaches the final position. - Page 18 01/13 Rev. 5.05-01 USER MANUAL Attachment, Setup Rewinder 2000 Rotation speed Pressing the Cut button after securing the material end lets the rewinder start winding at a comparably slow, constant speed. This startup speed is independent of the formerly set printspeed and is maintained until the bouncer arm reaches its final position for the first time after starting.
-
Page 19: (Ap 5.4) Run-In Roller For Narrow Labels
01/13 Rev. 5.05-01 USER MANUAL Attachment, Setup Rewinder 2000 (AP 5.4) Run-in roller for narrow labels To improve the guiding accuracy of AP 5.4 printers processing very narrow label material, it is recommended to install an additional run- in roller (1) (article number A100422). At older rewinders, an additional hole according to fig. -
Page 20: Technical Specifications
01/13 Rev. 5.05-01 USER MANUAL Attachment, Setup Rewinder 2000 Technical Specifications Motor Stepper motor Position sampling Infrared light barrier Rot. direction Free selectable – Rewind direction with label facing outside or inside. Rewind speed Max. 203 mm/s (8"/s) Spezification Max. outer-Ø 230 mm material roll Core Inner-Ø... -
Page 21: Index
01/13 Rev. 5.05-01 USER MANUAL Attachment, Setup Rewinder 2000 Index Run-in roller for narrow labels (AP 5.4) ..19 Application ........... 2 Assembly, rewinder ........4 Sensor adjustment – 64-xx ........... 13 – TTK ............9 Direction of rotation ........5 –...
Need help?
Do you have a question about the 64 Series and is the answer not in the manual?
Questions and answers