Novexx Solutions AP5.4 User Manual
Hide thumbs
Also See for AP5.4:
- User manual (136 pages) ,
- Service manual (11 pages) ,
- User manual (17 pages)
Table of Contents
Advertisement
Quick Links
06/15 Rev. 6.01-01
Commissioning and Operation
Installation ..................................................... 2
Unpacking the printer ................................ 2
Setting up the printer ................................. 3
Scope of delivery ....................................... 4
Assembly ................................................... 5
Connecting the printer ............................... 6
Main operating steps ..................................... 7
Configuring the data interface ................... 7
(De)activating the internal rewinder .......... 7
(De)activating the dispensing edge ........... 9
Setting the dispenser ................................ 9
Operating in offline mode ........................ 10
Online operation ...................................... 11
Creating a print job .................................. 12
Transferring a print job ............................ 13
Using SD cards ....................................... 15
Setting the real-time clock ....................... 16
USER MANUAL
AP5.4 - AP5.6
Advertisement
Table of Contents

Subscribe to Our Youtube Channel
Related Manuals for Novexx Solutions AP5.4


Summary of Contents for Novexx Solutions AP5.4
-
Page 1: Table Of Contents
06/15 Rev. 6.01-01 USER MANUAL AP5.4 – AP5.6 Commissioning and Operation Installation ............. 2 Unpacking the printer ........ 2 Setting up the printer ......... 3 Scope of delivery ........4 Assembly ........... 5 Connecting the printer ....... 6 Main operating steps ........7 Configuring the data interface .... -
Page 2: Installation
06/15 Rev. 6.01-01 USER MANUAL Commissioning and Operation AP5.4 – AP5.6 Installation Unpacking the printer CAUTION! To avoid damage to the printer, observe the following: Do not lift the printer using the plastic components on the front and rear. -
Page 3: Setting Up The Printer
06/15 Rev. 6.01-01 USER MANUAL Commissioning and Operation AP5.4 – AP5.6 Setting up the printer WARNING! Lethal hazard from mains power, if any liquid gets into the printer! Protect the printer from liquid penetration! CAUTION! The printer and printing materials will be damaged by moisture and wetness! ... -
Page 4: Scope Of Delivery
06/15 Rev. 6.01-01 USER MANUAL Commissioning and Operation AP5.4 – AP5.6 Scope of delivery • Printer AP 5.4/5.6 including 2 pairs of core adapters [3B] and one paper core [3A] for rewinding thermotransfer ribbon. • Mains power cable • Documentation CD Contains detailed operating manual for printer as well as Windows drivers and Servicing manual. -
Page 5: Assembly
06/15 Rev. 6.01-01 USER MANUAL Commissioning and Operation AP5.4 – AP5.6 Assembly Housing parts [5] Assembly of the separately shipped housing parts. 1. Press the cover for the pheripheral connector [5A] into the housing opening, until it is flush with the housing. -
Page 6: Connecting The Printer
06/15 Rev. 6.01-01 USER MANUAL Commissioning and Operation AP5.4 – AP5.6 Connecting the printer WARNING! This unit operates at mains voltage! Contacting electrically live components can cause potentially lethal electrical shocks and burns. Make sure that the machine has been switched off before connecting the mains cable. -
Page 7: Main Operating Steps
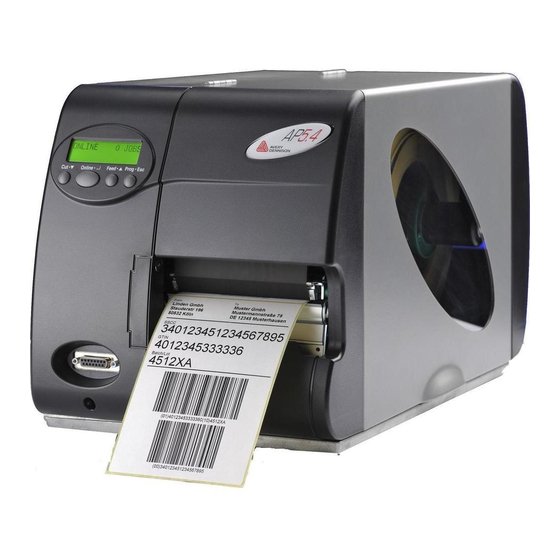
06/15 Rev. 6.01-01 USER MANUAL Commissioning and Operation AP5.4 – AP5.6 Main operating steps Switching on/off [8] Rear side of the AP 5.6. Switch on the printer by the mains switch (position „I“). Display, if the printer is ready: OFFLINE 0 JOBS With unchanged factory settings, the printer starts in offline mode. -
Page 8: (De)Activating The Internal Rewinder
06/15 Rev. 6.01-01 USER MANUAL Commissioning and Operation AP5.4 – AP5.6 (De)activating the internal rewinder Only applies to AP 5.4/5.6 dispensers with baffle plate installed. Activate Ensure that material has been inserted before you activate the rewinding function, otherwise a fault message will appear! For information on inserting material, see topic section “Setup”, chapter... -
Page 9: (De)Activating The Dispensing Edge
06/15 Rev. 6.01-01 USER MANUAL Commissioning and Operation AP5.4 – AP5.6 (De)activating the dispensing edge Only applies to AP 5.4/5.6 dispensers with dispensing edge installed! Activating SYSTEM PARAMETER > Periph. device to “Dispenser”. The printer restarts. Afterwards, an additional menu... -
Page 10: Operating In Offline Mode
06/15 Rev. 6.01-01 USER MANUAL Commissioning and Operation AP5.4 – AP5.6 Operating in offline mode • Changing from offline to online mode: ONLINE x JOBS OFFLINE x JOBS Online • Switching into online mode when print job is stopped OFFLINE... -
Page 11: Online Operation
06/15 Rev. 6.01-01 USER MANUAL Commissioning and Operation AP5.4 – AP5.6 Online operation • Switching to offline mode: ONLINE x JOBS OFFLINE x JOBS Online • Adjusting the print contrast: press Feed button to increase, press Cut button to de-... -
Page 12: Creating A Print Job
06/15 Rev. 6.01-01 USER MANUAL Commissioning and Operation AP5.4 – AP5.6 Creating a print job There are basically two ways of generating a print job: You can use a label layout pro- gram together with a Windows printer driver or create a simple text file containing print- er commands. -
Page 13: Transferring A Print Job
06/15 Rev. 6.01-01 USER MANUAL Commissioning and Operation AP5.4 – AP5.6 Command file Enter a sequence of printer commands into a text file and send this file to the printer. To do this, you require a simple text editor and the copy command in MS-DOS. Easy- Plug is a special command language for formulating print jobs. - Page 14 06/15 Rev. 6.01-01 USER MANUAL Commissioning and Operation AP5.4 – AP5.6 SD card and Printing starts immediately after switching on Easy-Plug file 1. Rename print job file on SD card (root directory) as autostrt.for. 2. Insert SD card into card slot on printer (see next section).
-
Page 15: Using Sd Cards
06/15 Rev. 6.01-01 USER MANUAL Commissioning and Operation AP5.4 – AP5.6 Using SD cards CAUTION! To prevent malfunctions, observe the following. Only use SD cards that have been approved by the manufacturer. Only insert or remove SD cards after the printer has been switched off. -
Page 16: Setting The Real-Time Clock
06/15 Rev. 6.01-01 USER MANUAL Commissioning and Operation AP5.4 – AP5.6 Removing the card: 1. Insert the card into the slot until it stops [11B] and release it. The card springs back out of the card slot [11A]. 2. Remove the card fully from the slot.
Need help?
Do you have a question about the AP5.4 and is the answer not in the manual?
Questions and answers