You should also read the instruction manual for the battery charger, and the documentation for any other equipment that you use with a DTM-302 series instrument. Note – Always keep the manual near the instrument for easy reference.
LED safety. Specifications for LED emission Wave length 850 nm Drive method Output power < 200 µW Repetition rate 15 KHz Safety class E.U. EN60825-1/Am.2:2001 (IEC60825-1/Am.2:2001), class 1 Japan JIS C6802-1997, class 1 Total Station DTM-302 Series Instruction Manual v...
Warning – Never look at the sun through the telescope. If you do, you may damage or lose your eyesight. Warning – DTM-302 series instruments are not designed to be explosion-proof. Do not use the instrument in coal mines, in areas contaminated with coal dust, or near other flammable substances.
Page 7
Warning – The battery BC-65 is not waterproof on its own. Do not get the battery wet when it is removed from the instrument. If water seeps into the battery, it may cause a fire or burns. Total Station DTM-302 Series Instruction Manual vii...
Page 8
Caution – Securely fasten the leveling base clamp knob. If the knob is not securely fastened, the leveling base may come loose or fall off when you lift the instrument, causing personal injury or instrument damage. viii Total Station DTM-302 Series Instruction Manual...
Page 9
Caution – Do not swing or throw the plumb bob. You could injure yourself or other people. Caution – Before charging the battery pack, read the instruction manual for the quick charger (part number Q-75U/E). Total Station DTM-302 Series Instruction Manual ix...
Page 10
Safety Total Station DTM-302 Series Instruction Manual...
Changing the direction of the prism ..19 Setting the prism constant ... . 19 Setting the position of the target plate ..20 Total Station DTM-302 Series Instruction Manual xi...
Page 12
Measuring distances ....52 Measurement settings ....53 x ii Total Station DTM-302 Series Instruction Manual...
Page 13
....82 Measuring distance and offset values on the arc-curve ....84 Total Station DTM-302 Series Instruction Manual x ii i...
Page 14
Cogo ......112 Calculating angle and distance between two coordinates ....112 Calculating and manually inputting coordinates..115 x iv Total Station DTM-302 Series Instruction Manual...
Page 15
Uploading coordinate data ... .151 Advanced feature: Editing the data order for upload ....153 Total Station DTM-302 Series Instruction Manual xv...
Page 16
Tribrach ....170 Level vial sensitivity ....170 x v i Total Station DTM-302 Series Instruction Manual...
Page 17
....184 Nikon raw record formats ... .184 SDR2x and SDR33 record formats ..187 Data examples .
Page 18
Stakeout ......201 Station Setup..... . . 202 x v i ii Total Station DTM-302 Series Instruction Manual...
Instrument accuracy and display 11.1 One of the benefits of the Nikon DTM-302, NPL-302, and DTM-502 series products is ease-of-use. The software for these three product series has been designed to make it easy for you to learn to operate one model of instrument and apply that knowledge to the other models with little additional training.
Page 21
DTM-352 DTM-362 NPL-332 NPL-352 NPL-362 DTM-522 DTM-532 DTM-552 0.5'' The manuals for all of these total station product families show the measurement screens with the higher resolution data for the highest accuracy DTM-552. Total Station DTM-302 Series Instruction Manual 3...
1 Introduction 
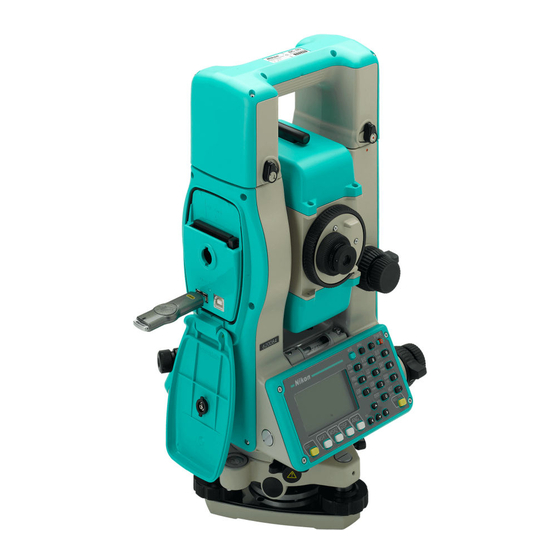
Parts of the Instrument Figure 1.1 and Figure 1.2 show the main parts of the DTM-302 series instrument. Carrying handle Battery mounting Telescope button focusing ring Telescope Vertical tangent eyepiece screw Diopter ring Vertical clamp Plate level Display...
Page 23
Optical plummet Display and face-2 keyboard Data output/ external power input connector (Input voltage Leveling base 7.2 – 11 V DC) Circular level Leveling screw Figure 1.2 Electronic Total Station DTM-302 series – Face-2 Total Station DTM-302 Series Instruction Manual 5...
• Do not store the DTM-302 series instrument in hot or humid locations. In particular, you must store the battery pack in a dry location at a temperature of less than 30 °C (86 °F).
Page 25
If exposure to rain is unavoidable, make sure that the carrying case is placed with the Nikon nameplate facing upward. • The BC-65 battery pack contains a Ni-MH battery. When disposing of the battery pack, follow the laws or rules of your municipal waste system.
Page 26
1 Introduction 8 Total Station DTM-302 Series Instruction Manual...
In this chapter: Unpacking and Packing the Instrument Charging and Discharging the Battery Pack Detaching and Re-Attaching the Battery Pack Setting Up the Tripod Centering Leveling Sighting Setting Up the Prism Reflector Face-1/Face-2 Measurements Total Station DTM-302 Series Instruction Manual 9...
Warning – Use only the specified battery charger (part number Q-75U/E) to charge the battery pack (part number BC-65). Using other chargers, such as a charger with part number Q-7U/E or Q7C, may cause the battery pack to catch fire or rupture. 10 Total Station DTM-302 Series Instruction Manual...
Page 29
0 °C and 40 °C (between 32 °F and 104 °F). If you try to charge the battery when the ambient temperature is outside this range, the protective circuit will work and prevent it from being charged normally. Total Station DTM-302 Series Instruction Manual 11...
Page 30
DISCHARGE battery pack. button The CHARGE indicator lights up, and charging starts automatically. When the battery pack is fully charged, the Air holes CHARGE indicator turns off. 12 Total Station DTM-302 Series Instruction Manual...
Detaching the BC-65 battery pack If the instrument is turned on, press [PWR] to turn it off. Depress the battery mounting button while holding the battery pack. Caution – Avoid touching the contacts on the battery pack. Total Station DTM-302 Series Instruction Manual 13...
Note – If you want to use the plumb bob to center the instrument (see Centering, page 15), you must level the tripod head precisely. Securely fasten the thumb screws on the tripod legs. Place the instrument on the tripod head. 14 Total Station DTM-302 Series Instruction Manual...
– If the station point is slightly off center, loosen the tripod mounting screw and then center the instrument on the tripod. Use only direct movement to center the instrument. Do not rotate it. Total Station DTM-302 Series Instruction Manual 15...
Rotate the alidade until the plate level is parallel with any two of the leveling screws (B and C). Use leveling screws B and C to move the bubble into the center of the level. Rotate the alidade approximately 90°. 16 Total Station DTM-302 Series Instruction Manual...
Telescope focusing Diopter ring Move your eye vertically and laterally ring to check whether the target image moves relative to the reticle crosshairs. If the target image does not move, there is no parallax. Total Station DTM-302 Series Instruction Manual 17...
Set the prism constant (see page 19). If you are using a single prism holder, set the position of the target plate (see page 20). Detailed instructions for Step 2 through Step 5 are provided on the following pages. 18 Total Station DTM-302 Series Instruction Manual...
Adjusting the height of the tribrach adapter 20.1 The tribrach adapter has two height settings. To use the prism reflector with a DTM-302 series instrument, use the lower height setting. To adjust the height of the tribrach adapter: Remove the height adjustment screw from the tribrach adapter.
For more information, see Measurement settings, page 53. Note – The prism constant of a Nikon prism is always 0, whether it is attached to a single prism holder or a triple prism holder. If your prism constant is not 0mm, then directly enter the prism constant value in the Const field.
Page 39
A Face-1 measurement is made with the vertical circle positioned to the left of the telescope eyepiece. A Face-2 measurement is made with the vertical circle positioned to the right of the telescope eyepiece. See Figure 2.2. Face-1 Face-2 Figure 2.2 Face-1 and Face-2 Total Station DTM-302 Series Instruction Manual 21...
Page 40
2 Preparation 22 Total Station DTM-302 Series Instruction Manual...
C H A P T E R Getting Started In this chapter: Turning the Instrument On and Off Display and Key Functions List Display Inputting Data Jobs Measuring Distances Total Station DTM-302 Series Instruction Manual 23...
If you tilt the telescope before you rotate the alidade, the horizontal angle is not initialized, and the instrument uses the previous HA reading. 24 Total Station DTM-302 Series Instruction Manual...
When the instrument is in sleep mode, it wakes up if any of the following occurs: • You press a key • The instrument receives a remote control command • You rotate the alidade • You tilt the telescope Total Station DTM-302 Series Instruction Manual 25...
3 Getting Started Display and Key Functions Figure 3.1 shows the keys on the DTM-302 series instrument keyboard and the LCD display. Figure 3.1 DTM-302 keyboard and display Table 3.1 summarizes the functions of the DTM-302 keys. Table 3.1 Key functions...
Page 45
A, B, C, or 7. Displays the Stakeout menu. page 73 Shows stakeout settings, if held down for one second. In numeric mode, enters 8. In alphanumeric mode, enters D, E, F, or 8. Total Station DTM-302 Series Instruction Manual 27...
Page 46
In numeric mode, enters – (minus). In alphanumeric mode, enters . (period), – (minus), or + (plus). Displays the Bubble indicator. page 38 In numeric mode, enters 0. In alphanumeric mode, enters *, /, =, or 0. 28 Total Station DTM-302 Series Instruction Manual...
Press the key repeatedly to cycle through all the letters assigned to that key. For example, to enter the letter O in alphabetic mode, press [5] three times. Total Station DTM-302 Series Instruction Manual 29...
For example, to turn the backlight on or off, press Alternatively, to highlight the switch that you want to set, press . Then press [ENT] to cycle through the settings for that switch. 30 Total Station DTM-302 Series Instruction Manual...
When several display screens are available, the indicator appears at the top left of the screen, and the screen indicator (for example, appears at the top right. To move to the next available screen, press [DSP] Total Station DTM-302 Series Instruction Manual 31...
Page 50
The items displayed in the DSP1, DSP2, DSP3, and DSP4 screens are also used in the corresponding Stakeout screens (SO2, SO3, SO4, and SO5). You can also customize the displayed items in Stakeout. 32 Total Station DTM-302 Series Instruction Manual...
When the cursor is in a height (HT) field, only numeric input mode is available. Pressing [MODE] has no effect when the cursor is in a HT field. Total Station DTM-302 Series Instruction Manual 33...
Page 52
[DSP] key in the Basic Measurement Screen (BMS). To return to the BMS from the Qcode screen, press [MODE] [ESC] 34 Total Station DTM-302 Series Instruction Manual...
To change the measurement mode for the Quick Sett code observation, press the softkey. In Quick code measurement, the Rec mode can only be set to Confirm or ALL. Total Station DTM-302 Series Instruction Manual 35...
. A list of the five target sets appears. To select a target set, either press the corresponding numeric key ( through ), or use to highlight the target set in the list and press [ENT] 36 Total Station DTM-302 Series Instruction Manual...
Page 55
The note is stored as a CO record in the raw data. To display a list of previously used notes, press Stack softkey. The stack stores the last 20 notes. to highlight a note in the list. Then press [ENT] to select the note. Total Station DTM-302 Series Instruction Manual 37...
The current setting of leveling compensators is indicated by header characters (:, #, :, and #) after field labels (such as HA, VA, SD, and HD) in observation screens. For more information, see Header characters, page 33. 38 Total Station DTM-302 Series Instruction Manual...
, a sub-menu appears. [ENT] The first item on the sub-menu ends with the text [MENU] . If you select this item, the whole menu is assigned to the [USR] key. Total Station DTM-302 Series Instruction Manual 39...
Select Format screen. Use this screen to change the type of data that is assigned to [DAT] . Press or select DAT [MENU] to display the Data menu whenever you press [DAT] 40 Total Station DTM-302 Series Instruction Manual...
Press [>] to move down one page. To select an item from the list, move the cursor onto the item and press [ENT] Total Station DTM-302 Series Instruction Manual 41...
To adjust the duration of the coordinate window MENU > Settings > display, go to Others . To leave the window open until you press [ENT], set the XYZ disp field to +ENT. For more information, see page 132. 42 Total Station DTM-302 Series Instruction Manual...
Page 61
Then press [ENT] If the Page Up or Page Down icons are displayed, use [<] [>] to page up or page down the list. Total Station DTM-302 Series Instruction Manual 43...
Page 62
(this is the default “Replace All” input mode). Press [>] to change the input mode to Overwrite mode and highlight the first character. Press [<] to move the cursor the end of the string. 44 Total Station DTM-302 Series Instruction Manual...
[COD] in the BMS. For more information, see [COD] key, page 35. You can use numeric or alphanumeric names up to 16 characters long to identify codes. Total Station DTM-302 Series Instruction Manual 45...
Page 64
To edit the code list, go to Code List . For more information, see Editing an item in the point list or code list, page 147. to highlight the feature code that you want to use. Then press [ENT] 46 Total Station DTM-302 Series Instruction Manual...
Once you have selected a letter, the cursor moves to the feature code beginning with that letter. If there is no code beginning with that letter, the cursor moves to the next available letter. Total Station DTM-302 Series Instruction Manual 47...
16, you do not have to enter it, and it is not displayed on the screen. For example, if you enter 2'08" 5/ [2] [.] [0] [8] [.] [5] [.] [ENT] , it is displayed as (2 feet, 8 and 5/16ths inches). 48 Total Station DTM-302 Series Instruction Manual...
Creating a new job 33.1 Press [MENU] to open the MENU screen. Press to open the Job Manager. Creat Press the softkey to open the Create Job screen. Enter the job name. Total Station DTM-302 Series Instruction Manual 49...
Page 68
If the point is not found in the current job, the search is automatically extended to the control job. If the point is found in the control job, the selected point is copied to the current job as a UP record. 50 Total Station DTM-302 Series Instruction Manual...
For information on how to assemble the prism reflector, see Setting Up the Prism Reflector, page 18. Sight the telescope to see crosshairs at the center of the prism reflector. Sighting a single prism Total Station DTM-302 Series Instruction Manual 51...
If the average count is set to a value from 1 to 99, the averaged distance is displayed after the last shot. The field name SD changes to SDx to indicate the averaged data. 52 Total Station DTM-302 Series Instruction Manual...
Field Values Target Prism Sheet Const (prism constant) –999 mm through 999 mm Mode Precise Normal AVE (Average count) 0 (Continuous) through 99 Rec mode One of the following: MSR only Confirm Total Station DTM-302 Series Instruction Manual 53...
Page 72
The Confirm setting displays the Record PT screen before data is recorded. The ALL setting is a quick shooting and recording mode. The instrument automatically records the point using the default PT/CD. The instrument then returns to the BMS for the next measurement. 54 Total Station DTM-302 Series Instruction Manual...
C H A P T E R Applications In this chapter: HA Reset and Angle Operations Station Setup Stakeout Program Key Recording Measurement Data Measuring Offsets Total Station DTM-302 Series Instruction Manual 55...
HR=0 is displayed. Sight the backsight and press [ENT] Sight the foresight and press [ENT] The horizontal angle is accumulated and the value is held again. To end repeat angle measurement, press [ESC] 56 Total Station DTM-302 Series Instruction Manual...
For more information, see Face-1/Face-2 Measurements, page 20. F1/F2 measurements are not available with the DTM-332. To take F1/F2 data without taking a distance F1/F2 measurement, press or select in the Angle menu. Total Station DTM-302 Series Instruction Manual 57...
To select a command from this menu, press the corresponding number key. Alternatively, press [<] [>] to highlight the command and then press [ENT] . Press to move up or down one page. The last function used is highlighted. 58 Total Station DTM-302 Series Instruction Manual...
Select an input method for defining the backsight point. – To sight the backsight by entering coordinates, see below. – To sight the backsight by entering the azimuth and angle, see page 62. Total Station DTM-302 Series Instruction Manual 59...
Page 78
BS, press [DSP] to display a QA screen. The QA screen shows the dHD and dVD values, which indicate the difference between the measured distance and the distance calculated from the known coordinates. 60 Total Station DTM-302 Series Instruction Manual...
To record a CP record which stores the averaged HA, VA, and SD from the F1/F2 data, press the softkey. To record only the ST and F1/F2 records, without a CP record, press the softkey. Total Station DTM-302 Series Instruction Manual 61...
Page 80
Sight the BS point and press [ENT] . ST and F1 records are stored in the job. You can also use the softkey for F1/F2 measurements. See Advanced feature: Measuring F1 and F2, page 61. 62 Total Station DTM-302 Series Instruction Manual...
If the angle between known point 1 and known point 2 (measured from the station point) is extremely acute or extremely oblique, the resulting solution will be less reliable geometrically. For geometric reliability, select known point locations (or station point locations) that are widely spaced. Total Station DTM-302 Series Instruction Manual 63...
Page 82
Advanced feature: Measuring F1 and F2, page 61. softkey is not available on the DTM-332. To proceed to the next point, press [ENT] Enter the second point (PT2) and its height of target. 64 Total Station DTM-302 Series Instruction Manual...
Page 83
If you have set Split ST to Yes, the ST field defaults to the last recorded ST value + 1. For more information, see Others settings, page 132. BS defaults to the first observed point. Change To change the BS, press the softkey. Total Station DTM-302 Series Instruction Manual 65...
To delete a measurement (because of large sigma values, for example), highlight the measurement data or display the detail screen for the measurement. Then press the softkey. The STN coordinates are automatically recalculated. 66 Total Station DTM-302 Series Instruction Manual...
(AZ) automatically. To calculate the AZ between two known points Station Setup > Known (ST and BS), use . For more information, see Setting up a station with known coordinates or azimuth, page 59. Total Station DTM-302 Series Instruction Manual 67...
To record the updated STN, press [ENT] When the HI is changed, the Z coordinate is updated before the station is recorded. You must complete a station setup before you use the Remote Benchmark function. 68 Total Station DTM-302 Series Instruction Manual...
Reset in the last station setup sight the BS and press the softkey or press [ENT] Abrt – To cancel the process and return to the BMS, press the softkey or press [ESC] Total Station DTM-302 Series Instruction Manual 69...
Page 88
– To reset the horizontal angle, enter a value in the HA field and press [ENT] – If you do not need to reset the HA, leave the HA field blank and press [ENT] The display returns to the BMS. 70 Total Station DTM-302 Series Instruction Manual...
By Angle If you select , the azimuth input screen appears. Enter the angle value and press [ENT] A measurement screen appears. Sight P2 and press [MSR1] [MSR2] to take a measurement. Press [ENT] Total Station DTM-302 Series Instruction Manual 71...
Page 90
To finish the setup and record the station, press [ENT] in the BS field. Sample records CO, Temperature:20C Pressure:1013hPa Prism:0 … ST,9005, ,265, ,1.2350,150.40300,150.40300 F1,265,1.6040,79.0010,90.30150,89.35260, F1,200,1.4590,50.2300,269.4035,93.50110, CO, P1-P2 HD=122.0350 VD=0.5600 72 Total Station DTM-302 Series Instruction Manual...
HA-HD select in the Stakeout menu. Enter the values and press [ENT] Horizontal distance from station point to stakeout point Vertical distance from station point to stakeout point Horizontal angle to stakeout point Total Station DTM-302 Series Instruction Manual 73...
Page 92
Once a measurement is taken, the Cut/Fill value and Z coordinate are updated as the VA is changed. If you press [HOT] in any observation screen, the HOT key menu is displayed. You can use this menu at any time to change HT and T-P. 74 Total Station DTM-302 Series Instruction Manual...
Page 93
PT+1. Press [ENT] to record the point. After recording the point, it returns to the observation screen. You can continue observation, or press to input another angle and distance [ESC] for stakeout. Total Station DTM-302 Series Instruction Manual 75...
When the target is on the intended position, the displayed errors become 0.000 m (or 0.000 ft). Difference in horizontal angle to the target point Right/Left (Lateral error) IN/OUT In/Out (Longitudinal error) CUT/FIL Cut/Fill 76 Total Station DTM-302 Series Instruction Manual...
Page 95
PT defaults to the last PT + 1. If you selected a point from the list, the display returns to the list, unless all points have been selected. Press [ESC] to return to the point input screen. Total Station DTM-302 Series Instruction Manual 77...
. To go to the stakeout observation screen, press [ENT] If you have assigned a control job, and additional points are found in the control job, Ctrl softkey is displayed under the list. 78 Total Station DTM-302 Series Instruction Manual...
Sight the prism and press [MSR1] [MSR2] to change the guide point. You can calculate and guide up to double the number of the stakes. To record the point as an SO record, press [ENT] Total Station DTM-302 Series Instruction Manual 79...
Enter the first point (P1) of the line. If you press [ENT] without entering a PT name, you can enter temporary coordinates which are not recorded in the job. Alternatively, press the softkey to measure a point. 80 Total Station DTM-302 Series Instruction Manual...
Page 99
Using [DSP] to switch between display screens You can use [DSP] to switch between display screens. This function works as in the angle-distance stakeout. For more information, see Using [DSP] to switch between display screens, page 75. Total Station DTM-302 Series Instruction Manual 81...
Enter the second point for the reference line. Enter an asterisk (*) in the PT field to perform a wildcard search. A list of matching points is displayed. Highlight a point in the list and then press [ENT] 82 Total Station DTM-302 Series Instruction Manual...
Page 101
The REF5 screen is only available if the secondary distance unit is set. For more information, see Others settings, page 132. Every time you press [DSP] , the next screen appears. If you press [DSP] in the last screen (REF4 or REF5), the REF1 screen appears. Total Station DTM-302 Series Instruction Manual 83...
(AZ1). To enter P1 by direct measurement, press the softkey. Choose a method to define the arc. P2 can be any point on the tangent line that is to exit the curve. 84 Total Station DTM-302 Series Instruction Manual...
Page 103
If the curve length (Len) is too large for a circle of the given radius, it is shortened. To ... Press ... [DSP] switch between display screens [HOT] change HT record points [ENT] Total Station DTM-302 Series Instruction Manual 85...
Page 104
To record the point, press [ENT] on any observation screen. The arc is stored in comment records. Sample records CO,Arc P1:583 AZ1=0.0000 P2:102 AZ2=311.2932 Radius=50.0000 Length=125.6637 Sta= -12.6876 Offset= 1.3721 dZ= 0.0971 SS,17,1.0000,6.9202,18.4700,80.3120,15:48:48,2REF-LINE 86 Total Station DTM-302 Series Instruction Manual...
Station point Slope distance between two points Horizontal distance between two points Vertical distance between two points Percentage of grade (rVD/rHD) × 100% Vertical grade (rHD/rVD) :1 Azimuth from first point to second point Total Station DTM-302 Series Instruction Manual 87...
Page 106
[ENT] in the 1/2 or 2/2 observation screen. Default point numbers are displayed. You can change these point numbers. To record a note, press in the To field. [ENT] 88 Total Station DTM-302 Series Instruction Manual...
Page 107
Applications 4 Data that you save in RDM functions is stored in RM records. For more information, see RM records, page 135. When you download data in Nikon RAW format, they are output as comment (CO) records. Measuring between the current point and the immediately preceding point To enter the RDM (Continuous) function, RDM(Cont.)
Enter the height of target. Sight the target point and press [MSR1] [MSR2] Loosen the vertical clamp, and turn the telescope to aim at an arbitrary point. The difference in elevation (Vh) is displayed. 90 Total Station DTM-302 Series Instruction Manual...
Enter two points to define the plane. – To enter the point by direct measurement, press the softkey. When you press the softkey, a temporary observation screen appears. Press [MSR1] [MSR2] . The Record PT screen appears. Total Station DTM-302 Series Instruction Manual 91...
Page 110
(PLN3), the PLN1 screen appears. To record the point, press [ENT] on any screen (V- PLN1/3 to V-PLN3/3). Enter PT and CD. Then press [ENT] Sample records CO,Vertical Ref Plane Pt1:516-A1 Pt2:530 CO,Sta=68.021 dz=17.459 SS,30123-A48,1.5480,16.4020,40.4720,89.0730,14:22:47, 92 Total Station DTM-302 Series Instruction Manual...
[ENT] in a blank field, an input screen for temporary coordinates appears. These coordinates will not be stored. When you have entered the temporary <Keyed-in XYZ> coordinates, appears instead of the PT name. Total Station DTM-302 Series Instruction Manual 93...
Page 112
(PLN3), the PLN1 screen appears. To record the point, press [ENT] on any screen (S-PLN1/3 to S-PLN3/3). Enter PT and CD. Then press [ENT] Sample records CO,3ptPlane P1:1062 P2:2902 P3:1547 CO,a=31.497 b=14.239 SS,30123-A49,1.6110,0.0000,234.3210,86.0955,16:07:18, 94 Total Station DTM-302 Series Instruction Manual...
Depending on the type of existing record, you can overwrite the old record with the new data. For more information, see Recording Data, page 199. Hold down [ENT] for one second to record the measurement as a CP record. Total Station DTM-302 Series Instruction Manual 95...
COM. For more information, see Recording, page 131. Sample output records through COM port When the Ext.Comm field is set to NIKON: TR PN: PT8 SD:000066626 HA:003856010 VA:008048500 HT:0000061757 (TR PN: point name SD HA VA HT; when ACK is returned, PN is incremented.) When the Ext.Comm field is set to SET:...
Sight the target and press [MSR1] [MSR2] Enter offset distances from the measured point. Use to move to the appropriate offset field. Up (+) Left (-) Out (+) Down (-) In (-) Right (+) Total Station DTM-302 Series Instruction Manual 97...
[ENT] to record the measured distance with the updated angle value. If you use this method, the dimension of the angle offset is not stored as a CO record. To store the CO record, use the O/S function. 98 Total Station DTM-302 Series Instruction Manual...
To record the point, press [ENT] or the softkey. Sample records SS,14,0.0000,38.9200,271.0350,89.2630,11:04:15,DITCH CO,2Prism O/S: P1-P2= 0.5090( 0.5060) P2-Tgt= 0.5020 In this sample data, 0.5090 is the measured value. 0.5060 is the entered value. Total Station DTM-302 Series Instruction Manual 99...
Sight the second prism (or target) and press [MSR1] [MSR2] Sight the alternative place on the same vertical line as the desired target point. To calculate the coordinates and the raw data of the target point, press [ENT] 100 Total Station DTM-302 Series Instruction Manual...
Page 119
Measurements to the first and second target (P1 and P2) are stored as comment records (PT1 and PT2). The last record records the angle measurement to the ALT (vertically offset point from the actual target point). Total Station DTM-302 Series Instruction Manual 101...
Enter the HD. Usually this is the taped distance from the instrument point. Enter a PT (and CD) value and press [ENT] The target point is calculated and recorded as an SS record. Sample records SS,158,0.0000,77.0518,62.08380,108.06510,11:51:48, CO, Input HD:76.1243 102 Total Station DTM-302 Series Instruction Manual...
If you take a measurement to a fourth point, the corner point can be calculated as the intersection of two walls (P1-P2 and P3-P4). The default elevation is given by P4. Total Station DTM-302 Series Instruction Manual 103...
If you use a prism attached to the surface of the circle for the distance measurement, press the softkey to eliminate the offset error (from the attached point to the measured surface of the prism) before you press [ENT]. 104 Total Station DTM-302 Series Instruction Manual...
Page 123
The following one or two comment records are angle-measured points. For example: CO, Point name (fixed to PT1/ PT2), HT(0.0000), SD(0.0000), HA, VA. If you press the softkey before you sight Edge1, the input value is recorded at the end. Total Station DTM-302 Series Instruction Manual 105...
Enter the slope distance that you need to add or subtract. You can enter any value from –99.990 through +99.990 m (–328.000 through +328.000 ft). To record the point, press [ENT] Sample records SS,83,1.5000,77.0518,62.08380,81.06510,11:51:48, CO,O/S MSR:83 1.5555 76.5518 62.08380 81.06510 106 Total Station DTM-302 Series Instruction Manual...
C H A P T E R Menu Key In this chapter: Introduction Job Manager Cogo Settings Data Communication 1sec-Keys Calibration Time Total Station DTM-302 Series Instruction Manual 107...
Press [ENT] to open the highlighted job. When you open a job, all job settings are automatically changed to match those used in the open job. 108 Total Station DTM-302 Series Instruction Manual...
Scale Factor 0.999600 to 1.000400 T-P correction ON/OFF Sea Level ON/OFF C&R correction OFF/0.132/0.200 Angle unit DEG/GON/MIL Distance unit Metre/US-Ft/I-Ft Temp unit °C/°F Press unit hPa/mmHg/inHg Total Station DTM-302 Series Instruction Manual 109...
In the job list, highlight the job that you want to delete. Press the softkey. A confirmation screen appears. Do one of the following: – To delete the selected job, press [ENT] or the softkey. 110 Total Station DTM-302 Series Instruction Manual...
To clear the control job selected, highlight the current control job in the job list and press the Ctrl softkey. Then press [ENT] or the softkey to confirm. Total Station DTM-302 Series Instruction Manual 111...
PT-PT calculates the distance and the angle between two input points. To calculate a PT-PT inverse: PT-PT Press or select in the Inverse menu. Enter the first point number or name. Press [ENT] 112 Total Station DTM-302 Series Instruction Manual...
Page 131
P1 is the base point. Two lines are to be defined by P2 and P3, both from P1. Enter the point name, or use the softkey to take a measurement to the point. Total Station DTM-302 Series Instruction Manual 113...
Page 132
When you have entered three points, the instrument calculates the angle and distances. Do one of the following: – To return to the Inverse menu, press [ENT] – To return to the Input BasePt screen, press [ESC] 114 Total Station DTM-302 Series Instruction Manual...
If you do not enter a value in the dVD field, the value 0.0000 is used. A recording point screen with the calculated coordinates appears. PT defaults to the last recorded PT + 1. Press [ENT] to store the point. Total Station DTM-302 Series Instruction Manual 115...
Page 134
P1 (base PT) defaults to the previously recorded PT. P2 defaults to the previous P1. To continuously calculate a new point, enter +Ang, HD, and dVD from the previous bearing line. This is a convenient way to enter Traverse points. 116 Total Station DTM-302 Series Instruction Manual...
In the upper right corner of the screen, a counter indicates how many points you have entered. To input point numbers consecutively, use the Fr/To softkey. For more information, see Advanced feature: Entering a range of points, page 119. Total Station DTM-302 Series Instruction Manual 117...
Page 136
If you chose to store the area, enter a name to identify the area and then press [ENT] When you download data in Nikon RAW format, area (AR) records are output as comment (CO) records. 118 Total Station DTM-302 Series Instruction Manual...
Calculating coordinates from line and offset 50.3 Line & O/S To enter the Line & offset function, press or select in the Cogo menu. Enter the base point (P1). Total Station DTM-302 Series Instruction Manual 119...
Page 138
A negative value in the O/S field is for the left-hand side of the bearing line. To calculate the coordinates of the point (PM), press [ENT] in the dVD field. You can change the Z coordinate here. 120 Total Station DTM-302 Series Instruction Manual...
To calculate a bearing-bearing intersection, Brng-Brng press or select in the Intersection menu. Enter the first point name and press [ENT] Alternatively, to measure directly to the point, press the softkey. Define the first line by azimuth. Total Station DTM-302 Series Instruction Manual 121...
Page 140
CO,Int BB P1:P10 AZ:330.54175-90.00000 CO, P2:408 AZ:100.0000+0.0000 CC,A123,,4567.3080,200.1467,-1.2056,POT Calculating a bearing-distance intersection Brng-Dist Press or select in the Intersection menu. Brng-Dist calculates the intersection point formed by one line and one distance (radius). 122 Total Station DTM-302 Series Instruction Manual...
Page 141
[ENT] when the required solution is displayed. Enter a Z coordinate if necessary. To move to the PT and CD fields, press [ENT] Sample records CO,Int BD P1:4672 AZ:330.54175+0.00000 CO, P2:71 HD:100.0000 CC,504,,-839.3065,347.6682,,SIGN Total Station DTM-302 Series Instruction Manual 123...
Page 142
To record the point, press [ENT] when the required solution is displayed. Enter a Z coordinate if necessary. Press [ENT] move to the PT and CD fields. Sample records CO,Int DD P1:486 HD:330.6020 CO, P2:7 HD:100.0000 CC,505,,236.5817,50.0461,0.0000, 124 Total Station DTM-302 Series Instruction Manual...
Page 143
If P1 and P2 are 3D points, the Z coordinate of the perpendicular point is calculated relative to the P1-P2 slope. Enter PT and CD then press [ENT] to record the point. Sample records CO,Int PtLine P1:38 AZ:90.00000+0.00000 CO, P2:506 CC,A-123,,4567.3080,200.1467,-1.2056,POT Total Station DTM-302 Series Instruction Manual 125...
Enter a negative value to rotate the line counterclockwise. In the O/S field, enter a positive value to specify an offset to the right. Enter a negative value to specify an offset to the left. 126 Total Station DTM-302 Series Instruction Manual...
When this field is set to Azimuth, the horizontal angle (HA) that is displayed and recorded is in Azimuth value. When this field is set to 0 to BS, HA is in HA zero to BS value. Total Station DTM-302 Series Instruction Manual 127...
Stakeout Press or select in the Settings menu to open the Stakeout menu. Add PT Integer between 1 and 999,999 This field sets the default point number to record observed data in stakeout. 130 Total Station DTM-302 Series Instruction Manual...
Set this field to COM to output data on the COM port when you press [ENT] in the BMS or a Stakeout screen. The data is not stored to the job file. For more information, see Outputting data to the COM port, page 96. Total Station DTM-302 Series Instruction Manual 131...
If you set the Split ST field to Yes, an additional setting screen appears. Use this screen to specify the starting ST number. CD Input ABC/123 Sets the default input mode when a CD field is displayed. 132 Total Station DTM-302 Series Instruction Manual...
Raw SS, CP, F1, and F2 records contain PT, HT, CD, HA, VA, and SD fields. SS records are sideshots (topo shots). All shots from the Basic Measurement Screen (BMS) are stored as SS records. Total Station DTM-302 Series Instruction Manual 133...
Page 152
A CO record is a comment added to the job from the system. For example, when you change the Stn-Z using the Remote Benchmark function, or you reset the horizontal angle using the BSCheck function, the system writes a comment record. 134 Total Station DTM-302 Series Instruction Manual...
Page 153
(showing From, To, rHD, and rVD) and the second screen (showing rAZ, rSD, rV%, and rGD). When you download data in Nikon RAW format, RM records are output as comment (CO) records. AR records An AR record stores an area and perimeter calculation.
Page 154
ST->SS/SO/CP in the Data menu. A list of all stations appears. to highlight the station name that you want to view. Use [<] [>] to move up or down one page. 136 Total Station DTM-302 Series Instruction Manual...
If the Store DB setting is set to Both, the system also deletes the corresponding coordinate data when you delete an SS, SO, or CP record. You can also delete raw data by pressing the softkey in the detailed display screen for the record. Total Station DTM-302 Series Instruction Manual 137...
Page 156
If the record that you want to delete is referred by an ST record, a confirmation message appears. Deleting station records In the Station screen, use to highlight the record that you want to delete. Then press the softkey. 138 Total Station DTM-302 Series Instruction Manual...
You cannot edit the HA, VA, or SD values. Editing raw records Do one of the following: – In the RAW screen, highlight the record Edit that you want to edit. Then press the softkey. Total Station DTM-302 Series Instruction Manual 139...
Page 158
– To return to the edit screen, press [ESC] softkey. Editing coordinate records You can edit PT, CD, and coordinate values in coordinate records. You cannot edit the coordinate record for the current station. 140 Total Station DTM-302 Series Instruction Manual...
Page 159
Do one of the following: – To accept the changes and return to the data view screen, press [ENT] or the softkey. – To go back to the edit screen, press [ESC] softkey. Total Station DTM-302 Series Instruction Manual 141...
You can search for records by their type, point name, code, or by any combination of these values. Searching raw records Srch In the RAW screen, press the softkey to access the raw data search function. 142 Total Station DTM-302 Series Instruction Manual...
Page 161
Then press [ENT] to select it. Detailed data for the selected record appears. Press the softkey to change the fields shown. Press [ESC] to return to the list. Total Station DTM-302 Series Instruction Manual 143...
Page 162
500-A, and 5000. To search by point type, move to the Type field and use [<] or [>] to change the selected point type. The options are ALL, MP, UP, CC, and RE. 144 Total Station DTM-302 Series Instruction Manual...
Use the numeric keys to enter the coordinates. Press [ENT] in each field to move to the next field. When you press [ENT] in the CD field, the point is stored as an MP record. Total Station DTM-302 Series Instruction Manual 145...
For more information, see Advanced feature: Searching for a code by using the first character, page 47. 146 Total Station DTM-302 Series Instruction Manual...
Page 165
An editing screen appears. For points, the Edit Item screen appears. It contains only the PT field. For codes, the Edit Code screen appears, containing the CD field and the REC field. Edit the text shown and then press [ENT] Total Station DTM-302 Series Instruction Manual 147...
Page 166
[ENT] in the Lyr field. Adding a point name In the point list, press the softkey to add a new point name to the current layer. 148 Total Station DTM-302 Series Instruction Manual...
Page 167
REC field, this value is stored. If you leave the REC field blank, the CD value is stored. Press [ENT] to add the new code and update the code list. Total Station DTM-302 Series Instruction Manual 149...
The new layer is added to the list in alphabetic order. Communication Use the Communication menu to download or upload data. To display the Communication menu, Comm. press or select on the MENU screen. 150 Total Station DTM-302 Series Instruction Manual...
. To return to the Basic Measurement Screen (BMS), press [ESC] Abrt softkey. Uploading coordinate data 51.2 To upload coordinate data from a computer, press Upload XYZ or select in the Communication menu. Total Station DTM-302 Series Instruction Manual 151...
Page 170
If the existing point is a UP, CC, or MP record, and it is not referred to by any ST or BS, it is automatically overwritten by the uploaded point. No error message appears. 152 Total Station DTM-302 Series Instruction Manual...
When you upload a code list, it always replaces the existing code list on the instrument. PT List To upload a point name list via cable, press or select in the Communication menu. Total Station DTM-302 Series Instruction Manual 153...
. To access this menu, press or select 1sec-Keys in the MENU screen. [MSR] key settings 51.1 To change settings for the [MSR1] [MSR2] keys, [MSR] press or select in the 1sec-Keys menu. 154 Total Station DTM-302 Series Instruction Manual...
To save the changes, press [ENT] at the last line of Save <DSP3> or press the softkey. Tip – You can also access the DSP settings screen by holding down [DSP] for one second. Total Station DTM-302 Series Instruction Manual 155...
[USR] [ENT] [S-O] key settings 51.4 To enter the Stakeout settings screen, press [S-O] select in the 1sec-Keys menu. There are two Stakeout settings. For more information, see Stakeout, page 130. 156 Total Station DTM-302 Series Instruction Manual...
The current date and time settings are displayed. Enter the date in Year-Month-Day format. For example, to change the date to June 18, 2002, press [2] [0] [0] [2] [ENT] [6] [ENT] [1] [8] [ENT] Total Station DTM-302 Series Instruction Manual 157...
Page 176
4:35 PM, press [1] [6] [ENT] [3] [5] [ENT] Do one of the following: – To finish setting the date and time, press [ENT] in the Minutes field. – To cancel the input, press [ESC] 158 Total Station DTM-302 Series Instruction Manual...
In this chapter: Checking and Adjusting the Plate Level Checking and Adjusting the Circular Level Checking and Adjusting the Optical Plummet Zero Point Errors of Vertical Scale and Horizontal Angle Corrections Checking the Instrument Constant Total Station DTM-302 Series Instruction Manual 159...
Once you have checked and adjusted the plate level, check the circular level. If the bubble is not in the center of the level, use the adjusting pin to rotate the three adjustment screws until the bubble is centered. 160 Total Station DTM-302 Series Instruction Manual...
X is in Position P. Position P is the center point of the line connecting the X and the center of the reticle mark Repeat from Step 2. Total Station DTM-302 Series Instruction Manual 161...
Take an F1 measurement to a target on the horizon. Press [ENT] The vertical angle is shown in the V0 dir= Horiz setting. Face-1 vertical angle (tilt-off value) Face-1 horizontal angle (tilt-off value) 162 Total Station DTM-302 Series Instruction Manual...
Page 181
Face-2 Y axis tilt value When the observation on F2 is completed, four parameters are displayed. Do one of the following: – To return to the first observation screen, Redo press [ESC] or the softkey. Total Station DTM-302 Series Instruction Manual 163...
The instrument constant is set by the manufacturer before the instrument is shipped. However, to ensure the highest operational accuracy, we recommend that you check the instrument constant several times a year. 164 Total Station DTM-302 Series Instruction Manual...
Page 183
At 100 m distance, the error range is ±3.2 mm. If the error is out of range, contact your dealer. Move the DTM-302 to other points on the line between Point P and Point Q. Repeat Step 5 through Step 10 several times. Total Station DTM-302 Series Instruction Manual 165...
Page 184
(±3 mm + 2 ppm × distance). At 100 m distance, the error range is ±3.2 mm. If the error is out of range, contact your dealer. 166 Total Station DTM-302 Series Instruction Manual...
C H A P T E R Specifications In this chapter: Main Body Standard Components External Device Connector Total Station DTM-302 Series Instruction Manual 167...
(no haze, visibility over 40 km (25 miles)) With single prism 2,300 m (7,500 ft) With triple prism 3,000 m (9,900 ft) Dual-axis tilt sensor (DTM-332 single-axis) 71.3 Method Liquid-electric detection Compensation range ±3' 168 Total Station DTM-302 Series Instruction Manual...
± (3 + 3 ppm × D) mm (-20 °C to -10 °C, +40 °C to +50 °C) Normal mode ± (10 + 3 ppm × D) mm within 500 m (1600 ft) Total Station DTM-302 Series Instruction Manual 169...
–999 mm to +999 mm (1 mm step) Clamps/tangent screws 71.7 Type Coaxial tangent/clamp knobs Range ±3.5° Tribrach 71.8 Type Detachable Level vial sensitivity 71.9 Plate level vial 30''/2 mm Circular level vial 10'/2 mm 170 Total Station DTM-302 Series Instruction Manual...
7.2 V DC rechargeable Continuous operation time 16 hours (angle/distance measurements) 30 hours (angle measurements) Tested at 25 °C (normal temperature). Operation times may vary depending on the condition and deterioration of the battery. Total Station DTM-302 Series Instruction Manual 171...
• Battery pack BC-65 • Quick charger Q-75U or Q-75E • Tool set • Objective lens cap • Vinyl cover • Total Station DTM-302 Series Instruction Manual (this document) • Carrying case • Shoulder strap 172 Total Station DTM-302 Series Instruction Manual...
Signal Description Receive data (Input) Send data (Output) Power – Ground 4, 6 No connection Caution – Use only the pin connections shown above. Using other connections will damage the instrument. Total Station DTM-302 Series Instruction Manual 173...
Page 192
The instrument can be damaged by static electricity from the human body discharged through the data output/external power input connector. Before handling the instrument, touch any other conductive material once to remove static electricity. 174 Total Station DTM-302 Series Instruction Manual...
B4E Diagonal eyepiece DTM 302 Series Low-power eyepiece (21X) DTM/PC connecting cable (9 pin/25 pin) High-power eyepiece (41X) Zenith prism Solar prism Personal computer Solar filter Solar reticle Figure 8.1 Measurement side 176 Total Station DTM-302 Series Instruction Manual...
Page 195
C prism holder holder Mini prism Prism adapter adapter Tribrach adapter 13/14 Leveling base W10/W11 Telescopic Tripod for telescopic prism pole Nikon tripod prism pole Figure 8.2 Prism reflector side Total Station DTM-302 Series Instruction Manual 177...
Page 196
8 System Diagrams 178 Total Station DTM-302 Series Instruction Manual...
C H A P T E R Communications In this chapter: Uploading Coordinate Data Uploading Point Lists and Code Lists Downloading Data Total Station DTM-302 Series Instruction Manual 179...
To configure the transmission speed and other MENU > Settings > Comm settings, go to For more information, see Communications, page 130. Record format 91.2 You can upload coordinate records in the following formats: 180 Total Station DTM-302 Series Instruction Manual...
20113 4657.778 2335.667 20115,,,34.353,MANHOLE 20117,,,33.444 Uploading Point Lists and Code Lists Settings 92.1 To configure the transmission speed and other MENU > Settings > Comm settings, go to For more information, see Communications, page 130. Total Station DTM-302 Series Instruction Manual 181...
String5, Code5 String6, Code6 String7, Code7 “String” represents characters that are displayed on the screen. “Code” represents characters that are stored in the database. Figure 9.1 Record format for PT lists and code lists 182 Total Station DTM-302 Series Instruction Manual...
ST , stnpt , (stnid) , bspt , (bs id) , hi , bsazim , bsha Station record identifier (fixed text) stnpt Station point number (stn id) (Station ID) bspt Backsight point number (bs id) (Backsight ID) Height of instrument bsazim Backsight azimuth bsha Backsight horizontal angle 184 Total Station DTM-302 Series Instruction Manual...
Page 203
SS , pt , ht , sd , ha , va , time , code Sideshot record identifier (fixed text) Point number Height of target Slope distance Horizontal angle Vertical angle time 24-hour time stamp code Feature code Total Station DTM-302 Series Instruction Manual 185...
Page 204
Shot taken using Face-2 (fixed text) Point number Height of target Slope distance Horizontal angle Vertical angle time 24-hour time stamp Comment/note records CO , text Comment record identifier (fixed text) text Comment text 186 Total Station DTM-302 Series Instruction Manual...
Distance units. One of the following: Meters Feet press Pressure units. One of the following: mm Hg In. Hg temp Temperature units. One of the following: Celsius Fahrenheit coor Coordinate order. One of the following: Not used Total Station DTM-302 Series Instruction Manual 187...
Page 206
Northing of station 21–36 (33) 19–28 (2x), easting Easting of station 37–52 (33) 29–38 (2x), elevation Elevation of station 53–68 (33) 39–48 (2x), Height of instrument 69–84 (33) 49–64 (2x), desc Station description 85–100 (33) 188 Total Station DTM-302 Series Instruction Manual...
Page 207
9–18 (2x), northing Northing of the coordinate 21–36 (33) 19–28 (2x), easting Easting of the coordinate 37–52 (33) 29–38 (2x), elevation Elevation of the coordinate 53–68 (33) 39–54 (2x), desc Feature code 69–84 (33) Total Station DTM-302 Series Instruction Manual 189...
Page 208
5–20 (33) 9–12 (2x), Observed point number 21–36 (33) 13–22 (2x), Slope distance 37–52 (33) 23–32 (2x), Vertical angle 53–68 (33) 33–42 (2x), Horizontal angle 69–84 (33) 43–58 (2x), desc Feature code 85–100 (33) 190 Total Station DTM-302 Series Instruction Manual...
Page 209
Refraction constant. One of the following: 0.132 0.200 sealev Sea level correction. One of the following: Note record 13NM note 1–4 13NM Note record ID (fixed text) 5–64 note Note text Total Station DTM-302 Series Instruction Manual 191...
C H A P T E R Error Messages In this chapter: Angle Cogo Communications Data Job Manager Programs Recording Data Searching Settings Stakeout Station Setup Total Station DTM-302 Series Instruction Manual 195...
Press any key. Then check the specified line in the data. DUPLICATE PT 103.2 The uploaded data contains a duplicate PT. Press any key. Then check the specified point in the data. 196 Total Station DTM-302 Series Instruction Manual...
You have tried to change the coordinates of an SO, SS, or CP record. You cannot change the coordinates of an SO, SS, or CP record. Press any key to return to the previous screen. Total Station DTM-302 Series Instruction Manual 197...
You are trying to create a new job when the maximum number of jobs (32) is already stored. Press any key to return to the Job Manager. Then use the softkey to delete old jobs. 198 Total Station DTM-302 Series Instruction Manual...
The input PT you are trying to record already exists in the current job. An existing coordinate record cannot be overwritten by measured data. Press any key to return to the point input screen. Change PT. Total Station DTM-302 Series Instruction Manual 199...
Page 218
OVER RANGE 107.6 You are trying to record a coordinate with more than 13 digits Press any key to return to the previous screen. Then check the current ST coordinate. 200 Total Station DTM-302 Series Instruction Manual...
For example, the Fr field style is 1, and the To field style is A200. Press any key to return to the Fr/To input screen. Then re-enter the point name, using the same naming style in both fields. Total Station DTM-302 Series Instruction Manual 201...
The input PT or coordinate is identical to the current station in STN/1:Known, or the same coordinate or point name/number is found in Resection. Press any key to return to the PT input screen. Then use a different PT. 202 Total Station DTM-302 Series Instruction Manual...
Page 221
Z-coordinate is required 1011.5 The input point for Benchmark does not have a Z coordinate. Press any key to return to the PT input screen. Then use a PT that has a Z coordinate. Total Station DTM-302 Series Instruction Manual 203...
Page 222
10 Error Messages 204 Total Station DTM-302 Series Instruction Manual...
Need help?
Do you have a question about the DTM-302 Series and is the answer not in the manual?
Questions and answers