
Subscribe to Our Youtube Channel
Related Manuals for Avnet SMARC MSC SM2S-IMX8MINI


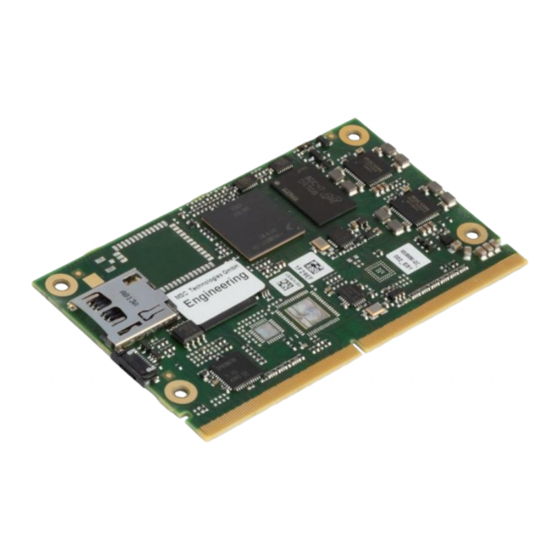
Summary of Contents for Avnet SMARC MSC SM2S-IMX8MINI
- Page 1 User Manual SMARC™ Module MSC SM2S-IMX8MINI SMARC Rev. 2.0 Standard 30.04.2021 Rev. 1.4...
- Page 2 Preface Copyright Notice Copyright © 2021 MSC Technologies GmbH. All rights reserved. Copying of this document, and providing to others and the use or communication of the contents thereof, is forbidden without express authority of MSC Technologies GmbH. Offenders are liable to the payment of damages. All rights are reserved in the event of the grant of a patent or the registration of a utility model or design.
- Page 3 Before contacting Technical Support of MSC Technologies GmbH, please consult the respective pages on our web site at https://www.msc-technologies.eu/support/boards.html for the latest documentation, drivers and software downloads. If the information provided there does not solve your problem, please contact our Avnet Integrated /MSC Technical Support: Phone: +49 - 8165 906 - 200 Email: support.boards@avnet.eu...
-
Page 4: Table Of Contents
Contents INTRODUCTION ........................................11 Key Features ..............................................11 Block Diagram ............................................... 16 Power Supply ..............................................17 Power Consumption ............................................17 1.4.1 Use Cases ..................................................17 1.4.2 Hardware used ................................................18 1.4.3 Measurement Results ..............................................18 Mechanical Dimensions ..........................................19 Mechanical Distortion of PCB ........................................20 THERMAL SPECIFICATIONS.................................... - Page 5 5.3.1 SDRAM ..................................................50 5.3.2 eMMC .................................................... 50 5.3.3 EEPROM ..................................................51 Trusted Platform Module ..........................................51 WiFi/Bluetooth ............................................... 52 MicroSD Card Socket ............................................ 52 Debug Options ............................................... 52 5.7.1 Debug Connector ................................................52 5.7.2 JTAG Connector ................................................54 BUS AND ADDRESS MAPPING ..................................56 I²C Devices ..............................................
- Page 6 Figure 1-1: Block Diagram ............................................16 Figure 1-2: Module Dimensions ..........................................19 Figure 1-3: Overall height without heat spreader of the SMARC™ Module .............................. 19 Figure 1-4: Distance between mounting holes ......................................20 Figure 2-1: Defined Temperature Point ........................................22 Figure 5-1: Start-up Sequence ..........................................
- Page 7 Figure 7-29. Bug report. Target partition selector..................................... 85 Table 1: Module Power Inputs ........................................... 17 Table 2: Modules used for Power Consumption Measurement ................................18 Table 3: Typical Power Consumption Measurement ....................................18 Table 4: Temperature Range ............................................ 22 Table 5: Module Connector Pinout ..........................................
- Page 8 Revision History Rev. Date Description July 31, 2020 First Release September 16, 2020 Added comment in section EEPROM February 10, 2021 Bug fix March 17, 2021 Fix USB Boot option and Section 2.1 April 30, 2021 Corrected Section 4.5 Camera MSC SM2S-IMX8MINI 8 / 87 User Manual...
- Page 9 Reference Documents SMARC™ Specification Revision 2.0 Last update: June 2nd 2016 http://www.sget.org IEEE Std. 802.3-2002 802.3-2002.pdf http://www.ieee.org i.MX8 Series of Application Processors IMX8MMIEC.pdf http://www.nxp.com Module Datasheet MSC-SM2S-IMX8MINI.pdf https://www.msc-technologies.eu/products-solutions/products/boards/smarc/msc-sm2s-imx8mini.html i.MX Yocto Project User’s Guide i.MX_Yocto_Project_User's_Guide.pdf Rev. L4.19.35_1.1.0, 11/2019 http://www.nxp.com i.MX Reference Manual. i.MX_Reference_Manual.pdf Rev.
- Page 10 Docker documentation https://docs.docker.com/ MSC SM2S-IMX8MINI 10 / 87 User Manual...
-
Page 11: Introduction
1 Introduction SMARC™ modules are compact, highly integrated Single Board Due to the standardized mechanics and interfaces the system can be Computers. scaled arbitrarily. Despite the modular concept the system design is very flat and compact. Typically a SMARC™ module consists of a CPU, chipset, memory, Ethernet controller and USB controller. - Page 12 Camera Interface: • 1x MIPI CSI-2 2 Lane or 1x MIPI CSI-2 4 Lane * PCI Express Interface: • Up to 1x PCIe x1 Gen.2 * Network: • Up to 2x 10/100/1000BASE-T Ethernet * • Optional: H&D Wireless™ Module SPB209A with 802.11 ac/a/b/g/n and Bluetooth 4.2 with BLE support * USB: •...
- Page 13 I²C Bus: • 1x I²C for power Management functions • 1x I²C bus for general purposes • 1x I²C bus for display interface • 1x I²C bus for camera interface UART: • 2x UART without RTS/CTS support • 2x UART with RTS/CTS support Flash: •...
- Page 14 Real-time Clock: • High accuracy RTC • Optional RTC with temperature compensated DTCXO Watchdog: • Module provides a watchdog connected to the SMARC™ connector Security Device: • Advanced Security, Safety, and Reliability integrated in the SOC • Optional Trusted Platform Module 2.0 (TPM): Infineon™ SLB9673 or STMicroelectronics™ ST33TPHF20I2C Environment Temperature: •...
- Page 15 The SPI interface(s) are used to implement the optional CAN interface(s) and so are mutually exclusive options. If two CAN controllers are used then the two SPI buses are not available. MSC SM2S-IMX8MINI 15 / 87 User Manual...
-
Page 16: Block Diagram
1.2 Block Diagram Figure 1-1: Block Diagram MSC SM2S-IMX8MINI 16 / 87 User Manual... -
Page 17: Power Supply
1.3 Power Supply Table 1: Module Power Inputs Power Rail Description VDD_IN Primary power input Nominal Voltage Range +4.75V ... +5.25V Max. Input Ripple ±100mV Max. Rate of Voltage Rise < 250V/s VDD_RTC May be sourced from a Lithium cell or a Super Cap. Nominal Voltage Range +1.5V ... -
Page 18: Hardware Used
1.4.2 Hardware used Table 2: Modules used for Power Consumption Measurement Order Reference Temp. Range Number 78402 MSC SM2S-IMX8MINIQC-14N0261I PCBFTX i.MX8M Mini Quad, Quad-Core Cortex-A53 at 1.8GHz 2G LPDDR4 -40°C to +85°C 78370 MSC SM2S-IMX8MINIQC-13N4200I PCBFTX i.MX8M Mini Quad, Quad-Core Cortex-A53 at 1.8GHz 2G LPDDR4 -40°C to +85°C 79649... -
Page 19: Mechanical Dimensions
1.5 Mechanical Dimensions Figure 1-2: Module Dimensions Figure 1-3: Overall height without heat spreader of the SMARC™ Module TOP Side – Component 3.0mm max 5.7mm min Module PCB 1.2mm BOT Side – Component 1.3mm max 1.5mm min Carrier PCB The overall height is dependent on the MXM3 connector used on the baseboard. MSC SM2S-IMX8MINI 19 / 87 User Manual... -
Page 20: Mechanical Distortion Of Pcb
1.6 Mechanical Distortion of PCB For thermal heat dissipation the heat sink needs to have a good mechanical contact to the CPU housing which means the heat sink should be mounted such that there is some mechanical stress applied. The higher the force applied the better the thermal resistance and consequently the better the thermal cooling. -
Page 21: Thermal Specifications
2 Thermal Specifications The cooling solution for a SMARC™ module is based on a heat spreader or heat-sink concept. A heat spreader or heat sink is typically made of aluminum mounted on top of the module. The connection between this plate and the module components is made using thermal interface materials such as phase change foils, gap pads and copper or aluminum blocks. - Page 22 The temperature at the defined point on the PCB shall not exceed the temperature range in the following table. Table 4: Temperature Range Module Variant Tpcb_min Tpcb_max Module variants with commercial temperature components 0 °C +70 °C Module variants with extended temperature components -25 °C + 85 °C Module variants with industrial temperature components...
-
Page 23: Module Connector Pinout
3 Module Connector Pinout The pinout of the module connector is based on the SMARC™ specification[1]. Table 5: Module Connector Pinout Primary (Top) Side Secondary (Bottom) Side Primary (Top) Side Secondary (Bottom) Side SMB_ALERT_1V8# I2C_CAM1_CK GBE1_MDI0- I2C_CAM1_DAT GBE0_MDI3- GBE1_LINK100# CSI1_CK+ GBE0_MDI3+ GBE1_MDI1+ CSI1_CK-... - Page 24 Primary (Top) Side Secondary (Bottom) Side Primary (Top) Side Secondary (Bottom) Side SDIO_CD# USB4+ SPI1_CK SDIO_CK USB4- SPI1_DIN SDIO_PWR_EN SPI1_DO AUDIO_MCK SDIO_D0 I2S0_LRCK USB0+ SDIO_D1 I2S0_SDOUT USB0- SDIO_D2 I2S0_SDIN USB0_EN_OC# SDIO_D3 I2S0_CK USB0_VBUS_DET SPI0_CS0# USB0_OTG_ID SPI0_CK USB1+ SPI0_DIN USB1- SPI0_DO USB1_EN_OC# USB3+ I2C_GP_CK...
- Page 25 Primary (Top) Side Secondary (Bottom) Side Primary (Top) Side Secondary (Bottom) Side PCIE_A_RST# USB4_EN_OC# S100 P100 S101 P101 S102 P102 S103 P103 S104 PCIE_A_REFCK+ P104 S105 PCIE_A_REFCK- P105 S106 P106 S107 LCD1_BKLT_EN PCIE_A_RX+ P107 S108 LVDS1_CK+ / DSI1_CLK+ PCIE_A_RX- P108 GPIO0 S109 LVDS1_CK- / DSI1_CLK-...
- Page 26 Primary (Top) Side Secondary (Bottom) Side Primary (Top) Side Secondary (Bottom) Side P117 GPIO9 S118 LVDS1_2- / DSI1_D2- P138 SER2_RTS# S139 I2C_LCD_CK P118 GPIO10 S119 P139 SER2_CTS# S140 I2C_LCD_DAT P119 GPIO11 S120 LVDS1_3+ / DSI1_D3+ P140 SER3_TX S141 LCD0_BKLT_PWM P120 S121 LVDS1_3- / DSI1_D3- P141...
-
Page 27: Module Connector Signal Description
4 Module Connector Signal Description In the following tables signals are marked with the power rail associated Output pins are also classified as push pull (PP) or open drain (OD). with the pin, and for input and I/O pins, with the input voltage tolerance. The column “PU/PD”... -
Page 28: Ethernet
Pin on Pin name on Power Signal Pin Type Signal Level PU/PD Description i.MX8M Mini i.MX8M Mini Tolerance I2S2_SDIN 1.8V CMOS AG15 SAI1_RXD0 1.8V Serial TDM data inputs from the codec. AUDIO_MCK O PP 1.8V CMOS CLKOUT1 1.8V Connected by default. 4.2 Ethernet Based on Texas Instruments™... - Page 29 Pin on Pin name on Signal Signal Level Power Tolerance PU/PD Description Type i.MX8M Mini i.MX8M Mini GBE0_LINK100# O OD 3.3V CMOS 3.3V Link Speed Indication for 100Mbps, active low, and 24mA sink capability. GBE0_LINK1000# O OD 3.3V CMOS n.a. n.a.
-
Page 30: Pci Express
4.3 PCI Express The i.MX8M Mini SoC supports PCIe x1 Gen2 lane.* Table 8: PCIe Signal Description Pin on Pin name on Power Signal Pin Type Signal Level PU/PD Description i.MX8M Mini i.MX8M Mini Tolerance PCIE_A_TX+ LVDS PCIe PCIE_TXN_P According to PCI Express Differential Transmit Pairs. - Page 31 Table 9: USB Signal Description Pin on Option Pin name on Power Signal Pin Type Signal Level i.MX8M PU/PD Description Availability i.MX8M Mini Tolerance Mini USB0+ 1 & 2 USB1_DP 3.3V Differential USB 2.0 data pairs USB0- connected to SoC. Can be USB1_DN configured as host or device.
-
Page 32: Camera
Pin on Option Pin name on Power Signal Pin Type Signal Level i.MX8M PU/PD Description Availability i.MX8M Mini Tolerance Mini USB3_EN_OC# I/O OD 3.3V CMOS n.a. n.a. 3.3V PU 10k Multi-function signal for enabling 3.3V USB power and indicating an over- current event. -
Page 33: Lvds
Pin on Pin name on Power Signal Signal Level PU/PD Description Type i.MX8M Mini i.MX8M Mini Tolerance CSI0_CK+ 1.8V CMOS MIPI_CSI_CLK_N 1.8V CSI differential clock inputs CSI0_CK- MIPI_CSI_CLK_P CSI1_CK+ 1.8V CMOS MIPI_CSI_CLK_N 1.8V CSI differential clock inputs CSI1_CK- MIPI_CSI_CLK_P CAM_MCK O PP 1.8V CMOS CLKOUT2... - Page 34 Features: • Single-Link and Dual-Link with four data lanes per link • Supports 18bpp and 24bpp • Pixel clock up to 154 MHz Table 11: LVDS Signal Description Pin on Signal Pin name on Power Signal i.MX8M PU/PD Description Type Level i.MX8M Mini Tolerance...
-
Page 35: Spi Bus
Pin on Signal Pin name on Power Signal i.MX8M PU/PD Description Type Level i.MX8M Mini Tolerance Mini LVDS1_CK+ / DSI1_CLK+ LVDS n.a. n.a. 2.8V LVDS Channel 1 differential clock LVDS1_CK- / DSI1_CLK+ LCD0_VDD_EN O PP 1.8V AF21 SAI1_TXD3 1.8V PD 10k LCD0 panel power enable (CPU CMOS GPIO4_IO15) - Page 36 • Master/Slave configurable • Two Chip Select (CS) signals to support multiple peripherals • Transfer continuation function allows unlimited length data transfers • 32-bit wide by 64-entry FIFO for both transmit and receive data • Polarity and phase of the Chip Select (CS) and SPI Clock (SCLK) are configurable •...
-
Page 37: Can
4.8 CAN The i.MX8M Mini SMARC module optionally features two CAN interfaces based on the Microchip™ MCP2515 stand-alone controller. The controller implements CAN 2.0B protocol specification with up to 1Mbps bit rate. Standard data, extended data and remote frames are supported. Several features are supported (time-triggered protocols, data byte filtering and one-shot mode). -
Page 38: Gpio
4.9 GPIO The CPU GPIO can be used with default Linux GPIO SYSFS interface in user space. Table 14: GPIO Signal Description Pin on Pin name on Power Signal Signal Level PU/PD Description Type i.MX8M Mini i.MX8M Mini Tolerance GPIO0 / CAM0_PWR# 1.8V CMOS AG14 GPIO1_IO00... -
Page 39: Sdio
To achieve higher bus speed mode (SDR50 and SDR104) it is highly recommend to keep SD signal trace length less then 100mm. A load switch with quick output discharge should be used for SD-Card power. Please contact Avnet Integrated /MSC Technical Support if this feature is required. MSC SM2S-IMX8MINI... -
Page 40: Uart
4.11 UART The i.MX8M Mini offers four separate UART interfaces that are linked to the SMARC™ connector, two of them with Hardware flow control support signals. The UART interfaces supports Serial RS-232NRZ mode, 9-bit RS-485 mode or IrDA mode and includes the following features amongst others: •... -
Page 41: I²C Bus
Table 16: UART Signal Description Power Pin on Pin name on Signal Signal Level Toleranc PU/PD Description Type i.MX8M Mini i.MX8M Mini SER0_TX 1.8V CMOS UART1_TXD 1.8V PU 10k 1.8V UART transmit data (see Note 1 below) SER0_RX 1.8V CMOS UART1_RXD 1.8V PU 10k 1.8V... - Page 42 The I²C bus driven by CPU core function has the following key features: • Compatible with I2C bus standard • Multimaster operation • Software programmability for one of 64 different serial clock frequencies • Software-selectable acknowledge bit • Interrupt-driven, byte-by-byte data transfer •...
-
Page 43: Watchdog
4.13 Watchdog Table 18: Watchdog Signal Description Pin on Pin name on Power Signal Signal Level PU/PD Description Type i.MX8M Mini i.MX8M Mini Tolerance WDT_TIME_OUT# O PP 1.8V CMOS AG13 GPIO1_IO02 1.8V Watch-Dog-Timer Output from the SOC. 4.14 System Management Table 19: System Management Signal Description Pin on Pin name on... - Page 44 Pin on Pin name on Power Signal Signal Level PU/PD Description Type i.MX8M Mini i.MX8M Mini Tolerance CHARGING# 1.8V CMOS AC15 SAI5_RXC 1.8V PU 10k 1V8 Held low by Carrier during battery charging. Carrier to float the line when charge is complete.
-
Page 45: Boot Options
4.15 Boot Options Table 20: Boot Options Control Signal Description Pin on Pin name on Power Signal Signal Level PU/PD Description Type i.MX8M Mini i.MX8M Mini Tolerance BOOT_SEL0# I OD 1.8V CMOS AF23 SAI1_TXD7 1.8V PU 10k 1.8V Input straps determine the module boot device. Pulled up on Module. - Page 46 The boot device for the primary boot loader is selected using the TEST# signal: • If TEST# is pulled low the module uses carrier SD-Card as the primary boot device. • If TEST# is left floating the module loads the boot loader from eMMC. If the primary Boot device fails, module will always try to load the primary boot loader from the Carrier SD card.
-
Page 47: Functions On Module
The module can be ordered with several i.MX8M Mini CPU types. Detailed information is provided in the module datasheet which can be downloaded from https://www.msc-technologies.eu/support/boards/smarc/msc-sm2s-imx8mini.html. For details regarding the i.MX8M Mini CPU please refer to the NXP™ website. For order information please contact Avnet Integrated /MSC. 5.2 Power-Up Behaviour The module will behave in the following ways: •... -
Page 48: Power-On Sequencing
5.2.1 Power-On Sequencing Figure 5-1: Start-up Sequence VIN_PWR_BAD# (Carrier to Module) CARRIER_PWR_ON (Module to Carrier) CARRIER_STBY# (Module to Carrier) RESET_OUT# (Module to Carrier) Figure 5-2: Power-On Timings Time Slot Description Value CARRIER_PWR_ON to VIN_PWR_BAD# timing 10.8ms RESET_OUT# to CARRIER_PWR_ON 355ms MSC SM2S-IMX8MINI 48 / 87 User Manual... -
Page 49: Reset Sequencing
5.2.2 Reset Sequencing I.MX8M Mini can’t be reset by internal reset and a power cycle is preferred. Some peripherals require a power cycle during system reset. RESET_IN# assertion leads to a module power cycle as shown in the following figure: Figure 5-3: Reset Sequencing RESET_IN# (Carrier to Module) CARRIER_PWR_ON (Module to Carrier) -
Page 50: Memory
5.3 Memory 5.3.1 SDRAM The DDR Controller supports 32/16-bit LPDDR4-3000. MSC SM2S-IMX8MINI SMARC™ modules use one physical rank with up to 4GByte SDRAM. Table 22: Available SDRAM options Memory Bus Width Memory Size Organisation i.MX8M Mini Solo, Dual 64-bit Interface 1 GB 2x 32Mx16x8B and Quad... -
Page 51: Eeprom
Chip Identification Memory Size Technology Operating Temperature 8 GB 15nm X2 eMLC -40°C to +85°C SDINBDG4-8G-XI1 16 GB 15nm X2 eMLC -40°C to +85°C SDINBDG4-16G-XI1 32 GB 15nm X2 eMLC -40°C to +85°C SDINBDG4-32G-XI1 64 GB 15nm X2 eMLC -40°C to +85°C SDINBDG4-64G-XI1 5.3.3 EEPROM 64Kb EEPROM for board data connected to I2C3 bus at address 0x50. -
Page 52: Wifi/Bluetooth
5.7.1 Debug Connector Access to the Debug UART port is possible via an 8pin FFC connector. Note: This connector may not be populated on all board variants. Contact Avnet /MSC Technical Support if this feature is required. MSC SM2S-IMX8MINI 52 / 87... - Page 53 Figure 5-5: Module top side with debug UART FFC connectors marked in red Pinout: 1: Ground 2: NC 3: NC 4: NC 5: UART_TXD 6: UART_RXD 7: RESET_IN# 8: VCC_3V3 Figure 5-6: Module top side with MSC UART debug adapter MSC Debug-Adaptor 40402 Debug UART Adapter for i.MX8-based...
-
Page 54: Jtag Connector
CPU. The JTAG connector is not populated by default. Please contact Avnet Integrated /MSC Technical Support if this feature is required. NOTE: JTAG_MODE has an on-module 10k pull down. If JTAG Mode is left open or pulled low, the CPU is in debug-JTAG mode (JTAG Interface is connected to the CPU core for software debug). - Page 55 Figure 5-7: Module bottom side with JTAG FFC connectors marked in red Pinout: 10: VCC_1V8 9: JTAG_TRST# 8: JTAG_TDI 7: JTAG_TDO 6: JTAG_TMS 5: JTAG_TCK 4: JTAG_MOD 3: NC 2: RESET_IN# 1: Ground Figure 5-8: Module bottom side with MSC JTAG debug adapter MSC JTAG-Adaptor FFC 10pol 68948 Debug JTAG Adapter for i.MX8-based...
-
Page 56: Bus And Address Mapping
6 Bus and Address Mapping 6.1 I²C Devices Table 24: I²C Interfaces Overview CPU Interface Device SMARC Connector 7-bit Address I2C1 0x2E PMIC1 0x31 PMIC2 0x33 Temp. Sensor 0x71 0x32 PCIe Clock Generator 0x6B I2C2 I2C_PM I2C3 Serial EEProm I2C_GP 0x50 I2C4 I2C_LCD... -
Page 57: Spi Devices
6.2 SPI Devices Table 25: SPI Interfaces Overview CPU Interface Chip Select CPU Pin CPU Pin Name Device SMARC Connector Description ECSPI1 ECSPI1_SS0 SPI0_CS0# AD22 SAI2_TXC SPI0_CS1# GPIO based chip select (CPU GPIO4_IO25) AD22 SAI2_TXC CAN0 Controller Dedicated chip select for CAN0 Controller ECSPI2 ECSPI1_SS0... -
Page 58: Board Support Package (Bsp)
7 Board Support Package (BSP) 7.1 General information MSC-LDK and the underlying NXP release are based on the Yocto build system (https://yoctoproject.org). The current MSC-LDK and the msc-sm2s-imx8mm BSP base on NXP’s Release L4.19.35_1.1.0. 7.2 MSC-LDK (Yocto) 7.2.1 MSC-LDK Terms •... - Page 59 7.2.2.2 Registration on the MSC Git Server Downloading files from the MSC Git server requires a registration on: http://www.msc-technologies.eu/register.html Registered users may apply for specific Git repositories by sending an email with their public SSH key and desired project name to: mailto:support@msc-technologies.eu 7.2.2.3 Creating SSH key If there is no SSH key already available ( /.ssh/id_rsa.pub), it can be generated with following command :...
-
Page 60: Setup The Msc-Ldk Build Environment
Note: Replace "my-proxy" with the appropriate address of your network's proxy, Port number "3128" may also vary depending on your network. Please consult your admin for proper settings. On some networks, tunneling Git SSH access over HTTPS may be additionally necessary. Please contact Avnet Integrated /MSC Technical Support for a related App Note. - Page 61 7.2.3.1 The “classic” method 7.2.3.1.1 Step 1: Clone the base MSC-LDK repo To clone and enter the base MSC-LDK repo, run the following command: git clone ssh://gitolite@msc-git02.msc-ge.com:9418/msc_ol99/msc-ldk --branch v1.5.0 msc-ldk-v1.5.0 cd msc-ldk-v1.5.0 Example: Figure 7-2. Clone base MSC-LDK repo Your current directory now contains the following sub directories: Figure 7-3.
- Page 62 The 0103801 refers to the MSC LDK for the SM2S-i.MX8MMini module. Example: Figure 7-4. Create build directory. Your current directory now contains the following sub directories: Figure 7-5. Base directory content after setup build directory. MSC SM2S-IMX8MINI 62 / 87 User Manual...
- Page 63 7.2.3.1.3 Step 3: Enter build directory To enter the build directory execute: cd build/0103801 Example: Figure 7-6. Enter build directory. 7.2.3.2 The “docker” method We assume that the docker packages (docker, docker.io, etc.) are already installed on your development system and your local user is a member of the docker group.
- Page 64 Example: Figure 7-7. Prepare docker container for MSC-LDK. Part 1. Figure 7-8. Prepare docker container for MSC-LDK. Part 2. MSC SM2S-IMX8MINI 64 / 87 User Manual...
- Page 65 Figure 7-9. Prepare docker container for MSC-LDK. Part 3. 7.2.3.2.2 Step 2: Start and enter the MSC-LDK container for the first time Execute: docker run --privileged -t -i --dns $(nmcli -f 'IP4.DNS' \ -m multiline device show 2>&1 | sed -rn 's/IP4.DNS\[1\]: *(.*)/\1/p') \ --name msc-ldk -h docker -v `pwd`/src:/src msc-ldk /bin/bash Example: Figure 7-10.
- Page 66 7.2.3.2.6 Leave the MSC-LDK container. Execute: exit Example: Figure 7-11. Leave the MSC-LDK container. 7.2.3.2.7 Re-start and re-enter the MSC-LDK container. Execute: docker container start msc-ldk docker container exec -ti msc-ldk /bin/bash Example: Figure 7-12. Re-start and re-enter the MSC-LDK container. 7.2.3.2.8 Stop the MSC-LDK container and release its resources.
- Page 67 Example: Figure 7-13. Stop the MSC-LDK container and release its resources. MSC SM2S-IMX8MINI 67 / 87 User Manual...
-
Page 68: Generate Images
7.2.4 Generate images 7.2.4.1 Choosing an MSC-LDK image The MSC-LDK provides different images for the sms2-imx8mmini module. The following table lists all currently available images, their contents and sizes. Table 26: Available images approx size comment A small Wayland GUI image with full target device hardware support. msc-image-base 612MiB Contains MSC features/tools. - Page 69 Example: Figure 7-14. Building msc-image-qt5 image. For more details and further information see also [5], Chapter 5 “Building an image” Some scripts of the recipes use an ’echo -e <somewhat>’ command. bitbake calls the buildscripts with /bin/sh as shell. If your hostsystem uses "bash"...
- Page 70 Depending on the internet connection and the development host a first build may take several hours. To speed it up on further installations, share the directories downloads and sstate-cache. All generated images can be collected in a specific directory with: user@devhost:msc-ldk$ make install_images DESTDIR=/tmp/msc-ldk-images 7.2.4.3 Reproduce Images with MSC-LDK One of the key features of Yocto is the strong versioning of the resulting images.
-
Page 71: Image Deployment
Modifications of conf/local.conf are not traced. This will checkout exactly the versions used by version_layer. It is then no longer possible to use scripts/update.py to pull the latest changes on the branch. A fresh checkout of MSC-LDK is necessary. The directories downloads and sstate-cache can be moved or copied to improve build speed. - Page 72 Example: Figure 7-17. Forced SPL boot from carrier SD card 7.3.1.2 TEST# = HIGH: Booting SPL/U-Boot from module eMMC flash With TEST# line = HIGH (e.g. on MSC SM2-MB-EP1 Carrier Board: "Test Mode Select" DIP Switch = OFF), the iMX8MMini Boot ROM code uses the module eMMC flash as primary and the carrier SD card as secondary (fallback) boot media.
- Page 73 Figure 7-19. SPL boot from module eMMC flash. 7.3.1.3 Booting SPL from USB Not supported yet. MSC SM2S-IMX8MINI 73 / 87 User Manual...
-
Page 74: Booting Os
7.3.2 Booting OS According to chapter 4.15 “Boot Options”, the BOOT_SEL [0:2] pins are used to select one of the following OS boot schema. 7.3.2.1 Booting OS from carrier SD card Carrier SD Card Boot Mode BOOT_SEL0# BOOT_SEL1# BOOT_SEL2# Dip Switches on SM2-MB-EP1 HIGH Table 27: Carrier SD Card Boot Mode In this configuration the Linux kernel image (Image) and the device tree blob are loaded from the first partition on the carrier SD card. - Page 75 7.3.2.2 Booting OS from module eMMC flash eMMC Boot Mode BOOT_SEL0# BOOT_SEL1# BOOT_SEL2# Dip Switches on SM2-MB-EP1 HIGH HIGH Table 28: eMMC Boot Mode In this configuration the Linux kernel image (Image) and the device tree blob are loaded from the first partition on the module eMMC flash. The second partition contains the Linux file system (FS, ext4).
- Page 76 7.3.2.3 Booting OS from Network (Ethernet) Network Boot Mode BOOT_SEL0# BOOT_SEL1# BOOT_SEL2# Dip Switches on SM2-MB-EP1 HIGH HIGH Table 29: Network Boot Mode In this configuration the Linux kernel image (Image) and the device tree blob are loaded from the TFTP-, and the Linux file system is mounting on NFS- Server on LAN.
- Page 77 Example: MSC SM2S-IMX8MINI 77 / 87 User Manual...
- Page 78 Figure 7-23. Booting OS (linux) from network. 7.3.2.4 Booting OS from USB USB Boot Mode BOOT_SEL0# BOOT_SEL1# BOOT_SEL2# Dip Switches on SM2-MB-EP1 HIGH HIGH HIGH Table 30: USB Boot Mode In this configuration the Linux kernel image (Image) and the device tree blob are being loaded from the first partition on the USB. The second partition contains the Linux file system (FS, ext4).
- Page 79 Figure 7-24. Booting OS (linux) from USB device (pen drive). 7.3.2.5 Available device tree blobs (DTBs) Table 31. Available DT-blobs. comment msc-sm2s-imx8mm-03N0840E-headless for 03N0840E variant based headless systems for 03N0840E variant based systems with Raydium RM67191 (1080x1920) msc-sm2s-imx8mm-03N0840E-dsi-rm67191 MIPI/DSI panel for 03N0840E variant based systems with AV Display TT78QT (400x1280) msc-sm2s-imx8mm-03N0840E-dsi-avd-tt78qt MIPI/DSI panel...
-
Page 80: Login To Fs
for 14N0261I variant based systems with Ampire AMA-800480N7 (800x480) msc-sm2s-imx8mm-14N0261I-lvds-ama070a04 single channel LVDS panel for 14N0261I variant based systems with Ampire AMA-121A01 (1280x800) msc-sm2s-imx8mm-14N0261I-lvds-ama121a01 single channel LVDS panel for 14N0261I variant based systems with AUO P215HVN01 (1920x1080) msc-sm2s-imx8mm-14N0261I-lvds-p251hvn01 dual channel LVDS panel 7.3.3 Login to FS Login is enabled via serial console (115200 baud/8 bits/no parity). -
Page 81: Bug Reporting
gpio8 available gpio9 available gpio10 available gpio11 available For detailed information about GPIO hardware- and software-operation see [6]: chapter 2.1.5.6.1 "GPIO Hardware Operation" chapter 2.1.6 "General Purpose Input/Output (GPIO)" 7.3.5 Bug Reporting To simplify collecting information necessary for effectively responding to bug reports, please use the msc_bug_report.sh tool to generate bug report message. - Page 82 • Select “Edit User Message”. Figure 7-26. Bug report. User message editor. • Enter bug report message and press Ctrl-O and Ctrl-X. MSC SM2S-IMX8MINI 82 / 87 User Manual...
- Page 83 • Optionally you can then view the message with the board report (hardware information). Figure 7-27. Bug report. Viewer page. • Press “Create a zip file” and select the components you want to send (e.g. bootlog, mscio.ini, last kernel logs (dmesg) or the installed hardware).
- Page 84 Figure 7-28. Bug report. Zip archive content selector. • Press “Save ZIP to a disc” and select the filesystem where to store the zip file. It is recommended to use a USB stick. • Send the files msc_bug_report_brief.txt and msc_bug_report.zip to MSC support@msc-technologies.eu MSC SM2S-IMX8MINI 84 / 87 User Manual...
-
Page 85: Hotfixes And Updating Msc-Ldk
Figure 7-29. Bug report. Target partition selector. 7.4 Hotfixes and updating MSC-LDK Typically twice a year a full MSC-LDK release is issued. A release may contain an updated Yocto or other updated layers as well as new supported boards. For each release an own branch is used (e.g. v1.0.0) which is tagged with the date encoded (e.g. LC984_20150421_V0_4_0, 21st April 2015), too. - Page 86 MSC-LDK release state of "v1.5.0" (State: March 2021). This may change soon, as MSC is working on the next release already. Please ask Avnet Integrated /MSC Technical Support for respective last state at any given time.
-
Page 87: Troubleshooting
Both CAN transceivers drive SPI[0:1]_DIN signals low even though not selected by chip select signal. Source: Hardware Workaround: Not specified yet. 8.2 Support For additional help please contact Avnet Integrated /MSC Technical Support: Phone: +49 8165 906-200 https://www.msc-technologies.eu/support/boards.html Email: support.boards@avnet.eu...
Need help?
Do you have a question about the SMARC MSC SM2S-IMX8MINI and is the answer not in the manual?
Questions and answers