Table of Contents
Advertisement
Quick Links
Advertisement
Table of Contents

Related Manuals for Agilent Technologies CrossLab CS


Summary of Contents for Agilent Technologies CrossLab CS
- Page 1 Agilent CrossLab CS Electronic Leak Detector Operation Manual...
- Page 2 C AU T I O N translation into a foreign language) without prior agreement and written consent from Agilent Technologies, Inc. as governed by A CAUTION notice denotes a United States and international hazard. It calls attention to an copyright laws.
-
Page 3: Table Of Contents
Low battery indication Power Indications Installing and Replacing the Cartridge Installing the cartridge Swapping or replacing the cartridge with ADM Flow Meter cartridge Replacing the Batteries Upgrading the Firmware Using the Leak Detector Stand Agilent CrossLab CS Electronic Leak Detector Operation Manual... - Page 4 Leak Detector Safety and Regulatory Certification Class A EMC certification Agilent CrossLab CS Electronic Leak Detector Operation Manual...
-
Page 5: Introduction
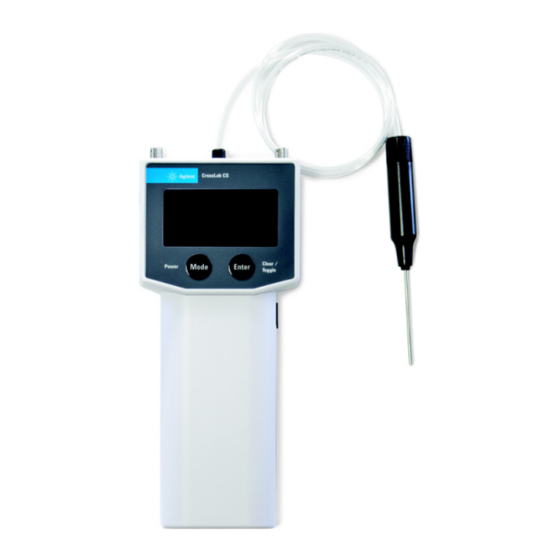
Leak Detector Introduction Introduction Figure 1. The Agilent CrossLab CS leak detector front screen buttons. The Agilent leak detector is controlled with two buttons on the front of the instrument directly below the screen, as shown in Figure 1. The functions of these buttons are described in this section. -
Page 6: Enter/Clear/Toggle Button
To reset the baseline of detection in Detection mode, briefly press and release Enter/Clear/Toggle button. • To change the settings in Info mode, press and hold the Enter/Clear/Toggle button for two seconds. Agilent CrossLab CS Electronic Leak Detector Operation Manual... -
Page 7: Switching The Leak Detector On And Off
Figure 2. The initial screen display for the Agilent leak detector. With the unit powered on, press and hold the Power/Mode button for three seconds to power down the unit. Figure 3. The shutdown screen for the Agilent leak detector. Agilent CrossLab CS Electronic Leak Detector Operation Manual... -
Page 8: Notes, Cautions, And Warnings
USB cable to run this device. • Do not use the leak detector in hazardous environments where there are large leaks of flammable gases. • Do not use the leak detector as safety equipment. Agilent CrossLab CS Electronic Leak Detector Operation Manual... - Page 9 • No utilice el detector de fugas en entornos peligrosos en los que existen grandes fugas de gases inflamables. • No use el detector de fugas como equipo de seguridad. Agilent CrossLab CS Electronic Leak Detector Operation Manual...
- Page 10 Leak Detector Notes, Cautions, and Warnings • 仅使用 5v DC、0.5A USB 电源和随附的 USB 电缆为本设 警告 备充电。 • 请勿在有⼤量易燃⽓体泄漏的危险环境中使用检漏仪。 • 请勿将检漏仪用作安全设备。 Agilent CrossLab CS Electronic Leak Detector Operation Manual...
-
Page 11: Product Specifications
USB power Display 128 × 64 pixels monochrome with 16 gray scales * When verified with calibrated leak source at ambient temperature of 20 °C to 26 °C at standard atmospheric pressure. Agilent CrossLab CS Electronic Leak Detector Operation Manual... -
Page 12: Detection Sensitivity To Gases
Calculated minimum detectable leak Minimum Detectable Level Leak Rate (mL/min) Indicator Hydrogen 0.0025 Filled bar Helium 0.003 Filled bar Methane 0.014 Filled bar Nitrogen Empty bar Argon 0.03 Empty bar Carbon dioxide 0.03 Empty bar Agilent CrossLab CS Electronic Leak Detector Operation Manual... -
Page 13: Operating Modes
However, to guarantee accuracy in Detection mode, allow for the completion of the warm up process. After the warm up is complete, the leak detector will switch to Detection mode automatically and is ready for use. Agilent CrossLab CS Electronic Leak Detector Operation Manual... -
Page 14: Detection Mode
There are two types of bar levels to indicate the type of gas entering the detector: Filled bar – Gas leak for gases with higher thermal conductivity than air. Agilent CrossLab CS Electronic Leak Detector Operation Manual... - Page 15 2 seconds, then press and release the Enter/ Clear/Toggle button. After the correction, the number of bar levels is reset to zero and Recalibrated is displayed on the screen to indicate that the leak detector is recalibrated. Agilent CrossLab CS Electronic Leak Detector Operation Manual...
-
Page 16: Info Mode
Brightness screen is displayed. Press and hold the Enter/Clear/Toggle button for two seconds to toggle between High and Low options. The screen brightness changes based on the selected option. Agilent CrossLab CS Electronic Leak Detector Operation Manual... - Page 17 Auto off setting is disabled. To change the Auto off setting: With Info mode displayed, briefly press and release the Enter/Clear/Toggle button to cycle through available screens until the Auto off screen is displayed. Agilent CrossLab CS Electronic Leak Detector Operation Manual...
- Page 18 Auto off function changes based on the selected option. Errors/Warnings With Info mode displayed, briefly press and release the Enter/Clear/Toggle button to cycle through available screens until the Error/Warning screen is displayed. Agilent CrossLab CS Electronic Leak Detector Operation Manual...
- Page 19 Detection mode of range 12 Ver Error Firmware version Upgrade the firmware Mismatch mismatch with to latest version cartridge version 13 Invalid Cart Error Unable to identify Contact Agilent cartridge types Technical Support Agilent CrossLab CS Electronic Leak Detector Operation Manual...
- Page 20 When the filter is expired, the rectangular bar is fully filled and Expired! is blinking in the rectangular bar to alert the user. Agilent CrossLab CS Electronic Leak Detector Operation Manual...
- Page 21 In the Filter Exchanged screen, press and hold the Enter/Clear/Toggle button for two seconds to toggle between Yes and No options. With the desired option highlighted, briefly press and release the Enter/Clear/Toggle button to select the highlighted option. Agilent CrossLab CS Electronic Leak Detector Operation Manual...
- Page 22 After the Yes option is selected, the Filter New date is reset to the current Pacific time, and the Filter Due date is set to one year after the Filter New date. Agilent CrossLab CS Electronic Leak Detector Operation Manual...
- Page 23 Enter/Clear/Toggle button to cycle through available screens until the Mainframe screen is displayed. The Mainframe screen displays information about the mainframe. This includes mainframe model number (MDL), serial number (SN) and firmware version number (Ver). Agilent CrossLab CS Electronic Leak Detector Operation Manual...
-
Page 24: Detecting Leaks
(when the Buzzer is set to On). Always press and release the Enter/Clear/Toggle button while the probe is held in ambient air. This should be done before probing in suspected leak areas to ensure accuracy. Agilent CrossLab CS Electronic Leak Detector Operation Manual... -
Page 25: Replacing And Servicing The Probe Filter
The mesh filter can be back flushed with compressed air or replaced entirely. (Order P/N G6694-60005). Back flush the probe tip if necessary Insert the mesh filter in position and screw the probe tip back on. Figure 5. The probe filter, dissembled. Agilent CrossLab CS Electronic Leak Detector Operation Manual... -
Page 26: Usb Interface
USB port. Data from the leak detector can be collected by connecting the USB port to your computer with the included USB cable. The leak detector USB driver will be needed for the instrument to communicate with your PC. Agilent CrossLab CS Electronic Leak Detector Operation Manual... - Page 27 When the leak detector is connected to PC software, the buttons on the leak detector are disabled. This is indicated by an icon to the left of USB icon on the screen. Agilent CrossLab CS Electronic Leak Detector Operation Manual...
-
Page 28: Warning And Error Indications
RTC battery is low, and so on. Error indication When a hardware fault occurs, an error icon is displayed on the screen. This example shows when a cartridge is not detected in the leak detector. Agilent CrossLab CS Electronic Leak Detector Operation Manual... -
Page 29: Low Battery Indication
Low battery indication When the batteries need to be replaced, a low battery indication is displayed on the screen. When power is too low for operation, the leak detector will automatically shut down. Agilent CrossLab CS Electronic Leak Detector Operation Manual... -
Page 30: Power Indications
The leak detector can be powered by batteries or through the USB port. When powered by batteries, a battery icon will appear on the screen. When powered through the USB port, a USB icon will appear on the screen. Agilent CrossLab CS Electronic Leak Detector Operation Manual... -
Page 31: Installing And Replacing The Cartridge
Installing and Replacing the Cartridge Installing the cartridge The CrossLab CS Mainframe is a platform that can accept the ADM Flow Meter Cartridge P/N G6692A and Electronic Leak Detector Cartridge P/N G6694A. If you purchased the leak detector cartridge standalone,... -
Page 32: Swapping Or Replacing The Cartridge With Adm
Loosen both captive thumbscrews completely and lift the cartridge out of the CrossLab CS Mainframe body. Captive screws Insert cartridge of ADM Flow Meter in to the CrossLab CS Mainframe body. Hand tighten the two captive thumbscrews. Agilent CrossLab CS Electronic Leak Detector Operation Manual... - Page 33 Leak Detector Swapping or replacing the cartridge with ADM Flow Meter cartridge Install new flexible tubing. Tubing Agilent CrossLab CS Electronic Leak Detector Operation Manual...
-
Page 34: Replacing The Batteries
Press and hold the Power/Mode button for three seconds to power off the leak detector. Remove the battery cover by pressing in on the grooved thumb pad on the rear of the leak detector and sliding the battery cover off. Agilent CrossLab CS Electronic Leak Detector Operation Manual... - Page 35 Reinstall the battery cover. Position the battery cover over the batteries and slide onto the flow meter until it locks in place. Briefly press the Power/Mode button to power on the leak detector. Agilent CrossLab CS Electronic Leak Detector Operation Manual...
-
Page 36: Upgrading The Firmware
The flip down wire stand will give you a better viewing angle when the leak detector is placed above bench level. Pull the stand down until it is in the locked position. Stand Agilent CrossLab CS Electronic Leak Detector Operation Manual... - Page 37 This equipment has been evaluated for its suitability for use in a commercial environment. When used in a domestic environment, there is a risk of radio interference. Designed and manufactured under a quality system registered to ISO 9001. Agilent CrossLab CS Electronic Leak Detector Operation Manual...
- Page 38 Leak Detector Class A EMC certification Agilent CrossLab CS Electronic Leak Detector Operation Manual...
- Page 39 This page intentionally left blank. Agilent CrossLab CS Electronic Leak Detector Operation Manual...
- Page 40 © Agilent Technologies, Inc. 2021 First edition, November 2021 *G6693-90000* G6693-90000...