Table of Contents
Advertisement
Quick Links
Advertisement
Table of Contents
Troubleshooting

Related Manuals for Xerox 8254E


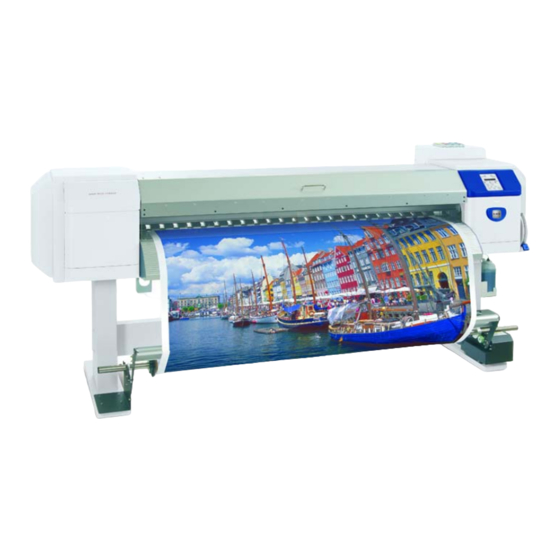
Summary of Contents for Xerox 8254E
- Page 1 September 2008 701P48513 8254E/8264E Color Wide Format Printer User Guide...
- Page 3 About this Manual Purpose and Target Readers This manual explains preparations before use and operation procedures for both the Xerox 8254E Color Wide Format Printer and the Xerox 8264E Color Wide Format Printer. This manual is prepared for the owners and operators of this printer.
-
Page 5: Table Of Contents
1.6.2 Location and type of warning labels ..............7 1.6.2.1 8264E Warning labels ................7 1.6.2.2 8254E Warning labels ................12 1.7 8254E only - Operational procedure labels ............13 1.7.1 Handling the operational procedure labels .............13 1.7.2 Location and type of operational procedure labels ........13 1.8 Product Recycling &... - Page 6 3.5 Media handling ......................40 3.5.1 Loading roll media ..................40 3.5.1.1 8264E Loading roll media ..............40 3.5.1.2 8254E Loading roll media ..............44 3.5.2 Setting roll media ...................45 3.5.2.1 8264E Setting roll media ..............45 3.5.2.2 8254E Setting roll media ..............52 3.5.3 Setting media type.
- Page 7 4.6.1.23 Subnet Mask menu ................111 4.6.1.24 Gateway menu ..................112 4.6.1.25 8254E only- Front Interlace..............112 4.6.1.26 8254E only - Media Cut menu ............112 4.6.1.27 Temporary menu ................113 4.6.2 Test Print menu (Setup item 2 of 7 total) .............113 4.6.3 Adjust Print menu (Setup item 3 of 7 total) ..........114...
- Page 8 4.10.1Cutting media ....................163 4.10.1.1 8264E Cutting media ................163 4.10.1.2 8254E Cutting media when the Media Cut menu is set to “Manual” 165 4.10.1.3 8254E Cutting media when the Media Cut menu is set to “Off” ..166 5 Troubleshooting ......................167 5.1 Introduction ......................167...
- Page 9 6.5 Maintenance performed by authorized technician ..........226 6.5.1 Periodic replacement of parts................226 6.5.1.1 8264E Replacement of parts............... 226 6.5.1.2 8254E Replacement of parts ...............226 6.5.2 Periodic inspection ..................226 6.6 Long term storage of the printer ................227 7 Appendix ........................229 7.1 Product specifications ..................229...
- Page 10 8254E / 8264E User Guide...
-
Page 11: Safety Instructions
1 Safety Instructions Introduction This chapter explains the precautions that must be taken when installing and operating the 8254E or 8264E printer. It describes the warning and caution terms that operators need to know and points out warning labels on the printer main unit. -
Page 12: Important Safety Instructions
These include safety agency examination, approval, and compliance with established environmental standards. To ensure the continued safe operation of your Xerox equipment, follow these safety guidelines at all times. Always follow all warnings and instructions that are marked on or supplied with the equipment. - Page 13 Do not use aerosol cleaners. Aerosol cleaners can be explosive or flammable when used on electromechanical equipment Always exercise care when moving or relocating equipment. Please contact your local Xerox Service Department to arrange relocation of the copier to a location outside of your building.
- Page 14 Pay attention to the following points when handling the power cables. • Do not put heavy objects on the power cables. • Do not bend, twist or pull the power cables by force. • Do not route the power cables near heating appliances. 8254E / 8264E User Guide...
- Page 15 Oil from your hands can cause print head cleaning to not be performed correctly. • For the 8264E, clean the wiper using a dry cleaning stick. For the 8254E, clean the wiper using a dry poly-knit wiper. • Do not immerse the head of the cleaning stick or the poly-knit wiper in water.
-
Page 16: Electro/Mechanical Certifications
Cet appareil numérique de la classe “A” est conforme à la norme NMB-003 du Canada. Product Safety Certification This product is certified by the following Agency using the Safety standards listed: Agency MET LABORATORIES, INC. Standard UL60950-1 1st (2003) (USA) IEC60950-1 Edition 1 (2001) CAN/CSA-C22.2 No. 60950-1-03 (Canada) 8254E / 8264E User Guide... -
Page 17: Certifications In Europe
1.5.1 Certifications in Europe CE The CE mark applied to this product, symbolizes XEROX’s declaration of conformity with the following applicable European Union Directives, as of the dates indicated: December 12,2006: Council Directive 2006/95/EC as amended. Approximation of the laws of the member states related to low voltage equipment. - Page 18 1 Safety Instructions 8254E / 8264E User Guide...
- Page 19 1 Safety Instructions Types of warning labels 8254E / 8264E User Guide...
- Page 20 1 Safety Instructions Types of warning labels 8254E / 8264E User Guide...
- Page 21 1 Safety Instructions Types of warning labels 8254E / 8264E User Guide...
-
Page 22: 8254E Warning Labels
1 Safety Instructions 1.6.2.2 8254E Warning labels Locations of the 8254E warning labels are shown in the following figure. Types of warning labels 8254E / 8264E User Guide... -
Page 23: 8254E Only - Operational Procedure Labels
8254E only - Operational procedure labels This section explains the handling of the 8254E’s operational procedure labels, as well as their location and types. The 8264E has no operational procedure labels. 1.7.1 Handling the operational procedure labels When handling the warning labels, be careful about the following points. -
Page 24: Product Recycling & Disposal
Xerox environmental programs, visit www.xerox.com/environment.html. If your product is not part of the Xerox program and you are managing its disposal, please note that the product may contain lead and other materials whose disposal may be regulated due to environmental considerations. - Page 25 (1-800-ASK-XEROX) to determine whether this Xerox product is part of the program. For more information about Xerox environmental programs, visit: http://www.xerox.com/environment. If you are managing the disposal of your Xerox product, please note that the product may contain lead, mercury, Perchlorate, and other materials whose disposal may be regulated due to environmental considerations.
- Page 26 1 Safety Instructions containing devices, such as batteries. Special handling may apply; please see: http://www.dtsc.ca.gov/ hazardouswaste/perchlorate/ 8254E / 8264E User Guide...
-
Page 27: Product Overview
8264E - The print head can print up to 1,615mm (64.6") in width. 8254E - The print head can print up to 1,355.5mm (54.2") in width when set up for one-way printing or up to 1,336.5mm (53.5") when set up for two-way printing. -
Page 28: Part Names And Functions
It is normally closed. Stand Used to support the printer. Media guide Used for feeding media smoothly when the media is set or printed. The After Heater is installed under the guide. 8254E / 8264E User Guide... - Page 29 Used to level the printer on uneven floors. Media holder plates Installed inside of the front cover. (Right and Left) Used to engage both sides of the media, guiding the media and helping to prevent buckling or warpage. 8254E / 8264E User Guide...
-
Page 30: 8254E Front Section
Used to cut media straight. Pressurizing rollers Installed inside of the front cover. Press and hold the media when printing. Platen Installed inside of the front cover. The Platen Heater is installed under the platen. 8254E / 8264E User Guide... -
Page 31: Printer Rear
Used to connect a network interface cable. Waste fluid tank Used for collecting the waste ink discharged from the printer. Waste fluid valve Used when discharging the waste fluid from the waste fluid tank. It is normally closed. 8254E / 8264E User Guide... -
Page 32: 8254E Rear Section
The Pre-Heater used to warm the media is installed under the media guide. Waste fluid tank Used for collecting the waste ink discharged from the printer. Used when discharging the waste fluid from the waste fluid tank. Waste fluid valve It is normally closed. 8254E / 8264E User Guide... -
Page 33: Position And Function Of The Heating Elements
This improves the fixation of the ink to both coated and uncoated media and optimizes the dot gain control, all of which produces improved print quality. Name Roll media guide Platen Heater Print head 8254E / 8264E User Guide... -
Page 34: After Heater
After Heater The After Heater is located under the Media Guide. It is used to complete the fixation process, making the printed media dry to the touch. Name Roll media guide After Heater Print head 8254E / 8264E User Guide... -
Page 35: Printer Control Panel
Refer to the following for details regarding the use of the control panel. • When performing menu settings from the control panel: 4.7 Menu setups on the control panel • When performing various other operations within the control panel: Operating from the control panel 8254E / 8264E User Guide... - Page 36 • Pressing the [+] key or [–] key allows you to select any of the other six menus. [Enter] key • The menu to set is selected and it 8254E only - Restarts printing during shifts to the next hierarchy. printing. • The setting is determined and saved.
- Page 37 • The setting is changed to the reverse • Same key as the [Backward] key. direction. • The numeric value is decreased • 8254E only - Pauses the printer during numerical input. during printing. [Power] key Turns the printer ON or OFF.
- Page 38 When an error requiring restart (a fatal malfunction for the printer operation) occurs, all lamps blink with an alarm. 5.3.5 Error requiring restart • If the error persists even when the malfunction is fixed, contact your local XEROX dealer. 8254E / 8264E User Guide...
-
Page 39: Preparing For A Job
Do not route the power cables near heating appliances. • Contact your local XEROX dealer in case of power cable damage. Follow the procedure below to install the power cable(s). 1. Connect the power cable(s) to the AC inlet(s) on the rear of the printer. -
Page 40: 8264E Power Cable Connections
Power cable with 90°angle plug • Only the cable with the angle plug will work for the 8254E. The straight cable 90° that is supplied with the 8254E’s winder will not work. It will interfere with the media roller. 8254E / 8264E User Guide... - Page 41 • Use only building electrical outlets that are connected to a ground. • The ground wire should be attached to a copper plate which is buried in the ground to a depth of 650mm (25"). 8254E / 8264E User Guide...
- Page 42 The 8264E’s two power cables require a total capacity of 17A. If a single electrical outlet cannot supply the required total capacity, plug one of the power supply cables into one outlet and the other power supply cable into a different outlet. Name Power supply cable 8254E / 8264E User Guide...
-
Page 43: Turning The Printer Power On/Off
• If there is a problem during initial operation, the printer will display a message in the control panel and may stop operating. If operation stops, refer to 5 Troubleshooting and deal with the problem. 8254E / 8264E User Guide... -
Page 44: Turning The Power Off
Follow the procedure below to turn the power OFF. Only Step 1 is a little different for the 8264E and the 8254E. The rest of the steps are the same for both printers. - Page 45 If the printer does stop operating, refer to 5 Troubleshooting and deal with the problem. • After turning the printer OFF, wait for ten seconds or longer to turn it ON again. 8254E / 8264E User Guide...
- Page 46 4. If the printer is going to be put into long term storage, you should perform a head cleaning following the HeadWash procedure in 4.6.1.18 Head Wash menu. You should also press the [Power] key to turn the printer’s power OFF, then disconnect the power cable(s) and the communication cable. 8254E / 8264E User Guide...
-
Page 47: Connecting The Network Interface
PC. Prepare the cable according to the PC that will be connected. • For information about connecting a network interface cable, refer to 3.4.3 Connecting a network interface cable. • For the recommended cable specifications, refer to 7.2 Interface specification. 8254E / 8264E User Guide... -
Page 48: Connecting A Network Interface Cable
1. Turn both the printer and the PC OFF. 2. Insert the network interface cable into the network interface connector located on the rear of the printer. 8264E 8254E Name Network interface cable Network interface cable connector 8254E / 8264E User Guide... - Page 49 4. Connect the other connector of the network interface cable to your PC. • For information about connecting to your PC, refer to the User Guide included with the PC. • For network setting on the side of the printer, refer to 4.7.2 Panel Setup menu overview. 8254E / 8264E User Guide...
-
Page 50: Media Handling
Outside diameter of media: 150mm (5.9") • Weight of media: 8264E maximum = 30kg (66lb.) 8254E maximum = 19kg (41.8lb.) 3.5.1.1 8264E Loading roll media Follow the procedure below to load roll media on the 8264E. 1. Loosen the left side and right side roll media holders at the rear of the printer. To do this, pull the lever towards you to release it from the ratchet. - Page 51 Fixing lever 4. Engage the damper drive switching plates and their locking brackets on the end of each roll media holder to increase tension on the media roll to avoid slack and "No media found" errors. 8254E / 8264E User Guide...
- Page 52 6. Mount the roll media onto the core of the roll media holder (Left). Make sure the media’s cardboard tube is all the way onto the core so that it is flat against the inner part of the holder’s flange. Name Roll media holder (Left) Roll media 8254E / 8264E User Guide...
- Page 53 10. Engage the damper drive switching plates and their locking brackets on the end of each roll media holder to increase tension on the media roll to avoid slack and "No media found" errors. Name Roll media holder (Left) Roll media holder (Right) Roll media Fixing lever 8254E / 8264E User Guide...
-
Page 54: 8254E Loading Roll Media
3 Preparing For A Job 3.5.1.2 8254E Loading roll media Follow the procedure below to load roll media on the 8254E. • Load roll media on a horizontal surface such as a desk or table. If you load roll media with the scroller standing vertically, there is a possibility that the scroller might get damaged. -
Page 55: Setting Roll Media
1. Press the [Power] key to turn the printer ON. • The Power lamp on the control panel lights up in green. • The printer starts the initializing operation. • "Media End" displays in the control panel. 8254E / 8264E User Guide... - Page 56 2. Raise the media loading lever. "Lever Up" displays in the control panel. Name Media loading lever 3. Open the front cover. Name Front cover 8254E / 8264E User Guide...
- Page 57 Name Roll media Media feed slot 5. Pull the roll media out about one meter (39") from the front media feed slot which is located inside the front cover. Name Roll media Media feed slot 8254E / 8264E User Guide...
- Page 58 Confirm that the right edge of the roll media does not extend outward of the loading mark on the right side of the media guide at the front of the printer. If it does, it may negatively affect print quality. Name Roll media Media loading mark 8254E / 8264E User Guide...
- Page 59 When setting the roll media, set both sides of the media at least 5mm away from the edge of the pressurizing roller. If you don’t do this, slippage or creasing may occur during printing. Name Roll media Pressurizing rollers 8254E / 8264E User Guide...
- Page 60 After moving the roll media, fix it in place by re-tightening both fixing levers. • Fix the roll media holders by pressing the holders to the printer. Name Roll media holder (Left) Roll media holder (Right) Roll media Fixing lever 8254E / 8264E User Guide...
- Page 61 When loading the roll media, cut the front edge of the media if it is not straight. 4.10.1.1 8264E Cutting media • To increase the pressure on the media, lower the media loading lever further. Name Media loading lever (second arrow indicating more pressure applied) 8254E / 8264E User Guide...
-
Page 62: 8254E Setting Roll Media
For changing the media type, set the media type as shown in 3.5.3 Setting media type.. 3.5.2.2 8254E Setting roll media Follow the procedure below to set the roll media on the 8254E. 1. Press the [Power] key to turn the printer ON. • The green LED lights up. •... - Page 63 Media loading lever 3. Set the roll media to the media feed slot. • If the roll media is not wound tightly, wind it tightly again, and then load it. Name Roll media Media feed slot 8254E / 8264E User Guide...
- Page 64 Name Front cover Roll media 5. Holding the front edge of the roll media, roll it backward, using the scroller flanges, to remove any bend and/or slant in the media. Name Roll media Scroller flanges 8254E / 8264E User Guide...
- Page 65 When loading the new roll media, cut the front edge of the media if it is not straight. 4.10.1.2 8254E Cutting media when the Media Cut menu is set to “Manual” 4.10.1.3 8254E Cutting media when the Media Cut menu is set to “Off”...
-
Page 66: Setting Media Type
1. Press the [Power] key to turn the printer ON. 2. Load media. • After the media is loaded, the display shifts to the Media Type setup menu. • Refer to the following for media loading. 3.5.2 Setting roll media 8254E / 8264E User Guide... - Page 67 If no keys are pressed, the printer will default to that media type. It will display "Media Initial." The print head will move across the width of the media and then display the media's width. Press any key and the display will return to "Ready to Print." 8254E / 8264E User Guide...
- Page 68 5. If correct, press [Enter] or [Cancel]. "Ready to Print" displays in the control panel. 6. When using roll media, wind it backwards with the roll media scroller flanges until any slack is removed. This media loading procedure is complete. 8254E / 8264E User Guide...
-
Page 69: Test Printing
3. Confirm that "Ready to Print" is displayed in the control panel. 4. Display the Test Print menu in the control panel by doing the following. a. Press the [Menu] key. "Menu 1: Setup>" displays in the control panel. 8254E / 8264E User Guide... - Page 70 Press the [+] key or [–] key to select "Menu2: Test Print>." c. Press the [>] key. "Test1: Nozzle Check" displays in the control panel. 4.6.2 Test Print menu (Setup item 2 of 7 total) 8254E / 8264E User Guide...
- Page 71 When "Banner 1" or "Banner 2" is set in the Print Mode menu, PalettePrint is not displayed on the test print menu. 4.6.2 Test Print menu (Setup item 2 of 7 total) 5. Press the [Enter] key. • The printer begins generating a test print for the selected item. 8254E / 8264E User Guide...
- Page 72 6. Repeat Step 4 and Step 5 when you are generating a test print for other items. 7. Press the [Cancel] key to exit from Test Print. "Ready to Print" displays in the control panel. Test printing is complete. 8254E / 8264E User Guide...
-
Page 73: Setup List
This is used to check the current setup of the printer. • User Media and Print Mode lists are printed only when ALL Set List is selected. • Refer to the following for printing procedure. 4.6.2 Test Print menu (Setup item 2 of 7 total) 8254E / 8264E User Guide... -
Page 74: Nozzle Check
6.3.3 Cleaning the head Perform the Nozzle Check once again at the end of the work. • Refer to the following for the printing procedure. 4.6.2 Test Print menu (Setup item 2 of 7 total) 8254E / 8264E User Guide... -
Page 75: Mode Print
Pre-Heater set temperature • Platen Heater set temperature • Drier heater set temperature • Adjustment value • Refer to the following for the printing procedure. 4.6.2 Test Print menu (Setup item 2 of 7 total) 8254E / 8264E User Guide... -
Page 76: Color Palette
4.6.2 Test Print menu (Setup item 2 of 7 total) • Refer to the following for the printing procedure. 4.6.2 Test Print menu (Setup item 2 of 7 total) 8254E / 8264E User Guide... -
Page 77: Adjust Print
3. Display the Printing mode menu in the control panel by doing the following. a. Press the [Menu] key. "Menu 1: Setup>" displays in the control panel. b. Press the [>] key. "Set1: MediaType" displays in the control panel. 8254E / 8264E User Guide... - Page 78 Press the [Enter] key. "Media: Type 1" displays in the control panel. d. Press the [+] key or [–] key to select the media type to use. e. Press the [Enter] key. "**>1: Print Mode" displays in the control panel. 8254E / 8264E User Guide...
- Page 79 Press the [Enter] key. "Mode: Graphics 2 – >" displays in the control panel. 4.6.1.1.2 Print Mode menu 4. Select the printing mode that you want to use. a. Press the [+] key or [–] key to select the printing mode to use. 8254E / 8264E User Guide...
- Page 80 5. Display the Adjust Print menu in the control panel. a. Press the [Menu] key. "Menu 1: Setup>" displays in the control panel. b. Press the [+] key or [–] key to select "Menu3: Adjust Print>." 8254E / 8264E User Guide...
- Page 81 4.6.3 Adjust Print menu (Setup item 3 of 7 total) 6. Press the [Enter] key. • A confirmation pattern for quality adjustment is printed. • After the confirmation pattern is printed, "Adj.1: Confirm" displays in the control panel. 8254E / 8264E User Guide...
- Page 82 You do need to perform the Alignment. Proceed to Step 8. 8. 8254E only - Register a set value for Bi-D Quality (two-way printing/quality priority mode). a. Display the “Adjust Print” menu in the control panel in the same way as in Step 5.
- Page 83 Check the three print samples that were printed with the Bi-D Quality pattern, and select the number that is not out of alignment. The number "4" is selected in the following sample. e. Press the [+] or [–] key to enter the number that you just selected in Step d. 8254E / 8264E User Guide...
- Page 84 • The set value for Bi-D Quality is registered. 9. 8264E and 8254E - Register the setting for Bi-D Normal (two-way printing/normal mode) in the same way as in Step 8a through 8f. a. Display the "Adjust Print" menu in the control panel in the same way as in Step 5.
-
Page 85: Handling The Printer
Do not touch the media feed slot, platen or media guide while heaters are operating. They are hot and may cause a burn. • Keep the work area well-ventilated. This prevents fire, and prevents operators from feeling sick from fumes. 8254E / 8264E User Guide... -
Page 86: Printer Status
Press the [Menu] key when "Ready to Print" is displayed . "Menu 1: Setup>" displays in the control panel. • For details regarding the Setup menu, refer to 4.7 Menu setups on the control panel. 8254E / 8264E User Guide... -
Page 87: Using Media
Various recommended media are prepared for this printer. Select the appropriate media according to the usage. • For details on recommended media, contact your local XEROX dealer. • If failures or malfunctions of the printer occur through the use of non-recommended media: •... -
Page 88: Precautions For Handling Media
Avoid using such media especially in winter, in dry conditions, or when printing formal documents. • Do not discard the individual box and bag in which the media was shipped. Use them for storing the media. 8254E / 8264E User Guide... -
Page 89: Precautions For Storing Media
Keep the media dry. 4.4.4 Printing area 4.4.4.1 8264E Printing area The printable area of the 8264E printer is as follows. 4.4.4.2 8254E Printing area The printable area of the 8254E printer is as follows. 8254E / 8264E User Guide... -
Page 90: Head Height Adjustment
Do not open the front cover or change the head height during printing. If the head height is changed, the alignment will be changed and high print quality will not be guaranteed. 1. Open the front cover. 8264E 8254E Name Front cover 8254E / 8264E User Guide... - Page 91 Do not raise the head height adjustment lever higher than the 90° position shown below. Doing so may damage the printer. 8264E 8254E Name Head height adjustment lever • The High lamp on the control panel lights up in green. 8254E / 8264E User Guide...
- Page 92 4 Handling The Printer 3. Close the front cover. 8264E 8254E Name Front cover 8254E / 8264E User Guide...
-
Page 93: When Returning The Print Head To The Original Position
Do not open the front cover or change the head height during printing. If the head height is changed, the alignment will be changed and high print quality will not be guaranteed. 1. Open the front cover. 8264E 8254E Name Front cover 8254E / 8264E User Guide... - Page 94 4 Handling The Printer 2. Change the head height by moving the orange head height adjustment lever downward.. 8264E 8254E Name Head height adjustment lever • The Low lamp on the control panel lights up in green. 8254E / 8264E User Guide...
- Page 95 4 Handling The Printer 3. Close the front cover. 8264E 8254E Name Front cover 8254E / 8264E User Guide...
-
Page 96: Menu Overview
Allows you to configure Sleep Mode settings. 4.6.7 Sleep Mode menu (Setup item 7 of 7 total) • The values displayed within the < > marks in each list are the factory default settings (i.e., the initial values). 8254E / 8264E User Guide... -
Page 97: Setup Menu (Setup Item 1 Of 7 Total)
• Pressing the [Enter] key shifts to the sub menu. 4.6.1.9 Prev. Stick menu 8264E only - HeadFan Sets up head fan operation. • Pressing the [Enter] key shifts to the sub m4.6.1enu. 4.6.1.10 8264E only - Head Fan menu 8254E / 8264E User Guide... - Page 98 • Pressing the [Enter] key shifts to the sub menu. 4.6.1.25 8254E only- Front Interlace 8254E only - MediaCut Sets the media cutting operations after finishing printing. • Pressing the [Enter] key shifts to the sub menu. 4.6.1.26 8254E only - Media Cut menu 8254E / 8264E User Guide...
-
Page 99: Mediatype Menu
• Pressing the [Enter] key shifts to the sub menu. Type 30 4.6.1.1.1 User media menu • Pressing the [Cancel] key saves the setting and shifts to the previous menu. — 4.6.1 Setup menu (Setup item 1 of 7 total) 8254E / 8264E User Guide... -
Page 100: User Media Menu
Vacuum Fan Sets up the vacuum fan operation. • Pressing the [Enter] key shifts to the sub menu. 4.6.1.1.8 Vacuum Fan menu • Pressing the [Cancel] key shifts to the previous menu. — 4.6.1.1 MediaType menu 8254E / 8264E User Guide... -
Page 101: Print Mode Menu
6 times Uni (unilateral) Banner 2 540×720 dpi N (normal) 6 times Bi (bidirectional) Banner 3 720×720 dpi Q (high quality) 4 times Uni (unilateral) Banner 4 720×720 dpi N (normal) 4 times Bi (bidirectional) 8254E / 8264E User Guide... -
Page 102: Pf Adjust Menu
Sets up Initial Adjust Change. 300.0mm • Pressing the [Enter] key saves the setting and shifts to the previous menu. • Pressing the [Cancel] key cancels the setting and — shifts to the previous menu. 4.6.1.1.3 PF Adjust menu 8254E / 8264E User Guide... - Page 103 • Pressing the [Enter] key saves the setting and shifts to the previous menu. • Pressing the [Cancel] key cancels the setting and — shifts to the previous menu. 4.6.1 Setup menu (Setup item 1 of 7 total) 8254E / 8264E User Guide...
-
Page 104: Pre-Heater Menu
Allows you to set up the Pre-Heater temperature to preheat the media before printing. This control is active during printing operation. • The preset temperature of the Pre-Heater varies, depending on the media. For the preset temperature of the Pre-Heater, contact your local XEROX Sales Representative for a recommended media list. Setup item Setting... -
Page 105: Platen Heater Menu
• The preset temperature of the Platen Heater varies, depending on the media. For the preset temperature of the Platen Heater, contact your local XEROX Sales Representative for a recommended media list. Setup item Setting... -
Page 106: After Heater Menu
4 Handling The Printer 4.6.1.1.6 After Heater menu The 8254E calls this the "Drier menu" but the items and steps are identical. Allows you to set up the After Heater temperature to dry the printed media. This control is active during printing operation. -
Page 107: Vacuum Fan Menu
Allows you to set up the Effect menu. Set up this menu when you want to improve print quality by adjusting the set print mode. • The menus for the 8264E and 8254E are only slightly different. Both are provided below. 4.6.1.2.1... -
Page 108: 8254E Effect Menu
"Wave 1, 2, 3, or 4" is used. Set up this menu if you need to improve the print quality compared with "Fine&Wave 1 to 4." 8254E / 8264E User Guide... -
Page 109: Flushing Menu
• Pressing the [Enter] key saves the setting and shifts to the sub menu. 4.6.1.3.1 Flushing Return Count menu • Pressing the [Cancel] key cancels the setting and shifts to the previous menu. — 4.6.1 Setup menu (Setup item 1 of 7 total) 8254E / 8264E User Guide... -
Page 110: Flushing Return Count Menu
• Pressing the [Enter] key saves the setting and shifts to 8254E <3mm> to 25mm the previous menu. • Pressing the [Cancel] key cancels the setting and — shifts to the previous menu. 4.6.1 Setup menu (Setup item 1 of 7 total) 8254E / 8264E User Guide... -
Page 111: Media Initial Menu
If media detection is automatically performed during media initialization, the menu displays the detected media width. . (2) MediaWidth menu (with auto-detection), immediately below Name Front media guide Media width 5mm line on media guide 8254E / 8264E User Guide... - Page 112 Setup item Setting Description MediaWidth **** mm Displays the media width that is detected while initializing. • Pressing the [Cancel] key shifts to the previous menu. — 4.6.1 Setup menu (Setup item 1 of 7 total) 8254E / 8264E User Guide...
-
Page 113: Take-Up Menu
Allows you to set up the operation of the optional winding unit. • For details about the optional winding unit, contact your local XEROX dealer. • When the winding unit is not installed, please do not set to "Type 1."... -
Page 114: Origin Menu
Save the setting and shift to the previous menu. 4.6.1 Setup menu (Setup item 1 of 7 total) • Pressing the [Cancel] key cancels the setting and shifts to the previous menu. — 4.6.1 Setup menu (Setup item 1 of 7 total) 8254E / 8264E User Guide... -
Page 115: Prev. Stick Menu
• Pressing the [Enter] key saves the setting and shifts to the previous menu. • Pressing the [Cancel] key cancels the setting and — shifts to the previous menu. 4.6.1 Setup menu (Setup item 1 of 7 total) 8254E / 8264E User Guide... -
Page 116: Overwrite Cnt Menu
• Pressing the [Enter] key saves the setting and shifts to the previous menu. • Pressing the [Cancel] key cancels the setting and — shifts to the previous menu. 4.6.1 Setup menu (Setup item 1 of 7 total) 8254E / 8264E User Guide... -
Page 117: Auto Cleaning Menu
Displays the amount of ink remaining in the K, C, M Example = 64/ 64/ 63/ 64 and Y cartridges, expressed as %. • Pressing the [Cancel] key shifts to the previous menu. — 4.6.1 Setup menu (Setup item 1 of 7 total) 8254E / 8264E User Guide... -
Page 118: Roll Length Menu
• Pressing the [Enter] key saves the setting and shifts to the previous menu. • Pressing the [Cancel] key cancels the setting and — shifts to the previous menu. 4.6.1 Setup menu (Setup item 1 of 7 total) 8254E / 8264E User Guide... -
Page 119: Head Wash Menu
4 Handling The Printer 4.6.1.18 Head Wash menu Allows you to perform the HeadWash procedure. • Make sure to use a dedicated cleaning fluid (Xerox P/N 108R00735). Setup item Setting Description HeadWash Start Performs Head washing. • Pressing the [Enter] key causes the Head washing operation to begin. -
Page 120: Initialization Menu
(Each asterisk represents 20% of lifespan.) • The part should be changed when all of the asterisks have disappeared, and "Change" is displayed. Contact your local XEROX dealer for replacement parts. • Pressing the [Cancel] key shifts to the previous menu. —... -
Page 121: Ip Address Menu
• Pressing the [Enter] key changes the setting for the 255.255.255.255 next segment. • Pressing the [Cancel] key saves the setting and shifts to the previous menu. — 4.6.1 Setup menu (Setup item 1 of 7 total) 8254E / 8264E User Guide... -
Page 122: Gateway Menu
• Pressing the [Cancel] key cancels the setting and — shifts to the previous menu. 4.6.1 Setup menu (Setup item 1 of 7 total) 4.6.1.26 8254E only - Media Cut menu Allows you to set up media cutting Setup item Setting... -
Page 123: Temporary Menu
Allows Mode Print to be performed. Used to confirm the following printing conditions. • Print quality • Effect • Pre-Heater temperature • Platen Heater temperature • After Heater temperature • Adjustment value 3.6.3 Mode Print 8254E / 8264E User Guide... -
Page 124: Adjust Print Menu (Setup Item 3 Of 7 Total)
Sets up the set value when performing two-way printing in the speed mode. • Pressing the [Enter] key causes "Printing" to be displayed in the control panel — and the test pattern printing to start. • Pressing the [Cancel] key shifts to the previous menu. 8254E / 8264E User Guide... -
Page 125: Cleaning Menu (Setup Item 4 Of 7 Total)
• Pressing the [Enter] key causes "Cleaning **%" to be displayed in the control panel and the Head cleaning to start. — The state of progress on the Head cleaning displays in % in the control panel. • Pressing the [Cancel] key shifts to the previous menu. 8254E / 8264E User Guide... -
Page 126: Selection Menu (Setup Item 5 Of 7 Total)
Sets up whether to display the Prev. Stick menu. 8264E only - HeadFan <On> Sets up whether to display the Head Fan menu. 8254E only - Media Cut <On> Sets up whether to display the Media cut menu. CR Movement <On>... - Page 127 Sets up whether to display the Subnet Mask menu. Gateway <On> Sets up whether to display the Gateway menu. 8254E only - Front Interlace <On> Sets up whether to display the Front Interlace menu. ALL On Displays all of the items in the Setup menu.
-
Page 128: Version Menu (Setup Item 6 Of 7 Total)
Set the auto cleaning interval. 4.6.7.1 Timer Setting menu Activate Sleep Mode Start 4.6.7.2 Sleep Mode Start menu • Pressing the [Cancel] key shifts to the previous menu. — 4.6.1 Setup menu (Setup item 1 of 7 total) 8254E / 8264E User Guide... -
Page 129: Timer Setting Menu
3 hours 4 hours 5 hours <6> hours 9 hours 12 hours 18 hours 24 hours Pressing the [Cancel] key shifts to the previous menu. 4.6.7 Sleep Mode menu (Setup item 7 of 7 total) 8254E / 8264E User Guide... -
Page 130: Sleep Mode Start Menu
Sleep Mode. 4.6.7 Sleep Mode menu (Setup item 7 of 7 total) During Sleep Mode. Restart -> Enter • Pressing the [Enter] key causes "Ready to Print" to be displayed in the control panel. 8254E / 8264E User Guide... -
Page 131: Menu Setups On The Control Panel
When a setup item has a submenu, ">" is displayed on the right side of the control panel’s LCD monitor. • For the general outline of each setup item, refer to 4.7.2 Panel Setup menu overview. 8254E / 8264E User Guide... - Page 132 The setting is saved and the next setup item displays. • If you press the [Cancel] key, [+] key, or [–] key without pressing the [Enter] key after changing a setting, the change will not be saved. 8254E / 8264E User Guide...
-
Page 133: Panel Setup Menu Overview
Allows you to determine which Setup items will be displayed in the Setup menu. Version menu Displays the version of the firmware. Sleep Mode menu Allows Sleep Mode settings to be configured. • For details of each setup item, refer to 4.6 Menu overview. 8254E / 8264E User Guide... -
Page 134: Operating From The Control Panel
The accuracy of media feeding may be improved with the following methods. 1. Adjust the media feed compensation value. 4.8.2.2 Setting the Media feed compensation 2. 8264E only - Fix the media firmly. 4.8.2.1 8264E only - How to fix the media firmly 8254E / 8264E User Guide... -
Page 135: 8264E Only - How To Fix The Media Firmly
Setting the Media feed compensation This control is active during printing operation. 1. Display the Media feed compensation menu in the control panel. a. Press the [Menu] key. "Menu 1: Setup>" displays in the control panel. 8254E / 8264E User Guide... - Page 136 Press the [>] key. "Set1: MediaType" displays in the control panel. c. Press the [Enter] key. "Media: Type 1" displays in the control panel. d. Press the [+] key or [–] key to select the media type you are using. 8254E / 8264E User Guide...
- Page 137 Press the [Enter] key. "**>1: Print Mode" displays in the control panel. • The selected media (Type 1 to 30) is displayed in "**." 4.6.1.1 MediaType menu Press the [+] key or [–] key to select "**2: PF Adjust." 8254E / 8264E User Guide...
- Page 138 250mm. • If you increase the feeding length, the accuracy of the Media feed compensation improves. • To change the feeding length, press the [+] key or [–] key and change the set value. 8254E / 8264E User Guide...
- Page 139 When the initial adjustment printing is complete, "Ready to Print" displays. c. After the initial adjustment printing, cut the media. 4.10.1 Cutting media 3. Measure the distance between the two plus marks (+) in the initial adjustment print, using a ruler. 8254E / 8264E User Guide...
- Page 140 Press the [+] key or [–] key to select "PF2: Initial Change." b. Press the [Enter] key. "Init.: 250.0/250 mm" displays in the control panel. c. Press the [+] key or [–] key and enter the measured value from Step 3. 8254E / 8264E User Guide...
- Page 141 The initial adjustment value is saved. 5. Perform Confirm Print. a. Press the [+] key or [–] key to select "PF3: Confirm Print." b. Press the [Enter] key. "Feed Length: 250 mm" displays in the control panel. 8254E / 8264E User Guide...
- Page 142 Name Feed length Media feeding direction • When the Confirm Print operation is complete"Ready to Print" displays in the control panel. d. After the confirmation adjustment printing is complete, cut the media. 4.10.1 Cutting media 8254E / 8264E User Guide...
- Page 143 Display the Media feed compensation menu in the control panel in the same way as in Step 1. b. Press the [+] key or [–] key to select "PF4:Micro Print." c. Press the [Enter] key. "Printing" displays in the control panel. • Micro adjustment printing starts. 8254E / 8264E User Guide...
- Page 144 Make another adjustment. • Run again. • When you feel you are in the correct region, run again and view all five bands to confirm that the adjustment is correct. c. Press the [Enter] key. 8254E / 8264E User Guide...
- Page 145 8. If you see white or dark lines on all bands, you may have to adjust the pulse to a greater +/- value than +/- 2 and retry. • After the micro adjustment printing is completed, "PF4:Micro Print" displays in the control panel. 9. Refer to the illustrations below and check the printing result. 8254E / 8264E User Guide...
- Page 146 Press the [+] key or [–] key to select "PF5:Micro Change." b. Press the [Enter] key. "Micro: 0pulse" displays in the control panel. c. Press the [+] key or [–] key and enter the micro adjustment value according to the printing result in Step 7. 8254E / 8264E User Guide...
- Page 147 The micro adjustment value is saved. • "PF5:Micro Change" displays in the control panel. 11. Press the [Cancel] key several times. "Ready to Print" displays in the control panel. The adjustment of the Media feed compensation value is complete. 8254E / 8264E User Guide...
-
Page 148: 8264E Only - Installing Media Holder Plates
1. Display the Side margin menu in the control panel. a. Press the [Menu] key. "Menu 1: Setup>" displays in the control panel. b. Press the [>] key. "Set1: MediaType" displays in the control panel. 8254E / 8264E User Guide... - Page 149 Press the [+] key or [–] key to select "Set4: Side Margin." d. Press the [Enter] key. "Side Margin: ** mm" displays in the control panel. 4.6.1.4 Side Margin menu • The current setting value is displayed in the "**" of the Side Margin menu. 8254E / 8264E User Guide...
- Page 150 Press the [Enter] key. This saves the setting and "Set4: Side Margin" is again displayed in the control panel. c. Press the [Cancel] key several times. "Ready to Print" displays in the control panel. 8254E / 8264E User Guide...
- Page 151 Do not remove the clogged media by force. • Stop using the printer. Using the printer with deformed media plates may damage the grid roller or print heads. If you need to replace media plates, contact your local XEROX dealer. 8254E / 8264E User Guide...
- Page 152 6. If the plates are not used, return them to their initial positions as shown in the following figure. Name Roll media Media holder plate 8254E / 8264E User Guide...
-
Page 153: Controlling The Heater Elements
• The preset temperature of the Pre-Heater varies, depending on the media. For the preset temperature of the Pre-Heater, contact your local XEROX Sales Representative for a recommended media list. 1. Follow the procedure below to make changes to the Pre-Heater settings: a. - Page 154 Press the [Enter] key. "Type *" displays in the control panel (where * is the currently-selected Media Type). Press the [Enter] key. "Print mode" displays in the control panel. e. Press either the [+] key or the [-] key until "PreHeater" displays in the control panel. 8254E / 8264E User Guide...
- Page 155 Press the [Enter] key. "PreHeater **c" displays in the control panel (where ** is the current Pre- heater temperature setting). Press the [-] key to lower the temperature or Press the [+] key to raise it. • The minimum temperature is 30C and the maximum temperature is 50C. 8254E / 8264E User Guide...
- Page 156 3. Print head • Pressing the [Enter] key saves the setting and shifts to the previous menu. • Pressing the [Cancel] key cancels the setting and — shifts to the previous menu. 4.6.1.1.1 User media menu 8254E / 8264E User Guide...
-
Page 157: Platen Heater Menu
• The preset temperature of the Platen Heater varies, depending on the media. For the preset temperature of the Platen Heater, contact your local XEROX Sales Representative for a recommended media list. 1. Follow the procedure below to make changes to the Platen Heater settings: a. - Page 158 Press the [Enter] key. "Type *" displays in the control panel (where * is the currently-selected Media Type). Press the [Enter] key. "Print mode" displays in the control panel. e. Press either the [+] key or the [-] key until "PlatenHeater" displays in the control panel. 8254E / 8264E User Guide...
- Page 159 Press the [Enter] key. "PreHeater **c" displays in the control panel (where ** is the current Platen Heater temperature setting). Press the [-] key to lower the temperature or Press the [+] key to raise it. • The minimum temperature is 30C and the maximum temperature is 50C. 8254E / 8264E User Guide...
- Page 160 3.Print head • Pressing the [Enter] key saves the setting and shifts to the previous menu. • Pressing the [Cancel] key cancels the setting and — shifts to the previous menu. 4.6.1.1.1 User media menu 8254E / 8264E User Guide...
-
Page 161: After Heater Menu
4 Handling The Printer 4.8.4.3 After Heater menu The 8254E calls this the "Drier menu" but the items and steps are identical. Allows you to set up the After Heater temperature to dry the printed media. This control is active during printing operation. - Page 162 Press the [Enter] key. "Type *" displays in the control panel (where * is the currently-selected Media Type). Press the [Enter] key. "Print mode" displays in the control panel. e. Press either the [+] key or the [-] key until "AfterHeater" displays in the control panel. 8254E / 8264E User Guide...
- Page 163 Press the [Enter] key. "PreHeater **c" displays in the control panel (where ** is the current After Heater temperature setting). Press the [-] key to lower the temperature or Press the [+] key to raise it. • The minimum temperature is 30C and the maximum temperature is 50C. 8254E / 8264E User Guide...
- Page 164 3. Print head • Pressing the [Enter] key saves the setting and shifts to the previous menu. • Pressing the [Cancel] key cancels the setting and — shifts to the previous menu. 4.6.1.1.1 User media menu 8254E / 8264E User Guide...
-
Page 165: Standbyheating Menu
With "Ready to Print" displayed, press the [Menu] key. "Setup >" displays in the control panel. b. Press the [>] key. "Media Type" displays in the control panel. c. Press the [Enter] key. "Type *" displays in the control panel (where * is the currently-selected Media Type). 8254E / 8264E User Guide... - Page 166 Press either the [+] key or the [-] key until "Standby" displays in the control panel. Press the [Enter] key. "PreHeater **c" displays in the control panel (where ** is the current Standby Heating setting). 8254E / 8264E User Guide...
- Page 167 • Pressing the [Enter] key saves the setting and shifts to the previous menu. • Pressing the [Cancel] key cancels the setting and — shifts to the previous menu. 4.6.1.1.1 User media menu 8254E / 8264E User Guide...
-
Page 168: Control Panel During Printing
2. Check that the media loading lever is lowered. 3. Press and hold the [Forward↓] key or the [Backward↑] key. • Media is fed forward or backward. 4. Release the [Backward↑] key or [Forward↓] key after feeding media to the desired position. 8254E / 8264E User Guide... -
Page 169: Stopping Printing Operation
If a large amount of data is saved on the printer, the control panel may not display "Ready to Print" by pressing the [Cancel] key once. In such cases, wait for a few seconds and press the [Cancel] key again. 8254E / 8264E User Guide... -
Page 170: Changing And Confirming Set Values While Printing
3. Press the [+] key or [–] key to change or confirm settings. • For the setting items whose set values can be changed or confirmed, refer to 4.9.3.2 Settings that can be changed or confirmed while printing. 8254E / 8264E User Guide... -
Page 171: Settings That Can Be Changed Or Confirmed While Printing
PF Adjust –20 pulse to 0 to 20 pulse Change the feed adjustment value. — Backup • [Enter] key: Save the changed setting. • [Cancel] key: "Ready to Print" displays in the control — panel. 8254E / 8264E User Guide... -
Page 172: Pausing Printing
1. While the printer is printing, press the [–] key. • The printer pauses its printing. • "PrintRestart -> ENTER" displays in the control panel. 2. To restart printing, press the [Enter] key. • The printer resumes its printing. 8254E / 8264E User Guide... -
Page 173: Operations After Printing
• When you hold media, do not place your finger on the media cut groove. • Move the razor blade along the media cut groove. 8254E / 8264E User Guide... - Page 174 4. Place a razor blade on the media cut groove on the media guide, and cut the roll media. Name Media guide Media cut groove Razor blade The cutting roll media operation is complete. • When loading the new roll media, cut the front edge of the media if it is not straight. 8254E / 8264E User Guide...
-
Page 175: 8254E Cutting Media When The Media Cut Menu Is Set To "Manual
4 Handling The Printer 4.10.1.2 8254E Cutting media when the Media Cut menu is set to “Manual” 1. Feed the roll media to the media cut position after printing. • “Manual Cut -> ENTER” displays in the control panel. •... -
Page 176: 8254E Cutting Media When The Media Cut Menu Is Set To "Off
4 Handling The Printer 4.10.1.3 8254E Cutting media when the Media Cut menu is set to “Off” 1. Verify the following regarding the operational condition of the printer. • Printing or other operations are not in progress. • "Ready to Print" displays in the control panel. -
Page 177: Troubleshooting
Introduction This chapter describes possible problems you may encounter while using this printer and how to resolve them. If an error occurs that is not mentioned in this section, contact your local XEROX dealer. • To receive your warranty for this printer, you must prepare the warranty certificate. If the warranty certificate is not presented, the repair will not be covered by the warranty even if it occurs within the warranty period. -
Page 178: Cannot Print At All
Is the printer being used in an Only use the printer in an environment that 8254E environment other than the one is specified for use. Installation manual specified, such as in direct sunlight? 8264E Installation manual 8254E / 8264E User Guide... - Page 179 If the Data lamp does not turn on, contact the Confirm that the turn on after sending printing data computer manufacturer. printer is connected to from the computer? the network and that the IP, Subnet Mask, and Gateway are set properly. 8254E / 8264E User Guide...
-
Page 180: Media-Related Troubleshooting
8264E only - Is the roll media set eeding media 3.5.1 Loading correctly? correctly. roll mediaa 8254E only -Is the scroller set Set the scroller correctly. 3.5.1 Loading correctly? roll media Are there any foreign materials such as Clean the pressurizing roller. - Page 181 (5) The media veers off-track during printing Possible cause Remedy Reference Are you using recommended media? Use recommended media. 4.4.1 Media type Is the loading position of the media Set the media correctly. 3.5.2 Setting roll correct? media 8254E / 8264E User Guide...
-
Page 182: Printing-Related Troubleshooting
Remedy Reference 8264E only - Is the roll media set Set the roll media correctly. 3.5.1 Loading correctly? roll media 8254E only - Is the scroller set Set the scroller correctly. 3.5.1 Loading correctly? roll media 5.2.4 Printing-related troubleshooting (1) Printing is partially stained or incomplete •... - Page 183 4.4.1 Media type 8264E only - Is the roll media set Set the roll media correctly. 3.5.1 Loading correctly? roll media 8254E only -Is the scroller set Set the scroller correctly. 3.5.1 Loading correctly? roll media Is the nozzle in good condition? Perform Head cleaning.
- Page 184 Or, specify a smaller media width in the RIP, set. Although the Media may compensating for the margins. physically be wide enough, the actual print area may not be. The condition of the media plays a large part also. 8254E / 8264E User Guide...
-
Page 185: Error Messages
Insert the cleaning cartridges. Wash menu Insert InkCartridges Filling the ink. 6.2.1 Replacing Insert the ink cartridges. ink cartridges 8254E only - Transport Mode Preparing for transportation. 6.4.2 Please wait a while. Transporting the printer 8254E / 8264E User Guide... -
Page 186: Error Message Display And Remedies
Lever Up The media loading lever is raised. 3.5 Media Lower the lever. handling 8254E only - Media Cut -> ENTER Roll media is fed to the media cut position 4.10.1 Cutting after printing. media Press the [Enter] key after cutting media. - Page 187 OFF (Stops operation) • The color inside [****] in the error display represents the ink color with a problem. • If the "Ink End" and "No Cartridge" errors occur simultaneously, "No Cartridge" displays. 8254E / 8264E User Guide...
-
Page 188: Data Error Display And Remedies
The "***" in the error message is the code number that indicates what type of error occurred. • The command code representing the error that occurred may be indicated within [ ]. • For the settings on your PC side, refer to the Operating Manual included with your PC. 8254E / 8264E User Guide... -
Page 189: Error Requiring Restart
For an error requiring restart, operation will return to normal after removing the cause of the error and restarting the printer. If the same error continues to be displayed, contact the your local XEROX dealer. When you contact him, be sure to be able to tell the dealer the code number of the error message. -
Page 190: When Media Jams Occur
When the media is jammed, follow the procedure below. 1. Press the [Power] key to turn the printer’s power OFF. 3.3.2 Turning the power OFF 2. Open the front cover. 8264E 8254E Name Front cover 8254E / 8264E User Guide... - Page 191 3. Move the print head section all the way to the right. 8264E 8254E Name Print head section Roll media 8254E / 8264E User Guide...
- Page 192 • When you hold media, do not place your finger on the media cut groove. • Move the razor blade along the media cut groove. 8254E / 8264E User Guide...
- Page 193 5 Troubleshooting 5. Pull the media toward the front of the printer, and cut the torn part with a cutting tool such as a razor blade. 8264E 8254E Name Razor blade Roll media 8254E / 8264E User Guide...
- Page 194 6a. 8264E only - Turn the flanges of the roll media holders and wind roll media backwards, onto its spool. Name Flanges Roll media 6b. 8254E only - Turn the flanges of the roll media holders and wind roll media backwards, onto its spool. Name Roll media Scroller 7.
-
Page 195: Maintenance
This message displays when there is a small amount of ink remaining in the ink cartridge. • The alarm buzzer sounds. To stop the buzzer, press the [Enter] key. • Replace the near-empty ink cartridge with a new ink cartridge. 8254E / 8264E User Guide... - Page 196 If "InkEnd" displays, you cannot print until inserting the new ink cartridge. • If there is no replacement cartridge at hand, leave the empty cartridge inserted in the printer. Leaving the printer with the ink cartridge removed may cause the print head to clog. 8254E / 8264E User Guide...
- Page 197 Printing might become blurred, or the end of the ink in the cartridge might not be detected correctly. • Any problems caused by using an ink cartridge other than those recommended above will not be covered by the warranty, and repair expenses will be paid by the customer. 8254E / 8264E User Guide...
- Page 198 Do not replace ink cartridges when the printer is turned OFF. The remaining ink may not be detected correctly, causing abnormal printing. • A used ink cartridge should be put in a vinyl bag, etc., and disposed of in compliance with local ordinance and instructions of local authorities. 8254E / 8264E User Guide...
- Page 199 6 Maintenance 2. Remove the ink cartridge that you want to replace from its ink cartridge slot. 8264E 8254E Name Ink cartridge to be removed Ink cart 8254E / 8264E User Guide...
- Page 200 4. Install the new ink cartridge. 5. Confirm that "Ready to Print" is displayed in the control panel. • If the ink cartridge is replaced during printing, printing restarts. Ink cartridge replacement is complete. 8254E / 8264E User Guide...
-
Page 201: Replacing Roll Media
1. If the printer is turned ON, confirm that no operation such as printing is in progress. • Be careful to not trap your fingers when opening and closing the media cover. 2. Raise the media loading lever. Name Media loading lever 8254E / 8264E User Guide... - Page 202 Roll media 4. Loosen the fixing lever of the right roll media holder and move the holder toward the right, removing it from the roll media’s core. Name Roll media holder (Right) Fixing lever Roll media 8254E / 8264E User Guide...
- Page 203 For loading roll media, refer to 3.5.1 Loading roll media. • For storing roll media not in use, refer to 4.4.3 Precautions for storing media. The roll media replacement procedure for the 8264E is complete. 8254E / 8264E User Guide...
-
Page 204: 8254E Only - Roll Media Replacement Steps
6 Maintenance 6.2.2.2 8254E only - Roll media replacement steps Follow the procedure below to replace roll media. 1. If the printer is turned ON, confirm that no operation such as printing is in progress. • Be careful to not trap your fingers when opening and closing the media cover. - Page 205 5. Turn the movable flange back and forth while pulling it away from the roll media until it is disengaged. Name Movable flange Scroller 6. Remove the roll media from the scroller. Name Roll media Scroller 8254E / 8264E User Guide...
- Page 206 8. When you have no need to set roll media, attach the movable flange to the scroller and store the scroller in the printer’s scroller receivers. Name Movable flange Scroller The roll media replacement procedure for the 8254E is complete. 8254E / 8264E User Guide...
-
Page 207: 8264E Only - Replacing The Flushing-Box Sponges
1. If the printer is turned ON, make sure of the following. • Printing or other operations are not in progress. • "Ready to Print" is displayed in the control panel. 2. Open the front cover. Name Front cover 8254E / 8264E User Guide... - Page 208 4. Install a new flushing-box sponge into each flushing-box. 5. Close the front cover to complete the procedure. Name Front cover 8254E / 8264E User Guide...
-
Page 209: Cleaning
Be careful that no moisture enters the printer. There is a possibility that the electric circuit inside the printer could be short circuited. • Do not, under any circumstances, open covers attached using screws . This may cause an electric shock or a malfunction. 8254E / 8264E User Guide... -
Page 210: Cleaning The Outer Case
1. Open the front cover. 8264E 8254E Name Front cover • Do not blow paper powder inside the printer using tools such as an air duster. It may cause an abnormal noise from the inside of the printer. 8254E / 8264E User Guide... - Page 211 6 Maintenance 2. Use a soft brush to remove paper powder and dust attached to the pressurizing rollers. 8264E 8254E Name Pressurizing rollers 8254E / 8264E User Guide...
- Page 212 6 Maintenance 3. Apply a slightly damp, tightly wrung-out soft cloth to wipe out paper powder and ink attached to the platen and media guide. 8264E 8254E Name Platen Media guide 8254E / 8264E User Guide...
- Page 213 4. Use a slightly damp, tightly wrung-out soft cloth to wipe off any dirt that may be on the unpainted (silver color) areas in the center of the grid roller. 8264E 8254E Name Grid roller 8254E / 8264E User Guide...
-
Page 214: Cleaning The Head
Cleaning with the media loaded may lead to contact between the print head and media. 1. Confirm that "Ready to Print" is displayed in the control panel. 2. Check that the media loading lever is lowered. 3. Press the [>] key to select the cleaning mode. 8254E / 8264E User Guide... -
Page 215: Cleaning The Cleaning Wiper
8264E only - Use a new, dry cleaning stick to clean the cleaning wiper. • 8254E only - Use a new, clean poly-knit wiper to clean the cleaning wiper. For details on the cleaning stick and the poly-knit wiper, refer to 7.3 Options/Supply... - Page 216 Press the [Menu] key. "Menu 1: Setup>" displays in the control panel. b. Press the [>] key. "Set1: MediaType" displays in the control panel. c. Press the [+] key or [–] key to select "Set20: CR Maintenance." 8254E / 8264E User Guide...
- Page 217 4.6.1.19 CR Maintenance menu 3. Press the [Enter] key. • Maintenance starts. • The print head moves to the left. • 8264E only - The cleaning wiper moves forward. • "CR Maintenance: End" displays in the control panel. 8254E / 8264E User Guide...
- Page 218 6 Maintenance 4. 8264E - Open the maintenance cover on the right front of the printer. 8254E - Open the front cover. 8264E Name Maintenance cover (Right) 8254E Name Front cover 8254E / 8264E User Guide...
- Page 219 5. 8264E only - Use the cleaning stick to remove the ink and dust on the cleaning wiper. 8254E only - Use the poly-knit wiper to remove the ink and dust on the cleaning wiper. a. Cleaning the front side of the wiper: Remove the ink and dust by moving the cleaning stick (8264E) or the poly-knit wiper (8254E) to the right and left.
- Page 220 Cleaning stick (8264E) or Poly-knit wiper (8254E) Head cap unit b. Cleaning the back side of the wiper: Remove the ink and dust by moving the cleaning stick (8264E) or the poly-knit wiper (8254E) from bottom to top. 8264E 8254E / 8264E User Guide...
- Page 221 6 Maintenance 8254E Name Cleaning wiper Cleaning stick (8264E) or Poly-knit wiper (8254E) Head cap unit 6. 8264E - Close the maintenance cover on the right front of the printer firmly until it is locked. 8254E - Close the front cover.
- Page 222 7. Press the [Enter] key. • The print head returns to its original position. • 8264E only - The cleaning wiper returns to its original position. • "CR Mainte.: Start" displays in the control panel. 8254E / 8264E User Guide...
-
Page 223: 8264E Only - Cleaning Around The Print Head
For information on the cleaning stick, refer to 7.3 Options/Supply list. 1. If the printer is turned ON, make sure of the following. • Printing or other operations are not in progress. • "Ready to Print" is displayed in the control panel. 8254E / 8264E User Guide... - Page 224 Press the [Menu] key. "Menu 1: Setup>" displays in the control panel. b. Press the [>] key. "Set1: MediaType" displays in the control panel. c. Press the [+] key or [–] key to select "Set20: CR Maintenance". 8254E / 8264E User Guide...
- Page 225 Press the [Enter] key. "CR Mainte.: Start" displays in the control panel. 4.6.1.19 CR Maintenance menu 3. Press the [Enter] key. • Maintenance starts. • The print head moves to the left. • "CR Maintenance: End" displays in the control panel. 8254E / 8264E User Guide...
- Page 226 5. Using a light such as a penlight, confirm that there are no foreign objects, such as dust or ink attached to the following parts: • Around the print head • Head guide area • Nozzle Name Around the print head Head guide area Nozzle Dust, ink mass 8254E / 8264E User Guide...
- Page 227 Do not re-use the cleaning stick. Dust attached to the stick may damage the print head. 6. If foreign objects, such as dust or ink are attached to the print head, remove them using the cleaning stick. Name Around the print head Head guide area Nozzle Cleaning stick 8254E / 8264E User Guide...
- Page 228 Close the cover firmly until it is locked. Name Maintenance cover (Left) 8. Press the [Enter] key. • The print head returns to its original position. • "CR Mainte.: Start" displays in the control panel. 8254E / 8264E User Guide...
- Page 229 6 Maintenance 9. Press the [Cancel] key several times. "Ready to Print" displays in the control panel. Cleaning around the print head is complete. 8254E / 8264E User Guide...
-
Page 230: Moving Or Transporting The Printer
3. Make sure that the bolts that secure the printer to its dedicated stand are tight. 4. Disconnect the power cable(s) and any communication cable from the rear of the printer. 5. Check that the print head is in the rightmost position. 8254E / 8264E User Guide... - Page 231 Name Adjusters Stand • There is a flexible, metallic belt very close to the flexible, black CR (carriage return) belt mentioned in the next step. Be very careful to not touch this metallic belt! 8254E / 8264E User Guide...
- Page 232 6 Maintenance 7. 8254E only - Bind the flexible, black CR (carriage return) belt in the center section of the printer by fastening the CR belt clip around it. Name CR (carriage return) belt CR belt clip 8. 8254E only - Remove the scroller.
- Page 233 6 Maintenance 9. 8254E only - Release the locking caster on each set of two casters. Name Locking caster (one on each leg) 10. Move the printer. (2) Reinstalling after moving After moving the printer, make sure you undo everything you did in Step (1) to prepare the unit. Follow the procedure below to make it ready for use.
-
Page 234: Transporting The Printer
• Before transporting the printer, consult the XEROX printer dealer at your point of purchase. 6.4.2.1 Pre-transport procedure 1. -
Page 235: Post-Transport Procedure
10. 8254E only - Bind the flexible, black CR (carriage return) belt in the center section of the printer by fastening the white plastic CR belt clip around it.. Name CR (carriage return) belt CR belt clip (white, plastic) 11. Remove the printer from the stand. -
Page 236: Maintenance Performed By Authorized Technician
Timing fence Foreign objects Once per year (CR encoder detection slit plate) Damages Rail on the CR guide frame Once per year Foreign objects Media dust accumulation P_REAR sensor front surface Once per year Foreign objects 8254E / 8264E User Guide... -
Page 237: Long Term Storage Of The Printer
6 Maintenance Long term storage of the printer If the printer is going to be put into long term storage, you should perform a head cleaning following the HeadWash procedure in 4.6.1.18 Head Wash menu. 8254E / 8264E User Guide... - Page 238 6 Maintenance This page has been intentionally left blank. 8254E / 8264E User Guide...
-
Page 239: Appendix
This chapter describes specifications, options and components included with this printer. Product specifications 7.1.1 8264E Printer specifications Item Specification Model name XEROX 8264E Color Wide Format Printer Printing method On-demand piezo drive system Drive system Firmware servo/DC motor drive Media feed system Multipoint pressurizing grid roller system... -
Page 240: 8254E Printer Specifications
Weight 173kg (382lbs.) (including the stand) 7.1.2 8254E Printer specifications Item Specification Model name XEROX 8254E Color Wide Format Printer Printing method On-demand piezo drive system Drive system Firmware servo/DC motor drive Media feed system Multipoint pressurizing grid roller system... -
Page 241: Interface Specification
This section describes each type of interface specification supported by this product. 7.2.1 Network interface specification Item Specification Network type Ethernet IEEE802.3 Network I/F 10BASE-T/100BASE-TX Automatic transfer type (RJ-45 Connector twist pair cable) MDI/MDI-X Automatic transfer Corresponding TCP/IP protocol 8254E / 8264E User Guide... -
Page 242: Options/Supply List
7 Appendix Options/Supply list For more information about options and supply items, contact your local XEROX dealer. 7.3.1 Consumables Printer Item Part No. Remarks Model Media Both Ink cartridges Both 106R01227 Black 220ML 106R01228 Cyan 220ML 106R01229 Magenta 220ML 106R01230... - Page 244 Printed in the United States of America. XEROX® and all Xerox product names mentioned in this publication are trademarks of XEROX CORPORATION. Other company trademarks are also acknowledged.
Need help?
Do you have a question about the 8254E and is the answer not in the manual?
Questions and answers