
Subscribe to Our Youtube Channel
Related Manuals for FLIR X-Series


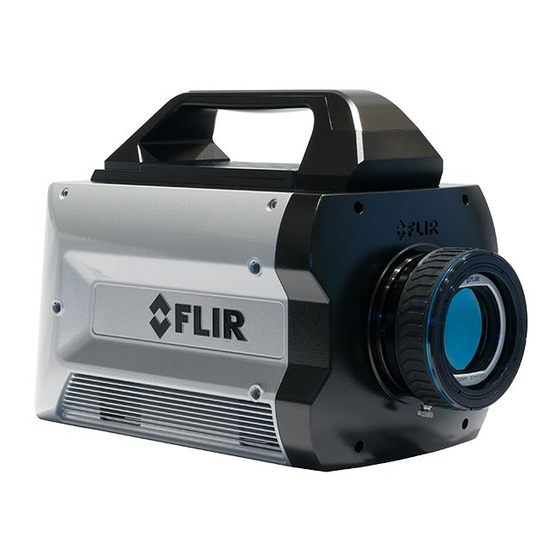
Summary of Contents for FLIR X-Series
- Page 1 X-Series Science Camera User’s Manual This document contains no export-controlled information. Document Number: 4221772 Version: C Issue Date: April 8, 2020...
- Page 2 FLIR Systems, Inc. 9 Townsend West, Nashua, NH 03063 Support: 1-800-GO-INFRA (800-464-6372) http://flir.custhelp.com Service: 1-866-FLIR-911 www.flir.com ©2020 FLIR Systems, Inc. X-Series User’s Manual...
-
Page 3: Table Of Contents
INTRODUCTION ............................. 7 Camera System Components ..................7 Camera Models ....................... 7 System Overview......................8 Key features of the X-Series science cameras ..............9 WARNINGS AND CAUTIONS ........................12 INSTALLATION ............................13 Basic Connections ......................13 X-SERIES CAMERA CONTROLLER ......................17 Online Help........................ - Page 4 HDMI Video ..........................74 6.2.8 Power Interface .......................... 75 ® 6.2.9 Camera Link Video Output ......................75 6.2.10 Auxiliary Connector/Breakout Cable ..................76 6.2.11 Record Trigger ..........................78 6.2.12 CoaXPress (CXP) Video Output [X6900/X8500 only] ..............78 X-Series User’s Manual...
- Page 5 Performance Characteristics ..................87 Non Uniformity Correction ..................... 87 Detector/FPA ......................... 88 General Characteristics ....................88 MAINTENANCE ............................90 Camera and Lens Cleaning ................... 90 9.1.1 Camera Body, Cables and Accessories ..................90 9.1.2 Lenses ............................90 X-Series User’s Manual...
-
Page 6: Revision History
1 – Revision History 1 Revision History Version Date Initials Changes 07/09/2019 Initial Release 01/06/2020 Correction to Aux cable pinout, 1308 gain states X-Series User’s Manual... -
Page 7: Introduction
2 – Introduction 2 Introduction Thank you for choosing a FLIR X-series science camera! The X-series cameras are some of the fastest commercial infrared cameras in the world, and they were designed with the high-end infrared camera user in mind. -
Page 8: System Overview
*NOTE: SLS upper cutoff tolerance is +/- 0.5um 2.3 System Overview The X-Series infrared camera systems have been developed by FLIR to meet the needs of the research, industrial and range phenomenology communities. The X8500sc camera makes use of FLIR’s advanced ISC1308 readout integrated circuit (ROIC), mated to an Indium Antimonide (InSb) detector to cover the shortwave and midwave infrared bands and an SLS array for longwave infrared. -
Page 9: Key Features Of The X-Series Science Cameras
These presets can be used in either Superframing or Preset Sequencing modes. Factory Calibrations Most variants of the X-Series cameras can be purchased with radiometric calibrations that are performed in the calibration laboratory in Niceville, Florida using NIST-traceable calibration sources. - Page 10 2 – Introduction Adjustable Digital Gains and Offsets The X-Series cameras allow the user to adjust digital gains and offsets per preset, making it possible to map only the linear portion of the FPA to the full range of digital count values.
- Page 11 The X6800 camera does not support an IRIG-B input. 4-position filter wheel The X-Series cameras have internal motorized filter wheels that can position a warm filter between the lens and detector. The filters can be installed by the user and the filter holders support automatic identification.
-
Page 12: Warnings And Cautions
➢ The camera is a precision optical instrument and should not be exposed to excessive shock and/or vibration. Refer to Section 8.8 for detailed environmental requirements. ➢ The camera contains static-sensitive electronics and should be handled appropriately. X-Series User’s Manual... -
Page 13: Installation
4 Installation 4.1 Basic Connections All connections to the X-series cameras are located on the Back Panel. Although the X6900 and X8500 cameras have a large number of connections, only a small number are required for basic operation. The X6800 is a simplified version of the X6900 camera with fewer connections. - Page 14 Connect the DC power cable between the power supply and the power connector located on the rear panel of the X-series camera. Turn on the camera by pressing the power button on the rear panel. The button will illuminate to indicate that the unit is ON.
- Page 15 ON. Digital Data Gigabit Ethernet The X6800sc has a Gigabit Ethernet interface that is GigE Vision compliant. Use a regular CAT5e or CAT6 Ethernet patch cable. If a crossover cable is used, the camera interface will automatically X-series User’s Manual...
- Page 16 This is the Auxiliary connector which is described in Section 6.2.10. Record This record input will trigger the recording to the internal RAM buffer I the camera. The input can be a contact closure or a rising-edge TTL pulse. X-series User’s Manual...
-
Page 17: Series Camera Controller
5 – X-series Camera Controller 5 X-Series Camera Controller The X-Series Camera Controller (also called the Graphical User Interface or GUI) can be accessed from within the ResearchIR software. Once the user is connected to the camera, a mini controller will... -
Page 18: Online Help
5 – X-series Camera Controller 5.1 Online Help The X-Series Camera Controller provides two online help options. First there is this manual which can be accessed via the Help menu. Second, when placing the mouse cursor over a particular control, a Tooltip will be displayed giving a basic description of the control. - Page 19 Activates all controller features. Advanced NOTE: The X-series cameras have two internal clocks: A Real Time Clock (RTC) and an IRIG clock. The RTC is a low resolution clock used to keep system time. The RTC has a battery backup and will retain time while the camera is off. The IRIG clock is a high resolution (microsecond) clock.
-
Page 20: Advanced Time Controls
5 – X-series Camera Controller 5.2.1.1 Advanced Time Controls This dialog is accessed using the Tools>>Set Time>>Advanced menu options. This allows the user to directly set the cameras system time, and IRIG time. Under the Synchronize Time section the user can select various clocks on the left and synchronize them to a clock from the right. - Page 21 5 – X-series Camera Controller X-series User’s Manual...
-
Page 22: Basic User Mode
5 – X-series Camera Controller 5.3 Basic User Mode The Basic User mode enables a limited set of controls, thus greatly simplifying the controller interface. Most controls will be disabled until the user connects to the camera using the Camera>>Connect menu option. -
Page 23: Status Page
5 – X-series Camera Controller 5.3.1 Status Page The Status Page gives general information about the camera state including camera type, camera time, integration time, frame size, and frame rate. This page also shows the current IRIG time and the camera operating hours. - Page 24 5 – X-series Camera Controller The frame size selections are here, 1280x720 is an option and is not shown: Basic Setup Page Controls Integration Enter integration (exposure) time in milliseconds. If factory calibration is active, then time this will be a dropdown list of available calibration ranges.
-
Page 25: Correction Page
5 – X-series Camera Controller 5.3.3 Correction Page The Correction Page provides functions related to performing an on-camera NUC. Three correction types are available and are described in the table below. The Correction Status area will show messages and prompt the user to complete certain tasks such as place a blackbody in the field of view. -
Page 26: Advanced User Mode
5 – X-series Camera Controller Correction Sources Use the internal flag as the NUC source. The flag is not Internal temperature controlled and floats at camera internal Use an external blackbody as the NUC source. Program will External prompt the user to place each source in front of the camera. NUC source needs to fill the entire field of view. -
Page 27: Setup Page
5 – X-series Camera Controller 5.4.2 Setup Page In Advanced mode, the Setup page allows the user to configure each camera preset, set integration time (or calibration range), frame rate, windowing, sync, and filter wheel options. The Setup Page has four tabs: Presets, Window, Sync, and Filter/Flag. - Page 28 5 – X-series Camera Controller Frame Sync Frame Sync Integration Integration Data Read Data Read Integration Period Data Width Integration Period Data Width Dead Time Dead Time Dead Time Dead Time ITR Frame Generation Process The Integration and the Data Readout periods can be thought of as two separate processes; however, they are linked together by certain timing requirements.
-
Page 29: Presets Tab
A Preset is a combination of four parameters: Integration Time, Frame Rate, Window Size, and Window Location. The X-series can store up to four presets in internal memory. The user can switch from one preset to another manually, using the GUI, or the camera can automatically switch using Preset Sequencing or Superframing. -
Page 30: Preset Sequencing Mode
5 – X-series Camera Controller TIP: The controller often provides additional information using tooltips. Mouse over just about any control or indicator to see information about the current setting or about the bounds of valid values for the control. Frame Sync... - Page 31 5 – X-series Camera Controller The camera will stay at each preset for a number of frames set in the Dwell column. This setting is the dwell time (in frames) for each preset. A dwell time of zero tells the camera to skip that preset and proceed to the next non-zero preset.
-
Page 32: Superframing Mode
In traditional Preset Sequencing you can only adjust integration time and dwell for each preset. The X-series incorporates Optimized Preset Sequencing. This allows the user to set integration time, dwell, and frame rate for each preset. This is depicted in the diagram below. - Page 33 5 – X-series Camera Controller Superframing is a subset of preset sequencing with dwell counts of 0 (unchecked) or 1 (checked) and optimized frame rates for each preset. The user enables the checkbox for each preset they wish to include in the Superframing. The “superframe rate” is the rate at which the entire group of included presets is generated.
-
Page 34: Window Tab
5 – X-series Camera Controller 5.4.2.2 Window Tab The Window tab allows the user to set the size of the active image window and the location of the window. The window size and offset for the image data must be the same for both the FPA and analog video. -
Page 35: Analog Video Sub-Tab
5 – X-series Camera Controller X6800/X6900 Frame Size Variables Minimum Maximum Step Size Frame Width 32 pixels Frame Height 4 pixels Horizontal Offset Depends on 4 pixels window size Vertical Offset Depends on 4 pixels window size X8500 Frame Size Variables... -
Page 36: Sync Tab
A sync is a signal that synchronizes the timing of an individual frame. A trigger is a signal that synchronizes the start of a sequence of frames. The X-series has independent SYNC and TRIGGER inputs. The SYNC and TRIGGER IN input require a 3.3V TTL pulse (5V max). -
Page 37: Sync Mode
Sync Mode 5.4.2.3.1.1 Frame Sync Starts The X-series makes use of frame syncs and triggers to control the generation of image data. Again, frame syncs control the start of individual frames whereas triggers start sequences of frames. The generation of a frame consists of two phases: integration and data readout. Depending on the timing between these two events, you can have two basic integration modes: Integrate Then Read (ITR) and Integrate While Read (IWR). - Page 38 5 – X-series Camera Controller NOTE: When using an external frame sync and preset sequencing or superframing, the external frame sync should be set to comply with ITR frame rate limits. If the external sync rate is too fast, the...
-
Page 39: Sync Source
5 – X-series Camera Controller When a trigger occurs, the camera will complete a sequence a set number of times. For example, if Preset Sequencing is used with a dwell of two frames set for all four presets, each trigger would generate 8 frames. - Page 40 5 – X-series Camera Controller Sync Sources The frame sync is generated internally to run at the frequency Internal set by the user The frame sync is generated externally through the Sync In External connect on the camera rear chassis.
-
Page 41: Sync Options
5 – X-series Camera Controller clock reaches a specified time. 5.4.2.3.3 Sync Options The Sync Options page allows the user to set delays and polarities for the Sync and Trigger In. Sync In Allows for the user to set a delay (µsec) for the external sync. See Delay timing diagrams below. -
Page 42: Filter/Flag
5 – X-series Camera Controller Sync Out Options Sync Out Delay Allows for the user to set a delay (in microseconds) for the sync out on a preset basis. Sync Out Source Allows for the sync out to be referenced to the start of frame or start of integration. -
Page 43: Filter Wheel Controls
5.4.2.4.2 Filter Wheel Controls The X-series has a motorized 4-position filter wheel. Warm filters are held in the wheel by a removable filter holder. Each holder can hold up to two filters with a combined thickness of 2mm. The holders have an ID number that is encoded using a set of magnets. The camera can recognize the ID number. -
Page 44: Advanced Page
5 – X-series Camera Controller it can be accessed. See Section 7 for more information on how to install filters. After installing a filter, press the “Scan” button so that the camera can detect the new filter IDs. 5.4.3 Advanced Page... -
Page 45: One-Point Correction Process
5 – X-series Camera Controller To create the NUC table, the camera images either one or two uniform temperature sources. The source can be an external source provided by the user or the camera’s internal NUC flag which is basically a shutter the camera places in front of the detector. If the source is external it should be uniform and large enough to overfill the cameras field-of-view (FOV). -
Page 46: Update Offset
One-Point Correction because those tables have a value of one (“1”) as the gain coefficients. The Twinkler test can be done on either correction process. The X-series camera uses the Nearest Neighbor algorithm for bad pixel replacement, a simple replacement using an adjacent pixel. The adjacent pixel is picked using the pattern depicted below. -
Page 47: Correction Tab
5 – X-series Camera Controller 5.4.3.2 Correction Tab The Correction Tab contains all the controls needed to manage the on-camera NUCs. On-camera NUCs are stored in two types of memory: RAM memory. This type of memory is used to store NUCs that will be applied to live image data. - Page 48 5 – X-series Camera Controller NUC Controls NUC Info. Displays camera parameters and statistics related to the selected NUC Perform NUC. Starts the NUC Wizard. Updates the current NUC to flash memory Load a NUC from flash to RAM memory.
-
Page 49: Nuc Information
5 – X-series Camera Controller 5.4.3.2.1 NUC Information button displays a list of camera parameters that are saved as part of the NUC as well as bad pixel statistics. Note that there is a scroll bar that can be used to see the whole list. The Save button allows the user to dump this list to a text file. -
Page 50: Performing A Nuc
5 – X-series Camera Controller The default setting is to “Load Table Only”, in which case only the NUC coefficients are used from a NUC file. When the user selects “Load Table and the Following Settings”, the user can select which parameters from the NUC will override the current state. - Page 51 5 – X-series Camera Controller Correction (NUC) Types Sets the gain terms to “1” and computes the offset terms. One Point Uses a single NUC source. Does not compute a BP correction. Sets both the gain and offset terms. Uses two NUC Two Point sources.
- Page 52 5 – X-series Camera Controller Set the number of frames to average when computing NUC coefficients. 16 is the default and works well for most Number of frames scenarios. The value can be to be 2, 4, 8, 16, 32, 64, or 128.
-
Page 53: Video Setup Tab
5.4.3.3 Video Setup Tab The X-series cameras have a 14-bit digital output. However, the video output is only 8-bit. An Automatic Gain Control (AGC) algorithm is used to map the 14-bit digital to the 8-bit analog data. The Video Tab provides controls related to optimizing the Analog video output. - Page 54 5 – X-series Camera Controller Analog Video Setup Options Format HDMI/SDI: 1080p @ 29.9/25Hz, 720p @ 59.9/50Hz, NTSC, PAL, Overlay Enables the video overlay. Filter Rate Rate at which AGC is computed (1 to 20 Hz). Enable with checkbox Rate at which AGC is allowed to change. This will keep the AGC from responding rapidly to fast tridents changes.
- Page 55 5 – X-series Camera Controller Analog Video Setup Options Bounds Sets the lower and upper data range to be scaled to on the video data. Note: Bounds is only visible when AGC Mode>>Manual Linear is selected Only visible when AGC is set to DDE. Selects the amount of enhancement DDE Sharpness processing.
-
Page 56: Video Roi
5 – X-series Camera Controller One final note about the PE algorithm: it is very aggressive. It can pull detail out of very low contrast imagery. It can also greatly enhance some very low-level NUC and FPA artifacts and noise if the contrast is low enough. -
Page 57: Video Overlay Tab
5 – X-series Camera Controller 5.4.3.5 Video Overlay Tab The X-series cameras have a video overlay feature that can display a wide variety of camera status indicators on the analog video. This lets an operator see the camera status without needing to have a PC connected. - Page 58 5 – X-series Camera Controller Video Overlay Options Enable Overlay Turns the overlay On or Off without changing the selected options Logo Displays the FLIR logo Date Displays the system date stamp Time Displays the system time stamp Displays the accumulated camera “on” time (H:M). (Cannot be reset by...
-
Page 59: Digital Tab
5 – X-series Camera Controller Video Overlay Options Status/Preset Displays sequencing mode and currently displayed preset Displays FPA frame rate (in single Preset mode). Displays effective rate Frame Rate when Preset Sequencing (PS) or Superframing (SF) Select All Selects all overlay options... - Page 60 5 – X-series Camera Controller Uncorrected Data Bad Pixel Detector 14-bit A/D Replacement Corrected Data Algorithm Analog Digital NUC Table Gain/Offset Gain/Offset X-series Signal Processing Chain The analog FPA data is passed through an analog gain and offset stage that are factory-set to ensure that the entire range of the FPA output is matched to the A/D input.
-
Page 61: Analog Tab
5 – X-series Camera Controller 5.4.3.7 Analog Tab These parameters are set at the factory and are generally not adjusted by the user. X-series User’s Manual... -
Page 62: Misc Tab
5 – X-series Camera Controller 5.4.3.8 Misc Tab 5.4.3.9 Lockin Tab The lockin feature is designed for a non-destructive testing technique, where a periodic thermal excitation is applied to a part under test. An electrical signal that is synchronous with the excitation mechanism is also sent into the lockin input port on the camera’s Auxiliary connector. -
Page 63: Saturation Detection
5 – X-series Camera Controller 5.4.3.10 Saturation Detection The camera can compare each pixel to a user defined threshold and count the number of pixels that exceed that threshold. Once that count has been determined for the entire frame, it is compared to threshold and sets a flag in the image header. -
Page 64: Integrate Active Polarity
5 – X-series Camera Controller It is important to note the camera does not account for bad pixels when counting for saturation. When determining the threshold, the user should account for the typical number of bad pixels. 5.4.3.10.1 Integrate Active Polarity Sets the polarity (active high or low) of the Integrate Active signal on the camera rear chassis AUX connector. -
Page 65: Ssd Page
The camera uses standard form factor flash drives used in PCs and laptops which can be obtained from a variety of retail outlets. FLIR recommends the use of premium quality SSD drives as these will typically have much faster read/write times. - Page 66 5 – X-series Camera Controller SSD Functions the rear panel of the camera. NOTE: Any data currently in the RAM buffer from a previous recording WILL BE LOST once the system is re-armed. Start Recording. Pressing this button will initial the recording of live data to the RAM buffer.
-
Page 67: Installing The Ssd
5 – X-series Camera Controller SSD Functions These controls allow the user to precisely control the playback limits. The start and stop frame can be set directly by the text boxes. The handles at the end of the blue line can also dragged Playback Controls by the mouse to set the limits. - Page 68 The only time the drive should not be removed is when data from the RAM buffer is being written to the SSD. Here is a typical commercially-available 2.5 inch SATA solid-state drive one can easily buy online for the X-series. These 2.5 inch drives can be had up to 4TB: X-series User’s Manual...
-
Page 69: Interfaces
6 – Interfaces 6 Interfaces 6.1 Mechanical Dimensions Side view of X-Series cameras with 4-tab bayonet lens interface and filter wheel X-series User’s Manual... - Page 70 6 – Interfaces X-series User’s Manual...
- Page 71 6 – Interfaces Front and bottom view of X-Series cameras with filter wheel X-series User’s Manual...
-
Page 72: Electrical - X8500 And X6900 Series
6.2.1 Power Switch Illuminates when camera power is ON. Switch is mechanical and retains its ON/OFF statues through a power cycle. Camera power cannot be controlled remotely. X-series User’s Manual... -
Page 73: Solid State Drive
6 – Interfaces 6.2.2 Solid State Drive The X-series cameras use a standard form factor 2.5 inch SSD that is used in PCs and laptops and can be obtained from many retail outlets. A 512GB high performance SSD is provided with the cameras, and SSD drives with capacities up to 4TB are available. -
Page 74: Gigabit Ethernet
When an HD video mode is selected, this output port is active. It is compatible with standard HDMI cables. Behind the rubber flap on the back of the X-Series cameras there is a slot and two connectors as described below (from top to bottom): MicroSD Card: This is not currently implemented and is reserved for future use. -
Page 75: Power Interface
Camera Link® is a standard data interface for high end visible and IR cameras. The X-Series cameras use a Camera Link® Full interface in a 4- tap, 16-bit configuration, at 85Mhz. In terms of ports, the A and B ports are used with bit A0 being the LSB and bit B7 being the MSB of the data transferred. -
Page 76: Auxiliary Connector/Breakout Cable
BNC Male ANALOG_IN0 0-5V BNC Male ANALOG_IN1 0-5V BNC Male LOCKIN 0-5V BNC Male Here is an image of the breakout cable, and a closeup of the molded-in number on Cable 20, which is reserved for future capabilities: X-series User’s Manual... - Page 77 6 – Interfaces X-series User’s Manual...
-
Page 78: Record Trigger
5.5V. The absolute maximum range is -0.5V to 6.5V. Vih=2V, Vil=0.8V. Vih is the minimum voltage at which the camera will interpret the signal as a “high” and Vil is the maximum voltage at which the camera will interpret the signal as a “low”. X-series User’s Manual... -
Page 79: Hd-Sdi [X6900/X8500 Only]
Sync In and can be used to synchronize other events to the camera when the camera is in a free run mode. It is also used in conjunction with the clock out signal to synchronize two X-Series cameras in master-slave fashion. When used in this way, the... -
Page 80: Genlock Input [X6900/X8500 Only]
6 – Interfaces 6.2.17 Genlock Input [X6900/X8500 only] The purpose of the Genlock input is to allow the X-Series cameras to synchronize the active standard video output to an external video signal. The X-Series cameras can Genlock to both SD and HD video signals. -
Page 81: Filter Wheel
6 – Interfaces 7 Filter Wheel The X-Series cameras have a 4-position, motorized, warm filter wheel. The wheel sits between the lens and the detector warm window. The filter wheel can be seen by removing the lens as shown in the picture below. - Page 82 Turn gently (but firmly) a few degrees clockwise until you feel the holder click into position. On the Setup>>Filter/Flag page of the controller, press the scan button to refresh the filter list in the camera. X-series User’s Manual...
-
Page 83: Specifications
8 – Specifications 8 Specifications 8.1 Interface AC Power 90-230V , 50-60 Hz (using FLIR 24123-000 power supply) Control Gigabit Ethernet, USB, Camera Link Serial, CXP or RS-232 • NTSC/PAL selectable, BNC, 75Ω, 1V pk-pk Standard Video Outputs • HDMI (720p 50/59.94, 1080p 25/29.97) (where applicable) •... -
Page 84: Acquisition Modes And Features
Frame Sync Starts Readout: synchronizes FPA data readout to external sync source • 4 presets programmable for 1 to 4,294,967,295 frames each Preset Sequencing • Preset sequence programmable for up to 4,294,967,295 sequences per triggered event Digital Video Output Selectable: X-series User’s Manual... - Page 85 Raw digital video (14-bits) • Gain and offset (NUC) corrected (14-bits) • NUC with bad pixel replaced (14-bits) Variable, per preset • Global Gain: 0→3.9; 2 Digital Gain and Offset resolution • Global Offset: ± full A/D resolution X-series User’s Manual...
-
Page 86: Analog Video
Palettes Grayscale • Various color palettes Selectable • x1/2 • Zoom • 4:3 (SD to HD) • • • Temporal Filter Brightness and Contrast User controlled to increase or decrease (analog video) Video Boresight +/- 16 rows X-series User’s Manual... -
Page 87: Performance Characteristics
8.5 Performance Characteristics Continuous Cool Down: 50 VA Continuous Normal: 41 VA Power Consumption FLIR PWR Supply @ 120V Continuous Normal w/NUC Flag: 75 VA Continuous Cool Down: 24 Watts Continuous Normal: 21.25 Watts Power Consumption Camera DC Power @ 24V Continuous Normal w/NUC Flag: 36 Watts ≈7 minutes to reach operating temperature... -
Page 88: Detector/Fpa
249 mm (9.8 inches), not including lens or lens cover Width 156 mm (6.2 inches) Height 201 mm (7.9 inches) w/ handle, 147 mm (5.8 inches) w/o handle Weight 6.4 kg (14 lbs.), not including lens or lens cover Temperature X-series User’s Manual... - Page 89 40 g’s, 11msec half sine pulse Shock Vibration 4.3 g's RMS random vibration, all three axes Humidity <95% relative humidity, non-condensing Altitude 0 to 40,000 feet operational, 0 to 70,000 feet non-operational Operating Orientation No restriction in orientation X-series User’s Manual...
-
Page 90: Maintenance
Set-up a clean area to work from with an anti-roll barrier around the edge to prevent anything from leaving the table. Use a clean, lint free cloth or lens tissue. Wear latex gloves - clean them with alcohol or detergent before handling optic. X-series User’s Manual... - Page 91 Magnesium Fluoride 1,2,4 Dielectric coating 1,2,3,4 Sodium Chloride Nitrogen Interference filters Potassium Chloride Nitrogen Soft metallic coating Air only Potassium Bromide Nitrogen Hard/Protected metallic 1,2,3,4 Thallium Bromoiodide Nitrogen 1] Water free Acetone 2] Ethanol 3] Methanol 4] Isopropanol X-series User’s Manual...
Need help?
Do you have a question about the X-Series and is the answer not in the manual?
Questions and answers