Table of Contents
Advertisement
ADS1278EVM-CVAL Evaluation Module User's Guide
This user's guide describes the characteristics, operation, and use of the ADS1278EVM-CVAL kit. This
evaluation kit is an evaluation system for the ADS1278-SP, a 24-bit, radiation hardened, 8 channel, delta-
sigma analog-to-digital converter (ADC).
This document includes an EVM QuickStart, hardware and software details, bill of materials, and
schematic.
The following related documents are available through the Texas Instruments web site at
http://www.ti.com.
Device
ADS1278-SP
REF5025
OPA2350
OPA1632
Trademarks
ADCPro is a trademark of Texas Instruments.
All other trademarks are the property of their respective owners.
SBAU324 – September 2018
Submit Documentation Feedback
ADS1278EVM-CVAL Evaluation Module Kit
Table 1. EVM-Compatible Device Data Sheets
Literature Number
SBAS937
SBOS410
SBOS099
SBOS286
Copyright © 2018, Texas Instruments Incorporated
Device
Literature Number
SN74LVC2G157
SCES207
TPS65131
SLVS493
PCA9535
SCPS129
ADS1278EVM-CVAL Evaluation Module User's Guide
User's Guide
SBAU324 – September 2018
1
Advertisement
Table of Contents

Related Manuals for Texas Instruments ADS1278EVM-CVAL


Summary of Contents for Texas Instruments ADS1278EVM-CVAL
- Page 1 ADS1278EVM-CVAL Evaluation Module User's Guide ADS1278EVM-CVAL Evaluation Module Kit This user's guide describes the characteristics, operation, and use of the ADS1278EVM-CVAL kit. This evaluation kit is an evaluation system for the ADS1278-SP, a 24-bit, radiation hardened, 8 channel, delta- sigma analog-to-digital converter (ADC).
-
Page 2: Evm Overview
EVM Overview www.ti.com EVM Overview The ADS1278EVM-CVAL is an evaluation module kit that includes an EVM, MMB0 motherboard, a USB cable, and a barreled power supply cable as shown in ADS1278EVM-CVAL Evaluation Module Kit above. When used with the MMB0 EVM, the ADS1278-SP can be evaluated quickly using software GUI ADCPro™. -
Page 3: Quick Start
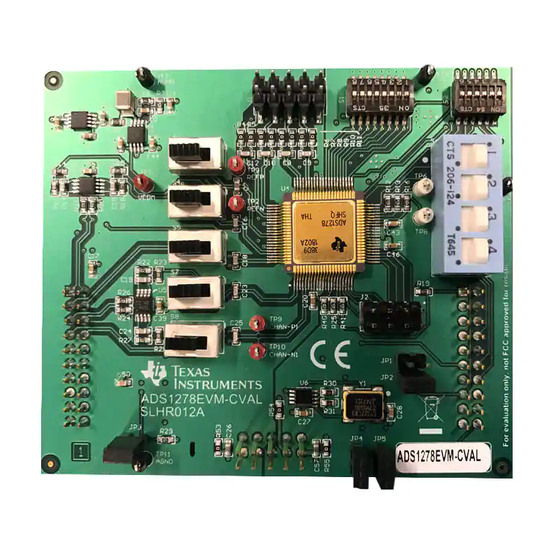
Quick Start www.ti.com Quick Start This section provides a QuickStart guide to quickly begin evaluating the ADS1278EVM-CVAL with ADCPro. Default Jumper/Switch Configuration Figure 1 Table 2 show the factory default jumper positions for the MMB0 motherboard EVM. Figure 1. MMB0 Default Jumper Positions Table 2. - Page 4 Quick Start www.ti.com Figure 2 Table 3 show the factory default jumper and switch positions for the ADS1278EVM-CVAL. Figure 2. ADS1278EVM-CVAL Default Jumper/Switch Positions Table 3 lists the jumpers and switches and the factory default conditions. Table 3. Default Jumper/Switch Configuration...
- Page 5 Figure Figure 3. EVM Setup • Launch ADCPro and then load the ADS1278EVM-CVAL plug-in by clicking on the EVM menu item and selecting ADS1278EVM-CVAL. • Verify that the plug-in loaded correctly by observing that the black box at the top of the plug-in screen reads “Connected to EVM”...
- Page 6 Quick Start www.ti.com Figure 4. Connected to EVM Status To capture Channel 1 waveform configure ADS1278EVM-CVAL PCB as follows and as shown in Figure • Remove jumper JP3, Power down Buffer. • Set switches S8 to right position to enable buffers in analog input signal paths.
- Page 7 On the EVM plug-in GUI, select the SETTINGS tab, set the Operating Mode to High Resolution as shown below, leaving all other settings in the default state. SBAU324 – September 2018 ADS1278EVM-CVAL Evaluation Module User's Guide Submit Documentation Feedback Copyright © 2018, Texas Instruments Incorporated...
- Page 8 In ADCPro, select the Continuous button to begin continuous conversions. Confirm that the signal being applied to Channel 1 is being captured and displayed in the Multichannel Scope window as shown below and that the signal is roughly 1 Vpp-diff. ADS1278EVM-CVAL Evaluation Module User's Guide SBAU324 – September 2018 Submit Documentation Feedback...
- Page 9 Quick Start www.ti.com Figure 8. Multichannel Scope Capture of Analog Channel 1 SBAU324 – September 2018 ADS1278EVM-CVAL Evaluation Module User's Guide Submit Documentation Feedback Copyright © 2018, Texas Instruments Incorporated...
- Page 10 EVM. Analog Inputs The analog inputs for the ADS1278EVM-CVAL are connected to J1 and J3. Channels 1-4 connect to J3 and provisions are provided to buffer these signals before being connected to the converter. Switches S4, S5, S7, and S8 control whether the buffered or unbuffered signal is connected to the ADS1278-SP.
- Page 11 Quick Reference www.ti.com Figure 9. TP2, REFN, and TP3, REFP, Test Points SBAU324 – September 2018 ADS1278EVM-CVAL Evaluation Module User's Guide Submit Documentation Feedback Copyright © 2018, Texas Instruments Incorporated...
- Page 12 Top Level Controls You can adjust the ADS1278EVM-CVAL settings when you are not acquiring data. During acquisition, all controls are disabled and settings may not be changed. The effective data rate of the ADS1278-SP depends upon settings of the Clock Freq and Operating Mode.
-
Page 13: Settings Tab
Using the ADS1278EVM-CVAL Plug-in ADCPro www.ti.com Figure 10. Channel Enable The Master (All) Enable control allows for the selection of channels to convert. Manual Control allows channel enable control via CH1 through CH8 selector switches. All Channels Enabled and All Channels Disabled turn all the selector switches either ON or OFF. - Page 14 Resolution, Low-Power, or Low-Speed. The CLKDIV control can be set to 0 or 1. The Data Output Format allows selection of the data output formats. For the ADS1278EVM-CVAL software, the formats are limited to the Frame-Sync, TDM Format. The available options select whether the software collects data for all channels Fixed Mode or only channels that are powered up Dynamic Mode.
-
Page 15: About Tab
Using the ADS1278EVM-CVAL Plug-in ADCPro www.ti.com Table 5. Operating Modes: Clock Frequency Operating Mode CLKDIV Frequency (MHz) High-Speed 32.768 High-Resolution Low-Power Low-Power 13.5 Low-Speed Low-Speed About Tab The About tab provides information on the EVM hardware and software versions. Plug-in Version is software version of ADCPro plug-in. -
Page 16: Jumpers And Switches
ADS1278EVM-CVAL Hardware Details www.ti.com ADS1278EVM-CVAL Hardware Details The ADS1278EVM-CVAL is designed to easily interface with multiple control platforms. Dual-row, header/socket combinations at J3, J4, and J5 allow connection to external circuitry for evaluation and debug. Jumpers and Switches Jumpers and Switches function shown in Table 6 below. -
Page 17: Clock Source
The ADS1278-SP has several pins to control the power-down of individual channels and select the mode and format for the digital interface. For users of the ADS1278EVM-CVAL as a stand-alone module, these pins may be pulled high or low through DIP switches S1 and S2 (see Table 6). -
Page 18: Digital Interface
– Port P10 of the I C port expander U8 is connected to a logic high level, so that the position of switch S12 can be read back by software. ADS1278EVM-CVAL Evaluation Module User's Guide SBAU324 – September 2018 Submit Documentation Feedback... - Page 19 Otherwise, the propagation delay from the MSB in Frame Sync mode may result in missing the MSB out of the data word. SBAU324 – September 2018 ADS1278EVM-CVAL Evaluation Module User's Guide Submit Documentation Feedback Copyright © 2018, Texas Instruments Incorporated...
- Page 20 • DVDD supply is connected to the +3.3VD pin of the J3 header. The ADS1278-SP analog supply, AVDD, is connected to the +5VA pin of the J5 header. ADS1278EVM-CVAL Evaluation Module User's Guide SBAU324 – September 2018 Submit Documentation Feedback...
-
Page 21: Schematic And Bill Of Materials
Schematic and Bill of Materials www.ti.com Schematic and Bill of Materials This section provides EVM schematics for the ADS1278EVM-CVAL as well as the bill of materials (BOM). Gerber files are available on request. Please e-mail support@ti.com E2E Community Forums and ask for details on how to receive the files. - Page 22 DGND 10uF AGND IOVDD IOVDD_22_23 R53, R54, R55 are available for current monitoring TP7 TP4 TP1 TP11 DGND AGND Figure 12. Schematic01 ADS1278EVM-CVAL Evaluation Module User's Guide SBAU324 – September 2018 Submit Documentation Feedback Copyright © 2018, Texas Instruments Incorporated...
- Page 23 REFP AVDD 0.15µF 10uF OPA2350EA/250 VOUT 1.0k TRIM/NR REFN 0.1uF TEMP 1µF 1µF 10uF 100µF REFN_HDR REF5025AIDGKT AGND REF5025AIDGKT Figure 13. Schematic02 SBAU324 – September 2018 ADS1278EVM-CVAL Evaluation Module User's Guide Submit Documentation Feedback Copyright © 2018, Texas Instruments Incorporated...
- Page 24 AVDD CHAN-P2 AVDD CHAN-P4 0.1uF 0.1uF 0.1uF ANN2 AGND 1500pF AGND 1500pF AGND 1.0k 1.0k ANP3 ANN3 ANN4 ANP4 Figure 14. Schematic03 ADS1278EVM-CVAL Evaluation Module User's Guide SBAU324 – September 2018 Submit Documentation Feedback Copyright © 2018, Texas Instruments Incorporated...
- Page 25 4.3k 0.1uF DGND DGND TCA9535RTWR TCA9535RTWR 0.1uF DGND DGND 24AA256-I/ST IOVDD IOVDD DGND 0.1uF 0.1uF DGND DGND DGND DGND Figure 15. Schematic04 SBAU324 – September 2018 ADS1278EVM-CVAL Evaluation Module User's Guide Submit Documentation Feedback Copyright © 2018, Texas Instruments Incorporated...
-
Page 26: Bill Of Materials
NOTE: All components should be compliant with the European Union Restriction on Use of Hazardous Substances (RoHS) Directive. Some part numbers may be either leaded or RoHS. Verify that purchased components are RoHS-compliant. (For more information about TI's position on RoHS compliance, see the http://www.ti.com.) Table 12. ADS1278EVM-CVAL Bill of Materials Designator Value... - Page 27 Schematic and Bill of Materials www.ti.com Table 12. ADS1278EVM-CVAL Bill of Materials (continued) Designator Value Description Package Reference Part Number Manufacturer R32, R33 100k RES, 100 k, 5%, 0.0625 W, AEC-Q200 Grade 1, Resistor Resistor Array - 8x1 EXB-2HV104JV Panasonic Array - 8x1 10.0k...
- Page 28 ADCPro GUI. Before proceeding, ensure that ADCPro software GUI has been installed per the instructions in ADCPro™ Hardware and Software Installation Manual (SLAU372). 1. From Tool folder for ADS1278EVM-CVAL download the ADS1278EVM-CVAL GUI and unzip file. 2. Right click on installer executable and Run as administrator as shown below: Figure 16.
- Page 29 Appendix A www.ti.com 4. Read the License Agreement and then click I Agree. Figure 18. 5. 5. Click Next. Figure 19. SBAU324 – September 2018 ADS1278EVM-CVAL Plug-in GUI installation Submit Documentation Feedback Copyright © 2018, Texas Instruments Incorporated...
- Page 30 Appendix A www.ti.com 6. Click Install to begin installation of USBStyx Driver. Figure 20. 7. Click Finish. Figure 21. ADS1278EVM-CVAL Plug-in GUI installation SBAU324 – September 2018 Submit Documentation Feedback Copyright © 2018, Texas Instruments Incorporated...
- Page 31 Appendix A www.ti.com 8. Click Finish. Figure 22. SBAU324 – September 2018 ADS1278EVM-CVAL Plug-in GUI installation Submit Documentation Feedback Copyright © 2018, Texas Instruments Incorporated...
- Page 32 TI products. TI’s provision of these resources does not expand or otherwise alter TI’s applicable warranties or warranty disclaimers for TI products. Mailing Address: Texas Instruments, Post Office Box 655303, Dallas, Texas 75265 Copyright © 2018, Texas Instruments Incorporated...
Need help?
Do you have a question about the ADS1278EVM-CVAL and is the answer not in the manual?
Questions and answers