Table of Contents
Advertisement
Quick Links
MANUALE DI ISTRUZIONI PER L'USO E
LA MANUTENZIONE
Istruzioni originali
USE AND MAINTENANCE INSTRUCTIONS
Original instructions
MANUAL D'INSTALLATION,
D'UTILISATION ET D'ENTRETIEN
Instructions originales
INSTALLATION, BEDIENUNG UND WAR-
TUNG
Originalbetriebsanleitung
MANUAL DE INSTRUCCIONES
Manual de instrucciones original
ED. 01/10
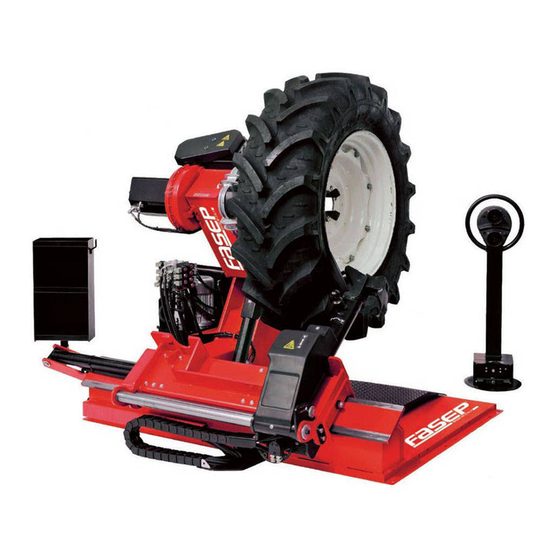
SMONTAGOMME UNIVERSALE
UNIVERSAL TRUCK TYRE CHANGER
DEMONTE-PNEUS UNIVERSEL
UNIVERSELLE LKW-REIFENMONTIERGERÄT
DESMONTADORA DE NEUMATICOS UNIVERSAL
RGU-566
Advertisement
Table of Contents

Subscribe to Our Youtube Channel
Related Manuals for Fasep RGU-566


Summary of Contents for Fasep RGU-566
- Page 1 DESMONTADORA DE NEUMATICOS UNIVERSAL MANUALE DI ISTRUZIONI PER L'USO E LA MANUTENZIONE Istruzioni originali USE AND MAINTENANCE INSTRUCTIONS Original instructions MANUAL D'INSTALLATION, D'UTILISATION ET D'ENTRETIEN Instructions originales INSTALLATION, BEDIENUNG UND WAR- TUNG Originalbetriebsanleitung RGU-566 MANUAL DE INSTRUCCIONES ED. 01/10 Manual de instrucciones original...
- Page 2 DICHIARAZIONE CE DI CONFORMITA' CE DECLARATION OF CONFORMITY DECLARATION DE CONFORMITE CE CE - ÜBEREINSTIMMUNG FASEP 2000 S.r.l. - Via Faentina, 96 - 50030 Ronta (FI) DECLARACION CE DE CONFORMIDAD ITALY Smontagomme universale dichiara sotto la propria esclusiva responsabilità che il prodotto: Universal truck tyre changer declare on our own responsibility that the product:...
- Page 3 DICHIARAZIONE DI CONFORMITA' RoHS FASEP 2000 S.r.l. - Via Faentina, 96 - RoHS DECLARATION OF CONFORMITY 50030 Ronta (FI) ITALY DECLARATION DE CONFORMITE RoHS RoHS - ÜBEREINSTIMMUNG dichiara sotto la propria esclusiva responsabilità che il prodotto: Smontagomme universale declare on our own responsibility that the product: Universal truck tyre changer Déclare sous son propre responsabilité...
- Page 4 DICHIARAZIONE DI CONFORMITA' RAEE FASEP 2000 S.r.l. - Via Faentina, 96 - RAEE DECLARATION OF CONFORMITY 50030 Ronta (FI) ITALY DECLARATION DE CONFORMITE RAEE RAEE - ÜBEREINSTIMMUNG dichiara sotto la propria esclusiva responsabilità che il prodotto: Smontagomme universale declare on our own responsibility that the product: Déclare sous son propre responsabilité que le produit: Universal truck tyre changer erklärt unter ihrer eigenen Verantwortung, daß...
-
Page 5: Table Of Contents
SOMMARIO INDEX SOMMAIRE INHALT INDICE 1 - GENERALITA' 1 - GENERAL INFORMATION 1 - GENERALITES 1 - ALLGEMEINES 1 - GENERALIDADES 2 - CARACTERISTICAS TECNICAS 2 - CARATTERISTICHE TECNICHE 2 - TECHNICAL DATA 2 - CARACTERIST. TECHNIQUES 2 - TECHNISCHE DATEN 3 - NORME DI SICUREZZA 3 - GENERAL SAFETY REGULATION 3 - NORMES DE SECURITE... - Page 6 GENERAL INFORMATION GENERALITA' Questo smontagomme è una macchina realizzata per smontare e This tyre changer has been specifically designed to demount and montare pneumatici di autocarri, autobus e veicoli industriali con mount truck, bus and commercial van tyres, with rims from 14" to cerchi da 14"...
-
Page 7: Generalidades
ALLGEMEINES GENERALITES GENERALIDADES Diese Montiermaschine eignet sich zum Demontieren und Montieren Cette machine a été réalisée pour démonter et monter des pneu- La desmontadora es una máquina realizada para desmontar y montar von LKW-, Bus- und Nutzfahrzeug-Reifen mit Felgen von 14" bis 56" matiques de camions, autobus et de véhicules industriels avec des neumáticos de camión y vehículos industriales con llantas de 14"... - Page 8 DISPOSITIVI DI SICUREZZA SAFETY DEVICES The tyre changer has a number of safety devices designed to guar- Lo smontagomme è dotato di una serie di dispositivi preposti a antee the utmost operator safety: garantire la massima sicurezza per l'operatore : 1.
-
Page 9: Dispositivos De Securidad
DISPOSITIFS DE SECURITE DISPOSITIVOS DE SECURIDAD SICHERHEITSVORRICHTUNGEN Le démonte-pneus est doté d’une série de dispositifs de sécurité Die Reifenmontiermaschine ist mit einer Reihe von Sicherheits- La desmontadora está dotada de una serie de dispositivos pour garantir la sécurité maximale de l’opérateur: vorrichtungen ausgerüstet, die dem Bediener ein Höchstmaß... - Page 10 DISIMBALLO UNPACKING Dopo aver tolto l'imballaggio assicurarsi dell'integrità della macchina Once the packing material has been removed, check the machine controllando che non vi siano parti visibilmente danneggiate. visually for any signs of damage. Gli elementi dell'imballaggio non devono essere lasciati alla portata Keep the packing materials out of the reach of children as they can dei bambini in quanto potenziali fonti di pericolo.
-
Page 11: Desembalaje
AUSPACKEN DESEMBALAJE DEBALLAGE Après avoir enlevé l’emballage s’assurer du bon état de la machine Nach dem Auspacken der Maschine ist zu prüfen, daß sie keine Tras haber desembalado la máquina, asegurarse de la integridad de en vérifiant qu’il n’y a pas de parties visiblement endommagées. sichtbaren Schäden aufweist. - Page 12 Lo smontagomme universale deve essere installato su un pavimento The universal tyre-changer must be installed on a levelled concrete di cemento ben livellato di almeno 20 cm di spessore e di una qualità floor at least 20 cm. thick, with a minimum concrete quality of B25 in minima di cemento pari a B25, secondo le normative accordance with DIN 1045 requirements (foundations).
- Page 13 Le démonte-pneus universel doit être installé sur un sol en béton bien Das universelle Reifenmontiergerät muß auf ebenem Betonboden La desmontadora de ruedas universal debe ser instalada sobre un nivellé d’au moins 20 cm. d’épaisseur et d’une qualité mini. de beton von mindestens 20 cm Stärke und einer Mindestbetongüte von B25 pavimento de cemento bien nivelado, de como minimo 20 cm de de B25, d’après les normes DIN 1045 (fondations).
- Page 14 ALLACCIAMENTO ELETTRICO ELECTRIC HOOK UP Prima di effettuare qualsiasi collegamento elettrico controllare at- Before making any electric hook up, check to be certain that the mains tentamente che la tensione di rete corrisponda con quanto riportato voltage corresponds to that stamped on the voltage tag (attached to sul cartellino voltaggio (posizionato in prossimità...
-
Page 15: Conexión Eléctrica
ELEKTRISCHER ANSCHLUSS CONEXION ELECTRICA RACCORDEMENT ELECTRIQUE Antes de efectuar cualquier conexión eléctrica controlar atentamente Bevor irgendein elektrischer Anschluß vorgenommen wird, ist sicher- Avant d’effectuer tout raccordement électrique contrôlez attentive- que la tensión de red corresponda a la referida en la etiqueta de ment que la tension du réseau d’alimentation correspond à... - Page 16 RAPPRESENTAZIONE DELLE PARTI FUNZIO- NALI 1 - Staffa di sollevamento 2 - Braccio porta autocentrante 3 - Autocentrante 4 - Pedana 5 - Interruttore a levetta 8 - Manipolatore carrello 9 - Interruttore a levetta braccio utensile 10 - Pedale a bilanciere 11 - Manipolatore carrello utensile 13 - Carrello 14 - Braccio porta utensile...
- Page 17 REPRESENTACION REPRESENTATION DARSTELLUNG DER LAYOUT OF FUN- DE LAS PARTES DES PIECES FON- WICHTIGSTEN MA- CTIONAL PARTS FUNCTIONALES CTIONNELLES SCHINENTEILE 1 - Hebebügel 1 - Anneau de levage 1 - Lifting bracket 1 - Brida de elevación 2 - Spannfuttertragearm 2 - Self-centering chuck holding arm 2 - Bras porte-mandrin autocentrant 2 - Brazo porta-autocentrante...
- Page 18 IDENTIFICAZIONE SEGNALI DI PERICOLO 3000961 3005423 3005421 3006038 3008614 ATTENZIONE: Nel caso le targhette di pericolo risultino illeggibili o siano sta- te rimosse, sostituirle immediatamen- 3005419 te. Non utilizzare lo smontagomme se mancante di una o più targhette di pericolo. 3014772 Non interporre oggetti che ne ostrui- 3008615...
- Page 19 IDENTIFICATION KENNZEICHNUNG IDENTIFYING WAR- IDENTIFICACION DE DES SIGNAUX DE DER WARNSIGNALE SEÑALES DE PELIGRO NING SIGNALS DANGER WARNING: ATTENTION: ATENCION ! ACHTUNG: Unreadable and missing Si les plaques signaléti- En caso de que las tarje- Unleserlich gewordene warning labels must be replaced im- ques de danger sont peu lisibles ou si tas de peligro resulten ilegibles o oder entfernte Warnschilder müssen...
- Page 20 CONTROLS DESCRIPTION IDENTIFICAZIONE COMANDI La colonnetta mobile porta comandi (fig. C) consente all'operatore di The mobile control unit (C) enables the operator choosing the most scegliere la posizione di lavoro di volta in volta più conveniente. Su suitable work position time by time. In this control unit all controls questa colonnetta sono concentrati tutti i comandi;...
-
Page 21: Idendificacion De Comandos
BESCHREIBUNG DER STEUERUNGEN DESCRIPTION DES COMMANDES IDENTIFICACION DE COMANDOS La columna móvil de mandos (fig. C) permite al operador escoger La console mobile de commande (C) permet à l’opérateur de Das bewegliche Steuerpult (C) ermöglicht den Bediener, die cada vez la posición de trabajo mas conveniente. En esta choisir la position de travail de fois en fois la plus convenable. - Page 22 Agire quindi, prima di tutto, sul manipolatore (11, Fig. D) per ribaltare Act first on joystick (11, Fig. C) to tilt the arm to this position. il braccio in questa posizione. ATTENZIONE! CAUTION! Non tenere il viso vicino al braccio porta Do not move your face close to the tool utensili mentre lo si "sgancia"...
- Page 23 Actionner d’abord le manipulateur (11, Fig. C) pour basculer le der Werkzeugtragearm in der Position "außer Betrieb" stehen. Actuar por tanto, en primer lugar, sobre el manipulador (11, fig. D) Den Steuergriff (11, Abb. C) zuerst betätigen, um den Arm in diese bras dans cette position.
- Page 24 4) Verificare il buon funzionamento del circuito oleodinamico: 4) Check to be certain the hydraulic circuit is working correctly: - azionare l'interruttore (5, Fig. C) verso l'alto fino a che i bracci - move switch lever (5, Fig. C) towards the top until the spindle arms dell'autocentrante non siano completamente aperti.
-
Page 25: Utilizacion
4) Vérifier le bon fonctionnement du circuit hydrodynamique: 4) Den ordnungsgemäßen Betrieb des hydraulischen Kreislaufs 4) Verificar el correcto funcionamiento del circuito hidráulico: actionner l’interrupteur (5, Fig. C) vers le haut jusqu’à l’ouverture prüfen: - Accionar el interruptor (5, Fig. C) hacia arriba hasta que los brazos totale des bras du mandrin. - Page 26 che va scelta in base al tipo di cerchio, come esemplificato nelle The most convenient locking position on the rim may be selected figure E/1-E/2-E/3-E/4-E/5-E/6. according to figs E/1 - E/2 - E/3 - E/4 - E/5 and E/6. Si ricorda comunque che il bloccaggio sulla flangia centrale è da Always remember that the safest locking is on the central flange.
-
Page 27: Ruedas Tubeless Y Supersingle
au type de jante (voir les figures E/1 - E/2 - E/3 - E/4 - E/5 - E/6). betätigen, um das Spannfutter zu öffnen und die Felge von innen in niente en base al tipo de llanta, como muestran los ejemplos de las der günstigsten Position aufzuspannen, die aufgrund des Felgentyps Sachez que le blocage sur le plateau central est toujours plus sûr. - Page 28 4) Agendo sul manipolatore posizionare la ruota in modo che il profilo 4) Operating from the mobile control centre, manoeuvre the wheel esterno del cerchio sfiori il disco stallonatore (fig.F). until the outside of the rim skims the bead-breaker disk (fig. F). ATTENZIONE! DANGER! Il disco stallonatore non deve fare pressione sul...
- Page 29 4) A l’aide du manipulateur placer la roue de manière à ce que le bord 4) Den Steuergriff betätigen, um das Rad so anzuordnen, daß das 4) Accionando el manipulador posicionar la rueda de forma que el extérieur de la jante effleure le disque détalonneur (fig. F). Außenprofil der Felge gerade die Abdrückscheibe berührt (Abb.
- Page 30 SMONTAGGIO DEMOUNTING Lo smontaggio di pneumatici tubeless può avvenire in due modi: Tubeless tyres can be demounted in two ways: 1) Se la ruota non presenta difficoltà di smontaggio proseguire, dopo la stallonatura, spingendo con il disco 1) If the tyre is not difficult to demount, once the beads have been stallontore sul fianco interno del pneumatico fino a far uscire i due loosened, use the bead disk to push against the inside plane of the talloni dal cerchio (vedi fig.
- Page 31 DEMONTAGE DEMONTAGE DESMONTAJE Le démontage de pneumatique tubeless peut être réalisé de deux El desmontaje de los neumáticos tubeless puede efectuarse de dos Die Demontage von schlauchlosen Reifen ist auf zwei Weisen manières: möglich: modos: 1) Wen das Rad keine Schwierigkeiten hinsichtlich der Demontage 1) Si la rueda no presenta dificultades de desmontaje proseguir como 1) Si la roue ne présente pas de difficultés de démontage, continuer se indica a continuación: Tras el destalonado, oprimiendo con el disco...
- Page 32 Portarsi con la colonnetta mobile in posizione di Take the mobile control unit to work position B. lavoro B. - Traslare l'utensile a becco in modo da portare il suo punto rosso di -Move the hook tool so that its red reference dot is about 3 cm inside riferimento circa 3 cm.
- Page 33 Den beweglichen Ständer in die Arbeitsposition B Colocarse con la columna de mandos en la posición Se placer dans la position de travail B avec la colon- nette mobile de commande. bringen. de trabajo B. - Déplacer l’outil de manière à mettre son point rouge de repère à - Das Hakenwerkzeug so verfahren, bis daß...
- Page 34 Portarsi con la colonnetta mobile in posizione di Take the mobile control unit to work position C. lavoro C. 6) Posizionare il disco stallonatore contro il secondo tallone del 6) Position the bead loosener disk against the second bead of the pneumatico e ruotare l'autocentrante fino a portare la pinza nel punto tyre and turn the spindle until the clip is at the low point (at 6 o’clock).
- Page 35 Se placer dans la position de travail C avec la colon- Den beweglichen Ständer in die Arbeitsposition C Colocarse con la columna de mandos en la posición nette mobile de commande. bringen. de trabajo C. 6) Placer le disque détalonneur contre le deuxième talon du pneu- 6) Die Abdrückscheibe gegen den zweiten Wulst des Reifens bringen 6) Posicionar el disco destalonador contra el segundo talón del neu- matique et tourner le mandrin en plaçant la pince dans le point le...
- Page 36 MONTAGGIO CON UTENSILE A BECCO MOUNTING WITH THE HOOKED TOOL 1) Follow the steps described in points 1,2,3,4,5 for mounting with 1) Procedere come descritto ai punti 1,2,3,4,5 del montaggio con the disk. disco stallonatore. 2) Move the tool carrier arm to its non-working position. Move it to the 2) Portare il braccio portautensili in posizione di fuori lavoro;...
- Page 37 MONTAGE AVEC L’OUTIL A DOIGT MONTAGE MIT DEM HAKENWERKZEUG MONTAJE CON UTIL DE UNA 1) Procéder comme décrit aux points 1, 2, 3, 4, 5 du montage avec 1) Vorgehen, wie unter Punkt 1,2,3,4,5 der Montage mit der Abdrück- 1) Proceder como se ha descrito en los puntos 1, 2, 3, 4, 5 del montaje le disque détalonneur.
- Page 38 RUOTE CON CAMERA D'ARIA TUBED WHEELS 13.3 13.3 STALLONATURA BEAD BREAKING ATTENZIONE: Quando si sgonfia la ruota è necessario svitare la WARNING: Unscrew the bush which fixes the valve when deflating ghiera che fissa la valvola in modo che, quest'ultima, rientrando the tyre so that the valve, coming in the inside of the rim, is not an all'interno del cerchio, non costituisca ostacolo durante la stallonatura.
-
Page 39: Ruedas Con Cámara De Aire
ROUES AVEC CHAMBRE A AIR RADER MIT SCHLAUCH RUEDAS CON CAMARA DE AIRE 13.3 13.3 13.3 DETALONNAGE ABDRUCKEN DESTALONADO ATTENTION: Lors du gonflage de la roue il faut dévisser la bague ACHTUNG: Wenn man die Luft auf dem Rad abläßt, muß man die Nut- ATENCION: Cuándo se deshincha la rueda es necesario desmontar qui fixe la valve pour que cette dernière, en rentrant à... - Page 40 Portarsi con la colonnetta mobile in posizione di Take the mobile control unit to work position D. lavoro D. 10) Traslare il braccio portautensile sul lato interno della ruota, ruotare 10) Move the tool carrier arm to the inside plane of the tyre, turn the l'utensile di 180°...
- Page 41 Se placer dans la position de travail D avec la colon- Den beweglichen Ständer in die Arbeitsposition D Colocarse con la columna de mandos en la posición nette mobile de commande. bringen. de trabajo D. 10) Placer le bras porte-outil sur le côté interne de la roue, tourner 10) Den Werkzeugtragearm auf die Radinnenseite verfahren, das 10) Trasladar el brazo porta-útiles al lado interior de la cubierta.
- Page 42 5) Sollevare il cerchio con il pneumatico agganciato e ruotarlo in 5) Lift the rim with the tyre hook to it and turn it anticlockwise about senso antiorario di 15-20 cm. Il pneumatico si posizionerà in modo 15-20 cm. The tyre will be positioned tilted across the rim. obliquo rispetto al cerchio.
- Page 43 5) Soulever la jante avec le pneumatique accroché et le tourner dans le 5) Levantar la llanta con el neumático enganchado y girar el autocen- 5) Die Felge mit dem angehakten Reifen heben und 15-20 cm im sens inverse aux aiguilles d’une montre de 15-20 cm. Le pneumatique trante en sentido antihorário 15-20 cm.
- Page 44 16) Turn the spindle until the valve is at the bottom (6 o’clock). 16) Ruotare l'autocentrante fino a portare la valvola in basso (ad 17) Inflate the inner tube a little (until it has no folds) so as not to pinch ore 6).
- Page 45 16) Girar el autocentrante hasta colocar la válvula en la parte inferior 16) Tourner le mandrin pour placer la vanne en bas (à 6 heures). 16) Das Spannfutter verdrehen, bis das Ventil ganz unten (in der 17) Gonfler légèrement la chambre à air (jusqu’à ce qu’il n’y ait plus de 6-Uhr-Stellung) steht.
- Page 46 30) Traslare la pedana in modo da liberare la ruota dall'autocentrante. 30) Move the platform to release the wheel from the spindle. 31) Rimuovere la ruota. 31) Remove the wheel. WHEELS WITH SPLIT RING RUOTE CON CERCHIETTO 13.4 13.4 STALLONATURA E SMONTAGGIO BEAD BREAKING AND DEMOUNTING RUOTE CON CERCHIETTO A 3 PEZZI WHEELS WITH 3-PIECE RINGS...
-
Page 47: Ruedas Con Arillo
30) Déplacer la plate-forme de manière à libérer la roue du mandrin. 30) Die Plattform muß so verfahren werden, daß das Rad vom Span- 30) Trasladar la peana de forma que la rueda libre el autocentrante 31) Enlever la roue. nfutter befreit wird. - Page 48 Portarsi con la colonnetta mobile in posizione di Take the mobile control unit to work position B. lavoro B. 14) Traslare verso l'esterno la pedana fino alla completa uscita 14) Move the platform towards the outside until the tyre is completely del pneumatico dal cerchio avendo cura di seguire la valvola nella off the rim.
- Page 49 Se placer dans la position de travail B avec la colon- Colocarse con la columna de mandos en la posición Den beweglichen Ständer in die Arbeitsposition B nette mobile de commande. de trabajo B. bringen. 14) Déplacer la plate-forme vers l’extérieur pour sortir complètement 14) Die Plattform nach außen verfahren, bis der Reifen sich ganz von 14) Trasladar hacia el exterior la peana hasta la completa extracción le pneumatique de la jante en faisant attention à...
- Page 50 12) Abbassare l'autocentrante fino a che il pneumatico non appoggi 12) Lower the spindle until the wheel is resting on the platform. sulla pedana. 13) Move the platform towards the outside until the tyre together with 13) Traslare la pedana verso l'esterno fino a sfilare il pneumatico (con the split ring comes completely off the rim.
- Page 51 12) Abaisser le mandrin pour appuyer le pneumatique sur la plate-forme. 12) Das Spannfutter senken, bis der Reifen auf der Plattform steht. 12) Bajar el autocentrante hasta que el neumático descanse sobre 13) Déplacer la plate-forme vers l’extérieur pour sortir complètement le 13) Die Plattform nach außen verfahren, bis der Reifen (mit dem la peana.
- Page 52 Portarsi con la colonnetta mobile in posizione di Take the mobile control unit to work position B. lavoro B. 3) Traslare la pedana mobile all'esterno in modo da poter farvi salire 3) Move the platform to be able to place the tyre on it. sopra il pneumatico.
- Page 53 Se placer dans la position de travail B avec la colon- Den beweglichen Ständer in die Arbeitsposition B Colocarse con la columna de mandos en la posición nette mobile de commande. bringen. de trabajo B. 3) Déplacer la plate-forme mobile vers l’extérieur pour y faire monter 3) Die bewegliche Plattform nach außen fahren, damit man den 3) Trasladar la peana móvil al exterior para poner encima de la rueda.
- Page 54 Portarsi con la colonnetta mobile in posizione di Take the mobile control unit to work position B. lavoro B. 3) Traslare la pedana mobile all'esterno in modo da poter farvi salire 3) Move the platform to be able to place the tyre on it. sopra il pneumatico.
- Page 55 Se placer dans la position de travail B avec la colon- Den beweglichen Ständer in die Arbeitsposition B Colocarse con la columna de mandos en la posición nette mobile de commande. bringen. de trabajo B. 3) Déplacer la plate-forme mobile vers l’extérieur pour y faire monter 3) Die bewegliche Plattform nach außen fahren, damit man den 3) Trasladar la peana móvil al exterior para poner encima de ella le pneumatique.
- Page 56 DANGER!! ATTENZIONE! Do not inflate the tyre with the wheel mounted on the Non gonfiare il pneumatico con la ruota ancora montata sull'autocentrante. spindle. Il gonfiaggio di pneumatici può essere pericoloso, perciò Tyre inflation is dangerous and should only deve essere effettuato togliendo la be done by removing the wheel from the ruota dall ‘autocentrante e introducendola spindle and placing it inside a safety...
-
Page 57: Mantenimiento Ordinario
ATTENTION! ACHTUNG! Den Reifen nicht aufpumpen, wenn das Rad ATENCION! Ne pas gonfler la roue quand elle est sur le mandrin. noch auf dem Spannfutter montiert ist. No inflar la rueda estando montada en el Le gonflage des pneumatiques peut être dangereux, il doit Das Aufpumpen von Reifen kann gefährlich sein. - Page 58 WARNING! ATTENZIONE! Dispose of the used oil following the Smaltire l'olio usato secondo le leggi present legislation on the matter. vigenti. INCONVENIENTI / CAUSE / RIMEDI TROUBLE SHOOTING Al raggiungimento dei 5 anni dalla data di installazione e messa in servizio, il prodotto dovrà essere revisionato in Azionando l'interruttore generale posto, sulla centralina After having switched the general button on the electric tutte le sue parti...
- Page 59 ATTENTION! ACHTUNG: Zur Altölentsorgung die ATENCION! Eliminer l’huile usagée conformément aux geltenden gesetzlichen Bestimmungen Deshacerse del aceite usado según las leyes lois en vigueur. beachten. vigentes INCONVENIENTS / CAUSES /REMEDES FEHLERSUCHE PROBLEMAS / CAUSAS / REMEDIOS En actionnant l’interrupteur général de la centrale électri- Beim Betätigen des Hauptschalters auf der elektrischen Accionando el interruptor general colocado en la centra- que le témoin général reste éteint et aucune commande...
- Page 60 MOVIMENTAZIONE MOVING THE MACHINE Lo smontagomme dispone di una staffa (1, Fig. A) appositamente sistemata The tyre changer has got a fork (1, Fig. A) which has been positionned per effettuare la movimentazione della macchina. there on purpose for moving the machine. Procedere nel modo seguente: Follow these instructions: 1) Abbassare completamente il braccio porta autocentrante (2, Fig.
-
Page 61: Almacenado
TRASLADO MANUTENTION BEWENGEN DER MASCHINE Le démonte-pneus dispose d’un anneau (1, Fig. A) prévu pour effec- La desmontadora dispone de un estribo (1, Fig. A) específicatamente Die Reifenmontiermaschine ist mit einem Bügel (1, Abb. A) ausgestat- tuer la manutention de la machine. sistemado para efectuar el movimiento de la máquina. - Page 62 Essendo considerato un rifiuto speciale smontare l'apparecchio in These units are considered as special waste material, and should be parti omogenee e smaltire secondo le leggi vigenti. broken down into uniform parts and disposed of in compliance with Riporre i materiali dell'imballo negli appositi luoghi di raccolta se current laws and regulations.
-
Page 63: Datos De Matricula
L’appareil est considéré un déchet particulier par conséquent il faut Da die Maschine als Sondermüll zu betrachten ist, muß sie in sorten- Siendo considerado un residuo especial desmontar el aparato en le démonter en parties homogènes et le mettre à la décharge con- reine Teile zerlegt und gemäß... - Page 64 SCHEMA ELETTRICO - SCHEMA ELECTRIQUE - ELECTRIC DIAGRAM - SCHALTPLAN...
- Page 65 SCHEMA ELETTRICO - SCHEMA ELECTRIQUE - ELECTRIC DIAGRAM - SCHALTPLAN...
- Page 66 SCHEMA ELETTRICO - SCHEMA ELECTRIQUE - ELECTRIC DIAGRAM - SCHALTPLAN...
- Page 67 SCHEMA IDRAULICO - SCHEMA HYDRAULIQUE - HYDRAULIC DIAGRAM - HYDRAULIKPLAN...
- Page 68 FASEP 2000 srl Via Faentina, 96 - 50030 RONTA (FI) - ITALY Tel. +39. 055. 8403126 - Fax. +39. 055. 8403354 E-mail: info@fasep.it Cod. 3010008 http://www.fasep.it...
Need help?
Do you have a question about the RGU-566 and is the answer not in the manual?
Questions and answers