
Subscribe to Our Youtube Channel
Related Manuals for Labnet C0226R


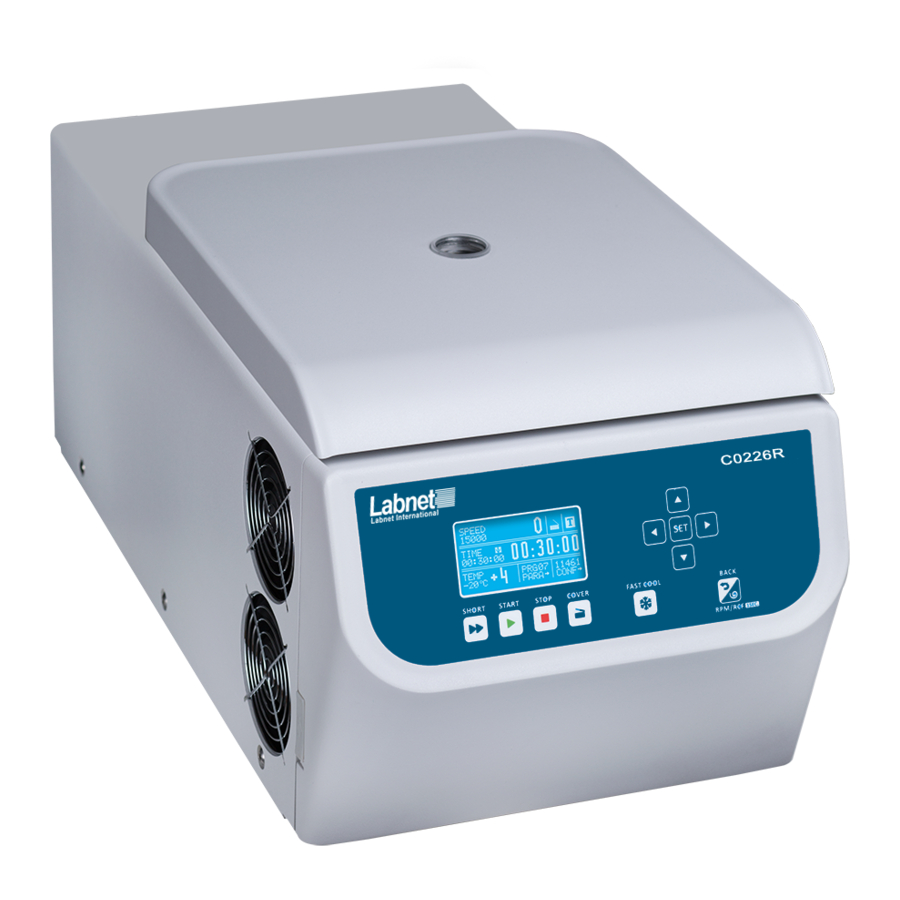
Summary of Contents for Labnet C0226R
- Page 1 High Performance Refrigerated Centrifuge User Manual C0226R Read it before use! © 2018 Corning Incorporated...
- Page 2 DANGER Risk of explosion with potential for severe injury or death as a consequence. This manual was prepared with special care. LABNET INTERNATIONAL may change the manual at any time and without notice. Changes will be incorporated in later editions of user manual.
- Page 3 This manual is designed to assist you in the optimal usage of your Labnet Refrigerated Laboratory Centrifuge. The manual is available in English, French, German, Italian, Portuguese, and Spanish on our website at: www.labnetinternational.com © 2018 Corning Incorporated...
-
Page 4: Table Of Contents
Contents 1 APPLICATION ............................6 2 TECHNICAL SPECIFICATION ........................7 3 INSTALLATION ............................8 ..........................8 ONTENT OF PACKAGE ............................8 OCATION ..........................9 URRENT PROTECTION 4 SAFETY OF OPERATION ........................10 ......................... 10 PERATING PERSONNEL ............................10 UARANTEE ........................10 RRANGEMENT OF TUBES ............................ - Page 5 – ................ 33 CCELERATION DECELERATION CHARACTERISTICS CHOOSING ............................. 33 ADIUS ............................33 ENSITY .......................... 34 EMPERATURE OFFSET ........................35 HERMAL HAMBER DELAY ) ........35 HERMAL CHAMBER ONSTANT TEMPERATURE IN CHAMBER WITHOUT CENTRIFUGING ........................... 36 UTOMATIC LID OPEN ......................... 36 TART DELAY OF TIME –...
-
Page 6: Application
1 Application The Labnet C0226R centrifuge is a high performance refrigerated table top laboratory centrifuge. This device is used for separation samples taken from people, animal and plant components of different densities, under the influence of the centrifugal force, to provide information about their biological. -
Page 7: Technical Specification
2 Technical specification Corning Incorporated Manufacturer 271 County Route 64, Big Flats, NY 14814 Type Labnet – C0226R 230V 120V Mains voltage (L1+N+PE) ±10% ±5% Frequency, ±1% 50 Hz 60Hz Power consumption (max) 500W 500W Current protection T 6,3A T 10A... -
Page 8: Installation
Open the package. Take out the box containing the accessories. Take out centrifuge from the container. Keep the box and packing materials in case of service shipping. Content of package name Centrifuge Labnet C0226R Complete clamp Spanner for a rotor Key for emergency lock release... -
Page 9: Current Protection
Do not position the centrifuge so that it is difficult to operate the power switch Supply voltage given on the rating plate has to be consistent with local supply voltage. LABNET INTERNATIONAL laboratory centrifuges are 1st safety class devices and they are provided with the three-core cable with the plug resistant to dynamic loadings. -
Page 10: Safety Of Operation
4 Safety of operation Operating personnel Laboratory centrifuge can be operated by laboratory personnel after getting acquainted with user manual. User manual shall be always held near the centrifuge. The centrifuge can not be misused. If the centrifuge is used in a manner not specified by the manufacturer, the protection provided by the device may be impaired. -
Page 11: Safety Hints
(to ensure vacuum), use high vacuum grease. HAZARDOUS MATERIALS LABNET accessories are not biotight. For centrifuging infectious materials it is necessary to use hermetically closed tubes meeting demands of biotightness, in order to prevent germs migration into the centrifuge and beyond it. -
Page 12: Maintenance Conditions
GENERAL HINTS One must use original rotors, test-tubes and spare parts only. In case of faulty operation of the centrifuge one shall ask for assistance service LABNET INTERNATIONAL/Corning authorized representatives. NEVER switch the centrifuge on if it is not installed properly or rotor is not fitted correctly. -
Page 13: Safety Precautions
Safety precautions For safety reasons, inspections of the centrifuge carried out by the authorized service at least once a year after the period of warranty. The reason for more frequent inspections could be corrosion inducing environment. Examinations should end with issuing report of validation that checks on the technical state of the laboratory centrifuge. -
Page 14: Residual Risk
ROTORS NEVER use the rotors and round carriers with signs of corrosion or other mechanical defects. NEVER centrifuge highly corrosive substances which may cause material impairment and lower mechanical properties of rotor and round carriers. NEVER use rotors and accessories specified by the manufacturer. You must use commercial glass and plastic test tubes, which are destined to centrifuging in this laboratory centrifuge. -
Page 15: Operating
5 Operating 5.1. Centrifuge description New generation of LABNET INTERNATIONAL laboratory centrifuges is provided with state-of- the-art microprocessor control systems, very durable and quiet asynchronous brushless motors and accessories consistent with requirements of the present-day user. 5.2. Centrifuge overview Fig.1. Right side of centrifuge 1. -
Page 16: Construction
Construction The centrifuge has a rigid self-supporting structure. Housing is made of sheet aluminium, back made of steel sheet. Front and cover was made of ABS. Cover is fixed on steel axles of hinges and from the front it is locked with electric lock blocking possible opening during centrifugation. The rotation chamber bowl is made of stainless steel sheet. - Page 17 In case of rotors designed with the cover they must not be used without it. Rotor covers must be closed exactly. Rotor covers ensure smaller drags of the rotors, proper setting of the test-tubes and airtight sealing. One should use only buckets intended for selected types of the rotor. Fill test tubes outside the centrifuge.
-
Page 18: Control Device
In order to prolong lifetime of the rotor and gaskets rotors shall be lubricated with the maintenance oil, while gaskets and threaded parts shall be lubricated with the petroleum jelly. For replacement of the rotor one shall unscrew clamping and then grab the rotor with both hands at opposite sides, taking it away from drive shaft by pulling it up. -
Page 19: Centrifugation
6 Centrifugation Power switching ON/OFF is carried out with master switch situated on the right-side wall of the centrifuge. All settings on the centrifuge are done by means of the control panel. Control panel The control panel placed on the front casing serves the purpose of controlling centrifuge operation. -
Page 20: Display
Display The display is located in the centre of the control panel. The main screen variants are presented below. After switching on centrifuge, welcome screen appears. After the welcome screen disappears it is possible to setting up parameters. Simplified display mode is set as default, there is possible to switch to normal (see chapter 9.3) display mode (with two sub modes shown below). - Page 21 Display Symbols changing values density > 1,2 g/cm centrifuging radius changed counting time down (decreasing) counting time up (increasing) centrifuging centrifuging (with automatic cover opening) rotor stopped / closed cover rotor stopped / opened lid braking fastest decelerating rotor identification thermal chamber temperature delay time delay...
-
Page 22: Setting Up Rpm, Rcf, Time, Temperature
Setting up RPM, RCF, time, temperature On the main screen, it is possible to set: rotating speed - RPM SPEED relative centrifugal force (multiple of g-force) centrifuging time TIME centrifuging temperature TEMP Exemplary change of SPEED setting: Press SET (to enter edit mode) – appears. - Page 23 Switching between SPEED and RCF. On the screen appear an additional window, in which: keys mark field . Press SET. Change of screen mode will be active to switch off the centrifuge Switching between basic and simplified screens is described in 9.3 Main screen modes. Exemplary change of TIME setting: Press SET (to enter edit mode) - appears.
-
Page 24: Users Programs
HOLD mode continuous run mode To run centrifuging in HOLD mode set 00:00:00 time. To end centrifuging in HOLD mode press STOP. Exemplary change of TEMP setting: Press SET (to enter edit mode) – appears. keys mark TEMP field (highlited). Press SET key. - Page 25 Normal display mode Press SET key – appears. keys mark PRG– – field (highlited) Press SET key – list of programs is visible. choose demanded program. Confirm with SET key. LOAD, SAVE, DELETE, NEW PROGRAM refer choosen program which is highlighted. SAVE –...
-
Page 26: Rotor Choosing
Creating a new program: Press SET key. keys mark PRG field (highlighted).) Press SET key. List of programs is visible. Press SET key- menu of program settings will appear. Choose NEW PROGRAM, and then press demanded parameters of centrifuging (look chapter 6. Centrifugation). Changing parameters during centrifuging There is a possibility to change parameters: SPEED, RCF, TIME, TEMP during centrifuging. -
Page 27: Short Mode
Normal display mode Press SET– appears. mark rotor choosing field. Press SET (Rotor list will appear). keys mark demanded rotor number Confirm by press SET. Press BACK. With keys one may switch between screens of rotors parameters It is possible to set AUTOMATIC ROTOR IDENTIFICATION. The procedure is described in subsection 9.8. -
Page 28: Finishing The Centrifuging
Finishing the centrifuging ENDING CENTRIFUGING When preselected time is reached, centrifugation will end automatically. Before lapse preselected time one may stop centrifugation. Pressing STOP for the first time will stop centrifuging with the charasteristic set in loaded program. Confirm message by pressing any key (except COVER). Pressing STOP second time will stop centrifuging with the fastest characteristic. -
Page 29: Temperature Control
7 Temperature control Centrifuge is equipped with ecological refrigerating system with temperature control. During centrifugation, there may appear differences in temperature on the display and temperature of the samples in the rotor. It depends on thermal conductivity of the rotor, and samples, centrifugation time, initial temperature of rotor and samples Exemplary change of TEMP setting: Press SET (to enter edit mode) –... -
Page 30: Initial Cooling Without Centrifuging - Thermal Chamber
FAST COOL mode is marked by symbol blinking in the right upper side of display. ATTENTION -to use FASTCOOL mode set temperature must be lower than current temperature shown by centrifuge. When set temperature is higher, ! symbol is visible and accoustic signal is emmited. -
Page 31: Cooling In „Short" Mode
Centrifugation/SHORT mode. Cooling notes Labnet 226R centrifuge is equipped with an efficient cooling system. It allows obtaining selected temperatures in the chamber even at maximum spin speed or fast obtaining desired temperatures (e.g. 4 C). Note that time and possibility of obtaining a set temperature is dependent on multiple factors, including: the power of the cooling system, the shape of the rotor, the rotor speed, ambient temperature, etc. -
Page 32: Parameters Of Centrifugation
8 Parameters of centrifugation Simplified display mode Press and hold by 1 second. Choose PARAM with Press SET. Execute points descripted follow (below Normal display mode description) Normal display mode Press SET– appears. With keys mark PARA field Press SET. It is possible to switch between two different screens via keys in PARA field ACCELERATION... -
Page 33: Acceleration/Deceleration - Characteristics Choosing
Acceleration/deceleration – characteristics choosing ACCELERATION – linear accelerating characteristics assigned to every rotor (0 - 9) DECELERATION – linear decelerating characteristics assigned to every rotor (0 - 9). 0-the fastest possible acceleration/deceleration, 9-the slowest possible acceleration/deceleration. Radius RADIUS [mm] - control of the radius of the rotor within the range from R to R Available values depends on chosen rotor,... -
Page 34: Temperature Offset
When density is changed, symbol is visible on the screen. Increasing density of the sample above 1,2 g/cm (and limiting of the maximum speed of centrifuging resulting from it) applies until switching off power supply of the centrifuge or setting the device back to 1,2 g/cm Increasing the density reduces the maximum speed of the rotor. -
Page 35: Thermal Chamber Delay
Thermal Chamber delay With keys choose CHAMBER DEL. Press SET - appears. With keys select time value. Set demanded value by pressing Press SET. Press BACK. Thermal chamber (Constant temperature in chamber without centrifuging) keys choose THERM. CHAMB. Press SET (to switch off/on). keys mark value of temperature. -
Page 36: Automatic Lid Open
Automatic lid open Automatic lid open OPEN LID AFTER RUN keys choose AUTOM. LID OPENING. Press SET (to switch off/on). When centrifuge process is finished, cover will be opened automatically. When centrifuging is terminated by pressing STOP, opening cover is possible by pressing COVER. -
Page 37: Start Delay - Of Temperature
START DELAY / OF TIME function cannot be run when START DELAY / OF TEMP. is activated. Start delay – of temperature Start centrifuging since preselected START DELAY / OF TEMP delay is reached. keys select START DELAY. Press SET. keys select OF TEMP. -
Page 38: Screen Messages
Screen messages End of centrifuging – manual mode Centrifuging may be stopped at any moment via the STOP key. The information message: CYCLE CANCELLED will be displayed. End of centrifuging – manual mode Stopping centrifuging in accordance the set time causes generating multi-tone audible signals (after stopping the rotor) and displaying the message FINISH OF CENTRIFUGING... - Page 39 The rotor is automatically updated (when auto-identification is enabled). Rotor is braking (only when centrifuge was switched off during rotor running). After pressing the SET or STOP key, the device returns to the main screen. © 2018 Corning Incorporated...
- Page 40 Screen messages that may occur during operation. MESSAGE EXPLANATION "SPEED OF ROTOR" SPEED OF ROTOR IDENTIFICATION <> 90 RPM "IDENTIFICATION <> 90 RPM" "IMBALANCE FAST STOP!" UNBALANCE DETECTED "PLEASE REMOVE CAUSE" "THEN RESTART" "NO ROTOR OR IDENTIFICATION" ERROR OF ROTOR IDENTIFICATION {LIMIT OF 6SEC. IS OVER} "SENSOR DAMAGED!"...
-
Page 41: Unbalance
Unbalance The centrifuge is provided with the rotor unbalance sensor and when it will be activated, centrifugation process will be stopped through fast braking and at the same time an error message will be displayed. Cancellation of this error is possible only through pressing COVER key after stopping of the rotor. -
Page 42: Menu
9 MENU Simplified display mode Press and hold by 1 second. Choose PARAM with Press SET. Execute points descripted follow (below Normal display mode description) Normal display mode Press SET – appears. With keys select MENU (highlighted). Press SET. Moving in the MENU is possible via keys. -
Page 43: Screen Saver
Screen saver Setting time of screen saver MENU / CONFIGURATION / SCREEN MODE With keys select SCREENSAVER. Press SET. With keys choose (highlighted). Press SET- appears. With keys select demanded value from 1 to 60 minutes. Mark selection by pressing SET. Leave the menu by pressing BACK. - Page 44 9.3.1 Switching the normal display to simplified screen Method I SET – appears. Press keys select MENU. Press SET. keys select CONFIGURATION tab. Press SET. keys select SIMPLIFIELD DISPLAY. Press SET. Leave menu via BACK key. Method II Press the BACK button for 1 sec. to return to the basic display (a short menu is displayed on the screen), then: keys select SIMPLIFIED DISPLAY.
-
Page 45: Rotating Time
keys select DISPLAY tab. Press SET. (a new selection window is displayed on the screen) keys select NORMAL DISPLAY tab. Press SET. Rotating time MENU/CONFIGURATION/ ROTATING RUNTIME The method of counting time centrifuging choose demanded option. Mark it by pressing SET. Leave menu via BACK key Counting since: FROM PRESSING START... -
Page 46: Buzzer
Buzzer Switching ON/OFF short audible signals MENU/ CONFIGURATION /BUZZER accompanying every pressing of any key. With keys select demanded option. Mark selection by pressing SET. Leave menu via BACK key Warning signals are always switched on. © 2018 Corning Incorporated... -
Page 47: Date/Time
Date/time Setiing up time and date MENU/ CONFIGURATION /DATE/TIME Press SET. keys choose demanded value. Press SET - appears. keys change choosen value. Repeat above steps for other values. Confirm by pressing SET. Press BACK. Set date and time are still active even after restart of centrifuge. Language Changing menu language MENU / CONFIGURATION / LANGUAGE... -
Page 48: Password Protection
Choice of temperature unit MENU / CONFIGURATION / OTHER The TEMPERATURE in °C is turned on by default. To change the temperature unit: keys select unit Confirm by pressing SET. Password protection Setting up password MENU / PASSWORD To prevent from an unauthorized use, a PASSWORD can be set. Note: No PASSWORD is set by default. -
Page 49: Cycles History
From then on, access to the MENU is possible after entering the password. In case of incorrect password, it will show message: ACCESS DENIED! To delete the PASSWORD, “0000” must be set. If the PASSWORD is forgotten, the emergency code “7654” should be used to clear password and remove all locks. -
Page 50: Rotor Cycles
Rotor cycles Information about the time of centrifuging and of the quantity of the working cycles of each rotor. CONFIGURATION / ROTOR RUNTIME The table also contains icons warning of the duty of execution of validation. The list can be scrolled using keys. -
Page 51: Manufacturers Details
Manufacturer’s details Information about the type of the centrifuge, CONFIGURATION / CONTACT US firmware version, and contact details. CONTACT US LABNET INTERNATIONAL The list can be scrolled using keys. 33 WOOD AVE. SOUTH To exit press BACK key. ISELIN, NJ 08830 WWW.LABNETINTERNATIONAL.COM... -
Page 52: Maintenance
10 Maintenance Cleaning of the centrifuge Attention! Pull the mains plug before cleaning. Before any cleaning or decontamination process other than that is recommended by the manufacturer, the user has to ask the manufacturer if the planned process does not damage the device. For cleaning, water with soap or other water soluble mild detergent shall be used. - Page 53 In case of observation of surface damage, crevice or other change, as well as the corrosion, the given part (rotor, bucket, etc.) shall be immediately replaced. Clamping rotor, containers and reducer inserts must be cleaned regularly to prevent corrosion. Cleaning of the accessories shall be carried out outside of the centrifuge once every week or still better after each use.
-
Page 54: Sterilization
Sterilization Plastics - legend to abbreviations polystyrene ethylene/chlorotrifluoroethylene ECTFE styrene-acrylonitrile ethylene/tetrafluoroethylene ETFE polymethyl methacrylate polytetrafluoroethylene PMMA PTFE polycarbonate tetrafluoroethylene/perfluoropropylene polyvinyl chloride tetrafluoroethylene/perfluoroalkylvinylether acetal polyoxymethylenel fluorcarbon rubber low density polyethylene ethylene propylene diene PE-LD EPDM high density polyethylene natural rubber PE-HD polypropylene silicon rubber polymethyl pentene... - Page 55 10.3.1 Autoclaving Rotors, buckets and round carriers can be sterilized in autoclave with temperature 121°C OPTIONAL ACCESSORY during 20 min (215 kPa), unless otherwise specified in the During sterilization (autoclaved) by means of steam one should to consider temperature resistance of individual materials. Deformation of the accessories (carriers or lids made of plastic) may occur during autoclaving.
-
Page 56: Chemical Resistance
FEP, PFA EPDM DANGER! Labnet accessories are not biotite. For centrifuging infectious materials, it is necessary to use hermetically closed tubes meeting demands of bio tightness, in order to prevent germs migration into the centrifuge and beyond it. User is responsible for proper disinfections of the centrifuge, if some dangerous material was spilled inside or outside of the centrifuge. -
Page 57: Troubleshooting
11 Troubleshooting Majority of faults could be removed by restart the centrifuge. After switching the centrifuge ON, there shall be displayed parameters of the recently implemented program and sound signals comprising four successive tones shall be generated. In case of short-duration power failure the centrifuge terminates the cycle and displays PROGRAM ERROR code. - Page 58 Emergency lid release In case of e.g. mains failure it is possible to open cover manually. On the right side is plug, which should be unscrew (via key for emergency lid release 18640 basic accessories). Then, one should pull the plug. point of emergency lid releasing It is not allowed to emergency lid releasing when rotor is running!
-
Page 59: Limited Warranty
12 Limited Warranty Corning Incorporated (Corning) warrants that this product will be free from defects in material and workmanship for a period of two (2) years from date of purchase. CORNING DISCLAIMS ALL OTHER WARRANTIES WHETHER EXPRESSED OR IMPLIED, INCLUDING ANY IMPLIED WARRANTIES OF MERCHANTABILITY OR OF FITNESS FOR A PARTICULAR PURPOSE. -
Page 60: Disposal
13 Disposal According to Directive 2012/19/EU of the European Parliament and of the Council of 4 July 2012 on waste electrical and electronic equipment (WEEE), the centrifuge is marked with the crossed-out wheeled bin and must not be disposed of with domestic waste. -
Page 61: Manufacturer's Info
14 Manufacturer’s info 800-492-1110 CORNING INCORPORATED Customer Service option 2 800-492-1110 Service/technical Option 5 support 271 County Route 64 www.labnetinternational.com http:// Big Flats, NY 14814 labnetinfo@corning.com e-mail: © 2018 Corning Incorporated... -
Page 62: Annexes
15 Annexes Nomogram © 2018 Corning Incorporated... - Page 63 Available Rotors Cat. No Description Rotor image C0226-4PCR Fixed angle rotor for 4 x 8 – 0.2 ml PCR strip tubes C0226-242SC Fixed angle rotor for 24 x 1.5/2.0 ml filter tubes/spin columns C0226-610 Fixed angle rotor 6 x 10 ml, complete with buckets for 17 x 70/85 mm tubes C0226-615 Fixed angle rotor 6 x 15/10ml, complete with buckets for 17...
- Page 64 NOTES: © 2018 Corning Incorporated...
- Page 65 © 2018 Corning Incorporated...
- Page 66 Corning Incorporated 271 County Route 62 Big Flats, NY 14814 www.labnetinternational.com labnetinfo@corning.com LN182000 © 2018 Corning Incorporated...
Need help?
Do you have a question about the C0226R and is the answer not in the manual?
Questions and answers