
Related Manuals for Vanderbilt ACT365-VCU


Summary of Contents for Vanderbilt ACT365-VCU
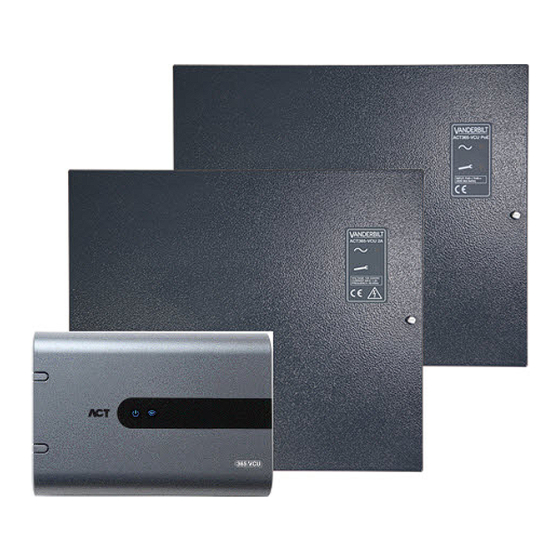
- Page 1 ACT365-VCU / ACT365-VCU2A / ACT365-VCUPoE Installation and Operating Instructions Document ID: A-100528-b Edition date: 20.05.2019...
- Page 2 ACT365-VCU & ACT365-VCUPoE Hereby, Vanderbilt International (IRL) Ltd declares that this equipment type is in compliance with the following EU Directives for CE marking: • Directive 2014/30/EU (Electromagnetic Compatibility Directive) •...
-
Page 3: Table Of Contents
5.1 Accessing the ACT365-VCU web interface 5.2 Adding Cameras using Discovery 5.3 Adding Cameras Manually 5.4 Installing ACT365-VCU on the ACT365 Installer Portal 5.5 Associating cameras to doors 5.6 Configuring motion detection for a camera 5.7 Network Settings on ACT365-VCU 5.7.1 Reset the ACT365-VCU hardware to use DHCP... - Page 4 8 FAQs 8.1 How do I find the address of the ACT365-VCU? 8.2 What is the password for the ACT365-VCU web front end? 8.3 Why is the ACT365-VCU not connecting to ACT365? 8.4 How many cameras can I add to my ACT365-VCU? 8.5 Why can I not see my cameras on the camera setup page?
-
Page 5: Overview
1 Overview An ACT365-VCU is a 4 camera IP controller with a 1TB hard disk for CCTV storage. The controller includes a rich set of IP video features including automatic camera discovery, automatic camera configuration and full HD streaming. ACT365-VCUs can be registered with and monitored from ACT365, a cloud-based, integrated access control and video management solution. -
Page 6: Product Comparisons
(Front) Rear Tamper Detection The ACT365-VCU includes a 1TB HDD for CCTV storage. Under normal conditions, the HDD provides enough storage for approximately 20 days for 4 cameras at Standard stream size, or 10 days for 4 cameras at High stream size. -
Page 7: Electrical Specification
Overview IMPORTANT NOTE: The ACT365-VCU only operates with IP cameras that comply with ONVIF 2.0 Profile S or later. Vanderbilt recommend checking the ONVIF conformant devices list on www.onvif.org to ensure that your cameras are compliant. Alternatively, contact the camera manufacturer directly. -
Page 8: Ordering Details
ACT365-VCU / ACT365-VCU2A / ACT365-VCUPoE – Installation and Operating Instructions Overview 1.4 Ordering Details ACT365-VCU V54502-C140-A100 ACT365-VCU Video Controller ACT365-VCU2A V54502-C141-A100 ACT365-VCU2A Video Controller with 2A PSU ACT365-VCUPoE V54502-C142-A100 ACT365-VCUPoE Video Controller with PoE++ PSU © Vanderbilt 2019 A-100528-b 20.05.2019... -
Page 9: Installation
ACT365-VCUs are for indoor installation only and must be installed as permanently connected equipment. Each ACT365-VCU supports up to four IP cameras. Mounting Mount the ACT365-VCU to a solid surface using the supplied screws. The unit should be installed in a ventilated area that allows for easy access after installation. 2.1 ACT365-VCU Connections The ACT365-VCU requires an external 12V DC power supply connected to the +12V and 0V terminals on the ACT365-VCU. -
Page 10: Power Supply
2. Once the ferrite bead is in place, crimp the Ethernet cable at the terminating end. 2.1.2 Power supply The ACT365-VCU requires an external 12V DC or 24V DC power supply. The supply should be connected to the +12/24V DC and 0V/GND connections. -
Page 11: Mounting
2.2.4 Standby Battery Note: Ensure batteries being fitted to this unit are in good condition 1. Connect battery leads to battery, ensuring correct polarity of battery connections. Vanderbilt recommend using a 7Ah battery. 2. Apply mains power and check that the green Mains LED is on. -
Page 12: Tamper
2. Close cover and secure using fastening screw(s) provided. 2.2.6 Ferrite bead installation for the ACT365-VCU2A While installing the ACT365-VCU2A, Vanderbilt recommend that you place the provided ferrite cores (noise-suppression devices) around the Ethernet and power cables to attain a desired level of electromagnetic compatibility (EMC). -
Page 13: Act365-Vcupoe
ACT365-VCU / ACT365-VCU2A / ACT365-VCUPoE – Installation and Operating Instructions Installation 2.3 ACT365-VCUPoE This unit must be fed from a compliant PoE (power over Ethernet) power source (PoE 802.3bt for 3A power output). 2.3.1 Mounting 1. Mount the boxed module securely using the enclosure mounting points in the correct orientation, allowing 100mm clearance around the enclosure –... -
Page 14: Tamper
2. Close cover and secure using fastening screw(s) provided. 2.3.5 Ferrite bead installation for the ACT365-VCUPoE While installing the ACT365-VCUPoE, Vanderbilt recommend that you place the provided ferrite core (a noise-suppression device) around the Ethernet cable to attain a desired level of electromagnetic compatibility (EMC). -
Page 15: Connecting Act365-Vcus To A Customer Lan
3 Connecting ACT365-VCUs to a Customer LAN Each ACT365-VCU can be connected directly to the customer network. 3.1 Cabling Chart From Network Type Cable Type Comments ACT365-VCU TCP/IP Cat5/6 Max distance between network devices is 100m. © Vanderbilt 2019 A-100528-b... -
Page 16: Status Indicators
(A) Power / System Running This indicates that the ACT365-VCU has power. (B) Communications Constant illumination indicates that the ACT365-VCU is connected to the ACT365 server. Flashing indicates there is an issue connecting to the ACT365 server. (C) Fault Illuminates to indicate a fault on the ACT365-VCU. -
Page 17: Configuring Act365-Vcu
PCB), or http://{IP address}:8040. The ACT365-VCU home page may take up to a minute to load. If you do not know the ACT365-VCU NetBIOS name or IP address, see How do I find the address of the ACT365-VCU? on page 33. -
Page 18: Adding Cameras Using Discovery
Once the password is successfully changed, you may continue with the setup of ACT365-VCU. 5.2 Adding Cameras using Discovery To add a camera using discovery, log in to the ACT365-VCU web interface (see Accessing the ACT365- VCU web interface on the previous page), then: 1. - Page 19 Username and Password fields provided. 4. Click Probe. When the probe has finished, a camera snapshot displays. 5. Enter an appropriate Name for the camera. Vanderbilt recommend using a name that describes the camera location, for example, Front Door. © Vanderbilt 2019 A-100528-b...
-
Page 20: Adding Cameras Manually
Note: Only expert users should manually add cameras. A camera stream URL must be entered manually, and any inaccurate data entered could adversely affect the ACT365-VCU operation. To add a camera manually, log in to the ACT365-VCU web interface (see Accessing the ACT365-VCU web interface on page 17), then: 1. - Page 21 ACT365-VCU / ACT365-VCU2A / ACT365-VCUPoE – Installation and Operating Instructions Configuring ACT365-VCU 3. Enter the following details in the Probe Device dialog: Username: Camera login username Password: Camera login password IP: IP address of the camera, for example, 192.168.1.1. RTSP URL: Camera first stream URL, for example, rtsp://192.168.1.1/firststream.
-
Page 22: Installing Act365-Vcu On The Act365 Installer Portal
Vanderbilt recommend using a name that describes the camera location, for example, Front Door. 6. Select the Record check box if the ACT365-VCU should record camera footage. The ACT365-VCU will record approximately 20 days of camera footage (dependent on the type of scene the camera is viewing). -
Page 23: Associating Cameras To Doors
(see Viewing recorded footage on the ACT365 Installer Portal on page 29). To configure motion detection for a camera, log in to the ACT365-VCU web interface (see Accessing the ACT365-VCU web interface on page 17), then: 1. -
Page 24: Network Settings On Act365-Vcu
The ACT365-VCU is configured to use DHCP addressing by default. You can modify network settings through the ACT365-VCU web interface. To configure the ACT365-VCU to use a static IP address, log in to the ACT365-VCU web interface (see Accessing the ACT365-VCU web interface on page 17), then: 1. -
Page 25: Reset The Act365-Vcu Hardware To Use Dhcp
5.7.1 Reset the ACT365-VCU hardware to use DHCP If an ACT365-VCU has an invalid IP address, or the unit is no longer accessible on its known IP address, the red LED will flash on unit boot. You can reset the ACT365-VCU to use DHCP using the following procedure: 1. -
Page 26: Factory Reset
Manually on page 20. 4. Click Save. 5.9 Factory Reset In the event of a unit failure or forgotten ACT365-VCU password, follow the procedure below to factory reset the ACT365-VCU. IMPORTANT: Factory reset removes all custom settings and camera databases. Previous camera footage is erased. - Page 27 2. Configure the unit DIP switches as pictured below. (ON = 2,4; OFF = 1,3) 3. Power up the ACT365-VCU. Wait for the red LED to flash. 4. Reset all DIP switches to the OFF position, as pictured below. (OFF = 1, 2, 3, 4) 5.
-
Page 28: Video
6.4 Exporting Video from the ACT365-VCU 6.1 Viewing Live Video on the ACT365-VCU To view a live video stream from the ACT365-VCU, log in to the ACT365-VCU web interface (see Accessing the ACT365-VCU web interface on page 17), then: 1. Click the Live tab. -
Page 29: Viewing Live Video On The Act365 Installer Portal
ACT365-VCU / ACT365-VCU2A / ACT365-VCUPoE – Installation and Operating Instructions Video 6.2 Viewing Live Video on the ACT365 Installer Portal To view a live video stream from the ACT365 Installer Portal: 1. Log in to the ACT365 Installer Portal at ACT365.eu. -
Page 30: Exporting Video From The Act365-Vcu
6.4 Exporting Video from the ACT365-VCU Footage can be exported locally on the ACT365-VCU via the export tap in the local web access. Exporting locally saves bandwidth and resources, as footage does not need to be uploaded to the cloud to be prepared before export. - Page 31 ACT365-VCU / ACT365-VCU2A / ACT365-VCUPoE – Installation and Operating Instructions Video The ACT365-VCU converts and exports the selected footage. When this process is complete, the new video file is downloaded in accordance with your browser download settings. © Vanderbilt 2019 A-100528-b 20.05.2019...
-
Page 32: Diagnostics On Act365-Vcu
Reset the ACT365-VCU to factory defaults. Click Factory Reset to remove all local configuration and reset the unit. You can also reset the ACT365-VCU as described in Factory Reset on page 26. Identify an individual ACT365-VCU. Click ID Mode and all LEDs on the ACT365-VCU will flash repeatedly. -
Page 33: Faqs
To find the NetBIOS name or IP address of the ACT365-VCU, do one of the following: Use Windows Explorer on your PC to find the IP address of the ACT365-VCU under the Network folder. Navigate to the Network folder in Windows Explorer and double-click the ACT365-VCU. -
Page 34: Why Is The Act365-Vcu Not Connecting To Act365
If the ACT365-VCU is set to use DHCP, ensure that the DHCP server on your network is running. If the ACT365-VCU is set to use a static IP address, ensure that the address is set correctly. 4. If the ping is successful: a. -
Page 35: Why Can I Not See My Cameras On The Camera Setup Page
ACT365-VCU / ACT365-VCU2A / ACT365-VCUPoE – Installation and Operating Instructions FAQs 8.5 Why can I not see my cameras on the camera setup page? The ACT365-VCU automatically discovers cameras on the network. If the ACT365-VCU fails to discover any cameras, check the following: Does the camera have connectivity? -
Page 36: What Ip Cameras Does The Act365-Vcu Support
You should ensure that all browsers are up to date for best performance. 8.9 What IP cameras does the ACT365-VCU support? The ACT365-VCU is compatible with most ONVIF 2.0 profile S or later IP cameras. Ensure that your camera meets this specification. For more information regarding ONVIF or supported cameras visit: www.onvif.org... - Page 37 © Vanderbilt 2019 Data and design subject to change without notice. Supply subject to availability. Document ID: A-100528-b Edition date: 20.05.2019 Issued by Vanderbilt International Ltd. Clonshaugh Business and Technology Park vanderbiltindustries.com Clonshaugh, Dublin D17 KV 84, Ireland @VanderbiltInd Vanderbilt Industries...
Need help?
Do you have a question about the ACT365-VCU and is the answer not in the manual?
Questions and answers
DO YOU HAVE A LIST OF ORGANISATIONS WHO ARE ABLE TO MANAGE THE ACT 36 PTOGRAM PLEASE OR CAN WE CHOOSE OURSELFS