
Subscribe to Our Youtube Channel
Related Manuals for Datafox ZK-MasterIV


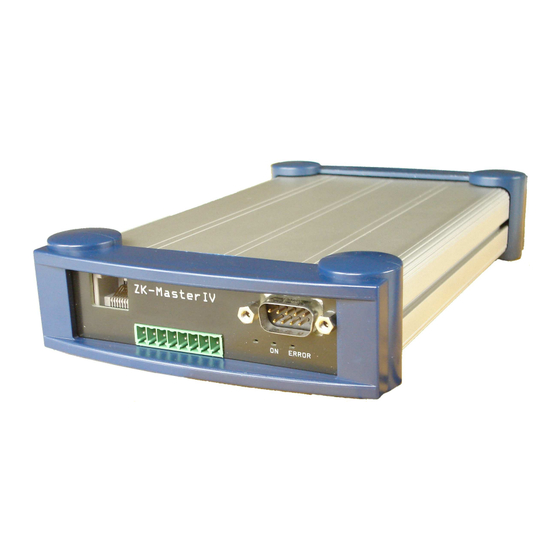
Summary of Contents for Datafox ZK-MasterIV
- Page 1 Manual Datafox ZK-MasterIV Datafox ZK-MasterIV Access only for authorized persons Page 1 Version: 04.01.07.00 www.datafox.de...
-
Page 2: Table Of Contents
Manual Datafox ZK-MasterIV Contents 1 Introduction 1.1 Updates in this document ........ - Page 3 Manual Datafox ZK-MasterIV 3.5.4.2 Configuration ........3.5.4.3 Connection state .
- Page 4 Manual Datafox ZK-MasterIV 3.8.2 Configuration ........
- Page 5 Manual Datafox ZK-MasterIV 5.2.6 Creating a user guidance ....... . . 139 5.2.6.1...
- Page 6 Datafox GmbH. The assertion of all rights in this respect is reserved to Datafox GmbH, especially in case of the grant of a patent. The handover of this documentation does not establish a claim to the licence or the use the soft- and hardware.
-
Page 7: Introduction
Device files (*.hex) of the MasterIV - devices are delivered in a common device file archive. It has the file extension dfz (stands for Datafox Zip). Now simply the device file archives are indicated instead of the device files (*.hex). This applies to the DatafoxStudioIV and DLL. The indication of device files (*.hex) is still possible. -
Page 8: Typography Of The Manual
It is still tested if the file can be loaded into the chosen device before the transmission takes place. 1.4 Typography of the manual exposition contextual meaning file names ZK-MasterIV , Sof twareV ersion.pdf ¡ a path via a program menu at DatafoxStudioIV Setup edit ¢ ¡... -
Page 9: Important General Advice
Because of technical development illustrations, functional steps, technical processes and data can differ slightly. Datafox ZK-MasterIV has been developed to create a flexible terminal for time and attendance, order time collection and access control that can easily be integrated. The device is robust and easy to use. - Page 10 Note: £ Because of the DatafoxStudioIV the Datafox devices have many functions and com- bination of functions; therefore, it is not possible to test all functions and their com- binations in case of updates. This applies especially to all the setups you created as a customer.
-
Page 11: System Structure And Functional Principle
Manual Datafox ZK-MasterIV 2 System structure and functional principle 2.1 Software versions and compatibility of device firmware and setup The firmware (operating system) of the device and the setup program (*.aes data file = application pro- gram) form a unit. With the setup program the configuration for the device (definition of the data tables and the data fields, operation, etc.) is compiled and transmitted to the device. - Page 12 You will find the file on the CD. Please alsocomply with the instructions given in the chapters of the manual. The updates are available for download on our internet page www.datafox.de. Caution: When the new device is delivered always the firmware version recently released is used.
-
Page 13: Firmware
Manual Datafox ZK-MasterIV 2.2 Firmware Caution: A firmware update or downgrade is a very sensitive process. Possibly a reset of the main communication to RS232 may occur. In any case comply with the details about the compatibility in the software version list. -
Page 14: System Structure
Manual Datafox ZK-MasterIV 2.3 System structure 2.3.1 Device functions In principle, Datafox ZK-MasterIV offers two possibilities to create workflows for data col- lection. ¦ Via the PC-setup program "‘DatafoxStudioIV"’ many processes for data collection can be created quickly without programing knowledge. Such a process is a setup for the device and can be loaded on the device via the communication program. - Page 15 ASCII-file. If desired and with computation a direct connection to databases is possible. There the costumer has to decide which database tables and fields shall be filled. Datafox-Talk supports all functions for transmitting data and for setting the device. Via timing the times for transmission can be set freely.
- Page 16 Manual Datafox ZK-MasterIV Advantages: ¦ Via Datafox-Talk integration of the devices can be realized easily and fast. ¦ Transmission takes place automatically and is ensured via a log file. ¦ The data are accessible forthwith. ¦ There is no programming work for data transmission.
- Page 17 Manual Datafox ZK-MasterIV Figure 5: System structure Page 17 Version: 04.01.07.00 www.datafox.de...
-
Page 18: Zk-Masteriv
Manual Datafox ZK-MasterIV 3 ZK-MasterIV When using the ZK-MasterIV you have to comply with the temperature range of -20 to +70 C , see data § sheet. Caution: Pleas keep in mind that MasterIV terminals use a flash memory. According to the manufacturer each memory sector (512 byte) can be written to a maximum of 100,000 times. -
Page 19: Connection
Manual Datafox ZK-MasterIV 3.2 Connection The ZK-MasterIV (central controller for access control, door- or rather remote control) has to be installed in a safe area which is accessible only for authorized persons. You find the connections of the device narrow sided over the edge connector. That way the installation of the device is easier. - Page 20 Manual Datafox ZK-MasterIV Figure 7: Edge connector of the ZK-MasterIV from HW V 1.4 Designation Plug Description Power supply 12 V 3 A DC Digital input Input 10 Hz (this are potential-free 0 - 3 Volt = logical 0 (V...
- Page 21 Manual Datafox ZK-MasterIV Figure 8: Steckerleiste des ZK-MasterIV ab HW V 2.0 Designation Plug Description Power supply 24 V 300 mA AC/DC (If a DC voltage is connected, the polarity is to be followed.) Input 5 kHz Digital input 0 - 1 Volt = logical 0 (V...
-
Page 22: Power Supply
3.2.1 Power supply The power supply for the ZK-MasterIV (HW V 1.4) is connected to the Datafox device power supply unit 12 V 3 A DC via the 8 pole strip terminal, position (4) in figure 7. From HW V 2.0 on the terminal is supplied with power (24 V 300 mA power supply unit) via the Molex connector (8) in figure 8. -
Page 23: Usb Connector
3.2.3 USB connector The USB Type B connector (slave, no active USB controller) can optionally be led out of the device by a USB cable through the edge connector. By this, the ZK-MasterIV can be connected to a PC as USB terminal. -
Page 24: Commissioning
After having finished booting the device automatically switches to the operating mode (8) in figure is "‘ON"’ (9) is "‘OFF"’. Now the ZK-MasterIV is ready for use. Only use power supply units with appropriate power to establish the power supply (see chapter 3.2.1). Also note the information in figure 52. -
Page 25: Conversion Of Rs232 To Rs485
Note that the fall of voltage is dependent on wire cross- section and length. The pin assignment of the converter will be demonstrated using the Datafox converter RS232/485 (small) as example. Gather the wiring of the RS485 bus from the following examples. - Page 26 Figure 14: RS485 Bus über Stiftleisten (RS485A HW V 2.0) Caution: If the power supply of the ZK-MasterIV and the RS485 bus is established via PIN 7/8 (RJ45 connection of the ZK-MasterIV in figure 13) or PIN 1/4 (male connector of the in figure 14) direct voltage must be used (see chapter 3.2.1).
-
Page 27: Communication Via Usb
3.5.2 Communication via USB Note: £ Note that the USB-interface of the ZK-MasterIV is an USB type B. That means the ZK-MasterIV works in slave mode and therefore cannot manage other USB-devices. 3.5.2.1 Conditions You have to install the USB device drivers and the USB serial converter drivers that are necessary to communicate via USB. - Page 28 Select the folder of the driver file. Figure 17: Selection of the source directory Installation of the driver for the Datafox USB serial converter. The driver has no Microsoft logo, there- fore the pictured message will be shown. Click on "‘Continue installation"’...
- Page 29 Figure 20: Driver installation finished You can check the successful USB driver instal- lation in the Device Manager. There have to be the following entries without a yellow exclamation mark. Figure 21: Datafox USB Controller Page 29 Version: 04.01.07.00 www.datafox.de...
-
Page 30: Usb Stick As Data Medium
In addition to the main communication USB, it is possible to use an USB stick as data medium. That way you can read out data records from a ZK-MasterIV and continue processing on a PC or create lists the for master data or the access control. - Page 31 Manual Datafox ZK-MasterIV 1. Select the drive, that was allocated to the USB stick. 2. Create the directory structure for all devices, irrespective of their serial numbers. 3. Create a password, that is valid for all devices. The correct password is the basis of a data transfer between the terminal and the USB stick.
- Page 32 Manual Datafox ZK-MasterIV within the first 8 digits, a termination of the communication may occur. No lists are transmitted to the terminal then. If you want to transmit data and lists terminal oriented, you have to log an additional data structure in the following steps.
-
Page 33: Change The Password Of The Communication
Manual Datafox ZK-MasterIV The already existing data structure (created in the first step) is used for all terminals, irrespective of the serial number. Next, an additional directory structure only for the terminal with the serial number 1212 is created on the USB stick. -
Page 34: Communication Via Analogous Modem
For a communication via analogous modem, you have to set "‘RS232"’ as communication in the system menu-BIOS of the ZK-MasterIV (see chapter 4.5.12). The baud rate of the terminal and the connected modem must be coordinated. The timeout must be set dependent on the line quality of the telephone network (Which disturbance sources the cable is exposed to?). - Page 35 Manual Datafox ZK-MasterIV Analogous modem to analogous modem (Wiring of the Null modem adaptor see figure 28) Nullmodem- analog Modem analog Modem Adapter Art: 25102 Art: 25102 RS232 Telefonnetz RS232 ATD039627822222 Terminals on 9600 RS232-Port: baud and AT&F AT&D0 AT&F AT&D0...
- Page 36 Manual Datafox ZK-MasterIV Figure 28: Wiring of the Null modem adaptor Designation Importance DCD data carrier detect Träger erkannt RxD receive data Empfangsdaten TxD transmit data Sendedaten DTR data terminal ready DEE empfangsbereit GND ground Signalmasse DSR data set ready...
-
Page 37: Modem Initialization
Manual Datafox ZK-MasterIV 3.5.3.3 Modem initialization Check on which baud rate the ZK-MasterIV is set. You can find this information in the system menu- BIOS (see chapter 4.5.12). Connect the "‘Devolo-MicroLink"’ to the COM- interface at your PC. Start the DatafoxStudioIV and open the modem configuration dialogue via... -
Page 38: Connection Via The Dfcomdll
3.5.3.5 Connection via the DFComDLL You can also start the connection to the ZK-MasterIV from your own application. Use the functions of the DFComDLL.dll to establish a connection between a PC and the device. Proceed as it is shown in the figure below. -
Page 39: Communication Via Gsm Or Gprs/Gsm
ZK-MasterIV to a web server. The advantage is that the data is sent immediately. 3.5.4.1 Preparation Put the SIM-card in the ZK-MasterIV before bringing the device into service. An external aerial has possibly to be connected; this depends on the selected hardware option (internal or external aerial). See chapter 3.2.5. -
Page 40: Connection State
If a wrong PIN was transmitted to the device three times, the PUK has to be entered together with the PIN to activate the SIM. 3.5.4.3 Connection state After transmitting the .ini’-file to the device the operating mode of the ZK-MasterIV can be set to "‘GSM/GPRS"’, see chapter 4.5.12. GSM: The communication takes place via GSM. -
Page 41: Send Data Via Gprs
3 = 1 x short, 4 = 2 x short and 5 = 3 x short If you want to adjust date and time of the ZK-MasterIV and the server, you can do it in the answer to the ZK-MasterIV as in the following example: status=ok&checksum=3142&time=2003-10-28_17:00:55... - Page 42 Manual Datafox ZK-MasterIV Now the ZK-MasterIV sets its internal clock on 17:00:55 and the date on 28 Oct 2003. If connection problems occur, the error analysis can be simplified with the help of an alive-data record. Via the alive- data record you can detect if the device was on- or off-line, e.g. at the moment of power outage.
-
Page 43: Communication Via Tcp/Ip
Manual Datafox ZK-MasterIV 3.5.5 Communication via TCP/IP Usually, the configuration of the network connection is necessary to integrate a ZK-MasterIV. But if a DHCP server, that supplies all PCs and peripheral with dynamic IPs, is available in the network, this configuration can be omitted. -
Page 44: Lan
Manual Datafox ZK-MasterIV 3.5.5.1 LAN Analogous to the direct connection via RS232 a single device can be connected directly to the PC via TCP/IP. In this case the device is connected to the PC with a CAT-5 network cable (in case of direct connection with crossover;... -
Page 45: Transition From Tcp/Ip To Rs232
Manual Datafox ZK-MasterIV 3.5.5.2 Transition from TCP/IP to RS232 In order to connect a single device via RS232 to a TCP/IP network a COM-server has to be used. The COM-server serves as converter. Figure 34: TCP/IP to RS232 The necessary settings of the COM-server will be explained using the W&T COM-server as example. -
Page 46: Transition From Tcp/Ip To Rs485 Bus
Manual Datafox ZK-MasterIV Figure 35: COM-Server configuration over telnet 3.5.5.3 Transition from TCP/IP to RS485 Bus Up to 31 devices can be connected economically via a COM-server with RS485 bus. You can find details about the structure of a RS485-network in the separate networking description. You can request it from us or download it from our homepage. -
Page 47: Wlan
Manual Datafox ZK-MasterIV 3.5.5.4 WLAN The ZK-MasterIV can be integrated into a WLAN with a WLAN router via TCP/IP. Please note that a WLAN router is an external component and that you have to pay attention to the compatibility to the present network topology. -
Page 48: Active Connection Via Tcp/Ip
The maximum total length of a bus cable is 1000 m. The bus line should be laid in trunkings at the ceiling or the wall. In order to connect a ZK-MasterIV the data line is wired to a Cat. -
Page 49: Configuration Of An Active Connection
Manual Datafox ZK-MasterIV 3.5.7.2 Configuration of an active connection An active connection requires that the following parameters are set or configured in the ZK-MasterIV or the application (DFComDLL.dll): ¦ com.active (0 = deaktiviert, 1 = aktiviert) Switching on/off the active connection. - Page 50 Afterwards all functions of the DatafoxStudioIV can be used in order to configure the device. Figure 39: Setting the communication via the ZK-MasterIV Page 50 Version: 04.01.07.00 www.datafox.de...
-
Page 51: Device Servicing Via Active Connection
Manual Datafox ZK-MasterIV 3.5.7.3 Device servicing via active connection The following overview shows you the single procedures of the active connection and the possibilities for the servicing of the terminals. Figure 40: Page 51 Version: 04.01.07.00 www.datafox.de... - Page 52 Manual Datafox ZK-MasterIV Page 52 Version: 04.01.07.00 www.datafox.de...
-
Page 53: Wlan
Manual Datafox ZK-MasterIV 3.5.8 WLAN 3.5.8.1 General information There are two possibilities to configure the match port. Either via the TCP/IP with the DeviceInstaller of Lantronix or via the RS232 using the tool WLANConfig and the DatafoxStudio (from version 04.01.06.xx on). -
Page 54: Frequencies And Ports
Manual Datafox ZK-MasterIV a long list of experimental protocols (OLSR, MIT RoofNet, B.A.T.M.A.N etc.) and several proposals for standardisation (Hybrid Wireless Mesh Protocol, 802.11s) as well as some commercial solutions (e.g. Adaptive Wireless Path Protocol from Cisco) were produced. 3.5.8.2.3 Frequencies and ports... -
Page 55: Passwords
Factory default WLAN, which is possible only at the terminal). You could compare the BIOS menu with a remote maintenance tool, but changing the settings is accessible only via RS232. The setting of WLAN parameters is going to be available from version 04.01.06.xx in the Datafox Studio. Page 55 Version: 04.01.07.00... -
Page 56: Dependencies
Datafox-Optionen ( eingebaute Module )wLAN, Matchport. With the help of this tool the COM servers Xport and MatchPort of the Datafox devices can be configured. The device installer accesses to the COM server via TCP/IP, the Datafox terminals via RS232. If a COM server is not available, because it is adjusted that much, so that the device installer is unable to access, it is possible to reset the COM server to the default values via the BIOS menu of the terminal. -
Page 57: Wlan Configuration Via The Datafoxstudioiv
Manual Datafox ZK-MasterIV 3.5.8.6 WLAN configuration via the DatafoxStudioIV 3.5.8.6.1 General The program WLANConfig can set the TCP/IP and the WLAN settings of the MatchPort via RS232. These settings can be saved as a file and the data of this file can be transmitted to the device. The depen- dencies of the single parameters among each other are permitted or locked by the program automatically. -
Page 58: Selection Of The Configuration File
Manual Datafox ZK-MasterIV 3.5.8.6.3 Selection of the configuration file Via the button Select INI-File the dia- logue is started. Here you can create new files or select a file, where data are logged on. On the INI file all settings of the TCP/IP and the WLAN are logged. -
Page 59: Tcp/Ip Settings
MAC-address are displayed. You can edit the other parameters, which are equal to those of the BIOS dialogue of the terminal and of the Datafox Studio. Figure 44: Selection of the configuration file 3.5.8.6.5 WLAN settings The WLAN settings allow the editing of values, that were read out of the terminal and loaded inon a INI file or entered manually. - Page 60 Manual Datafox ZK-MasterIV Via Read WLAN Config the data are loaded from the device to the program. Via Write WLAN Config the data are loaded from the program into the device. Via Read INI file the data are loaded from the selected file into the program.
-
Page 61: Access Control Ii With Ts Tmr33 Modules
A connecting diagram and a description of the commands for the activation are included. 3.6.1 Set-up In the following chapters different possibilities to set the device up are explained. The ZK-MasterIV is used as reference device. Page 61 Version: 04.01.07.00... -
Page 62: A Door Without A Separate Reader
The terminal is access master and door-opener at the same time. The door opening relay is in the ZK- MasterIV and thus in the protected area. The access identification captured by the reader is transmitted to the ZK-MasterIV and analysed by it. If the access is permitted, the door is opened via the relay in the ZK-MasterIV. -
Page 63: Several External Doors Via Rs485 Bus
The door module permanently calls up the reader. If a transponder is read the information is transmit- ted from the reader to the door module. The ZK-MasterIV permanently polls to the door module. If a booking is available, it is collected immediately. If the access is permitted, the ZK-MasterIV sends a command to the door module to open the door. -
Page 64: Several Internal Doors Via Rs485 Bus
The ZK-MasterIV permanently polls to the door module. If a booking is available, it is collected immedi- ately. If the access is permitted, the ZK-MasterIV sends a command to the door module to open the door. Note: £... -
Page 65: Mantrap Function With Rs485 Bus
Door supervision The ZK-MasterIV permanently polls to the door module. If a booking is available, it is collected immedi- ately. If the access is permitted, the ZK-MasterIV sends a command to the door module to open the door. Note: £... -
Page 66: Connection
Manual Datafox ZK-MasterIV 3.6.2 Connection The following figure shows the possibilities for connecting the TMR33 devices to a ZK-MasterIV for the ac- cess control. The TMR33 devices have to be set depending on the interface that is used (RS232 or RS485). -
Page 67: Wiring
Manual Datafox ZK-MasterIV Caution: The installation and connection of the TMR33 module may only be carried out by a person qualified in this field. Avoid switching the connecting terminal (reverse polarity). From this arise different possible combinations. The following figures show examples for the connection wiring. - Page 68 Table 9: Reader table ID = 1 identifies the data record for the ZK-MasterIV, that always gets the value 320 in the column TM (Türmodul/ door module). ID = 2 identifies the external reader (TS TMR33-L), that is connected to the ZK-MasterIV via RS485.
- Page 69 A door is controlled via an internal door module with integrated reader TMR33-TMR and an external ac- cess reader TMR33-TR as mantrap In this case the internal door module is connected to the ZK-MasterIV via a RS485 bus. The external access reader is connected to the internal door module with a RS232 stub.
- Page 70 Manual Datafox ZK-MasterIV Example: Controlling the door-opener only via the ZK-II You can control the door-opener directly via the access control-II (ZK-II). Please note that the door-opener has to work in a voltage range from 8 to 12 V DC and must not exceed a power consumption of 100 mA.
- Page 71 Manual Datafox ZK-MasterIV Example: Controlling the door-opener via the ZK-II, relay and push-button You want to control the door-opener directly via the access control-II. You want to open the door without transponder via a push-button in a lobby with a view of the entrance area. Additionally, this push-button circuit should only be active at certain times.
- Page 72 Manual Datafox ZK-MasterIV Figure 52: Wiring scheme Page 72 Version: 04.01.07.00 www.datafox.de...
-
Page 73: Calculation Instructions
RS485 network for the access control. The voltage drop in the whole bus must not be higher than 4 V. Please note that if you use a Datafox device power supply unit as voltage source, 16 modules at most (8 in the RS485 bus and 8 via RS232 stub line) can be fed. -
Page 74: Topologie
Manual Datafox ZK-MasterIV 3.6.2.3 Topologie If a bus topology is used when setting up the network, you have to calculate the cable cross-section for each bus segment with regard to the maximum power consumption of the respective segment (see figure 53). -
Page 75: Star Topology
Manual Datafox ZK-MasterIV 1 , 438A 1 , 438A 6 5m 6 5m ¢ ¢ Ω 0, 83mm ¢ If we take as a basis that the bus has a maximum length of 200 m, the result of the calculation will be a cable cross-section of 2, 6 mm . -
Page 76: Configuration
Manual Datafox ZK-MasterIV cable 1: 1x180, 0mA 1 x56, 5mA ¢ 236, 5mA ¢ 0, 2365A ¢ The result for the maximum cable length for cable 1 is: 0, 75mm 0, 75mm 5 6m Ω ¢ ¢ 0 , 2365A... - Page 77 Manual Datafox ZK-MasterIV Figure 55: Data structure of the access control II When adding comments you have to notice that in a comment line no field values can be given and that the comment line has to start with a semicolon.
- Page 78 Manual Datafox ZK-MasterIV Alias Data type Description Length Number Unique Key (W ert 0) of the Reader table. ¡ (int) Number It has in our example number 1. If there are several (int) PZE-MasterIV in an access system, they can be depicted in one table connection and it is not necessary to have a separate string for each PZE-MasterIV.
- Page 79 Manual Datafox ZK-MasterIV Alias Data type Description Length Number ID of the room. All other tables refer to this data line via (int) this number, if necessary. RefGroup Number Reference to the identification table. Labels the access (int) authorized group. All cards of this group have access to this room.
-
Page 80: An Example For A Zk System
TS TMR33-L and analysed by the ZK-MasterIV.If a person is authorized, the TS TMR33-TM receives a signal from the ZK-MasterIV and switches the open-collector for a given period of time in order to open door 1. Because the TS TMR33-L, which is an insecure are, is connected via a RS232 stub line, manipulation of the system can be ruled out. - Page 81 Manual Datafox ZK-MasterIV Raum 1 Raum 2 Figure 56: Schematic depiction of an example system Page 81 Version: 04.01.07.00 www.datafox.de...
- Page 82 Manual Datafox ZK-MasterIV The power supply for the ZK-MasterIV and the access modules (TS TMR33) is established via the red wire (12 V DC) and the blue wire (GND). Note the information in chapter 3.2.1. The RS485 bus is connected via the yellow wire (data line A = +) and the grey wire (data line B = -).
- Page 83 Manual Datafox ZK-MasterIV The bus no. is set on 1 via the DIP switch on the TS-TMR33-L door module without a reader (TS TMR33-TM); the DIP switch 1 has to be at ON, the DIP switches 2 to 5 have to be at OFF. The DIP switch 7 always has to be at OFF.
- Page 84 4 1 011 2 2 0 The data record with the ID 1 stands for the ZK-MasterIV and receives number 1 as access master (ZM - Zutrittsmaster). The access master always receives the number 320 as TM value, that means it always receives the bus number 32.
- Page 85 2 3 2 25 0 The first data record sets that the first internal relay (PortOut = 1) of the ZK-MasterIV (RefRead 1 = reference to the first data record of the reader table) is switched for the duration of 5 seconds. If you set Elapse on = you have to give a time model in which you define how long the relay should be switched.
-
Page 86: Timing Of The Digital Exits For The Masteriv Device Series
files. If you have paid attention to the construction and configuration instructions and their hints, you can transmit the lists (tables or text files) to the ZK-MasterIV with a standard setup for the access control and test them. - Page 87 A buzzer is to be activated for seconds from Monday to Friday at 10.00 am and 4 pm 16.00. The buzzer is controlled by the internal relay of the ZK-MasterIV. ¦ The heating system is to be turned on the "‘day mode"’ at 07.00 am and on the "‘night mode"’...
-
Page 88: Access Control Ii With Phg Modules
ZK-MasterIV Because the ZK-MasterIV is only used for the access control, door and remote monitoring, you can supervise up to 16 doors with one device and control 18 doors at most. -
Page 89: Connection
In the PHG documents for the single modules the pin assignment and configuration via the DIP switches are described. In order to carry out an access control with the ZK-MasterIV the option "‘access"’ has to be integrated (Datafox Art. no. 105201). The following figure shows the possible connections o PHG devices to a ZK-MasterIV for an access control. -
Page 90: Configuration
/ AES-128 standard (AES - Advanced Encryption Standard). The code is set in the setup under access after selecting the access series. The 1685 protocol of PHG is not supported by Datafox. Figure 62: Communication key for the PHG-crypt protocol The modules always work with encryption. -
Page 91: Status Message Of The Access Control
PIN in the online mode read Access control deactivated in the setup At the moment the access control cannot be called up (busy) Access control needs the lists Incorrect bus type (Datafox, PHG, etc.) Table 18: Access control Page 91 Version: 04.01.07.00... - Page 92 Manual Datafox ZK-MasterIV Display Assigned status message Digital output 1 is low (off) Put digital output 1 on high (on) Digital output 1 is trigger (on for given period of time) Digital output 2 is low (off) Put digital output 2 on high (on)
-
Page 93: Datafoxstudioiv - General Operation
Manual Datafox ZK-MasterIV 4 DatafoxStudioIV - General operation Note: £ The dialogues can differ from the presentations in this manual, dependent on the version of the DatafoxStudioIV. This also applies to differences in functionality. 4.1 Installation The DatafoxStudioIVis required for setting up and changing the device setup. The setup and communi- cation program just consist of the files DatafoxStudioIV.exe and DFComDLL.dll. -
Page 94: Menu Datei
Manual Datafox ZK-MasterIV Client-Window The edition, e.g. writ- ing setup, etc., always refers to the current marked window. file name of the setup file is visible in the title bar. Figure 63: DatafoxStudioIV User interface As long as the setup-mask-dialogue is opened you have no access to other functions of the DatafoxStu- dioIV. -
Page 95: Open Setup File
Manual Datafox ZK-MasterIV Main window of the DatafoxStudioIV Menu bar Tool bar Window of the used setup Figure 64: User interface of the DatafoxStudioIV 4.3.2 Open setup file In order to open an already created setup file with the DatafoxStudioIV, click on Datei ”Of f nen... -
Page 96: Menu Setup
Manual Datafox ZK-MasterIV 4.4 Menu Setup 4.4.1 Edit Via the menu item you reach the domain of the DatafoxStudioIV where you Setup Editieren ¢ ¡ ¡ can edit a setup. You can find a more detailed description of the procedure in chapter 5. -
Page 97: Configure Data Storage
Manual Datafox ZK-MasterIV 4.4.3 Configure data storage Under the menu item a dialogue opens where you can set Setup Datenablage konf igurieren ¢ ¡ ¡ how the read out data records should be saved. You can define if an existing file should be over- written or if the data shall be added to the file. -
Page 98: Load Firmware
Manual Datafox ZK-MasterIV 4.4.4 Load firmware You can make all necessary settings for a firmware update via the menu item Setup F irmware laden ¢ ¡ ¡ You can select a *.zip archive which contains the firmware file (*.hex) for the ZK-MasterIVvia the button (1). -
Page 99: Device Maintenance Via Modem Connection
4.4.5 Device maintenance via modem connection It often happens that a ZK-MasterIV is autarkically installed as data entry terminal at a machine or plant. In this case it would be very time-consuming to do a firmware update with direct connection to a PC. -
Page 100: Functions For Device Maintenance
Manual Datafox ZK-MasterIV Figure 69: Device maintenance via modem connection 4.4.5.1 Functions for device maintenance ¦ Read out serial number ¦ Read out firmware version ¦ Compare clock with system time ¦ Transmit device file (firmware update) - Via the button in figure... - Page 101 Manual Datafox ZK-MasterIV ¦ read out data records - Via this function you can read out data records from the ZK- MasterIV. Via the button in figure a dialogue opens where you can define the folder (path) in which you want to save the data records.
-
Page 102: Edit Text Data Of The Firmware
Manual Datafox ZK-MasterIV 4.4.6 Edit text data of the firmware From version 04.01.06. x you can edit the text data of the device firmware about DatafoxStudioIV. Open the edit dialogue about the menu . Open now an Setup T extdaten der F irmware bearbeiten ¢... - Page 103 Manual Datafox ZK-MasterIV Figure 72: Zeile auswählen With the next single click in the column of user(description/...) or user(message/...) you put the cursor in this field. Figure 73: Zelle zum Bearbeiten auswählen Page 103 Version: 04.01.07.00 www.datafox.de...
- Page 104 Manual Datafox ZK-MasterIV Now you can edit the text. Figure 74: Textdaten eingeben bzw. bearbeiten If you conclude the input, the description from the column default(description/...) is taken over. Figure 75: Änderungen übernehmen You can change this text now in the column user(description/...). To transfer user to text data, they store all changes.
-
Page 105: Menu Communication
Manual Datafox ZK-MasterIV 4.5 Menu Communication Note: £ You can and should check all displayed communication parameters at each dialogue that opens with one of the following function calls, and adjust them via the button Settings if necessary. 4.5.1 Write / read setup When the setup is finished, back-up it on disk via... -
Page 106: Import And Load Timeboy Lists
fields of activities. The Group ID is logged on the Timeboy. Addition- ally, you can delete lists from the ZK-MasterIV (5). This functions are also available in the DLL and can be used via own applications. -
Page 107: Read, Delete, Display Data
4.5.4 Read, delete, display data The setup program offers simple functions for reading out and deleting data from the device. Only ASCII files can be created. For different output formats the use of the communication DLL or Datafox-Talk is advisable. Please not chapter 2.3.2. -
Page 108: Read Global Variables
Manual Datafox ZK-MasterIV 4.5.7 Read global variables Via the function "‘Read global variable"’ you can check which value has a global variable in the de- vice. Figure 80: Values of the read variables At the function call all global variables are read out from the device and shown with their current value. -
Page 109: System Variables Of The Signal Processing
"‘Write"’. You should note that, if the value of a system vari- able is set on "‘0"’, the settings from the setup of the ZK-MasterIV are used. Otherwise, the entered value. Figure 82: Dialogue system variables of the signal processing Page 109 Version: 04.01.07.00... -
Page 110: Display State Of The Zk-Modules
In the list the max- imum number of modules that can be connected to the ZK-MasterIV is shown. The next number indicates the state of the module. In the next col- umn the type of the module is shown, L stands for Leser (reader), TM for Türmodul (door module) -
Page 111: Work Through Batches
Manual Datafox ZK-MasterIV 4.5.10 Work through batches Via the function the functions read data, delete data, set Kommunikation Stapel abarbeiten ¢ ¡ ¡ time, load setup, load lists and load access lists can be worked through chronologically. Further functions proceed automatically. -
Page 112: Gprs Configuration
Manual Datafox ZK-MasterIV 4.5.11 GPRS configuration Corresponding to the data of your provider you can create a *.ini file for the GPRS configuration. The parameters that are necessary for the configuration of a GPRS/GSM connection are provided in the Ini- file. - Page 113 Manual Datafox ZK-MasterIV Via the GPRS configuration in the menu "Commu- nication" you can read out the GPRS configuration data from a device, edit them and write them to a device or you can open an INI-file from your PC and edit it.
-
Page 114: Device Configuration Bios
4.5.12 Device configuration BIOS Because the ZK-MasterIV has no keyboard and display, it is necessary to make all configurations con- cerning the device bios via a PC. For this purpose, connect the device to the PC via the RS232 interface. - Page 115 The blue progress bar displays the activation pro- cess. After the execution you receive a status mes- sage. Figure 93: Activate bios mode at the ZK-MasterIV After a successful activation of the bios mode, all available interfaces for the main communication are displayed.
- Page 116 Manual Datafox ZK-MasterIV On the tab TCP/IP you can parameterize the IP address, network mask (hostbits), standard gate- way and the option "‘remote access"’. If a DHCP is in the network, the IP address has to be set on "‘000.000.000.000"’. In this case the device obtains a dynamic IP address from the DHCP server.
-
Page 117: Settings
¢ ¡ ¡ nication between a PC and the ZK-MasterIV. For all communications applies: at first select the device type. It can be set optionally whether only error messages should be output or whether the accessibility, should be checked via Ping before establishing a connection. - Page 118 Figure 99: Settings of the RS485 communication via converter At a communication via TCO/IO the IP address of the ZK-MasterIV, the communication port and the timeout (in msec) have to be set. Figure 100: Settings of the TCP/IP communication Page 118 Version: 04.01.07.00...
-
Page 119: Menu Extra
Manual Datafox ZK-MasterIV In this case, analogous to a communication via TCP/IP the parameter have to be set and addi- tionally it has to be set if one or several devices should be activated. For a communication with only one device the bus number of the device is selected. -
Page 120: Datafoxstudioiv - Setup
On the graphic you can see the connections between parameterisation and result data. You may find secondary project support in the form of models on the Datafox CD. Figure 102: System relations Page 120 Version: 04.01.07.00... - Page 121 Manual Datafox ZK-MasterIV Planning steps ¦ Define all the tables for the data records that should be collected: field order, field name, field format ¦ Set the method of data collection for each field of a data record. In order to do this please use the operation (input chain fields):...
-
Page 122: Functions Of A Setup
Global variables are used as buffers within the device and do not depend on a data type. That way it is possible to transmit values, created within an input chain, to another input chain for reprocessing. At most 8 global variables can be defined in the ZK-MasterIV. The use of global variables is explained in detail in chapter 5.3. -
Page 123: Transponder
Manual Datafox ZK-MasterIV When a global variable is filled via an input chain you have to differ to cases: Either you fill the GV and create a data record concurrently, or you fill the GV without creating a data record. In the second case please note, that there should be no connection to any data record description. - Page 124 Manual Datafox ZK-MasterIV At the moment the following transponders are supported by the ZK-MasterIV Fields on the transponder Frequency Type Module Fields on the transponder Comment 125 KHz Unique TMR33, Fixed 13-digit number Only reading possible 125 KHz Hitag1 ProxLine...
-
Page 125: Transponder Reading Systems
Manual Datafox ZK-MasterIV 5.2.3.1 Transponder reading systems Read Type Frequency Module Unique 125 kHz TSR20, TSR21, TSR30, TSR32, TSR33 Hitag1 125 kHz TSR21, TSR32, TSR33 Hitag2 125 kHz TSR20, TSR21, TSR30, TSR32, TSR33 HitagS H32 125 kHz TSR21, TSR32, TSR33... - Page 126 Manual Datafox ZK-MasterIV Unique Unique is a pure reading system. The card number is a worldwide well-defined ID and is used in all conceivable fields. A 64bit information is saved on the card. For the well-defined ID only 40bits are used. The remaining bits are amongst other things used for a checksum.
- Page 127 Manual Datafox ZK-MasterIV can be edited in the device-BIOS. The set autoincrement value is only displayed in the device-BIOS and cannot be changed on the device itself. The writing of cards can be saved by a menu password. Hitag2 Hitag 2 is organized in 8 segments. Each segment is 32 bits long.
- Page 128 Manual Datafox ZK-MasterIV HitagS When using this method you differ between "‘HitagS H32"’, "‘HitagS H56"’ and "‘HitagS H48"’. HitagS H32 means, that this transponder has just a 32bit-value (= serial number of the card) (see Unique). Figure 108: HitagS H32...
- Page 129 Manual Datafox ZK-MasterIV The H48 means, that this transponder has 64 regis- ters for a 32bit-value each, altogether 2048 bit (see Hitag1). Figure 110: HitagS H48 Titan Titan (EM4450) is organized in 34 segments. Each segment has a length of 64 bits. You can find the serial number in segment 32.
- Page 130 (i.e. the key-A is the reading password and the key-B is the master key for reading and writing). At the moment the Datafox devices (up to version 4.1.4.xx) support only the default-format.
-
Page 131: Function Upgrading For Mifare Transponders
Manual Datafox ZK-MasterIV 5.2.3.2 Function upgrading for Mifare transponders 5.2.3.2.1 General information The function Autologin always works in this version. If no password is entered, the default password by Philips or Infineon is used. If a password is entered, at first a login as key A is carried out and if that fails, this password is used as key B. - Page 132 Manual Datafox ZK-MasterIV Figure 112: Sektor Trailer The card with the set default password key A FFFFFFFFFFFF for reading and writing with the ACBs FF078069 is new.. The card should have an ID number (32- bit as decimal value with leading pre- zeros, 10 digits) in the range sector 1 block 1, and a data range for fingerprint...
- Page 133 Manual Datafox ZK-MasterIV The ACBs (Access Condition Bits) should have a value of 78778869. Figure 114: Sektor Trailer In order to set the card on the values, intended for the use in the setup, the password group 3 has to contain the old passwords;...
-
Page 134: Function Normal
Manual Datafox ZK-MasterIV 5.2.3.2.3 Function normal New for this field function is the switching-on and -off of the acoustic sig- nalisation. The background is, that the last access to the transponder shall cre- ate a beep, in case of carrying out several reading and writing processes within one input chain. -
Page 135: Application Possibilities For Hitag-Transponder
Example 1. ZK-MasterIV setup for Hitag2 with firm code in segment 4 and personnel number in segment 5. Operation: The firm code is filed in segment 4. When reading the card a format check is carried out, e.g. 010101* for the customer ID 10101. - Page 136 Manual Datafox ZK-MasterIV Each card has to be programmed. Example 2. ZK-MasterIV setup for Hitag 2 with card number in segment 0 and check on lists. Page 136 Version: 04.01.07.00 www.datafox.de...
-
Page 137: Creating Data Record Descriptions
Note: £ Datafox offers a desktop reader with USB-connection to read the serial numbers into the PZE-software. By the keyboard emulation software the reader reacts like a keyboard. The cursor is put to the field Card number and the transponder is read. -
Page 138: Creating List Descriptions
Manual Datafox ZK-MasterIV When creating new data record descriptions under the element Data records please proceed as follows. Select the element Data records in the tree structure (it is highlighted in blue then). Via the button Paste a new data record description is created;... -
Page 139: Creating A User Guidance
5.2.6 Creating a user guidance As explained in chapter operating the terminal via keyboard is impossible. Therefore the ZK-MasterIV does not possess a actual main menu. Nevertheless you need an input chain (with the appropriate logic) to carry out access controls. -
Page 140: Defining Input Fields
Manual Datafox ZK-MasterIV 5.2.6.2 Defining input fields Note: £ All inputs always apply to the input field selected in the tree structure. After adding the input chain fields by pasting the input chain, these input chain fields can be config- ured. -
Page 141: Field Functions In General
Manual Datafox ZK-MasterIV At next you have to assign the collection function for data to the input chain field. Via this functions you set, which data (in which form) are transmit- ted to the field. Figure 124: Assignment of the collection function to an input chain field of the access control The following input functions (1) are available: 5.2.6.2.1 Field functions in general... -
Page 142: Field Functions Of The Access Control
Manual Datafox ZK-MasterIV ¦ Carry out access control with GV = You can carry out an access control within an input chain. ¦ Switch relay ¦ Apply debug value 5.2.6.2.2 Field functions of the access control ¦ Access: apply ZM (AccessMaster) = The value of the ZM is applied from the reader list. -
Page 143: Reaction On List Selection
Manual Datafox ZK-MasterIV 5.2.6.4 Reaction on list selection ¦ If you tick off Return necessary for confirmation (...), the list is displayed until a selection is made (in case of a list selection). ¦ (no tick) Timeout 0 (...). The first found list input is applied without being displayed. Please be careful in this case! ¦... -
Page 144: Use As Counter
Manual Datafox ZK-MasterIV When using as Start/ Stop a single digital input is allocated. It is appropriate to use the slower 10 Hz input for this. When using as Start/ Stop an edge change (High to Low or Low to High) is interpreted as a valid signal, only if the signal level is over the period of time set as debounce time. -
Page 145: Use As Counter With Start/Stop
Manual Datafox ZK-MasterIV 5.2.7.3 Use as counter with Start/Stop When using as counter with Start/Stop two digital inputs are allocated. The faster 1 kHz input is used as counter and the slower 10 Hz input as Start/Stop. Both inputs are configured according to their use (see figure... -
Page 146: Use As Counter With Start/Stop Via Timeout And 1St Counting Impulse
Manual Datafox ZK-MasterIV 5.2.7.5 Use as counter with Start/Stop via timeout and 1st counting impulse When using as counter with Start/Stop via timeout and 1st counting impulse a single digital input is allocated. It is reasonable to use the faster 1 kHz input for this, because it also functions as counter. -
Page 147: Connection Timeboy
In both variants the alive parameter in the GPRS.ini has to have a value larger than 60. The ZK-MasterIV checks Alive via F6 chain and then Alive via signal processing. Figure 133: Setting the alive data record 5.2.7.8 Setting of timers... - Page 148 (call up the function Start/stop timer) or automatically after starting the ZK-MasterIV. An input chain can be assigned to each timer. It is called up after the timeout was reached and then, if set, cyclically.
-
Page 149: Creating Setups
5.3.1.1 General There are the following special features for a setup of access control. The ZK-MasterIV does not have a keyboard or a display. Therefore operating via direct user input on terminal is impossible. -
Page 150: Basic Settings
Datei Speichern unter ¢ ¡ ¡ In our example you use the name ZK-MasterIV-Setup.aes. You can also create a new setup file via and save it with an own name. The setting of device type and communication Datei N eu ¥... -
Page 151: Creating A Data Record Description
Manual Datafox ZK-MasterIV In order to demonstrate the use of global variables you define a global variables named DeviceID. It is preallocated with the default value 4413. Each data record is characterized with this variable. If several terminals are used, data can be filtered and evaluated that way. -
Page 152: Creating The Access Control Lists
Manual Datafox ZK-MasterIV The dialogue for editing the setup is opened via a double click on the client range of the DatafoxStu- dioIV or via . Mark the Setup Editieren ¢ ¡ ¡ input Data records on the left side of the tree and then click on Paste. - Page 153 Manual Datafox ZK-MasterIV After setting all characteristics of the fields, the tree looks like that. Figure 141: Complete data record description Reader-List (Reader.txt) ;ID ZM TM RefLocation RefAction PinGeneral 320 0 000 1 010 2 011 2 Identification-List (Identification.txt) ;ID Group Pin...
-
Page 154: Creating An Input Chain Of Access Control
5.3.1.6 Creating an input chain of access control There is no keyboard or display on the ZK-MasterIV. Therefore operating by direct user input is not possible. The input chain, you want to create, will carry out the control (whether a person is access authorized or not). - Page 155 Manual Datafox ZK-MasterIV The next step is to assign an appropriate data record description to the input chain (for saving the booking data). Figure 143: Assignment of the data record description Erstellen Sie fünf Eingabekettenfelder innerhalb der Eingabekette für die Zutrittskontrolle.
- Page 156 Manual Datafox ZK-MasterIV This input chain field is named Master_ID. As- sign the same-named field to the data record de- scription. Select the function Access: apply ZM (AccessMaster). Figure 146: Definition of the input chain field Master_ID This input chain field is named Module_ID. As- sign the same-named field to the data record de-...
-
Page 157: Transmission Of The Complete Configuration To The Terminal
(ZK-MasterIV). Connect the ZK-MasterIV to the PC according to the selected communication type (see figure 141). Make sure that the PC interface is configured correctly, e.g. the baud rate, number of data bits, parity and stop bits of the COM-interface have to be concurrent to the configuration of the terminal. - Page 158 Manual Datafox ZK-MasterIV yellow green state of the TS TMR33-xx off off off No supply voltage is connected off off Supply voltage is connected on (ca. 1 s) an (ca. 1 s) Acoustic signal by buzzer (ca. 1s) signalizes module test off...
- Page 159 Manual Datafox ZK-MasterIV Now you can transmit the setup to the device via . The Kommunikation Setup schreiben ¢ ¡ ¡ progress bar indicates, that data are transmitted to the device. A successful conclusion of the transmission is indicated by a message you have to confirm via OK.
- Page 160 Manual Datafox ZK-MasterIV All red LEDs should turn out then. If they do not, you should check the list contents, especially the Bus-No. (DM) of the reader list and the configuration of the access components via the dip switch. If everything is okay, you can test the access control system.
Need help?
Do you have a question about the ZK-MasterIV and is the answer not in the manual?
Questions and answers