Table of Contents
Advertisement
This documentation with all illustrations is intellectual property of Trotec Laser GmbH.
The entire documentation is given to the user for personal use only. This documentation
must not be reproduced or made available to others without our written permission. Any
breach of law will be prosecuted.
8026 | V5.0_EN (11/2015)
Technical changes reserved
Operation
Manual
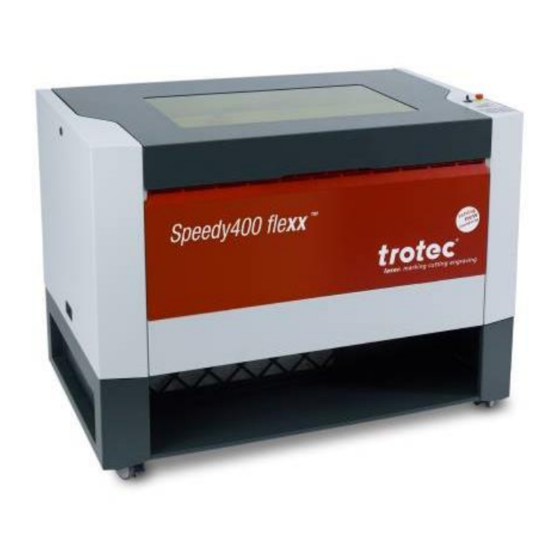
Speedy 400 flexx
Trotec Laser GmbH
Page 1 of 62
Advertisement
Table of Contents

Related Manuals for Trotec Speedy 400 flexx


Summary of Contents for Trotec Speedy 400 flexx
- Page 1 Manual Speedy 400 flexx This documentation with all illustrations is intellectual property of Trotec Laser GmbH. The entire documentation is given to the user for personal use only. This documentation must not be reproduced or made available to others without our written permission. Any breach of law will be prosecuted.
- Page 2 Troubleshooting. If unsuccessful, please note all data of the device (year of manufacture, software version, etc.) and call us from a telephone next to the switched on device. For queries or technical problems please contact your dealer or Trotec directly at the above address.. 8026 | V5.0_EN (11/2015)
-
Page 3: Table Of Contents
Connecting the Mains ................... 22 3.7.2 Connecting the Computer ..................23 3.7.3 Connecting the Exhaust System ................24 OPERATION ..................25 Machine view and connections front ..............25 8026 | V5.0_EN (11/2015) Trotec Laser GmbH Technical changes reserved Page 3 of 62... - Page 4 CLEANING THE MIRRORS #2, #3 AND #4 ............49 Maintenance Plan ....................51 MATERIAL TABLE .... FEHLER! TEXTMARKE NICHT DEFINIERT. TIPS FOR TROUBLESHOOTING ............57 TROTEC FORMS ................. 58 Acceptance report ....................58 TRAINING SCHEDULE .................... 59 Response Form ....................... 60 HOW TO CREATE A SERVICE FILE ...........
-
Page 5: General
Caution: In this area pay attention to the possible dangers of the laser beam. Note or information on individual components of the device, that simplify the use or make it more understandable. 8026 | V5.0_EN (11/2015) Trotec Laser GmbH Technical changes reserved Page 5 of 62... -
Page 6: Designated Use
Designated Use The TROTEC laser engraver, Speedy 400 flexx, is used for engraving and cutting of signs, stamps and suchlike. A wide variety of materials such as rubber, acrylic, coated metal, tin, special steel, anodized aluminum, cork, cardboard, glass, leather, marble, several plastics and wood can be processed on the laser. -
Page 7: Technical Data / Device Specification
Software JobControl X Expert Laser power Adjustable 0 - 100% Interface hardware USB, RS-232 (RS-232 mandatory for TroCAM and JobControl® Vision) Interface software ASCII, HPGL, JobContro 8026 | V5.0_EN (11/2015) Trotec Laser GmbH Technical changes reserved Page 7 of 62... - Page 8 Atmos Duo Plus or equivalent Electrical Equipment Power consumption 1,4 kW (60 W laser power) Subject to change without notice. Errors and omissions excepted. March 2012 8026 | V5.0_EN (11/2015) Trotec Laser GmbH Technical changes reserved Page 8 of 62...
-
Page 9: Manufacturer's Label
It is recommended to enter data such as serial number and year of manufacture data sheet above so that you always have this data handy if you have problems with your device or require spare parts. 8026 | V5.0_EN (11/2015) Trotec Laser GmbH Technical changes reserved Page 9 of 62... -
Page 10: Eu - Declaration Of Conformity
Trotec Laser GmbH. Linzer Strae 156, A-4600 Wels Authorized person for the compilation of technical documentation: Gerhard KREMPL, Trotec Laser GmbH., Linzer Strae 156, A-4600 Wels We hereby certify that Speedy400 flexx Model N 8027 Speedy400 flexx in its conception, construction and form put by us into circulation is in accordance with all the relevant essential health and safety requirements of the EC machinery directive 2006/42/EEC. -
Page 11: Safety
2 SAFETY Please read this chapter before operating or servicing a Trotec Speedy 400 flexx laser system! General Safety Information All personnel involved in installation, set-up, operation maintenance and repair of the machine, must have read and understood the Operation Manual and in particular the "Safety"... -
Page 12: Laser Safety Information
Laser Safety Information To assess the potential dangers laser systems pose, they are classified into 5 safety classes: 1, 2, 3a, 3b and 4. Trotec Speedy 400 flexx is a device of class 2 (USA: Class II) and class 4 (USA: Class... - Page 13 Also other components inside the machine may be damaged if the aforementioned conditions are given. To improve laser safety an optional “Laser Protection Cover” is available on request. 8026 | V5.0_EN (11/2015) Trotec Laser GmbH Technical changes reserved Page 13 of 62...
-
Page 14: Safety Precautions When Operating The Device
Safety Precautions when Operating the Device In your Speedy 400 flexx, a closed safety system is integrated which immediately switches off the power to the laser tube when the protection cover is opened. Consequently an incomplete engraving can occur if the cover is opened during operation. -
Page 15: Warning And Information Labels
Therefore, follow the information on the labels. If labels are lost or damaged, they must be replaced immediately. Visible from outside P = xxx W 8026 | V5.0_EN (11/2015) Trotec Laser GmbH Technical changes reserved Page 15 of 62... - Page 16 8026 | V5.0_EN (11/2015) Trotec Laser GmbH Technical changes reserved Page 16 of 62...
-
Page 17: Before Operation
3 BEFORE OPERATION You receive your Speedy 400 flexx packed in a wooden crate, which contains the laser and additional accessories. A suitable fork-lift is required to unload from the courier vehicle and lift the machine off its pallet. A powered screwdriver with cross-head bit is recommended for dismantling the wooden crate. -
Page 18: Contents Of Delivery
Computer connection cable USB Computer connection cable serial (optional) Cleaning kit for optics Additional lenses (optional) Air assist nozzles(s) Focus tool(s) Allen key set 1.5 - 10 mm 8026 | V5.0_EN (11/2015) Trotec Laser GmbH Technical changes reserved Page 18 of 62... -
Page 19: Location
Try to place a working table or a place to put things next to it. This shall avoid, that the machine is misused as a table. 8026 | V5.0_EN (11/2015) Trotec Laser GmbH Technical changes reserved Page 19 of 62... -
Page 20: Electrical - Requirements
If installing any of these devices, make sure that they meet the electrical requirements of the laser system. It is your responsibility to provide a suitable electrical supply. 8026 | V5.0_EN (11/2015) Trotec Laser GmbH Technical changes reserved Page 20 of 62... -
Page 21: Exhaust System - Requirements
The device must be equipped with a pre and fine dust filter as well as an activated carbon filter (neutralization of smells). Trotec advises to use the Atmos Duo Plus. Connection - see section 3.7.3 Connecting the Exhaust System. Do not start the machine without an adequate exhaust system. -
Page 22: Connections
Under no circumstances switch on the device if the voltages do not correspond. INPUT POWER INPUT POWER 220-240VAC 50HZ 100-120VAC 60HZ The main fuse (2) is located below the connection socket and is accessible from the exterior. 8026 | V5.0_EN (11/2015) Trotec Laser GmbH Technical changes reserved Page 22 of 62... -
Page 23: Connecting The Computer
The computer must be switched off and connected to the mains voltage. Connect the laser (see Figure below) to a free serial interface (1) or USB port (2) on your computer. 8026 | V5.0_EN (11/2015) Trotec Laser GmbH Technical changes reserved Page 23 of 62... -
Page 24: Connecting The Exhaust System
When using the Trotec exhaust system, also connect it with the cable included to the remote control connector of the laser (3). Also follow the operation and maintenance instructions in the Operation Manual of the exhaust system. -
Page 25: Operation
Machine view and connections front Top lid Vaccuum table connection Service access panel Dust Protection (optional) Connection Socket for Rotary Keypad Working table X-axis Front lid 8026 | V5.0_EN (11/2015) Trotec Laser GmbH Technical changes reserved Page 25 of 62... -
Page 26: Machine View And Connections Back
Exhaust connector Laser and Power Supply covers JobControl® Vision connetors (optional) Fuse External interlock lamp Power socket Manufacturer's label Remote Interlock plug Exhaust hose connectors USB connector 8026 | V5.0_EN (11/2015) Trotec Laser GmbH Technical changes reserved Page 26 of 62... - Page 27 The work pieces to be processed are put onto the working table. To facilitate orientation, a horizontal and a vertical ruler are located on the working table. The table is ferromagnetic for easier fixation of work pieces. 8026 | V5.0_EN (11/2015) Trotec Laser GmbH Technical changes reserved Page 27 of 62...
- Page 28 The motion system is the part that performs the mechanical movements in X direction (horizontal) (Focusing head movement) and Y direction (vertical). The X axis is visible in the working area. 8026 | V5.0_EN (11/2015) Trotec Laser GmbH Technical changes reserved Page 28 of 62...
- Page 29 Must not be opened by unauthorized persons. Fuse(s) Power Socket To connect the main power according the information on the manufacturers label. Remote Interlock Plug USB connector For PC connection 8026 | V5.0_EN (11/2015) Trotec Laser GmbH Technical changes reserved Page 29 of 62...
- Page 30 Turns on when interlock is closed and machine is ready for processing. Manufacturer's Label Shows important data of the machine like serial number or manufacturing date. Exhaust hose connectors 8026 | V5.0_EN (11/2015) Trotec Laser GmbH Technical changes reserved Page 30 of 62...
-
Page 31: On/Off Switch
When switching off the mains supply, all processing data is lost. 8026 | V5.0_EN (11/2015) Trotec Laser GmbH Technical changes reserved Page 31 of 62... -
Page 32: Keypad
Shift + Down: the table moves down to the lowest possible position Shift + Up: the table moves up to the autofocus- position. 8026 | V5.0_EN (11/2015) Trotec Laser GmbH Technical changes reserved Page 32 of 62... - Page 33 Standby mode is entered after finishing the Z- axis- move (Z- axis move can be stopped by pressing any of the Z- axis keys). 8026 | V5.0_EN (11/2015) Trotec Laser GmbH Technical changes reserved Page 33 of 62...
- Page 34 Cover open during switch-on process, simultaneously acoustic signal - no referencing HOME Pressing this button will change the machines homeposition temporary (Home-move to this position) 8026 | V5.0_EN (11/2015) Trotec Laser GmbH Technical changes reserved Page 34 of 62...
-
Page 35: Tables
It is not allowed to place Workpieces into the baseframe without a Table attachment (e.g. Standard-, Vacuum- or Cutting Table). This is important so no bending on the frame and impairment of the exhaust function is possible. 8026 | V5.0_EN (11/2015) Trotec Laser GmbH Technical changes reserved Page 35 of 62... -
Page 36: First Steps Before Marking
For optimal processing the surface of the material that you want to engrave or cut, must be adjusted to this point. 8026 | V5.0_EN (11/2015) Trotec Laser GmbH Technical changes reserved Page 36 of 62... - Page 37 Now the lens is focused onto the surface of the material. B - Focusing by software: Click the icon "focus laser" in the Trotec JobControl The working table moves in Z direction. The following values are used to determine the focus position and therefore always have to be checked before using this focus option: ...
- Page 38 By pressing the two keys for Z positioning of the working table simultaneously, the laser beam is automatically focused onto the work piece (If you don't have the autofocus-option, the table will go down to Z = 0). 8026 | V5.0_EN (11/2015) Trotec Laser GmbH Technical changes reserved Page 38 of 62...
-
Page 39: First Marking Tests
With the positioning keys the lens is positioned over the material to be engraved. You focus with the help of the focus tool or by auto focus (see page 34 ongoing). 8026 | V5.0_EN (11/2015) Trotec Laser GmbH Technical changes reserved Page 39 of 62... - Page 40 After the material, the engraving direction, die orientation of the work piece and the orientation of the plate have been specified in the Trotec JobControl under "Plate, Setup Plate", the job can be positioned on the plate with a double-click. If necessary, the job can be positioned at any position on the plate by dragging with the mouse.
-
Page 41: Manually Switching Lasersources
1) After referencing of the 2a) To change to the CO2- 2b) To change to the fiber- machine press "Standby" mode, press both X-buttons mode, press both Y-buttons together together 8026 | V5.0_EN (11/2015) Trotec Laser GmbH Technical changes reserved Page 41 of 62... -
Page 42: Tips And Tricks
Cast acrylic can be best engraved without protection foil. It is better to engrave the entire surface with a low energy setting. 8026 | V5.0_EN (11/2015) Trotec Laser GmbH Technical changes reserved Page 42 of 62... - Page 43 With one material large dot look better, with another material smaller points look better. If you cannot select rasters with your software, the machine will select the raster automatically. 8026 | V5.0_EN (11/2015) Trotec Laser GmbH Technical changes reserved Page 43 of 62...
-
Page 44: For Laser Cutting
During laser cutting the Hz setting (pulses per second) should be set to low, in particular for flammable materials. Multiple cutting Often a clearer contour can be achieved by cutting twice rather than cutting only once. 8026 | V5.0_EN (11/2015) Trotec Laser GmbH Technical changes reserved Page 44 of 62... -
Page 45: For The Production Of Rubber Dies
Test the rubber first, to find out the correct speed setting. The Trotec JobControl software simplifies the creation of a stamp significantly. Mirroring as well as converting is performed automatically and a cone-shaped shoulder is generated around each letter. Due to the wider base the letters are stabilized during stamping and therefore the imprint becomes clearer. -
Page 46: Maintenance
Clean the cover of the laser tube. You can clean the acylic cover with a cotton cloth. Do not use paper towels as they could scratch the acrylic. 8026 | V5.0_EN (11/2015) Trotec Laser GmbH Technical changes reserved Page 46 of 62... -
Page 47: Cleaning The Optical Parts
Cleaning the Optical Parts Trotec recommends to use following cleaning material: Lens tissues Part number 69249 Lens cleaner Part number 69248 The lens has a durable multi-coating and won't be damaged by correct and careful cleaning. You should inspect the mirrors and the lens according the maintenance plan. - Page 48 The rounded side (= convex) of the lens is facing upwards. This is guaranteed by the design of the lens holder. Fix the lens holder carefully with the fixing ring. 8026 | V5.0_EN (11/2015) Trotec Laser GmbH Technical changes reserved Page 48 of 62...
-
Page 49: Cleaning The Mirrors #2, #3 And #4
Use a fresh lens cleaning tissue soaked with lens cleaning liquid each time and again wipe over the mirror only once. Then 8026 | V5.0_EN (11/2015) Trotec Laser GmbH Technical changes reserved Page 49 of 62... - Page 50 Examine the mirror and repeat the cleaning process, if necessary. Re-insert the mirror into the mirror holder by setting it straight onto the holder and tightening the knurled screws. 8026 | V5.0_EN (11/2015) Trotec Laser GmbH Technical changes reserved Page 50 of 62...
-
Page 51: Maintenance Plan
According to the operation manual Particle filter of the exhaust system Activated carbon filter For detailed information on the maintenance activities on exhaust systems please refer to the respective manual. 8026 | V5.0_EN (11/2015) Trotec Laser GmbH Technical changes reserved Page 51 of 62... - Page 52 Make sure the engraving or vacuum table is installed. Move the working table to the lower position, switch off the laser and open the top lid and front panel for easier loading. 8026 | V5.0_EN (11/2015) Trotec Laser GmbH Technical changes reserved Page 52 of 62...
- Page 53 Connect the rotary engraving attachment via the control cable with the connector of the motion system. The connector is located inside the left front of the interior. 8026 | V5.0_EN (11/2015) Trotec Laser GmbH Technical changes reserved Page 53 of 62...
- Page 54 Now check if the work piece is horizontal and, if necessary, adjust the level by lever 1 on the right side or lever 4 or screw 2 on the left side. 8026 | V5.0_EN (11/2015) Trotec Laser GmbH Technical changes reserved Page 54 of 62...
- Page 55 Establish the connection to the laser. Switch on the exhaust system (only necessary if you do not use an original Trotec exhaust system). If you use a machine type with a water cooled laser tube, switch on the cooling system before switching on the laser.
-
Page 56: Material Table
Trotec. We recommend to run a material processing test with the above mentioned mate-rial using the appropriate configuration. Trotec assumes no responsibility for any consequences of laser processing in any application such as medical or pharmaceutical applications. -
Page 57: Tips For Troubleshooting
Make sure that the directory "Spool" has been created in the directory of JobControl ("Trotec") and that the correct path to this directory has been set under "Options" in the "Settings" menu. A job transferred to JobControl does not contain any graphics, ... -
Page 58: Trotec Forms
Deficiencies determined the manufacturer. Thank you very much. The machine with the machine designation: Speedy 400 flexx has been checked according to the listed items and has been transferred properly. City, Date Company stamp / Signature 8026 | V5.0_EN (11/2015) -
Page 59: Training Schedule
Announcement of Failure and instituting Procedure Responsibility on remedial measure Operation Manual and its depository for inspection Cleaning and Maintenance ..........................Signature of Trainer Signature of Trainee 8026 | V5.0_EN (11/2015) Trotec Laser GmbH Technical changes reserved Page 59 of 62... -
Page 60: Response Form
What happened before the error showed up? (Thunder&Lightning, Windows What was tried to solve the problem? Please send the information to your sales representative or to techsupport@troteclaser.com. 8026 | V5.0_EN (11/2015) Trotec Laser GmbH Technical changes reserved Page 60 of 62... -
Page 61: How To Create A Service File
Start JobControl and go to Settings> Create Service File. The window "Save Service File to" shows up. Please select a directory to save the file and click on "Save". 8026 | V5.0_EN (11/2015) Trotec Laser GmbH Technical changes reserved Page 61 of 62... - Page 62 Photoshop file, AutoCAD file,). Click on "Open". The following window confirms, that the Service File (ServiceLog.txt) was created successfully. Please send the Service File to your sales representative or to techsupport@troteclaser.com. 8026 | V5.0_EN (11/2015) Trotec Laser GmbH Technical changes reserved Page 62 of 62...
Need help?
Do you have a question about the Speedy 400 flexx and is the answer not in the manual?
Questions and answers