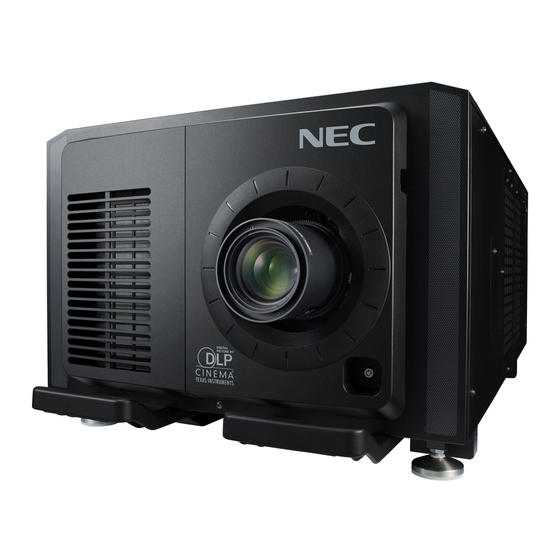
NEC NP-02HD Installation Manual
Dlp cinema projector head/light module
Hide thumbs
Also See for NP-02HD:
- User manual (80 pages) ,
- User manual (81 pages) ,
- User manual (82 pages)
Table of Contents
Advertisement
Quick Links
Download this manual
See also:
User Manual
Advertisement
Table of Contents

Related Manuals for NEC NP-02HD


Summary of Contents for NEC NP-02HD
- Page 1 DLP Cinema Projector ® Installation Manual DLP Cinema Projector Head ® NP-02HD Light Module NP-24LU01/NP-20LU01/NP-18LU01 Model No. NP-02HD NP-24LU01 / NP-20LU01 / NP-18LU01...
-
Page 2: Introduction
DLP Cinema Projector Installation and Adjustment NEC Display Solutions, Ltd. Manual (This document) describes the procedures to install, adjust and maintain the projector (NP-02HD). For safe and correct installation, adjustment and use of this projector, care- fully read this document before location assessment and installation. -
Page 3: Important Information
02HD and keep the manual handy for future reference. The edition 2015. This product is classified as RG3 of IEC62471:2006 NP-02HD (projector unit) is called the “projector”, and the (for USA). Obey the laws and regulations of your country in rela- NP-90MS01/NP-90MS02 (integrated media server) is called tion to the installation and management of the device. - Page 4 ) and lens (8 kg) for an extended period of time, MAINTENANCE AND SERVICE OF THE PRODUCT IS ONLY and the installation must be in accordance with any local TO BE HANDLED BY NEC AUTHORIZED TECHNICIANS. building codes. Important Safeguards When the light module NP-18LU01is installed, the weight is about 149 kg.
- Page 5 Important Information When using the projector tilted in the forward or backward 2. The power cable is not included with the projector. Use a direction, use it in the range of (+15° to -15°) from horizontal. If power cable that meets the standards and power supply you tilt it outside of this range or tilt it to the left or right, it may voltage of the country where you are using the projector.
- Page 6 Important Information 2. Prevent foreign objects such as paper clips and bits of CAUTION paper from falling into your projector. Do not attempt to retrieve any objects that might fall into your projector. Do 1. Do not shut down AC power to the projector under the following conditions.
- Page 7 Important Information Handling the Battery • Take care when handling the battery, as it could cause fire, injury, or damage to surrounding objects. - Do not short out, dismantle, or place batteries in a fire. • Dispose of used batteries according to your local regulations.
- Page 8 Email Address: contact@goldenduckgroup.com Email Address: info@nec-displays.com WEB Address: https://www.nec-display-solutions.com In North America Company Name: NEC Display Solutions of America, Inc. Address: 500 Park Boulevard, Suite 1100 Itasca, Illinois 60143, U.S.A. Telephone: +1 800 836 0655 Fax Line: +1 800 356 2415 Email Address: pjtechsupport@necdisplay.com...
- Page 9 Important Information Label Information Label A Label A: Lamp Warning Label...
- Page 10 Important Information Label C Label B Label D Label E • Label B Laser Explanatory Label • Label C...
- Page 11 Important Information • Label D • Label E...
- Page 12 Important Information Radiation Range of Emitted Light by the Projector (HD: Hazard Distance) • The below table describes the radiation range of emitted light by the projector that is classified as Risk Group 3 (RG3) of IEC62471-5 First edition 2015. • The below table describes the radiation range of emitted light by the projector that is classified as Risk Group 3 (RG3) of IEC62471:2006.(for USA).
- Page 13 Important Information CAUTION Please heed all precaution for safety. To install the projector • For planning the layout of the projector, make sure to take safety measures instructed on the installation manual. • In order to refuse danger, install either a wall outlet within easy reach for pulling out the power plug in emergency or a device as a breaker to shut down the power supply to the projector.
-
Page 14: Wichtige Informationen
Lesen Sie sich dieses Handbuch bitte sorgfaltig durch, Klasse 1 klassifiziert. Dieses Produkt ist als RG3 von IEC62471-5 bevor Sie den NP-02HD benutzen, und bewahren Sie das Erste Ausgabe 2015 eingestuft. Beachten Sie bei der Installa- Bedienungshandbuch in reifbarer Nahe als spatere Referenz tion und Verwaltung des Geräts die Gesetze und Bestimmun-... - Page 15 11. Installieren und bewahren Sie den Projektor nicht unter den NEN ODER MODIFIZIEREN. nachfolgend aufgeführten Umständen auf. Nichtbeachtung ES GIBT KEINE VOM BENUTZER ZU WARTENDEN TEILE. kann eine Fehlfunktion verursachen. DIE WARTUNG DES PRODUKTS DARF NUR VON NEC- • In starken Magnetfeldern AUTORISIERTEN TECHNIKERN DURCHGEFÜHRT WERDEN.
- Page 16 Wichtige Informationen Spannungsversorgung WARNUNG 1. Zum Installieren des Netzkabels am Projektor wenden Sie 1. Verwenden Sie den Projektor nicht, während die mitgelie- sich bitte an Ihren Fachhändler. UNTER KEINEN UMSTÄN- ferte Linsenkappe oder Ähnliches angebracht ist, und der DEN versuchen, das Netzkabel selbst zu installieren. Projektor in Betrieb ist.
- Page 17 Wichtige Informationen • Falls der Projektor nicht normal arbeitet, obwohl Sie die ACHTUNG in diesem Bedienungshandbuch beschriebenen Anlei- tungen befolgen. Der nachfolgend abgebildete Netzkabelstopper wird mit • Wenn der Projektor fallengelassen oder das Gehäuse diesem Projektor mitgeliefert. Um zu verhindern, dass sich das Netzkabel löst, stellen Sie beschädigt wurde.
- Page 18 Wichtige Informationen ACHTUNG Peripheriegeräte und Verbindungskabel 1. In den folgenden Situationen darf die Netzspannung nicht Verwenden Sie abgeschirmte Kabel für die Verbindungskabel getrennt werden. Der Projektor konnte sonst beschadigt zwischen dem IMB mit Peripheriegeräten (GPI-, GPO-, AES- werden. Kabel). Wenn Sie ein nicht abgeschirmtes Kabel verwenden, Anderenfalls kann der Projektor beschadigt werden.
- Page 19 Talingchan, Bangkok, Thailand 10170 Web-Adresse: http://www.nec-display-solutions.com Telefon: +66-2887-8807 Fax-Nummer: +66-2887-8808 In Nordamerika E-Mail-Adresse: contact@goldenduckgroup.com Firmenname: NEC Display Solutions of America, Inc. Adresse: 500 Park Boulevard, Suite 1100 Itasca, Illinois 60143, U.S.A. Telefon: +1 800 836 0655 Fax-Nummer: +1 800 356 2415 E-Mail-Adresse: pjtechsupport@necdisplay.com Web-Adresse: http://www.necdisplay.com/...
- Page 20 Wichtige Informationen Laseraustrittsmodule Aufkleber A Aufkleber A: Lampenwarnschild...
- Page 21 Wichtige Informationen Aufkleber C Aufkleber B Aufkleber D Aufkleber E • Aufkleber B Laser-Hinweisschild • Aufkleber C...
- Page 22 Wichtige Informationen • Aufkleber D • Aufkleber E...
- Page 23 Wichtige Informationen Strahlungsbereich des abgegebenen Lichts durch den Projektor(Sicherheitsabstand – HD: Hazard distance) • Die nachfolgend abgebildete Tabelle gibt den Strahlungsbereich des abgegebenen Lichts durch den Projektor an, das als Risik- ogruppe 3 (RG3) nach IEC62471-5 Erste Ausgabe 2015 eingestuft. • Bitte bei der Installation des Projektors die Einschränkungen beachten.
- Page 24 Wichtige Informationen ACHTUNG: Bitte beachten Sie alle Sicherheitshinweise. Installation des Projektors • Beachten Sie bei der Planung des Aufbaus des Projektors die Sicherheitsmaßnahmen im Installationshandbuch. • Installieren Sie zur Gefahrenverringerung eine Wandsteckdose in Reichweite, damit der Netzstecker im Notfall herausgezogen werden kann, oder einen Trennschalter, um die Stromversorgung zum Projektor unterbrechen zu können.
-
Page 25: Table Of Contents
Table of Contents Introduction ..................................2 Important Information ................................ 3 Wichtige Informationen ..............................14 Installation of the light module ............................27 1. Before Setting Up Your Projector ..........40 1-1. Clearance for Installing the Projector (English) ....................40 1-2. Freiraum bei der Projektorinstallation (Deutsch) ....................42 1-3. - Page 26 Installation of the light module 4. LCD Menu ................118 4-1. List of Menu ................................118 4-1-1. When You Use the Service Personnel Menu .................... 121 4-2. Title Select ................................122 4-2-1. Title select (Title Memory) ......................... 122 4-2-2. Test Pattern ..............................122 4-3.
-
Page 27: Installation Of The Light Module
Installation of the light module The NP-24LU01, NP-20LU01 and NP-18LU01 light modules can be used in combination with the projector head (NP-02HD). Other light modules cannot be used in combination with the projector head. The explanation on how to install the light module assumes the projector is as it was when shipped from the factory. In addition, in this explanation the projector head is referred to as the “main unit”. - Page 28 Installation of the light module Remove the top panel. These screws do not come off. Remove the three M4 screws (silver) on the left and right sides respectively. Turn the two M4 screws (black) at the front and back centers of the top panel until they turn freely (they do not come off), then lift the panel and remove it.
- Page 29 Installation of the light module Place the light module on the main unit. CAUTION ・ The light module (NP-24LU01 and NP- 20LU01)* weighs approximately 65 kg. To avoid lower back pain, it should only be in- stalled by multiple people. * The NP-18LU01 weighs approximately 56 kg.
- Page 30 Installation of the light module Slide the light module forward. When this is done, the tip of the light module's light flux pipe is inserted into the light source socket of the main unit. Light source socket Light flux pipe Fine-adjust the light module's mounting position.
- Page 31 Installation of the light module Once the position is set, tighten with the four M6 cross-slot upset screws (temporarily fixed to the light module base) and the two M5 cross-slot upset screws (included with the main unit). Remove the dedicated positioning bars. Use the M5 screws included with the main unit for these two screws.
- Page 32 Installation of the light module Close the fan bracket and fasten it. Stopper Rotate the stopper clockwise and line it up with the screw hole. Close the fan bracket and tighten it with the three M4 screws. Mount the quick release board onto the light module's connector holder.
- Page 33 Installation of the light module Now carefully insert the quick release board into light module's connector holder, attach the left and right hooks to the ends of the quick release board, then turn the knobs to fasten. Quick release board Hook Knob Connector holder...
- Page 34 Installation of the light module Use the six M4 screws (silver) removed in step 1 (2) and the two M4 screws removed in step 2 to fasten at four po- sitions respectively on the left and right sides. When doing this, tighten the screws in the notch-less screw holes on left and right sides. Notch Mount the left and right side panels.
- Page 35 Installation of the light module Replacing the notch filter kit (for the NP-18LU01 light module) Upon shipment from the factory, the notch filter kit (NFK-G24) for the NP-24LU01 and NP-20LU01 light modules is installed on the main unit. When using the main unit in combination with the NP-18LU01 light module, replace the notch filter kit with the NFK-G18 that is included with the main unit.
- Page 36 Installation of the light module Take out the notch filter kit. Turn the knob counterclockwise until it turns freely. The knob does not come off. Pull the notch filter kit straight out to remove it. Install the new notch filter kit (NFK-G18). Point the arrow upwards and slowly insert the Insertion slot notch filter kit into the insertion slot in the main unit,...
- Page 37 Installation of the light module Maintaining the information of light module Store the various information and the initial adjustment data of the light module to the projector head. To execute the following steps, first you need to log in the projector main unit as a serviceman. To use the menu for Serviceman, refer to “4-1-1.
- Page 38 Installation of the light module Shadow adjustment If the illumination position of the light source deviates, shadows will appear around the projection screen. Shadow adjustment consists of adjusting for this deviation. Perform shadow adjustment when replacing the light module. WARNING ・...
- Page 39 Installation of the light module Adjust the illumination position of the light source. CAUTION ・ Do not short-circuit the circuit boards with the tools. ・ Do not touch anything other than the shadow adjustment nut. CAUTION ・ Strong light is projected during operation, so do not look into the lens. Doing so may cause dam- age to the eyes.
-
Page 40: Before Setting Up Your Projector
1. Before Setting Up Your Projector 1-1. Clearance for Installing the Projector (English) Allow ample clearance between the projector and its surroundings as shown below. Avoid installing the projector in a place where air movement from the HVAC is directed at the projector. Heated air from the HVAC can be taken in by the projector’s intake vent. - Page 41 Before Setting Up Your Projector (2) For ceiling mounting: Lens 70cm/27.6" or greater • The drawing shows the proper clearance required for the front, sides, back and bottom of the projector. NOTE • If suspending the projector 30 cm/12 inches away from the ceiling, allow ample clearance for all four sides and the under the projector.
-
Page 42: Freiraum Bei Der Projektorinstallation (Deutsch)
Before Setting Up Your Projector 1-2. Freiraum bei der Projektorinstallation (Deutsch) Achten Sie auf ausreichenden Freiraum zwischen dem Projektor und seiner Umgebung, wie unten gezeigt. Vermeiden Sie es, den Projektor an einer Stelle zu installieren, an der er den Luftströmungen von Klimaanlagen ausgesetzt ist. Die aufgeheizte Luft aus einer Klimaanlage kann vom Lüftungseinlass des Projektors aufgenommen werden. - Page 43 Before Setting Up Your Projector (2) Bei der Deckenmontage: Linse 70 cm oder mehr • Die Abbildung zeigt den ordnungsgemäßen Abstand für die linke, rechte, Vorder-, Rück- und Unterseite des HINWEIS Projektors. • Wenn Sie den Projektor 30 cm von der Decke entfernt installieren, achten Sie auf ausreichende Freiräume auf allen vier Seiten und unter dem Projektor.
-
Page 44: Selecting The Lens Unit
Before Setting Up Your Projector 1-3. Selecting the lens unit This section provides guideline information on how to select the screen size, the projector mounting position, and the type of lens unit that is appropriate for your presentation purposes. Multiple lens units are sold separately as options for this projector. Select an appropriate lens unit according to the environment in which your projector is installed. - Page 45 Before Setting Up Your Projector Vertical moving screen mask Screen masks move vertically to adjust the screen. Screen mask Screen Screen mask...
-
Page 46: Calculating The Lens Zoom Magnification To Use
Before Setting Up Your Projector 1-3-2. Calculating the lens zoom magnification to use The lens zoom magnification required when installing the projector is calculated using the following method. (1) Calculate the lens zoom magnification for SCOPE projection. (2) Calculate the lens zoom magnification for VISTA (FLAT) and HDTV projection. (3) Select the lens that satisfies the zoom magnification calculated in (1) and (2). - Page 47 Before Setting Up Your Projector Option lenses The lens units that can be attached to this projector are shown in the following table. MODEL Magnifying 1.20 - 1.81 NC-60LS12Z 1.40 - 2.05 NC-60LS14Z 1.59 - 2.53 NC-60LS16Z 1.90 - 3.25 NC-60LS19Z 2.40 - 3.90 NC-60LS24Z...
-
Page 48: Carrying The Projector
Before Setting Up Your Projector 1-4. Carrying the projector WARNING • When moving the projector, it should be carried by holding the handles or hook on the base of the unit by 6 or more people. • When moving the projector, first turn off the power and always disconnect the power plug from the electrical outlet, and check that all of the connecting cables between equipment and the lenses have been removed. -
Page 49: Removing The Projector Covers
Before Setting Up Your Projector 1-5. Removing the Projector Covers This section provides guideline information on how to remove and mount covers on the projector. Name of the cover Air inlet (Filter cover / Filter) Lens cover Side panel Air outlet Plate inlet Air inlet (Filter cover / Filter) Air inlet (Filter cover / Filter) - Page 50 Before Setting Up Your Projector Position of the key locks on the covers When removing or attaching a cover of the projector main unit, the lock needs to be unlocked using the included service key. The positions of the locks on each of the covers are as follows. WARNING TO REDUCE THE RISK OF ELECTRIC SHOCK AND LASER RADIATION, DO NOT OPEN COVER.
-
Page 51: Removing And Mounting The Lens Cover
Before Setting Up Your Projector 1-5-1. Removing and Mounting the Lens Cover Preparation: Service key (attached goods) Remove the front filter cover. Pull the filter cover in the direction of the arrow to remove it. Handle Unlock the lens cover. Unlock the cover using the service key. - Page 52 Before Setting Up Your Projector Remove the lens cover. The lens cover is secured to the projector body by two claws each at the cover top and bottom. Hold the cover sides and pull toward you. Handle Handle • This completes removing the lens cover. To mount the cover, perform the removal procedure in reverse. Make sure to lock the key.
-
Page 53: Removing And Mounting The Side Panel
Before Setting Up Your Projector 1-5-2. Removing and Mounting the Side Panel Preparation: Phillips-head screwdriver (No.2), service key (attached goods) Loosen the seven fixing screws on the side panel. Loosen four screws on the side panel until they are free to spin. The screws do not detach from the panel. Unlock the lock on the side panel. -
Page 54: Setting Up Your Projector
2. Setting Up Your Projector 2-1. Setup Procedure Set up the projector according to the procedure below. This chapter describes the installation of procedure until turning on of the power. • Step 1 Projector Installation (See page 55). • Step 2 Selecting the Power Cable (See page 58). Connecting the Power Cable (See page 64). -
Page 55: Projector Installation
Setting Up Your Projector 2-2. Projector Installation Move the projector to the projection position and install it corresponding to the screen and projection conditions. To correct the inclination to the right or left of the projector, use the level adjusters at 4 positions. You can extend the level adjuster to 10 mm at the maximum (Rotate it counterclockwise for extension). -
Page 56: Installing The Projector On The Ceiling
Setting Up Your Projector 2-2-1. Installing the Projector on the Ceiling To install the projector on the ceiling, install it by referring to the following specifications. 213.5 55.5 Max M8x20 Max M8x20 Max M8x20 48.5 Lens center (Lens shift 0) The ceiling mounting surface Lens center (Lens shift 0) -
Page 57: Terms For Preparation Of Frames And Ceiling Hanging Brackets
Setting Up Your Projector 2-2-2. Terms for Preparation of Frames and Ceiling Hanging Brackets Ask whoever is installing the projector to prepare a specifically designed frame and ceiling hanging brackets (Charged Service). Take note of the following upon its design. - There are intake openings and exhaust openings on the side of the main unit, exhaust openings on the rear, intake openings on the front, intake openings on the top side. -
Page 58: Selecting The Power Cable For C2 Connection (English)
Setting Up Your Projector 2-3. Selecting the Power Cable for C2 Connection (English) The power cable for C2 Connection is not included with the projector. Refer to “2-3-1. AC Power Work Specifications” (page 59) and provide the necessary power cable. WARNING Carefully read the contents described in this section before connection and connect the cables according to the proper proce- dure. -
Page 59: Ac Power Work Specifications
Setting Up Your Projector 2-3-1. AC Power Work Specifications AC power supply equipment Do not use any voltage other than those shown below for the AC power supply connected to the projector. For C2 connection (when using two different power cables to supply the AC power to the projector and the light source separately) - AC100–... - Page 60 Setting Up Your Projector Japan Plug Cable Connector JIS C 8303 HVCTF 3 x 1.25mm IEC60320 C13 China Plug Cable Connector GB2099 RVV 300/500 GB17465.1 Connector Dimensions of the connector of the power cable are shown below. -0.9 -0.7 + 0.5 4-R3.5 (Min) + 0.5...
-
Page 61: Auswahl Des Netzkabels Für Anschluss C2 (Deutsch)
Setting Up Your Projector 2-4. Auswahl des Netzkabels für Anschluss C2 (Deutsch) Es wird kein Netzkabel für Anschluss C2 mit dem Projektor geliefert. Nehmen Sie auf „2-4-1. Netzstrom-Spezifikationen“ (Seite 62) Bezug, und beschaffen Sie das notwendige Netzkabel. WARNUNG Lesen Sie diesen Abschnitt vor dem Herstellen der Verbindungen sorgfältig durch, und schließen Sie die Kabel anhand der ordnungsgemäßen Verfahren an. -
Page 62: Netzstrom-Spezifikationen
Setting Up Your Projector 2-4-1. Netzstrom-Spezifikationen Netzkabel Der Projektor ist mit einem C19-Steckverbinder gemäß IEC60320 zum Anschließen des Netzkabels ausgestattet. Sorgen Sie dafür, dass die Netzkabel, die von den Steckverbindern am Projektor zum Netzanschluss führen, über die unten angegebenen Stromka- pazitäten verfügen. - Page 63 Setting Up Your Projector Japan Stecker Kabel Steckverbinder JIS C 8303 HVCTF 3 x 1.25mm IEC60320 C13 China Stecker Kabel Steckverbinder GB2099 RVV 300/500 GB17465.1 Für Benutzer in UK Verwenden Sie ein Netzteil mit BS-Zulassung und 10A-Sicherung. Steckverbinder Die Abmessungen des Netzkabels sind unten angegeben. -0.9 -0.7 + 0.5...
-
Page 64: Connecting The Power Cable (English)
Setting Up Your Projector 2-5. Connecting the power cable (English) Connect the power cable of the projector. The AC power cable is not attached as an accessory. Be sure to have professional technicians do any power supply construction. WARNING Carefully read the contents described in this section before connection and connect the cables according to the proper proce- dure. - Page 65 Setting Up Your Projector • C2 connection AC power is provided to the projector power supply and the light power supply by separate cables. C2 connection AC power supply Electric outlet equipment AC power supply cable Projector Breaker (Main unit) AC power supply equipment AC power supply cable Light power...
- Page 66 Setting Up Your Projector Input Selection The power supply connection method is configured by the wiring to the input selection. The configurations are as follows. Connection Connection AC power supply cable • For the AC power cable, use a cable of thickness as appropriate for the installation country and made of copper as shown below. • Use a round type UL-listed solderless terminal for the section connected to the main unit.
- Page 67 Setting Up Your Projector WARNING • The power supply unit handles large electrical currents. To maintain safety, use wires with the specifications as shown in the following table, and affix to the terminals at the designated attachment torque. • Always use solderless terminals with the dimensions as shown in the following diagram. • The use of parts with dimensions other than as designated creates a risk of the AC power supply unit short circuiting due to the terminal block generating heat and melting because the terminal block of the light power supply unit cannot be attached correctly.
- Page 68 Setting Up Your Projector • Ground terminal G (Green/Yellow) IEC/EN Thickness of compatible wiring AWG6 or AWG6 or 14mm 14mm (using solderless terminal) AWG8 AWG8 Solderless terminal dimensions M6 x 15 Tightening torque 3.5 to 5.0N·m Solderless terminal dimensions Min φ6.1 Max 13 Min 1.0 -Max 2.0 Max 11 Min 1.0...
- Page 69 Setting Up Your Projector Connecting the cable In order to attach the power cable to the connector block, connect the wires using the following procedure such that the individual wires cannot directly touch each other. Remove the power cable sleeves from the terminals Sleeves to ensure that the sleeves are not pinched by the ter- minal attachment screw.
- Page 70 Setting Up Your Projector When connecting the cables to the ground terminal block, ensure that parts other than the solderless terminal (such as cable wires and fittings) are not pinched within the terminal fastening area. When correctly fastened. When the cable wire has become pinched due to using a solderless termi- nal with dimensions other than as designated.
-
Page 71: Procedure For Connecting The Power Cable (C1 Connection)
Setting Up Your Projector 2-5-2. Procedure for connecting the power cable (C1 connection) Preparation: Phillips-head screwdriver (No. 2), service key (projector accessory) WARNING • Before connecting the power cable, make sure that the AC power supply is disconnected. Otherwise a fire or electric shock may occur. - Page 72 Setting Up Your Projector Insert the L/N lines of the AC power cable into the connection terminals, and tighten the screws. Insert the crimping terminals of the AC power cable into the retaining holes of the connection terminals, and tighten the screws with the Phillips-head screwdriver.
- Page 73 Setting Up Your Projector Configure the power supply for C1 connection. For C1 connection, connect the left-side connector. Connect the C1 connector. Fix the plate inlet with the fixing screws (at four points). In Europe, fix the supplied φ35 plate inlet.
-
Page 74: Procedure For Connecting The Power Cable (C2 Connection)
Setting Up Your Projector 2-5-3. Procedure for connecting the power cable (C2 connection) Preparation: Phillips-head screwdriver (No. 2), service key (projector accessory) WARNING Before connecting the power cable, make sure that the AC power supply is disconnected. Otherwise a fire or electric shock may occur. - Page 75 Setting Up Your Projector Connect the AC power supply cable to the AC input of the projector. Insert the plug firmly all the way into the AC input. AC input Make sure you insert the plug firmly. Connect the power plug to the electrical outlet. This completes the connection of the AC power supply cable.
- Page 76 Setting Up Your Projector Attaching the power cable stopper To prevent the power cable from accidently removing from the AC IN of the projector, attach the supplied power cable stopper to clamp the power cable. CAUTION • To prevent the power cable from coming loose, make sure that all the prongs of the power cable are fully inserted into the AC IN terminal of the projector before using the power cable stopper to fix the power cable.
- Page 77 Setting Up Your Projector Slide the clamper to the hilt of the power cable. Pulling the knob in the arrow direction allows you to adjust the clamper position. Once the clamper position is adjusted, release the knob to lock the clamper. knob Pull the band to hold the power cable.
- Page 78 Setting Up Your Projector Removing the power cable from the power cable stopper Pull the knob of the clamper and loosen the band. knob knob band CAUTION The projector may become hot temporarily when the power is turned off or if the AC power is disconnected while the projector is projecting.
-
Page 79: Anschließen Des Netzkabels (Deutsch)
Setting Up Your Projector 2-6. Anschließen des Netzkabels (Deutsch) Schließen Sie das Netzkabel des Projektors an. Das Netzkabel ist nicht abziehbar sondern fest mit dem Gerät verbunden. Lassen Sie die Installation einer Netzstromversorgung unbedingt nur von professionellen Elektrikern durchführen. WARNUNG Lesen Sie diesen Abschnitt sorgfältig durch, bevor Sie die Kabel anschließen, und befolgen Sie beim Anschließen der Kabel die entsprechenden Anweisungen. - Page 80 Setting Up Your Projector • Anschluss C2 Die Stromversorgung zu den Netzteilen des Projektors und der Lichtquelle wird über getrennte Kabel zugeführt. Anschluss C2 Netzstrom- versorgung Elektrosteckdos Netzstromkabel Projektor Sicherung (Grundgerät) Netzstrom- versorgung Netzstromkabel Licht Netzteil Sicherung Eingabe Auswahl Wechselstromversorgung Betreiben Sie den Projektor nur mit den unten angegebenen Netzspannungen. Bei Verwendung von Anschluss C1 • 200 –...
- Page 81 Setting Up Your Projector Eingabe Auswahl Die Netzanschluss Methode wird durch die Schaltung der Eingabe Auswahl festgelegt. Die Konfigurationsmöglichkeiten sind im Folgenden aufgeführt. Anschluss C1 Anschluss C2 Connection Connection Netzkabel • Verwenden Sie als Netzkabel ein Kabel mit einer Kabelader aus Kupfer und einem Leiterquerschnitt, der den Vorgaben des jeweiligen Landes entspricht (siehe folgende Abbildung).
- Page 82 Setting Up Your Projector WARNUNG • Das Netzteil verarbeitet hohe elektrische Ströme. Verwenden Sie zur Gewährleistung der Sicherheit Kabeladern entsprechend den in der folgenden Tabelle aufgeführten Vorgaben, und befestigen Sie die Anschlussklemmen am angegebenen Klemmenblock. • Verwenden Sie immer lötfreie Anschlussklemmen, deren Abmessungen den Angaben in der folgenden Abbildung entsprechen.
- Page 83 Setting Up Your Projector • Erdungsklemme G (Grün/Gelb) IEC/EN Leiterquerschnitt kompatibler AWG6 bis AWG6 oder Kabel (bei Verwendung lötfreier 14mm 14mm AWG8 AWG8 Anschlussklemmen) Abmessungen lötfreier M6 x 15 Anschlussklemmen Anzugsmoment 3,5 bis 5,0 N·m Abmessungen lötfreier Min φ6.1 Anschlussklemmen Max 13 Min 1.0 -Max 2.0 Max 11 Min 1.0...
- Page 84 Setting Up Your Projector Anschließen des Kabels Schließen Sie zum Befestigen des Netzkabels am Klemmenblock die Drähte entsprechend den folgenden Anweisungen an, sodass sich die einzelnen Drähte nicht direkt berühren können. Ziehen Sie die Kabelmanschetten der Netzkabel von Manschetten den Anschlussklemmen zurück, um sicherzustellen, dass diese nicht von der Schraube der Anschluss- klemme eingeklemmt werden.
- Page 85 Setting Up Your Projector Achten Sie beim Anschließen der Kabel an die Masseanschlussklemme darauf, dass keine anderen Teile als der Quetschkabelschuh (z. B. Kabe- ladern undVerschraubungen) in der Klemmenbefestigung eingeklemmt werden. Richtig befestigt. Kabeldraht ist verkantet, da eine lötfreie Anschlussklemme mit Abmessun- gen verwendet wurde, die nicht den Vorgaben entsprechen.
-
Page 86: Anschluss Des Stromkabels (Anschluss C1)
Setting Up Your Projector 2-6-2. Anschluss des Stromkabels (Anschluss C1) Vorbereitung: Kreuzschraubenzieher (Nr. 2), Serviceschlüssel (Projektorzubehör) WARNUNG • Stellen Sie sicher, dass die Stromversorgung unterbrochen ist, bevor Sie das Stromkabel anschließen. Es besteht Brand- und Stromschlaggefahr. • Es entsteht viel Kriechstrom. Stellen Sie unbedingt sicher, die Stromversorgung nur anzuschließen, nachdem die Erdung angeschlossen ist. - Page 87 Setting Up Your Projector Entfernen Sie den Deckel der Strombuchse. Ziehen Sie dazu den Deckel zu sich hin und heben Sie ihn nach oben. Stecken Sie die L-Leitung und N-Leitung des Stromkabels in die Anschlussbuchse und schrau- ben Sie sie fest. Stecken Sie den Crimpanschluss des Stromkabels in die Öffnung der Anschlussbuchse und schließen Sie die Schrauben mit einem Kreuzschraubenzieher.
- Page 88 Setting Up Your Projector Configure the power supply for C1 connection. For C1 connection, connect the left-side connector. Connect the C1 connector. Fix the plate inlet with the fixing screws (at four points). EU-Region: Befestigen Sie die als Zubehör beigefügte 35mm-Platte Inlet.
-
Page 89: Anschluss Des Stromkabels (Anschluss C2)
Setting Up Your Projector 2-6-3. Anschluss des Stromkabels (Anschluss C2) Vorbereitung: Kreuzschraubenzieher (Nr. 2), Serviceschlüssel (Projektorzubehör) WARNUNG Stellen Sie sicher, dass die Stromversorgung unterbrochen ist, bevor Sie das Stromkabel anschließen. Es besteht Brand- und Stromschlaggefahr. Führen Sie die Schritte unter „2-6-2. Anschluss des Stromkabels (Anschluss C1)“ (Seite 86) aus. - Page 90 Setting Up Your Projector Connect the AC power supply cable to the AC input of the projector. Insert the plug firmly all the way into the AC input. AC input Make sure you insert the plug firmly. Connect the power plug to the electrical outlet. Dadurch ist der Anschluss des Netzkabels abgeschlossen.
- Page 91 Setting Up Your Projector Anbringen des Netzkabelstoppers To prevent the power cable from accidently removing from the AC IN of the projector, attach the supplied power cable stopper to clamp the power cable. CAUTION • To prevent the power cable from coming loose, make sure that all the prongs of the power cable are fully inserted into the AC IN terminal of the projector before using the power cable stopper to fix the power cable.
- Page 92 Setting Up Your Projector Slide the clamper to the hilt of the power cable. Pulling the knob in the arrow direction allows you to adjust the clamper position. Once the clamper position is adjusted, release the knob to lock the clamper. knob Pull the band to hold the power cable.
- Page 93 Setting Up Your Projector Removing the power cable from the power cable stopper Pull the knob of the clamper and loosen the band. knob knob band CAUTION The projector may become hot temporarily when the power is turned off or if the AC power is disconnected while the projector is projecting.
-
Page 94: Mounting The Lens Unit
2.40 - 3.90 NC-60LS39Z 3.90 - 6.52 • The other NEC optional lenses are not available on this model. NOTE • The projector and lenses are made of precision parts. Do not subject them to shock or excessive forces. • Remove the lens unit when moving the projector. If not, the lens could be subject to shock while the projector is being moved, damaging the lens and the lens shift mechanism. -
Page 95: Part Names Of Lens Mount
Setting Up Your Projector This chapter illustrates the factory default settings. 2-7-1. Part names of Lens Mount Lens unit fall prevention metal fitting Lens control connector Release lever Lens stopper Lens mount cap Remove the lens cover. For removing the lens cover, refer to “1-5-1. Removing and Mounting the Lens Cover” on page 51. Remove the lens mount cap. (1) Rotate the release lever clockwise in the upward (1)... - Page 96 Setting Up Your Projector Mount the lens unit to the lens mount Lens control connector Lens mount of the projector. (1) Align the guide slit of the lens mount with the position of the pin on the lens unit. Guide slit (2) Slowly insert the lens unit into the lens mount.
- Page 97 Setting Up Your Projector (2) Slide the fall prevention metal fitting downward. (3) Tighten the two screws that were loosened. Attach the lens cover. For details on attaching the lens cover, refer to “1-4-1. Removing and Mounting the Lens Cover”. Make sure the release lever is set in the downward direction. If it is set in the upward direction, the lens cover can not be attached.
-
Page 98: Mounting The Option Board
Setting Up Your Projector 2-8. Mounting the Option Board This section describes the procedure of mounting the media block. The following option board can be mounted to the slot of the projector. Name Slot NP-90MS01 NP-90MS02 Preparation: Phillips-head screwdriver (No.2), service key (attached goods). • Step 1 Remove Side Panel from the Projector (See page 53) • Step 2... - Page 99 Setting Up Your Projector Remove the side panel. Side panel of the projector should be removed to mount the option board. For the procedure of removing the side panel, refer to “1-5-2. Removing and Mounting the Side Panel” (page 53). Remove the blocking panel from slot.
-
Page 100: Make The Option Board Usable
Setting Up Your Projector 2-8-1. Make the option board usable By registering the mounted option board to the slot, you can use option board by setting up the projector. This procedure is described for the example, when IMB (NP-90MS02) is mounted to slot. For the operation of the projector, refer to projector’s “User’s Manual”. - Page 101 Setting Up Your Projector Press the LEFT/RIGHT button to display “IMB”. Press the ENTER button. (*) is displayed to the selected item. Press the EXIT button several times. The projector exits the menu and goes back to the regular screen. If you press the EXIT button and then select “Yes”...
-
Page 102: Projector Adjustment And Connecting
3. Projector Adjustment and Connecting 3-1. Flow of Adjustment and Connecting Adjustment and Connecting of the projector accord to the procedure below. • Step1 Turning Your Projector On (See page 106) • Step2 Setting The Date and Time in the Projector (See page 107) Setting the date of installation of the projector (See page 107) • Step3 Setting the Projector Projection Method (See page 108) -
Page 103: Recovering From Tamper Errors
Projector Adjustment and Connecting 3-2. Recovering from Tamper Errors The projector is fitted with a tamper detection circuit. If the cover or a slot device is removed, a tamper event is detected by the tamper detection circuit. When the projector is started after a tamper event has been detected, an error message is displayed on the LCD screen of the projector. -
Page 104: Clearing Tamper Events
Projector Adjustment and Connecting 3-2-1. Clearing tamper events Be sure to do this while the power of the projector is on (when Power-ON). If any tamper events have been detected by the tamper detection circuit of the projector main unit, clear the tamper events using the following procedure. - Page 105 Projector Adjustment and Connecting • Step 1 “Clear the “Service Door Tamper” by using the buttons on the Control Panel.” Refer to “4-1-1. When You Use the Service Personnel Menu” (page 121) for details on logging into the projector with Advanced User or higher privileges using the buttons on the control panel. Press and hold the LEFT/RIGHT buttons simultaneously for 3 seconds or more to display the passcode entry screen.
-
Page 106: Turning Your Projector On
Projector Adjustment and Connecting 3-3. Turning your Projector On • Do not use the projector with the lens cap left attached, and do not attach the lens cap while the projector is NOTE operating. The lens cap may become hot, causing them to deform or melt. • In the following instances, the power to your projector cannot be turned on even if you press the POWER button. -
Page 107: Setting The Date And Time In The Projector
Projector Adjustment and Connecting 3-4. Setting the Date and Time in the Projector The internal clock in the projector operates on coordinated universal time (UTC). You can set the internal projector time to the time in your region by setting the time difference between the standard time in your region and UTC. When IMB is used, the date and time of IMB are automatically used as the date and time of the projector (UTC). -
Page 108: Setting The Projector Projection Method
Projector Adjustment and Connecting 3-5. Setting the Projector Projection Method The projection method can be changed in the projector menu. In the factory default settings, it is set to front (installed on a stand and projecting from the front of the screen). Press the LEFT/RIGHT button to display “Configuration”... -
Page 109: Adjusting The Lens
Projector Adjustment and Connecting 3-6. Adjusting the Lens Display the test pattern and adjust the screen size, focus and screen position with the lens unit. 3-6-1. Display the Test Pattern Press the MENU button. “Title Select” is displayed on the LCD screen at the projector’s control panel. Press the DOWN button. -
Page 110: Adjusting The Screen Angle
Projector Adjustment and Connecting 3-6-2. Adjusting the Screen Angle Preparation: Display the zoom/focus adjustment screen by using the following procedure. [1] Press the MENU button on the projector’s control panel. “Title Select” appears on the projector’s LC display. [2] Select “Configuration” menu using the LEFT/RIGHT buttons. [3] Press the DOWN button. -
Page 111: Connecting With The Image Input Port
Projector Adjustment and Connecting 3-7. Connecting with the Image Input Port By installing option board to projector, you can add input port. Input port which can add to option board is listed below. For the connection diagram of projector and peripheral equipment, refer to Installation manual of option board. Option Board Image Input Port NP-90MS01/NP-90MS02 (Note) -
Page 112: Connecting The Various Control Terminal
Projector Adjustment and Connecting 3-8. Connecting the Various Control Terminal For control, your projector comes with such ports as the PC control terminal and the Ethernet port (RJ-45). PC control terminal (RS-232) Use this terminal when controlling the projector in serial connection from a PC. Use a retail RS-232C straight cable for the connection between the projector and the computer. -
Page 113: Cg Adjustments
Projector Adjustment and Connecting 3-9. CG adjustments Adjust for physical color shifting of the R, G and B colors. WARNING ・ No one other than a specialized service person should perform this adjustment. Doing so may result in electric shock or short circuits. ・... - Page 114 Projector Adjustment and Connecting 1-2. Remove the FMT board. Remove the three clampers shown in the upper figure and the five clampers shown in the lower figure. Remove the four M3 screws from the FMT board. If the FMT board is lifted, it will hit the fan flange, so slide it first then remove it.
- Page 115 Projector Adjustment and Connecting 1-3. Project a test pattern. Turn on the power of the projector and the light source and warm up for about 30 minutes. Refer to page for instructions on turning on the power. Operate the adjustment menu to set the Native Color mode.
- Page 116 Projector Adjustment and Connecting Turn the adjustment screw of the shifted color to match it to the red pattern. The pattern moves in an arc for the G2/G3 and B2/B3 adjustment screws. The pattern moves in a straight line for the G1 and B1 adjustment screws.
- Page 117 Projector Adjustment and Connecting Mount the top panel. Turn off all power to the projector and shut off the AC power supply. Close the rubber seals that were opened. Put the FMT board back in its original position and attach the four M3 screws. Fix the FMT board's cables to their original posi- tions with the clampers.
-
Page 118: Lcd Menu
4. LCD Menu This chapter describes the menus displayed in the LCD screen on the projector’s control panel and their functions. For basic opera- tions of menus, refer to the projector’s operation manual. 4-1. List of Menu Menus in parentheses are menus for our service personnel. Normally, these menus cannot be used. Reference Main menu Submenu... - Page 119 LCD Menu Reference Main menu Submenu Description page Information Light Light Output Displays the light module's brightness (output) setting value. Model Displays the light module's model name. Displays the serial number of the light module. Lens Type Displays the light source output setting. Preset Button Preset Button 1–16 Displays the titles which are assigned to the preset buttons (<1>...
- Page 120 LCD Menu Other menu functions [LAN Reset to Manual IP] Change the projector IP address assignment setting to “Manual”. Press the MENU and EXIT buttons simultaneously for three seconds. When the following screen appears, press the ENTER button for execution. ← Pressing the ENTER button executes this function. [Save PJ Log] Save a log of the projector into a USB flash drive.
-
Page 121: When You Use The Service Personnel Menu
LCD Menu 4-1-1. When You Use the Service Personnel Menu To use the menu for service personnel, you need to input the passcode. This section describes how to display the passcode entry screen and how to enter the passcode. Refer to the Service manual for details on how to enter text. Press the MENU button for three seconds or longer. -
Page 122: Title Select
LCD Menu 4-2. Title Select 4-2-1. Title select (Title Memory) Select the title of the signal to be projected. You can register up to 100 titles. You can also assign registered titles to the preset buttons <1> to <8> on the projector’s control panel and call them up directly using those buttons. -
Page 123: Configuration
LCD Menu 4-3. Configuration 4-3-1. Light Setup Adjust Adjusts the light source brightness (output). This setting is the fraction based on taking the maximum value of light source brightness as 100%. ← Adjusts the output power value (%). 4-3-2. Lens Control Adjust the position, size, and focus of the projected screen. -
Page 124: Reset
LCD Menu 4-3-3. Reset Used when initializing settings and usage times. Some of the items are in the service personnel menu. Refer to “4-1-1. When You Use the Service Personnel Menu” (page 121) for details on how to use these. Item Service Personnel User... - Page 125 LCD Menu Fan Usage Resets the fan usage time. Select the fan. Press the ENTER button, then select “Yes” in the displayed confirmation screen, and then press the ENTER button to reset the fan usage time. ← Press the ENTER button to display the confirmation screen. Light Usage Resets the light source usage time.
-
Page 126: Setup
LCD Menu Douser Count Resets the number of times the douser has been used. Press the ENTER button, then select “Yes” in the displayed confirmation screen, and then press the ENTER button to reset the number of times the douser has been used. ←... - Page 127 LCD Menu Auto Key Lock Enables or disables Auto Key Lock. ← Displays the currently selected item with asterisk (*). ← Displays the setting. Enable Enables the auto key lock function. This applies the key lock automatically if you do not perform any operations from the main unit control panel for 30 seconds after entering the standby state.
-
Page 128: Installation
LCD Menu Silent Mode Sets whether the rear (SYSTEM/LIGHT) status indicator, buzzer, indicators on the projector’s control panel, illumination, and LCD screen backlight are enabled or disabled. ← Selects the item. ← Displays the currently selected item with asterisk (*). ← Displays the setting. Rear LED Sets whether to use or not use the rear (SYSTEM/LIGHT) status indicator. - Page 129 LCD Menu Lens Type Sets the type of lens (supports or does not support the lens memory function) attached to the projector. ← Displays the currently selected item with asterisk (*). ← Displays the setting. With Sensor Selected when using a lens unit that supports the lens memory function (default value). Without Sensor Selected when using a lens unit that does not support the lens memory function.
- Page 130 LCD Menu Date/Time Use this to set the date and time on the projector. The internal clock in the projector uses coordinated universal time (UTC). This sets the time difference between the standard time in your region and UTC. ← Displays the currently setting with asterisk (*). ←...
- Page 131 LCD Menu [Sensor Calibration] When installing the projector, measure the initial brightness of the light source and save the measured value into the projector. Once it is saved, it is used as reference to display the current brightness as a percentage. This function can be used when the projector is on standby.
- Page 132 LCD Menu [CG Adj.] Use the function to adjust CG. This menu can be used only during standby On the confirmation screen shown by pressing the ENTER button, selecting “Yes” and pressing the ENTER button automatically starts up the projector to project an image for the CG adjustment. During the use of this function, the pattern cannot be changed. [Shadow Adj.] Use the function to adjust shadow.
-
Page 133: Memory
LCD Menu 4-3-6. Memory This menu is the service personnel menu. For the using service personnel menu, refer to “4-1-1. When You Use the Service Person- nel Menu” (page 121). The selected lens memory (lens adjustment value) and the content of the light memory (light output power value) can be overwritten with the current settings. -
Page 134: Title Setup
LCD Menu 4-4. Title Setup This menu is the service personnel menu. For the using service personnel menu, refer to “4-1-1. When You Use the Service Person- nel Menu” (page 121). 4-4-1. Preset Button Use this button to set the titles to be assigned to the preset buttons (<1> to <8> buttons). You cannot assign the same title to several preset buttons. -
Page 135: Information
LCD Menu 4-5. Information Displays information relating to the light source, the usage time of the projector, the version information and error codes. 4-5-1. Light Displays the light source information. ← Displays the current setting (%). Output Displays the output setting value (%). Models Displays the model name of the light module Displays the serial number of the light module. -
Page 136: Usage
LCD Menu 4-5-4. Usage Displays information related to the projector usage, such as the usage time of the projector, light source, air filters, and fan. ← Selects the item to display. ← Displays information about the selected item. Projector Displays the usage time of the projector. Filter Cleaning Displays the usage time of the air filters (for confirming the filter cleaning time). -
Page 137: Version
LCD Menu 4-5-6. Version Displays the version information about the projector, optional boards and IMB. System Displays the version information of the projector. ← Selects the item to display. ← Displays the version information. Display items are as follows. ・Model ・Slave Firmware ・Serial No. -
Page 138: Setup Date
LCD Menu 4-5-8. Setup Date Displays the date when the projector was setup (starting date of the warranty period). The setup date is configured by using DCC. Refer to “Digital Cinema Communicator v2 Installation Manual” for details. ← Displays the date when the projector was set up (starting date of the warranty period). 4-5-9. -
Page 139: Appendix
5. Appendix 5-1. List of Registered Titles (when shipped from the factory) -
Page 140: Error Code List
Appendix 5-2. Error Code List Please inquire your dealer/distributor about action to be taken for each error code. Error Code Error message Description GPSU Fail Power supply is abnormal. Light Unlit The light source is not on. EEPROM R Fail E2PROM data read error. - Page 141 Appendix Error Code Error message Description Green DAD1000 Offset Under Voltage Error Cinema circuit status error. Green DAD1000 Thermal Shutdown Error Cinema circuit status error. Blue Satellite Reports Reset Cinema circuit status error. Blue Satellite Serial Link Error Cinema circuit status error. Blue Satellite Firmware Configuration Error Cinema circuit status error.
- Page 142 Appendix Error Code Error message Description 1005 Slave No Notify No message from Slave CPU to notify the command completion. 1111 Filter-Side(L) Cleaning Time The time to clean air filter. 1112 Filter-Side(R) Cleaning Time The time to clean air filter. 1113 Filter-Top(L) Cleaning Time The time to clean air filter.
- Page 143 Appendix Error Code Error message Description 1252 PW2 Stop Phosphor Wheel has stopped. 1253 DF2 Motor Stop Diffuser Motor has stopped. 1262 Pump-PRISM Stop Pump error. 1263 Pump-BANK-U Stop Pump error. 1264 Pump-BANK-D Stop Pump error. 1265 Pump-RLCS Stop Pump error. 1300 OverTemp.INTAKE Set inside temperature is abnormal.
- Page 144 Appendix Error Code Error message Description 1600 Fan-ENG-IN1 Precaution Fan Stop Precaution. 1601 Fan-ENG-IN2 Precaution Fan Stop Precaution. 1602 Fan-RAD(PRSM)1 Precaution Fan Stop Precaution. 1603 Fan-RAD(PRSM)2 Precaution Fan Stop Precaution. 1604 Fan-RAD(BANK)1 Precaution Fan Stop Precaution. 1605 Fan-RAD(BANK)2 Precaution Fan Stop Precaution. 1606 Fan-RAD(BANK)3 Precaution Fan Stop Precaution.
- Page 145 Appendix Error Code Error message Description 1702 SensorFail LD1-Y1 Temperature sensor read error. 1703 SensorFail LD1-Y2 Temperature sensor read error. 1704 SensorFail LD1-Y3 Temperature sensor read error. 1705 SensorFail LD1-Y4 Temperature sensor read error. 1706 SensorFail LD2-B Temperature sensor read error. 1707 SensorFail LD2-Y1 Temperature sensor read error.
-
Page 146: Remote Interlock Connector
Appendix 5-3. Remote Interlock Connector This connector functions as safety device for the projector. The contacts are normally closed. When an abnormality occurs, the contacts open to immediately stop the projector (interlock state) (shipped with a shorting wire installed). By replacing the shorting wire with wiring and attaching it to the contacts, the projector can be immediately stopped remotely when an abnormality occurs in the projector. - Page 147 Appendix Circuit diagram Interlock connector Inside projector Shorting wire 2 390Ω/0.5W resistor 390Ω/0.5W resistor Photocoupler Shorting wire 1 1A fuse VCC +5V Connector no. Photocoupler ON/OFF Description — +5V supply ON/OFF Connects to the photocoupler anode inside the projector Connects to the photocoupler cathode inside the projector —...
-
Page 148: Outline Drawing
Appendix 5-4. Outline Drawing NP-02HD Lens center Lens center Units: mm... - Page 150 © NEC Display Solutions, Ltd. 2019 Ver. 1.0 06/19...
Need help?
Do you have a question about the NP-02HD and is the answer not in the manual?
Questions and answers