Table of Contents
Advertisement
Quick Links
Advertisement
Table of Contents
Troubleshooting

Related Manuals for Xerox Instant Print Kiosk


Summary of Contents for Xerox Instant Print Kiosk
- Page 1 ERSION 2019 702P06965 Xerox Instant Print Kiosk ® User Guide...
- Page 2 © 2019 Xerox Corporation. All rights reserved. Unpublished rights reserved under the copyright laws of the United States. Contents of this publication may not be reproduced in any form without permission of Xerox Corporation. Copyright protection claimed includes all forms of matters of copyrightable materials and information now allowed by statutory or judicial law or hereinafter granted, including without limitation, material generated from the software programs which are displayed on the screen such as styles, templates, icons, screen displays, looks, and so on.
-
Page 3: Table Of Contents
Accessing Device Management..................33 Automatic Data Collection ..................... 34 Billing and Usage Information ....................35 More Information ........................36 Welcome Center ......................36 Locating the Serial Number....................37 3 Paper and Media ........................39 Xerox ® Instant Print Kiosk User Guide... - Page 4 Clearing a Dark Screen on the User Interface ..............79 Restarting or Powering Off the User Interface ..............79 Resetting the Credit Card Reader ..................79 Troubleshooting Credit Card Reader Errors ............... 80 Xerox ® Instant Print Kiosk User Guide...
- Page 5 Electrical Specifications......................118 Recycling Supplies......................118 Performance Specifications ....................119 Printing Resolution......................119 Print Speed ........................119 B Regulatory Information...................... 121 FCC Compliance Information Statement................122 Basic Regulations......................... 123 United States FCC Regulations..................123 Xerox ® Instant Print Kiosk User Guide...
- Page 6 United States......................... 125 Canada.......................... 126 Other Countries......................127 Safety Certification ......................128 Material Safety Data Sheets ....................129 C Recycling and Disposal ....................... 131 All Countries ........................132 North America ........................133 Other Countries........................134 Xerox ® Instant Print Kiosk User Guide...
-
Page 7: Safety
Safety Your kiosk and the recommended supplies are designed and tested to meet strict safety requirements. Attention to the following information ensures the continued safe operation of your Xerox ® kiosk. This chapter contains: • Notices and Safety........................8 • Electrical Safety ........................... 9 •... -
Page 8: Notices And Safety
These include safety agency evaluation and certification, and compliance with electromagnetic regulations and established environmental standards. The safety and environment testing and performance of this product are verified using Xerox ® materials only. -
Page 9: Electrical Safety
P P o o w w e e r r C C o o r r d d S S a a f f e e t t y y I I n n f f o o r r m m a a t t i i o o n n Before operating your kiosk, read the following instructions carefully. For details, contact your Xerox ®... -
Page 10: Emergency Power Off
E E m m e e r r g g e e n n c c y y P P o o w w e e r r O O f f f f If any of the following conditions occur, power off the kiosk immediately, then disconnect the power cords from the electrical outlet. Contact an authorized Xerox ®... -
Page 11: Operational Safety
Install the kiosk in a well-ventilated room. For details in the United States and Canada, go to www.support.xerox.com. K K i i o o s s k k L L o o c c a a t t i i o o n n •... -
Page 12: Kiosk Supplies
Warranty, Service ® Agreement, and Total Satisfaction Guarantee do not cover damage, malfunction, or degradation of performance caused by use of non-Xerox supplies, or the use of Xerox ® supplies not specified for this kiosk. The Total Satisfaction Guarantee is available in the United States and Canada. -
Page 13: Maintenance Safety
• Clean the device with a dry lint-free cloth only. WARNING: Do not use aerosol cleaners. Aerosol cleaners can be explosive or flammable when used on electromechanical equipment. • Do not burn any consumables or routine maintenance items. For information on Xerox ® supplies recycling programs, refer to www.support.xerox.com. -
Page 14: Kiosk Symbols
Do not expose the drum cartridge to light for more than 10 minutes. Do not touch the drum cartridge. Hot surface. Wait the indicated time before handling. Warning: Moving parts. Use caution to avoid personal injury. Xerox ® Instant Print Kiosk User Guide... -
Page 15: Environmental, Health, And Safety Contact Information
For details on Environment, Health, and Safety in relation to this Xerox ® product and supplies, contact the following customer help line: United States and Canada: 1-800-ASK-XEROX (1-800-275-9376) For product safety information in the United States and Canada, go to www.support.xerox.com. Xerox ® Instant Print Kiosk User Guide... -
Page 17: Features
• Powering On and Off the Kiosk....................26 • Services............................31 • Information Pages ........................32 • Logging In ..........................33 • Automatic Data Collection ......................34 • Billing and Usage Information ....................35 • More Information ........................36 Xerox ® Instant Print Kiosk User Guide... -
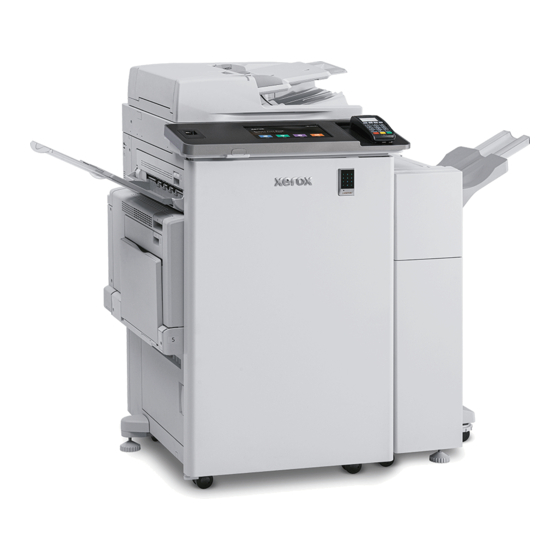
Page 18: Parts Of The Kiosk
7. Credit Card Reader 2. Tray 5 8. User Interface Touch Screen 3. USB Port 9. Front Cover 4. Lint-Free Cloth Compartment 10. Trays 1-4 5. Document Feeder 11. Optional Front Door 6. Document Glass Xerox ® Instant Print Kiosk User Guide... -
Page 19: Left Rear View
4. USB Memory Port, for service only 9. Door C Release Lever 5. Ethernet Connection Note: Ensure that the rear, right cover is attached. When connecting an interface cable, open the rear, right cover. Xerox ® Instant Print Kiosk User Guide... -
Page 20: Internal Components
1. Second Bias Transfer Roller 6. Transfer Belt Cleaner 2. Fuser Assembly 7. Waste Container 3. Drum Cartridge Release Lever 8. Drum Cartridges 4. Toner Cartridges 9. Drum Cartridge Cover 5. Main Power Switch Xerox ® Instant Print Kiosk User Guide... -
Page 21: Document Feeder
D D o o c c u u m m e e n n t t F F e e e e d d e e r r 1. Confirmation Indicator 5. Document Output Tray 2. Top Cover 6. CVT Glass 3. Document Guides 7. Document Glass 4. Document Feeder Tray Xerox ® Instant Print Kiosk User Guide... -
Page 22: User Interface Assembly
• Provides access to information pages • Prompts you to load paper, replace supplies, and clear paper jams • Displays errors and warnings • Connects to a USB Flash drive for scan and print access Xerox ® Instant Print Kiosk User Guide... -
Page 23: Office Finisher Lx
1. Front Transport Cover 5. Right Tray 2. Hole Punch Waste Container (optional) 6. Staple Cartridge 3. Hole Punch Unit (optional) 7. Finisher Front Cover 4. Finisher Top Cover 8. Office Finisher LX Xerox ® Instant Print Kiosk User Guide... -
Page 24: Front Door Electronic Lock
4. To enter a new pass code, touch SET, then enter a new six-digit pass code. 5. To confirm the new pass code, touch OK, then enter the new pass code again. 6. To save the pass code, touch OK. The electronic lock activates automatically. Xerox ® Instant Print Kiosk User Guide... -
Page 25: User Guide
Features Note: It is recommended that you record the new pass code, as you cannot deactivate the lock without it. Xerox ® Instant Print Kiosk User Guide... -
Page 26: Powering On And Off The Kiosk
After the screen goes dark, wait 10 seconds, then power off the main power switch. • Do not plug in or unplug the power cords while the power switch is in the On position. Xerox ® Instant Print Kiosk User Guide... -
Page 27: Powering On The Kiosk
3. Power on the secondary power switch. Note: The secondary power switch is located behind a clear plastic door. 4. Close the front cover (1), then close the front door (2), if installed. Xerox ® Instant Print Kiosk User Guide... -
Page 28: Powering Off The Kiosk
3. Power off the secondary power switch, then wait 10 seconds before proceeding. Note: The secondary power switch is behind a clear plastic door in area F. 4. Open the front cover (2). Xerox ® Instant Print Kiosk User Guide... -
Page 29: Restarting The User Interface
• Press in and hold the plunger switch for 2 seconds, then release the plunger switch. At the touch screen, touch Restart. The User Interface powers off, then powers on. 4. If installed, close the optional front door. Xerox ® Instant Print Kiosk User Guide... -
Page 30: Powering Off The User Interface
To locate the kiosk plunger switch, from the front of the device, reach under the left front of the User Interface. b. Press in and hold the plunger switch for 2 seconds, then release the plunger switch. 3. Select Power off. 4. If installed, close the optional front door. Xerox ® Instant Print Kiosk User Guide... -
Page 31: Services
For information on printing, copying, scanning, and faxing, refer to the Quick Start Guide at www. support.xerox.com. Note: For faxing, system administrator login credentials are required to enable and configure the feature. For details, refer to the System Administrator Guide at www.support.xerox.com. Xerox ® Instant Print Kiosk User Guide... -
Page 32: Information Pages
Information Pages Your kiosk has a printable set of information pages stored on its internal hard drive. Information pages include configuration and demonstration pages. For details about printing information pages, refer to the System Administrator Guide at www.support.xerox.com. Xerox ®... -
Page 33: Logging In
1. Log in to the kiosk user interface as an administrator. For details, refer to Logging in to the Kiosk User Interface. 2. From the Device menu, touch Device Management. The kiosk functions appear. Xerox ® Instant Print Kiosk User Guide... -
Page 34: Automatic Data Collection
Features Automatic Data Collection This kiosk automatically collects data and transmits it to a secure offsite location. Xerox or a ® designated service provider uses this data to support and service the kiosk, or for billing, supply replenishment, or product improvement. Automatically transmitted data can include product registration, meter read, supply level, kiosk configuration and settings, software version, and problem or fault code data. -
Page 35: Billing And Usage Information
Billing and kiosk usage information appears on the Billing Information screen. The impression counts shown are used for billing. Note: To view billing and usage information, refer to the System Administrator Guide at www. support.xerox.com. Xerox ® Instant Print Kiosk User Guide... -
Page 36: More Information
W W e e l l c c o o m m e e C C e e n n t t e e r r If you need assistance during or after kiosk installation, visit the Xerox ®... -
Page 37: Locating The Serial Number
Open tray 5 as shown (1). b. While lifting the release lever (2), open door A (3). 2. On a metal plate toward the rear of the kiosk, locate the kiosk serial number. 3. Before contacting Xerox ® for assistance, record the serial number. -
Page 39: Paper And Media
Paper and Media This chapter contains: • Supported Paper ........................40 • Loading Paper..........................43 Xerox ® Instant Print Kiosk User Guide... -
Page 40: Supported Paper
O O r r d d e e r r i i n n g g P P a a p p e e r r To order paper or other media, contact your local reseller or go to www.support.xerox.com. -
Page 41: Paper Storage Guidelines
® Warranty, Service Agreement, and Total Satisfaction Guarantee do not cover damage, malfunction, or degradation of performance caused by use of non-Xerox supplies, or the use of Xerox ® supplies not specified for this kiosk. The Total Satisfaction Guarantee is available in the United States and Canada. -
Page 42: Supported Standard Paper Sizes
• Letter (8.5 x 11 in.) • Legal (8.5 x 14 in.) • Tabloid (11 x 17 in.) Paper weights from 60 g/m² through 256 g/m² can be used for automatic 2-sided printing. Xerox ® Instant Print Kiosk User Guide... -
Page 43: Loading Paper
For details, refer to the System Administrator Guide at www.support.xerox.com. Note: The Xerox Instant Print Kiosk supports various paper and other media types. For details, refer to Supported Paper. -
Page 44: User Guide
6. Load paper in the tray. Do one of the following actions: • For long-edge feed, insert letterhead and pre-printed paper facing down with the top edge toward the front. Load hole-punched paper with the holes to the left. Xerox ® Instant Print Kiosk User Guide... -
Page 45: User Guide
Load hole-punched paper with the holes toward the rear of the kiosk. Note: Do not load paper above the maximum fill line. Overfilling the tray can cause paper jams. 7. Adjust the length and width guides to fit the paper. Xerox ® Instant Print Kiosk User Guide... -
Page 46: User Guide
If you load non-default media into any of the paper trays, you must identify the media size and type at the user interface. For details, refer to the System Administrator Guide at www. support.xerox.com. Xerox ® Instant Print Kiosk User Guide... -
Page 47: Maintenance
Maintenance This chapter contains: • General Precautions ........................48 • Cleaning the Kiosk ........................49 • Routine Maintenance......................... 56 • Ordering Supplies........................73 Xerox ® Instant Print Kiosk User Guide... -
Page 48: General Precautions
• Do not touch the electrical contacts or gears. Doing so can damage the kiosk and cause the print quality to deteriorate. • Ensure any parts removed during cleaning are replaced before you plug in the kiosk. Xerox ® Instant Print Kiosk User Guide... -
Page 49: Cleaning The Kiosk
1. Use a lint-free, lightly-dampened cloth. Clean the document glass and the CVT glass to its left. Note: There is a lint-free cloth stored in a compartment on the underside of the document feeder. 2. Use a lint-free cloth and Xerox ® Cleaning Fluid to clean the underside of the document cover and the document feeder. -
Page 50: Cleaning The Document Feed Rollers
1. Lift the lever and open the top cover of the document feeder. 2. While turning the rollers, wipe them with a clean, lint-free cloth moistened with water. Caution: Do not use alcohol or chemical cleaners on the document feed rollers. Xerox ® Instant Print Kiosk User Guide... -
Page 51: Cleaning The Second-Side Scanning Lens Assembly
1. To access the second-side scanning lens assembly, lower the lever under the left side of the document cover. 2. To separate the left end of the document cover from the lens assembly, continue to lower the lever. Xerox ® Instant Print Kiosk User Guide... -
Page 52: User Guide
4. Return the document cover to its original position, ensuring the lever is locked in place. If you touch the document cover with your bare hands, clean the cover before closing the document feeder. Xerox ® Instant Print Kiosk User Guide... -
Page 53: Cleaning The Kiosk Exterior
1. To remove fingerprints and smudges, clean the User Interface with a soft, lint-free cloth. 2. Use a soft, lint-free cloth to clean the outside of the output tray, paper trays, and other exterior areas of your kiosk. Xerox ® Instant Print Kiosk User Guide... -
Page 54: Cleaning The Printhead Lenses
4. Each of the four printheads has its own cleaning tool. Slowly pull the LED printhead cleaner out until you can see the three dots. Note: The LED printhead cleaner does not detach from the kiosk. Xerox ® Instant Print Kiosk User Guide... -
Page 55: User Guide
7. Close the drum cartridge cover. 8. Turn the belt tension lever to the right to return it to the locked position. 9. Close the front cover (1) and the front door (2). Xerox ® Instant Print Kiosk User Guide... -
Page 56: Routine Maintenance
2. Place your fingers under the lip of the toner cartridge, then pull the toner cartridge straight out of the kiosk. 3. Remove the new toner cartridge from the packaging. Tilt the cartridge up and down, then left and right 10 times. Xerox ® Instant Print Kiosk User Guide... -
Page 57: User Guide
4. Hold the new toner cartridge with the arrow facing up, then push the cartridge in slowly until it stops. 5. Push gently on the toner cartridge to ensure that it is seated. 6. Close the front cover (1) and the front door (2). Xerox ® Instant Print Kiosk User Guide... -
Page 58: Replacing The Waste Toner Container
1. Open the front door (1) and the front cover (2). 2. Remove the new waste toner container from the packaging. Retain the packaging. 3. Pull the used waste toner container out slowly while supporting it with your other hand. Xerox ® Instant Print Kiosk User Guide... - Page 59 6. Hold the left side of the new waste toner container and slide it into the kiosk until it clicks. 7. Clean the printhead lenses. For details, refer to Cleaning the Printhead Lenses. 8. Close the front cover (1) and the front door (2). Xerox ® Instant Print Kiosk User Guide...
-
Page 60: Replacing The Drum Cartridges
1. Open the front door (1) and the front cover (2). 2. Turn the belt tension lever to the left. 3. Pull the drum cartridge cover down until it clicks into the open position. Xerox ® Instant Print Kiosk User Guide... -
Page 61: User Guide
7. With the guides inserted in the slot, remove the black paper sheet by pulling it in the direction shown. 8. Remove the tape from the top of the cartridge shield. 9. Hold the shield, then use the orange handle to push the cartridge into the kiosk. Xerox ® Instant Print Kiosk User Guide... -
Page 62: User Guide
11. Carefully remove the protective shield. 12. Push the drum cartridge until it stops. 13. Close the drum cartridge cover. 14. To return the belt tension lever to the locked position, turn it to the right. Xerox ® Instant Print Kiosk User Guide... -
Page 63: Replacing The Transfer Belt Cleaner
1. Open the front door (1) and the front cover (2). 2. Turn the orange lever to the right to unlock the belt cleaner. 3. Turn the orange knob counterclockwise until it releases. Xerox ® Instant Print Kiosk User Guide... -
Page 64: User Guide
6. Place the used transfer belt cleaner in the plastic bag. 7. Remove the protective cover from the new transfer belt cleaner. Caution: Do not touch the surface of the transfer belt cleaner. Doing so can deteriorate image quality. Xerox ® Instant Print Kiosk User Guide... -
Page 65: User Guide
9. Push the orange knob in, then turn it clockwise until snug. 10. Turn the orange lever to the left to lock the belt cleaner. 11. Close the front cover (1) and the front door (2). Xerox ® Instant Print Kiosk User Guide... -
Page 66: Replacing The Second Bias Transfer Roller
Do not touch the transfer belt. Touching the belt can reduce image quality or damage the transfer belt. Do not touch the transfer roller. Touching the roller can reduce image quality. 2. Remove the new transfer roller from the packaging. Retain the packaging. Xerox ® Instant Print Kiosk User Guide... -
Page 67: User Guide
3. Push the orange lever in the direction shown. 4. Lift the used transfer roller out of the kiosk. Note: Do not touch any toner adhering to the transfer roller. 5. Place the used transfer roller in the plastic bag. Xerox ® Instant Print Kiosk User Guide... -
Page 68: Replacing Staple Cartridges
R R e e p p l l a a c c i i n n g g S S t t a a p p l l e e C C a a r r t t r r i i d d g g e e s s A message appears on the User Interface (UI) when a staple cartridge is empty. Xerox ® Instant Print Kiosk User Guide... -
Page 69: User Guide
3. Push the stapler to the right as shown. 4. Grip the staple cartridge by the orange handle and pull it firmly toward you to remove it. 5. Remove any loose staples or other debris from inside the finisher. Xerox ® Instant Print Kiosk User Guide... -
Page 70: Emptying The Hole Punch Waste Container
E E m m p p t t y y i i n n g g t t h h e e H H o o l l e e P P u u n n c c h h W W a a s s t t e e C C o o n n t t a a i i n n e e r r For models with a hole punch, when the hole punch waste container is full, a message appears on the User Interface (UI). Xerox ® Instant Print Kiosk User Guide... -
Page 71: User Guide
Do not perform this procedure while the kiosk is copying or printing. 1. Open the front door, if installed. 2. Lift the finisher transport top cover, then open the front transport cover. 3. Pull out the hole punch waste container. Xerox ® Instant Print Kiosk User Guide... -
Page 72: User Guide
4. Empty the container. 5. Insert the container and slide it all the way into the finisher. 6. Close the finisher front transport cover, then close the top cover. 7. Close the front door, if installed. Xerox ® Instant Print Kiosk User Guide... -
Page 73: Ordering Supplies
Logging in to the Kiosk User Interface Accessing Device Management. To prevent an interruption in kiosk usage, Xerox recommends that you keep a spare set of each of the supplies listed in Routine Maintenance Items Other Supplies. -
Page 74: Recycling Supplies
® Warranty, Service Agreement, and Total Satisfaction Guarantee do not cover damage, malfunction, or degradation of performance caused by use of non-Xerox supplies, or the use of Xerox ® supplies not specified for this kiosk. The Total Satisfaction Guarantee is available in the United States and Canada. -
Page 75: Troubleshooting
This chapter contains: • General Troubleshooting ......................76 • Jams ............................83 • Print Quality Problems......................104 • Copy and Scan Problems ......................109 • Fax Problems..........................110 • Getting Help ..........................111 Xerox ® Instant Print Kiosk User Guide... -
Page 76: General Troubleshooting
K K i i o o s s k k D D o o e e s s N N o o t t P P o o w w e e r r O O n n o o r r U U s s e e r r I I n n t t e e r r f f a a c c e e T T o o u u c c h h Xerox ® Instant Print Kiosk User Guide... -
Page 77: Troubleshooting User Interface Error Messages
Restart the device. For details, refer toPowering On and Off the Kiosk. • Device not able to detect DNS The Ethernet cable is Connect the Ethernet cable. For connectivity. Please contact disconnected. further support, contact your Xerox ® Instant Print Kiosk User Guide... - Page 78 The device or User Interface Restart the device and the User message where a spinning wheel requires restarting. Interface. For details, refer to displays for an extended period of Powering On and Off the Kiosk. time. Xerox ® Instant Print Kiosk User Guide...
-
Page 79: Clearing A Dark Screen On The User Interface
R R e e s s e e t t t t i i n n g g t t h h e e C C r r e e d d i i t t C C a a r r d d R R e e a a d d e e r r 1. If the credit card reader is not working normally, press the Yellow button and the # button simultaneously until the credit card reader beeps. Xerox ® Instant Print Kiosk User Guide... -
Page 80: Troubleshooting Credit Card Reader Errors
A system error occurred. Contact your Xerox ® representative with the error code and message. Check the User Interface (UI) fault history. For details, refer to the System Administrator Guide at www.support.xerox.com. Xerox ® Instant Print Kiosk User Guide... -
Page 81: User Guide
D D a a t t e e a a n n d d T T i i m m e e A A r r e e I I n n c c o o r r r r e e c c t t If a Set Time Error appears on the kiosk touch screen, set the time. The steps below can be performed by an administrator. For details, refer to the System Administrator Guide at www.support.xerox.com. Xerox ®... -
Page 82: User Guide
Probable Causes Solutions Scanner is not communicating. Power off the kiosk, and check the scanner cable. Wait two minutes and power on the kiosk again. If the problem is not resolved, contact your Xerox ® service representative. Xerox ® Instant Print Kiosk... -
Page 83: Jams
• If toner gets on your skin, wash it off with cool water and a mild soap. • If toner gets in your eyes, wash it out immediately with cool water and consult a doctor. Xerox ® Instant Print Kiosk User Guide... -
Page 84: User Guide
4. If the paper is torn, remove the tray completely and check inside the kiosk for torn pieces of paper. 5. Reload the tray with undamaged paper, then push the tray in until it stops. Xerox ® Instant Print Kiosk User Guide... -
Page 85: User Guide
Troubleshooting 6. On the user interface, touch Confirm. 7. Close the front door, if installed. For details on logging in to the device user interface, refer to the System Administrator Guide. Xerox ® Instant Print Kiosk User Guide... -
Page 86: User Guide
Do not touch the transfer belt. Touching the belt can reduce image quality or damage the transfer belt. Do not touch the transfer roller. Touching the roller can reduce image quality. 2. Remove the jammed paper. Xerox ® Instant Print Kiosk User Guide... -
Page 87: User Guide
Toner can adhere to the transfer roller. Adherence of toner does not affect print quality. 4. If paper is jammed in the fuser, pull green lever A1 to open the fuser exit gate. Xerox ® Instant Print Kiosk User Guide... -
Page 88: User Guide
5. Remove the paper as shown. Note: If the paper is torn, remove all torn pieces from the kiosk. If the paper is jammed at the bottom entry of the fuser, remove it as shown. Xerox ® Instant Print Kiosk User Guide... -
Page 89: User Guide
Troubleshooting 6. Return the green lever A1 to its normal position. 7. Close door A, then close tray 5. Xerox ® Instant Print Kiosk User Guide... -
Page 90: User Guide
To open door B, while lifting the release lever (2), open door B (3). 2. Remove the jammed paper. Note: If the paper is torn, remove all torn pieces from the kiosk. 3. Close door B, then close tray 5. Xerox ® Instant Print Kiosk User Guide... -
Page 91: User Guide
3. For paper jammed in the upper position, look inside the kiosk to remove it. Note: If the paper is inaccessible, refer to Clearing Jams at Door 4. For paper jammed in the tray feed roller: a. Open the front door, if installed. Xerox ® Instant Print Kiosk User Guide... -
Page 92: User Guide
Troubleshooting b. Open the tray and remove the paper. c. Close the front door, if installed. 5. Close door C. Xerox ® Instant Print Kiosk User Guide... -
Page 93: User Guide
Do not touch the transfer belt. Touching the belt can reduce image quality or damage the transfer belt. Do not touch the transfer roller. Touching the roller can reduce image quality. 2. Lift the lever up to open door D. Xerox ® Instant Print Kiosk User Guide... -
Page 94: User Guide
1. Lift the lever and open the top cover of the document feeder as shown. 2. If the original is not caught in the entry to the document feeder, pull it straight out in the direction shown. Xerox ® Instant Print Kiosk User Guide... -
Page 95: User Guide
6. Close the inner cover, then close the top cover, pressing it down until it clicks into place. 7. If the original is not visible when the top cover is opened, lift the document cover and remove the original. Xerox ® Instant Print Kiosk User Guide... -
Page 96: User Guide
C C l l e e a a r r i i n n g g J J a a m m s s U U n n d d e e r r t t h h e e F F i i n n i i s s h h e e r r T T o o p p C C o o v v e e r r 1. Pull up the lever on the top cover. 2. Open the top cover by rotating it to the left. Xerox ® Instant Print Kiosk User Guide... -
Page 97: User Guide
C C l l e e a a r r i i n n g g J J a a m m s s i i n n t t h h e e O O f f f f i i c c e e F F i i n n i i s s h h e e r r L L X X T T r r a a n n s s p p o o r r t t 1. Open the front door, if installed. 2. Lift the handle of the center tray straight up to open the transport cover. Xerox ® Instant Print Kiosk User Guide... -
Page 98: User Guide
M M i i n n i i m m i i z z i i n n g g P P a a p p e e r r J J a a m m s s The kiosk is designed to function with minimal paper jams using Xerox ®... -
Page 99: User Guide
• Adjust the paper guides in all trays after inserting the paper. An improperly adjusted guide can cause poor print quality, misfeeds, skewed prints, and kiosk damage. • Store paper in a dry location. • Use only Xerox ® paper and transparencies designed for the kiosk. -
Page 100: User Guide
Interface. For details, refer to the System Administrator Guide at www.support.xerox.com. P P a a p p e e r r J J a a m m M M e e s s s s a a g g e e S S t t a a y y s s O O n n... -
Page 101: User Guide
Do not perform this procedure while the kiosk is copying or printing. 1. Open the finisher door as shown. 2. Reach into the finisher cabinet and pull the stapler toward you until it stops. 3. Push the stapler to the right as shown. Xerox ® Instant Print Kiosk User Guide... -
Page 102: User Guide
The points of the jammed staples are sharp. Remove the jammed staples carefully. 8. Grip the staple cartridge by the orange handle and insert it into the stapler until it clicks to lock in place. 9. Close the finisher front door. Xerox ® Instant Print Kiosk User Guide... -
Page 103: User Guide
If the kiosk stops printing and reports a hole punch jam, empty the hole punch waste container. For details, refer to Emptying the Hole Punch Waste Container. After emptying the hole punch waste container, locate and remove any paper jams. Xerox ® Instant Print Kiosk User Guide... -
Page 104: Print Quality Problems
® Warranty, Service Agreement, and Total Satisfaction Guarantee do not cover damage, malfunction, or degradation of performance caused by use of non-Xerox supplies, or the use of Xerox supplies ® not specified for this kiosk. The Total Satisfaction Guarantee is available in the United States and Canada. -
Page 105: User Guide
® Warranty, Service Agreement, and Total Satisfaction Guarantee do not cover damage, malfunction, or degradation of performance caused by use of non-Xerox supplies, or the use of Xerox supplies ® not specified for this kiosk. The Total Satisfaction Guarantee is available in the United States and Canada. -
Page 106: User Guide
Troubleshooting If you find a match in the Troubleshooting Print Quality Pages, check the Solutions column for the appropriate action to resolve the problem. If the problem persists, for online support information, go to www.support.xerox.com. Xerox ® Instant Print Kiosk... -
Page 107: User Guide
Supported Paper. The print or color density is too light, missing, or the background is foggy. 2 Verify that the paper loaded in the tray matches the paper type selected at the UI. Xerox ® Instant Print Kiosk User Guide... -
Page 108: User Guide
3 At the UI, select a heavier paper. Note: Papers from lightest to heaviest are: • For uncoated paper: Plain, Lightweight Cardstock, Cardstock, and Heavyweight Cardstock • For coated paper: Lightweight Glossy Cardstock, Glossy Cardstock, and Heavyweight Glossy Cardstock. Xerox ® Instant Print Kiosk User Guide... -
Page 109: Copy And Scan Problems
Adjust the document feeder width angle. are not adjusted to fit the width of guides so that they fit against the the document. document. If the problem persists, for online support information, go to www.support.xerox.com. Xerox ® Instant Print Kiosk User Guide... -
Page 110: Fax Problems
P P r r o o b b l l e e m m s s S S e e n n d d i i n n g g F F a a x x e e s s If the problem persists, for online support information, refer to www.support.xerox.com. -
Page 111: Getting Help
When a fault or alert condition occurs, the UI displays a message informing you of the problem. For information on troubleshooting User Interface error messages, refer to Powering On and Off the Kiosk. Xerox ® Instant Print Kiosk User Guide... -
Page 113: Kiosk Configurations And Options
Specifications This appendix contains: • Kiosk Configurations and Options..................... 114 • Physical Specifications ......................116 • Environmental Specifications ....................117 • Electrical Specifications......................118 • Performance Specifications ...................... 119 Xerox ® Instant Print Kiosk User Guide... - Page 114 Xerox ® Instant Print Kiosk 50 color/55 black and white O O p p t t i i o o n n s s a a n n d d U U p p g g r r a a d d e e s s •...
- Page 115 Specifications • 2000-Sheet high-capacity feeder • Standard work surface • McAfee enhanced security features Xerox ® Instant Print Kiosk User Guide...
-
Page 116: Physical Specifications
C C l l e e a a r r a a n n c c e e R R e e q q u u i i r r e e m m e e n n t t s s f f o o r r B B a a s s e e C C o o n n f f i i g g u u r r a a t t i i o o n n Xerox ® Instant Print Kiosk User Guide... -
Page 117: Environmental Specifications
Operating: 15% to 85% (non-condensing) E E l l e e v v a a t t i i o o n n For optimum performance, use the kiosk at elevations below 2500 m (8200 ft.). Xerox ® Instant Print Kiosk User Guide... -
Page 118: Electrical Specifications
R R e e c c y y c c l l i i n n g g S S u u p p p p l l i i e e s s If you want to return used supplies for recycling, follow the instructions included with the new supplies. If the instructions or shipping label are not available, for details, go to www.support.xerox. com. Xerox ® Instant Print Kiosk User Guide... -
Page 119: Performance Specifications
11.69 in.) or Letter (216 x 279 mm, 8.5 x 11 in.) Bond 64–105 g/m² (18–28 lb.) paper from any tray except Tray 5. Kiosk Model Color Black and White Xerox Instant Print Kiosk: 50 ppm 55 ppm ® Several factors affect print speed: • Paper Orientation: Load paper long-edge feed. Loading paper short-edge feed reduces print speeds. -
Page 121: Fcc Compliance Information Statement
Regulatory Information This appendix contains: • FCC Compliance Information Statement.................. 122 • Basic Regulations ........................123 • Copy Regulations ........................125 • Safety Certification ........................128 • Material Safety Data Sheets ....................129 Xerox ® Instant Print Kiosk User Guide... - Page 122 Regulatory Information FCC Compliance Information Statement Xerox ® Instant Print Kiosk This device complies with Part 15 of the FCC Rules. Operation is subject to the following two conditions: 1. This device may not cause harmful interference 2. This device must accept any interference received, including interference that may cause...
-
Page 123: Basic Regulations
Regulatory Information Basic Regulations Xerox has tested this kiosk to electromagnetic emission and immunity standards. These standards are designed to mitigate interference caused or received by this kiosk in a typical office environment. U U n n i i t t e e d d S S t t a a t t e e s s F F C C C C R R e e g g u u l l a a t t i i o o n n s s This equipment has been tested and found to comply with the limits for a Class A digital device, pursuant to Part 15 of the FCC Rules. - Page 124 This product is certified to Eco Logo standard for office machines, meeting all requirements for reduced environmental impact. As part of achieving certification, Xerox Corporation has proven this product meets the Eco Logo criteria for energy efficiency. Certified copier, kiosk, multifunctional device, and fax products must also meet criteria such as reduced chemical emissions and demonstrate compatibility with recycled supplies.
-
Page 125: Copy Regulations
“fair use” or library reproduction rights provisions of the copyright law. Further information of these provisions can be obtained from the Copyright Office, Library of Congress, Washington, D.C. 20559. Ask for Circular R21. Xerox ® Instant Print Kiosk User Guide... -
Page 126: Canada
Canada or a department, board, Commission, or agency established by the Government of Canada or of a province or of a government of a state other than Canada Xerox ® Instant Print Kiosk User Guide... - Page 127 • Copyright material or trademarks without the consent of the owner • Postage stamps and other negotiable instruments This list is not inclusive and no liability is assumed for either its completeness or accuracy. In case of doubt, contact your legal counsel. Xerox ® Instant Print Kiosk User Guide...
-
Page 128: Safety Certification
Regulatory Information Safety Certification This device is certified by the following Agencies using the following safety standards. Agency Standard CSA-Canadian Standards Association UL 60950-1:2007:R10.14 CAN/CSA C22.2 No. 60950-1-07 +A1:2011 +A2:2014 Xerox ® Instant Print Kiosk User Guide... -
Page 129: Material Safety Data Sheets
Regulatory Information Material Safety Data Sheets For Material Safety Data information regarding your kiosk, go to: • North America: www.support.xerox.com For the Customer Support Center phone numbers, go to www.xerox.com/office/worldcontacts. Xerox ® Instant Print Kiosk User Guide... -
Page 131: All Countries
Recycling and Disposal This appendix contains: • All Countries..........................132 • North America ......................... 133 • Other Countries........................134 Xerox ® Instant Print Kiosk User Guide... - Page 132 Recycling and Disposal All Countries If you are managing the disposal of your Xerox product, note that the kiosk can contain lead, ® mercury, perchlorate, and other materials whose disposal can be regulated due to environmental considerations. The presence of these materials is fully consistent with global regulations applicable at the time that the product was placed on the market.
-
Page 133: North America
Recycling and Disposal North America Xerox operates an equipment take-back and reuse/recycle program. Contact your Xerox ® ® representative (1-800-ASK-XEROX) to determine if this Xerox ® product is part of the program. For details about Xerox ® environmental programs, visit www.support.xerox.com, or for recycling and disposal information, contact your local authorities. -
Page 134: Other Countries
Recycling and Disposal Other Countries Contact your local waste management authority to request disposal guidance. Xerox ® Instant Print Kiosk User Guide...
Need help?
Do you have a question about the Instant Print Kiosk and is the answer not in the manual?
Questions and answers