Table of Contents
Advertisement
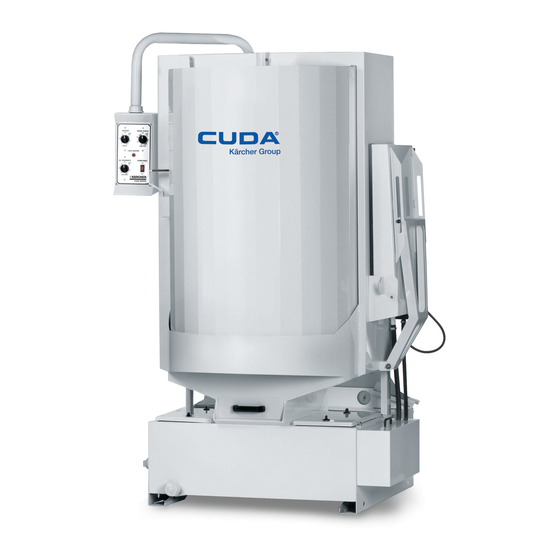
Series 2840
Operator's Manual
WARNING:
This product and accessories may contain a chemical
State of California to cause cancer and birth defects or other
reproductive harm.
For more information about this regulation:
LI
M
IT
A T
90-
E D
DAY
T E
EXT
LAB
OR
WIT
H EXC
END
S TO
WA
U SE
N T
CUD
LUS
1-Y
RR
ANT
A DET
IVE
EAR
Y
D ET
O N
I O
ERG
USE
OF
LA
LY
ENT
S
B O
ER
C U
N
R W
G EN
DA
A R
TS
A PP
MI
R A
TO
RO
5-G
X DE
N TY
EX
VE
AL
TE
RG
TE
D
LO
EN
TO
N D
Fo
r CU
NS
TS
1- YE
(15
LIT
1 LB
ht tp
DA
ER
(1/
A R
://w
Ap
pr ov
S)
2 KG
!
ww
ed
OF
WA
) PE
ca
.cu
De
TE
R
ll 88
da
ter
R
8-3
us
a.c
ge
nt s
19
-08
om
vis
82
or
it
9.8
-51
07
3.0
PR
Thi
s
EC
W A
com
is
a
AU
R N
Do
no
bus
tibl
hea
CI
ON
ma
ter
t fill
e,
ted
wa
/ AD
IN
pla
to
be
suc
ial
or
ter
par
-ba
ts
VE
G
an
cin
cle
ane
h as
con
tam
sed
cle
ane
RT
ext
g ins
d
of
gas
ina
cle
r.
Us
IS SE
rem
ide
ely
cab
olin
any
te
e,
wit
ani
ng
e
onl
ME
Es
te
haz
ine
com
alc
oho
h
any
com
y
NT
me
nte
es
un
ard
ou
t. Fai
bus
tib
l, min
flam
po
un
non
flam
ma
infl
am
en
lim
s con
lur
e to
le
or
era
ma
ds
in
ma
etc
ter
abl
est
es
a má
pia
do
dit
ion
ob
ser
flam
l spi
ble
or
thi
s
ble
, non
CU
C A
ma
. Dre
ial
infl
y no
qu
r de
.
ve
ma
rits
, etc
com
ma
chi
-
ID
U T
des
ter
ne
ial
las
am
com
abl
ina
com
par
this
ble
ma
. Dra
bus
ne.
AD
IO
nes
cui
infl
par
e com
bus
tib
po
tes
qu
wa
rni
ter
ial
in
par
tibl
e
O
/ AT
N
ext
da
ob
am
tes
abl
o,
les
. No
nen
tes
e
se
ng
wil
bef
ts
H O
TE
rem
ada
ser
var
e
a ser
gas
olin
llen
de
cal
l cre
ore
Be
for
T W
NT
Ce
me
est
ant
es
lim
pia
a,
ar
lim
pie
ien
ta.
ate
se
e op
A T
IO
N
seu
net
toy
nte
pel
as
pre
de
das
alc
o con
oh
za
Uti
bas
lice
arm
co
nd
en
E R
infl
am
lem
ent
eur
igr
cau
osa
cio
int
rod
de
cua
ol,
tam
ese
ina
e agu
sol
/tu
s to
ing
lid
PR
com
ma
des
de
piè
s.
nes
uci
lqu
r
ier
nci
as
r con
a,
a-
rnt
all
ow
, wa
EC
W A
des
bus
tibl
ble
s.
net
toy
ces
, pu
ede
en
com
min
alg
no
sp
ab
le
sp
it 5
AU
R N
à l'in
ma
tér
es
tels
Ne
pas
eur
est
n cre
el
gab
bus
era
les
ún
inn
ing
to
sto
ray
•
Ma
CI
ON
cré
tér
er
ieu
iau
x com
: gas
y ajo
s à
bas
cha
uff
ars
ine
tib
le
,
.
p
loc
ch
/ AD
IN
des
r du
situ
bus
olin
ute
e d'e
é.
e con
te.
o
A G
•
ka
ine
mu
VE
G
atio
cab
ine
tib
e,
alc
r ou
au,
Uti
lise
dic
Si
io-
C A
U A
•
Ins
tal
ble
st
RT
O PE
ns
t. Ne
les
ou
oo
con
l, etc
tam
no
n com
r dan
An
es
tes
LI E
Fo
r su
lat
ion
dis
co
be
co
IS SE
ris
qu
pas
infl
. Vid
ine
bus
s
cet
pe
de
N TE
•
at
lea
pp
mu
nn
ec
nn
ME
RA
ées
.
ob
ser
am
ma
er
r ave
les
tib
app
qu
e la
re
5 se
ab
rir
Do
st
ly
co
st
t.
ec
ted
NT
IMP
com
OR
TI NG
ver
ble
s ava
piè
c des
les
are
et
il
ba
gu
la
no
t us
90
de
nn
ec
co
mp
to
ma
ple
TA
NT
IN
ces
ave
nt
ces
ma
tér
non
rra
de
nd
rot
os
tap
a,
•
La
e be
gre
tio
ly
wi
a pro
ins
nua
tely
: Be
ST
rtis
de
con
iau
ten
x
E A
ten
ato
pa
má
low
es
C.
n,
us
th
pe
rly
Bef
truc
l pro
vid
fam
fore
iliar
ope
RU
sem
les
pla
ant
U
ga
.
ria
ra
•
elé
ctr
qu
ina
gra
e wi
NE
C
siz
tain
ore
ted
ind
ed.
ize
you
rati
CT
ent
s peu
cer
Av
an
C H
se
•
La
ins
ico
de
de
res
co
de
ed
sol
the
loa
din
ivid
On
ual
ly
rse
ng
this
IO
NS
t
att
en
t d'o
A U
Pa
ra
tal
de
se
be
flo
or
ac
ce
.
1.
utio
pum
ns
p is
g par
s sho
aut
hor
lf with
ma
teu
pe
rm
de
z 5
uv
rir
D E
do
las
ac
ión
gu
es
tar
or
gra
pta
ble
Fill
tan
are
off
ts
ont
uld
ize
d and
ins
truc
chi
ne,
r/p
ett
re
se
le
co
No
pa
ra
co
ne
de
rid
ad
co
ne
de
for
Wa
ter
k wit
at
ope
and
o turn
ope
rate
pro
tion
IN
laq
ue
au
bra
co
nd
uv
ert
uti
lic
al
me
xio
be
cu
.
cta
lev
2.
Ch
eck
leve
h wa
rati
not
ng
run
tab
le/
this
per
ST
tou
s vap
es
po
,
•
e po
no
ne
s de
mp
da
a un
el.
Pro
gra
dai
l sho
ly.
uld
ter
and
tem
nin
bas
g and
ket
ma
chi
ly
IMP
RU
de
tou
rna
nte
ori
ur
L'a
r de
s 90
ali
lir
co
ope
rati
m
hea
be
cle
per
atu
, be
ne.
ple
OR
TA
CC
rne
d'a
sa
-
ve
pp
are
ba
jo
gra
do
me
n el
en
ch
3.
sol
utio
on.
ter
2"
bel
ani
ng
re.
the
wa
cer
-
per
tam
ent
NT
E:
IO
NE
r.
rrê
ter
•
L'i
rro
uil
il do
de
s ce
nta
ció
có
dig
ufe
Op
en
n.
Allo
w
tim
er
ow
the
sol
utio
sh
ést
son
e equ
al
e con
An
SD
•
Po
ns
tal
lab
it êtr
l niv
ntí
n,
o NE
bas
ket
doo
r/lid
tim
e for
for
des
acc
n.
car
ga
ipo
aut
oriz
el
ma
tes
de
E O
ur
lat
le
de
e co
el
de
gra
do
us
e ca
C.
bas
thro
ugh
/tur
nta
and
uni
ired
ess
doo
est
é apa
sob
. An
ado
nua
opa
rar
PE
fils
po
le
rac
ion
do
tai
nn
l pis
s.
ble
hei
ket
the
ble
pla
t to
pre
per
iod
rs.
est
én
re
gad
la
tes
y deb
de
l de
ope
el
equ
RA
Ne
pa
uv
co
it se
lle
ap
ec
té
o.
a-
4.
ght
/tur
nta
bot
tom
. Be
ce
cer
arti
hea
of
1.
Lle
a tem
a y
torn
am
abr
ida
me
rac
ipo
CI
s uti
an
t ac
rde
me
co
pro
à un
set
Clo
se
or
we
ble
. Do
or
tain
cle
s to
t cle
ani
niv
ne
el
per
atu
sin
fun
esa
ir la
/ca
pue
nte
ión
cap
que
, fam
O N
lis
ce
nt
nfo
pri
ée
se
cle
to
doo
igh
r/lid
t lim
not
bey
ond
no
par
be
ng
ces
el
del
dep
ra
cio
de
nar
nas
rta/
aci
se
ilia
ríce
er
un
pte
r au
de
l'a
rm
er
.
cti
on
has
ani
ng
sh,
wa
and
it for
exc
the
ts
pro
cle
an
2.
Pro
o.
Ver
agu
ósi
to
fun
, y
ta,
ase
cub
tad
iert
o deb
inc
luy
se
com
ca
lib
mo
lim
au
co
ne
ur
5.
Be
exp
tim
turn
latc
this
eed
sid
the
es
trud
ont
o
ope
gra
me
ifiq
ue
a deb
con
cio
agu
nam
que
las
gúr
ese
a o
e opa
So
e.
-
IN
re
ins
en
tat
de
fore
off
ired
e.
.
Pu
"wa
mp
sh
h sec
spr
ay
spe
of
e
the
pre
rac
ión
el
e est
niv
el
ar
a y
ien
to.
sol
uci
de
las
pie
lo
rar
ST
RU
ou
un
90
ion
NE
C.
nin
and
ope
nin
will
cyc
le"
ure
ly.
wa
sh
cifi
ed
3.
Abr
cal
ien
des
Tem
por
el
dia
2"
por
la
sol
one
que
zas
de
IMP
OR
CT
gra
de
gré
, uti
lis
and
g.
Thi
wa
it 5
g the
sta
rt and
tim
Wit
er
h ma
cab
ine
nam
a la
la
te
ead
o.
iza
dor
riam
deb
uci
ón
s de
la
bom
vou
ma
s com
TA
NT
IO
de
s Ce
er
exc
s will
sec
doo
to
the
chi
t.
bre
esa
pue
rta/
sol
uci
De
je
del
ent
e.
ajo
de
par
a lim
lim
pie
ba
aut
chi
plè
: Ava
NS
inf
éri
lsi
de
s
ess
wa
allo
ond
w
s for
r/lid
, turn
run
unt
des
ne
los
pas
/ca
e el
nas
tap
ón
par
pas
ar
cal
ent
las
pie
za
ou
oris
ne
dev
tem
nt
d'u
D'
eu
r.
us
.
M AI
ter
to
ste
am
ma
wa
il tim
ired
lav
lim
ado
ites
fon
ta,
a y
ase
col
a lim
un
ado
pue
rta
za.
El
s'a
du
é et
form
rait
être
ent
ave
tilis
O PÉ
NT
dra
to
chi
ne
sh
cyc
e
4.
Cie
.
esp
do
ni
gúr
oqu
pie
e las
za.
tiem
r par
po
a el
de
pas
ssu
cha
rer
rge
é.
util
c le
er
cet
RA
The
EN
in
from
esc
ape
to
sto
le
tim
en
rre
la
eci
fica
el
ese
per
de
pie
par
a que
per
ac-
fon
et
que
que
me
nt
Ava
isé
e seu
ma
nue
te
ma
TI O
Hig
follo
AN
you
the
p spi
er
lav
ado
pos
ició
pue
rta/
dos
íme
tro
que
zas
íod
o de
1.
ctio
nne
les
la
pom
des
nt
l'ou
lem
l d'in
chi
ne,
N
nan
her
win
g sch
CE
r par
ts.
cab
ine
n-
5.
dur
ant
" al
n de
tap
de
pes
de
nin
gun
a lav
ar
la
uni
Re
mp
me
sol
utio
pe
piè
ces
ver
ture
ent
stru
ctio
fam
ilia
IMP
ce.
usa
ge
edu
IN
ST
t
An
tes
e el
tiem
lav
ar,
a y
ase
o y
la
altu
torn
a pie
en
dad
Le
niv
lir
le
nt.
ns
est
en
sur
de
par
du
n fou
rise
fore
OR
ma
y req
le
is bas
RU
cic
lo
de
tiem
po
des
aju
ste
gur
e el
ra
am
esa
za
la
so-
tor-
por
2.
eau
tes
rés
erv
de
lav
pos
la
tab
la
por
per
rni.
z-
ser
dra
TA
NT
uire
ed
CT
dej
de
e de
lav
abr
ir la
po
sel
ead
o.
el
tem
can
par
a el
. No
Pro
gra
d'a
d'e
ccè
au
oir
d'e
age
itio
son
n arrê
le
tou
te/d
u cou
son
Ce
nel
tte
DA
vic
e this
inin
g sum
: Be
mo
on
ave
IO
el
exc
gira
ado
pue
ecc
ion
La
bom
por
dad
gab
exc
eda
la
pér
mm
s. Vér
doi
t se
au
t à
t et
rna
nte
ver
ILY
ma
p.
sur
e ele
re
freq
rag
NS
eso
r. Est
y esp
rta/
cub
ado
.
iza
ba
dor
o.
Co
ine
te
3.
pou
iod
r que
e de
er
le
ifie
trou
et
d'u
tem
ne
pér
fon
/le
pan
cle
•
Ch
:
chi
On
ly
ctri
uen
e use
t ma
.
de
agu
o per
ere
iert
5 seg
arr
anc
de
n la
má
de
Ou
vrir
l'ap
fon
min
r quo
ute
ver
à 5
ne
sol
atu
ctio
ier,
off
eck
ne.
qua
cal
sup
inte
IN
ST
a dre
mit
irá
und
a,
apa
ará
"cic
lo
qui
na
sur
le
la
por
par
ctio
rie
nne
de
tidi
enn
utio
cm
n de
re
de
nne
hea
the
wa
ter
lifie
d per
ply
-
RU
ne
de
que
os
gue
el
y fun
de
auc
pan
une
ier/
te/c
eil
pré
me
cha
em
ent
po)
(2
net
•
Re
ter
wa
ter
lev
el
is
son
OF
El
pla
CC
las
el
vap
par
a que
tem
cio
nar
4.
du
pai
piè
pla
ouv
ert
cha
nt
uffe
sou
uffa
ge
.
sou
toy
age
•
mo
ele
me
dai
ly
in
the
nel
sho
F be-
bas
ado
n de
IO
pie
zas
or
sal
la
por
iza
á
Fer
ner
me
/pla
ce
dép
que
tou
et
pla
la
hai
tée
de
l'ap
s les
.
Vis
ual
ve
and
nt.
will
pre
sum
uld
sev
ero
ma
en
nte
NE
S DE
.
ga
del
má
qui
dor
del
La
cyc
ma
z la
que
ass
ant
rna
cez
sol
utio
. Pré
par
and
cle
ly
che
cle
an
ven
p dai
ly.
IMP
pue
un
uso
nim
ien
gab
na
jus
chi
le"
ne
por
te/c
tou
rna
le
nte
. Ass
les
arti
n de
voi
r du
eil
pou
WE
nal
pos
an
if nee
ck
for
deb
t dam
Top
APA
OR
TA
de
req
pro
to
que
M AN
ine
te
5.
Ava
qu'
au
à ce
tem
prê
te
ouv
ert
nte
.
pai
ner
ure
cle
s à
net
toy
tem
r
•
EK
LY:
itio
n.
ded
plu
gge
ris
scr
age
to
pin
g
deb
e rep
GA
DO
NT
E:
uer
ir un
me
dio
se
y
cyc
nt
que
ps
de
pou
r le
et
ou
z-v
dan
ous
être
age
.
ps
MO
Gre
. Re
d noz
een
.
the
DIA
ara
ant
Ase
ma
del
equ
pre
sen
TE
NI
l'ap
d'o
le
de
uvr
tem
la
lav
ver
lav
rou
s le
qu'
il n'y
lav
é
•
NT
HLY
ase
/oil
ins
tall
zle
•
RIA
ME
r est
es
gúr
de
ese
nte
nim
ipo
ta
a con
M IE
s'é
par
eil
lava
ir la
por
ps
sél
age
age
ille
, tou
z de
fon
d au-
est
Per
:
doo
in
the
Re
s.
Co
mp
NT
a má
vac
iar
de
que
ien
. Un
to
uso
tinu
NT
piè
cha
ppe
s'a
ge
à l'ar
te/l
ect
ion
dés
iré.
rne
faç
del
•
Dra
form
r hin
ges
mo
exa
ve
Ma
nte
rue
E:
qui
na.
cár
el
el
má
s frec
má
ació
O
ces
.
r du
rrêt
e de
rêt
e cou
né
La
z le
on
séc
à
grit
in
wa
visu
al
.
ct
orig
•
ele
me
ner
be
el
ter.
sis
tem
s frec
uen
n,
est
cab
ine
tou
et
ver
atte
cle,
soi
t éco
pom
min
pe
ute
urit
aire
tak
from
sh
che
ck
i-
•
Re
nto
el
niv
niv
el
Só
lo
per
a elé
te.
uen
te
á
t et
rne
r. Ce
ndr
e pen
me
ttre
ulé
fon
ur
"wa
.
me
en
to
bot
tom
sol
utio
of
turn
Co
tire
y lim
del
cal
el
ade
del
agu
son
ctri
co
o
Le
DI
RE
à l'ex
la
per
dan
min
la
.
ctio
nne
sh
•
Wh
nt
dur
avo
id
of
n from
tabl
e driv
cor
mp
rue
pie
ent
cua
ado
do
a en
al
cal
est
é
Un
tab
lea
CT
cès
d'e
me
t 5
ute
ra
wa
en
ing
the
ben
the
sum
sum
e cha
la
pos
rec
tam
be
vis
los
res
r.
del
el
cár
ific
ado
fréq
e util
u sui
IV ES
au
de
ttra
à la
sec
ond
rie
du
gen
ter,
sum
p has
cle
din
g or
p.
p,
rem
in.
SEM
AN
ició
ent
ual
me
idu
os
agu
a evi
ter
dia
IMP
uen
isa
tion
van
s'é
vap
cou
es
que
NO
TE
t for
add
the
bee
ani
ng
dam
Ca
re
ove
•
Lub
ALM
n orig
e.
Re
tire
nte
de
tará
riam
ava
OR
t.
plu
t est
fon
D'
EN
ler
eur
de
bef
ore
: Dis
you
r ma
rec
n cle
pro
ces
agi
ng
sho
uld
san
d/
ME
NS
riqu
EN
TE:
ina
l exa
y lim
que
la
crib
dañ
ent
e.
par
nt
TA
de
NT
s imp
dé
TR
de
vos
am
oun
add
sol
ve
chi
om
me
ane
s.
hea
be
•
UA
LM
e las
cta
pie
las
boq
a.
ar
el
er
cet
vid
: S'a
orta
nte
sur
une
ET
t to
ing
the
cle
ani
ne.
nde
d and
d qua
ter
ele
Re
alic
EN
bis
agr
.
si
es
uilla
QU
OT
app
le
er
rés
ssu
rer
peu
util
IE N
the
tan
ma
ng
pow
ntit
refi
lled
-
•
de
la
e una
TE:
as
de
nec
s est
esa
án
•
Vé
IDI
EN
are
il.
erv
que
t exi
isa
ger
tion
k.
act
nuf
der
y of
wit
Dre
torn
am
ver
la
pue
rio.
ins
erv
rifie
NE
ME
oir.
Se
le
sys
un
mo
yen
ure
r's
into
det
h
er-
cár
ter
ne
la
esa
ific
aci
rta.
Re
ins
tala
das
d'e
oir.
r quo
tidi
NT
:
ul
le
tèm
ent
reti
ne.
rec
om
wa
rm
dañ
ar
los
sol
uci
.
ón
vis
tale
en
•
Dé
ndo
mm
Le
rem
enn
per
e éle
son
ctri
en
plu
me
nde
wa
ter
•
lim
pie
ele
el
sed
ime
ón
de
ual
de
•
mo
nte
age
plis
em
ent
nel
que
s
d
Un
a vez
za.
me
nto
lim
s.
pie
la
cad
stru
Vér
ifie
r et
r l'élé
sag
e quo
le
niv
qua
lifié
est
à l'ar
agr
egu
que
nto
del
De
be
za
del
ena
dan
ées
r vis
uel
net
toy
me
nt
tidi
eau
doi
t ré-
rêt
NO
má
qui
e la
el
cal
ten
ent
cár
de
pro
HE
BD
s la
. Dé
lem
er
le
cha
en
d'e
d'e
au
lo
TA
: Dis
na.
can
cár
tida
ter
ado
er
cui
ter,
reti
pul
sió
•
OM
pos
mo
nte
ent
si
filtr
uffa
e à
nt.
au
per
dan
s le
al
tan
que
uel
d rec
est
á lim
r dur
dad
o de
re
del
n
ME
Gra
iss
AD
AIR
itio
n init
r et
net
des
déb
me
rés
va
en
el
om
pio
ant
e el
no
fon
•
NS
UE
er/h
EM
iale
toy
er,
bus
es
ris.
t d'é
vite
-
la
can
det
erg
end
ada
y rell
pro
ces
dob
do
lar
de
Pro
LLE
uile
r les
EN
T:
exa
cte
cas
le
son
t bou
r
tida
d rec
ent
e en
de
eno
o de
o
•
de
céd
er
ME
NT
pen
.
éch
ché
om
agu
det
erg
de
agu
Ass
la
tab
à un
:
ture
éan
es/
end
a cali
ent
e par
a,
sab
éch
er
le
tou
con
trôl
s/c
har
t. Ré
ins
ob-
ada
por
ent
e ant
a la
être
le/g
rav
la
sol
rna
nte
e vis
niè
res
tall
er
fab
el
es
•
ou
pris
de
ier
es
se
utio
.
uel
de
de
la
rica
de
agr
Lor
l'en
pou
trou
n de
lav
la
cha
por
te.
nte
.
ega
r-
NO
qua
squ
e le
dom
ma
r évi
van
ter
t au
age
îne
TE
ntit
é de
rés
ger
de
fon
du
rés
d'e
ntra
d'a
jou
: Bie
n dis
erv
dét
oir
au
plie
cou
r/co
d.
De
erv
oir,
îne
ter
dan
sou
erg
a été
ent
rs
urb
du
s pré
et
me
nt
s le
dre
rec
net
toy
er
pro
l'él
cau
tion
enl
eve
rés
erv
la
pou
om
ma
é et
rem
ces
sus
ém
ent
s doi
r tou
oir.
dre
dan
ndé
e pou
pli
de
cha
uffa
ven
t
t
s l'ea
r vot
d'e
au,
net
toy
nt
u cha
re
ajo
ute
age
.
ude
app
are
r la
ava
il.
nt
8.9
22-
402
.0
www.P65Warnings.ca.gov
Automatic Parts Washer
MODELS:
For the Cuda Dealer nearest
you, consult our web page at
www.CudaUSA.com
known
to the
Front-Load
1.043-395.0
1.043-416.0
1.043-417.0
1.043-418.0
1.043-419.0
1.043-420.0
1.043-492.0
1.043-493.0
1.043-494.0
1.043-496.0
1.043-497.0
1.043-498.0
8.930-370.0-AU
06/01/18
Advertisement
Table of Contents
Troubleshooting

Related Manuals for CUDA Series 2840


Summary of Contents for CUDA Series 2840
- Page 1 For the Cuda Dealer nearest you, consult our web page at WARNING: www.CudaUSA.com This product and accessories may contain a chemical known to the State of California to cause cancer and birth defects or other reproductive harm.
-
Page 2: Machine Data Label
Machine Data Label Cuda 2840 Operator’s Manual 8.930-370.0 - AU... -
Page 3: Table Of Contents
Operation ....... . . 14 Cuda 2840 Front ......38 Main Operating Components . -
Page 4: How To Use This Manual
KIT INSTRUCTIONS which came with the kit. It contains replacement parts numbers needed for ordering future parts. NOTE: The manual part number is located on the lower right corner of the front cover. Cuda 2840 Operator’s Manual 8.930-370.0 - AU... -
Page 5: Safety
When ordering parts, please specify model and serial number. Use only identical replacement parts. This machine is to be used only by trained operators. Cuda 2840 Operator’s Manual 8.930-370.0 - AU... -
Page 6: General Safety Information
8. Use caution when lifting items in and out of parts pourraient survenir. basket to prevent back injuries. KEEP WATER SPRAY AWAY FROM 2.All installations must comply ELECTRICAL WIRING. with local codes. Contact your Cuda 2840 Operator’s Manual 8.930-370.0 - AU... - Page 7 16. After the machine stops, wait 10 seconds before opening the lid or door. This automatic parts washer is designed to operate safely and efficiently. Before you begin to install and use the machine, please familiarize yourself with the major components. Cuda 2840 Operator’s Manual 8.930-370.0 - AU...
-
Page 8: Operations
: Bie r au rés aîn n dis dé a été s pré , et l’é rés yé lém s do t ch ée l’e d’e , ajo r la Debris Screen Sump Cover Cuda 2840 Operator’s Manual 8.930-370.0 - AU... -
Page 9: Component Identification - Rear View
W he , ad • e cle : Di g the e ad Sump Cover Fresh Water In Low Water Shut-Off Assy. Pump Heating Element & Thermostat Enclosure Cuda 2840 Operator’s Manual 8.930-370.0 - AU... -
Page 10: Component Identification - Front - Options
Sink Tray Latch (Optional) Swing Down Spray Manifold Parts Tree Turntable Power Brush (Optional) Detail Brush Turntable (Optional) Chain Small Parts Basket Oil Drain Container Containment Ring Door Latch Side Sink/Pump (Optional) Sump Cover Cuda 2840 Operator’s Manual 8.930-370.0 - AU... -
Page 11: Installation
In 5. Hang the power brush on the bracket mounted along the right side of the machine. Cuda 2840 Operator’s Manual 8.930-370.0 - AU... -
Page 12: Step 4: Connect A Water Line
5. Close and latch the door. 6. Turn the wash cycle timer to 2 hours for the first time, and allow the machine to complete the cycle to thoroughly dissolve the detergent into the water. Cuda 2840 Operator’s Manual 8.930-370.0 - AU... - Page 13 8. Replace all sump covers. When the machine stops, and after the wash water reaches operating temperature, it is ready for use. Refer to Section 3: Operation for complete operating instructions. Cuda 2840 Operator’s Manual 8.930-370.0 - AU...
-
Page 14: Operation
Low Water Indicator Decrease The low water indicator light illuminates if the wash Temperature solution in the sump is low. For more information refer to Low Water Shut-off. Cuda 2840 Operator’s Manual 8.930-370.0 - AU... -
Page 15: Door Safety Switch
Detail Brush free spray nozzle operation, and also provides a To Air safeguard against small parts that might accidentally be Outlet Supply washed through from the cleaning chamber. To Detail Brush Cuda 2840 Operator’s Manual 8.930-370.0 - AU... -
Page 16: Detail Sump
If you need to adjust the flow, pull out the flow regulator knob, then rotate it clockwise to increase the flow or Holding counter-clockwise to decrease the flow. After adjusting, Bracket push the knob back in to lock it. Cuda 2840 Operator’s Manual 8.930-370.0 - AU... -
Page 17: Oil Skimmer
Top switch CLOSED, Bottom Switch Water Fill Valve (if installed) CLOSED, CLOSED, Automatic Water Fill Valve (if OPEN, Automatic Water Fill Valve (if Heating Element ON. installed) OPEN, Heating Element OFF. installed) OPEN, Heating Element OFF. Cuda 2840 Operator’s Manual 8.930-370.0 - AU... -
Page 18: Filtration System (Optional)
15 psi. The filtration system continuously filters solid particles from the wash solution, and you can use the sump sweep system to periodically remove waste build up from the bottom of the sump chamber. Cuda 2840 Operator’s Manual 8.930-370.0 - AU... -
Page 19: Sump Sweep System (Optional)
If you need help interpreting test results, contact customer service. Rust Inhibitor Additive Factory detergents protect the entire inside of your machine against the degenerative effects of water evaporation. A rust inhibitor additive actually evapo- Cuda 2840 Operator’s Manual 8.930-370.0 - AU... -
Page 20: Washing Parts
Cuda 2840 Operator’s Manual 8.930-370.0 - AU... -
Page 21: Shutting Down The Machine
NOTE: Perform rust preventative treatment on mild steel units prior to extended storage. • If your machine is equipped with an optional 24- hour, 7-day heater timer, periodically verify the settings to prevent inadvertent unattended operation. Cuda 2840 Operator’s Manual 8.930-370.0 - AU... -
Page 22: Maintenance
Lubricate the door spindle using high-quality automotive grease. Add grease until it begins to flow out of the joint beneath the grease fitting, then wipe excess grease from the fitting and the joint. Door Spindle Grease Fittings Cuda 2840 Operator’s Manual 8.930-370.0 - AU... -
Page 23: Cleaning And Aligning The Spray Nozzles
NOTE: The spray nozzles are sized and positioned to optimize the distribution of cleaning solution in the wash chamber. If you remove the nozzles make sure you replace them in the correct position on the appropriate pipe. Cuda 2840 Operator’s Manual 8.930-370.0 - AU... - Page 24 NOTE: While the sump sweep is operating, monitor the outlet pressure on the filter system to ensure that it does not drop below 30 psi. If the pressure drops below 30 psi, immediately stop the machine and Cuda 2840 Operator’s Manual 8.930-370.0 - AU...
-
Page 25: Cleaning The Filters
To clean or 10. Turn on machine and continue washing. replace the filters, perform the following procedure: 1. Turn off the machine and open the door. Cuda 2840 Operator’s Manual 8.930-370.0 - AU... -
Page 26: Repairing The Machine
6. Install the new thermostat. Installation is the sealing tape or compound on the threads to deter reverse of removal. corrosion. 6. Install the new heating element(s). Installation is the reverse of removal. Cuda 2840 Operator’s Manual 8.930-370.0 - AU... -
Page 27: Turntable Motor
9. Install the new motor. Installation is the reverse of removal. 5. Push the motor assembly toward the front of the machine, then reach into the drive pulley access hole with your fingers to free the chain from the Cuda 2840 Operator’s Manual 8.930-370.0 - AU... -
Page 28: Timers And Switches On The Control Panel
Slide Cover Toward Rear Retaining to Remove Screws Knob 6. Detach the power leads from the timer. 7. Attach the power leads to the new timer. Cuda 2840 Operator’s Manual 8.930-370.0 - AU... - Page 29 5. Remove the two screws from the center of the skimmer disk to detach the disk from the skimmer assembly. To remove the disk, disengauge it from the center pin, then slide it down. Screws Cuda 2840 Operator’s Manual 8.930-370.0 - AU...
-
Page 30: Troubleshooting
Blown; Replace the Blown Fuse of Each Pump Overload approximately 0 Ohms Relay E l e c t r i c a l Pa n e l i s OK, Refer to Testing Individual Components Cuda 2840 Operator’s Manual 8.930-370.0 - AU... -
Page 31: Troubleshooting A Three Phase Panel
One of the Pump Fuses Power Fuses; Measure the is Blown; Replace the Resistance of Each Blown Fuse approximately 0 Ohms Pump Electrical Panel is OK, Refer to Testing Overload Individual Components Relay Cuda 2840 Operator’s Manual 8.930-370.0 - AU... -
Page 32: Testing Individual Components
2. Remove the cover from the heating element and 4. Using a large flat-head screwdriver, pry the ther- thermostat enclosure (four screws; use a 5/16” mostat out of the mounting bracket, then remove it wrench or socket). from the machine. Cuda 2840 Operator’s Manual 8.930-370.0 - AU... - Page 33 If the ohm meter reads approximately 1 Ohm, the start capacitor is no longer functional; replace the start capacitor. Cuda 2840 Operator’s Manual 8.930-370.0 - AU...
- Page 34 Check the thermostat to ensure that it is Thermostat is incorrectly installed correctly installed into the mounting bracket. (See WASH Thermostat Section). SOLUTION IS TOO HOT Replace the thermostat Failed thermostat (See Thermostat Section). Cuda 2840 Operator’s Manual 8.930-370.0 - AU...
-
Page 35: Oil Skimmer
Pump is failed customer service representative to test the pump motor. OIL SKIMMER DOES NOT Check electrical panel for a blown fuse; Blown fuse OPERATE replace if necessary. PROPERLY Cuda 2840 Operator’s Manual 8.930-370.0 - AU... - Page 36 MACHINE IS correct amount to add. Verify that you are using our RUSTING detergents at the correct concentration. Condensation on door and cabinet causing Leave door open. rust during idle periods Cuda 2840 Operator’s Manual 8.930-370.0 - AU...
-
Page 38: Cuda 2840 Front
8.930-370.0 • Printed in U.S.A.
Need help?
Do you have a question about the Series 2840 and is the answer not in the manual?
Questions and answers