
Related Manuals for CUDA 2412


Summary of Contents for CUDA 2412
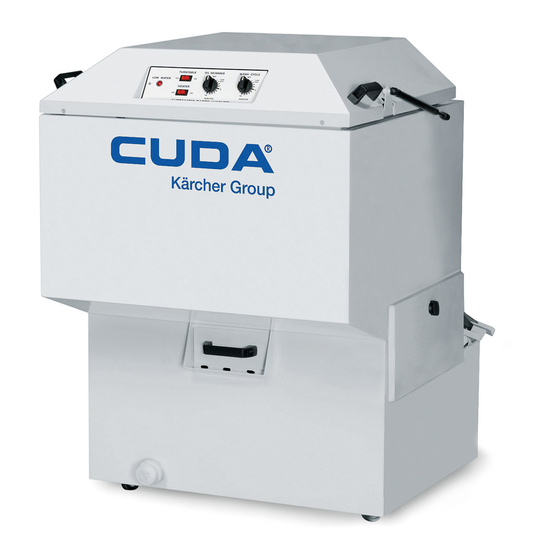
- Page 1 2412 AUTOMATIC PARTS WASHER ■ 1.043-356.0 ■ 1.043-379.0 ■ 1.043-357.0 9 .8 -1 2 5 .0 89143840-1 For technical assistance or the Kärcher dealer nearest you, visit our website at www.CudaUSA.com 8.914-384.0...
-
Page 2: Table Of Contents
Testing Individual Components SECTION 5 Maintenance and Repair Maintaining the Machine Repairing the Machine Heating Element Thermostat Timers and Switches on the Control Panel Torque Limiter Turntable Motor 22-23 Using the Oil Skimmer System Cuda 2412 • 8.914-384.0 • Rev. 5/12... - Page 3 The model and serial numbers will be found on a decal attached to the parts washer. You should record both serial number and date of purchase and keep in a safe place for future reference. Cuda 2412 • 8.914-384.0 • Rev. 5/12...
-
Page 4: General Safety Information
Before you begin to install and use the machine, please cal power indicated on the electrical specifications familiarize yourself with the major components. tag. Operating the machine on any other power supply will permanently damage the motors. Cuda 2412 • 8.914-384.0 • Rev. 5/12... - Page 5 Do not touch machine with wet hands or while standing in water. Always discon- nect the power before servicing. 19. Never make adjustments on machine while it is in operation except those prescribed in this manual. Cuda 2412 • 8.914-384.0 • Rev. 5/12...
-
Page 6: Component Identification
SECTION 1: COMPONENT IDENTIFICATION - FRONT VIEW Lid Support Strut Control Panel Handle Autofill (Optional) 9. 80 1- 12 5. 0 Power Brush (Optional) Detail Brush (Optional) Sump Drain Access Panel 89143840-2 Debris Screen Cuda 2412 • 8.914-384.0 • Rev. 5/12... - Page 7 SECTION 1: COMPONENT IDENTIFICATION - REAR VIEW H I G I N G Air Flow Valve & Flow Regulator (Optional) Water Inlet (Optional) Skimmer 89143840-16 Heating Element & Thermostat Pump Cuda 2412 • 8.914-384.0 • Rev. 5/12...
-
Page 8: Before You Begin
Step 1: Hose Connection Remove the power brush from the box, install the wire (Optional) brush in the chuck, and connect the air hose. Cuda 2412 • 8.914-384.0 • Rev. 5/12... -
Page 9: Step 4: Fill The Machine With Water And Add Detergent
24-hour 7-day heater timer. Refer to 24-hour, 7-day Heater Timer for more information. IMPORTANT: Allow the sump water to reach operating temperature before adding detergent and running the machine. If you add detergent and run the machine Cuda 2412 • 8.914-384.0 • Rev. 5/12... -
Page 10: Main Operating Components
(120V only). After long wash cycles Switch (Located it may be necessary to let the machine sit idle for a Behind Lip) period of time to allow the wash solution to reheat to operating temperature. 89143840-3 Cuda 2412 • 8.914-384.0 • Rev. 5/12... - Page 11 Throttle Lever Lock Holding Bracket Throttle Lever NOTE: The power brush is available as an option on this machine. For ordering information, contact your distributor or call customer service. Cuda 2412 • 8.914-384.0 • Rev. 5/12...
- Page 12 If you need to adjust the flow, pull out the flow regulator knob, then rotate it clockwise to decrease the flow or counter-clockwise to increase the flow. After adjusting, push the knob back in to lock it. Cuda 2412 • 8.914-384.0 • Rev. 5/12...
-
Page 13: Detergents And Additives
• Thick, white residue on parts after washing: too much detergent To maintain proper detergent concentration under typical operating conditions, add detergent each month Cuda 2412 • 8.914-384.0 • Rev. 5/12... -
Page 14: Preparing The Machine For Use
Make sure none of the parts extend beyond the edge of the turntable and make sure large, light parts (valve covers, for example) are secured to the turntable. Cuda 2412 • 8.914-384.0 • Rev. 5/12... -
Page 15: Troubleshooting
Water hardness and TDS Use a water softener and/or change your sump (totally dissolved solids) water more frequently. Large parts can dry before Turn heat down to approximately 140°. solutions runs off, leaving powdery residue Cuda 2412 • 8.914-384.0 • Rev. 5/12... - Page 16 Pump is failed Contact a licensed electrician to test the pump; replace if necessary. MACHINE RUSTING Steam condensing on inside Leave lid open during idle periods. INTERIOR of a lid Check soap concentration. Cuda 2412 • 8.914-384.0 • Rev. 5/12...
-
Page 17: Troubleshooting The Electrical System
Tighten Loose Power Grey Terminal Blocks for Connections Loose Connections Loose E l e c t r i c a l Pa n e l i s OK, Refer to Testing Individual Components Cuda 2412 • 8.914-384.0 • Rev. 5/12... -
Page 18: Testing Individual Components
If there is continuity the thermostat is no longer functional; replace the thermostat. Step 6: Allow the thermostat to cool to room temperature, then test for continuity. If there is not continuity the thermostat is no longer functional; replace the thermostat. Cuda 2412 • 8.914-384.0 • Rev. 5/12... -
Page 19: Maintenance And Repair
SPRAY THE MACHINE WITH WATER. TOP & BOTTOM NOZZLES SIDE NOZZLES 3° Turntable Rotate Each Nozzle Align The Notch In Approximately 3° Each Spray Nozzle From The Center Line With The Center Of Of The Pipe The Turntable 2412 • 8.914-384.0 • Rev. 5/12... -
Page 20: Repairing The Machine
Install the new heating element. Installation is the • sealing tape or compound reverse of removal. • medium phillips-head screwdriver Replacement Procedure Step 1: Disconnect power to the machine. Step 2: Drain the wash solution from the sump. Cuda 2412 • 8.914-384.0 • Rev. 5/12... -
Page 21: Thermostat
R e p l a c e t h e c o m p o n e n t , t h e n r e a s s e m bl e • small flat-head screwdriver the lid cover. Step 6: Ensure thermostat is set to 180°F. 2412 • 8.914-384.0 • Rev. 5/12... -
Page 22: Torque Limiter
The torque arm should begin to slip at 7 pounds. If it slips at less than 7 pounds, tighten the adjusting bolt. If it slips at greater than 7 pounds, loosen the adjusting bolt. Cuda 2412 • 8.914-384.0 • Rev. 5/12... -
Page 23: Using The Oil Skimmer System
Step 9: Step 3: Install the new motor. Installation is the reverse of removal. Dispose of the oil in the collection container in accor- dance with local and state regulations, then replace the container. 2412 • 8.914-384.0 • Rev. 5/12... - Page 24 EXPLODED VIEW - 115V ELECTRICAL PANEL 15, 30 17, 20 Oil Skimmer Auto Fill Option 89143840-12 Cuda 2412 • 8.914-384.0 • Rev. 5/12...
- Page 25 8.713-316.0 Clip, Mounting (For Merc. 8.716-021.0 Cover 1" 12" Tilt SW) 8.716-400.0 End Cover Blue 8.713-105.0 Switch Boot, Threaded 8.713-357.0 Timer, 30 Min 8.913-711.0 Lid, Top 2412 ▲ Not Shown 8.913-721.0 Lid 2412 Cuda 2412 • 8.914-384.0 • Rev. 5/12...
- Page 26 EXPLODED VIEW - 208V, 230V ELECTRICAL PANEL 17, 20 Timer Option Oil Skimmer Auto Fill Option 89143840-13 Cuda 2412 • 8.914-384.0 • Rev. 5/12...
- Page 27 Washer, 1/4" Flat SAE TT ON/OFF 8.714-379.0 Gearmotor, AC Fract 6 RPM 8.714-057.0 Light, Indicator Red 120V, .50" D 1 2412 Drive 120V 1/2" SS Shaft 1 8.713-086.0 Ground, Lug 2 Hole Alum 9.804-247.0 Gasket, Gearmotor Paper 8.714-164.0 Terminal Block, 2 Pos...
- Page 28 EXPLODED VIEW - FRONT VIEW Nozzle Alignment (Option) TOP & SIDE BOTTOM Turntable Approx. 3° Align with from center the center of line of pipe turntable 43,44,45 9. 80 1- 12 5. 0 89143840-14 Cuda 2412 • 8.914-384.0 • Rev. 5/12...
- Page 29 Filter Mediol, 1/4", 2" x 12" x 1" 9.800-013.0 Label, Assembled USA Intended for indoor use. 9.800-034.0 Label, Clear Lexan Label, UL/ETL 9.804-361.0 Decal, Patent Number 8.706-150.0 Elbow, 1" 8.706-191.0 Elbow, 1" x 3/4" Cuda 2412 • 8.914-384.0 • Rev. 5/12...
- Page 30 Brush Option I N G 2, 3, 4 See Oil Skimmer Assy Auto-Fill Option * E P D 89143840-17 * WARNING: If connnection is made to a potable water supply, Protect against backflow Cuda 2412 • 8.914-384.0 • Rev. 5/12...
- Page 31 Nut, 4-40 Keps, Zinc * 8.713-359.0 Seal Kit 8.714-226.0 Float, PLY, Cylindrical 8.713-360.0 O-Ring 2" Dia x 3-3/4" 8.913-717.0 Float Holder 8.930-331.0 Cover, Heater Element 9.802-094.0 Foam strip 1/8" x 1/2" Adhesive Back 30" Cuda 2412 • 8.914-384.0 • Rev. 5/12...
- Page 32 AUTO FILL, DETAIL BRUSH & POWER BRUSH OPTIONS To Sump Chamber Plug (Item 35) Installed Here When Power Brush is Not Supplied 9. 80 1- 12 5. 0 89143840-18 Cuda 2412 • 8.914-384.0 • Rev. 5/12...
- Page 33 Clip -Detail Brush Male 8.712-838.0 Pipe -Ball Valve 1/4" 3-Way 8.713-656.0 ▲ Connector, Electrical 3 Pin Female 9.802-254.0 Hose, 1/4", Push-on, Fuel Line 24" ▲ Not Shown 8.706-161.0 Elbow, 1/4", Street, 90° Galv Cuda 2412 • 8.914-384.0 • Rev. 5/12...
- Page 34 Bolt, 1/4" x 3/4", NC 8.706-198.0 Elbow, 1-1/4" Female, 90 ° 9.802-802.0 Washer, 1/4", Flat Galv 8.718-568.0 Washer, 1/4", Sealing 8.706-341.0 Pipe, Barbed Male NPT 1-1/4" 9.802-773.0 Nut, 1/4" ESNA Galv 8.904-658.0 Decal, Caution Filter Pressure 1 Cuda 2412 • 8.914-384.0 • Rev. 5/12...
- Page 35 Nut, 5/16 ESNA 8.718-568.0 Washer, 1/4" Sealing 8.918-672.0 Disc, Skimmer SS 9.804-567.0 Nut, 10/32 ESNA 9.802-791.0 Nut, Cage, 10/32" x 16 Ga. 9.802-514.0 Strain Relief, STRT, LQ Tite 9.804-564.0 Screw, 6-22 x 12 Cuda 2412 • 8.914-384.0 • Rev. 5/12...
- Page 37 CUDA does not authorize any other party, including authorized Distributors, to make any representation or promise on behalf of CUDA, or to modify the terms, conditions, or limitations in any way. It is the buyer’s responsibility to ensure that the installation and use of CUDA products conforms to local codes.
- Page 38 Form #8.914-384.0 • Revised 5/12 • Printed in U.S.A.
Need help?
Do you have a question about the 2412 and is the answer not in the manual?
Questions and answers