Table of Contents
Advertisement
OPERATOR'S MANUAL
■ 1.043-394.0
■ 1.043-423.0
For technical assistance or the dealer nearest you,
■ 1.043-421.0
■ 1.043-424.0
L IM
A T
IT
90-
E D
T E
DA
Y LA
EX TEN
BO
TH
WI
DS
R WA
U S
N T
EX CL
TO
RR
AN
E O
CU
DA
US
1-Y
EA R
TY
I O
DE
TER
IVE
US
D E
N LY
GE
E OF
L A
T E
C U
N
NT
S
B O
R G
R W
E N
D A
T S
A P
M IX
A R
TO
P R
R A
O V
5- GA
DE
TE
N T
E X
E D
LL
RG
Y TO
T E
ON
EN
N D
Fo
r CU
S (1
TS
1- Y
5 LI
1 LB
E A
DA
TE
(1 /2
R !
ht tp
Ap
RS
KG
:// w
pr ov
) OF
) PE
w w.
ed
W AT
ca
cu
De
ER
R
ll 88
da
te rg
8- 31
us
en
9- 08
a. co
ts
m
vi si
82
or
t
9.8
07
-51
3.0
visit our website at www.CudaUSA.com
2848
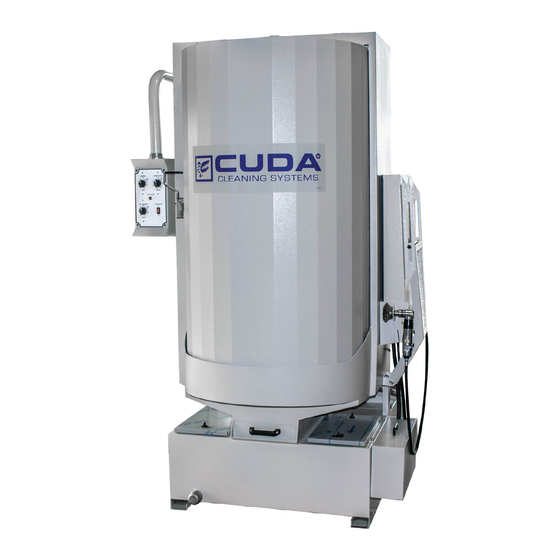
AUTOMATIC PARTS WASHER
■ 1.043-422.0
■ 1.043-425.0
89303690-14
8.930-369.0
Advertisement
Table of Contents
Troubleshooting

Related Manuals for CUDA 2848


Summary of Contents for CUDA 2848
- Page 1 2848 AUTOMATIC PARTS WASHER OPERATOR'S MANUAL ■ 1.043-394.0 ■ 1.043-421.0 ■ 1.043-422.0 ■ 1.043-423.0 ■ 1.043-424.0 ■ 1.043-425.0 L IM Y LA EX TEN R WA EX CL EA R N LY E OF M IX 5- GA Y TO...
-
Page 3: Table Of Contents
Door Safety Switch Debris Screen Air Flow Valve Detail Tray and Sump Assembly Power Brush Detail Brush and Flow Regulator Oil Skimmer Water Level Low Water Shut-off 17-18 Filtration and Sump Sweep Systems Filtration System 8.930-369.0 • 2848 • Rev. 4/13a... - Page 4 Manual Sump Cleanout 28-29 Cleaning the Filters Repairing the Machine Heating Element 29-30 Thermostat Turntable Motor 30-31 Timers and Switches on the Control Panel 31-32 Oil Skimmer Motor 32-33 Front Exploded View & Parts List 34-35 8.930-369.0 • 2848 • Rev. 4/13a...
- Page 5 The model and serial numbers will be found on a decal attached to the machine. You should record both serial number and date of purchase and keep in a safe place for future reference. 8.930-369.0 • 2848 • Rev. 4/13a...
-
Page 6: General Safety Information
Drain parts to be cleaned of AND FOOTWEAR to be cleaned. WHEN OPERATING. any combustible or flammable material before placing inside cabinet. Failure to observe this warning will create an extremely hazardous condition. 8.930-369.0 • 2848 • Rev. 4/13a... - Page 7 EPA or sewer district for disposal regulations. WARNING: Keep wand, hose and WARNING water spray away from electric wiring or fatal electric shock may result. KEEP WATER SPRAY AWAY FROM ELECTRICAL WIRING 8.930-369.0 • 2848 • Rev. 4/13a...
-
Page 8: Component Identification
) PE W AT .c ud ll 88 et er 8- 31 .c om nt s 9- 08 vi si 9. 80 7- 51 3. 0 Pump Debris Screen Sump Cover 89303690-15 8.930-369.0 • 2848 • Rev. 4/13a... - Page 9 90 -D EX TE CL US TE RG H EX W IT Oil Skimmer Solenoid Assy Valve (Optional) Sump Cover Fresh Water In Low Water Shut-Off Assy. Pump 89303690-13 Heating Element & Thermostat Enclosure 8.930-369.0 • 2848 • Rev. 4/13a...
- Page 10 Parts Tree Sink Tray Manifold (Optional) Latch (Optional) Door Latch Power Turntable Brush (Optional) Detail Brush (Optional) Turntable Chain Small Parts Basket (Optional) Oil Drain Container (Optional) Containment Ring (Optional) Side Sink/Pump (Optional) Sump Cover 8.930-369.0 • 2848 • Rev. 4/13a...
-
Page 11: Before You Begin
Hang the power brush on the bracket mounted along the right side of the machine. The timer is located below the electrical panel inside the main electrical enclosure. To configure the timer, refer to the instruction label inside the timer door. 8.930-369.0 • 2848 • Rev. 4/13a... -
Page 12: Step 4: Connect Awater Line
The use of any other detergent during the warranty period will void the warranty. In addition, using factory detergents will extend your 90 day labor warranty to 1 year. Step 5: Close and latch the door. 8.930-369.0 • 2848 • Rev. 4/13a... - Page 13 Step 8: Replace all sump covers. When the machine stops, and after the wash water reaches operating temperature, it is ready for use. Refer to Section 3: Operation for complete operating instructions. 8.930-369.0 • 2848 • Rev. 4/13a...
-
Page 14: Main Operating Components
SECTION 3: OPERATION 24-hour, 7-day Timers MAIN OPERATING Models 2840, 2840, and 2848 machines are available COMPONENTS with a 24-hour, 7-day heater timer or a 24-hour, 7-day heater and oil skimmer timer. The heater timer controls Familiarize yourself with the main operating compo- the heating system. -
Page 15: Door Safety Switch
(See Figure Below). The debris screen continuously filters To Air Outlet debris particles from the cleaning solution to ensure Supply To Detail blockage-free spray nozzle operation, and also provides Brush 8.930-369.0 • 2848 • Rev. 4/13a... -
Page 16: Detail Tray And Sump Assembly
Deluxe Edition version of the models 2840, 2530, Detail Tray 2840, and 2848. It is available as an option on the base The detail tray is located on the right side of the ma- models. To order a Deluxe Edition option package, chine. -
Page 17: Oil Skimmer
Top switch CLOSED, Bottom Switch Water Fill Valve (if installed) CLOSED, CLOSED, Automatic Water Fill Valve (if OPEN, Automatic Water Fill Valve (if Heating Element ON. installed) OPEN, Heating Element OFF. installed) OPEN, Heating Element OFF. 8.930-369.0 • 2848 • Rev. 4/13a... -
Page 18: Filtration And Sump Sweep Systems
Rust Inhibitor Additive Factory detergents protect the entire inside of your machine against the degenerative effects of water evaporation. A rust inhibitor additive actually 8.930-369.0 • 2848 • Rev. 4/13a... -
Page 19: Preparing The Machine For Use
When the machine automatically stops (or after you manually stop the wash cycle), open the door and wait a few moments to allow the parts to cool and dry before removing them. Most parts will flash-dry in seconds. 8.930-369.0 • 2848 • Rev. 4/13a... -
Page 20: Troubleshooting
WASH Thermostat is incorrectly installed Check the thermostat to ensure that it SOLUTION IS is correctly installed into the mounting TOO HOT bracket. (See Thermostat Section). Failed thermostat Replace the thermostat (See Thermostat Section). 8.930-369.0 • 2848 • Rev. 4/13a... - Page 21 OIL SKIMMER Blown fuse Check electrical panel for a blown fuse; replace if DOES NOT necessary. OPERATE PROPERLY 8.930-369.0 • 2848 • Rev. 4/13a...
-
Page 22: Troubleshooting The Electrical System
• Electrical troubleshooting should be performed by qualified personnel only. • Avoid contact with power leads, terminals and fuses when power is connected. • Disconnect power to machine before removing fuses or other electrical components. 8.930-369.0 • 2848 • Rev. 4/13a... - Page 23 One of the Pump Fuses Remove Pump Power Fuses; Measure the is Blown; Replace the ∞ Resistance of Each Blown Fuse approximately 0 Ohms Pump Electrical Panel is Overload OK, Refer to Testing Individual Components Relay 8.930-369.0 • 2848 • Rev. 4/13a...
-
Page 24: Testing Individual Components
With the switch fully closed (depressed), test for continuity. If there is not continuity the switch is no longer Power functional; replace the switch. Leads Thermostat Single Phase Heating Element Step 1: Screw Disconnect power to the machine. 8.930-369.0 • 2848 • Rev. 4/13a... - Page 25 If the ohm meter reads approximately 1 Ohm, the start capacitor is no longer functional; replace the start capacitor. 8.930-369.0 • 2848 • Rev. 4/13a...
-
Page 26: Maintenance And Repair
NOTE: The spray nozzles are sized and positioned to optimize the distribution of cleaning solution in the wash chamber. If you remove the nozzles make sure you replace them in the correct position on the appropriate pipe. 8.930-369.0 • 2848 • Rev. 4/13a... -
Page 27: Using The Oil Skimmer
TIP: While extracting oil from the cleaning solution, oil will flow off the wiper blades in a fine continuous stream. Water will flow off the blades in droplets. Once droplets begin to flow off the wiper blades, stop the skimmer motor. 8.930-369.0 • 2848 • Rev. 4/13a... -
Page 28: Cleaning Out The Sump
After the machine stops, position the three-way wash Step 6: solution valve as shown in figure top of next column. Refill the sump with fresh clean water. 8.930-369.0 • 2848 • Rev. 4/13a... -
Page 29: Cleaning The Filters
REPLACEMENT PROCEDURE Step 1: Disconnect power to the machine. Filter Step 2: Drain the wash solution from the sump. Step 3: Remove the cover from the heating element and thermostat enclosure (two 5/16” screws). 8.930-369.0 • 2848 • Rev. 4/13a... -
Page 30: Heating Element
Remove the thermostat knob and the two screws to Drive Pulley remove the thermostat from the housing (See Figure Access Below). Screws To remove the plate, remove the two screws using a 5/16” wrench or socket, then slide the plate toward 8.930-369.0 • 2848 • Rev. 4/13a... -
Page 31: Timers And Switches On The Control Panel
See Figure Below). Step 6: Disconnect all power leads from the motor, taking care to mark them for reassembly. Step 7: Raise the motor and bracket to remove the assembly from the pivot pin. 8.930-369.0 • 2848 • Rev. 4/13a... -
Page 32: Oil Skimmer Motor
Remove the two wire nuts from the power leads to • small phillips-head screwdriver disconnect the leads from the motor, and disconnect the conduit from the motor housing (See Figure Below). Oil Skimmer Motor Wire Nuts 8.930-369.0 • 2848 • Rev. 4/13a... - Page 33 (See Reassemble the skimmer assembly and replace it on Figure Below). To remove the disk, disengage it from the machine. Assembly is the reverse of removal. the center pin, then slide it down. Screws 8.930-369.0 • 2848 • Rev. 4/13a...
-
Page 34: Front Exploded View & Parts List
EXPLODED VIEW - FRONT VIEW 89303690-1 Field Installed 8.930-369.0 • 2848 • Rev. 4/13a... - Page 35 Sleeve, Vinyl 8.915-200.0 Angle, Door Top 2848 8.713-265.0 Cap, Vinyl Black, 1/4" x 3/4" LG 6 8.712-951.0 Foam Strip 1/8" x 1" Adhesive 9.804-203.0 Handle, Strainer Back 64" w/12" Hgt Ext 76" 8.714-150.0 Chain 8.930-369.0 • 2848 • Rev. 4/13a...
- Page 36 8.713-187.0 Rubber Bumper, 1/4" Stem 8.712-996.0 Elbow, 90° 1-1/2" x 1" 9.802-773.0 Nut, 1/4", ESNA, NC Reducing Black 8.718-965.0 Washer, 1/4", FLAT, SAE, SS 8.915-370.0 Pipe, Upper Spray Manifold 9.802-807.0 Washer, 3/8" SAE Flat 8.930-369.0 • 2848 • Rev. 4/13a...
- Page 37 /w w 8- 31 1- YE E OF p :/ ll 88 S TO 90 -D TE ND IV E h tt H EX TE RG W IT Details See TT Motor Page 89303690-2 8.930-369.0 • 2848 • Rev. 4/13a...
- Page 38 Plug, 7/8", Hole 8.706-195.0 Elbow, 1-1/2" Female Black 90° 1 9.802-517.0 Connector, 1/2" L/T, 90° Black 1 8.735-005.0 Nipple, 1-1/2" x 2.5" Lg Sch 40 1 9.802-515.0 Strain Relief, Strt, LQ Tite 3200 1 8.930-369.0 • 2848 • Rev. 4/13a...
- Page 39 Screw 10/32" x 1/2" 9.803-249.0 Screw M 4 x 10 (3 PH only) 9.802-525.0 Locknut 1/2" 8.718-960.0 Washer Flat 3/16 Zinc 8.719-030.0 Washer 3/8" Star 9.803-831.0 Connector, 3/4" L/T, 90° Black 2 9.807-513.0 Label, Cuda Approved Detergents 8.930-369.0 • 2848 • Rev. 4/13a...
-
Page 40: Tt Motor Exploded View & Parts List
8.713-036.0 Washer -rubber Bonded #10 .120- 74 lb/in 9.802-698.0 Screw, 10/32" x 1/2" BH 8.718-685.0 Bolt, 3/8", 16 x 5" Hex HD. SocSS Plated 8.725-437.0 Capacitor 8.718-937.0 Screw #8 x 3/4" Phillips Zinc Plated 8.930-369.0 • 2848 • Rev. 4/13a... - Page 41 Label, Disco Power Supply 9.804-564.0 Screw, 6-32 x 1/2 PL SLTD 8.714-176.0 Cord, 16/9 SOOW Black Rubber Jacket 140" 8.713-328.0 Switch, Lighted Rocker 8.904-659.0 Label, Control Panel Skimmer/TT On/Off 9.800-040.0 Label,Ground 8.716-408.0 Light, Indicator Amber 120V 8.930-369.0 • 2848 • Rev. 4/13a...
- Page 42 ELECTRICAL PANEL - 208V 1PH EXPLODED VIEW 1.043-421.0 Timer Option Auto Fill Option Oil Skimmer 89303690-6 8.930-369.0 • 2848 • Rev. 4/13a...
-
Page 43: Electrical Panel - 208V 1Ph Exploded View Parts List
8.714-394.0 Contactor, 3 Pole, 40 Amp 9.802-457.0 Din Rail, 35 mm 7" 8.716-599.0 Terminal, Grounding, Green w/Yellow 8.713-697.0 Connector, Elect 6 Pin Male 8.713-603.0 Connector, Elect 3 Pin Male 8.713-604.0 Connector, Elect Pin Female 8.930-369.0 • 2848 • Rev. 4/13a... - Page 44 ELECTRICAL PANEL - 230V 1PH EXPLODED VIEW 1.043-422.0 Timer Option Auto Fill Option Oil Skimmer 89303690-6 8.930-369.0 • 2848 • Rev. 4/13a...
-
Page 45: Electrical Panel - 230V 1Ph Exploded View Parts List
8.714-394.0 Contactor, 3 Pole, 40 Amp 9.802-457.0 Din Rail, 35 mm 7" 8.716-599.0 Terminal, Grounding, Green w/Yellow 8.713-697.0 Connector, Elect 6 Pin Male 8.713-603.0 Connector, Elect 3 Pin Male 8.713-604.0 Connector, Elect Pin Female 8.930-369.0 • 2848 • Rev. 4/13a... - Page 46 ELECTRICAL PANEL - 208V 3PH EXPLODED VIEW 1.043-423.0 Timer Option Auto Fill Option Oil Skimmer 89303690-7 8.930-369.0 • 2848 • Rev. 4/13a...
-
Page 47: Electrical Panel - 208V 3Ph Exploded View Parts List
8.750-867.0 Contactor, 3 Pole, 45 Amp 9.802-457.0 Din Rail, 35 mm 9" 8.716-599.0 Terminal, Grounding, Green w/Yellow 8.713-697.0 Connector, Elect 6 Pin Male 8.713-603.0 Connector, Elect 3 Pin Male 8.713-604.0 Connector, Elect Pin Female 8.930-369.0 • 2848 • Rev. 4/13a... - Page 48 ELECTRICAL PANEL - 230V 3PH EXPLODED VIEW 1.043-394.0 Timer Option Auto Fill Option Oil Skimmer 89303690-8 8.930-369.0 • 2848 • Rev. 4/13a...
-
Page 49: Electrical Panel - 230V 3Ph Exploded View Parts List
8.750-867.0 Contactor, 3 Pole, 45 Amp 9.802-457.0 Din Rail, 35 mm 9" 8.716-599.0 Terminal, Grounding, Green w/Yellow 8.713-697.0 Connector, Elect 6 Pin Male 8.713-603.0 Connector, Elect 3 Pin Male 8.713-604.0 Connector, Elect Pin Female 8.930-369.0 • 2848 • Rev. 4/13a... - Page 50 ELECTRICAL PANEL - 460V 3PH EXPLODED VIEW 1.043-424.0 Timer Option Auto Fill Option Oil Skimmer 89303690-9 8.930-369.0 • 2848 • Rev. 4/13a...
-
Page 51: Electrical Panel - 460V 3Ph Exploded View Parts List
Label, Ground Symbol 8.716-400.0 End Cover Entrelec, Blue 9.802-457.0 Din Rail, 35 mm 9" 8.716-599.0 Terminal, Grounding, Green w/Yellow 8.713-697.0 Connector, Elect 6 Pin Male 8.713-603.0 Connector, Elect 3 Pin Male 8.713-604.0 Connector, Elect Pin Female 8.930-369.0 • 2848 • Rev. 4/13a... - Page 52 ELECTRICAL PANEL - 575V 3PH EXPLODED VIEW 1.043-425.0 Timer Option Auto Fill Option Oil Skimmer 89303690-10 8.930-369.0 • 2848 • Rev. 4/13a...
-
Page 53: Electrical Panel - 575V 3Ph Exploded View Parts List
Label, Ground Symbol 8.716-400.0 End Cover Entrelec, Blue 9.802-457.0 Din Rail, 35 mm 9" 8.716-599.0 Terminal, Grounding, Green w/Yellow 8.713-697.0 Connector, Elect 6 Pin Male 8.713-603.0 Connector, Elect 3 Pin Male 8.713-604.0 Connector, Elect Pin Female 8.930-369.0 • 2848 • Rev. 4/13a... - Page 54 8.918-672.0 Disc, Skimmer SS 9.804-567.0 Nut, 10/32 ESNA 9.802-791.0 Nut, Cage, 10/32" x 16 Ga 9.804-621.0 Gasket, Skimmer 9.802-514.0 Strain Relief, STRT, LQ Tite 8.718-968.0 Washer, #10 Flat Zinc Plt 9.804-374.0 Label, Keep Dry 8.930-369.0 • 2848 • Rev. 4/13a...
- Page 55 CUDA does not authorize any other party, including authorized Distributors, to make any representation or promise on behalf of CUDA, or to modify the terms, conditions, or limitations in any way. It is the buyer’s responsibility to ensure that the installation and use of CUDA products conforms to local codes.
- Page 56 2848 • 8.930-369.0 • Revised 4/13a • Printed in U.S.A.
Need help?
Do you have a question about the 2848 and is the answer not in the manual?
Questions and answers