Thecus N8900 series User Manual
Hide thumbs
Also See for N8900 series:
- User manual (220 pages) ,
- Quick installation manual (6 pages) ,
- User manual (137 pages)
Table of Contents
Advertisement
Quick Links
Advertisement
Table of Contents

Subscribe to Our Youtube Channel
Related Manuals for Thecus N8900 series


Summary of Contents for Thecus N8900 series
- Page 1 Th e cus N 8 9 0 0 se r ie s/ N 1 2 0 0 0 se r ie s/ N 1 6 0 0 0 se r ie s N 5 5 5 0 / N 6 8 5 0 / N 8 8 5 0 / N 1 0 8 5 0 N 7 7 0 0 PRO V 2 / N 7 7 1 0 se r ie s N 8 8 0 0 PRO V 2 / N 8 8 1 0 U se r ie s N 4 5 1 0 U se r ie s/ N 7 5 1 0...
-
Page 2: Copyright And Trademark Notice
Copyright and Trademark Notice Thecus and ot her nam es of Thecus pr oduct s ar e r egist ered t radem ar ks of Thecus Technology Corp. Microsoft , Windows, and t he Windows logo ar e regist er ed t radem arks of Microsoft Corporat ion. -
Page 3: Safety Warnings
Safety Warnings For your safet y , please read and follow t he following safet y warnings: Read t his m anual t horoughly befor e at t em pt ing t o set up your Thecus I P st orage. -
Page 4: Table Of Contents
Table of Contents Copyr igh t a n d Tr a de m a r k N ot ice ........... 2 Abou t Th is M a nu a l ................. 2 Lim it e d W a r r a nt y ................2 Sa fe t y W a r n in gs ................ - Page 5 Aut o Module I nst allat ion ............... 147 Ba ck u p ....................1 4 8 Dual DOM ( N12000 series/ N16000 series/ N8900 series only) .... 148 Rsync Target Serv er ..............149 Dat a Guard ( Rem ot e Backup) ............150 ACL Backup and Rest or e ...............
- Page 6 USB a n d e SATA St or a ge Ex p a n sion ............ 1 7 6 Re m ot e Adm in ist r a t ion ..............1 7 6 Part I - Set up a DynDNS Account ..........178 Part I I - Enable DDNS on t he Rout er ..........
-
Page 7: Chapter 1: Introduction
File Se r v e r First and forem ost , t he Thecus I P st orage allows you t o st or e and shar e files ov er an I P net w or k. Wit h a Net wor k At t ached St orage ( NAS) device, y ou can cent ralize your files and share t hem easily over your net w ork . - Page 8 Thecus I P st orage is not only a file ser ver, but it also support s iSCSI init iat ors. Your serv er can access Thecus I P st or age as a direct - at t ached- st orage ov er t he LAN or I nt ernet .
-
Page 9: Package Contents
Package Contents N8900/ N12000/ N16000 Series/ N8800PRO V2/ N8810U series/ N4510U- R/ N4510U PRO- R The Thecus I P st orage should cont ain t he following com m on it em s: Syst em Unit x1 QI G ( Quick I nst allat ion Guide) x1 ... -
Page 10: Fr On T Pa N E
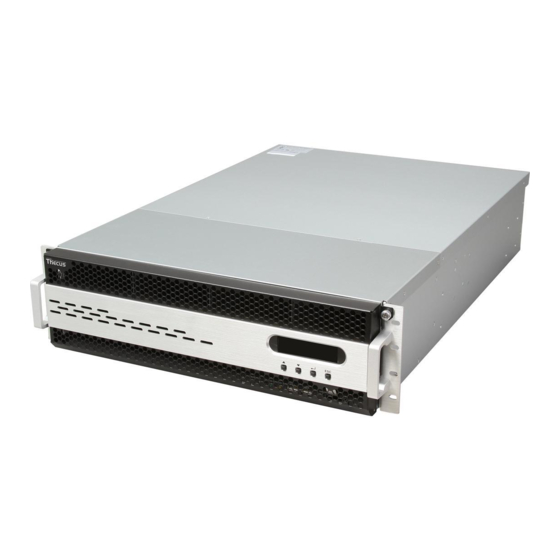
Front Panel N 8 9 0 0 se r ie s: Fr ont Pa ne l I t e m D e scr ipt ion • Power on/ off N8900 1.Power But t on • Solid gr e e n: Syst em is power on. 2.Power LED •... - Page 11 N 1 2 0 0 0 se r ie s: The Thecus N12000 series fr ont panel has t he device’s cont r ols, indicat or s, and hard disk t ray s: Fr ont Pa ne l I t e m D e scr ipt ion •...
- Page 12 N 1 6 0 0 0 se r ie s: The Thecus N16000 series fr ont panel has t he device’s cont r ols, indicat or s, and hard disk t ray s: Fr ont Pa ne l I t e m D e scr ipt ion •...
- Page 13 N 6 8 5 0 : The Thecus N6850’s fr ont panel has t he device’s cont r ols, indicat ors, and hard disk t rays: Fr on t Pa n e l I t e m D e scr ipt ion •...
- Page 14 N 8 8 5 0 : The Thecus N8850’s fr ont panel has t he device’s cont r ols, indicat ors, and hard disk t rays: Fr on t Pa n e l I t e m D e scr ipt ion •...
- Page 15 N 1 0 8 5 0 : The Thecus N10850’s fr ont panel has t he device’s cont rols, indicat ors, and hard disk t rays: Fr on t Pa n e l I t e m D e scr ipt ion •...
- Page 16 N 7 7 0 0 PRO V2 / N 7 7 1 0 se r ie s: The Thecus N7700PRO V2/ N7710 series fr ont panel has t he device’s cont rols, indicat ors, and hard disk t ray s:...
- Page 17 N 8 8 0 0 PRO V2 / N 8 8 1 0 U se r ie s: The Thecus N8800PRO V2/ N8810U series fr ont panel has t he device’s cont rols, indicat ors, and hard disk t ray s:...
- Page 18 N 5 5 5 0 : The Thecus N5550 fr ont panel has t he device’s cont r ols, indicat ors, and hard disk t rays: Fr ont Pa ne l I t e m D e scr ipt ion •...
- Page 19 N 4 5 1 0 U: The Thecus N4510U fr ont panel has t he device’s cont rols, indicat ors, and hard disk t ray s: Fr ont Pa ne l I t e m D e scr ipt ion •...
- Page 20 N 4 5 1 0 U PRO: The Thecus N4510U PRO front panel has t he device’s cont rols, indicat or s, and hard disk t ray s: Fr ont Pa ne l I t e m D e scr ipt ion •...
- Page 21 N 7 5 1 0 : The Thecus N7510 fr ont panel has t he device’s cont r ols, indicat ors, and hard disk t rays: Fr ont Pa ne l I t e m D e scr ipt ion •...
-
Page 22: Re A R Pa N E
Rear Panel N 8 9 0 0 Ba ck Pa ne l I t e m D e scr ipt ion • Connect t he included power cords t o t hese connect ors 1.Power Connect or • This port is for ext ernal UPS device 2.Serial Port •... - Page 23 • USB 3.0 port for com pat ible USB devices. 5.USB Port • WAN/ LAN1 port for connect ing t o an Et hernet net work t hrough a 6.WAN/ LAN1 Port swit ch or rout er • LAN2 port for connect ing t o an Et hernet net work t hrough a swit ch 7.LAN2 Port or rout er •...
- Page 24 N 1 6 0 0 0 : The N16000 r ear panel feat ur es port s and connect ors. Ba ck Pa ne l I t e m D e scr ipt ion • Connect t he included power cords t o t hese connect ors 1.Power Connect or •...
- Page 25 N 1 6 0 0 0 V/ N 1 6 0 0 0 PRO: N16000V/ N16000PRO r ear panel feat ur es port s and connect ors. Ba ck Pa ne l I t e m D e scr ipt ion •...
- Page 26 N 6 8 5 0 : The N6850 r ear panel feat ures port s and connect ors. Ba ck Pa ne l I t e m D e scr ipt ion • Connect t he included power cords t o t hese connect ors 1.Power Connect or •...
- Page 27 N 8 8 5 0 : The N8850 r ear panel feat ures port s and connect ors. Ba ck Pa ne l I t e m D e scr ipt ion • Connect t he included power cords t o t hese connect ors 1.Power Connect or •...
- Page 28 N 1 0 8 5 0 : The N10850 r ear panel feat ur es port s and connect ors. Ba ck Pa ne l I t e m D e scr ipt ion • Connect t he included power cords t o t hese connect ors 1.Power Connect or •...
- Page 29 N 7 7 0 0 PRO V2 : The N7700PRO V2 r ear panel feat ures port s and connect ors. Ba ck Pa ne l I t e m D e scr ipt ion • LAN2 port for connect ing t o a local Et hernet net work t hrough a 1.LAN2 Port swit ch or rout er.
- Page 30 N 7 7 1 0 se r ie s: The N7710 series r ear panel feat ures port s and connect ors. Ba ck Pa ne l I t e m D e scr ipt ion • Connect t he included power cords t o t hese connect ors 1.Power Connect or •...
- Page 31 N 8 8 0 0 PRO V2 : The N8800PRO V2 r ear panel feat ures port s and connect ors. Ba ck Pa ne l I t e m D e scr ipt ion • Connect t he included power cords t o t hese connect ors 1.Power Connect or •...
- Page 32 N 8 8 1 0 U se r ie s: The N8810U series r ear panel feat ures port s and connect ors. Ba ck Pa ne l I t e m D e scr ipt ion • Connect t he included power cords t o t hese connect ors 1.Power Connect or •...
- Page 33 N 5 5 5 0 : The N5550 r ear panel feat ures port s and connect ors. Ba ck Pa ne l I t e m D e scr ipt ion • Connect t he included power cords t o t hese connect ors 1.Power Connect or •...
- Page 34 N 4 5 1 0 U- R: Ba ck Pa ne l I t e m D e scr ipt ion • Connect t he included power cords t o t hese connect ors 1.Power Connect or • WAN/ LAN1 port for connect ing t o an Et hernet net work t hrough a 2.
- Page 35 N 4 5 1 0 U PRO- R: Ba ck Pa ne l I t e m D e scr ipt ion • Connect t he included power cords t o t hese connect ors 1.Power Connect or • WAN/ LAN1 port for connect ing t o an Et hernet net work t hrough a 2.
- Page 36 N 7 5 1 0 : The N7510 r ear panel feat ures port s and connect ors. Ba ck Pa ne l I t e m D e scr ipt ion • Connect t he included power cords t o t hese connect ors 1.Power Connect or •...
-
Page 37: Chapter 2: Hardware Installation
Cable Connections To connect t he Thecus I P st orage pr oduct t o your net work, follow t he st eps below: 1. Connect an Et hernet cable from your net w ork t o t he WAN/ LAN1 port on t he back panel of t he Thecus I P st orage. - Page 38 2. Connect t he pr ovided power cord int o t he univer sal power socket on t he back panel. Plug t he ot her end of t he cord int o a surge pr ot ect or sock et . ▲ N12000 series/N16000 series/N8900 series power socket ▲ N6850/N8850/N10850 power socket ▲...
- Page 39 N5550 power socket N4510U/N4510U PRO power socket 3. Press t he pow er but t on on t he Front Panel t o boot up t he Thecus I P st or age. ▲ N12000 series/N16000 series/N8900 series power button ...
- Page 40 ▲ N7700PRO V2/N7710 series/ ▲ N8800PRO V2/N8810U series power button N7510 power button ▲ N4510U power button ▲ N4510U PRO power button...
-
Page 41: Ch A Pt Er 3 : Fir St Tim E Se T U
Once t he hardwar e is inst alled, physically connect ed t o your net w or k, and pow er ed on, y ou can configure t he Thecus I P st orage so t hat it is accessible t o y our net w or k user s. - Page 42 6. Nam e y our Thecus I P st orage and configure t he net work I P address. I f y our swit ch or rout er is configured as a DHCP Serv er , configuring t he Thecus I P st orage t o aut om at ically obt ain an I P address is recom m ended.
-
Page 43: Lcd Operation
XP/ 2000/ v ist a/ 7 or Mac OSX or lat er. User s w it h ot her operat ing syst em s w ill need t o inst all t he Thecus Set up Wizar d on a host m achine w it h one of t hese operat ing sy st em s before using t he unit . - Page 44 Current st at us of disk slot has been inst alled RAI D Current RAI D st at us. The Thecus I P st orage will rot at e t hese m essages ev er y one- t w o seconds on t he LCD display. USB Copy The USB Copy funct ion enables you t o copy files st or ed on USB devices such as USB disks and digit al cam eras t o t he Thecus I P st orage by pr ess but t on.
-
Page 45: Oled Ope R A T Ion( D Oe S Not A P Ply T O T H E N 7 7 0 0 Pro V2 / N 8 8 0 0 Pro V2 / N 7 7 1 0 Se R Ie S/ N 8 8 1 0 U Se R Ie S/ N 5 5 5 0 / N 4 5 1 0 U Se R Ie S
The USB Copy funct ion enables you t o copy files st or ed on USB devices such as USB disks and digit al cam eras t o t he Thecus I P st orage wit h a press of a but t on. To use USB copy, follow t he st eps below: 1. -
Page 46: Typica L Se T U P Pr Oce D Ur
From t he Web Adm inist rat ion I nt erface, you can configure t he net w or k set t ings of t he Thecus I P st orage for your net w ork. You can access t he N e t w or k m enu fr om t he m enu bar. - Page 47 St e p 5 : St a r t Se r vice s Finally, you can st art t o set up t he differ ent services of Thecus I P st orage for t he user s on y our net work. You can find out m or e about each of t hese services by...
-
Page 48: Chapter 4: System Administration
The Thecus I P st orage provides an easily accessible W e b Adm inist r a t ion I nt e r fa ce . Wit h it , you can configure and m onit or t he Thecus I P st orage anywher e on t he net work. -
Page 49: My Favorite
Following t he disclaim er page, you will see t he W e b Adm in ist r a t ion I n t e r f a ce . From her e, y ou can configure and m onit or virt ually every aspect of t he Thecus I P st orage fr om anywher e on t he net work. - Page 50 The M e nu Ba r is wher e you will find all of t he inform at ion scr eens and syst em set t ings of Thecus I P st orage. The various set t ings ar e placed in t he following...
-
Page 51: Logout
Syst em St at us page as shot cut . Logout Click t o logout Web Adm inist rat ion I nt erface. Language Selection The Thecus I P st orage support s m ult iple Languages, including: • English •... -
Page 52: System Information
The m enu bar allows y ou t o see various aspect s of t he Thecus I P st orage. From her e, y ou can discov er t he st at us of t he Thecus I P st orage, and also ot her det ails. -
Page 53: Logs
Syst em Fan 1 Speed Displays current Syst em fan ( left 1) st at us Syst em Fan 2 Speed Displays current Syst em fan ( left 2) st at us Syst em Fan 3 Speed Displays current Syst em fan ( left 3) st at us ( Depend on m odel) Syst em Fan 4 Speed Displays current Syst em fan ( left 4) st at us ( Depend on m odel) CPU Tem perat ure... - Page 54 Log Level ALL: Provides all log inform at ion including syst em , warning, and error m essages. I NFO: Shows inform at ion about syst em m essages. WARN: Shows only warning m essages. ERROR: Shows only error m essages. Export Records Export all logs t o an ext ernal file.
-
Page 55: User Access Log
User Access Log The Use r Acce ss Log Suppor t sect ion allows adm inist rat ors t o select t he desired prot ocols t o r ecord user act ivit y for. Use r Acce ss Log Use r Acce ss Log I t e m D e scr ipt ion... -
Page 56: On-Line Register
Thecus. To enable t his service, sim ply check t he “ Enable” check box . By enabling t his service, t he it em s in bold will be sent t o Thecus via t he I nt ernet . -
Page 57: Syslog Management
“ HDD I nfo” and “ Tim e Zone” . These t w o opt ional it em s can also be sent t o Thecus anonym ously for analysis and st at ist ics purposes. To send t hese it em s, sim ply check t he desired checkboxes t o help Thecus im prove it s product s and services. - Page 58 Configurat ion wit h syslog client and t arget t o st or e locally: Configurat ion wit h syslog client and t arget t o st or e rem ot ely: See t he following t able for a det ailed descript ion of each it em : Tim e I t e m D e scr ipt ion...
-
Page 59: System Monitor
System Monitor The syst em m onit or is capable t o m onit or syst em st at us including CPU/ m em ory ut ilizat ion, fan/ t em perat ure st at us, net work t hroughput and on- line user list in various pr ot ocols. - Page 60 For t he on- line users list , sy st em m onit or will display t he on- line user s and t he share folder t hey hav e visit ed. Syst e m M on it or I t e m D e scr ipt ion Save Lay out...
-
Page 62: System Management
D a t e , Tim e , and Tim e Zone . You can also elect t o synchronize t he syst em t im e on Thecus I P st orage wit h an N TP ( N e t w or k Tim e Pr ot ocol) Se r ve r . -
Page 63: Firmware Upgrade
• The buzzer only beeps if it is enabled in t he Syst em Not ificat ion m enu. N OTE • Check Thecus websit e for t he lat est fir m ware release and release not es. • Downgrading fir m ware is not perm it t ed. -
Page 64: Schedule Power On/Off
Using t he Thecus I P st or age Sy st em Managem ent , you can save energy and m oney by scheduling t he Thecus I P st orage t o t urn it self on and off during cert ain t im es of t he day. -
Page 65: Administrator Password
Administrator Password From t he m enu, choose t he Adm in ist r a t or Pa ssw or d it em and t he Ch a n ge Adm in ist r a t or Pa ssw or d screen appear s. Ent er a new password in t he N e w Pa ssw or d box and confirm your new password in t he Confir m Pa ssw or d box. -
Page 66: Factory Default
From t he m enu, choose t he Fa ct or y D e fa u lt it em and t he Re se t t o Fa ct or y D e fa ult screen appear s. Pr ess Apply t o reset Thecus I P st orage t o fact ory default set t ings. - Page 67 Click Ye s t o reboot t he syst em . Once t he syst em has r eboot ed, y ou will be ret urned t o t he File Syst e m Ch e ck prom pt . Ther e you will see t he available RAI D v olum es t o run t he file sy st em check. Check t he desired RAI D volum es and click N e x t t o proceed wit h t he file syst em check.
-
Page 68: Wake-Up On Lan (Wol)
Wake-Up On LAN (WOL) The Thecus I P st orage has t he abilit y t o be awok en from sleep m ode via WAN/ LAN1 or LAN2 port . -
Page 69: Ui Login Function
fields. Wit h t he SNMP m anagem ent soft war e, you can get ot her syst em ’s basic inform at ion. From t he m enu, choose t he SN M P it em , and t he SN M P Su ppor t scr een appears. From her e, y ou can En a ble or D isa ble . -
Page 70: Syst E M N E T W Or
PCI - e slot wit h associat ed com pat ible list . Ther efor e, t he scr een shown abov e is an ex am ple of a Thecus N16000 wit h 3 on board GbE NI C and an addit ionally I nt el PRO/ 1000 PT quad port NI C, for a t ot al of 7 NI C port s. -
Page 71: Dhcp/Radvd
Most faster Ethernet (10/100) Switches/Routers do not support Jumbo Frame and will not be W ARN I N G able to connect to your Thecus NAS after Jumbo Frame is turned on. DHCP/RADVD From t he Sy st e m N e t w or k m enu, choose D H CP/ RAD VD , and t he D H CP/ RAD VD Config u r a t ion screen appears. -
Page 72: Linking Aggregation
Linking Aggregation The Thecus I P st orage support s link aggregat ion fr om eit her on board net wor k port or addit ional NI C. Sim ply click on “ + ” as shown in t he screen shot below. - Page 73 The associat ed scr een shot will appear aft er t he “ + ” is clicked. Select from available net wor k port t hen m ov e over t o select ed box. Click “ Link” t o confirm t he select ion. The newly cr eat ed t ab will appear for m ore set t ings required t o com plet e t he link aggregat ion configurat ion.
-
Page 74: Additional Lan
Additional LAN Ot her t han on- board LAN port , Thecus I P st orage support s addit ional NI C t o be added in it s available PCI - e slot . For t he det ails of addit ional NI C support list please visit Thecus w ebsit e. -
Page 75: Storage Management
Storage Management The St or a ge m enu displays t he st at us of st orage devices inst alled in t he Thecus I P st orage. I t includes st or age configurat ion opt ions such as RAI D and disk set t ings, folder configurat ion, iSCSI and I SO Mount . - Page 76 Disk No. I ndicat es disk locat ion. Capacit y Shows t he SATA hard disk capacit y. Model Displays t he SATA hard disk m odel nam e. Link Displays t he hard disk int erface and link speed Firm ware Shows t he SATA hard disk firm ware version.
-
Page 77: Raid Information
M a n a ge m e n t scr een appear s. This scr een list s t he RAI D volum es cur rent ly r esiding in t he Thecus I P st orage. From t his screen, you can get inform at ion about t he st at us of y our RAI D volum es,... - Page 78 RAI D I nfor m a t ion I t e m D e scr ipt ion Mast er RAI D The RAI D volum e current ly designat ed as t he Mast er RAI D volum e. I D of t he current RAI D volum e. N OTE: All RAI D I D s m ust be unique .
- Page 79 st orage volum e. To cr eat e a RAI D volum e, follow t he st eps below: 1. On t he RAI D I nfor m a t ion screen, clicks cr eat e. 2. On t he RAI D Configu r a t ion scr een, set t he RAI D st orage space as JBOD , RAI D 0 , RAI D 1 , RAI D 5 , RAI D 6 , RAI D 1 0 , RAI D 5 0 or RAI D 6 0 ( depends on m odel) —...
- Page 80 4. I f t his RAI D v olum e is m eant t o be t he Mast er RAI D v olum e, t ick t he M a st e r RAI D checkbox . I n a m ult iple RAI D configurat ion, one RAI D volum e m ust be designat ed as t he N OTE Mast er RAI D volum e.
- Page 81 We st r ongly recom m ended copying t he RAI D volum e encrypt ion key t o a safe place. You can find t he encr ypt ion key file from t he USB disk in t he following for m at : (RAID volume created date)_xxxxxx.key Please keep your USB disk in a safe place and also backup t he encr ypt ed...
- Page 82 Single volum e size support ed: N OTE ext 3 8TB XFS 48TB ext 4 36TB 9. Press Su bm it t o build t he RAI D st orage volum e. 10. Press “ Yes” for RAI D v olum e creat ion pr eparat ion. Then click “ Finish” t o st art up wit h RAI D volum e building.
- Page 83 N12000 series N16000 series N8900 series N6850 N8850 ...
- Page 84 Le ve l D e scr ipt ion JBOD The st orage volum e is a single HDD wit h no RAI D support . JBOD requires a m inim um of 1 disk. RAI D 0 Provides dat a st riping but no redundancy. I m proves perform ance but not dat a safet y.
- Page 85 Re m ove RAI D Click t o r em ov e t he RAI D volum e. All user dat a and iSCSI cr eat ed in t he select ed RAI D volum e will be delet ed. To rem ov e a RAI D volum e, follow t he st eps below: 1.
- Page 86 Rem ove RAI D dest roys all dat a in t he select ed RAI D volum e. The dat a w ill W ARN I N G be unrecoverable.
- Page 87 Globa l H ot Sp a r e Up t o 5 RAI D v olum es can be cr eat ed per syst em . The global hot spare support can elim inat e t he redundant disk usage in each RAI D volum e. Sim ply select an unused disk from t he global hot spar e disk list t hen apply t o act ivat e.
- Page 88 M igr a t in g a RAI D Once a RAI D v olum e has been creat ed, you m ay want t o m ov e it t o ot her phy sical drives or change t he RAI D ar ray all t oget her. To m igrat e a RAI D 1, RAI D 5, RAI D 6, RAI D50 or RAI D 60 v olum e, follow t he st eps below: 1.
- Page 89 “ iSCSI ” volum e will be in r ead only m ode but r ead/ writ e of t he “ user dat a” will be possible during t he operat ion. The m igrat ion schem e below is based on Thecus I P N OTE St orage pr oduct ’s m axim um possible com binat ion.
- Page 90 Below is a t able list ing of possible RAI D m igrat ion schem es: From RAID 0 RAID 5 RAID 6 RAID [RAID 1] HDDx2 to [RAID 5] HDDx3 [RAID 1] HDDx2 to [RAID 6] HDDx4 [RAID 1] HDDx2 to [RAID 5] HDDx4 [RAID 1] HDDx2 to [RAID 6] HDDx5 [RAID 1] HDDx2 to [RAID 5] HDDx5 [RAID 1] HDDx2 to [RAID 6] HDDx6...
-
Page 91: Nas Stacking
NAS Stacking The Thecus I P st orage’s capacit y can be expanded ev en furt her using t he st ackable funct ion. Wit h it , users can expand t he capacit y of t heir net work st orage syst em s up t o 5 ot her st ack t arget v olum es which are locat ed in different syst em s. - Page 92 Wit h t he added st ack t ar get y ou can “ Enable” or “ Disable” t he st ack t ar get now or lat er depending on usage required. Next , input t he t arget I P addr ess of t he st ackable device and click t he D iscov e r y but t on.
- Page 93 The St a ck e d Ta r ge t n a m e will becom e t he net wor k share nam e and will be displayed t hrough net w ork access such as SMB. You m ay refer t o t he figure below t o see t he result .
- Page 94 The Br ow se a ble set t ing is t he sam e m et hod used for set t ing a syst em share folder . I t designat es whet her or not t his folder will be visible t hrough web disk. You m ay refer t o t he figure below for reference when Ye s and N o ar e select ed.
- Page 95 . I n general, if t he at t ached st ack t arget device has been used by anot her Thecus NAS as st ack t arget volum e, t hen t he For m a t it em will be display and syst em will recognize it st raight away and display it s capacit y.
- Page 96 Aft er y our changes hav e been m ade, click Apply t o confirm any m odificat ions. Once changes ar e applied, t he associat ed inform at ion will be updat ed on t he St a ck Ta r ge t List window.
-
Page 97: Iso Mount
ISO Mount The I SO Mount feat ur e is a v er y useful t ool from t he Thecus pr oduct s. Wit h it , user s can m ount an I SO file and have t he export nam e display all t he det ails from t he m ount ed I SO file. - Page 98 To m ount t he new I SO file, select one file from t he list of files and input t he desired m ount ing nam e int o t he “ Mount as: ” field. Click “ ADD” t o confirm t he com plet ion of t he m ount ing.
- Page 99 Please r efer t he scr een shot below. Her e, t he I SO file “ Thecus 01” wasn’t assigned a m ount ing nam e, so t he syst em aut om at ically cr eat ed a folder “ Thecus 01” .
-
Page 100: Share Folder
From t he St or a ge m enu, choose Sha r e Folde r s, and t he Sha r e d Folde r screen appear s. This scr een allows you t o cr eat e and configure folders on t he Thecus I P st orage volum e. - Page 101 Folder nam es are lim it ed t o 60 char act ers. Syst em s running Windows 98 or ear lier N OTE m ay not support file nam es longer t han 15 charact ers. M odify Folde r s On t he Fold e r screen, press t he Ed it but t on and t he M od ify Folde r screen appear s.
- Page 102 N FS Sh a r e To allow NFS access t o t he share folder , enable t he N FS Se r v ice , and t hen set up host s wit h access right s by clicking Add. N FS Sha r e I t e m D e scr ipt ion...
-
Page 103: Folder And Sub-Folders Access Control List (Acl)
share ( root : root ) . • Guest syst em root account will be m apped t o anonym ous user ( nobody: nogroup) on NAS. • All user on guest syst em w ill be m apped t o anonym ous user ( nobody: nogroup) on NAS. - Page 104 Writ able Provides Writ e access t o users or groups who are displayed in t his colum n. Recursive Enable t o inherit t he access right for all it s sub- folders. To configure folder access, follow t he st eps below: 1.
-
Page 105: Snapshot
Snapshot SMB and ent erprise Thecus I P st orage syst em s are now capable of saving 16 Snapshot versions of files and folder s. For Snapshot t o funct ion, a “ BTRFS” file syst em is r equired. - Page 106 Ta k in g a Sna psh ot Click on t he “ Snapshot ” but t on. The m anagem ent scr een will t hen appear as below for t he associat ed folder . To m anually t ake a Snapshot , sim ply click “ Tak e Snapshot ” and t he Snapshot hist ory will be list ed.
- Page 107 and select t he desired Snapshot int erval. Opt ions include Daily, Weekly, or Mont hly. Since files and folder s are lim it ed t o 16 Snapshot s v ersions, t he “ Aut om at ically rem ov e oldest Snapshot ” opt ion allows for t he r em oval of t he oldest v er sion aut om at ically once t he lim it is reached.
- Page 108 To access t he Snapshot folder, a user r equires t he N OTE relevant aut hent icat ion right s. I f t he Snapshot folder is used for iSCSI purposes, it N OTE can only be rest ored from t he WebUI ( i.e. t hrough t he Snapshot feat ur e) and cannot be done m anually.
-
Page 109: Iscsi
iSCSI You m ay specify t he space allocat ed for iSCSI . See t he t able below t o t he allowed iSCSI t arget num ber per syst em : Model N8900V N8800PRO N8900 N6850 N12000V N12000 N5550 N16000V N16000... - Page 110 Ther e ar e 3 opt ions ( iSCSI CRC/ Checksum , Max Advanced Connect ions, Err or Recovery Level) These cur rent ly allow t he Adm in t o Enable/ Disable t he Thecus I P st orage associat ed wit h t he iSCSI set t ing. Delet e Click t his t o delet e t he iSCSI Target .
- Page 111 Cr e a t e iSCSI Volum e I t e m D e scr ipt ion iSCSI Target Volum e Enable or Disable t he iSCSI Target Volum e. Target Nam e Nam e of t he iSCSI Target . This nam e will be used by t he St a ck a ble N AS funct ion t o ident ify t his export share.
- Page 112 LUN I D Specific Logic unit I D num ber. iSCSI Block size The iSCSI block size can be set under syst em advance opt ion, default is 512 Byt es. [ 4K ] block size w hile m ore t han 2TB capacit y will be configured in Windows XP.
- Page 113 2. Modify y our set t ings. Press ok t o change. Ex pa nd V olu m e The iSCSI volum e is now able t o expand it s capacit y from unused space ( I nst ant Allocat ion m ode only) .
- Page 114 You will t hen see t he dialog box displayed below. Drag t he Ex p a nd Ca p a cit y bar t o t he size you want . Then press Ex pa n d t o confirm t he operat ion. D e le t e Volu m e To delet e v olum e on t he cur rent RAI D v olum e, follow t he st eps below: 1.
-
Page 115: Iscsi Thin-Provisioning
2. Pr ess YES. All dat a in t he v olum e will be r em ov ed. iSCSI Thin-Provisioning I f iSCSI Thin- Provisioning is select ed when creat ing an iSCSI t arget v olum e, virt ual m em ory is assigned t o t he t arget , allowing t he physical m em ory t o reach m axim um capacit y and adding new disks only when needed. -
Page 116: Advance Option
Advance Option Ther e ar e 3 available opt ions for t he user t o operat e Thecus I P st orage associat ed wit h iSCSI set t ing. The det ails are list ed in t he following screenshot . I f t he opt ions are m odified, t he syst em will need t o r eboot for t he changes t o t ake place. -
Page 117: High-Availability (N8900, N12000 Series/N16000 Series Only)
H A se t up pr oce dur e : HA needs t wo id e n t ica l Thecus syst em s ( sam e m odels and sam e hard disk slot inst alled) which ar e capable for high availabilit y feat ur es. One needs t o be set up as “... - Page 118 Let ’s see an exam ple wit h t wo Thecus Unit s. unit : Host nam e: PMA ( 172.16.66.25) wit h JBOD RAI D volum e. This unit will be set up as t he Prim ary serv er.
- Page 119 Th e H D D ca pa cit y of H A Se con da r y se r ve r W ARN I N G m u st be e q ua l or gr e a t e r t h a n t h e Pr im a r y se r v e r or a w a r nin g m e ssa ge w ill a ppe a r .
- Page 120 Choose t he “ Aut o Failback” opt ion, t he default is disabled. For m ore det ails about aut o failback, please r efer t o t he descript ion below. In l egacy Heart beat clust ers, t he aut o f ailback opt ion would Aut o Fail Back: det ermine whet her a resource woul d aut omat ical ly f ail back t o it s "Act ive"...
- Page 121 1. Please select t he net w or k int erface from t he drop down list of physical connect ive available. I t can be eit her on board LAN port s or addit ional add- in NI C, even 10G. 2.
- Page 122 Advance opt ions can be set up by pr essing t he associat ed but t on. H e a r t Be a t s Configur a t ion I t e m D e scr ipt ion Keep alive t im e The keep alive direct ive set s t he int erval bet ween heart beat packet s.
- Page 123 Se t t in g up t he Se con da r y un it for H A. The se con da r y u nit for ou r e x a m ple is PM S ( 1 7 2 .1 6 .6 6 .2 4 ) : Login in t o t he w eb UI of t he syst em 172.16.66.24 t hen go t o “...
- Page 124 Aft er t he Secondary ser ver has com m unicat ed wit h Prim ary Serv er successfully, t hen t he st at e will changed t o: Click “ Yes” t o r eboot bot h Prim ary and Secondary serv er . I f t he com m unicat ion has failed t hen you will see an err or m essage as below.
- Page 125 At t his t im e, t he virt ual I P addr ess will be m apped t o t he PMS syst em because it is in an act ive st at e. H A Re a dy: Aft er bot h Prim ary and Secondary sy st em s has r eboot ed, t he HA link st at us and t he HA RAI D volum e can be seen from t he HA st at us page.
- Page 126 H A Re cove r y: I f one of t he HA m em ber is down and need t o be r ecov ered, sim ply go t o t he RAI D m anagem ent page and t he “ HA Recovery” icon will be available. Click on t he “...
-
Page 127: User And Group Authentication
, y ou can sim ply enable t he ADS/ NT support feat ur e; t he Thecus I P st orage will connect wit h t he ADS/ NT serv er and get all t he inform at ion of t he dom ain users and gr oups aut om at ically. - Page 128 • The DNS server specified in t he WAN/ LAN1 configurat ion page should be able t o correct ly resolve t he ADS server nam e. • The t im e zone set t ing bet ween Thecus I P st orage and ADS should be ident ical.
-
Page 129: Local User Configuration
Local User Configuration From t he Accou n t s m enu, choose t he Use r it em , and t he Loca l Use r Conf igu r a t ion screen appear s. This scr een allows you t o Add , Edit , and Re m ove local users. - Page 130 All users are aut om at ically assigned t o t he ‘users’ gr oup. N OTE Edit Use r s 1. Select an exist ing user from t he Loca l Use r Configur a t ion screen. 2. Click on t he Ed it but t on, and t he Loca l Use r Se t t ing scr een appears. 3.
-
Page 131: Local Group Configuration
Local Group Configuration From t he Accou nt s m enu, choose t he Gr oup it em , and t he Loca l Gr oup Conf igu r a t ion screen appear s. This scr een allows you t o Add, Edit , and Re m ove local groups. - Page 132 5. Select user s t o be in t his gr oup fr om t he Use r s List by adding t hem t o t he M e m be r s List using t he < < but t on. 6.
-
Page 133: Batch Users And Groups Creation
Batch Users and Groups Creation The Thecus I P st orage can also add users and groups in bat ch m ode. This enables you t o conv enient ly add num er ous users and gr oups aut om at ically by im port ing a sim ple com m a- separat ed plain t ext ( * .t xt ) file. -
Page 134: User Quota
User Quota The Thecus I P st orage support local or AD user s wit h st orage quot a lim it at ions in each RAI D v olum e of t he syst em . To enable t his funct ion, sim ply click “ Enable” , t hen apply. -
Page 135: Ldap Support
Samba / CIFS Ther e ar e opt ions allow Adm in t o Enable/ Disable t o operat e Thecus I P st orage associat ed wit h Sam ba / CI FS pr ot ocol. Wit h t he opt ion changed, it will need t o... - Page 136 Sa m b a is N a t ive m od e The Thecus I P st orage is support ed Sam ba m ode opt ions. I n t he ADS env ironm ent wit h “ Nat ive” m ode select ed t hen Thecus I P st orage is capable t o becom e local m ast er posit ion.
- Page 137 Sa m b a Re cycle Bin The Thecus I P st orage is support ed r ecycle bin via SMB/ CI FS prot ocol. Sim ply enable t he “ Recycle Bin” funct ion and “ Recy cle Folder Display” t hen all of delet ed files/ folders will reside in t he “...
-
Page 138: Afp (Apple Network Setup)
I f your AppleTalk net work uses ext ended net works and is assigned wit h m ult iple zones, assign a zone nam e t o t he Thecus I P st orage. I f you do not want t o assign a net work zone, ent er an... -
Page 139: Nfs Setup
From t he Syst e m N e t w or k m enu, choose t he N FS it em , and t he N FS Sup por t scr een appears. The Thecus I P st orage can act as an NFS serv er, enabling users t o download and upload files wit h t heir fav orit e NFS client s. -
Page 140: Tftp
Select ions include Unlim it e d, 1 ~ 3 2 M B/ s. To access t he shar e folder on t he Thecus I P st or age, use t he appropriat e user login and password set up on t he Use r s page. Access cont r ol t o each shar e folder is set up on t he ACL page ( St or a ge M a n a ge m e n t >... -
Page 141: Webservice
This device support s UPnP Media ser ver, which allows user s t o play m edia files wit h UPnP client ( ex. DMA devices) . Enable or disable Universal Plug and Play prot ocol. UPnP helps t o find t he I P addr ess of Thecus I P st orage. -
Page 142: Bonjour Setting
Bonjour Setting Bonj our, is Apple I nc.'s t rade nam e for it s im plem ent at ion of Zer oconf, a service discovery prot ocol. Bonj our locat es devices such as print ers, as w ell as ot her com put ers, and t he ser vices t hat t hose devices offer on a local net work using m ult icast Dom ain Nam e Syst em ser vice records. -
Page 143: Ddns
I t e m D e scr ipt ion SSH Service Enable or disable SSH service. Port The port num ber is default 22. SFTP Enable or disable SFTP prot ocol under SSH service. Apply Click “ Apply” t o confirm t he changes. DDNS To set up a ser ver on t he I nt ernet and enable t he users t o connect t o it easily, a fixed and easy- t o r em em ber host nam e is oft en required. -
Page 144: Upnp Port Management
UPnP Port Management One of t he m ost conv ent way t o allow user s t o access r equired services such as FTP, SSH, w eb disk and ht t p et c. fr om I nt ernet envir onm ent is set t ing UPnP port m anagem ent . -
Page 145: Applica T Ion Se R Ve
The Thecus I P st orage support s build- in applicat ion such as iTunes serv er . The Thecus I P st orage pr ovides act ivat ion of t he iTunes Ser ver on t he device. You will be able t o play m usic files on t his device wit h y our iTunes client soft ware direct ly. -
Page 146: Itunes® Server
Server Wit h t he built - in iTunes serv er capabilit y, Thecus I P st orage enables digit al m usic t o be shar ed and played anywhere on t he net w ork! From t he N e t w or k m enu, choose t he iTu ne s it em , and t he iTu ne s Conf igu r a t ion screen appear s. -
Page 147: Auto Module Installation
Choose t he Aut o M odu le I n st a lla t ion it em and t he a va ila ble sy st e m M od ule scr een appears. The default for t his m odule list is locat ed online. So if t he Thecus I P st orage is capable t o connect t o I nt ernet , t hen it will aut om at ically link t o t he Thecus official websit e and list t he available m odules. -
Page 148: Ba Ck U
“ Enable” t o act ivat e t he m odule. Backup Ther e ar e a num ber of ways t o back up dat a wit h t he Thecus I P st orage. Dual DOM (N12000 series/N16000 series/N8900 series only) The unique Dual DOM feat ure can now perform “... -
Page 149: Rsync Target Server
Rsync Target Server When it com es t o backing up your dat a, it ’s v ery im port ant t o have flexibilit y. Dat a guard provides y ou wit h m any opt ions, including full backup for all shares, cust om backup for select ed shares and iSCSI v olum e backup. -
Page 150: Dat A Guard ( Rem Ot E Backup)
1. Enable Rsyn c Ta r ge t Se r ve r 2. Add a u se r n a m e and pa ssw or d ( t hey can be differ ent t han y our NAS’s usernam e and passw ord) 3. - Page 151 re- st art t he real- t im e operat ion. Rest ore Rest ore t he associat ed t ask Click t o view t he associat ed t ask in process det ails. Rest ore NAS Configurat ion Click t o rest ore syst em configurat ion from select ed dest inat ion t o source unit .
- Page 152 dest inat ion. I t could also creat e shares aut om at ically from dest inat ion if it is not exist ent . This only applies if t he t arget server is t he sam e m odel as t he source. Cust om Back up The “...
- Page 153 - Fill out all t he necessar y det ails and choose your param et ers Add Rsync Ba ck u p Ta sk I t e m D e scr ipt ion Task Nam e This is how t his t ask will appear in t he t ask list . Backup Type Real t im e: I t will backup folder s/ files fr om source t o t arget on t he...
- Page 154 I nput t he bandwidt h cont rol for dat a backup operat ion. Speed Lim it Set up t he t im eout when t rying t o build up a connect ion in Tim eout Lim it bet ween t he source and t he t arget syst em . I f backup is set as “...
- Page 155 3. Click “ Next ” and m ore set t ing appears. These ar e t he as t he set t ings for “ Full backup” 4. Click “ Finish” and t he dat a guard t ask will appear in t he list as shown below. From t he t ask list , you can now see t he newly added “...
- Page 156 iSCSI Ba ck up I f t he sour ce unit cont ains iSCSI volum e, it can be back ed up t o t he t ar get unit as a single file. The pr ocedure is t he sam e as for t he pr evious “ Full backup” and “...
- Page 157 4. Click “ Finish” and t he dat a guard t ask will appear in t he list as shown below. From t he t ask list , you can now see t he newly added “ iscsiback” . This backup is set up as “...
- Page 158 • To rest ore t ask w it h backup t ype set as “ Real t im e” , fir st you need t o N OTE st op t he t ask t hen you can proceed w it h t he rest ore operat ion. Re st or e N AS Configur a t ion This is a useful feat ur e if t he sy st em configurat ion needs t o be rest ored t o a brand new unit .
- Page 159 2. Click on “ Rest ore NAS Configurat ion” and t he screen shown below will appear. I nput t he t arget serv er ’s I P address where t he syst em configurat ion has been backed up, and necessary aut hent icat ion info. Confirm by doing a “ Connect ion Test ”...
- Page 160 4. Aft er clicking “ Next ” , a scr een will appear as shown below. List ed on t he left hand side, you will see t he configurat ion backup det ails which cont ain t he 3 RAI D volum es.
-
Page 161: Acl Backup And Restore
The cur r ent syst em has 2 RAI D v olum es, “ RAI D” and “ RAI Da” . Select t he RAI D volum e fr om t he backup configurat ion volum e list which is going t o be m apped t o t he RAI D volum e of t he cur rent syst em . -
Page 162: Data Burn
Aft er input t ing t he ACL backup file and clicking t he “ Next ” but t on, t he syst em will show anot her scr een t o list t he m at ched folders in bet ween t he backup file and t his RAI D volum e. - Page 163 1. Writ e Files/ folders t o disc a. Click t he Add but t on and t he NAS shar e list appear s. b. Select files/ folders which you would like t o burn. All of t he select ed folders/ files will be seen under t he disc label nam e “...
- Page 164 d. Select t he burning speed from t he drop down list . e. Select whet her disc dat a verificat ion is required or not . Click “ Burn” t o st art disc burning. 2. Writ e im age file t o disc a.
-
Page 165: Usb Copy
3. Creat e im age file fr om files/ folders a. Click t he Add but t on and t he NAS shar e list will appear . b. Select t he files/ folders which you would like t o burn. - Page 166 D isa b le USB Copy Sim ply select “ Disable” for t he USB Copy Service opt ion and t he USB Copy but t on or LCM/ OLED USB Copy it em will becom e inact ive. Using USB Cop y Enable t he USB Copy service and select one of t he 3 opt ions available: “...
- Page 167 Click on “ Add” and select “ Source Pat h” and “ Tar get Pat h” from t he drop- down list . Add Source: Add Target : Save t he com plet ed t ask: To “ Edit ” or “ Rem ove” a USB Copy t ask, select t he t ask it em and click on t he associat ed funct ion:...
- Page 168 I f you select “ Copy all USB files t o NAS” , t hen please choose t he t arget pat h from t he dr op- down list . All files and folder s on t he USB device will be copied over t o t he NAS.
-
Page 169: Thecus Backup Utility
Thecus Backup Utility The Thecus Backup Ut ilit y is on your I nst allat ion CD. When y ou click on t he CD, t he Backup Ut ilit y will be inst alled under Pr ogr a m Gr oups > Th e cus > The cu s Ba ck u p Ut ilit y. -
Page 170: Apple Os X Backup Utilities
External Devices The Thecus I P st orage support s print er ser ver and UPS via USB int erface. The int egrat ed Print Serv er allows you t o share a single USB print er wit h all user s on t he net work. - Page 171 You can configure Thecus I P st or age t o act as a print er ser ver. That w ay, all PCs connect ed t o t he net w or k can ut ilize t he sam e print er.
- Page 172 9. Click Fin ish . • Not e t hat if a m ult i- funct ion ( all- in- one) pr int er is at t ached t o t he Thecus I P N OTE St orage, usually only t he pr int ing and fax funct ions w ill w ork. Ot her feat ures, such as scanning, w ill pr obably not funct ion.
- Page 173 Type http://<Thecus_NAS>:631/printers/usb-printer in t he box, wher e <Thecus_NAS_IP> is t he I P address of Thecus I P st orage. Click N e x t . 6. Select or inst all a print er and t hen press OK.
- Page 174 7. Windows will at t em pt t o connect t o t he print er. 8. You can choose t o set t his print er as t he default print er by checking t he Se t a s t h e de fa ult pr int e r box. Click N e x t t o cont inue. 9.
-
Page 175: Uninterrupted Power Source
Uninterrupted Power Source From t he Ex t e r n a l D e v ice s m enu, choose t he Un int e r r u pt e d Pow e r Sour ce it em and t he UPS Se t t in g scr een appears. Mak e any changes you wish, and press Apply t o confirm changes. -
Page 176: Ch A Pt Er 5 : Tips A N D Tr Ick
\\192.168.1.100\usbhdd\sd(x)1 where 192.168.1.100 m eans t he I P addr ess of Thecus I P st orage and sd(x)1 st ands for t he first part it ion on t he eSATA or USB disk drive. -
Page 178: Part I - Setup A Dyndns Account
Pr ogr a m Sca n but t ons t o find it . 3. On t he N e t w or k in g page, m anually add Thecus I P st orage I P address ( i.e. -
Page 179: Re Pla Cin G D A M A Ge D H A R D D R Ive
3. Slide a new hard disk int o t he t ray and fast en t he scr ews. 4. I nsert t he hard disk t ray back int o t he Thecus I P st orage unt il it snaps int o place. -
Page 180: Ch A Pt Er 6 : Tr Ou Ble Sh Oot In
From t he Sy st e m m enu, choose t he Fa ct or y D e fa u lt it em and t he Re se t t o Fa ct or y D e f a ult scr een appear s. Pr ess Apply t o r eset Thecus I P st orage fact ory default set t ings. -
Page 181: Pr Oble M S W It H Tim E A N D D A T E Se T T Ing
5. Click Apply. I n addit ion, if t he Thecus I P st orage is able t o access t he I nt ernet and y ou want t o keep t he NTP Ser ver clock.isc.org by default , please m ak e sur e t he DNS Serv er is corr ect ly ent er ed, t her eby allowing t he NTP Ser ver nam e t o corr ect ly r esolve. -
Page 182: Chapter 7: Updates For Fw V2.03.01
The Thecus N8900/ N12000/ N16000 series are support ing t he addit ion of t he JBOD device Thecus D16000 t o expand st orage capacit y. Fr om Ge n e r a l in Syst e m I nfor m a t ion , JBOD device info will be displayed if applicable. -
Page 183: Added Hardware Information
N OTE slot s num ber can range from 8, 12 t o 16 slot s depending on t he m odel of Thecus I P st orage. Also it w ill list t he disk info of JBOD dev ices if applicable... - Page 184 D isk s I nfor m a t ion I t e m D e scr ipt ion Disk No. I ndicat es disk locat ion. Capacit y Shows t he SATA hard disk capacit y. Model Displays t he SATA hard disk m odel nam e. Firm ware Shows t he SATA hard disk firm ware version.
- Page 185 JBOD device and his associat ed disks will also list under t he D isk I nfor m a t ion page. Please see below for a scr een shot of a N8900 wit h a Thecus...
-
Page 186: Dat A Guard ( Local Back Up)
(Local Backup) The Thecus pr oduct pr ovides com plet e backup solut ion bet ween Thecus NAS syst em s as w ell as bet w een folders of local syst em s. For r em ot e dat a guard backup, please r efer t o chapt er 4, Dat a Guard ( Rem ot e backup) . - Page 187 The local backup has 6 different select ion you can choose from . Loca l D a t a ba ck u p I t e m D e scr ipt ion I m port This is associat ed wit h ext ernal devices which are added t o t he syst em such as USB disk.
- Page 188 1. I m por t : click on “ I m port ” and a screen will appear as below. I f t here is an ext ernal device inst alled on sy st em such as USB disk, t hen it will be list ed in t he Source pane.
- Page 189 I n her e, w e hav e select ed t he “ I nt el Graphi…” and “ N10850” folders fr om t he ext ernal device and im port ed t hem t o t he NAS under t he RAI D60v olum e. Next , please select t he pat h from t he dr op down list t o save t he log.
- Page 190 Read t he not es and check t he “ Accept ” box for confirm at ion. I f a shar e nam e already exist s for t he im port , t hen t he im port will be renam e aut om at ically t o “...
- Page 191 Folder t o Folder Folder t o ext ernal device Ext ernal device t o Folder...
- Page 192 Let ’s t ake “ Folder t o Ext ernal device” as an exam ple. I n t he sour ce pane, select t he desired RAI D volum e and it s associat ed folder list will appear; sam e m et hod in t he t arget pane for t he associat ed ext ernal device.
- Page 193 Choosing t he sync t ype, “ I ncrem ent al” or ‘Sync” , and select t he log pat h fr om t he drop m enu list . Read t he not es and check t he “ Accept ” box for confirm at ion. Now, y ou will see in t he dat a guard t ask list t hat you hav e cr eat ed a t ask.
- Page 194 3. Re a lt im e Ba ck u p: click on “ Realt im e Backup” and t his screen will appear . 2 differ ent opt ions can be select ed fr om , folder t o folder, folder t o ext ernal device.
- Page 195 Re a lt im e Ba ck up I t e m D e scr ipt ion Task Nam e I nput t he t ask nam e, lengt h lim it ed t o 4~ 12 charact ers. Sync Type Select “...
- Page 196 Now, y ou can see in t he dat a guard t ask list t hat your creat ed t ask is list ed. The t ask st at us will say “ Processing” unt ill t he “ St op” but t on is pressed. 4.
- Page 197 Read t he not es and check t he “ Accept ” box for confirm at ion. Now, y ou will see in t he dat a guard t ask list t hat you hav e cr eat ed a t ask.
- Page 198 5. iSCSI Ba ck u p: click on “ iSCSI Backup” and scr een appear as below. I t can be backup t o t wo different st orage pool, iSCSI t o folder, iSCSI t o ext ernal device. Let ’s t ak e exam ple t o have “...
- Page 199 Reading t he not e and check on “ Accept ” for confirm at ion. Now, fr om t he dat a guard t ask list will have creat ed t ask list ed. To st art t he iSCSI volum e backup, select t he t ask and click “...
- Page 200 St at es change t o “ Finish” aft er t ask com plet e. From t he RAI D v olum e folder ‘andy_local’, it has backup iSCSI v olum e file st or ed. This backup iSCSI v olum e file is needed while it required im port t o st or age. Next t opic will describe about t his.
- Page 201 Next , pr ovide wher e t he t ask log will st ore. Reading t he not e and check on “ Accept ” for confirm at ion.
-
Page 202: Volume Expansion Management
Now, from t he dat a guard t ask list will have cr eat ed t ask list ed. Volume Expansion Management The user guide please r efer s t o URL below. ht t p: / / www.t hecus.com / download/ m anual/ AllinOne_64bit / Volum e_Expansion_v1.0.pdf... -
Page 203: Appe N Dix A: Cust Om E R Su Ppor
You can also t r y t o ensur e t hat you are using t he lat est firm war e v er sion for your Thecus I P st orage. Thecus is com m it t ed t o providing fr ee firm war e upgrades t o our cust om er s. -
Page 204: Appendix B: Raid Basics
RAID Levels The Thecus I P st orage support s st andard RAI D lev els 0, 1, 5, 6, 10, 50, 60 and JBOD. You choose a RAI D lev el when y ou creat e a sy st em v olum e. The fact ors for select ing a RAI D level are: •... - Page 205 This is excellent for com plet e dat a securit y. RAI D 5 RAI D 5 offer s dat a securit y and it is best suit ed for net w orks t hat perform m any sm all I / O t ransact ions at t he sam e t im e, as w ell as applicat ions t hat require dat a securit y such as office aut om at ion and online cust om er service.
- Page 206 D isk Usa ge When all disks ar e of t he sam e size, and used in RAI D, Thecus I P st orage disk usage per cent age is list ed below: RAI D Le ve l...
-
Page 207: Appendix C: How To Open The Top Cover
Appendix C: How to open the top cover N8900 series:... -
Page 208: N 1 2 0 0 0 Se R Ie
N12000 series: N16000 series:... -
Page 209: Appendix D: Active Directory Basics
ADS Benefits ADS let s Thecus I P st or age int egrat e it self wit h t he exist ing ADS in an office environm ent . This m eans t he Thecus I P st orage is able t o recognize your office user s and passw ords on t he ADS serv er . -
Page 210: Appendix E: Licensing Information
Source Code Availability Thecus Technology Corp. has exposed t he full source code of t he GPL licensed soft war e. For m ore infor m at ion on how y ou can obt ain our source code, please visit our w eb sit e, ht t p: / / www.t hecus.com... -
Page 211: Cgi C Lice N Se Te R M
CGIC License Terms Basic License CGI C, copy right 1996, 1997, 1998, 1999, 2000, 2001, 2002, 2003, 2004 by Thom as Bout ell and Bout ell.Com , I nc. Per m ission is grant ed t o use CGI C in any applicat ion, com m ercial or noncom m er cial, at no cost . - Page 212 m odified by som eone else and passed on, we w ant it s recipient s t o know t hat what t hey hav e is not t he original, so t hat any pr oblem s int roduced by ot hers will not reflect on t he original aut hors' r eput at ions.
- Page 213 copy right not ice and a not ice t hat t here is no w arrant y ( or else, saying t hat you provide a war rant y) and t hat users m ay r edist ribut e t he program under t hese condit ions, and t elling t he user how t o view a copy of t his License.
- Page 214 t hough t hird part ies ar e not com pelled t o copy t he source along wit h t he obj ect code. 4. You m ay not copy , m odify, sublicense, or dist ribut e t he Program ex cept as expr essly provided under t his License.
- Page 215 perm it t ed only in or am ong count ries not t hus excluded. I n such case, t his License incorporat es t he lim it at ion as if writ t en in t he body of t his License. 9.
Need help?
Do you have a question about the N8900 series and is the answer not in the manual?
Questions and answers