Table of Contents
Advertisement
Quick Links
Advertisement
Table of Contents

Related Manuals for Thecus N299


Summary of Contents for Thecus N299
- Page 1 Thecus N299 User’s Manual...
-
Page 2: Copyright And Trademark Notice
About This Manual All information in this manual has been carefully verified to ensure its correctness. In case of an error, please provide us with your feedback. Thecus Technology Corporation reserves the right to modify the contents of this manual without notice. -
Page 3: Safety Warnings
Do NOT expose the N299 to dampness, dust, or corrosive liquids. Do NOT place the N299 on any uneven surfaces. DO NOT place the N299 in direct sunlight or expose it to other heat sources. DO NOT use chemicals or aerosols to clean the N299. Unplug the power cord and all connected cables before cleaning. -
Page 4: Table Of Contents
Table of Contents Copyright and Trademark Notice ........... 2 About This Manual ................. 2 Limited Warranty................2 Safety Warnings ................3 Table of Contents ................4 Chapter 1: Introduction ..............8 Overview ....................8 Product Highlights.................8 File Server...................8 Media Server ..................8 FTP Server...................8 iTunes®... - Page 5 Windows Vista..................54 IP Cam Surveillance ................56 IP Cam Configuration ................57 Step 1: Connect the IP Cam to the N299 ............57 Step 2: Designate a Capture Schedule............58 Step 3: Browse Captured Images..............60 Chapter 5: Using the N299 ............61 Overview .....................
- Page 6 Apple OS X Backup Utilities ..............75 One-Button USB Copy................75 Chapter 6: Tips and Tricks ............76 Mapping a Client PC to the N299 ............76 Windows ................... 76 Apple OS X ..................77 USB Storage Expansion ............... 78 Replacing Damaged Hard Drives ............
- Page 7 Data Security..................87 RAID Levels..................87 RAID 0....................87 RAID 1....................88 JBOD ....................88 Stripe Size ................... 88 Disk Usage ..................88 Appendix D: Licensing Information ..........89 Overview ..................... 89 Source Code Availability ..............89 CGIC License Terms................90 GNU General Public License..............
-
Page 8: Chapter 1: Introduction
Got a lot of photos? Share them effortlessly with the N299’s built-in Photo Gallery. Users can create albums and upload photos in a snap, and the N299 will even auto-create thumbnails. To find out how to share photos with the N299, refer to Chapter 5: Using the N299 > Using Photo... -
Page 9: Backup Server
Don’t leave precious data to chance. With advanced backup capabilities, you can easily upload mission critical files to the N299, and even automate your backup tasks for true peace-of-mind. To find out how to backup your files with the N299, refer to Chapter 5: Using the N299 > File Backup. -
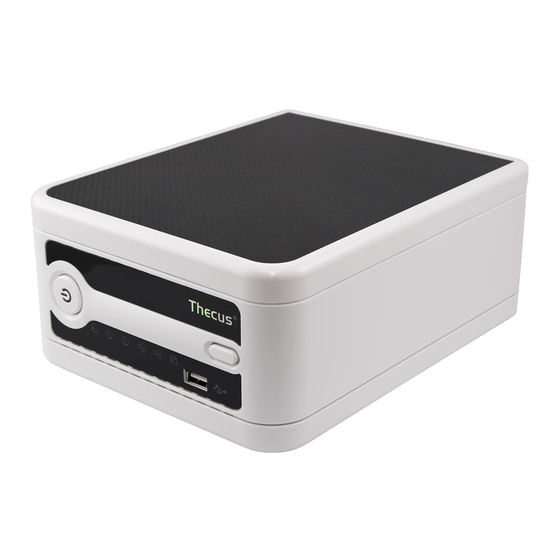
Page 10: Front Panel
Front Panel The N299’s front panel displays the unit’s array of status LEDs, and is also where you’ll find the power button and USB port. See the table below for a detailed explanation of each: Item Description Power LED •... -
Page 11: Rear Panel
USB 2.0 port for USB storage expansion. Power Button • Power on/off N299 Rear Panel The rear panel of the N299 houses the USB and Ethernet connections, as well as the power connector. See the table below for descriptions of each: Item Description Power Connector •... -
Page 12: Chapter 2: Getting Started
2. Unscrew four mounting screws. 3. Lift up the hard disk tray by pulling up the top panel of the N299. 4. Carefully insert a standard 3.5” SATA hard disk into the tray, and secure the hard disk with screws from the included accessory pack. -
Page 13: Cable Connections
Cable Connections Make the following connections on the Thecus N299 and then power up the unit: 1. Connect an Ethernet cable from your network to the WAN port on the back panel of the N299. 2. Connect the provided power cord into the universal power socket on the back panel. - Page 14 Login Login into N299 with administrator’s account and password. c. Network Setting Name your N299 system and configure the network IP address. You can choose either fixed IP or DHCP.
- Page 15 Change Admin Password e. Start Browser Access the current N299 administrator Web User Interface pressing the “Start Browser” button.
- Page 16 The Thecus Setup Wizard is designed for installation on systems running Windows NOTE XP/2000 or Mac OSX or later. Users with other operating systems will need to install the Thecus Setup Wizard on a host machine with one of these operating systems before using the unit.
-
Page 17: First Time Setup
First Time Setup Once the hardware is installed, physically connected to your network, and powered on, you can now configure the Thecus N299 so that it is accessible to your network users. Follow the steps below for initial software setup. -
Page 18: Step 4: Select Raid Level
Step 5: Create Local Users and Groups After your RAID is built, you can begin to create local users and groups for the N299. 1. From the Accounts menu, choose Users item and the Local User Configuration screen appears. Click Add to add a new user. -
Page 19: Step 6: Create Folders And Set Up Acls
Access Control List (ACL). Step 7: Start Services Finally, you can start to setup the different services of the N299 for the users on your network. You can find out more about each of these services by clicking below: Windows Networking... -
Page 20: Chapter 3: System Configuration
1. Type the N299’s IP address into your browser. (Default IP address is http://192.168.1.100) Your computer’s network IP address must be on the same subnet as the N299. If NOTE the N299 has default IP address of 192.168.1.100, your managing PC IP address must be 192.168.1.x, where x is a number between 1 and 254, but not 100. -
Page 21: Language Selection
To upload a language package, click Browse and browse for the language package location. Select the language package file and click Open. Then, click Apply to upload the language package to the N299. Once uploaded, the language package will appear in the User Upload Language Package List. -
Page 22: Status Menu
Status Menu The Status Menu on the menu bar allows you to see various aspects of the N299. From here, you can discover the status of the N299, and even find out other details like firmware version and up time. -
Page 23: System Information
System Information From Status menu, choose the Info item, and the System Information screen appears. You can change the system information that appears on uPnP devices screens (i.e. Network Neighborhood) on Windows-based systems by entering the new information here and pressing Apply to confirm. -
Page 24: Storage Management
Storage Management The Storage Menu displays the status of storage devices installed or connected to the N299, including disk and RAID information. Disk Information From the Storage menu, choose the Disks item and the Disk Information screen appears. From here, you can see various items about installed SATA hard disks. -
Page 25: Raid Configuration
RAID Configuration On the RAID Information screen, press the Config button to go to the RAID Configuration screen. In addition to RAID disk information and status, this screen lets you make RAID configuration settings. For more information on RAID, see Appendix C: RAID Basics. -
Page 26: Creating A Raid
Removing RAID destroys all data in the current RAID. The data is unrecoverable. Folder Management From the Storage menu, choose Folder, and the Folder screen appears. This screen allows you to create and configure folders on the N299 volume. Folder Item Description Folder name Displays the name of the folder. -
Page 27: Adding Folders
Adding Folders On the Folder screen, press the Add button and the Add Folder screen appears. This screen allows you to add a folder. After entering the information, press Apply to create new folder. Press Back to return to the Folder screen. Add Folder Item Description... -
Page 28: Folder Access Control List (Acl)
Click Cancel to exit without saving changes. Back Click Back to return to the Folder screen. Service Folders The N299 automatically creates folders for its built-in applications. To manage these service folders, select Service Folder from the Storage menu. Press NFS to setup access privilege. -
Page 29: Network Management
Most Fast Ethernet (10/100) Switches/Routers do not support Jumbo Frame and WARNING you will not be able to connect to your N299 after Jumbo Frame is turned on. If this happens, turn off the N299. Then, power on the N299 and immediately press and hold the Reset button on the front of the unit for 10 seconds. -
Page 30: Lan Configuration
Jumbo Frame. If your equipment is incompatible, you might not be able to connect to your N299. In this case, you have to reset the system back to default by the holding down front panel reset button for 5 seconds during boot up process. -
Page 31: Wlan Configuration
Specifies whether the ESSID will be broadcasted by the N299. This will prevent the Access Point from broadcasting the ESSID. The N299 will still respond to a wireless device that LAN1ts to communicate if it sends a matching ESSID. Channel The channel that the N299 uses to communicate with client devices. -
Page 32: Web Services Configuration
Disable HTTP support and Enable Secure HTTP support to guarantee secure access. Windows Network Configuration (SMB/CIFS) The N299 can act as a Samba server, enabling users to share files using the SMB/CIFS protocol. From the Network menu, choose the SMB/CIFS item, and the SMB/CIFS screen appears. -
Page 33: Apple Network Setup
Apple Network Configuration Item Description Apple File Service Enable Apple File Service to use the N299 on MAC OS-based system. MAC CHARSET If your operating system does not support Unicode (e.g. MAC OS9/8), select the same language as your OS here in order to properly view the files and directories on the server. -
Page 34: User And Group Management
User and Group Management The N299 has built-in user database that allows administrators to manage user access using different group policies. From the Accounts menu, you can create, modify, and delete users, and assign them to groups that you designate. -
Page 35: Modifying Users
Modifying Users 1. Select an existing user from the Local User Configuration screen. 2. Click on the Modify button, and Local User Setting screen appears. 3. From here, you can enter a new password and re-enter to confirm, or use the << or >> buttons to have this user join or leave a group. -
Page 36: Adding Groups
Adding Groups 1. On the Local Group Configuration screen, click on the Add button. 2. The Add NEW Local Group screen appears. 3. Enter a Group Name, and select users to be in this group from the Users List by adding them to the Members List using the <<... -
Page 37: System Management
System Management The System menu gives you a wealth of settings that you can use to configure your N299’s system administration functions. You can set up system notifications, view system logs, and even upgrade firmware from this menu. System Notifications... -
Page 38: Time And Date Settings
Select No to not have the N299 to synchronize with an NTP server. If an NTP server is selected, please make sure your N299’s network has been setup WARNING to access the NTP server. System Configuration Backup and Restore... -
Page 39: Reset To Factory Default Settings
3. The beeper beeps and the Busy LED blinks until the upgrade is complete. • The beeper only beeps if it is enabled in the System Notification menu. NOTE • Check Thecus website for the latest firmware release and release notes. -
Page 40: Change Administrator Password
Change Administrator Password From the System menu, choose the Administrator Password item and the Change Administrator Password screen appears. Enter a new password in the New Password box and confirm your new password in the Confirm Password box. Press Apply to confirm password changes. -
Page 41: Chapter 4: Additional Feature Setup
Chapter 4: Additional Feature Setup Overview With a bevy of additional features and services, the N299 is so much more than a mere external hard disk. The sections below show you how you can utilize your N299 to serve files, music, movies, pictures, and more. -
Page 42: Itunes® Server
Specify tag encoding for MP3 files stored in N299. All ID3 tags will be send out in UTF-8 format. Once the iTunes service is enabled, the N299 will make all music located in the Music folder available for iTunes-equipped computers on the network. -
Page 43: Adding Media Share Folders
3. Turn on the TV and change the video signal input to DMA. 4. Setup the DMA (These steps will be different if you use a different DMA) a. From the Server List screen, select “N299:Mediabolic Server” as the server. -
Page 44: Download Manager
Download Manager With the built-in Download Manager, you can have the N299 download HTTP, FTP, and BT files without having full PC powered on. What’s more, you can even schedule your downloads for off-peak hours, ensuring efficient use of bandwidth. - Page 45 3. Next, select the destination folder from the Destination Folder dropdown. This is where the download will reside. 4. Select the maximum download bandwidth from the Max. Download Bandwidth dropdown. 5. Press Apply to add the task.
-
Page 46: Adding An Ftp Task
6. Once added, your download will appear in the list of download tasks. To start the download, simply click the Start icon ( ) and the download will begin. 7. The following prompt will be shown when the download begins: 8. - Page 47 2. In the FTP Task window, start by inputting the target URL in the FTP File box. This is the link to the download you want to queue. 3. Next, select the destination folder from the Destination Folder dropdown. This is where the download will reside. 4.
- Page 48 If you are required to login with a user name and password, set Anonymous FTP to Disable and input your user name and password into the appropriate fields. 5. Select the maximum download bandwidth from the Max. Download Bandwidth dropdown. 6.
-
Page 49: Adding A Bt Task
8. The following prompt will be shown when the download begins: 9. The download status will continually update in the Download Tasks window. To pause the download, click the Pause icon ( Adding a BT Task To add a new BT task to the Download Manager, follow these steps: 1. - Page 50 3. Next, select the destination folder from the Destination Folder dropdown. This is where the download will reside. 4. Next, you can designate the Sharing time after completion by selecting the number of hours from the dropdown. 5. Next, you can select the maximum and minimum number of peers from selecting the counts from the appropriate dropdowns.
- Page 51 7. Press Apply to add the task. 8. Once added, your download will appear in the list of download tasks. To start the download, simply click the Start icon ( ) and the download will begin. 9. The following prompt will be shown when the download begins: 10.
-
Page 52: Deleting Tasks
Deleting Tasks To delete a task, simply follow the steps below: 1. Click the delete icon ( ) beside the task that you wish to delete. The Delete Task dialogue box will appear. 2. Select Delete Task only if you wish to remove only the torrent file and all transient files, leaving the unfinished download files intact. -
Page 53: Printer Server
Printer Server You can configure the N299 to act as a printer server. That way, all PCs connected to the network can utilize the same printer. From the Status menu, choose the Printer item, and the Printer information screen appears. To setup in either Windows XP or Vista, please refer the following for steps. -
Page 54: Windows Vista
“Default Printer”. Select Yes and all your print jobs will be submitted to this printer by default. Click Next. 9. Click Finish. • Not all USB printers are supported. Please check Thecus website for a list of NOTE supported printers. - Page 55 Searching for available printers to finish. 5. Click Select a shared printer by name. Type http://<Thecus_NAS>:631/printers/usb-printer in the box, where <Thecus_NAS_IP> is the IP address of the N299. Click Next. 6. Select or install a printer and then press OK.
-
Page 56: Ip Cam Surveillance
Set as the default printer box. Click Next to continue. 9. Done! Click Finish. IP Cam Surveillance With the Simple Surveillance Server, you can connect an IP cam to the N299 to capture images. The Simple Surveillance Server also supports scheduling, which means that you can configure the N299 to perform home surveillance at any time. -
Page 57: Ip Cam Configuration
Click Cancel to abandon changes. IP Cam Configuration Setting up an IP Cam for use with the N299 is easy. In this example, we’ll setup a Vivotek PT7237 IP cam for use with the N299. Configuring a different IP cam will be slightly different depending on the model you are using, but this guide will outline the basics. -
Page 58: Step 2: Designate A Capture Schedule
Interval: Here, you can designate the time between each captured image. Select the desired interval from the dropdown menu. Folder: Enter the name of the folder you wish the N299 to store captured images Once this information is entered, simply click Add. - Page 59 Frequency: Here, you can set the frequence of the schedule to either Daily or Weekly. When set to Daily, images will be captured every day at the designated time. When set to Weekly, you can have the IP camera capture images at certain days of the week (i.e Monday to Friday).
-
Page 60: Step 3: Browse Captured Images
Once the capture schedule has been set, you can browse the captured images on the N299. The easiest way to do this is to simply open the folder you previously designated as the capture directory and view your captured pictures using your favorite photo viewing software. -
Page 61: Chapter 5: Using The N299
To manage your personal files or access public files on the N299, just enter its IP address into your browser, and you will be taken to the N299 Login page. -
Page 62: Using Itunes® Server
2. Double click the Music folder to enter it. Then drag and drop music folders and files here. 3. The N299 iTunes server will take some time to cache the ID3 tag of every file. Once the process is done, you will see all the music files from iTunes clients. -
Page 63: Using Photo Gallery
• Only logged in users will see these icons. NOTE • To prevent system errors, the N299 sets the following limitations on photo files: • Each file upload is limited to a size of 4MB. Files exceeding 4MB will NOT be uploaded and no error message will appear. -
Page 64: Uploading Pictures To Albums
2. The owner of the album can enter an album password to protect the album, so that only people with the correct password can view the album. Uploading Pictures to Albums Uploading pictures to albums using the Web User Interface is easy: 1. - Page 65 3. Windows XP will ask whether you want to run or save this file. Click Run. 4. Once the Wizard is installed, use the Windows file manager to browse the folder that contains the picture you want to publish. On the left pane, there will be an icon labeled “Publish this folder to the Web”.
- Page 66 Click Next. 7. Your PC will start to connect to the Photo Web Server. 8. Select N299 Photo Gallery Wizard to publish your pictures to the N299. 9. Login into the N299 with your local user name and password.
- Page 67 11. Select the album you want to upload your pictures to. 12. Confirm the target album. 13. Windows will show you that the picture upload is in progress. 14. When the upload is finished, the Wizard will ask you whether if you want to go to the website.
- Page 68 15. Click on the user’s icon to go to that user’s album. 16. You will see the user’s album list. Click on MyAlbum. 17. Finished! You will see the pictures just selected in the album.
-
Page 69: Exif Information
EXIF Information While viewing pictures, you can also have the N299 display the EXIF information for each photo. Slide Shows Slide shows are a great way to enjoy pictures stored on your N299. You can click on the Start Slide Show icon on the top right hand corner to start the slide show. -
Page 70: File Backup
If the files on your N299 are lost for any reason, you can restore those files from the target N299. To backup files regularly, you can set up a scheduled task to run only once, daily, weekly, or monthly. You can also limit the bandwidth of your Nsync tasks, so other users on the network can share the bandwidth equally. -
Page 71: Adding An Nsync Task
Add Nsync Task Item Description Task Name The name of your Nsync task. Manufacturer Select whether the target is a Thecus Product (e.g. N299) or FTP server. Target Server IP The IP address of your target server. Address Source Folder The share folder you want to backup. -
Page 72: Setting Up An Nsync Target On An Nsync Device
ID and password. Setting Up an Nsync Target on Another Device If you selected “Other Device” when setting up your Nsync task, the N299 will use the FTP protocol to back up the share folder. On the external storage device, make sure there is a folder named “nsync”, and the Auth ID has writable... -
Page 73: Thecus Backup Utility
Backup Utility. If it is not installed, you can copy the file (Thecus Backup Utility.exe) to a convenient location on your hard disk and double click to execute it. If you can not find Thecus Backup Utility on your CD, please download it from the NOTE Thecus website (http://www.thecus.com). -
Page 74: Windows Xp Data Backup
3. To check the log for that task, click on the Log icon for that task. Thecus Backup Utility also supports MAC OS X. Just copy the Thecus Backup NOTE Utility.dmg to your MAC OS X machine and double click to execute it. -
Page 75: Apple Os X Backup Utilities
USB port. Then, simply press the One-Touch USB Copy button on the front panel, and all of the contents of the USB storage device will be copied over to the N299. All of the files copied will be contained in the USBCopy service folder, under a subfolder names with a timestamp (YearMonthDayHHMM). -
Page 76: Chapter 6: Tips And Tricks
Chapter 6: Tips and Tricks Mapping a Client PC to the N299 You can map share folders on the N299 so that you can access them as if they were drives on your computer. You can connect to the shared network folders on... -
Page 77: Apple Os X
7. Click OK. The share folder appears as the drive you assigned. You can now access this folder as though it were a drive on your computer. Apple OS X On an Apple computer, you can connect to shared computers and servers using a network address. -
Page 78: Usb Storage Expansion
3. When MAC OS X is trying to connect N299, it will ask for a User Name and Password which has access to the folder. 4. When MAC OS X has connected to the N299 successfully, an icon representing the folder will appear on the MAC OS X desktop. You can access the folder by double clicking on the icon. -
Page 79: Replacing A Hard Drive
2. Unscrew four mounting screws. 3. Lift up the hard disk tray by pulling up the top panel of the N299. 4. Remove the damaged hard drive. 5. Carefully insert a standard 3.5” SATA hard disk into the tray, and secure the hard disk with screws from the included accessory pack. -
Page 80: Part Ii - Enable Ddns On The Router
2. Click on the Sign Up Now link. 3. Check the Check boxes, select a user name (i.e.: N299), enter your email address (i.e.: xxx@example.com), check Enable Wildcard, and create a password (i.e.: xxxx). 4. Wait for an email from www.dyndns.org. -
Page 81: Chapter 7: Troubleshooting Guide
Chapter 7: Troubleshooting Guide N299 Won't Turn On In the event that the N299 won’t turn on, check to see that the power cable is correctly plugged in to the N299. Also check to see if the electrical outlet is functioning. -
Page 82: N299 Chassis Feels Hot
4. Set the Date, Time, and Time Zone. 5. Click Apply. In addition, if the N299 is able to access the Internet and you want to keep the NTP Server clock.isc.org by default, please make sure the DNS Server is correctly, thereby allowing the NTP Server name to correctly resolve. -
Page 83: Simple Problem Diagnosis Procedure
This procedure is meant to provide a simple and quick way to identify which part of the N299 has failed. 1. Don’t insert a hard disk into the N299. Attach the power cord and then reset the IP address and admin password to the default settings by doing... -
Page 84: Appendix A: Product Specifications
Appendix A: Product Specifications Hardware Specifications Core Processors / Memory Processor StorLink SL3516 32-bit SoC SATA Controller Integrated into Processor NOR Flash 16MB Memory 128MB Network Interfaces 1 x 10/100/1000 Mbps Ethernet Port 1 x 10/100/1000 Mbps Ethernet Port Wireless (optional) IEEE 802.11b/g AP mode (using approved USB Dongles) Storage HDD Bays... - Page 85 MS Windows discovery and setup utility program Email Notification Send system message via Email to specified Email accounts Backup Thecus Backup Program Thecus Backup Utility (Client backup utility; supports Microsoft Windows XP/2000/MAC OS X) ** For supported USB dongles, please contact sales@thecus.com...
-
Page 86: Appendix B: Customer Support
Troubleshooting Guide, located in this manual. You can also try to ensure that you are using the latest firmware version for your N299. Thecus is committed to providing free firmware upgrades to our customers. Our newest firmware is available on our Download Center: http://www.thecus.com/download.php... -
Page 87: Appendix C: Raid Basics
RAID volume can regenerate data from the data and parity stored on its other hard disk drives. RAID Levels The Thecus N299 supports standard RAID levels 0, 1, and JBOD. You choose a RAID level when you create a system volume. The factors for selecting a RAID level are: •... -
Page 88: Raid 1
The stripes can vary in size. Disk Usage When all 4 disks are of the same size, and used in RAID, the N299’s disk usage percentage is listed below: RAID Level... -
Page 89: Appendix D: Licensing Information
Source Code Availability Thecus Technology Corp. has exposed the full source code of the GPL licensed software. For more information on how you can obtain our source code, please visit our web site, http://www.thecus.com. -
Page 90: Cgic License Terms
CGIC License Terms Basic License CGIC, copyright 1996, 1997, 1998, 1999, 2000, 2001, 2002, 2003, 2004 by Thomas Boutell and Boutell.Com, Inc. Permission is granted to use CGIC in any application, commercial or noncommercial, at no cost. HOWEVER, this copyright paragraph must appear on a "credits"... - Page 91 Also, for each author's protection and ours, we Want to make certain that everyone understands that there is no warranty for this free software. If the software is modified by someone else and passed on, we Want its recipients to know that what they have is not the original, so that any problems introduced by others will not reflect on the original authors' reputations.
- Page 92 c) If the modified program normally reads commands interactively when run, you must cause it, when started running for such interactive use in the most ordinary way, to print or display an announcement including an appropriate copyright notice and a notice that there is no warranty (or else, saying that you provide a warranty) and that users may redistribute the program under these conditions, and telling the user how to view a copy of this License.
- Page 93 operating system on which the executable runs, unless that component itself accompanies the executable. If distribution of executable or object code is made by offering access to copy from a designated place, then offering equivalent access to copy the source code from the same place counts as distribution of the source code, even though third parties are not compelled to copy the source along with the object code.
- Page 94 This section is intended to make thoroughly clear what is believed to be a consequence of the rest of this License. 8. If the distribution and/or use of the Program is restricted in certain countries either by patents or by copyrighted interfaces, the original copyright holder who places the Program under this License may add an explicit geographical distribution limitation excluding those countries, so that distribution is permitted only in or among countries not thus excluded.
Need help?
Do you have a question about the N299 and is the answer not in the manual?
Questions and answers