
Subscribe to Our Youtube Channel
Related Manuals for SRAM RockShox Reverb Stealth


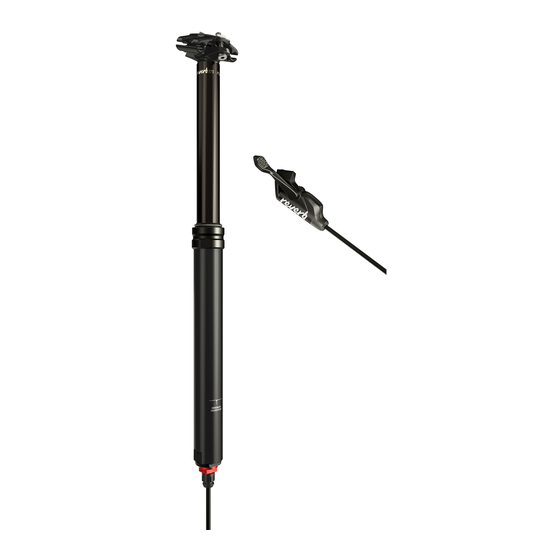
Summary of Contents for SRAM RockShox Reverb Stealth
- Page 1 Reverb™ Stealth Reverb & Hydraulic Hose Replacement Remote System Bleed b l e e d m a n u a l GEN.0000000005105 Rev B © 2017 SRAM, LLC...
- Page 2 LIMITATIONS OF LIABILITY To the extent allowed by local law, except for the obligations specifically set forth in this warranty statement, in no event shall SRAM or its third party suppliers be liable for direct, indirect, special, incidental, or consequential damages.
- Page 3 SAFETY FIRST! We care about YOU. Please, always wear your safety glasses and protective gloves when servicing RockShox® products. Protect yourself! Wear your safety gear!
-
Page 4: Table Of Contents
TABLE OF CONTENTS REVERB™ STEALTH - EXPLODED VIEW ................................5 REVERB - EXPLODED VIEW ....................................6 ROCKSHOX® SERVICE ......................................7 RECOMMENDED SERVICE INTERVALS ........................................7 SERVICE HISTORY ................................................7 TORQUE VALUES ................................................7 PARTS, TOOLS, AND SUPPLIES ..........................................8 BICYCLE PREPARATION .....................................9 HYDRAULIC HOSE REPLACEMENT ................................11 HYDRAULIC HOSE AND HOSE BARB PREPARATION .................................. -
Page 5: Reverb™ Stealth - Exploded View
R e v e r b ™ S t e a l t h - E x p l o d e d V i e w STANDARD REMOTE Remote Bleed Screw Remote Bleed Port Speed Adjuster Remote Hose Barb Remote Actuator Reverb Hydraulic Hose *REVERB 1X™... -
Page 6: Reverb - Exploded View
R e v e r b ™ - E x p l o d e d V i e w Remote Bleed Screw Remote Bleed Port Post Bleed Screw Speed Adjuster Remote Actuator Remote Hose Barb Reverb Bleed Port Reverb Hydraulic Hose Hose Barb Hose Barb Sleeve Reverb Hydraulic Hose... -
Page 7: Rockshox® Service
RockShox Spare Parts catalg and technical information. For order information, please contact your local SRAM® distributor or dealer. For recycling and environmental compliance information, please visit www.sram.com. Information contained in this publication is subject to change at any time without prior notice. Your product's appearance may differ from the pictures contained in this publication. -
Page 8: Parts, Tools, And Supplies
P a r t s , T o o l s , a n d S u p p l i e s Parts Bicycle Tools • Reverb™ hydraulic hose kit (Barb or Connectamajig™) • Bicycle work stand • Reverb Remote Hose Barb kit (optional) •... -
Page 9: Bicycle Preparation
B i c y c l e P r e p a r a t i o n Secure the bicycle in an upright position. Reverb™ Stealth: The seatpost will be removed from the bicycle. Do not clamp the seatpost in a bicycle work stand. Raise the seatpost to the fully extended position. - Page 10 Reverb™ 1x™ Remote: The 1x remote may be attached to the handlebar with a discrete clamp. If the 1x remote is attached to MatchMaker™ X and a SRAM® brake lever and clamp (pictured), the 1x remote and brake lever will both be removed at this time.
-
Page 11: Hydraulic Hose Replacement
H y d r a u l i c H o s e R e p l a c e m e n t H y d r a u l i c H o s e a n d H o s e B a r b P r e p a r a t i o n A new Reverb™... -
Page 12: Reverb Stealth Hose Removal And Installation
R e v e r b ™ S t e a l t h H o s e R e m o v a l a n d I n s t a l l a t i o n Loosen the seatpost collar. - Page 13 Hose Barb: Remove the hose barb. Hose Barb 10 mm 7 mm Connectamajig™ Hose Coupler: Remove the hose coupler. Connectamajig Hose Coupler Use a rag to wipe away any fluid. 9 mm 6 mm Cut the hydraulic hose. Hydraulic Hose Cutter Connectamajig Use a rag to collect any fluid that may drip.
- Page 14 Thread the end of the new hose onto the other end of the Barb Connector tool to connect the hoses. Pull the original hose out of the frame and insert the new hose into the frame. The original hose is used to pull the new hose through the bicycle frame and out of the hose port.
- Page 15 Hose barb: Install the hose barb into the seatpost and tighten. 10 mm 3.4-4.5 N•m (30-40 in-lb) 7 mm Connectamajig™ Hose Coupler: Install the hose coupler into the coupler and tighten. 9 mm 1.1-2.9 N•m (10-26 in-lb) 6 mm Remove the seatpost from the bicycle work stand. Apply friction paste to the outside of the seatpost.
- Page 16 Position the seatpost at the desired ride height and tighten the seatpost collar. The seatpost will be tightened to the correct torque after the bleed procedure is complete. Secure the hose to the frame. Unthread and remove the original hose and Reverb™ Stealth Hose Connector tool from the new hose.
- Page 17 Unthread and remove the remote from the original hose. Needle nose pliers Standard Remote Needle nose pliers Reverb 1x™ Remote Reverb™ Stealth: Proceed to Hose Sizing and Remote Installation. Reverb™ Stealth Hose Removal and Installation...
-
Page 18: Reverb Hose Removal And Installation
R e v e r b ™ H o s e R e m o v a l a n d I n s t a l l a t i o n Wrap a rag around the upper post. Remove the hose barb. - Page 19 Hold the hydraulic hose near the hose barb. Rotate the Reverb™ remote lever counterclockwise and unthread the hose from the remote hose barb. Discard the hose. Needle nose pliers Install the new hose barb and hose, and tighten to. 7 mm 3.4-4.5 N•m (30-40 in-lb) Secure the hose to the frame.
-
Page 20: Hose Sizing And Remote Installation
H o s e S i z i n g a n d R e m o t e I n s t a l l a t i o n With the seatpost fully extended and at the desired ride height in the Reverb frame, route the hose to the handlebar remote location. - Page 21 Mark the cut location. Marker Cut the hydraulic hose. NOTI CE To ensure a square cut and to prevent damage to the hose, use only a hydraulic hose cutter. Hydraulic Hose Cutters Thread the remote lever hose barb into the hydraulic hose. Hold the end of the hose and rotate the remote lever clockwise while pushing the remote lever barb into the hose.
-
Page 22: Remote System Bleed
R e m o t e S y s t e m B l e e d If the seatpost will not compress or extend when the remote actuator is depressed, check the hydraulic hose connections for leaking hydraulic fluid. Tighten the hose connections as needed before performing the remote and seatpost bleed procedure. - Page 23 Remove the seatpost and push the hydraulic hose into the frame. NOTI CE Do not pull the seatpost out of the frame if there is tension at the hose. This can cause damage to the hydraulic hose and hose barb. Hose port - seat tube Hose Port - Head Tube Secure the seatpost to the rear wheel with the bleed port oriented...
-
Page 24: 50/200 Hour Service
5 0 / 2 0 0 H o u r S e r v i c e R e m o t e P r e p a r a t i o n Install and orient the remote on the handlebar with the bleed port level, or at the highest point. -
Page 25: Remote Syringe Preparation
5 0 / 2 0 0 H o u r S e r v i c e R e m o t e S y r i n g e P r e p a r a t i o n Install the Bleeding Edge™... -
Page 26: Seatpost Syringe Preparation
2 0 0 H o u r S e r v i c e S e a t p o s t S y r i n g e P r e p a r a t i o n Draw 5 mL of fluid into the second RockShox®... -
Page 27: Remote And Seatpost Bleed
2 0 0 H o u r S e r v i c e R e m o t e a n d S e a t p o s t B l e e d Depress the remote syringe plunger while pulling the seatpost syringe Reverb 1x™... - Page 28 Remove the syringe. T10 TORX® 1.1-2.2 N•m (10-20 in-lb) Install the bleed screw and tighten. Spray isopropyl alcohol on the seatpost and hydraulic hose and clean them with a rag. Reverb™ Stealth T10 TORX 1.1-2.2 N•m (10-20 in-lb) Reverb Reverb 1x™ Remote Bleed: Proceed to Remote Bleed - Reverb 1x Remote.
-
Page 29: 50/200 Hour Service
5 0 / 2 0 0 H o u r S e r v i c e R e m o t e B l e e d - S t a n d a r d R e m o t e Pull up on the syringe plunger and push the remote actuator. -
Page 30: Remote Bleed - Reverb 1X™ Remote
5 0 / 2 0 0 H o u r S e r v i c e R e m o t e B l e e d - R e v e r b ™ 1 x ™ R e m o t e While applying light opposing pressure to the syringe body, slowly pull up on the syringe plunger to draw a vacuum. - Page 31 Slowly push the syringe plunger down while simultaneously slowly releasing the remote lever, applying light opposing pressure on the lever, then release pressure from the syringe. Do not release pressure from the remote lever until it is fully extended. When the remote lever is fully extended, release pressure from the syringe.
- Page 32 With the syringe plunger extended, hold the Bleeding Edge™ tool and gently but firmly, remove it from the bleed port. NOTI CE Do not pull the syringe or hose. This could cause separation and loss of fluid. Do not rock the Bleeding Edge tool side to side. This could damage the tool and remote.
- Page 33 Rotate the remote boot, insert each plug into each hole, and press it back into place. Clean the remote with isopropyl alcohol and a rag as needed. Reverb™ Stealth: Proceed to the next page. Reverb: Proceed to Saddle, Remote, and Brake Installation.
-
Page 34: Reverb Stealth Installation
2 0 0 H o u r S e r v i c e R e v e r b S t e a l t h I n s t a l l a t i o n Cut the cable tie and remove the seatpost from the rear wheel. Apply friction paste to the seatpost. -
Page 35: 50/200 Hour Service
The Reverb 1x remote can be attached to the handlebar with the included discrete clamp if the brake lever is not compatible with SRAM® MatchMaker™ X. T25 TORX® 3.0-4.0 N•m (35-44 in-lb) Reverb 1x Remote Standard Remote: Install the remote in the desired position and tighten the clamp bolt. -
Page 36: Test Function
T e s t F u n c t i o n Press the remote actuator and push the seatpost down by hand. Reverb™ 1x™ Remote The seatpost should compress when the remote actuator is depressed and weight is applied to the saddle. Standard Remote Press the remote actuator again. - Page 37 Adjust the speed adjuster to the desired setting and repeat step 1. Adjust as desired. Reverb™ 1x™ Remote: Reinstall the boot onto the lever. Standard Remote T25 TORX® Reverb 1x Remote This concludes the bleed procedure for the RockShox® Reverb Stealth and Reverb adjustable height seatposts. Test Function...
- Page 38 This publication includes trademarks and registered trademarks of the following companies: TORX® is a registered trademark of Acument Intellectual Properties, LLC.
- Page 39 ASIAN HEADQUARTERS WORLD HEADQUARTERS EUROPEAN HEADQUARTERS SRAM Taiwan SRAM LLC SRAM Europe No. 1598-8 Chung Shan Road 1000 W. Fulton Market, 4th Floor Paasbosweg 14-16 Shen Kang Hsiang, Taichung City Chicago, Illinois 60607 3862ZS Nijkerk Taiwan R.O.C. The Netherlands...
Need help?
Do you have a question about the RockShox Reverb Stealth and is the answer not in the manual?
Questions and answers