Windhager logwin premium touch Installation Instructions Manual
Wood gasification boiler
Hide thumbs
Also See for logwin premium touch:
- Operating manual (44 pages) ,
- Operating manual (24 pages)

Related Manuals for Windhager logwin premium touch


Summary of Contents for Windhager logwin premium touch
- Page 1 INSTALLATION INSTRUCTIONS LOGWIN PREMIUM TOUCH WOOD GASIFICATION BOILER 06/2016 095170/00...
-
Page 2: Table Of Contents
Table of contents Table of contents 1. Important information ....................4 Safety precautions ......................... 4 1.1.1 Caution symbols .................................4 1.1.2 General safety information ............................4 Flue .............................. 5 Boiler room/installation room ......................5 Initial start-up and operating instructions ..................6 Disposal/recycling ......................... 6 2. - Page 3 Technical data for calculating the flue gas system acc. to EN 13384-1 (for LWP 185–505T) ....44 General technical data (for LWP 185–505T) ................... 44 Dimensional drawings ........................45 LogWIN Premium Touch basic circuitry ..................46 4.10 LogWIN Premium Touch connection diagram .................. 47...
-
Page 4: Important Information
Important information All content of this document is the property of WINDHAGER and is therefore protected by copyright. Reproducing this content. passing it on to others or using it for other purposes without the written consent of the owner is strictly pro- hibited. -
Page 5: Flue
Important information Flue A properly dimensioned flue is required for optimum functioning of the combustion system. Calculation of the dimen- sions must follow EN 13384-1. See the technical data section for the values required for this calculation. Please note that in the lower performance range. flue gas temperature may be below 160 °C. The flue gas system must display at least the following classification: Temperature class: T400 = nominal operating temperature 400 °C... -
Page 6: Initial Start-Up And Operating Instructions
The initial start-up cannot be carried out if any of these points are neglected. The customer will be charged for any unnecessary costs arising as a result. Start-up and maintenance by Windhager Customer Service or a customer service partner are part of the guarantee requirements of the enclosed "Warranty conditions". -
Page 7: For The Installer
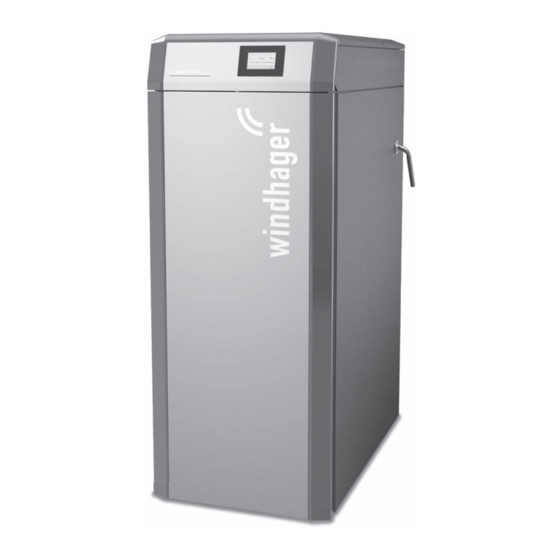
Fig. 3 Cardboard boxes with cladding and control panel Fig. 2 LogWIN Premium Touch boiler System 2.2.1 Area of use For heating buildings acc. to EN 12831. The boilers are designed and approved as heat generators for hot water heating systems with permissible flow tem- peratures of up to 90 °C. -
Page 8: Heat Accumulator (Buffer)
For the installer 2.2.3 Heat accumulator (buffer) The installation of a heat accumulator (buffer tank) is required by the following standards and laws: – EN 303-5 – 1. BImSchV – Art. 15a of the Small Combustion Devices Agreement (Austria) – Air Protection Ordinance (Switzerland) Having a correctly sized heat accumulator (buffer tank) is essential for correct operation of a wood-fired heating system. -
Page 9: Circulation Pump
For the installer heating. otherwise the temperature of the return flow must be increased using a mixing pump or valve. In order to achieve good temperature stratification in the heat accumulator or buffer tank. we recommend setting the boiler circuit to a 15–20 K differential by means of the return hold-up group SK RH. See the enclosed instructions for the return hold-up group for guidance values for the setting. -
Page 10: Water-Side Resistance (Pressure Loss)
For the installer 2.2.9 Water-side resistance (pressure loss) LWP 180T – 505T Pressure loss (mbar) Diagram 1 LogWIN water-side resistance 2.2.10 Combustion air The combustion air is drawn directly by the boiler from the installation room. therefore the installation room has to be adequately ventilated. -
Page 11: Installation Sequence
For the installer Installation sequence 2.3.1 Parts designations for installation All cladding parts must be fitted in full for air guidance and the dissipation of heat on CAUTION the boiler. Fig. 4 Parts for installation... -
Page 12: Taking Into The Building And Installing
For the installer 1 ... Front set screws (2 pcs.) 20 ..Upper insulating plate 2 ... Blower seal 21 ..Control panel 3 ... Flue connection adapter – accessories 22 ..Thermocontrol sensor cover 4 ..Blower housing 23 ..Cable channel (2 pcs.) 5 ... - Page 13 For the installer LogWIN Premium Touch: All measurements in mm. Minimum room height: 1950 mm Details in brackets apply to WP 360T / 365T. 500T / 505T 654 (764) 654 (764) 550 (660) 550 (660) 1324 (1544) 1324 (1544) min. 200 min.
-
Page 14: Prior To Installation
For the installer 2.3.4 Prior to installation Move the boiler to its definitive installation position and use the set screws to align it inclined slightly upwards towards the rear. If it is not possible to level the unit using only the rear set screws. 2 additional set screws can be installed at the front –... - Page 15 For the installer – Secure adapter. with slot position depending on desired angle of flue connection. on boiler according to Fig. 10 with seal and 4 M8 nuts – Fig. 10. Fig. 11. Boiler side Boiler side Boiler side Boiler side Fig.
-
Page 16: Converting The Door Catch From Left To Right
For the installer 2.3.6 Converting the door catch from left to right The filling. lighting and ash doors can be converted so that the catch is on the right side. If this is not necessary. move on to Section 2.3.7. Filling door: –... - Page 17 For the installer Lighting door/ash door: – Remove the lighting door/ash door – knock the hinge pins out and take the door off. – Unscrew the door mounting and lock mounting from the boiler body and screw them back on the other way round – Fig.
-
Page 18: Installing The Door Handles
For the installer 2.3.6.1 Setting the doors – The doors must be set so that the doors' rope seals sit centrally against the frame on the boiler creating a complete seal with sufficient pretension. It is fit by adjusting the door mounting and lock mounting on the other side – Fig. 19. Fig. -
Page 19: Installing The Flue Gas Blower. Air Control And Lambda Sensor
For the installer 2.3.8 Installing the fl ue gas blower. air control and lambda sensor – Hook in the air control at the top and secure with screw at the bottom – Fig. 24. Fig. 26. – Screw the lambda sensor in finger tight and tighten approx. 1/4 turn with an open-ended wrench (WAF 22) – Fig. 25. Fig. -
Page 20: Installing The Control Panel With Carburisation Gas Duct
For the installer 2.3.10 Installing the control panel with carburisation gas duct – Screw in 2 M8x60 threaded bolts for the control panel on the boiler above the lower heating door so that they are flush and secure with M8 nuts – Fig. 29. Fig. 30. –... -
Page 21: Installing The Side Panels And Insulation
For the installer 2.3.11 Installing the side panels and insulation – Screw in 2 M5x10 self-threading TT screws halfway on each side of the base (Fig. 34) and depending on which side the door catch is to be located. install the lower door hinge for attaching the cladding door on either the left or on the right with 2 M5x10 self-threading TT screws –... -
Page 22: Installing The Control Panel
For the installer – Release the side panels and hook them into the installed screws at the bottom (Fig. 36. Fig. 37) and loosely screw the top on with 2 self-tapping screws and 1 saw tooth ring for the earth on the inside (Fig. 38). and with 1 self-tapping screw at the front –... - Page 23 For the installer – Upper insulating plate: If no adapter for the flue gas blower (accessories) is being used. break off the cut-out at the top of the back panel – Fig. 41. Large cut-out = exhaust pipe insulated Small cut-out = exhaust pipe not insulated Do not break off = adapter for flue connection installed Position the upper insulating plate (Fig.
- Page 24 For the installer – Place the control panel on the boiler (Fig. 45). open the control panel cover and attach on the inside with 4 self-tap- ping screws and 1 saw tooth ring for the earth – Fig. 46. Fig. 45 Placing the control panel on the boiler Fig.
-
Page 25: Installing The Thermocontrol Sensor
For the installer 2.3.13 Installing the thermocontrol sensor – Route the thermocontrol sensor (green cable) at the front of the right side panel down and feed through – Fig. 47. Fig. 48. But first bend the cut-out (feed-through) at the bottom of the side panel out of the way. –... -
Page 26: Installing The Cable Channels. Routing The Blower Motor Cable And Installing The Sensor
For the installer 2.3.15 Installing the cable channels. routing the blower motor cable and installing the sensor – Attach the cable channels to the front of the control panel at left and right (feed-through at rear) with a drilling screw on each side –... - Page 27 For the installer – Route both cables from the air control upwards in the side panels via the cable channel feed-through into the control panel as shown in Fig. 54 and connect as shown in Fig. 55. – Route the lambda sensor cable downwards from the control panel via the cable channel feed-through in the side panel and connect to the lambda sensor –...
-
Page 28: Installing Insulation For The Rear Panel
For the installer 2.3.16 Installing insulation for the rear panel – Install insulation on the top and bottom as shown in Fig. 56. Fig. 56 Installing insulation on the rear panel 2.3.17 Installing the rear panels – If no adapter for the ue gas blower (accessories) is being used. break o the cut-out at the top of the back panel – Fig. 57. Large cut-out = exhaust pipe insulated Small cut-out = exhaust pipe not insulated Do not break off = adapter for flue connection installed... -
Page 29: Installing The Blower Housing On The Adapter
For the installer 2.3.18 Installing the blower housing on the adapter – Only for LogWIN with flue connection adapter (accessories) – First screw the 4 included M8x16 hexagon screws into the blower housing from the inside. the attach the blower housing with seal. -
Page 30: Installing The Cladding Door
For the installer 2.3.20 Installing the cladding door Note! The cladding door and the boiler doors are designed for door catches on either the left or right. Standard delivery always includes a door catch on the left. The catches on the cladding door and boiler doors must be on the same side. -
Page 31: Lon Cable From Control Panel To Operating Panel
For the installer 2.3.21 LON cable from control panel to operating panel – Connect the internal LON cable in the LED bar – Fig. 67. Fig. 68. LON cable Fig. 67 Connecting the LON cable Fig. 68 Connecting the LON cable 2.3.22 Installing the InfoWIN Touch –... -
Page 32: Door Safety Switch
For the installer 2.3.24 Door safety switch – Route the cable from the door safety switch into the control panel and connect at X15 – Fig. 72. Fig. 72 Routing the cable from the door safety switch and connecting at X15 2.3.25 Installing function modules (MES INFINITY control system) The function modules (MES INFINITY control system) can: –... -
Page 33: Installing The Rear Boiler Cover
For the installer 2.3.27 Installing the rear boiler cover – If no adapter for the ue gas blower (accessories) is being used. break o the cut-out on the rear boiler cover – Fig. 77. Large cut-out = exhaust pipe insulated Small cut-out = exhaust pipe not insulated Do not break off = adapter for flue connection installed –... -
Page 34: Installing The Exhaust Pipe
EN 1856-1 and EN 1856-2. Please ensure a sufficient immersion depth when fitting (e.g. when using Windhager stainless steel flue systems). f) The entire exhaust line should be insulated to a minimum of 2 cm thickness in order to prevent or minimise condensation. -
Page 35: For The Electrician
For the electrician For the electrician Electrical connections The boiler and related accessories are designed to be installed only in dry areas (protection type IP 20). Installation of electrical components may only be performed by a qualified technician. The regulations and specifica- tions of ÖVE. - Page 36 For the electrician To access the control panel: – Remove rear boiler cover (Fig. 82). loosen the 2 screws from the front boiler cover (Fig. 83). lift up the cover and pull it off to the rear – Fig. 84. Fig.
- Page 37 For the electrician – Remove the 2 screws at the front of the control panel and open the cover – Fig. 86. Fig. 86 Removing the 2 screws. opening the cover – Make sure that the plugs for the door switch. flue gas sensor X11 (accessories) and air control X6/X7. X14 are correct- ly connected in the control panel.
-
Page 38: Installing Function Modules (Mes Infinity Control System)
For the electrician Installing function modules (MES INFINITY control system) The function modules (MES INFINITY control system) can: – Be installed on a wall (Fig. 89) – Section 3.2.1 or – Be installed on the control panel in the boiler (Fig. 90) – Section 3.2.2. A 3-pole LON cable is used to connect the function modules (MES INFINITY control system) to the boiler. -
Page 39: Installing On The Wall
For the electrician 3.2.1 Installing on the wall CAUTION Do not install in plumbed rooms. Ambient temperature not over +50 °C. Note! The screws and plugs are included with the function modules. – Loosen the screws at the top of the cover for the function module and lift up the cover. –... -
Page 40: Installing On The Control Panel In The Boiler
For the electrician 3.2.2 Installing on the control panel in the boiler – Loosen the screws at the top of the cover for the function module and lift up the cover. – Screw the function module onto the control panel with the U-washers and self-tapping screws supplied – Fig. 93. –... -
Page 41: For The Service Technician
Start-up and operating instructions The Windhager Customer Service or customer service partner will start up the boiler and will familiarise the customer with the system operator and cleaning of the boiler. Start-up and maintenance are part of the guarantee requirements of the "Warranty conditions"... -
Page 42: Checking And Servicing The Thermal Discharge Safeguard
For the service technician Checking and servicing the thermal discharge safeguard (Please inform your customer) The function of the thermal discharge safeguard must be checked once a year by a WARNING technician and the amount of limescale in the thermal safety device must be checked. If there is limescale in the thermal safety device then it must always be removed. -
Page 43: Technical Data For Calculating The Flue Gas System Acc. To En 13384-1 (For Lwp 180-500T)
For the service technician Technical data for calculating the flue gas system acc. to EN 13384-1 (for LWP 180–500T) LWP 180T LWP 250T LWP 300T LWP 360T LWP 500T LogWIN Premium Touch Formula Unit wood gasification boiler symbols min. max. min. -
Page 44: Technical Data For Calculating The Flue Gas System Acc. To En 13384-1 (For Lwp 185-505T)
For the service technician Technical data for calculating the fl ue gas system acc. to EN 13384-1 (for LWP 185–505T) LogWIN Premium Touch Formula Unit LWP 185T LWP 255T LWP 305T LWP 365T LWP 505T wood gasification boiler symbol Values in practical operation (average between two cleaning intervals) Nominal thermal output 18.0... -
Page 45: Dimensional Drawings
Blower housing with adapter. flue connection steplessly adjustable from left to right Rear view Left view All measurements in mm. 1408 1274 1101 123 (178) 43 (98) Fig. 101 LogWIN Premium Touch ue gas blower with adapter on boiler 550 (660) 1324 (1544) -
Page 46: Logwin Premium Touch Basic Circuitry
For the service technician... -
Page 47: Logwin Premium Touch Connection Diagram
For the service technician... -
Page 48: Warranty Conditions
IMPRESSUM Media owner. issuer and publisher: Windhager Zentralheizung GmbH. Anton- Windhager-Straße 20. 5201 Seekirchen am Wallersee. Austria. T +43 6212 2341 0. F +43 6212 4228. info@at.windhager.com. Images: Windhager; subject to amendments. printing and layout errors. Translatet from 024296/01-AWP-vor...
Need help?
Do you have a question about the logwin premium touch and is the answer not in the manual?
Questions and answers