Xerox WorkCentre 3210 Service Manual
Hide thumbs
Also See for WorkCentre 3210:
- User manual (140 pages) ,
- Specifications (4 pages) ,
- Quick manual (4 pages)

Related Manuals for Xerox WorkCentre 3210


Summary of Contents for Xerox WorkCentre 3210
-
Page 1: Service Manual
® WorkCentre 3210/3220 Multifunction Printer WorkCentre 3210/3220 ® Service Manual... -
Page 3: Multifunction Printer
Service Manual 701P49487 ® WorkCentre 3210 / 3220 Multifunction Printer Warning The following servicing instructions are for use by qualified service personnel only. To avoid personal injury, do not perform any servicing other than that contained in the operating instructions, unless you are qualified to do so. First Printing: March 2009... - Page 4 Xerox technical training materials and service manuals are intended for use by authorized Xerox service technicians and service partners only and are not for resale. These materials may not be distributed, copied, or otherwise reproduced without prior written consent from Xerox Corporation.
-
Page 5: Service Terms
Caution: A personal injury hazard exists that may not be apparent. For example, a panel may cover the hazardous area. Danger: A personal injury hazard exists in the area where you see the sign. WorkCentre 3210/3220 Multifunction Printer Service Manual... -
Page 6: Symbols Marked On The Product
Refer to the manual(s) for information. Do not touch the OPC Drum. Do not expose the item to sunlight. Do not tilt the Print Cartridge. 35°C Do not expose item to high temperature. 0°C 95°F 32°F Recycle the item. WorkCentre 3210/3220 Multifunction Printer Service Manual... -
Page 7: Power Safety Precautions
WorkCentre 3210/3220 Multifunction Printer Service Manual... -
Page 8: Electrostatic Discharge Precautions
Handle IC’s and Erasable Programmable Read-Only Memories (EPROM’s) carefully to avoid bending pins. Pay attention to the direction of parts when mounting or inserting them on Printed Circuit Boards (PCB’s). WorkCentre 3210/3220 Multifunction Printer Service Manual... -
Page 9: Service Safety Summary
Class 1 Laser Product The WorkCentre 3210/3220 is certified to comply with Laser Product Performance Standards set by the U.S. Department of Health and Human Services as a Class 1 Laser Product. This means that this product does not emit hazardous laser radiation;... - Page 10 Do not install a fuse of a different type or rating. Installing the wrong type or rating of fuse can cause overheating and a risk of fire. Part Replacement Only use genuine Xerox approved spare parts or components to maintain compliance with legislation and safety certification. Assembly Precautions Use extreme care during assembly.
- Page 11 This printer uses heat to fuse the toner image to paper. The fuser is very hot. Turn the printer power Off and wait for the fuser to cool before attempting to service the fuser or adjacent components. WorkCentre 3210/3220 Multifunction Printer Service Manual...
- Page 12 When shipping the printer, repack the printer using the original packing material and boxes or a Xerox packaging kit. Instructions for repacking the printer are included in the kit. If you do not have all the original packaging, or are unable to repackage the printer, contact your local Xerox service representative.
-
Page 13: Regulatory Information
Consult the dealer or an experienced radio/television technician for help. Any changes or modifications not expressly approved by Xerox could void the user's authority to operate the equipment. To ensure compliance with Part 15 of the FCC rules, use shielded interface cables. -
Page 14: European Union
European Union The CE mark applied to this product symbolizes Xerox’s declaration of conformity with the following applicable Directives of the European Union as of the dates indicated: December 12, 2006: Council Directive 2006/95/EC as amended. Approximation of the laws of the member states related to low voltage equipment. - Page 15 Proclamations, orders, regulations or appointments, or notices thereof (with intent to falsely cause same to purport to have been printed by the Queens Printer for Canada, or the equivalent printer for a province). WorkCentre 3210/3220 Multifunction Printer Service Manual xiii...
-
Page 16: Fax Regulations
The telephone number provided may not be a 900 number or any other number for which charges exceed local or long distance transmission charges. In order to program this information into your machine, refer to customer documentation and follow the steps provided. WorkCentre 3210/3220 Multifunction Printer Service Manual... - Page 17 If your office has specially wired alarm equipment connected to the telephone line, make sure that the installation of the Xerox equipment does not disable your alarm equipment. If you have any question about what will disable alarm equipment, consult your telephone company or a qualified installer.
- Page 18 (PSTN). However, due to differences between the individual PSTNs provided in different countries, the approval does not, of itself, give an unconditional assurance of successful operation on every PSTN network terminal point. WorkCentre 3210/3220 Multifunction Printer Service Manual...
- Page 19 DTMF signaling provides reliable and faster call setup. Modification of this product, connection to external control software or to external control apparatus not authorized by Xerox, will invalidate its certification. New Zealand Telecom Warning Notice The grant of a Telepermit for any item of terminal equipment indicates only that Telecom has accepted that the item complies with minimum conditions for connection to its network.
- Page 20 For correct operation, total of the RN’s of all devices connected to a single line at any time should not exceed 5. xviii WorkCentre 3210/3220 Multifunction Printer Service Manual...
-
Page 21: Manual Organization
Manual Organization The WorkCentre 3210/3220 Multifunction Printer Service Manual is the primary document used for repairing, maintaining, and troubleshooting the printer. Use this manual as your primary resource for understanding the operational characteristics of the printer and all available options. This manual describes specifications, theory, and the diagnosis and repair of problems occurring in the print engine and attached options. - Page 22 WorkCentre 3210/3220 Multifunction Printer Service Manual...
-
Page 23: Table Of Contents
Clean Drum Page..............1-25 WorkCentre 3210/3220 Multifunction Printer Service Manual... - Page 24 Line Busy................3-29 xxii WorkCentre 3210/3220 Multifunction Printer Service Manual...
- Page 25 Common PostScript Problems ............4-28 WorkCentre 3210/3220 Multifunction Printer Service Manual...
- Page 26 Printer Condition ..............5-41 xxiv WorkCentre 3210/3220 Multifunction Printer Service Manual...
- Page 27 ADF Feed Pad Assembly ............. . . 8-47 WorkCentre 3210/3220 Multifunction Printer Service Manual...
- Page 28 UI PBA................8-115 xxvi WorkCentre 3210/3220 Multifunction Printer Service Manual...
- Page 29 Xerox Supplies and Accessories ........
- Page 30 WorkCentre 3210/3220 Menu Map ........
-
Page 31: General Information
General Information In this chapter... Printer Introduction and Overview Printer Configurations Parts of the Printer Printer Options Maintenance Items Consumables Specifications Print Cartridge Life Diagnostics CentreWare IS Power Save Mode Reports Chapter... -
Page 32: Printer Introduction And Overview
The printer supports PostScript 3 and PCL 6 for Base and Network configurations. The WorkCentre 3210/3220 provides a standard 250-Sheet, input tray. The manual feeder holds 1 sheet. The manual feeder supports specialty media, card stock, and envelopes. The output tray holds 50 sheets facedown. -
Page 33: Printer Configurations
General Information Printer Configurations The WorkCentre 3210/3220 printer is available in two configurations. WorkCentre 3210/3220 Configurations Features Printer Configurations WorkCentre 3210 WorkCentre 3220 Processor and Clock Speed 360 MHz 360 MHz Memory Configuration* 128 MB 128 MB Duplex Unit Standard... -
Page 34: Parts Of The Printer
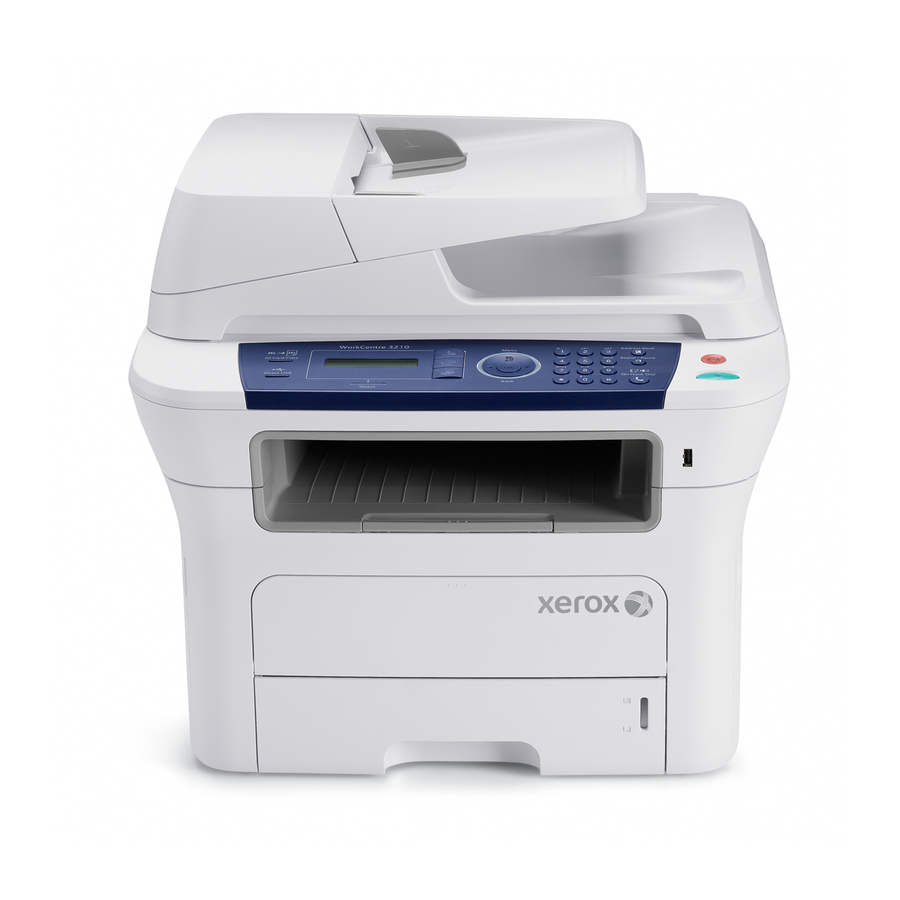
ADF Input Tray Output Support ADF Output Tray Control Panel USB Port ADF Cover Paper Level Indicator Print Cartridge Optional Tray Assembly Manual Feeder with Guides Tray 1 Scanner Lid Manual Tray Document Glass WorkCentre 3210/3220 Multifunction Printer Service Manual... -
Page 35: Rear View
General Information Rear View s3210mfp-082 Telephone Line Connector DIMM Cover Extension Connector Handle Power Switch 15-pin Optional Tray Connection Power Receptacle Ethernet Port Rear Cover USB Port WorkCentre 3210/3220 Multifunction Printer Service Manual... -
Page 36: Network Connection
General Information Network Connection The WorkCentre 3210/3220 supports Ethernet networks. LED State Printer State Active LED Random Blink Normal NPC & Normal packet receive Active LED Regular Blink Normal NPC & No Packet Active LED Off/On Maintenance NPC Initial Error... -
Page 37: Control Panel
Engages the telephone line. Stop/Clear Stops an operation at any time. In Ready mode, clears/ cancels the copy options, such as darkness, document type setting, copy size, and number of copies. Start Starts a job. WorkCentre 3210/3220 Multifunction Printer Service Manual... - Page 38 Flashing Red A minor error has occurred and the printer is waiting for the error to be cleared. The Print Cartridge toner is low. Note Refer to Chapter 4, General Information for additional information. WorkCentre 3210/3220 Multifunction Printer Service Manual...
-
Page 39: Printer Options
General Information Printer Options The WorkCentre 3210/3220 printer options include: Additional RAM (256 MB) Optional Tray Assembly (Tray 2) Additional RAM The standard 128 MB memory is soldered on board. The printer features one memory slot that supports an additional 256 MB for a maximum of 384 MB. -
Page 40: Maintenance Items
Print life is based on “typical” office printing with 5% coverage on 24 lb. paper. Print life is not guaranteed and varies depending on usage habits. Tray Feed Pad Fuser ADF Feeder Assembly ADF Rubber Feed Pad s3210mfp-114 1-10 WorkCentre 3210/3220 Multifunction Printer Service Manual... -
Page 41: Consumables
(Customer Replaceable Unit Meter) records toner usage data. When the toner count nears empty, Life End status is displayed to indicate toner empty. Print Cartridge Print Life Standard Capacity 2,000 pages High Capacity 4,000 pages s3210mfp-003 WorkCentre 3210/3220 Multifunction Printer Service Manual 1-11... -
Page 42: Specifications
SuSE 8.2~9.2, Mandriva 2005, 2006, 2007 (32bit/ 64bit), Ubuntu 6.06-7.04, Debian 3.1~4.0 * Assumes a 30 day month of printing. **For Duplex prints, the front and back sides are counted as 2 PV. 1-12 WorkCentre 3210/3220 Multifunction Printer Service Manual... -
Page 43: Print Speed
WorkCentre 3220 Less than 8.5 sec. Memory Specifications Characteristic Specifications Minimum 128 MB on-board Maximum 384 MB Supported RAM Supports up to 384 MB of DDR2 DIMM with one slot for 256 MB. WorkCentre 3210/3220 Multifunction Printer Service Manual 1-13... -
Page 44: Scanning Specifications
Scan to Application Standard Standard Scan to E-mail Standard Scan to E-mail SMTP Protocol Scan to E-mail Local Directories E-mail Address Book Up to 200 entry address book. Maximum message size up to 10MB. 1-14 WorkCentre 3210/3220 Multifunction Printer Service Manual... -
Page 45: Copy Specifications
First Copy Output Time (FCOT) is defined as the time slot when the Start button is pressed until the trailing edge of the first copy is ejected. Mode FCOT (sec.) From Document Glass Less than 11.0 sec. WorkCentre 3210/3220 Multifunction Printer Service Manual 1-15... -
Page 46: Fax Specifications
Send Confirmation Standard Auto Dial List Report/Printout Standard Send Receive Reporting Journal/Printout Standard System Data List Print Out Standard 2 sided Faxing (Duplex) Fax Forward to E-mail LAN Fax Internet Fax Cover Page 1-16 WorkCentre 3210/3220 Multifunction Printer Service Manual... -
Page 47: Environmental Specifications
Average Operation Less than 450 W Less than 450 W In-Rush Current At 25° Cold Start Less than 40 Amp Other Conditions Less than 50 Amp Leakage Current Less than 3.5 mA (UL) WorkCentre 3210/3220 Multifunction Printer Service Manual 1-17... -
Page 48: Warm-Up Time
(Based on 0.0112mm/mm) ±2.5 mm (ADF) / 177.8 mm (Based on 0.0112mm/mm) Registration Left Print Position ± 2.5 mm (±3.0 mm, Duplex) (scanning direction) Top Print Position ± 3.0 mm (±3.0 mm, Duplex) (feeding direction) 1-18 WorkCentre 3210/3220 Multifunction Printer Service Manual... -
Page 49: Physical Dimensions And Clearances
401.3 mm (15.8 in.) Weight 2.6 kg (5.7 lb.) 2.6 kg (5.7 lb.) Minimum Clearances 71.2 cm (28 in.) 10 cm (3.9 in.) 18 cm (7.1 in.) 10 cm 48.3 cm (3.9 in.) (18.8 in.) s3210mfp-009 WorkCentre 3210/3220 Multifunction Printer Service Manual 1-19... -
Page 50: Mounting Surface Specifications
2 mm (0.08 inch). Failure to adhere to the specified mounting specifications will void all guarantees of print-quality and/or performance. 2 mm 2 mm (0.08 in.) (0.08 in.) s3210mfp-083 1-20 WorkCentre 3210/3220 Multifunction Printer Service Manual... -
Page 51: Media And Tray Specifications
General Information Media and Tray Specifications These tables list supported media for the WorkCentre 3210/3220. Supported Paper Type and Size Manual Tray Duplex (**) Paper Type Paper Size Dimension Feeder 1, 2 Plain Paper Letter 8.5 x 11 in. (216 x 279 mm) Legal 8.5 x 14 in. - Page 52 C6 Envelope 4.49 x 6.38 in. (114 x 162 mm) DL Envelope 4.33 x 8.66 in. (110 x 220 mm) Note: Do not use envelopes with hot melt glue, windows, or metal clasps. 1-22 WorkCentre 3210/3220 Multifunction Printer Service Manual...
-
Page 53: Print Cartridge Life
Toner Empty Continues to print until hard stop. Firmware Update The Main Controller Board firmware can be updated by customers and service technicians. Firmware updates are available at www.xerox.com/office/ support. Updated Firmware Windows - via Network (port 9100) Main Controller Board... -
Page 54: Power Save Mode
The Power Save mode setting is accessed through the Control Panel. The Power Save can be set from 1 to 120 minutes. Reports The following reports are available in the WorkCentre 3210/3220 printer. The reports can be printed using the printer’s Control Menu or CentreWare IS. Report... -
Page 55: Supplies Information Report
Page Count information is listed on the Configuration Report. Clean Drum Page The Print Cleaning page is printed when a Cleaning procedure is performed. Refer to “Cleaning the Print Cartridge” on page 7-3 for detailed information. WorkCentre 3210/3220 Multifunction Printer Service Manual 1-25... - Page 56 General Information 1-26 WorkCentre 3210/3220 Multifunction Printer Service Manual...
-
Page 57: Theory Of Operation
Theory of Operation In this chapter... Operational Overview Paper Path Image Input Terminal Image Output Terminal Chapter... -
Page 58: Operational Overview
Theory of Operation Operational Overview The WorkCentre 3210/3220 is a monochrome multifunction printer that uses Laser Unit (LSU) with an electrophotographic process. The printer system consists of one print cartridge which creates the toner image. System Overview The WorkCentre 3210/3220 Multifunction Printer is divided into two main components: the Image Input Terminal (IIT - ADF and Scanner) and the Image Output Terminal (IOT - Print Engine). -
Page 59: Paper Path
The media supplied from the Tray 1, or Tray 2, is transported through the printer as shown in the illustrations below. Media fed from the manual feed slot enters the media path at the registration roller. Fuser Laser Unit Print Cartridge Duplex Unit Tray 2 s3210mfp-112 WorkCentre 3210/3220 Multifunction Printer Service Manual... -
Page 60: Paper Feeding
The paper path has an anti-static connection to ground to eliminate problems due to static charge on the paper. Tray Feed Pad s3210mfp-244 WorkCentre 3210/3220 Multifunction Printer Service Manual... - Page 61 The manual feeder is used to hold non-standard or custom paper sizes and special media (envelopes, transparencies, etc.). The manual feeder uses a friction pad method to ensure paper is separated and can only hold 1 sheet of paper. s3210mfp-128 WorkCentre 3210/3220 Multifunction Printer Service Manual...
- Page 62 Paper Guide Paper Guide Knock Up P Plate Rear Paper Guide s3210mfp-014 Optional Tray Assembly The Optional Tray Assembly (Tray 2) add a second 250-sheet input tray. Tray 2 has a separate feed mechanism. s3210mfp-002 WorkCentre 3210/3220 Multifunction Printer Service Manual...
- Page 63 Feed Roller (Registration) The Feed Roller arranges paper, transfers paper, detects paper, and removes jam. Feed Roller (top area of the printer) s3210mfp-010 Feed Roller (bottom area of the printer) s3210mfp-080 WorkCentre 3210/3220 Multifunction Printer Service Manual...
- Page 64 The Duplex Unit, available on the WorkCentre 3220 only, uses a side feeding method. When a jam occurs in the front or rear part of the printer, the Duplex Unit can be removed to access the jam area. Duplex Unit s3210mfp-129 WorkCentre 3210/3220 Multifunction Printer Service Manual...
-
Page 65: Image Input Terminal
Automatic Document Feeder (ADF) Scanner Assembly with the Control Panel Automatic Document Feeder The ADF automatically feeds original documents from the ADF input tray. ADF Assembly ADF Hinges Control Panel ADF Connector s3210mfp-130 WorkCentre 3210/3220 Multifunction Printer Service Manual... - Page 66 Theory of Operation ADF Feeder, Feed Pad, and Sensors ADF Feeder Assembly ADF Rubber Feed Pad s3210mfp-237 ADF Exit Sensor Registration Sensor Empty Sensor s3210mfp-245 2-10 WorkCentre 3210/3220 Multifunction Printer Service Manual...
- Page 67 Mechanical connection between the ADF and the scanner portion of the IIT consists of a set of hinges. These hinges allow for the ADF to lift from the document glass to facilitate book copying. WorkCentre 3210/3220 Multifunction Printer Service Manual 2-11...
-
Page 68: Scanner Assembly
The function of this window is to allow the scan head to image an original being fed through the ADF. Control Panel The Control Panel is the user interface with the printer. 2-12 WorkCentre 3210/3220 Multifunction Printer Service Manual... -
Page 69: Image Output Terminal
Pick Up Roller, Feed Rollers, and Duplex Unit. The Drive Unit Assembly consists of the Main Motor and gear set mounted to a support plate. Main Motor: DC 24V Rated RPM: 2170 rpm s3210mfp-134 WorkCentre 3210/3220 Multifunction Printer Service Manual 2-13... -
Page 70: Fuser
Thermostat monitor Fuser operating temperature. Fuser power = 750 Watt ± 5% Fuser s3210mfp-135 Fuser Components Halogen Lamp Heat Roller (inside Heat Roller) Thermostat Pressure Roller (behind Heat Roller) Thermistor Pressure Roller s3210mfp-012 2-14 WorkCentre 3210/3220 Multifunction Printer Service Manual... - Page 71 Thermostat cuts off main power to the lamp. Interlocks disable the Fuser, motors and Laser Unit. Fuser power is cut off when the front cover is opened. Fuser cover temperature is maintained at less than 80° F. WorkCentre 3210/3220 Multifunction Printer Service Manual 2-15...
-
Page 72: Laser Unit
Theory of Operation Laser Unit The Laser Unit is the core part of the WorkCentre 3210/3220 and is controlled by a video controller. The Laser Unit converts video data received from the computer into an electrostatic latent image on the surface of the OPC drum. -
Page 73: Print Cartridge
OPC cleaning blade Management of waste toner: Collects toner using the cleaning blade. OPC drum protecting shutter: No Toner CRUM reader: Identifies whether toner is Xerox branded toner or whether a non-Xerox Print Cartridge is installed. Cleaning Roller Laser Scanning Unit (LSU) 0.32 mW... -
Page 74: Control Panel
The printer’s major electrical components consist of these boards: ADF Control Board Scanner Board Control Panel Board Main Controller Board Power Supply (SMPS) HVPS Scanner Board ADF Control Board Control Panel Board Main Controller Board Power Supply (SMPS) HVPS s3210mfp-138 2-18 WorkCentre 3210/3220 Multifunction Printer Service Manual... - Page 75 Main Fan Interface Network IC Power Supply (SMPS) Ethernet Serial Flash DDR2 SODIMM CHORUS3 Optional Tray NOR Flash EEPROM Outbin Tray Full Sensor Paper Width Sensor Power Supply Fan Main Motor/Registration Clutch/Pick-Up Solenoid s3210mfp-246 WorkCentre 3210/3220 Multifunction Printer Service Manual 2-19...
- Page 76 Supports 4 channel external I/O device, 2 channel DMA DMAC Contains 3 channels HPVC Supports 32 bits AHB Master I/F A4 2400 dpi, A3 1200 dpi addressable Supports 200, 300, 400, 600 dpi Supports 4 channels single/dual beam 2-20 WorkCentre 3210/3220 Multifunction Printer Service Manual...
- Page 77 Step Motor Controller I2C Controller 2 channels I2C bus (SM bus) Slave Device Support (I2C version 2.1) 3 PLLs (for Main/ PVC/ DDR) 1 channel, 10 bits, 2 MSPS 8 channel, 10 bits, 500 KSPS WorkCentre 3210/3220 Multifunction Printer Service Manual 2-21...
- Page 78 The HVPS generates high voltage for the THV/MHV/BIAS and the outputted high voltage is supplied to the toner, Print Cartridge, and Transfer Roller. CN1 Main Controller Board Front Cover Open Switch (SW1) Rear Cover Open Switch (SW2) Supply Developer Varistor s3210mfp-141 2-22 WorkCentre 3210/3220 Multifunction Printer Service Manual...
- Page 79 The (+) transfer voltage is not outputted because the THV PWM is controlled with high. The (-) transfer voltage is outputted because the THV-Enable Signal is controlled with low. The output fluctuation range is large because there is no feedback control and connection resistor. WorkCentre 3210/3220 Multifunction Printer Service Manual 2-23...
- Page 80 Line regulation: under ± 3% (fluctuation input 21.6 V~27.6 V) Load regulation: under ± 3% Output voltage rising time: 50 ms Max Output voltage falling time: 50 ms Max Output control signal (BIAS-PWM): The CPU is HV output when PWM is Low. 2-24 WorkCentre 3210/3220 Multifunction Printer Service Manual...
- Page 81 AC 90 V~135 V AC 180 V~270 V Rated frequency: 50/60 Hz Rated frequency fluctuating range: 47~63 Hz Input current: under 4.0 A/ 2.0 A (when the lamp is Off or under rated load) WorkCentre 3210/3220 Multifunction Printer Service Manual 2-25...
-
Page 82: Fuser Ac Power Control
Triac. When the triac turns Off, the lamp is turned Off. Triac (Q51) feature: 16A-LV model/12A-HV model, 600 V switching Phototriac coupler (PC51) Turn On if current: 15 mA~50 mA (Design: 16 mA) High repetitive peak off state voltage: Min 600 V 2-26 WorkCentre 3210/3220 Multifunction Printer Service Manual... -
Page 83: Sensor Input Circuit
Control Panel. Registration and Duplex Sensing The WorkCentre 3210/3220 uses a single sensor to detect leading-edge registration and duplex transport. The Regi/ Duplex Sensor detects the registration timing and the existence of paper. In ready mode, the sensor is used as an MP sensor. -
Page 84: Driving Circuit
Main Controller Board. The diode protects the driving transistor from the noise pulse, which is created when the solenoid is de-energizing. Main Motor Driving The Drive Unit Assembly driving circuitry is located on the assembly control board containing a driver IC. 2-28 WorkCentre 3210/3220 Multifunction Printer Service Manual... -
Page 85: Fax
Tone detection with three programmable tone detectors Receive dynamic range 0 dBm to -43 dBm for V.17, V.29, V.27 ter and V.21 Channel 2 9 dBm to -43 dBm for V.34 half-duplex Digital speaker output to monitor received signal WorkCentre 3210/3220 Multifunction Printer Service Manual 2-29... - Page 86 LSD to output driver transfer data to SSD. DIB Data forms SSD to LSD by the transformer has differential structure of 180 phase difference between DIBP and DIBN for noise robustness. 2-30 WorkCentre 3210/3220 Multifunction Printer Service Manual...
- Page 87 (condition: Voltage = 40 Vrms, Frequency = 20 Hz) product Margin: over 15 mA False Ring Sound Ring Frequency: 750 Hz + 1020 Hz Ring Interrupt Cycle: On/Off depending on input Ring Signal Cycle. WorkCentre 3210/3220 Multifunction Printer Service Manual 2-31...
-
Page 88: Engine F/W
DUPLEX JAM 0 After the leading edge of the paper passes the Regi Sensor, the leading edge of the paper cannot reach the Feed Sensor in the specified time. 2-32 WorkCentre 3210/3220 Multifunction Printer Service Manual... - Page 89 When the error occurs, the engine stops all functions and keeps it at error state. Lower than 90° C for more than 20 seconds while warming up. WorkCentre 3210/3220 Multifunction Printer Service Manual 2-33...
- Page 90 In case of over heat error, no heat is supplied to the fixing unit. When a specified time is elapsed, the engine detects a present temperature again. If the present temperature is a specified degree lower than the memorized temperature, the error is recovered. 2-34 WorkCentre 3210/3220 Multifunction Printer Service Manual...
- Page 91 Error Description Polygon Motor Error When the polygon motor speed is not steady. H-SYNC Error The Polygon Motor speed is steady, but the H-SYNC is not generated. WorkCentre 3210/3220 Multifunction Printer Service Manual 2-35...
- Page 92 Theory of Operation 2-36 WorkCentre 3210/3220 Multifunction Printer Service Manual...
-
Page 93: Error Messages And Codes
Error Messages and Codes In this chapter... Introduction Servicing Instructions Error Messages and Procedures Jam Errors Tray and Media Errors Print Cartridge Errors Laser Unit Errors USB Read/Write Errors Network Configuration Errors System Errors Status Messages Chapter... -
Page 94: Introduction
ADC1 30 ___________________________________________________________________________________ ENGINE ERROR Memory Full Document Jam BYPASS JAM PAPER JAM-0 PAPER JAM-1 PAPER JAM-2 NO CARTRIDGE LSU ERROR OPEN HEAT ERR HEATING ERR OVER HEAT ___________________________________________________________________________________ Date Error Status Code ___________________________________________________________________________________ WorkCentre 3210/3220 Multifunction Printer Service Manual... -
Page 95: Servicing Instructions
1. Use the Parts List to locate a part number. 2. Use the Disassembly procedures to replace the part. Step 5: Final Checkout 1. Test the printer to be sure you have corrected the initial problem and there are no additional problems present. WorkCentre 3210/3220 Multifunction Printer Service Manual... -
Page 96: Measurement Techniques
Unless otherwise specified, the following voltage tolerances are used within this section: Stated Measured +3.3 VDC +3.135 to +3.465 VDC +5.0 VDC +4.75 to +5.25 VDC +24.0 VDC +21.6 to +26.4 VDC 0.0 VDC Less than +0.5 VDC WorkCentre 3210/3220 Multifunction Printer Service Manual... -
Page 97: Error Messages And Procedures
Embedded Diagnostic Control Firmware HSYNC Horizontal Sync Signal HVPS High Voltage Power Supply Hardware Laser Diode Laser Scanner Unit Main High Voltage (Charge Voltage) Optical Photo Conductor Second Cassette Feeder (Tray 2) Transfer High Voltage WorkCentre 3210/3220 Multifunction Printer Service Manual... -
Page 98: Error Message Summary
Installed Print Cartridge is not Install a genuine Print 3-21 compatible. Cartridge. Toner Empty Print Cartridge near end of life. Replace the cartridge. 3-22 Toner Exhausted Print Cartridge end of life. Replace the cartridge. 3-22 WorkCentre 3210/3220 Multifunction Printer Service Manual... - Page 99 There is a problem on the Check network settings. 3-35 Wrong Config network interface card. IP conflict The IP address is being used by Check the IP address 3-36 another device. and reset it if necessary. WorkCentre 3210/3220 Multifunction Printer Service Manual...
-
Page 100: Jam Errors
Clear the paper path of any jams and paper debris. Clean the paper rollers in the paper tray and tray slot using a slightly damp (water only) lint free cloth. WorkCentre 3210/3220 Multifunction Printer Service Manual... -
Page 101: Paper Jam 0
Wiring and Plug/Jack Map References Main Controller Board, PL1.0.2 Map 2 - Drive Locator Pick Up Roller, PL4.0.26 Map 5 - Main Controller Board Pick Up Solenoid, PL4.0.37 Main Controller Board Feed Sensor, PL4.0.75 Holder Pad, PL7.0.14 WorkCentre 3210/3220 Multifunction Printer Service Manual... -
Page 102: Paper Jam 1
A jam located between the Feed and Exit Sensors inside the printer. s3210mfp-239 Applicable Error Message Paper Jam 1 Initial Actions Check the paper path for obstructions or debris. Cycle printer power. If the problem persists, refer to the following procedure. 3-10 WorkCentre 3210/3220 Multifunction Printer Service Manual... - Page 103 Does the error still occur? (page 8-104). Go to step 5. Check the Main Controller Board for Replace the Complete. correct installation. Reseat the Main Main Controller Controller Board. Board Does the error still occur? (page 8-100). WorkCentre 3210/3220 Multifunction Printer Service Manual 3-11...
-
Page 104: Paper Jam 2
Exit Sensor, PL8.0.37 Troubleshooting Procedure Table Step Actions and Questions Check for media inside the Fuser. Remove the Go to step 2. Is there media in the Fuser? media and clean the Fuser rollers. 3-12 WorkCentre 3210/3220 Multifunction Printer Service Manual... -
Page 105: Document Jam
ADF Feed Roller Pinch Roller s3210mfp-113 Applicable Error Messages Document Jam Initial Actions Check the ADF media path for obstructions or debris. Clean the rollers. If the problem persists, refer to the following procedure. WorkCentre 3210/3220 Multifunction Printer Service Manual 3-13... - Page 106 Go to step 7. Trim or replace Is the Sponge Sheet properly the Sponge installed? Sheet. Reseat the wiring harness connectors Replace the ADF Complete. on the Lower ADF. Assembly Does the error persist? (page 8-31). 3-14 WorkCentre 3210/3220 Multifunction Printer Service Manual...
-
Page 107: Duplex Jam
Go to step 2. Complete. Does the error still occur? Remove the Duplex Unit and clean the Replace the Complete. the rollers and timing belts. Duplex Unit Does the problem persist? (page 8-69). WorkCentre 3210/3220 Multifunction Printer Service Manual 3-15... -
Page 108: Tray And Media Errors
Board (page 8-100). Check the continuity of the connection Repair the Replace the Bin between the Main Controller Board harness. Full Sensor and the Paper Empty Sensor. (page 8-70). Is the harness damaged? 3-16 WorkCentre 3210/3220 Multifunction Printer Service Manual... -
Page 109: Paper Mismatch
Main Controller Board, PL1.0.2 Map 3 - Sensor Locator Main Controller Board Fax Board and Optional Tray Troubleshooting Procedure Table Step Actions and Questions Go to step 2. Go to step 3. Complete. WorkCentre 3210/3220 Multifunction Printer Service Manual 3-17... -
Page 110: Out Bin Full
(page 8-100). Check the continuity of the bin full Repair the Replace the Bin harness connecting the Main harness. Full Sensor Controller Board and Bin Full Sensor. (page 8-70). Is the harness damaged? 3-18 WorkCentre 3210/3220 Multifunction Printer Service Manual... -
Page 111: Print Cartridge Errors
Gently shake the Print Cartridge from side to side five or six times to redistribute toner. s3210mfp-015 Install the Print Cartridge. Close the Front Cover. Cycle system power to clear the message. If the messages persists, replace the Print Cartridge. WorkCentre 3210/3220 Multifunction Printer Service Manual 3-19... -
Page 112: Install Toner
Does the error persist? Check the HV contacts located in the Replace the Repair the frame behind the HVPS. HVPS contacts. Are the contacts installed correctly and (page 8-101). is spring tension adequate? 3-20 WorkCentre 3210/3220 Multifunction Printer Service Manual... -
Page 113: Invalid Toner
Error Messages and Codes Invalid Toner The Print Cartridge is not a genuine Xerox cartridge. Non-Xerox or Third Party Print Cartridges can cause malfunctions, print-quality problems, and jam errors. An option is listed in the menu for “Ignore Toner”. Applicable Error Message... -
Page 114: Toner Empty Or Exhausted
Check for +3.3V at CN20-4. Go to step 5. Replace the Is +3.3V available at CN20-4? Main Controller Board (page 8-100). Replace the Print Cartridge. Replace the Complete. Does the error persist? Main Controller Board (page 8-100). 3-22 WorkCentre 3210/3220 Multifunction Printer Service Manual... -
Page 115: Fuser Errors
Reseat the Fuser connections. Go to step 2. Complete. Does the error still occur? Run the Fuser Temp test from EDC. Go to step 3. Replace the Does the Thermostat operate Thermostat correctly? (page 8-16). WorkCentre 3210/3220 Multifunction Printer Service Manual 3-23... -
Page 116: Laser Unit Errors
Controller Board. Are the connectors secure? Check the Laser Unit installation. Replace the Replace the Reseat the Laser Unit. Laser Unit Main Controller Does the error still occur? (page 8-95). Board (page 8-100). 3-24 WorkCentre 3210/3220 Multifunction Printer Service Manual... -
Page 117: Fax Errors
DSL Performance varies based on the quality and configuration of the specific site and equipment. Reduce transmission speed. The WorkCentre 3210/3220 uses 33.6 kbps by default. Some phone lines and older Fax machines do not support these speeds. -
Page 118: Fax Communication Error
Replace the Fax Complete. Does the error persist? Board (page 8-106). Check the connection (CN8) between Replace the Reseat the the Fax and Main Controller Boards. Main Controller connections. Are connections secure? Board (page 8-100). 3-26 WorkCentre 3210/3220 Multifunction Printer Service Manual... -
Page 119: Memory Full
Check the ADF connection CN5 to the Go to step 5. Connect the Main Controller Board. harness. Is the connection secure? Replace the Main Controller Board Replace the Complete. (page 8-100). Platen Assy Does the error persist? (page 8-48). WorkCentre 3210/3220 Multifunction Printer Service Manual 3-27... -
Page 120: No Answer
Reseat the the Fax and Main Controller Boards. connections. Are connections secure? Check the speaker connection on the Replace the Reseat the Fax Board. Main Controller connection. Is the connection secure? Board (page 8-100). 3-28 WorkCentre 3210/3220 Multifunction Printer Service Manual... -
Page 121: Line Busy
Fax and Main Controller Boards. connections. Are connections secure? Check the speaker connection on the Replace the Reseat the Fax Board. Main Controller speaker Is the connection secure? Board connection. (page 8-100). WorkCentre 3210/3220 Multifunction Printer Service Manual 3-29... -
Page 122: Usb Read/Write Errors
If the problem persists, follow the procedure below. Troubleshooting Reference Table Applicable Parts Wiring and Plug/Jack Map References Main Controller Board, PL1.0.2 Map 5 - Main Controller Board USB Host Board, PL6.3.1.11 Laser Unit and I/O UI Assembly, PL 6.4.1 3-30 WorkCentre 3210/3220 Multifunction Printer Service Manual... -
Page 123: System Errors
If the problem persists, refer to the following procedure. Troubleshooting Reference Table Applicable Parts Wiring and Plug/Jack Map References Main Controller Board, PL1.0.2 Map 2 - Drive Locator Drive Unit Assy, PL5.0.0 Map 5 - Main Controller Board Main Controller Board WorkCentre 3210/3220 Multifunction Printer Service Manual 3-31... - Page 124 Complete. Does the error persist? Main Controller Board (page 8-100). Check for +24V at CN16-1. Replace the Replace the Is +24V present at CN16-1? Main Controller Power Supply Board (page 8-104). (page 8-100). 3-32 WorkCentre 3210/3220 Multifunction Printer Service Manual...
-
Page 125: Fuser Fan Locked
Complete. Does the error persist? Main Controller Board (page 8-100). Check for +5V at CN16-14. Replace the Replace the Is +5V present at CN16-14? Main Controller Power Supply Board (page 8-104). (page 8-100). WorkCentre 3210/3220 Multifunction Printer Service Manual 3-33... -
Page 126: Door Open
Does the display change from Open to (page 8-101). Close when the cover is closed? Reseat the Main Controller Board Replace the Complete. connection to the HVPS CN10. Main Controller Does the error persist? Board (page 8-100). 3-34 WorkCentre 3210/3220 Multifunction Printer Service Manual... -
Page 127: Network Configuration Errors
Print a Network Configuration report. Go to step 4. Correct printer Are the TCP/IP settings correct? settings. Check server configuration. Go to step 5. Correct server Is the server configured to accept settings. incoming data? WorkCentre 3210/3220 Multifunction Printer Service Manual 3-35... -
Page 128: Ip Conflict
Troubleshooting Procedure Table Step Actions and Questions Check the TCP/IP Address stored in Advise the Enter the the printer’s NVM. customer of the correct IP Is the address correct for the printer? address conflict. address. 3-36 WorkCentre 3210/3220 Multifunction Printer Service Manual... -
Page 129: Status Messages
Operation Not In the Add Page/Cancel Job Check for any scheduled jobs. Assigned operation, but there are no jobs stored. Scanner locked The scanner module is locked Unlock the scanner and press Stop/ Clear. WorkCentre 3210/3220 Multifunction Printer Service Manual 3-37... - Page 130 Print Cartridge is near empty. Agitate the cartridge. Updating Data This message appears when Do not turn power Off. Please Wait... there is a change in the system setting or during back up. 3-38 WorkCentre 3210/3220 Multifunction Printer Service Manual...
-
Page 131: General Troubleshooting
General Troubleshooting In this chapter... Introduction Embedded Diagnostic Control Mode Tech Mode Status LED Inoperable Printer Troubleshooting Power Supply Troubleshooting USB Port Testing Operating System and Application Problems Chapter... -
Page 132: Introduction
Press OK after On appears on the display to run SMPS fan the selected Fan for 10 seconds. LSU Fan Clutch Test Pick Up Clutch Press OK after On appears on the display to Regi Clutch activate the selected clutch for 3 seconds. WorkCentre 3210/3220 Multifunction Printer Service Manual... -
Page 133: Tech Mode
Data Setup, Machine Test, and Report. Entering Tech Mode To enter Tech mode, pressthese keys in sequence Menu Menu s3210mfp-257 The LCD displays ‘Tech Mode, Tech Menu, indicating the machine has entered service (tech) mode. WorkCentre 3210/3220 Multifunction Printer Service Manual... -
Page 134: Tech Mode Menu
Pattern-1 Pattern Test Pattern-2 Shading Test Shading & Print Pattern-3 Print Pattern-4 Restart Machine Pattern-5 Pattern-6 Report Pattern-7 Pattern-8 All Report Protocol Configuration Supplies Info Error Info Usage Page Component Check Service Support s3210mfp-253 WorkCentre 3210/3220 Multifunction Printer Service Manual... -
Page 135: Data Setup
When the error rate exceeds the set value, the Baud rate automatically adjusts to 2400 bps. This ensures that the error rate remains below the set value. You can select rates between 5% and 10%. WorkCentre 3210/3220 Multifunction Printer Service Manual... - Page 136 Belgium Algeria Portugal Pakistan Sweden Norway Bahrain Denmark Sri Lanka Finland Saudi Arabia Switzerland Chile Greece Peru Ireland Argentina Turkey Hungary Romania Bulgaria Czech Clear All Counts This function resets all counts to zero. WorkCentre 3210/3220 Multifunction Printer Service Manual...
-
Page 137: Machine Test
Main Board has malfunctioned. DRAM Test This tests the printer's DRAM. The result appears in the LCD display. If all memory is working normally, the LCD shows DRAM Test OK and amount of installed DRAM. WorkCentre 3210/3220 Multifunction Printer Service Manual... - Page 138 Pattern Test This test prints one or all of the test patterns stored in ROM. These are used to evaluate printer performance and operation. Refer to “Test Prints” on page 5-35 for test print descriptions. WorkCentre 3210/3220 Multifunction Printer Service Manual...
- Page 139 If you select No, the machine returns to Shading & Print. The machine adjusts the shading value, then prints the result. s3210mfp-258 Restart Machine Select Yes to restart the printer immediately. WorkCentre 3210/3220 Multifunction Printer Service Manual...
-
Page 140: Report
If a communication error occurs while the machine is in Tech mode, the protocol list prints automatically. Configuration Report The Configuration Report lists the status and settings of counters, NVM settings, network parameters, and firmware version information. WorkCentre 3210 s3210mfp-256 4-10 WorkCentre 3210/3220 Multifunction Printer Service Manual... -
Page 141: Status Led
The Print Cartridge is empty, or requires replacement. Blinking A non-fatal error has occurred and the printer is waiting for the error to be cleared. The Print Cartridge is low. Order a new Print Cartridge. WorkCentre 3210/3220 Multifunction Printer Service Manual 4-11... -
Page 142: Paper Empty With No Indication
Is +5 V present at CN1. Main Controller Board (page 8-100). Check the continuity of the harness Repair the Replace the UI connecting the Main Controller Board harness. and Control Panel. (page 8-115). Is the harness damaged? 4-12 WorkCentre 3210/3220 Multifunction Printer Service Manual... -
Page 143: No Status Led Error Indication For Front Cover
Check the Main Controller Board signal. Complete. Replace the Is there +24 V across: Main CN10-1, CN10-4, CN10-6, CN10-8, and Controller CN10-10 pins Board Is there +5 V across: (page 8-100). CN10-12, CN10-14, and CN10-16 pins WorkCentre 3210/3220 Multifunction Printer Service Manual 4-13... -
Page 144: Paper Rolled In The Fuser
Go to Step 5. Is the gear damaged? Fuser (page 8-13). Run the Main Mtr tests from EDC. Replace the Replace the Does the main motor operate Fuser Drive Unit correctly? (page 8-13). (page 8-98). 4-14 WorkCentre 3210/3220 Multifunction Printer Service Manual... -
Page 145: Fuser Gear Damaged From Overheating
Go to step 3. Does the error still occur? Power Supply (page 8-104). Reseat connections on the Main Replace the Complete. Controller Board. Main Controller Does the error still occur? Board (page 8-100). WorkCentre 3210/3220 Multifunction Printer Service Manual 4-15... -
Page 146: Paper Rolled On The Opc Drum
Go to step 2. Replace the Does the media meet specifications? media. Check the Print Cartridge for damage Clean, or replace Complete. or debris. the Print Is the Print cartridge damaged or Cartridge. obstructed by debris? 4-16 WorkCentre 3210/3220 Multifunction Printer Service Manual... -
Page 147: Multi Sheet Picks
Pad Holder (page 8-11), if damaged. Check the Pick Up Solenoid for correct Replace the Pick Complete. installation and damage. Reseat the Up Solenoid Pick Up Solenoid. (page 8-79). Does the error still occur? WorkCentre 3210/3220 Multifunction Printer Service Manual 4-17... -
Page 148: Inoperable Printer Troubleshooting
If the regular fonts are not printing, the cable or the printer driver could be defective. Turn the computer and printer Off and back On. Send a print job. If the regular fonts are not printed again, replace the cable. 4-18 WorkCentre 3210/3220 Multifunction Printer Service Manual... -
Page 149: Scanner Malfunction
If the ADF drive operates, but the media does not feed correctly, clean or replace the ADF Feeder Assembly, ADF Feed Pad, and ADF Rubber Feed Pad. Check the ADF Front and Upper Cover for obstructions or damage. Replace the ADF. WorkCentre 3210/3220 Multifunction Printer Service Manual 4-19... -
Page 150: Fax Troubleshooting
The following table lists the most common commands exchanged between Fax machines during a typical data transfer. When reviewing the Protocol Report, trace the exchange of commands to identify irregularities. Commands in parentheses (_) may or may not appear in the report. 4-20 WorkCentre 3210/3220 Multifunction Printer Service Manual... - Page 151 (PPS-EOM) or the receiver (RNR) (PPS-PRI-MPS) or (PPS-PRI-EOP) or (PPS-PRI-EOM) (CRP) (RR) Ask for the status of the receiver: from (RNR) the transmitter to the receiver (ERR) (CRP) Phase E command None WorkCentre 3210/3220 Multifunction Printer Service Manual 4-21...
-
Page 152: No Dial Tone
Replace the Fax Complete. Does the error persist? Board (page 106). Check the speaker connection on the Replace the Reseat the Fax Board. Main Controller speaker Is the connection secure? Board connection. (page 100). 4-22 WorkCentre 3210/3220 Multifunction Printer Service Manual... -
Page 153: Power Supply Troubleshooting
AC wall outlet? output from the outlet. Check the power cord for defects or loose Replace or Replace the connection. reconnect the Power Supply Is the Power Cord loose or defective? Power Cord. (page 8-104). WorkCentre 3210/3220 Multifunction Printer Service Manual 4-23... -
Page 154: No Power
Go to step 7. Complete. Does the error still occur? Check the wiring harness between the Repair the Go to step 8. Power Supply CON3 and Main Controller harness. Board CN16. Is the wiring harness damaged? 4-24 WorkCentre 3210/3220 Multifunction Printer Service Manual... -
Page 155: Usb Port Testing
File menu pull-down. Open the General tab and click the Print Test Page button to generate the test print. If the test page prints, the USB port is functioning normally. WorkCentre 3210/3220 Multifunction Printer Service Manual 4-25... -
Page 156: Operating System And Application Problems
If there is a problem with the printer (out of toner, out of paper, etc...), the job may take a long time to delete as it must wait for a time out. 4-26 WorkCentre 3210/3220 Multifunction Printer Service Manual... -
Page 157: Common Macintosh Problems
“=oras.” If “-oraw” is specified in the command line parameter, then remove it to print properly. For Gimp front-end, select “print” --> “Setup printer” and edit command line parameter in the command item. WorkCentre 3210/3220 Multifunction Printer Service Manual 4-27... -
Page 158: Common Postscript Problems
Macintosh with in the printer driver setting in your printer driver Acrobat Reader 6.0 or may not be matched matches information in higher, colors print with that in Acrobat Acrobat Reader. incorrectly. Reader. 4-28 WorkCentre 3210/3220 Multifunction Printer Service Manual... -
Page 159: Print-Quality Troubleshooting
Print-Quality Troubleshooting In this chapter... Print-Quality Troubleshooting Overview Troubleshooting Print-Quality Checklist Print-Quality Troubleshooting Procedures Test Prints Print-Quality Specifications Chapter... -
Page 160: Print-Quality Troubleshooting Overview
Refer to “Media and Tray Specifications” on page 1-18 for supported and specialty media that have been tested and approved for use in the WorkCentre 3210/3220. Use paper from a fresh ream that is acclimated to room temperature and humidity. - Page 161 ADF feed motion. In this case, clean the feed rollers and validate the thickness of the original document. Any media out of specification should be copied from the platen. If cleaning does not solve the problem, replace the ADF feed components. WorkCentre 3210/3220 Multifunction Printer Service Manual...
-
Page 162: Troubleshooting Print-Quality Checklist
One area where accumulations of dust and debris often occur is the Laser Unit lens. Clean the lens using a dry cotton swab or lint-free cloth. s3210mfp-085 WorkCentre 3210/3220 Multifunction Printer Service Manual... -
Page 163: Check The Transfer Roller
Remove and inspect the Transfer Roller. Replace the roller if excessively worn or damaged. Caution Do not touch the surface of the Transfer Roller. Clean the Transfer Roller surface with a dry cotton swab or lint-free cloth. s3210mfp-149 WorkCentre 3210/3220 Multifunction Printer Service Manual... -
Page 164: Check The Image
Toner spots appear on the page and printing is blurred. Run the Clean Drum procedure from the Maintenance menu. Check the Print Cartridge to make sure that it is installed correctly. Replace the Print Cartridge. Random Spots WorkCentre 3210/3220 Multifunction Printer Service Manual... - Page 165 Printing Preferences. Click the Graphic tab. Under Image Mode, select Text Fuzzy Text Enhancement. Click OK. Part or all the page prints. Check the Print Cartridge to make sure it is installed correctly. Partial Band WorkCentre 3210/3220 Multifunction Printer Service Manual...
- Page 166 Printing on both ends of the transparencies is faded. This occurs when the printer is operating at a location where relative humidity reaches 85° or more. Adjust the humidity or relocate the printer to an appropriate environment. Light Print on Transparency WorkCentre 3210/3220 Multifunction Printer Service Manual...
-
Page 167: Print-Quality Troubleshooting Procedures
Incorrect magnification when copying with the ADF 5-30 Magnification feeding. Lines or Streaks There are lines or streaks on copies from the ADF. 5-31 from ADF Spots from ADF There are spots on copies from the ADF. 5-32 WorkCentre 3210/3220 Multifunction Printer Service Manual... -
Page 168: Repeating Defects
Heat Roller 77.8 mm Black spots or Fuser PL8.0.0 (3.05 in) bands 7-1 Large Pressure 62.8 mm Background Fuser PL8.0.0 Roller (2.47 in) 7-2 Small Pressure 37.7 mm Background Fuser PL8.0.0 Roller (1.48 in) 5-10 WorkCentre 3210/3220 Multifunction Printer Service Manual... -
Page 169: Light Or Undertone Print
Clean the inside Go to step 5. Is there toner spilled inside? of the printer. Check the HVPS installation. Reseat Complete. Replace the the HVPS if necessary (8-64). HVPS (8-64). Does the image quality improve? WorkCentre 3210/3220 Multifunction Printer Service Manual 5-11... -
Page 170: Black Print
HVPS (8-64). Go to step 4. Does the error still occur? Replace the Complete. Laser Unit (8-57). Go to step 5. Does the error still occur? Replace the Complete. Main Controller Board (8-62). 5-12 WorkCentre 3210/3220 Multifunction Printer Service Manual... -
Page 171: Uneven Density
Check the Print Cartridge. Replace the Go to step 3. Is the Print Cartridge empty? Print Cartridge (8-7). Check the Print Cartridge for damage. Replace the Complete. Is the Print Cartridge damaged? Print Cartridge (8-7). WorkCentre 3210/3220 Multifunction Printer Service Manual 5-13... -
Page 172: Background Contamination
Go to step 5. Clean the Does the Transfer Roller rotate Transfer Roller smoothly? bushings. Check the HVPS installation. Reseat Complete. Replace the the HVPS if necessary (8-64). HVPS (8-64). Does the image quality improve? 5-14 WorkCentre 3210/3220 Multifunction Printer Service Manual... - Page 173 Go to step 7. Does the image quality improve? Check the Main Controller Board Complete. Replace the installation. Reseat the Main Controller Main Controller Board (8-62). Board (8-62). Does the image quality improve? WorkCentre 3210/3220 Multifunction Printer Service Manual 5-15...
-
Page 174: Ghosting (2)
Actions and Questions Check that Thick mode is selected Clean HVPS Set to Thick Is the printer set to thick mode? contacts. If Mode on Paper problem Type menu. persists, go to Ghosting (1). 5-16 WorkCentre 3210/3220 Multifunction Printer Service Manual... -
Page 175: Ghosting (1)
Allow the Fuser to cool before starting the procedure. Troubleshooting Procedure Table Step Actions and Questions Check the Fuser. Clean the Fuser. Replace the Is there any contamination on the Fuser (8-13). Fuser? WorkCentre 3210/3220 Multifunction Printer Service Manual 5-17... -
Page 176: Vertical White Line
Go to step 5. Cartridge for damage. Print Cartridge Is the OPC Drum damaged? (8-7). Check the Transfer Roller surface for Replace the Complete. damage. Transfer Roller Is the Transfer Roller surface (8-10). damaged? 5-18 WorkCentre 3210/3220 Multifunction Printer Service Manual... -
Page 177: Vertical Lines Are Curved
Check the Power Supply for the Go to step 2. Replace the correct voltage. Power Supply Does the voltage show +24V? Replace the Laser Unit (). Replace the Complete. Does the error still occur? Main Controller Board (). WorkCentre 3210/3220 Multifunction Printer Service Manual 5-19... -
Page 178: Vertical Black Line Or Band
Replace the Go to step 2. Is the Print Cartridge damaged? Print Cartridge (8-7). Check the Transfer Roller surface for Replace the Complete. damage. Transfer Roller Is the Transfer Roller surface (8-10). damaged? 5-20 WorkCentre 3210/3220 Multifunction Printer Service Manual... -
Page 179: Horizontal Black Line And Band
Charge roller = 26.7mm Supply roller = 47.1mm Develop roller = 35.2mm Transfer roller = 47mm Check the right side OPC Drum gear Replace the Complete. for damage. Print Cartridge Is the Gear damaged? (8-7). WorkCentre 3210/3220 Multifunction Printer Service Manual 5-21... -
Page 180: Black/White Spot
Check the Print Cartridge for damage. Replace the Go to step 5. Is the Print Cartridge damaged? Print Cartridge (8-7). Check the Transfer Roller life usage. Replace the Complete. Is the Transfer Roller life expired? Transfer Roller (8-10). 5-22 WorkCentre 3210/3220 Multifunction Printer Service Manual... -
Page 181: Skew
Does the image quality improve? Complete. Go to step 7. Check the document placement. Replace the ADF Reseat the Is the document placed on the platen Scan Assembly document. correctly? (8-103). WorkCentre 3210/3220 Multifunction Printer Service Manual 5-23... - Page 182 Remove the Go to step 25. Is there any debris in the media path? debris. Replace the Tray 2 Feed Roller (). Replace the Tray Complete. Does the error still occur? 2 Holder Pad. 5-24 WorkCentre 3210/3220 Multifunction Printer Service Manual...
-
Page 183: Stains On The Front Of The Page
Perform Clean Go to step 2. contamination. Drum Is the Transfer Roller surface dirty? procedure. Check the Print Cartridge for damage Replace the Complete. or leakage. Print Cartridge Is the Print Cartridge damaged? (8-7). WorkCentre 3210/3220 Multifunction Printer Service Manual 5-25... -
Page 184: Stains On The Back Of The Page
Replace the Transfer Roller (8-10). Go to Step 3. Complete. Does the error still occur? Disassemble the Fuser and clean the Replace the Complete. pressure roller and thermistor. Fuser (8-13) Does the error still occur? 5-26 WorkCentre 3210/3220 Multifunction Printer Service Manual... -
Page 185: Blank Page (1)
Go to step 2. Complete. Cartridge and inside of the printer. Does the error still occur? Reseat the Main Controller Board Replace the Complete. connections (8-62). Main Controller Does the error still occur? Board (8-62). WorkCentre 3210/3220 Multifunction Printer Service Manual 5-27... -
Page 186: Blank Page (2)
Go to Step 3. Replace the Does the solenoid operate correctly? Pick-Up Solenoid (8-39). Reseat the Main Controller Board Replace the Complete. connections (8-62). Main Controller Does the error still occur? Board (8-62). 5-28 WorkCentre 3210/3220 Multifunction Printer Service Manual... -
Page 187: Incomplete Fusing
Is the Print Cartridge damaged? Cartridge (8-11). Reseat the Fuser. Go to step 6. Complete. Does the problem persist? Replace the Fuser (8-7). Replace the Complete. Does the problem persist? Power Supply (8-100). WorkCentre 3210/3220 Multifunction Printer Service Manual 5-29... -
Page 188: Incorrect Magnification
Is the ADF closed against the Go to step 3. Close the ADF. document glass completely? Cycle system power. Replace the ADF Complete. Does the error still occur? Scan Assembly (8-129). 5-30 WorkCentre 3210/3220 Multifunction Printer Service Manual... -
Page 189: Lines Or Streaks From Adf
Go to step 3. Clean the platen glass using a lint-free cloth. Does the image quality improve? Complete. Go to step 4. Are there scratches on the platen Replace the ADF Complete. glass? Scanner Assembly (8-129). WorkCentre 3210/3220 Multifunction Printer Service Manual 5-31... -
Page 190: Spots From Adf
Check for any debris on the platen Remove clean Go to step 3. glass. the platen glass Is there any debris? using a lint-free cloth. Does the image quality improve? Complete. Replace the ADF Scan Assembly (8-103). 5-32 WorkCentre 3210/3220 Multifunction Printer Service Manual... -
Page 191: Media Damage
Go to step 4. side guide setting to fit the sheet. Does the document feed correctly? Replace the ADF Feed Roller and Complete. Go to step 5. Holder Pad (8-110). Does the document feed correctly? WorkCentre 3210/3220 Multifunction Printer Service Manual 5-33... - Page 192 Remove the Go to step 22. Is there any debris in the media path? debris. Replace the Tray 2 Feed Roller (8-14). Replace the Complete. Does the error still occur? Holder Pad (8-17). 5-34 WorkCentre 3210/3220 Multifunction Printer Service Manual...
-
Page 193: Test Prints
TP 3 and 4 Halftones TP 3 and TP 4 are halftones used to check for dropout (white spot) performance, banding, fixing (fusing) and image density. TP 4 includes a margin line. s3210mfp-200 WorkCentre 3210/3220 Multifunction Printer Service Manual 5-35... -
Page 194: Tp 5 Ghosting
“Repeating Defects” on page 5-10 to determine the component. GHOSTING s3210mfp-201 TP 6 Black Solid Fill TP 6 is used to check for dropout (white spot) performance, banding, and image fixing (fusing). s3210mfp-202 5-36 WorkCentre 3210/3220 Multifunction Printer Service Manual... -
Page 195: Tp 7 Skew
TP 7 Skew TP 7 is used to check image skew on the media. The print provides instructions for calculating skew performance. s3210mfp-203 TP 8 Text TP 8 is used to check text uniformity. s3210mfp-204 WorkCentre 3210/3220 Multifunction Printer Service Manual 5-37... -
Page 196: Drum Cleaning Page
Transfer Roller. When smudges, spots, or streaks appear in the output, run this procedure first. If the print defect persists after several attempts, check the status of the indicated components. Access the Clean Drum procedure from the System Setup > Maintenance menu. 5-38 WorkCentre 3210/3220 Multifunction Printer Service Manual... -
Page 197: Print-Quality Specifications
Left print position (scanning direction): ± 2.5mm (±3.0mm, Duplex) Top print position (feeding direction): ± 3.0mm (±3.0mm, Duplex) Noise System noise specifications from different feed locations. Printing (Tray 1): 50dB Printing (Tray 2): 55dB ADF: 53dB Platen: 52dB WorkCentre 3210/3220 Multifunction Printer Service Manual 5-39... -
Page 198: Image Area
The print-quality is best when quality paper is fed from the tray. The print quality is evaluated on the maximum size of each standard paper. Color Print Quality: Xerox-brand Color XPressions paper Black and White Quality: Xerox-brand 4200 paper 5-40... -
Page 199: Paper Condition
Paper should be fresh and stored in the operating environment for 12 hours before use for printing. Printer Condition The specified print quality is guaranteed with the printer in specified normal environmental condition. WorkCentre 3210/3220 Multifunction Printer Service Manual 5-41... - Page 200 Print-Quality Troubleshooting 5-42 WorkCentre 3210/3220 Multifunction Printer Service Manual...
-
Page 201: Adjustments And Calibrations
Adjustments and Calibrations In this chapter... Adjustments Chapter... -
Page 202: Adjustments
WorkCentre 3210/3220. Note Verify the WorkCentre 3210/3220 printer driver has been installed. Prior to performing the altitude adjustment procedure, determine the altitude location of the printer and the appropriate value to be adjusted for the printer. -
Page 203: Adjusting Altitude
Altitude Adjustment window, from the pull-down menu, select the appropriate altitude information for the printer. Click the Apply button to change the altitude information. Click the Exit button to close the Printer Settings Utility window. WorkCentre 3210/3220 Multifunction Printer Service Manual... - Page 204 Adjustments and Calibrations WorkCentre 3210/3220 Multifunction Printer Service Manual...
-
Page 205: Cleaning And Maintenance
Cleaning and Maintenance In this chapter... Service Maintenance Procedure Cleaning Maintenance Chapter... -
Page 206: Service Maintenance Procedure
Clean the Fans. Ensure that all cover vents are clean and free of obstructions. Remove and clean the paper trays. Clean all rubber rollers with a lint-free cloth slightly dampened with cold water. WorkCentre 3210/3220 Multifunction Printer Service Manual... -
Page 207: Cleaning The Print Cartridge
Do not touch the OPC Drum or expose the Print Cartridge to light for more than 5 minutes. Open the front cover. Use a dry lint-free cloth to wipe any dust and/or spilled toner from the Print Cartridge area. Remove any paper debris from the area. s3210mfp-084 WorkCentre 3210/3220 Multifunction Printer Service Manual... -
Page 208: Cleaning The Laser Unit
Cleaning and Maintenance Cleaning the Laser Unit Open the front cover. Remove the Print Cartridge (page 8-8). Use a dry Q-tip to wipe the long strip of glass of the Laser Unit. s3210mfp-085 WorkCentre 3210/3220 Multifunction Printer Service Manual... -
Page 209: Cleaning The Document Glass
Open the scanner lid. Wipe the document glass using a moistened lint-free cloth. Be sure there are no scratches on the document glass surface. s3210mfp-086 WorkCentre 3210/3220 Multifunction Printer Service Manual... -
Page 210: Printing The Clean Drum Page
Setup. Press the OK button. Browse through the menu to find Maintenance. Press the OK button. Verify that Clean Drum is displayed. Press the OK button. Printing... message is displayed. A Cleaning Drum page is printed. WorkCentre 3210/3220 Multifunction Printer Service Manual... -
Page 211: Maintenance
Firmware Upgrade Procedures There are two methods for upgrading firmware, USB and Network. Down load the applicable files from the Xerox support web site. Unzip (decompress) the files. Be sure your appropriate firmware updating option (Network or USB) is available and connected. - Page 212 Ensure the printer is connected to the computer with a network connection. Verify that you have downloaded the *.fls file. Open a web browser. Enter the printer’s IP address. The CentreWare IS window is displayed. Click the Print button. WorkCentre 3210/3220 Multifunction Printer Service Manual...
- Page 213 The update is complete when the printer initializes and returns to “Ready.” Click OK to close the status window when the firmware upgrade is complete. Print a Configuration page and verify the firmware information. WorkCentre 3210/3220 Multifunction Printer Service Manual...
- Page 214 Cleaning and Maintenance 7-10 WorkCentre 3210/3220 Multifunction Printer Service Manual...
-
Page 215: Service Parts Disassembly
Service Parts Disassembly In this chapter... Overview Maintenance Items and Consumables Automatic Document Feeder Scanner Assembly Covers Duplex Paper Feeder Xerographics Exit Guide Drive Electrical Options Chapter... -
Page 216: Overview
When needed, the orientation of the printer is called out in the procedure as an aid for locating the printer parts. The following illustration identifies the Front, Rear, Left, and Right sides of the printer. Back Left Right Front s3210mfp-090 WorkCentre 3210/3220 Multifunction Printer Service Manual... -
Page 217: Preparation
Many parts are secured by plastic tabs. Do not over flex or force these parts. Do not over torque screws threaded into plastic parts. Warning Unplug the AC power cord from the wall outlet before removing any printer part. WorkCentre 3210/3220 Multifunction Printer Service Manual... -
Page 218: Notations In The Disassembly Text
Bold arrows in an illustration show direction of movement when removing or replacing a component. The notation “(tap, plastic, 10 mm)” or “(metal, 6 mm)” refer to the type of screw being removed. Note Provides information specific to the replacement of parts or assemblies. WorkCentre 3210/3220 Multifunction Printer Service Manual... -
Page 219: Fastener Types
Always use the correct type and size screw and properly align the screw to prevent damaging the tapped holes. Do not use excessive force to remove or install either a screw or a printer part. WorkCentre 3210/3220 Multifunction Printer Service Manual... -
Page 220: Maintenance Items And Consumables
Feeder Pad. Consumable item includes the Print Cartridge. Transfer Roller PL1.0.11 Caution Do not touch the surface of the Transfer Roller. Remove the Print Cartridge (page 8-8). Push the Transfer Roller holder forward to release the Transfer Roller. s3210mfp-020 WorkCentre 3210/3220 Multifunction Printer Service Manual... - Page 221 Slide the Transfer Roller toward the right side to release the Roller from the left holder and carefully lift the Transfer Roller up. Remove the Transfer Roller. s3210mfp-149 Replacement Note Do not touch the sponge area of the Transfer Roller during installation. WorkCentre 3210/3220 Multifunction Printer Service Manual...
-
Page 222: Print Cartridge
Do not touch the OPC drum or expose the Print Cartridge to light for more than 5 minutes. Open the front cover. Push the Print Cartridge handle upward and pull the Print Cartridge out from the printer. s3210mfp-087 WorkCentre 3210/3220 Multifunction Printer Service Manual... -
Page 223: Pick Up Roll
Do not over flex the tab. This will prevent the pick up idle from resting securely after installation. Release the pick up idle latch from the pick up shaft. s3210mfp-021 Slide the pick up idle toward the left side pass the groove on the shaft. Notch s3210mfp-022 WorkCentre 3210/3220 Multifunction Printer Service Manual... - Page 224 Slide the pick up stopper toward the left side away from the pick up housing. Rotate the pick up rubber and slide it out away from the shaft. Remove the Pick Up Roll. s3210mfp-023 8-10 WorkCentre 3210/3220 Multifunction Printer Service Manual...
-
Page 225: Tray Feed Pad Assembly
Press the Tray Feed Pad to the left and right to release the notches on the left and right sides. Notches s3210mfp-016 Apply pressure on the lift plate while pressing the white tab to release the lift plate. s3210mfp-017 WorkCentre 3210/3220 Multifunction Printer Service Manual 8-11... - Page 226 While holding the Tray Feed Pad, use a flat tip screwdriver to pry the Tray Feed Pad notch up from the tray. Remove the Tray Feed Pad from the tray. s3210mfp-019 8-12 WorkCentre 3210/3220 Multifunction Printer Service Manual...
-
Page 227: Fuser
Allow the Fuser to cool before performing this procedure. Remove the Duplex Unit (page 8-69). Remove the Rear Cover (page 8-61). Remove the Rear Guide Unit (page 8-97). Disconnect the wiring harness connector CN53. CN53 s3210mfp-236 WorkCentre 3210/3220 Multifunction Printer Service Manual 8-13... - Page 228 Service Parts Disassembly Remove 4 screws (12 mm, silver) that secure the Fuser. Pull the Fuser out from the printer. 110V s3210mfp-025 8-14 WorkCentre 3210/3220 Multifunction Printer Service Manual...
-
Page 229: Thermistor
Remove 2 screws (12 mm. silver) that secure the junction block. Release the wiring harness from the retainer. Pull the junction block forward and disconnect the wiring harness connector CN45. Remove the Thermistor. CN45 CN44 s3210mfp-026 WorkCentre 3210/3220 Multifunction Printer Service Manual 8-15... -
Page 230: Thermostat
Remove 2 screws (10 mm, black) that secure the Thermostat. Lift the Thermostat away from the fuser cover. Disconnect the wiring harness connectors CN49 & CN50 from the Thermostat. Remove the Thermostat. CN49 CN50 s3210mfp-027 8-16 WorkCentre 3210/3220 Multifunction Printer Service Manual... -
Page 231: Heat Roller
Remove the Fuser (page 8-13). Caution Do not apply too much pressure while releasing the tab in the following step to prevent damaging the lamp cap. Release the tab and remove the right lamp cap. s3210mfp-028 WorkCentre 3210/3220 Multifunction Printer Service Manual 8-17... - Page 232 Service Parts Disassembly Release the tab and remove the left lamp cap. s3210mfp-029 Unhook the left and right springs that secure the fuser frame and the fuser cover. s3210mfp-030 8-18 WorkCentre 3210/3220 Multifunction Printer Service Manual...
- Page 233 Hold the halogen lamp by the ends so there is no transfer of oil from the hands onto the lamp, which could damage the lamp. Slide the halogen lamp out away from the Heat Roller. s3210mfp-033 WorkCentre 3210/3220 Multifunction Printer Service Manual 8-19...
- Page 234 Service Parts Disassembly Replacement Note Be sure the bushings are placed in the correct position. Right Bushing s3210mfp-034 Left Bushing s3210mfp-035 8-20 WorkCentre 3210/3220 Multifunction Printer Service Manual...
-
Page 235: Large Pressure Roller
Allow the Fuser to cool before performing this procedure. Remove the Fuser (page 8-13). Caution Do not apply too much pressure while releasing the tab to prevent damaging the lamp cap. Release the tab and remove the right lamp cap. s3210mfp-028 WorkCentre 3210/3220 Multifunction Printer Service Manual 8-21... - Page 236 Service Parts Disassembly Release the tab and remove the left lamp cap. s3210mfp-029 Unhook the left and right springs that secure the fuser frame and the fuser cover. s3210mfp-030 8-22 WorkCentre 3210/3220 Multifunction Printer Service Manual...
- Page 237 On the wide open side of the fuser frame, slide the Large Pressure Roller out from the fuser frame. On the small open side of the fuser frame, slide the Large Pressure Roller out from the bushing. s3210mfp-036 WorkCentre 3210/3220 Multifunction Printer Service Manual 8-23...
-
Page 238: Small Pressure Roller
Allow the Fuser to cool before performing this procedure. Remove the Fuser (page 8-13). Caution Do not apply too much pressure while releasing the tab to prevent damaging the lamp cap. Release the tab and remove the right lamp cap. s3210mfp-028 8-24 WorkCentre 3210/3220 Multifunction Printer Service Manual... - Page 239 Service Parts Disassembly Release the tab and remove the left lamp cap. s3210mfp-029 Unhook the left and right springs that secure the fuser frame and the fuser cover. s3210mfp-030 WorkCentre 3210/3220 Multifunction Printer Service Manual 8-25...
- Page 240 Repeat steps 5-6 for the other jam link lever. s3210mfp-223 Slide the Small Pressure Roller together with the bushings and the springs away from the fuser frame. Remove the Small Pressure Roller. s3210mfp-037 8-26 WorkCentre 3210/3220 Multifunction Printer Service Manual...
-
Page 241: Halogen Lamp
Allow the Fuser to cool before performing this procedure. Remove the Fuser (page 8-13). Caution Do not apply too much pressure while releasing the tab to prevent damaging the lamp cap. Release the tab and remove the right lamp cap. s3210mfp-028 WorkCentre 3210/3220 Multifunction Printer Service Manual 8-27... - Page 242 Service Parts Disassembly Release the tab and remove the left lamp cap. s3210mfp-029 Unhook the left and right springs that secure the fuser frame and the fuser cover. s3210mfp-030 8-28 WorkCentre 3210/3220 Multifunction Printer Service Manual...
- Page 243 Hold the Halogen Lamp by the ends so there is no transfer of oil from the hands onto the lamp, which could damage the Lamp. Slide the Halogen Lamp out away from the heat roller. s3210mfp-033 WorkCentre 3210/3220 Multifunction Printer Service Manual 8-29...
- Page 244 Service Parts Disassembly Replacement Note Be sure the Bushings are placed in the correct position. Right Bushing s3210mfp-034 Left Bushing s3210mfp-035 8-30 WorkCentre 3210/3220 Multifunction Printer Service Manual...
-
Page 245: Automatic Document Feeder
Service Parts Disassembly Automatic Document Feeder Automatic Document Feeder PL6.1.0 Open the Automatic Document Feeder (ADF). Remove the ADF cable cover. Disconnect the ADF cable. s3210mfp-151 WorkCentre 3210/3220 Multifunction Printer Service Manual 8-31... - Page 246 Service Parts Disassembly Open, then lift the ADF while tilting it toward the rear and releasing the latches. Remove ADF from the printer. s3210mfp-153 8-32 WorkCentre 3210/3220 Multifunction Printer Service Manual...
- Page 247 Service Parts Disassembly Replacement Note Be sure to tilt the ADF toward the rear of the printer in order to insert the latches into the slots on the Scanner. s3210mfp-222 WorkCentre 3210/3220 Multifunction Printer Service Manual 8-33...
-
Page 248: Adf Motor
Remove the ADF Stacker (page 8-43). Remove the Upper ADF (page 8-40). Remove the Lower ADF (page 8-36). Disconnect the wiring harness connector CN2. Remove 1 screw (12 mm, silver) that secures the ground wire. s3210mfp-167 8-34 WorkCentre 3210/3220 Multifunction Printer Service Manual... - Page 249 Service Parts Disassembly Remove 4 screws (12 mm, silver) that secure the ADF Motor. Remove the ADF Motor. s3210mfp-164 WorkCentre 3210/3220 Multifunction Printer Service Manual 8-35...
-
Page 250: Lower Adf
Open the ADF cover. Pull the ADF cover toward the rear to release the notch from the ADF and slide the ADF cover toward the right side to release the notch on the left side. s3210mfp-161 8-36 WorkCentre 3210/3220 Multifunction Printer Service Manual... - Page 251 Push the upper ADF toward the left to release the Lower ADF from the hook and lift the Lower ADF while routing the cable through the hole on the platen cover. Hole Hook s3210mfp-163 Lift the Lower ADF from the platen cover. s3210mfp-162 WorkCentre 3210/3220 Multifunction Printer Service Manual 8-37...
- Page 252 Service Parts Disassembly Disconnect the 2 wiring harness connectors CN1 and CN2 from the ADF board. s3210mfp-168 8-38 WorkCentre 3210/3220 Multifunction Printer Service Manual...
-
Page 253: Adf Feeder Assembly
Open the ADF cover. Turn the bushing upward to release the ADF Feeder Assembly from the Upper ADF. Lift and slide the ADF Feeder Assembly toward the right side. Remove the ADF Feeder Assembly. s3210mfp-146 WorkCentre 3210/3220 Multifunction Printer Service Manual 8-39... -
Page 254: Upper Adf
Upper ADF PL6.1.7 Remove the ADF (page 8-31). Turn the ADF over with the bottom side facing upward. Remove 4 screws (12 mm, silver) that secure the ADF stacker and lower ADF. s3210mfp-155 8-40 WorkCentre 3210/3220 Multifunction Printer Service Manual... - Page 255 Open the ADF cover. Remove 2 screws (12 mm, silver) that secure the Upper ADF. Push the Upper ADF toward the left to release the 2 latches. Lift and remove the Upper ADF. Latch Locations s3210mfp-157 WorkCentre 3210/3220 Multifunction Printer Service Manual 8-41...
-
Page 256: Platen Cover
Push the lower ADF toward the left to release the lower ADF from the hook and lift the lower ADF while routing the cable through the hole on the Platen Cover. Hole Hook s3210mfp-163 Remove the lower ADF from the Platen Cover. s3210mfp-226 8-42 WorkCentre 3210/3220 Multifunction Printer Service Manual... -
Page 257: Adf Stacker
Remove 2 screws (12 mm, silver) that secure the ADF Stacker. s3210mfp-154 Turn the ADF over with the top side facing upward. Open the ADF cover. Lift and remove the ADF Stacker. s3210mfp-156 WorkCentre 3210/3220 Multifunction Printer Service Manual 8-43... -
Page 258: Platen Cover Hinge
PL6.2.2 Remove the ADF (page 8-31). Turn the ADF over with the bottom facing upward. Remove 3 screws (12 mm, silver) that secure the Platen Cover Hinge. Remove the Platen Cover Hinge. s3210mfp-251 8-44 WorkCentre 3210/3220 Multifunction Printer Service Manual... -
Page 259: Adf Idle Shaft/ Adf Feed Roller
PL6.2.3/ PL6.2.4 Remove the ADF (page 8-31). Remove the ADF Platen Cover (page 8-42). Pry the Shaft out from the ADF platen cover. Remove the ADF Feed Roller. Idle Shafts Feed Rollers s3210mfp-170 WorkCentre 3210/3220 Multifunction Printer Service Manual 8-45... -
Page 260: Adf Pinch Roll
Service Parts Disassembly ADF Pinch Roll PL6.1.5 Remove the ADF (page 8-31). Remove the Platen Cover (page 8-42). Pry the roller shaft out from the platen cover. Remove the ADF Pinch Roll. s3210mfp-171 8-46 WorkCentre 3210/3220 Multifunction Printer Service Manual... -
Page 261: Adf Feed Pad Assembly
Pry the ADF Feed Pad Assembly upward toward the right side. Press the left and right sides of the ADF Feed Pad Assembly inward to release it from the upper ADF. Remove the ADF Feed Pad Assembly. s3210mfp-169 WorkCentre 3210/3220 Multifunction Printer Service Manual 8-47... -
Page 262: Scanner Assembly
Service Parts Disassembly Scanner Assembly Platen Assembly PL6.0.3 Remove the ADF (page 8-31). Remove the Right Cover (page 8-62). Remove 2 screws (12 mm, silver) that secure the Platen Assembly. s3210mfp-159 8-48 WorkCentre 3210/3220 Multifunction Printer Service Manual... - Page 263 Remove 1 screw (12 mm, silver) that secures the ground wire. CN22 USB Connector Ground Screw s3210mfp-160 Push the Platen Assembly toward the rear to release the 2 tabs. Lift and remove the Platen Assembly. s3210mfp-221 WorkCentre 3210/3220 Multifunction Printer Service Manual 8-49...
-
Page 264: Contact Image Sensor
Remove the Upper Platen (page 8-57). Disconnect the ribbon cable. Tilt the sensor bracket to release the Contact Image Sensor from the bracket. s3210mfp-182 Note Be careful not to lose the springs. s3210mfp-183 8-50 WorkCentre 3210/3220 Multifunction Printer Service Manual... -
Page 265: Timing Belt
Release the sensor and bracket from the scan unit. Turn the sensor and bracket over with the Belt on the top side. Release the clip that secures the Belt. Remove the clip. Remove the Belt from the bracket. s3210mfp-179 WorkCentre 3210/3220 Multifunction Printer Service Manual 8-51... - Page 266 Service Parts Disassembly Replacement Note Be sure to secure the Belt with the clip. s3210mfp-180 Be sure to secure the Belt to the rollers. s3210mfp-181 8-52 WorkCentre 3210/3220 Multifunction Printer Service Manual...
-
Page 267: Sensor
Service Parts Disassembly Sensor PL6.3.1-10-9 Remove the Upper Platen (page 8-57). Disconnect the wiring harness connector CN1. Release the Sensor from the lower scan frame and remove the Sensor. s3210mfp-174 WorkCentre 3210/3220 Multifunction Printer Service Manual 8-53... -
Page 268: Scan Drive Unit
Disconnect the wiring harness connector CN3 from the Main Controller Board. s3210mfp-231 Remove the Control Panel (page 8-67). Remove the Upper Platen (page 8-57). Remove 4 screws (12 mm, silver) that secure the lower scan frame. s3210mfp-175 8-54 WorkCentre 3210/3220 Multifunction Printer Service Manual... - Page 269 Service Parts Disassembly Turn the lower scan frame over. Remove 3 screws (12 mm, silver) that secure the Motor. Remove the Motor. s3210mfp-184 WorkCentre 3210/3220 Multifunction Printer Service Manual 8-55...
-
Page 270: Usb Host Pba
USB Host PBA PL6.3.1-11 Remove the Control Panel (page 8-67). Disconnect the USB Host PBA Cable. Remove 1 screw (12 mm, silver) that secures the USB Host PBA. Remove the USB Host PBA. s3210mfp-173 8-56 WorkCentre 3210/3220 Multifunction Printer Service Manual... -
Page 271: Upper Platen
Remove the Control Panel (page 8-114). Remove 4 screws (12 mm, silver) that secure the Upper Platen. Pry the Upper Platen to release the 4 latches. Lift and remove the Upper Platen. Latches Latches s3210mfp-172 WorkCentre 3210/3220 Multifunction Printer Service Manual 8-57... -
Page 272: Covers
Open the Front Cover. Carefully press the left or right latch toward the center to release the Front Cover from the notch. Slide the Front Cover out at angle and remove the Front Cover. s3210mfp-234 8-58 WorkCentre 3210/3220 Multifunction Printer Service Manual... -
Page 273: Left Cover
Remove the Rear Cover (page 8-61). Pry the bottom rear of the Left Cover to release the 3 bosses on the bottom of the cover. Slide the Left Cover out and remove the Left Cover. s3210mfp-121 WorkCentre 3210/3220 Multifunction Printer Service Manual 8-59... - Page 274 Place the front side of the Left Cover at an angle to secure the latch of the Left Cover to the notch on the printer frame while sliding the Left Cover toward the printer. s3210mfp-185 8-60 WorkCentre 3210/3220 Multifunction Printer Service Manual...
-
Page 275: Rear Cover
Remove the Duplex Unit (page 8-69). Open the Rear Cover. Press the Rear Cover toward one side to release the notch from the printer frame. Slide the Rear Cover out and remove the Rear Cover. s3210mfp-186 WorkCentre 3210/3220 Multifunction Printer Service Manual 8-61... -
Page 276: Right Cover
Right Cover PL2.0.4 Remove the Front Cover (page 8-58). Remove the Duplex Unit (page 8-69). Remove the Rear Cover (page 8-61). Remove 1 screw (12 mm, silver) that secures the Right Cover. s3210mfp-235 8-62 WorkCentre 3210/3220 Multifunction Printer Service Manual... - Page 277 Right Cover. Disconnect the wiring harness connector CN11. Slide the Right Cover outward at angle and remove the Right Cover. CN11 s3210mfp-088 WorkCentre 3210/3220 Multifunction Printer Service Manual 8-63...
- Page 278 Right Cover at an angle to secure the latch of the Right Cover to the notch on the printer frame while sliding the Right Cover toward the printer. s3210mfp-227 8-64 WorkCentre 3210/3220 Multifunction Printer Service Manual...
-
Page 279: Middle Cover
Service Parts Disassembly Middle Cover PL3.0 Remove the Print Cartridge (page 8-8). Remove the Left Cover (page 8-59). Remove the Scanner Assembly (page 8-48). Disconnect the wiring harness connectors CN4 and CN45. CN45 s3210mfp-188 WorkCentre 3210/3220 Multifunction Printer Service Manual 8-65... - Page 280 Service Parts Disassembly Remove 5 screws (12 mm, silver) that secure the Middle Cover. Lift and remove the Middle Cover. s3210mfp-166 8-66 WorkCentre 3210/3220 Multifunction Printer Service Manual...
-
Page 281: Control Panel
Remove the ADF (page 8-31). Pry the Control Panel bezel and remove the Control Panel bezel. s3210mfp-207 Use a flat tip screwdriver to pry the Control Panel to release the 4 clips. Clip s3210mfp-208 WorkCentre 3210/3220 Multifunction Printer Service Manual 8-67... - Page 282 Service Parts Disassembly Turn the Control Panel over and disconnect the wiring harness connectors CN1, CN4, and CN5. Remove the Control Panel. CN4, CN5 s3210mfp-209 8-68 WorkCentre 3210/3220 Multifunction Printer Service Manual...
-
Page 283: Duplex
Service Parts Disassembly Duplex Duplex Unit PL1.0.13 Pull the Duplex Unit out of the printer. s3210mfp-125 WorkCentre 3210/3220 Multifunction Printer Service Manual 8-69... -
Page 284: Paper Feeder
Paper Feeder Out Bin Full Sensor PL3.0.10 Remove the Scanner Assembly (page 8-48). Disconnect the wiring harness CN41. Release the Bin Full Sensor from the middle cover. Remove the Bin Full Sensor. CN41 s3120mfp-249 8-70 WorkCentre 3210/3220 Multifunction Printer Service Manual... -
Page 285: Registration Clutch
Remove the Drive Unit Assembly (page 8-98). Remove 3 screws (12 mm, silver) that secure the Feed Bracket. Remove the feed bracket. Disconnect the black and gray wiring harness connector CN32. Remove the Registration Clutch. CN32 s3210mfp-038 WorkCentre 3210/3220 Multifunction Printer Service Manual 8-71... - Page 286 Make sure the 2 mounting bosses are seated properly when installing the Bracket. If the Bracket is not correctly installed, paper jam and grinding noise will occur. Be sure to secure the 3 screws in the order (1-3). s3210mfp-218 8-72 WorkCentre 3210/3220 Multifunction Printer Service Manual...
-
Page 287: Feed Roller (Registration Roller)
Remove the Power Supply (page 8-104). Remove the Power Supply Shield (page 8-113). Remove 3 screws that secure the swing bracket. Remove the swing bracket. s3210mfp-040 Remove the swing collar, the duplex gear, and the swing unit. s3210mfp-041 WorkCentre 3210/3220 Multifunction Printer Service Manual 8-73... - Page 288 Remove the gear and 1 screw (12 mm, silver) that secures the regi holder. Remove the regi holder. s3210mfp-042 Remove 2 screws (12 mm, silver) that secure the idle feed shaft. Remove the feed shaft together with the springs and bushings. s3210mfp-043 8-74 WorkCentre 3210/3220 Multifunction Printer Service Manual...
- Page 289 Service Parts Disassembly Use a flat tip screwdriver to release the Feed Roller. s3210mfp-044 WorkCentre 3210/3220 Multifunction Printer Service Manual 8-75...
-
Page 290: Pick Up Gear
Service Parts Disassembly Pick Up Gear PL4.0.21 Remove the Registration Clutch (page 8-71). Remove the Pick Up Gear. s3210mfp-216 8-76 WorkCentre 3210/3220 Multifunction Printer Service Manual... -
Page 291: Exit Idle Gear
Service Parts Disassembly Exit Idle Gear PL4.0.34 Remove the Registration Clutch (page 8-71). Remove the Exit Idle Gears. s3210mfp-215 WorkCentre 3210/3220 Multifunction Printer Service Manual 8-77... -
Page 292: Feed Gear
Service Parts Disassembly Feed Gear PL4.0.35 Remove the Registration Clutch (page 8-71). Remove the Retaining Ring and Feed Gear. s3210mfp-217 8-78 WorkCentre 3210/3220 Multifunction Printer Service Manual... -
Page 293: Pick Up Solenoid
Remove the Drive Unit Assembly (page 8-98). Disconnect the black and gray wiring harness connector CN33. Remove 1 screw (12 mm, silver) that secures the Pick Up Solenoid. Remove the Pick Up Solenoid. CN33 s3210mfp-039 WorkCentre 3210/3220 Multifunction Printer Service Manual 8-79... -
Page 294: Upper Exit Frame
Remove the CRUM Board (page 8-96). Remove the Exit Roller (page 8-81). Remove 4 screws (12 mm, silver) that secure the Upper Exit Frame. Left Side Right Side s3210mfp-224 Lift and remove the Upper Exit Frame. s3210mfp-225 8-80 WorkCentre 3210/3220 Multifunction Printer Service Manual... -
Page 295: Exit Roller
Allow the Fuser to cool before performing this procedure. Remove the Fuser (page 8-13). Remove the Middle Cover (page 8-65). Release the clip on the Exit Roller from the upper exit frame. Remove the Exit Roller. s3210mfp-250 WorkCentre 3210/3220 Multifunction Printer Service Manual 8-81... -
Page 296: Feed Actuator
Remove Tray 1. Remove the Print Cartridge (page 8-8). Remove the Duplex Unit (page 8-69). Place the printer on its right side. Remove 2 screws (12 mm, silver) that secure the duplex path frame. s3210mfp-048 8-82 WorkCentre 3210/3220 Multifunction Printer Service Manual... - Page 297 Service Parts Disassembly Press the latch to release the Feed Actuator from the printer frame. Latch s3210mfp-047 WorkCentre 3210/3220 Multifunction Printer Service Manual 8-83...
-
Page 298: Duplex Actuator
Remove Tray 1. Remove the Print Cartridge (page 8-8). Remove the Duplex Unit (page 8-69). Place the printer on its right side. Remove 2 screws (12 mm, silver) that secure the duplex path frame. s3210mfp-048 8-84 WorkCentre 3210/3220 Multifunction Printer Service Manual... - Page 299 Service Parts Disassembly Press the latch to release the Duplex Actuator from the printer frame. Latch s3210mfp-049 WorkCentre 3210/3220 Multifunction Printer Service Manual 8-85...
-
Page 300: Feed Sensor
Open the front cover. Remove the Print Cartridge (page 8-8). Remove the Duplex Unit (page 8-69). Place the printer on its right side. Remove 2 screws (12 mm, silver) that secure the duplex path frame. s3210mfp-048 8-86 WorkCentre 3210/3220 Multifunction Printer Service Manual... - Page 301 Service Parts Disassembly Remove the Feed Actuator (page 8-82). Disconnect the Feed Sensor wiring harness connector. Remove the Feed Sensor. s3210mfp-050 WorkCentre 3210/3220 Multifunction Printer Service Manual 8-87...
-
Page 302: Paper Empty Sensor
Remove tray 1. Remove the Print Cartridge (page 8-8). Remove the Duplex Unit (page 8-69). Place the printer on its right side. Remove 2 screws (12 mm, silver) that secure the duplex path frame. s3210mfp-048 8-88 WorkCentre 3210/3220 Multifunction Printer Service Manual... - Page 303 Service Parts Disassembly Remove the Duplex Actuator (page 8-84). Disconnect the Paper Empty Sensor wiring harness connector. Remove the Paper Empty Sensor. Latch s3210mfp-051 WorkCentre 3210/3220 Multifunction Printer Service Manual 8-89...
-
Page 304: Feed Roller
Remove 3 screws (12 mm, silver) that secure the feed bracket. Remove the feed bracket. s3210mfp-046 Remove the exit idle gear and the feed gear. Release the Feed Roller from the clips and remove the Feed Roller. s3210mfp-045 8-90 WorkCentre 3210/3220 Multifunction Printer Service Manual... -
Page 305: Empty Actuator
Empty Actuator PL4.0.84 Remove Tray 1. Remove the Print Cartridge (page 8-8). Remove the Scanner Assembly (page 8-48). Remove the Feed Roller (page 8-81). Slide the Empty Actuator out from the feed roller. s3210mfp-052 WorkCentre 3210/3220 Multifunction Printer Service Manual 8-91... -
Page 306: Exit Actuator
Allow the Fuser to cool before performing this procedure. Remove tray 1. Remove the Print Cartridge (page 8-8). Remove the Front Cover (page 8-58). Remove the Fuser (page 8-13). Release the Exit Actuator from the fuser. s3210mfp-053 8-92 WorkCentre 3210/3220 Multifunction Printer Service Manual... -
Page 307: Exit Sensor
Allow the Fuser to cool before performing this procedure. Remove the Print Cartridge (page 8-8). Remove the Front Cover (page 8-58). Remove the Fuser (page 8-13). Release the tab to remove the right lamp cap. s3210mfp-028 WorkCentre 3210/3220 Multifunction Printer Service Manual 8-93... - Page 308 Service Parts Disassembly Release the latch that secures the Exit Sensor and remove the Exit Sensor. s3210mfp-054 8-94 WorkCentre 3210/3220 Multifunction Printer Service Manual...
-
Page 309: Xerographics
Laser Unit PL1.0.12 Remove the Middle Cover (page 8-65). Disconnect the Laser Unit wiring harness CN7 connector. Remove 4 screws (10 mm, silver) that secure the Laser Unit. Remove the Laser Unit. s3210mfp-055 WorkCentre 3210/3220 Multifunction Printer Service Manual 8-95... -
Page 310: Crum Terminal
Service Parts Disassembly CRUM Terminal PL4.0.53 Remove the Laser Unit (page 8-95). Disconnect the CRUM Terminal wiring harness connector. Remove 1 screw (12 mm, silver) that secures the CRUM Terminal. Remove the CRUM Terminal. s3210mfp-056 8-96 WorkCentre 3210/3220 Multifunction Printer Service Manual... -
Page 311: Exit Guide
Open the Rear Guide Unit. Push the Rear Guide Unit toward one side to release the notch from the printer frame. Slide the Rear Guide Unit out and remove the Guide Unit. s3210mfp-126 WorkCentre 3210/3220 Multifunction Printer Service Manual 8-97... -
Page 312: Drive
Remove the Left Cover (page 8-59). Remove 7 screws (12 mm, silver) that secure the Drive Unit Assembly. s3210mfp-057 Disconnect the Drive Unit Assembly wiring harness connector and remove the Drive Unit Assembly. CN19 s3210mfp-058 8-98 WorkCentre 3210/3220 Multifunction Printer Service Manual... - Page 313 Service Parts Disassembly Replacement Note Be sure to secure the 7 screws in the order (1-7). s3210mfp-057 WorkCentre 3210/3220 Multifunction Printer Service Manual 8-99...
-
Page 314: Electrical
Be sure to transfer the memory DIMM from the old Main Controller Board to the new PBA. When installing the Main Controller Board, use pliers to guide the USB cable into the Main Controller Board. 8-100 WorkCentre 3210/3220 Multifunction Printer Service Manual... -
Page 315: High Voltage Power Supply
Service Parts Disassembly High Voltage Power Supply PL1.0.3 Remove the Right Cover (page 8-62). Remove 6 screws (12 mm, silver) that secure the HVPS. s3210mfp-061 WorkCentre 3210/3220 Multifunction Printer Service Manual 8-101... - Page 316 Service Parts Disassembly Disconnect the wiring harness connector CN1. Remove the HVPS. s3210mfp-062 Replacement Note Secure the 6 screws in order (1-6). Be careful not to drop the 4 Contact Springs. s3210mfp-063 8-102 WorkCentre 3210/3220 Multifunction Printer Service Manual...
- Page 317 Make sure the Switch Actuator does not interfere with the Link Cover Rear. 2 pt s3210mfp-064 Rear Link Cover with MEA Unit Guide Rear in Down Position (Correct) s3210mfp-065 Rear Link Cover with MEA Unit Guide Rear in Up Position (Incorrect) s3210mfp-066 WorkCentre 3210/3220 Multifunction Printer Service Manual 8-103...
-
Page 318: Power Supply
Remove the Right Cover (page 8-62). Disconnect the 3 wiring harness connectors CON1, CON2, and CON4. CON2 CON1 CON4 s3210mfp-142 Remove 4 screws (12 mm, silver) that secure the Power Supply. Remove the Power Supply. s3210mfp-187 8-104 WorkCentre 3210/3220 Multifunction Printer Service Manual... - Page 319 Service Parts Disassembly Replacement Note Be sure to attach the Power Supply Insulation to the Power Supply Shield prior to installing the Power Supply. s3210mfp-068 WorkCentre 3210/3220 Multifunction Printer Service Manual 8-105...
-
Page 320: Fax Board
Service Parts Disassembly Fax Board PL1.0.24 Remove the Scanner Assembly (page 8-48). Use a flat tip screwdriver to remove the fax board cover. s3120mfp-176 8-106 WorkCentre 3210/3220 Multifunction Printer Service Manual... - Page 321 Service Parts Disassembly Disconnect the wiring harness connector CN2 and the ribbon cable connector CN1 on the Fax Board. Remove 2 screws that secure the Fax Board. s3210mfp-177 WorkCentre 3210/3220 Multifunction Printer Service Manual 8-107...
-
Page 322: Power Supply Fan
Power Supply Fan PL2.0.4-5 Remove the Right Cover (page 8-62). Disconnect the wiring harness connector CN48. Release the wiring harness from the retainers. Release the Power Supply Fan from the Right Cover. CN48 s3210mfp-228 8-108 WorkCentre 3210/3220 Multifunction Printer Service Manual... -
Page 323: Zenor Pba
Service Parts Disassembly Zenor PBA PL4.0.3 Remove the Middle Cover (page 8-65). Remove the Controller Shield (page 8-112). Remove 1 screw (12 mm, silver) that secures the Zenor PBA. Remove the Zenor PBA. s3210mfp-075 WorkCentre 3210/3220 Multifunction Printer Service Manual 8-109... -
Page 324: Main Fan
Remove the Print Cartridge (page 8-8). Remove the Right Cover (page 8-62). Disconnect the gray and black wiring harness connector CN2. Pull the Fan out away from the printer and remove the Fan. s3210mfp-070 8-110 WorkCentre 3210/3220 Multifunction Printer Service Manual... -
Page 325: Laser Unit Fan
Laser Unit Fan PL4.0.39 Remove the Drive Unit Assembly (page 8-98). Disconnect the gray and black wiring harness connector CN34. Pull the Fan out away from the printer and remove the Fan. CN34 s3210mfp-072 WorkCentre 3210/3220 Multifunction Printer Service Manual 8-111... -
Page 326: Controller Shield
Remove 1 screw (12 mm, silver) and 1 screw (12 mm, black) that secure the Controller Shield. s3210mfp-060 Release the Controller Shield from the frame. Replacement Note Be sure to secure the ground wire between the Controller Shield and the screw. 8-112 WorkCentre 3210/3220 Multifunction Printer Service Manual... -
Page 327: Power Supply Shield
Remove the power supply insulation. Remove 1 screw (12 mm, silver) that secures the ground wire and 2 screws (12 mm, black) securing the Power Supply Shield. Remove the Power Supply Shield. s3210mfp-069 WorkCentre 3210/3220 Multifunction Printer Service Manual 8-113... - Page 328 Service Parts Disassembly Replacement Note Be sure to attach the power supply insulation to the Power Supply Shield. s3210mfp-068 8-114 WorkCentre 3210/3220 Multifunction Printer Service Manual...
-
Page 329: Ui Pba
Service Parts Disassembly UI PBA PL6.4.13 Remove the Control Panel (page 8-67). Remove 4 screws (12 mm, silver) that secure the Control Panel. CN4, CN5 s3210mfp-210 WorkCentre 3210/3220 Multifunction Printer Service Manual 8-115... -
Page 330: Options
Be sure to wear proper ESD protection to prevent from damaging the DIMM. Turn the printer power Off. Unplug all cables from the printer. Open the DIMM Cover. s3210mfp-127 Release the left and right latches that secure the DIMM and remove the DIMM. s3210mfp-189 8-116 WorkCentre 3210/3220 Multifunction Printer Service Manual... -
Page 331: Optional Tray Assembly
Service Parts Disassembly Optional Tray Assembly PL10.0.0 Caution Use care when removing the printer from the Optional Tray Assembly. Disconnect the Optional Feeder cable. s3210mfp-190 WorkCentre 3210/3220 Multifunction Printer Service Manual 8-117... - Page 332 Service Parts Disassembly Carefully lift the printer from the Optional Tray Assembly. 14 kg 31 lb. s3210mfp-191 8-118 WorkCentre 3210/3220 Multifunction Printer Service Manual...
-
Page 333: Left Cover
From the top side of the sheet feeder, pry the Left Cover to release the Cover from the 2 notches. While pressing on the ground, slide the Left Cover out and remove the Left Cover. Latches Ground Bosses s3210mfp-192 WorkCentre 3210/3220 Multifunction Printer Service Manual 8-119... -
Page 334: Motor Housing
Remove the Optional Tray Assembly (page 8-117). Remove the Left Cover (page 8-119). Remove 4 screws (12 mm, silver) that secure the Motor Housing. s3210mfp-193 Slide the Motor Housing away from the Optional Tray Assembly. s3210mfp-229 8-120 WorkCentre 3210/3220 Multifunction Printer Service Manual... - Page 335 Service Parts Disassembly Replacement Note Be sure to secure the ground wire when installing the Motor Housing. s3210mfp-230 WorkCentre 3210/3220 Multifunction Printer Service Manual 8-121...
-
Page 336: Pick Up Unit
Remove Tray 2. Note Do not flex the latch. This will prevent the pick up idle from resting securely after installation. Release the pick up stopper latch from the pick up shaft. s3210mfp-194 8-122 WorkCentre 3210/3220 Multifunction Printer Service Manual... - Page 337 Slide the pick up idles away from the pick up rubber. Rotate the pick up rubber, slide it out away from the shaft and remove the Pick Up Unit. s3210mfp-196 WorkCentre 3210/3220 Multifunction Printer Service Manual 8-123...
-
Page 338: Pick Up Solenoid
Remove the Optional Tray Assembly (page 8-117). Turn the Optional Tray Assembly over with the bottom side facing upward. Remove 1 screw (12 mm, silver) that secures the SIMM Cover. Remove the SIMM Cover and the Harness Cover. s3210mfp-197 8-124 WorkCentre 3210/3220 Multifunction Printer Service Manual... - Page 339 Disconnect the Solenoid wiring harness connector CN56. Push the harness into the tray cavity. Disconnect the wiring harness from the dual female connector. CN56 s3210mfp-211 Remove 1 screw (12 mm, silver) that secures the Solenoid. Remove the Solenoid. s3210mfp-212 WorkCentre 3210/3220 Multifunction Printer Service Manual 8-125...
-
Page 340: Pick Up Roll Retainer
Service Parts Disassembly Pick Up Roll Retainer PL10.0.11-18 Remove the Feed Roller (page 8-127). Release the clip from the shaft while pushing the shaft toward the motor side. Remove the Pick Up Roll Retainer. s3210mfp-242 8-126 WorkCentre 3210/3220 Multifunction Printer Service Manual... -
Page 341: Feed Roller
Pick Up Bushing Release the clip from the shaft while pushing the shaft toward the motor side. Slide the Feed Roller out from the Optional Tray Assembly and remove the Feed Roller. s3210mfp-198 WorkCentre 3210/3220 Multifunction Printer Service Manual 8-127... - Page 342 Service Parts Disassembly 8-128 WorkCentre 3210/3220 Multifunction Printer Service Manual...
-
Page 343: Parts List
Parts List In this chapter... Serial Number Format Using the Parts List Parts Lists Options Xerox Supplies and Accessories Chapter... -
Page 344: Serial Number Format
Parts List Serial Number Format Changes to Xerox products are made to accommodate improved components as they become available. It is important when ordering parts to include the following information: Component's part number Product type or model number Serial Number of the printer The serial number is found on a label located on the back of the printer. -
Page 345: Using The Parts List
J2 is attached to the other end that is plugged into P2. Note Only parts showing part numbers are available for ordering by support. Parts not showing part numbers are available on the parent assembly. Abbreviations Abbreviation Meaning C-ring E-ring K-clip Screw WorkCentre 3210/3220 Multifunction Printer Service Manual... -
Page 346: Parts Lists
Parts List Parts Lists Parts List 1.0 Main s3210mfp-091 WorkCentre 3210/3220 Multifunction Printer Service Manual... - Page 347 Print Cartridge - 2K 106R01485 Print Cartridge - 4K 106R01486 Print Cartridge - 4K (DMO - only) 106R01487 FAX_Board Cover Screw-Taptite FAX Board 140N63240 Power Cord 110V 105N02072 Power Cord 220V 117N01769 Terminator (220 V Only) 114N00078 WorkCentre 3210/3220 Multifunction Printer Service Manual...
-
Page 348: Parts List 2.0 Cover Assemblies
Parts List Parts List 2.0 Cover Assemblies s3210mfp-092 WorkCentre 3210/3220 Multifunction Printer Service Manual... - Page 349 Rear Cover Assembly 002N02734 Cover-Rear 3-1. Guide-Change_Dup 3-2. Sponge-Guide Change Dup 3-3. Sponge-Cover Rear 3-4. Right Cover Assembly 101N01442 4-1. Cover-Right 4-2. Cover-Right DIMM 4-3. Sponge-Side Bottom R 4-4. Sponge-Side Front 127N07354 4-5. Power Supply Fan WorkCentre 3210/3220 Multifunction Printer Service Manual...
-
Page 350: Parts List 3.0 Middle Cover Assembly
Parts List Parts List 3.0 Middle Cover Assembly s3210mfp-093 WorkCentre 3210/3220 Multifunction Printer Service Manual... - Page 351 Parts List 3.0 Middle Cover Assembly ID No. Name/Description Part Number Middle Cover Assembly 101N01444 Speaker Stacker-RX Large Stacker-RX Small Ground-Brush PMO-SUB_M_Stacker Cover-Middle Cover-L_FAX_Board Bin Full Actuator Holder Bin Full Actuator Bin Full Sensor 130N01274 Screw-Taptite WorkCentre 3210/3220 Multifunction Printer Service Manual...
-
Page 352: Parts List 4.0 Frame
Parts List Parts List 4.0 Frame 55 56 54-3 49 48 54-2 54-1 54-4 21-2 21-1 21-3 6-1 6-2 12 13 14 15 16 26-1 26-2 26-3 s3210mfp-094 9-10 WorkCentre 3210/3220 Multifunction Printer Service Manual... - Page 353 Parts List 104 105 s3210mfp-095 WorkCentre 3210/3220 Multifunction Printer Service Manual 9-11...
- Page 354 21-2. Spring-CS 21-3. Gear Pick Up B Cam-Pick Up PMO-Idle Pick Up Shaft-P-Pick Up Stopper-M-Pick Up_R2 Pick Up Roll 130N01540 26-1. Rubber Pick Up 26-2. Housing-M-Pick Up 26-3. Housing-M-Pick Up_R2 Bush-M-Pick Up R2 9-12 WorkCentre 3210/3220 Multifunction Printer Service Manual...
- Page 355 Gear-M-Fuser Idle 1 Ring-CS CBF Harness-LSU SW&Fan Terminal-CRUM SUB Terminal PBA 140N63398 54-1. Holder-Exit Roller 54-2. Roller-Exit Main 54-3. Roller-Exit FR 54-4. Spring CS Gear-M-Exit PMO-Bearing Shaft Support-Roller Exit Roller 022N02409 Shield-CONT Roller Shield-SMPS Insulation-SMPS WorkCentre 3210/3220 Multifunction Printer Service Manual 9-13...
- Page 356 Sheet-Brush MEC-Brush Pick Up Bracket-Cover Front Ground-Brush Pick Up Guide-Paper Guide Front Paper Guide-TR_RIB Plate-E_SAW Guide-TR Guide-Input Plate Earth Transfer Shaft-Feed Idle Bush-M-Feed Idle Spring ETC-TR 100. Plate-P-Push Bushing 101. PMO-Plate Guide DEVE_L 9-14 WorkCentre 3210/3220 Multifunction Printer Service Manual...
- Page 357 Terminal Spring TR 107. PMO-Bushing_TR(L) 108. Guide-Holder_TR 109. Spring ETC-ES (Guide holder TR) 110. Holder-Transfer 111. Link Cover_Rear 112. Spring-CS 114. Rear Guide Unit 032N00491 115. Bush-4 116. Harness-CCD Home 117. Harness-Fuser SMPS WorkCentre 3210/3220 Multifunction Printer Service Manual 9-15...
-
Page 358: Parts List 5.0 Drive Unit Assembly
Parts List Parts List 5.0 Drive Unit Assembly s3210mfp-096 9-16 WorkCentre 3210/3220 Multifunction Printer Service Manual... - Page 359 Gear Pick Up Idle 31 Gear RDCN 52/18 Gear OPC Clutch 29 Gear Fuser DR OUT 37 Washer Plain Bracket Motor Motor BLDC Screw Taptite ----- ----- Ring C Hub Clutch Spring Clutch WorkCentre 3210/3220 Multifunction Printer Service Manual 9-17...
-
Page 360: Parts List 6.0 Scan Assembly
Parts List Parts List 6.0 Scan Assembly s3210mfp-097 9-18 WorkCentre 3210/3220 Multifunction Printer Service Manual... - Page 361 Parts List Parts List 6.0 Scan Assembly ID No. Description Part Number ELA HOU-SCAN_High (3220) ELA HOU-SCAN_Low (3210) Cap-ADF Connector 022N02406 Platen Assembly 090N00168 UI Assy (3220) 101N01438 UI Assy (3210) 101N01439 WorkCentre 3210/3220 Multifunction Printer Service Manual 9-19...
-
Page 362: Parts List 6.1 Adf Assembly
Parts List Parts List 6.1 ADF Assembly s3210mfp-098 9-20 WorkCentre 3210/3220 Multifunction Printer Service Manual... - Page 363 Platen Cover Hinge 003N01051 Screw-Taptite ADF Motor 127N07619 Lower ADF 022N02407 ADF Feeder Assembly 130N01500 Upper ADF 022N02408 MEA-Cover Open Platen Cover 101N01441 MEA-TX Stacker ADF Feed Pad Assembly 019N00928 ADF Rubber Feed Pad 019N00566 WorkCentre 3210/3220 Multifunction Printer Service Manual 9-21...
-
Page 364: Parts List 6.2 Platen Cover
Parts List Parts List 6.2 Platen Cover s3210mfp-220 9-22 WorkCentre 3210/3220 Multifunction Printer Service Manual... - Page 365 Parts List 6.2 Platen Cover ID No. Description Part Number Platen Cover 022N02408 Platen Cover Hinge 003N01051 Feed Idle Shaft 006N01302 ADF Feed Roller 022N02312 Pinch Roll 022N02014 Feed Roll Spring 009N01489 Sponge Sheet WorkCentre 3210/3220 Multifunction Printer Service Manual 9-23...
-
Page 366: Parts List 6.3 Platen Assembly
Parts List Parts List 6.3 Platen Assembly 1-10-2 1-10-3 1-10-5 1-10-9 1-10-4 1-10-10 1-10-6 1-10-11 1-10-7 1-10-12 1-10-14 1-10-8 1-10-17 1-10-13 1-10-15 1-10-16 1-10 1-11 s3210mfp-099 9-24 WorkCentre 3210/3220 Multifunction Printer Service Manual... - Page 367 1-10-16. Screw-Taptite 1-10-17. Cover-FFC 1-11. USB Host PBA 140N63397 Platen Upper 090N00169 Tape Double Face 2-1. Tape Double Face 2-2. Platen Glass 090N00161 2-3. Sheet-Shading 2-4. Cover-Scan Upper 2-5. MEA HOU-ADF Sheet 2-6. WorkCentre 3210/3220 Multifunction Printer Service Manual 9-25...
-
Page 368: Parts List 6.4 Ui Assembly
Parts List Parts List 6.4 UI Assembly s3210mfp-100 9-26 WorkCentre 3210/3220 Multifunction Printer Service Manual... - Page 369 ID No. Description Part Number UI Assy (3220) 101N01438 UI Assy (3210) 101N01439 Cover-OPE (3220) Cover OPE (3210) Cover-Window SF-530 Screw-Taptite Key-Extra Key-FAX Key-Menu Key-OK Key-Status Key-Stop Key-Tel Key-Start UI PBA 140N63396 Cover-LCD WorkCentre 3210/3220 Multifunction Printer Service Manual 9-27...
-
Page 370: Parts List 7.0 Cassette Assembly
Parts List Parts List 7.0 Cassette Assembly 14-4 14-1 14-3 14-2 14-5 14-6 s3210mfp-103 9-28 WorkCentre 3210/3220 Multifunction Printer Service Manual... - Page 371 RPR-Friction Pad 14-3. Plate Pad 14-4. Sheet Pad 14-5. Ground Pad 14-6. Spring ETC Exit Roll FD Housing Holder Pad Cover Handle-Cassette Spring-ES Roller-M Idle Feed Screw Taptite Indicator Paper Sheet Guide-Side-Far Sheet Guide-Side-Near WorkCentre 3210/3220 Multifunction Printer Service Manual 9-29...
-
Page 372: Parts List 8.0 Fuser
Parts List Parts List 8.0 Fuser s3210mfp-102 9-30 WorkCentre 3210/3220 Multifunction Printer Service Manual... - Page 373 Halogen Lamp, 110V 122N00269 Halogen Lamp, 220V 122N00270 CAP Lamp-L 122N00286 CAP Lamp-R 122N00287 Gear Fuser RDCN 28-20 Gear MPF 5 Washer Plain Ring CS Exit Sensor 130N01274 Exit Actuator Cover Junction Block WorkCentre 3210/3220 Multifunction Printer Service Manual 9-31...
-
Page 374: Parts List 9.0 Duplex Unit
Parts List Parts List 9.0 Duplex Unit 17 18 12-1 12-2 12-1 12-2 s3210mfp-101 9-32 WorkCentre 3210/3220 Multifunction Printer Service Manual... - Page 375 Gear Exit F/Down Belt Timing Gear Belt Timing Gear ELA Unit Roller-DUP 12-1. Roller Feed-DUP 12-2. Ring-C Bracket Duplex-Align Screw Tapping Guide Duplex-Upper Roller M-Idle-DUP PCT-SILP Washer Shaft Idle Roll, DUP Spring-TS Screw Taptite WorkCentre 3210/3220 Multifunction Printer Service Manual 9-33...
-
Page 376: Options
11-7 11-9 11-4 11-30 11-26 11-6 11-29 11-11 11-8 10-1 13 10 11-4 10-2 11-22 11-5 11-24 11-18 11-10 11-23 11-17 11-13 11-19 11-4 10-3 11-4 11-24 11-19 11-14 11-15 11-12 11-4 s3210mfp-104 9-34 WorkCentre 3210/3220 Multifunction Printer Service Manual... - Page 377 9-8. Bracket Gear-SCF 9-9. Motor Step 9-10. PMO Impeller-DRV 9-11. Screw Taptite 9-12. Washer Plain Pick Up Roll 130N01540 10-1. Housing-M Pick Up R2 10-2. Rubber Pick Up 10-3. Housing-M Pick Up UP2-R2 WorkCentre 3210/3220 Multifunction Printer Service Manual 9-35...
- Page 378 PMO Bushing Feed 11-25. CAM M Pick Up 11-26. Spring-TS 11-27. Gear Feed 2 11-28. Ring CS; ID3, OD3, T0.25, Black, SU 11-29. PMO Gear Pick Up B 11-30. Gear Pick Up A 11-31. Spring-TS 9-36 WorkCentre 3210/3220 Multifunction Printer Service Manual...
-
Page 379: Xerox Supplies And Accessories
128 MB DDR2 Memory (1x 128 MB) 098N02189 PL10.0 Optional Tray Assembly 098N02204 Power Cords Description Part Number Power Cord, 110V 105N02072 Power Cord, 220V 117N01769 Tools Parts List Part Number Reference Description Toner Vacuum 003-1496-00 WorkCentre 3210/3220 Multifunction Printer Service Manual 9-37... - Page 380 Parts List 9-38 WorkCentre 3210/3220 Multifunction Printer Service Manual...
-
Page 381: Wiring
Wiring Component Locator Diagrams Plug/Jack Locators System Connections Wiring Diagrams Chapter... -
Page 382: Component Locator
Rear Cover Interlock Switch H-78 Front Cover Interlock Switch G-79 Duplex Registration Sensor F-79 Tray Feed Sensor F-79 Tray No Paper Sensor E-79 Laser Unit Fan D-57 Main Fan I-58 Power Supply Fan H-60 10-2 WorkCentre 3210/3220 Multifunction Printer Service Manual... -
Page 383: Map 1 - Circuit Board Locator
Wiring Map 1 - Circuit Board Locator ADF Interface Board ADF Control Board Fax Board Control Board Main Controller Board Power Supply (SMPS) USB Board HVPS s3210mfp-111 WorkCentre 3210/3220 Multifunction Printer Service Manual 10-3... -
Page 384: Map 2 - Drive Locator
Wiring Map 2 - Drive Locator ADF Motor Assembly Main Motor Assembly Scanner Motor Registration Clutch Pick Up Solenoid s3210mfp-115 10-4 WorkCentre 3210/3220 Multifunction Printer Service Manual... -
Page 385: Map 3 - Sensor Locator
Map 3 - Sensor Locator Registration Sensor ADF Exit Sensor Interlock Switch Empty Sensor Outbin Sensor Exit Sensor Rear Cover Open Switch Front Cover Open Switch Duplex Registration Sensor Feed Sensor Paper Empty Sensor s3210mfp-117 WorkCentre 3210/3220 Multifunction Printer Service Manual 10-5... -
Page 386: Map 4 - Fan Locator
Wiring Map 4 - Fan Locator Laser Unit Fan Main Fan Power Supply Fan s3210mfp-116 10-6 WorkCentre 3210/3220 Multifunction Printer Service Manual... -
Page 387: Plug/Jack Locators
Paper Empty, Registration / Duplex, and Feed Sensor CN19 I-142 Option Tray CN20 B-138 Print Cartridge CRUM CN21 F-143 Drive Unit, Pick Up Solenoid, Registration Clutch CN22 G-133 Platen Assembly CN25 E-138 DIMM WorkCentre 3210/3220 Multifunction Printer Service Manual 10-7... -
Page 388: Map 5 - Main Controller Board
Wiring Map 5 - Main Controller Board CN17 CN22 CN15 CN10 CN18 CN20 CN16 CN13 CN25 CN19 CN12 CN14 CN21 CN11 s3210mfp-005 10-8 WorkCentre 3210/3220 Multifunction Printer Service Manual... -
Page 389: Map 6 - Hvps
Wiring Map 6 - HVPS CN1 Main Controller Board Front Cover Open Switch Rear Cover Open Switch Supply Developer Varistor s3210mfp-006 WorkCentre 3210/3220 Multifunction Printer Service Manual 10-9... -
Page 390: Map 7 - Power Supply
Wiring Map 7 - Power Supply CON1 AC Inlet CON3 Main Board CON2 Fuser s3210mfp-007 10-10 WorkCentre 3210/3220 Multifunction Printer Service Manual... -
Page 391: Map 8 - Left Side Harness
Wiring Map 8 - Left Side Harness CN26 CN27 CN28 s3210mfp-079 WorkCentre 3210/3220 Multifunction Printer Service Manual 10-11... -
Page 392: System Connections
CN4, CN5 Panel Position Sensor Supply CN11 CN48 LINE1 LINE2 Outbin Modem Speaker CN41 CN12 Sensor ADF Control CISM CN42 CN22 Board Exit Snr ADF Motor Empty Snr Regi Snr Scanner CN43 Motor s3210mfp-105 10-12 WorkCentre 3210/3220 Multifunction Printer Service Manual... -
Page 393: Wiring Diagrams
Jumper Denotes the parts. PL X.Y.Z implies the item “Z” of plate (PL) “X.Y” Fuser in Parts List. PL X.Y.Z Subassembly 1 Denotes functional parts attached with functional parts name. Heater Subassembly 2 WorkCentre 3210/3220 Multifunction Printer Service Manual 10-13... - Page 394 The given voltage is for signal in high status. The arrow indicates the direction of signal. Function Logic 2 Denotes a connection between wires. Connection of Wires Denotes a Clutch or Solenoid. Solenoid/Clutch Denotes a Motor. Motor 10-14 WorkCentre 3210/3220 Multifunction Printer Service Manual...
- Page 395 Denotes an NPN Photo-transistor. NPN Phototransistor I/L +24 VDC Denotes DC voltage when the Interlock Switch in MCU Board turns On. +5 VDC Denotes DC voltage. +3.3 VDC Denotes signal ground. Denotes analog ground. Denotes return. WorkCentre 3210/3220 Multifunction Printer Service Manual 10-15...
-
Page 396: Main Controller Board
+3.3VDC Paper Empty Sensor nSENS_P_EMPTY CN38 +3.3VDC Duplex Registration nSENS_P_REGI Sensor CN39 +3.3VDC Feed Sensor nSENS_P_FEED Main Fan FAN_MAIN CN11 CN48 +24VDC FAN_LVPS Power Supply Fan CN12 CN41 +3.3VDC Outbin Sensor nSENS_OUTBIN_FULL s3210mfp-106 10-16 WorkCentre 3210/3220 Multifunction Printer Service Manual... -
Page 397: Power And Fuser
THERMISTOR +5VDC FUSER_THERM1 CN46 CN53 +3.3VDC Exit Sensor nSENS_P_EXIT HVPS CN10 PWM_DEV_DC PWM_MHV THV_READ nTHV_EN PWM_THV +5VDC +24VDC +24VDC Supply +24VDC +24VDC Drum CN20 Developer Unit SCL1_CHORUS 3 CRUM SDA1_CHORUS 3 +3.3VDC s3210mfp-107 WorkCentre 3210/3220 Multifunction Printer Service Manual 10-17... -
Page 398: Fax Board And Optional Tray
+3.3VDC +5VDC Paper Empty Fax Board Sensor nSENS_P_EMPTY +5VDC DATA<15> DATA<14> DATA<13> DATA<12> DATA<11> DATA<10> DATA<9> DATA<8> ADDR<1> ADDR<2> ADDR<3> ADDR<4> ADDR<5> ADDR<6> ADDR<7> nCS_MODEM N.C. nRST_MODEM +3.3VDC nINT_MODEM N.C. +3.3VDC +3.3VDC s3210mfp-108 10-18 WorkCentre 3210/3220 Multifunction Printer Service Manual... -
Page 399: Laser Unit And I/O
Main Controller Board Laser Unit +24VDC +24VAC nLSU_MOT_EN nREADY_LSU CLK_LSU_MOT nLDON_LSU LD_POWER1 HSYNC_1 nSH_LSU_1 VDO_1_N VDO_2_P +5VDC 5V_LSU CN13 Ethernet +3.3VDC +3.3VAC_CTR_TAP +3.3VAC_CTR_TAP LED1_POWER LED1 LED2_POWER LED2 VBUS USB (Front) CN15 +5VDC s3210mfp-109 WorkCentre 3210/3220 Multifunction Printer Service Manual 10-19... -
Page 400: Adf And Scanner
CN?? CN?? Board nADF_MOTOR_DIR +24VDC +3.3VDC ADF_CLK +5VDC ADF_MOTOR_READY nADF_MOTOR_EN ADF_MOT_NB ADF_MOT_PHB +12VDC ADF_MOTOR_BREAK ADF_MOT_PHA +24VDC ADF_MOT_B ADF_MOT_A +24VDC ADF_MOT_NA +24VDC nADF_P_DET nADF_P_REGI Registration nADF_P_POS Sensor Paper Paper Empty Exit Sensor Sensor s3210mfp-110 10-20 WorkCentre 3210/3220 Multifunction Printer Service Manual... - Page 401 Reference Contents... WorkCentre 3210/3220 Menu Map Tech Mode Menu Map Acronyms and Abbreviations Appendix...
-
Page 402: Workcentre 3210/3220 Menu Map
Ethernet Speed Ignore Toner All Settings Supplies Life Clear Setting Fax Setup Serial Number Copy Setup Network Info Paper Stacking Scan Setup CentreWare IS System Setup Network Setup Phone Book Sent Report RCV Report s3210mfp-254 WorkCentre 3210/3220 Multifunction Printer Service Manual... -
Page 403: Tech Mode Menu Map
Pattern-1 Pattern Test Pattern-2 Shading Test Shading & Print Pattern-3 Print Pattern-4 Restart Machine Pattern-5 Pattern-6 Report Pattern-7 Pattern-8 All Report Protocol Configuration Supplies Info Error Info Usage Page Component Check Service Support s3210mfp-253 WorkCentre 3210/3220 Multifunction Printer Service Manual... -
Page 404: Acronyms And Abbreviations
DC power. Diagnostic Control Unit DDR2 DIMM Double Data Rate Dual In-Line Memory Module DEVE Developer DHCP Dynamic Host Configuration Protocol DIMM Dual In-line Memory Module Dot Per Inch WorkCentre 3210/3220 Multifunction Printer Service Manual... - Page 405 Input and Output Intelligent Drive electronics or Imbedded Drive Electronics IEEE Institute of Electrical and Electronics Engineers. Inc. Image Processor Isopropyl Alcohol Kilo Byte Local Area Network Liquid Crystal Display Laser Diode Light Emitting Diode WorkCentre 3210/3220 Multifunction Printer Service Manual...
- Page 406 Raster Output Scanner - Laser Unit SMPS Switching Mode Power Supply Sensor Solenoid Start of Scan SPOOL Simultaneous Peripheral Operations Online Switch SYNC Synchronous or Synchronization Transfer High Voltage Toner User Interface Universal Serial Bus WorkCentre 3210/3220 Multifunction Printer Service Manual...
- Page 407 Black lines, 5-20 tech mode, 4-3 Black prints, 5-12 tech mode menu, 4-4 Blank prints, 5-27 test prints, 4-8, 5-35 Button Dial Mode, 4-5 definitions, 1-7 Dimensions, 1-19 location, 1-7 DRAM Tests, 4-7 WorkCentre 3210/3220 Multifunction Printer Service Manual I – 1...
- Page 408 Firmware upgrade, 7-7 removal, 8-81 Fonts Exit Sensor, 2-27 supported, 1-3 part number, 9-31 Front Cover, 1-4 removal, 8-93 interlock switch, 2-28 wiring, 10-17 part number, 9-5 Exit Sensor Actuator removal, 8-58 I – 2 WorkCentre 3210/3220 Multifunction Printer Service Manual...
- Page 409 2-28 operation, 2-33 functions, 2-15 Maintenance items, 1-10 laser unit wiring, 10-16 Manual Feeder, 2-5 switch location, 2-22 location, 1-4 switch tests, 4-7 supported media, 1-2 IOT, 2-2 Margins, 1-18 WorkCentre 3210/3220 Multifunction Printer Service Manual I – 3...
- Page 410 9-7 memory, 1-9 removal, 8-108 optional tray, 1-9 Power Switch Out Bin Full Sensor, 2-28 location, 1-5 part number, 9-9 Pressure Roller, 2-15 removal, 8-70 operation, 2-15 wiring, 10-16 I – 4 WorkCentre 3210/3220 Multifunction Printer Service Manual...
- Page 411 5-39 image streaks, 5-31 troubleshooting, 5-9 magnification error, 5-30 Protocol Report, 4-10 malfunction, 4-19 maximum image area, 1-14 noise specification, 5-39 output formats, 1-14 part number, 9-19 removal, 8-48 resolution, 1-12 WorkCentre 3210/3220 Multifunction Printer Service Manual I – 5...
- Page 412 4-18 modem test, 4-7 measurement techniques, 3-4 operation, 4-3 operating systems, 4-26 test prints, 5-35 power supply, 4-23 Technical support, 1-2 scanner malfunction, 4-19 Telephone connector, 1-5 usb port, 4-25 I – 6 WorkCentre 3210/3220 Multifunction Printer Service Manual...
- Page 413 3-8 front port, 1-4 port settings, 4-7 port testing, 4-25 rear port, 1-5 wiring, 10-19 Zenor PBA USB Host PBA part number, 9-12 part number, 9-25 removal, 8-109 removal, 8-56 WorkCentre 3210/3220 Multifunction Printer Service Manual I – 7...
- Page 414 Index WorkCentre 3210/3220 Multifunction Printer Service Manual...
- Page 416 Copyright © 2009, Xerox Corporation. All rights reserved. Unpublished rights reserved under the copyright laws of the United States. Part#: 701P49487...
Need help?
Do you have a question about the WorkCentre 3210 and is the answer not in the manual?
Questions and answers