
Related Manuals for Mahr Millimar C 1200


Summary of Contents for Mahr Millimar C 1200
-
Page 1: Operating Instructions
Compact amplifier Millimar C 1200 Operating instructions 3722478 Mahr GmbH Standort Esslingen Reutlinger Str. 48, 73728 Esslingen Tel. +49 711 9312-600, Fax +49 711 9312-756 mahr.es@mahr.de, www.mahr.com 0315... - Page 2 Dear valued customer, Congratulations on choosing a product from Mahr GmbH. We kindly request that you follow these instructions in order to ensure the long term accuracy of this measuring instrument. We operate a policy of continuous improvement and are constantly developing our products, especially with regard to renaming of type designations.
-
Page 3: Safety Information
The test and measuring equipment for which the Millimar is used are subject to inspection equipment monitoring. For this reason, regular inspection equipment monitoring performed by either the user or Mahr Service must ensure compliance to the specified error limits. Mahr GmbH • Millimar C1200... - Page 4 Do not use an electric marking tool Information regarding RoHS: Electronic equipment which where bought from Mahr after the 23. March 2006 can be returned to us for disposal. We will dispose/recycle our products without causing any harm or damage...
- Page 5 Declaration of conformity Mahr GmbH • Millimar C1200...
-
Page 6: Table Of Contents
Select the Color scheme ................27 Set the Brightness ..................28 Menu Setup Select Langauge ..................29 Choose the Unit of measurement ............... 30 Select the Probe type .................. 31 Select the ECO mode ................. 32 Mahr GmbH • Millimar C1200... - Page 7 Suitable Data connection cables ..............44 Interfaces: Opto RS232C,Digimatic, USB ........... 44 Data transmission parameters ..............45 Technical Data Compact amplifier Millimar C1200 .............. 46 Compatible probes for Millimar C1200 ............47 Spare Parts Available spare parts ................... 48 Mahr GmbH • Millimar C1200...
-
Page 8: Delivery And Setting Up
Delivery and setting up Unpacking the measuring instrument Mahr GmbH • Millimar C1200... -
Page 9: Scope Of Supply
Scope of supply Mahr GmbH • Millimar C1200... -
Page 10: Symbols
Set zero point (RESET) – Reduce the resolution – Increase resolution – Start data transmission – Scroll up – Scroll down – Scroll to the right – Scroll to the left – Confirm – Cancel – Exit menu Mahr GmbH • Millimar C1200... - Page 11 – Battery mode – Change batteries – Battery low – Mains power supply mode – Formula measuring combination – Data is been transferred – Factor is not equal to 1 Mahr GmbH • Millimar C1200...
-
Page 12: Operating Controls And Interfaces
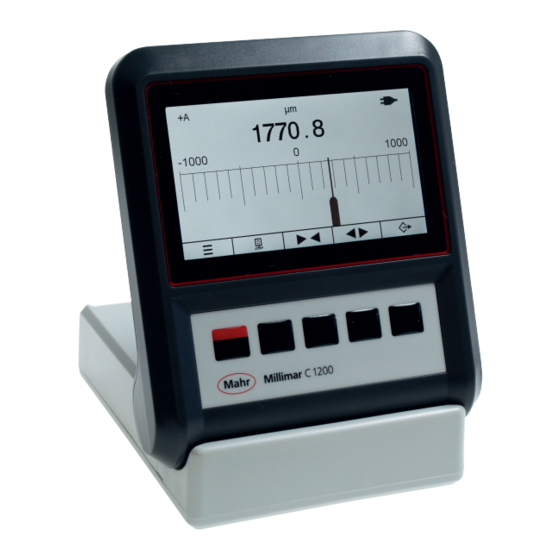
Operating controls and interfaces 1.4.1 Display and operating keys Display Operating keys Battery compartment 1.4.2 Interfaces Data output Probe input A AC Mains power supply socket Mahr GmbH • Millimar C1200... -
Page 13: 1.4.3 Battery Compartment
Observe polarity of the batteries! – Close the battery compartment cover in the reverse order. Battery compartment If connected to the mains power supply, the measuring instrument will automatically switch to AC mains power supply! Mahr GmbH • Millimar C1200... -
Page 14: Initial Operation (Basic Configuration)
Confirm by pressing the 4 key English Français Italiano Polski Set unit of measurement Welcome! – Select the required unit the q oder p Please select the measurement unit: keys µm inch – Confirm by pressing the 4 key Mahr GmbH • Millimar C1200... -
Page 15: Select Probe
Please select the probe type: – Confirm by pressing the 4 key Standard Probe Long Probe Scale graduation of the analog display -0.001 – Select the required resolution with the -0.1 ut or t u keys. ut tu Mahr GmbH • Millimar C1200... -
Page 16: Connecting The Probe
– Press 4 to select the probe type or press Ó to cancel selection – To exit the menu, press the ON / OFF key. Measurement Display Setup System Probe type Standard Probe Long Probe Mahr GmbH • Millimar C1200... -
Page 17: Setting Up The Selected Probe
Use the keys ut and t u to adjust Customer calibration ü the scale Factory calibration Factory Settings Info – Press 4 to confirm – To exit the input menu, press the ON / OFF key. ABSOLUTE -0.001 -0.1 ut tu Mahr GmbH • Millimar C1200... -
Page 18: Switching Off
To switch off this measuring instrument you must firstly exit the Input menu. ut tu => The analog display will appear on the screen – Press the ON / OFF key for > 2 seconds. Mahr GmbH • Millimar C1200... -
Page 19: Menu Measurement
Measurement Display Setup System Master – Press 4 to confirm or press Ó to cancel selection 0 0 . 0 0 0 0 – To exit the input menu, press the ON / OFF key. Mahr GmbH • Millimar C1200... -
Page 20: Choose Nominal Value
Display Setup System – Press 4 to confirm or press Ó to Nominal value cancel selection 0 0 . 0 0 0 0 – To exit the input menu, press the ON / OFF key. Mahr GmbH • Millimar C1200... -
Page 21: Select Tolerance
Press 4 to confirm or press Ó to cancel selection Lower Tolerance Nominal value Higher Tolerance -0.5000 +0.5000 Measurement Display Setup System Tolerance 0 . 5 0 0 0 Lower Tolerance Nominal value Higher Tolerance -0.5000 +0.5000 Mahr GmbH • Millimar C1200... - Page 22 Press 4 to confirm or press Ó to . 5 0 0 0 cancel selection Lower Tolerance Nominal value Higher Tolerance -0.5000 +0.5000 – To exit the input menu, press the ON / OFF key. Mahr GmbH • Millimar C1200...
-
Page 23: Choose The Formula
Use the q p keys to select +A / -A Measurement Display Setup System – Press 4 to confirm or press Ó to Formula cancel selection – To exit the input menu, press the ON / OFF key. Mahr GmbH • Millimar C1200... -
Page 24: Select The Factor
With the q p keys enter the required Value. Measurement Display Setup System Factor – Press 4 to confirm or press Ó to . 0 0 0 0 cancel selection – To exit the input menu, press the ON / OFF key. Mahr GmbH • Millimar C1200... -
Page 25: Menu Display
With the q p keys select the required Resolution – Press 4 to confirm or press Ó to cancel selection Measurement Display Setup System Resolution 0.01 0.001 0.0001 – To exit the input menu, press the ON / OFF key. Mahr GmbH • Millimar C1200... -
Page 26: Choose The Display Style
Display style – Press 4 to confirm or press Ó to cancel selection Measurement Display Setup System Display style Analog & Digital Digital Analog – To exit the input menu, press the ON / OFF key. Mahr GmbH • Millimar C1200... -
Page 27: Select The Color Scheme
With the q p keys enter the required Color scheme – Press 4 to confirm or press Ó to cancel selection Measurement Display Setup System Color scheme Standard Inverted – To exit the input menu, press the ON / OFF key. Mahr GmbH • Millimar C1200... -
Page 28: Set The Brightness
With the q p keys select the required Brightness – Press 4 to confirm or press Ó to cancel selection Measurement Display Setup System Brightness – To exit the input menu, press the ON / OFF key. Mahr GmbH • Millimar C1200... -
Page 29: Menu Setup
With the q p keys select the required Language – Press 4 to confirm or press Ó to cancel selection Measurement Display Setup System Language English English Español – To exit the input menu, press the ON / Português OFF key. Mahr GmbH • Millimar C1200... -
Page 30: Choose The Unit Of Measurement
With the q p keys select the required Unit – Press 4 to confirm or press Ó to cancel selection Measurement Display Setup System Unit µm inch – To exit the input menu, press the ON / OFF key. Mahr GmbH • Millimar C1200... -
Page 31: Select The Probe Type
Probe type – Press 4 to confirm or press Ó to cancel selection Measurement Display Setup System Probe type Standard Probe Long Probe – To exit the input menu, press the ON / OFF key. Mahr GmbH • Millimar C1200... -
Page 32: Select The Eco Mode
With the q p keys select the required Modus – Press 4 to confirm or press Ó to cancel selection Measurement Display Setup System ECO mode – To exit the input menu, press the ON / OFF key. Mahr GmbH • Millimar C1200... -
Page 33: Menu System
– Use the keys ut and t u to adjust the scale – Press 4 to confirm ABSOLUTE 0.001 -0.01 0.01 – To exit the input menu, press the ON / OFF key. ut tu Mahr GmbH • Millimar C1200... -
Page 34: Select Customer Calibration
If a customer specific calibration is required, this can be entered as described below. The calibration can be conducted with the connected probe or alteratively with a factory standard (e.g. Mahr 1283 WN Factory Calibration, Order no. 5312833). Customer calibration 6.2.1 Active customer calibration... -
Page 35: 6.2.2 Execute A Probe Calibration
– To exit the input menu, press the ON / OFF key. Measurement Display Setup System Customer calibration - 0 0 . 0 0 0 Calibration Min Nominal value Calibration Max -1.000 1.000 Mahr GmbH • Millimar C1200... - Page 36 => The Probe calibration according Absolute mode to the customer's specification is ü Customer calibration complete and activated. Factory calibration Factory Settings Info – To exit the input menu, press the ON / OFF key. Mahr GmbH • Millimar C1200...
-
Page 37: Conduct A Factory Standard Calibration
Press the q p keys to enter the required value. – Press 4 to confirm or press Ó to Measurement Display Setup System cancel selection Customer calibration 0 0 1 . 0 0 0 Calibration Min Nominal value Calibration Max -1.000 1.000 Mahr GmbH • Millimar C1200... - Page 38 Display Setup System Please set the probe at Calibration Customer calibration Max and accept Please set the probe at Calibration and accept – Press 4 to confirm Calibration Min Nominal value Calibration Max -1.000 1.000 Mahr GmbH • Millimar C1200...
- Page 39 Measurement Display Setup System according to the customer's Absolute mode specification is complete and ü Customer calibration activated. Factory calibration Factory Settings Info – To exit the input menu, press the ON / OFF key. Mahr GmbH • Millimar C1200...
-
Page 40: Execute A Customer Calibration Reset
Press 4 to confirm or press Ó to cancel selection Measurement Display Setup System Absolute mode ü Customer calibration Factory calibration – To exit the input menu, press the ON / Factory Settings OFF key. Info Mahr GmbH • Millimar C1200... -
Page 41: Activate A Factory Calibration
The symbol 4 depicts the currently Customer calibration Reset active correction – To exit the input menu, press the ON / Measurement Display Setup System OFF key. Absolute mode Customer calibration ü Factory calibration Factory Settings Info Mahr GmbH • Millimar C1200... -
Page 42: Reset To Factory Settings
– Press 4 to confirm or press Ó to cancel selection => The measuring instrument turns off automatically. After the restart, all the default settings must once again manually entered (see Initial operation, page 14). Mahr GmbH • Millimar C1200... -
Page 43: Request Firmware Version And Serial Number
No. (S/N) will appear on the screen – To exit the menu, press Ó Measurement Display Setup System Info Version 0.7 – To exit the input menu, press the ON / S/N: 275600895 OFF key. Mahr GmbH • Millimar C1200... -
Page 44: Description Of The Interfaces
Opto RS232C (2 m), SUB-D jack 9 pin Order no. 4346020 – Digimatic (2 m), SUB-D jack 9 pin Order no. 4346021 – 2000 usb (2 m), incl. MarCom Standard Order no. 4346023 Interfaces: Opto RS232C, Digimatic, USB Mahr GmbH • Millimar C1200... -
Page 45: Data Transmission Parameters
Data transmission parameters Mahr GmbH • Millimar C1200... -
Page 46: Technical Data
Technical Data Compact amplifier Millimar C 1200 Order no. Mahr: 5312010 Product type: Millimar C 1200 Display: TFT color display, 4.3 inch, 480 (W) x 272(H) Pixel Keypad: Membrane keypad, 1 Million actuations Meas. units: µm, mm, inch Display range (digital): ±1000 mm... -
Page 47: Compatible Probes For Millimar C1200
Compatible probes for Millimar C 1200 Standard Probe Order no. 1301 5313010 1303 5313030 1304K 5313049 1318 5313180 P1300MA 4400180 P1300MB 4400181 P2001M 5323040 P2004M 5323010 P2004MA 5323020 P2004MB 5323030 P2104MA 5324070 P2104MB 5324080 Long Probe P2010M 5324010 P2010MA 5324020... -
Page 48: Spare Parts
Spare Parts Available spare parts Positions Order no. Contents Description (P.U.) 4346361-E Knurled cap 4885431-E Battery compartment cover incl. oval head screw 4885417-E Plug in feet for housing 4885430-E Buffer, black, self-adhesive Mahr GmbH • Millimar C1200... - Page 49 Mahr GmbH • Millimar C1200...
Need help?
Do you have a question about the Millimar C 1200 and is the answer not in the manual?
Questions and answers