
Related Manuals for Mahr Digimar 816 CL


Summary of Contents for Mahr Digimar 816 CL
- Page 1 Operating instructions Digimar 816 CL Height Measuring Instrument 3759587-en Version 1.8 Mahr GmbH Standort Esslingen Reutlinger Str. 48, 73728 Esslingen Tel. +49 711 9312-600, Fax +49 711 9312-756 mahr.es@mahr.de, www.mahr.com 1014...
- Page 2 6. Any modification or manipulation of the height measuring instrument requires the express written approval of Mahr GmbH and must be carried out by qualified personnel. Unauthorized opening of the height measuring instrument and unauthorized intervention invalidates the warranty and frees Mahr GmbH from any liability.
-
Page 3: Table Of Contents
Contacting a bore from above ..................33 3.4.4.6 Center of a bore / display the position ............... 33 3.4.4.7 Contacting a shaft from below ..................34 3.4.4.8 Contacting a shaft from above ................... 34 Mahr GmbH • Digimar 816 CL... - Page 4 Switching the unit of measurement mm / inch ............. 43 Display ........................44 5.10 Factory settings ....................... 44 5.11 Service / Customer service (reserved only for Mahr) ........... 45 5.12 Select a list of measurements ................5.13 Software update ....................... 45 Measuring program Create and save a measuring program ..............
-
Page 5: Delivery And Setting Up
Delivery and setting up Scope of supply 3 mm 4 mm Mahr GmbH • Digimar 816 CL... -
Page 6: Unpacking
Unpacking Mahr GmbH • Digimar 816 CL... - Page 7 Mahr GmbH • Digimar 816 CL...
- Page 8 € € 350 mm 25 kg 600 mm 30 kg Mahr GmbH • Digimar 816 CL...
- Page 9 45° 90° Mahr GmbH • Digimar 816 CL...
- Page 10 Mahr GmbH • Digimar 816 CL...
- Page 11 Mahr GmbH • Digimar 816 CL...
- Page 12 ~8 h – 100-240 V~ / 50-60 Hz Euro Mahr GmbH • Digimar 816 CL...
-
Page 13: Description And Explanation Of The Height Measuring Instrument
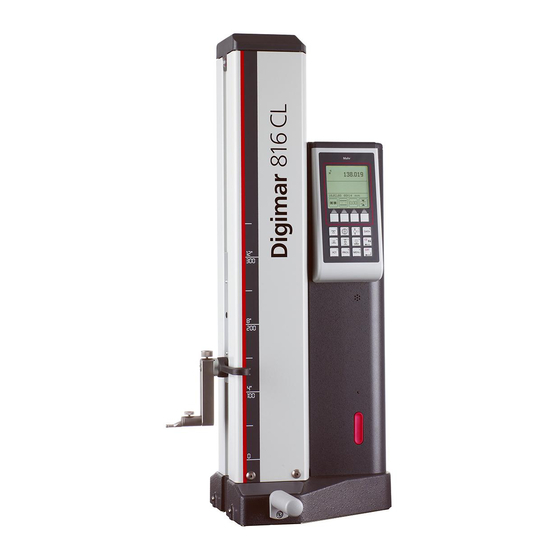
Contact point Socket for the battery charger Limit (stop) plate ON/OFF switch LED indicator for battery power Rechargeable battery compartment Handle for manually positioning the slide Interface for data output Display Battery charger Keypad Euro Mahr GmbH • Digimar 816 CL... -
Page 14: Keypad
2 and 1 Measurement number Actual measured value Measurement symbol Stored measured values Selected measurement (Cursor) Time or temperature State of charge of the battery Date Unit of measurement mm or inch Variable function keys Mahr GmbH • Digimar 816 CL... -
Page 15: Description Of The Symbols
Calculate the symmetry 0,00 Absolute (change the zero point to the Set the relative zero point base plate) Pause Continue Measuring a ledge Contacting a ledge from above Measuring a shaft Contacting a shaft from above Mahr GmbH • Digimar 816 CL... - Page 16 Add a new update Service / Customer service Register Display measurement number Record header ON / OFF ON / OFF Select diameter or coordinate Return to last value / Enter Manual data transmission Automatic data transmission Mahr GmbH • Digimar 816 CL...
-
Page 17: Symbols - Display
Shaft from above Shaft from below Shaft max. value, contact from below max. value, contact from above min. value, contact from above min. value, contact from below Min Max Data transmission Temperature compensation is active Mahr GmbH • Digimar 816 CL... -
Page 18: Commissioning / First Steps
Note: Once the zero point has been accepted, confirmation is given by 2 acoustic signals (beep). After the reference point has been confirmed, any zero point can be selected. Mahr GmbH • Digimar 816 CL... -
Page 19: Calibrating A Probe
Note: The pump for the air bearings should not be used continuously. This pump is only to be employed as a short-term pump to position / move the height measuring instrument. Mahr GmbH • Digimar 816 CL... -
Page 20: First Measurement
Position the probe in the bore (not in the center / eccentrically) – Press the „Measure bore“ key to start the measuring procedure – The probe will automatically travel upwards; the bore is contacted from below Mahr GmbH • Digimar 816 CL... -
Page 21: Switching Off
(center and diameter) will appear in the display. Switching OFF – The mains power supply switch can be found at the rear of the height measuring instrument Switch the mains power supply to OFF = (0) Mahr GmbH • Digimar 816 CL... -
Page 22: Standard Calibration / Calibrate A Probe
Once calibration has been successful, the determined probe constant will be shown in the display. Info: The determined diameter is usually smaller than the real diameter as the probe deflection also has to be taken into account. Mahr GmbH • Digimar 816 CL... -
Page 23: Calibrating A Probe Using A Ledge
Position the ledge a second time below the probe – The probe makes contact Each time the probe makes contact an acoustic signal (beep) will be emitted Once the calibration has been successful, the determined probe constant will appear in the display. Mahr GmbH • Digimar 816 CL... -
Page 24: Calibrate With A Taper Probe
Deviation is not accepted; the old value will be maintained. Probe constants with deviation will be shown in the status panel on the display Abort measurement, all previous probe constants will be maintained. Mahr GmbH • Digimar 816 CL... -
Page 25: Zero Points
– Enter the preset value using the cursor keys and the numerals on the keypad – The preset value of 300 mm applies to the dimension 227.015 (Measurement 2) as shown in this example. Mahr GmbH • Digimar 816 CL... -
Page 26: Expanding The Measuring Range
Use the cursor keys to select a measured value and press „Preset“ – With the cursor keys and the keypad enter the preset value (e.g. 226.467), to confirm press the „Accept“ key. – See Measurement 2 Before 53.462 mm After 226.467 mm Mahr GmbH • Digimar 816 CL... -
Page 27: Basic Measuring Functions
The probe automatically travels upwards and then automatically downwards – During measurement only the function key „Cancel“ can be used – The results (width of the groove and the center of the groove) will be shown in the display. Mahr GmbH • Digimar 816 CL... -
Page 28: Measuring A Bore
When measuring large bore holes or when obstacles are present the measuring procedure can be interrupted by pressing the Pause key. Press the Continue key to proceed. Pause Also see also to Chapter 2 - First measurement Mahr GmbH • Digimar 816 CL... -
Page 29: Function Keys
The symmetry between the last 2 stored measuring results will be calculated and shown in the display. The height of the line of symmetry related to the zero point will appear in the display. Mahr GmbH • Digimar 816 CL... -
Page 30: Relative / Absolute Zero Point
When a function has been selected, this function will allocated to the fourth function key in the measuring menu. This function remains until a new function is selected. Therefore, those functions that are regularly used can be activated by pressing one key. Mahr GmbH • Digimar 816 CL... -
Page 31: Min/Max-Function
Further measured values can be viewed: M = Max – maximum value M = Min – minimum value – To exit the menu press the „CE“ key Mahr GmbH • Digimar 816 CL... -
Page 32: Measuring A Ledge
Move the work piece parallel to the limit plate (stop face) in order to determine the reversal point (maximum), once the acoustic signal is emitted, the value has been accepted – The center point and the diameter will appear in the display. Mahr GmbH • Digimar 816 CL... -
Page 33: Contacting A Bore From Below
Press the „FCT“ key and the function key „Bore center“ The center of the bore will appear in the display. Note: When exchanging a probe, the new probe must be calibrated. See Chapter 3.1.3. Mahr GmbH • Digimar 816 CL... -
Page 34: Contacting A Shaft From Below
Move the work piece parallel to the limit plate (stop face) in order to determine the reversal point / maximum, the acoustic signal will confirm acceptance – The maximum of the shaft will be shown in the display. Mahr GmbH • Digimar 816 CL... -
Page 35: Delete, Save And Print Measured Values
Only the selected measurement will be deleted (only in the measuring mode - fixed list of measured values). – Press the „Accept“ key to exit the delete menu Note: To change measured values list (rolling or fixed) see Chapter 5.13. Mahr GmbH • Digimar 816 CL... -
Page 36: Delete An Entry
By pressing the „DATA“ key, measured values can either be sent DATA manually i.e. singularly When data is being transmitted the following symbol will appear in the display of the height measuring instrument Settings see Chapter 5.1 - Data transmission and Chapter Software. Mahr GmbH • Digimar 816 CL... -
Page 37: Menu - Basic Settings
Settings for data transmission ................. MENU DATA – Sending a series of measuring data ........ – Setting the format of measuring data output ........... – Record header ..............– Diameter and coordinate ................. – Only diameter ..............Mahr GmbH • Digimar 816 CL... -
Page 38: Interfaces
If the time between individual characters is longer than 30 ms (approx. 15 characters), then this will result in subsequent characters being interpreted as new instructions. – After receipt of the instruction RS232-receipt is being locked until the instruction is being executed. Each reply string is terminated by CR. Mahr GmbH • Digimar 816 CL... -
Page 39: Send A Series Of Measured Data
All measured data that are in the memory will be transferred simultaneously according to the how the measured data output is set to either a PC or a printer. See Chapter 7.1 Data transmission with MarCom See Chapter 5.1.2 Interfaces Mahr GmbH • Digimar 816 CL... -
Page 40: Select Measured Data
DIGIMAR 816CL V 1.3A 09.10.08 09:07 This is only visual when printed Four freely available rows, which are made up of 18 characters – Select the row with the „Cursor“ key and confirm with the „Accept“ key Mahr GmbH • Digimar 816 CL... -
Page 41: Resolution
Press the function key „Resolution“ – Select the resolution with the arrow keys Note: To change to the unit of measurement from mm to inch, see Chapter 5.8. – Confirm by pressing the „Accept“ key Mahr GmbH • Digimar 816 CL... -
Page 42: Acoustic Signal
(0.5; 1; 2; 4 s) is required. Standard setting: Standstill-time 1 s – Press the function key „Standstill-time“ – Select the standstill-time – Confirm by pressing the „Accept“ key Mahr GmbH • Digimar 816 CL... -
Page 43: Contacting Parameter (Probe Lift)
Select a unit of measurement, either mm or inch. inch Standard setting: Unit of measurement mm – Press the function key „mm / inch“ – Select the unit of measurement – Confirm by pressing the „Accept“ key Mahr GmbH • Digimar 816 CL... -
Page 44: Display
Rolling Data transmission settings: without record header without measurement numbers Measured value: coordinate Auto data transmission Record header is empty 5.11 Service / Customer service MENU This menu is exclusively reserved for Mahr-Service personnel. Mahr GmbH • Digimar 816 CL... -
Page 45: Select A List Of Measurements
Changing between the fixed and the rolling list is only possible, when the list is empty! Gaps / deleted measurements will not be filled. 5.13 Software update MENU – With the menu key, select the „Factory settings“ – Select the symbol „Software update“ Mahr GmbH • Digimar 816 CL... - Page 46 Serial Interface. – Select the actual program file – Press the push button „Software update“ – The progress of the download will be indicated – The transmission software update is a success. Mahr GmbH • Digimar 816 CL...
-
Page 47: Measuring Program
– if necessary delete stored measured values – Measure the work piece PROG With the „Pause“ key it is possible to insert a pause between 2 measurements, the pause lasts for 4 seconds. PROG Mahr GmbH • Digimar 816 CL... -
Page 48: Start A Measuring Program
(Bore 1 and Bore 2) are calculated. – Should a measurement be deleted during the programming – Press „CE“ and either the last or all measured values will be deleted. Mahr GmbH • Digimar 816 CL... -
Page 49: Additional Functions
CD/DVD drive for installation Recommended: MS Excel from version 97 MENU On the height measuring instrument the type of data transmission can be selected. DATA – Auto or Manual Also see Chapter 5.1.2 Interfaces Mahr GmbH • Digimar 816 CL... -
Page 50: Temperature Compensation
Note: The time and the temperature cannot be displayed simultaneously. 7.2.2 Active the temperature compensation MENU – Press the „Menu“ key and then the „Factory settings“ function key Mahr GmbH • Digimar 816 CL... - Page 51 When the temperature compensation is active a T in a square is displayed in on the top right corner of the display. If the temperature compensation is switched on, but at present not active only an empty square is indicated. Mahr GmbH • Digimar 816 CL...
-
Page 52: Self-Help, Maintenance And Care
Note: Over the course of time, batteries, which are not, used will discharge. Discharged batteries lose their capacity and may cease to function. To avoid this, batteries should be fully charged every 3 months. Mahr GmbH • Digimar 816 CL... -
Page 53: Exchanging The Batteries
Attach the new battery pack to the mains adapter and charger for a min. 5 hours. Attention Please only use the specified battery pack! Order no. 4429449 - NI-MH 4.8 V - 7000mAh (with 3 cables) Mahr GmbH • Digimar 816 CL... -
Page 54: Troubleshooting
Not a standard probe compensation Probe is not sufficiently clamped in Check charge status of the battery, mount if necessary recharge Battery is almost empty Remove the obstacle 6. Ref.-Error The probe cannot traverse the reference point Mahr GmbH • Digimar 816 CL... -
Page 55: Accessories
25 g (.881 oz) 4429228 18,8 25,2 38,2 Spherical probe K4/30 102g (3.597 oz) 7023813 Spherical probe K6/40 102g (3.597 oz) 7023816 Spherical probe K10/60 102 g (3.597 oz) 7023810 Spherical probe K10/100 102g (3.597 oz) 7023615 Mahr GmbH • Digimar 816 CL... - Page 56 817 h1 817 h2 KM 2 27,5 100,5 46,5 119,5 CXt2 MarCator 1086 817 h3 817 h4 Z10/31,2 817 h5 Mahr GmbH • Digimar 816 CL...
- Page 57 Probe carrier with a joint (without probe) 318 g (11.217 oz) 4429454 TMT 120 S Spherical probe (for depth) M2.5 / M2 333g (11.746 oz) 4429421 TMT 120 Spherical probe (for depth) M2.5 / M2 333g 11.746 oz) 4429221 Mahr GmbH • Digimar 816 CL...
- Page 58 12.5 mm / 0,001 MSP 2 Statistics printer 4102040 Spare battery 4.8V 7000mAh NiMh 4862931 Data cable 2000 usb incl. MarCom Standard 4346023 Data cable 2000r Opto RS232 4346020 800 a6 Mounting shaft for MarTest 4301865 Mahr GmbH • Digimar 816 CL...
-
Page 59: Technical Data
350 mm x 280 mm x 980 mm 14“ x 11“ x 29“ 14“ x 11“ x 39“ * When using the air bearings (cushion) the operating time of the battery will be reduced. Mahr GmbH • Digimar 816 CL... -
Page 60: Alphabetical Index
Display ..3, 4, 13, 14, 20, 21, 27-32, 34, 44, 45, 50 ............41, 44-45, 50, 54 Distance ..............17 Min – Max function ........16, 31, 44 Duplex ............36, 38, 58 Mahr GmbH • Digimar 816 CL... - Page 61 Shaft ..........3, 15-17, 32, 34, 58 Software ..........4, 36, 45-46, 58 Software update ........4, 36, 45-46 Standstill-time ........... 4, 16, 42, 44 State of charge of the battery ......52, 54 Switch OFF ............ 3, 21, 53 Mahr GmbH • Digimar 816 CL...
-
Page 62: Declaration Of Conformity
Declaration of conformity Mahr GmbH • Digimar 816 CL...
Need help?
Do you have a question about the Digimar 816 CL and is the answer not in the manual?
Questions and answers