
Related Manuals for National Instruments RMX-4120


Summary of Contents for National Instruments RMX-4120
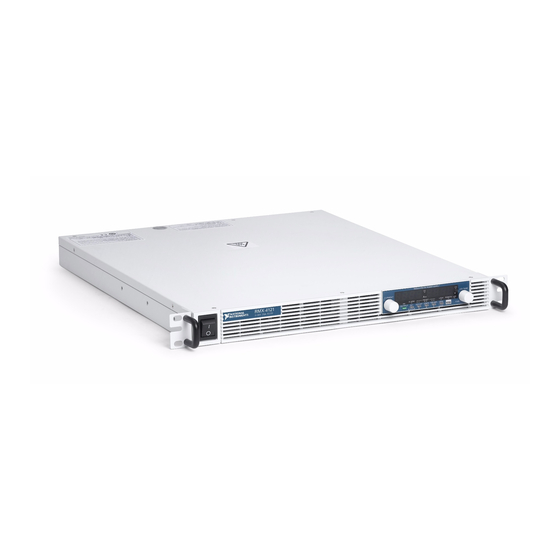
- Page 1 RMX Programmable Power Supplies User Manual RMX-4120 RMX-4121 RMX-4122 RMX-4123 RMX-4124 RMX-4125 RMX-4126 RMX-4127 RMX Programmable Power Supplies User Manual February 2017 375744C-01...
-
Page 2: Safety Guidelines
11500 North Mopac Expressway Austin, Texas 78759-3504 USA Tel: 512 683 0100 For further support information, refer to the NI Services appendix. To comment on National Instruments documentation, refer to the National Instruments website at ni.com/info enter the Info Code feedback... -
Page 3: Legal Information
National Instruments Corporation. National Instruments respects the intellectual property of others, and we ask our users to do the same. NI software is protected by copyright and other intellectual property laws. Where NI software may be used to reproduce software or other materials belonging to others, you may use NI software only to reproduce materials that you may reproduce in accordance with the terms of any applicable license or other legal restriction. - Page 4 ™ The ExpressCard word mark and logos are owned by PCMCIA and any use of such marks by National Instruments is under license. The mark LabWindows is used under a license from Microsoft Corporation. Windows is a registered trademark of Microsoft Corporation in the United States and other countries.
-
Page 5: Table Of Contents
Chapter 1 Installation and Preparation Attaching the Connector Cover ..................1-1 Connecting the Power Cord....................1-1 RMX-4120/4121/4122/4123 (750 W Models) ............1-2 Necessary Cable ....................1-2 RMX-4124/4125/4126/4127 (1500 W Models) ............1-2 Necessary Cable ....................1-3 Switchboard Breaker Requirements ..............1-3 Connection Procedure.................... - Page 6 Contents Measured Value Display, Setting Display, and Set OVP/OCP Display....2-3 Fine Adjustment....................2-3 Output Operations......................2-3 Output State at Power-up..................2-4 Operation Overview......................2-4 CV Power Supply and CC Power Supply................. 2-7 Crossover Point....................2-8 CV Mode and CC Mode Operation Examples ............2-8 Example 1 ......................
- Page 7 Features of the RMX Programmable Power Supplies During Series Operation..4-8 Voltage Display and Current Display............... 4-8 External Control ....................4-8 External Monitoring ..................4-8 Remote Sensing ....................4-9 Alarm ........................ 4-10 Connection (Series Operation) ................. 4-10 Connecting the Load (Series Operation) ............4-10 © National Instruments | vii...
- Page 8 Contents Settings (Series Operation) ..................4-11 Setting the Voltage and Current................ 4-11 Setting the Overvoltage Protection (OVP) and Overcurrent Protection (OCP).. 4-11 Starting (Series Operation) ..................4-11 Turning the Power On and Off ................. 4-11 Turning the Output On and Off ................ 4-11 Chapter 5 Maintenance Calibration Overview......................
-
Page 9: Installation And Preparation
IEC Safety Class I (equipment that has a protective conductor terminal). Be sure to earth ground the product to prevent electric shock. The product is grounded through the power cord ground wire. Connect the protective conductor terminal to earth ground. © National Instruments | 1-1... -
Page 10: Rmx-4120/4121/4122/4123 (750 W Models)
Chapter 1 Installation and Preparation RMX-4120/4121/4122/4123 (750 W Models) Necessary Cable • North America—Extra Hard Usage Cord, min. 300 V, 60 C, 14 AWG, 3 Conductor cord, 3 m or less, with a NEMA 5-15P to C14. • Europe—HAR Marked, min. 300 V, 60 C, 2.5mm , 3 Conductor cord, 3 m or less, with a plug configured for the country of use to C14. -
Page 11: Necessary Cable
Indicate that the breaker is dedicated for use with this product and that it is used to disconnect the product from the AC power line. Figure 1-2. Switchboard Diagram Breaker indication example For the RMX-4125 only 30 A RMX-4125 Switchboard dedicated breaker RMX-4125 Power cord © National Instruments | 1-3... -
Page 12: Connection Procedure
Chapter 1 Installation and Preparation Connection Procedure Check that the AC power line meets the nominal input rating of the product. The product can receive a nominal line voltage in the range of 100 VAC to 240 VAC at 50 Hz or 60 Hz. Check that the POWER switch is turned off. - Page 13 Attach an appropriate crimping terminal to the switchboard end of the power cord. Turn off the switchboard breaker. Connect the L, N, and (GND) wires of the power cord to the matching terminals on the switchboard. © National Instruments | 1-5...
-
Page 14: Turning The Power On
Chapter 1 Installation and Preparation Turning the Power On Turning the POWER Switch On Risk of electric shock. Regardless of whether load cables are connected to Caution the output terminals, be sure to attach the OUTPUT terminal cover before turning the POWER switch on. -
Page 15: Inrush Current
POWER switch back on. Repeatedly turning the POWER switch on and off at short intervals can cause damage to the inrush current limiter. Furthermore, this will shorten the service life of the POWER switch and the internal input fuse. © National Instruments | 1-7... -
Page 16: Rack Mounting
Chapter 1 Installation and Preparation Rack Mounting You can use brackets or slide rails to mount the RMX programmable power supply to a rack. When you mount an RMX programmable power supply to a rack, install the optional support angles (NI P/N) to support the device. NI recommends that you keep all pieces that you remove from a RMX programmable power supply during installation. -
Page 17: Loads That Generate Reverse Current To The Power Supply
This cannot be used in conjunction with remote sensing. Figure 1-8. Loads with Accumulated Energy : Reverse-current-protection diode RMX-4122 Load with accumulated energy © National Instruments | 1-9... -
Page 18: Load Cables
Chapter 1 Installation and Preparation To protect the load and the RMX programmable power supplies, use a D Caution that conforms to the following specifications. • Reverse voltage withstand capacity–At least twice the rated output voltage of the RMX programmable power supply. •... -
Page 19: Protecting Against Noise
Specifications, to see the maximum voltage drop each RMX power supply's remote sense terminals can compensate for. If the voltage drop exceeds this level, use shorter load cables or cables with a greater cross-sectional area. © National Instruments | 1-11... -
Page 20: Connecting To The Output Terminals
Chapter 1 Installation and Preparation Connecting to the Output Terminals Risk of electric shock. Turn the POWER switch off before you touch the Caution OUTPUT terminals. Even if you turn the output off or turn the POWER switch off, if the bleeder on/off setting (CF11) is set to “OFF,” the voltage that was present when the output was on will remain at the output terminals. - Page 21 Connect the positive cable to the positive output terminal and the negative cable to the negative output terminal. The orientation of the crimping terminals will vary depending on the wire diameter of the load cables used. © National Instruments | 1-13...
- Page 22 Chapter 1 Installation and Preparation Figure 1-12. Connection Using M8 Bolt Set for RMX-4120/4121/4124/4125 Crimping terminal Bolt (M8) Washer Spring washer Attach the cable to the inner side of the crimping terminal. Figure 1-13. Connection Using M5 Bolt Set for RMX-4122/4123/4126/4127...
-
Page 23: Attaching The Output Terminal Cover
The top and bottom halves of the OUTPUT terminal cover have different Note shapes. Align the tabs of the top half of the OUTPUT terminal cover with those of the bottom half. Align the tabs of the OUTPUT terminal cover according to the load cable diameter. © National Instruments | 1-15... - Page 24 Chapter 1 Installation and Preparation Figure 1-15. Aligning Both Halves of the OUTPUT Terminal Cover For thin load cables Align the protrusion of Cover hole diameter: the top half of the cover Top half of the cover Up to 10 mm with the middle section of the protrusion of the bottom half of the cover.
-
Page 25: Sensing
J1, and J2 connectors. For safety reasons, be sure to attach the connector cover when you use the RMX programmable power supply. If they are damaged or lost, contact National Instruments. Figure 1-17. Connector Cover Figure 1-18. - Page 26 Chapter 1 Installation and Preparation Even if you turn the output off or turn the POWER switch off, if the bleeder on/off setting (CF11) is set to oFF, the voltage that was present when the output was on will remain at the output terminals. Set the bleeder on/off setting to on before you touch the sensing terminals.
-
Page 27: Local Sensing
(across the load). To minimize noise on the output signal, use twisted-pair wires or 2-core shielded wires. Connect the ground of your shielded wire to the ground of the RMX programmable power supply or the load. © National Instruments | 1-19... - Page 28 Chapter 1 Installation and Preparation Figure 1-21. Remote Sensing Use twisted-pair wires for the load cables. Make the cables as short as possible. Output terminal Chassis terminal Load – Sensing terminal Connect an – electrolytic capacitor across the load as necessary. For the sensing cables, use twisted-pair wires or shielded wires.
- Page 29 Finally, bring the top and bottom sides of the connector cover together, and fasten with the included screws. Figure 1-24. Connector Cover Assembly Turn the power switch on. © National Instruments | 1-21...
-
Page 30: Connecting An Electrolytic Capacitor Across The Load
You can reduce the inductance component by twisting the load cables, which stabilizes the voltage. However, if this does not rectify the problem, connect an electrolytic capacitor across the load. Table 1-3. Electrolytic Capacitor with RMX Programmable Power Supplies RMX-4120 RMX-4121/ RMX-4122/ RMX-4123/... -
Page 31: Accessories
RMX Programmable Power Supplies User Manual Accessories RMX programmable power supplies have the following available accessories. For more information about accessories contact National Instruments. Parallel Operation Signal Cable This cable is used when you perform parallel operations. The following three types are available:... -
Page 32: Basic Functions
The output power is calculated from the measured output voltage and the measured output current. When displaying the output power, the PWR DSPL key LED will light up. Press PWR DSPL again to return to measured value display. Figure 2-2. Power Display © National Instruments | 2-1... -
Page 33: Setting Display
Chapter 2 Basic Functions Setting Display Press SET to display the present output voltage and output current settings, which will cause the SET key LED to illuminate. Press SET again to return to the measured value display. Figure 2-3. Setting Display When you recall a preset memory entry, the values stored in the preset memory entry are displayed on the panel. -
Page 34: Panel Operations
If you change the settings while the output is off, the device will switch to setting display mode (the SET key LED will light up). Pressing OUTPUT will apply and drive the output terminals using the new settings. © National Instruments | 2-3... -
Page 35: Output State At Power-Up
Chapter 2 Basic Functions You can use external control to toggle the output as well. Refer to Chapter 3, External Control, for additional information. CONFIG setting CF12 can be used to program the device to prioritize CC or CV mode at startup. Figure 2-7. - Page 36 RMX Programmable Power Supplies User Manual Figure 2-8. RMX-4120/4124 Output Power Rated output voltage: 30 V Rated output power Rated output power RMX-4120: 750 W RMX-4124: 1500 W Rated output current 70 75 RMX-4120 RMX-4124 140 150 160 Output current (A) Figure 2-9.
- Page 37 Chapter 2 Basic Functions Figure 2-10. RMX-4122/4126 Output Power Rated output voltage: 230 V Rated output power Rated output power RMX-4122: 750 W RMX-4126: 1500 W Rated output current RMX-4122 RMX-4126 Output current (A) Figure 2-11. RMX-4123/4127 Output Power Rated output voltage: 650 V Rated output power Rated output power RMX-4123: 750 W...
-
Page 38: Cv Power Supply And Cc Power Supply
R , the operating point falls in area B, and the RMX programmable power supply operates in CC mode (point q). In this case, set voltage V operates as a voltage limit. © National Instruments | 2-7... -
Page 39: Crossover Point
Chapter 2 Basic Functions When operating in CC mode, the output current is maintained at the programmed current setpoint. The output voltage V is determined by the equation V = I × R and is less than voltage limit V . -
Page 40: Using The Rmx Programmable Power Supplies As A Cv Or Cc Power Supply
RMX-4121 0 to 84 V RMX-4122 0 to 241.5 V RMX-4123 0 to 682.5 V RMX-4124 0 to 31.5 V RMX-4125 0 to 84 V RMX-4126 0 to 241.5 V RMX-4127 0 to 682.5 V © National Instruments | 2-9... - Page 41 Chapter 2 Basic Functions Turn the CURRENT knob to set the current. Current Range: 0 to 105% of the Rated Output Voltage RMX-4120 0 to 78.75 A RMX-4121 0 to 29.4 A RMX-4122 0 to 10.5 A RMX-4123 0 to 3.675 A RMX-4124 0 to 157.5 A...
-
Page 42: Protection Functions And Alarms
Overheat protection (OHP) • Overheat protection 2 (OHP2) • Fan failure protection (FAN) • Incorrect sensing connection protection (SENSE) • Low AC input protection (AC-FAIL) • Shutdown (SD) • Power limit (POWER LIMIT) • Communication monitoring (WATCHDOG) © National Instruments | 2-11... -
Page 43: Alarm Occurrence And Clearing Alarms
Chapter 2 Basic Functions Alarm Occurrence and Clearing Alarms Alarm Occurrence When a protection function is activated, RMX programmable power supplies behave as follows. Figure 2-13. OHP Alarm Indication with Output Off Figure 2-14. OHP Alarm Indication with Output On Blinking (in orange) •... -
Page 44: Clearing Alarms
If an alarm still occurs even after you have corrected all the causes of alarms, the RMX programmable power supply may be malfunctioning. Stop using it immediately, and contact National Instruments. For details about the specific conditions that cause each alarm to trigger, see the explanation of each protection function. -
Page 45: Protection Function Activation
Chapter 2 Basic Functions Protection Function Activation Setting limitation functions You can use the CONFIG settings to apply limits to the voltage and current output settings. You can set limitations so that the programmed values cannot exceed the set overvoltage protection (OVP trip point) and the set overcurrent protection (OCP trip point) and so that the values cannot be lower than the set undervoltage limit (UVL trip point). - Page 46 0.35 to 3.92 A OCP Setting 750 W 15 to 168 A 5.6 to 62.72 A 2 to 22.4 A 0.7 to 7.84 A OCP Setting 1500 W Press OCP•OVP twice to finalize the settings. © National Instruments | 2-15...
- Page 47 Chapter 2 Basic Functions The OCP•OVP key LED turns off, and the RMX programmable power supply returns to the measured value display. Checking OVP and OCP Operation The OVP and OCP functions are designed to protect the load. If you use the CONFIG settings to limit the voltage setting (CF15: ON), you will no longer be able to set the output voltage to a value that exceeds the OVP trip point.
- Page 48 Table 2-1. UVL Setting Range 0 to 105% of the Rated Output Voltage RMX-4120/ RMX-4121/ RMX-4122/ RMX-4123/ RMX-4124 RMX-4125 RMX-4126 RMX-4127 0 to 31.5 V 0 to 84 V 0 to 241.5 V 0 to 682.5 V UVL Setting Press OCP•OVP to finalize setting. © National Instruments | 2-17...
- Page 49 Chapter 2 Basic Functions Overheat Protection (OHP), Overheat Protection2 (OHP2) This protection function is activated when the RMX programmable power supply internal temperature rises to an abnormal level. Abnormal temperature levels can occur under the following conditions: • When used in an environment outside its operating ambient temperature range 0°C (32°F) to 50°C (122 °F) •...
- Page 50 This function operates regardless of whether the product is in remote or local (panel control) mode. When using local mode (panel control), set communication monitoring to off in the timer settings. When using remote mode, you can set the timer using a command (OUTP:PROT:WDOG). © National Instruments | 2-19...
-
Page 51: Config Settings
Chapter 2 Basic Functions You cannot stop communication monitoring with the *RST, *RCL, or *CLS command. In the alarm state, turn off communication monitoring before clearing the alarm. Figure 2-26. Alarm Indication when WATCHDOG has been Activated CONFIG Settings Use the CONFIG settings to set the RMX programmable power supply’s system configuration. You can set and display the following parameters in the CONFIG settings. - Page 52 CF15 Voltage setting limit † * CF16 Panel display brightness setting — CF17 Communication monitor timer setting — CF18 Unused — — CF19 Current and power display on slave units for — master-slave parallel operation © National Instruments | 2-21...
- Page 53 Chapter 2 Basic Functions Table 2-3. CONFIG Settings (Continued) Display Parameter Switching Number Description Effect Note CF20 LAN interface parameter * ‡ Interface CF21 Command language parameter CF22 Emulation parameter during remote control CF23 SCPI communication error display parameter CF24 Multichannel (VMCB) domain number parameter * ‡...
- Page 54 You cannot set the values of any of these CONFIG parameters. The SET key blinks when you have selected a CONFIG parameter whose Note setting you must confirm by pressing SET (CF00, and CF40). © National Instruments | 2-23...
-
Page 55: Specifying Cf01 To Cf36, Cf 41 To Cf52 Config Settings
Chapter 2 Basic Functions Specifying CF01 to CF36, CF 41 to CF52 CONFIG Settings Excludes CF00 (Reset panel settings) and CF40 (Resets or applies LAN Note interface settings). Complete the following steps to specify the CONFIG settings. Press CONFIG. The CONFIG key lights, and the SET key blinks. The ammeter displays the parameter number—CF00. -
Page 56: Specifying Cf00/Cf40 Config Settings
You can only use this parameter when the RMX programmable power supply is being used as a master unit. • Output voltage • Output current • Overvoltage protection • Overcurrent protection • Undervoltage limit • Output on/off at power-on • Constant current control using an Vext or Rext (CF05) © National Instruments | 2-25... - Page 57 Chapter 2 Basic Functions • Constant voltage control using an Vext or Rext (CF06) • External control setting for turning output on and off (CF09) • Voltage and current setting limits (CF15 and CF14) Value Parameter Description Resets the panel settings CF01 Master-slave Parallel Operation Parameter Sets the total number of units (master unit and slave units) in master-slave parallel operation.
- Page 58 (Rext) or an external resistance (Rext) via the J1 connector. This is set to “oFF” when the panel settings are reset (CF00) and when a preset memory entry is recalled. You can only specify this parameter when the RMX programmable power supply is being used as a master unit. © National Instruments | 2-27...
- Page 59 Chapter 2 Basic Functions Value Parameter Description External control will not be performed (factory default setting). External control will be performed. CF06 CV Control Using a Vext or Rext Selects whether constant voltage will be controlled by an external voltage (Vext) or an external resistance (Rext) via the J1 connector.
- Page 60 Depending on whether the bleeder circuit is enabled, the fall time of the output voltage and the amount of current sunk into the power supply will vary when an external load is connected. When using master-slave parallel operation or series operation, use the same settings on all connected units. © National Instruments | 2-29...
- Page 61 Chapter 2 Basic Functions Value Parameter Description The bleeder circuit is turned off. The bleeder circuit is turned on (factory default setting). CF12 Output-on Startup State Parameter Sets the operation mode to be prioritized when the output is turned on. Prioritizing the operation mode appropriately can prevent unwanted output overshoots at power-up.
- Page 62 (panel control) mode. If this parameter is not set to "oFF" and the specified time expires before any the device receives any SCPI commands, the Communication Monitoring (WATCHDOG) alarm will trigger. When using local mode (panel control), be sure to specify oFF. © National Instruments | 2-31...
- Page 63 Chapter 2 Basic Functions Value Parameter Description Communication monitor timer is set to off (factory default setting). 1 to 3000 1 s, 3 s, 10s, 30s, 100s, 300s, 1000s, 3000s CF18 Unused Value Parameter Description — Unused CF19 Current and Power Display on Slave Units for Master-slave Parallel Operation Sets whether the current or power on slave units is displayed during master-slave parallel operation.
- Page 64 This parameter is applied when you turn the POWER switch off and on. Value Parameter Description nonE Remote control is performed using the RMX programmable power supply’s commands made by National Instruments (factory default setting). 5700 Remote control is performed using the N5700/N8700 commands made by Agilent Technologies.
- Page 65 Chapter 2 Basic Functions CF24 Multichannel (VMCB) Domain Number Parameter Set the multichannel domain number. RMX models that have the same domain number perform multichannel operations. If you do not want to use the multichannel function, set this to 0 (this is the factory default setting).
- Page 66 To use the MANUAL IP function, set the DHCP server and AUTO IP function to off. The address that is assigned by the AUTO IP function is (where x is a number 169.254.x.x between 0 and 254). © National Instruments | 2-35...
- Page 67 Chapter 2 Basic Functions This parameter is applied when you turn the POWER switch off and on or when you execute APPL with CF40. If the LAN interface settings are reset (CF40: LCi/dEF) this is set to (110). Value/Display Parameter Description _ _¯...
- Page 68 This parameter is applied when you turn the POWER switch off and on or when you execute CF40. TCP port number 4880 cannot be used. Value Parameter Description 4000 to 9999 TCP port number (factory default setting: 5025) (except 4880, 5024, and 5044) © National Instruments | 2-37...
- Page 69 Chapter 2 Basic Functions CF50 Vendor ID Display Displays the USB Vendor ID. Display Description 3923 0x3923 CF51 Product ID Display Displays the USB Product ID. Display Description 78A3 RMX4121 0x78A3 78A4 RMX4122 0x78A4 78A6 RMX4124 0x78A6 78A7 RMX4125 0x78A7 78A8 RMX4126 0x78A8 78A9...
-
Page 70: Preset Memory Function
You can save preset memory entries when the output is on and the measured value display is being shown (the SET key LED is off). After you save a preset memory entry, press SET to view the preset memory values. © National Instruments | 2-39... -
Page 71: Recalling Preset Memory Entries
Chapter 2 Basic Functions Recalling Preset Memory Entries You can recall preset memory entries from the measured value display (when the SET key LED is off) and from the setting display (when the SET key LED is lit). If the output is on, the values in the preset memory entry are applied to the output the moment that the preset memory entry is recalled. -
Page 72: Locking Panel Operations (Key Lock)
Even if you turn the output off or turn the POWER switch off, if the bleeder on/off setting is set to “oFF” the voltage that was present when the output was on will remain at the output terminals. © National Instruments | 2-41... - Page 73 Table 2-4. Sink Current From an External Source when Bleeder is On/Off Sink Current Bleeder Model Circuit 10 V 15 V 20 V 25 V 30 V RMX-4120/ 704 mA 667 mA 630 mA 593 mA 556 mA 519 mA RMX-4124 0.2 mA 0.4 mA 0.6 mA...
- Page 74 RMX Programmable Power Supplies User Manual © National Instruments | 2-43...
-
Page 75: Fall Time
This is the time period for the rated output voltage to fall from 90% to 10% when the output is changed from on to off under no load conditions. Table 2-8. Fall Time of the Output Voltage when the Bleeder is Off Model Fall Time RMX-4120 310 seconds RMX-4121 280 seconds RMX-4122... -
Page 76: Factory Default Settings (Initialization)
External control parameter for turning output on and off CF10 External control logic parameter for LO (a LOW signal turns output on) turning output on and off CF11 Bleeder on/off parameter ON (bleeder circuit is on) © National Instruments | 2-45... - Page 77 Chapter 2 Basic Functions Table 2-10. CONFIG Settings (Continued) Parameter Number CONFIG Parameter Parameter Description CF12 Output-on startup state parameter CV (CV is prioritized) CF13 Detection time of OCP activation 0 ms CF14 Current setting limit ON (the setting is limited) CF15 Voltage setting limit ON (the setting is limited)
-
Page 78: External Control
J2 connectors. For safety reasons, be sure to attach the connector cover when you use the RMX programmable power supply. Figure 3-1. Connector Cover Plug kit 749809-9 DB25 is included for connecting to the J1 connector. © National Instruments | 3-1... -
Page 79: Attaching The J1 Cable Core
Chapter 3 External Control Attaching the J1 Cable Core To connect to the J1 connector, requires a core on the cable for connection. The core is not included. Use an appropriate core. Unlock the snap-on core and open to split. Figure 3-2. - Page 80 Correction signal output terminal for master-slave parallel operation. I SUM Current signal terminal for master-slave parallel operation. Not connected. N.C. Not connected. PRL ON On during master-slave parallel operation (output through an open-collector photocoupler). N.C. Not connected. © National Instruments | 3-3...
- Page 81 Chapter 3 External Control Table 3-1. J1 Connector Signals (Continued) Signal Name Description OUT ON/OFF CONT Output on/off terminal. On when set to LOW (0 to 0.5 V) or shorted (CF10: Lo); Off when set to HIGH (4.5 or 5 V) or open (CF10: Lo) On when set to HIGH (4.5 to 5 V) or open (CF10: Hi);...
-
Page 82: About The J2 Connector
J2 socket when the RMX programmable power supply ships from the factory. If you damage or lose the detachable plug, contact National Instruments for a replacement. To minimize the influence of noise, NI recommends using shielded twisted pair wires to make connections. - Page 83 Chapter 3 External Control Figure 3-7. J2 Connector Pinout Table 3-2. J2 Connector Signals Signal Description CV STATUS On when the RMX programmable power supply is in CV mode. (open-collector output from a photocoupler) CC STATUS On when the RMX programmable power supply is in CC mode.
-
Page 84: Output Terminal Insulation
RMX programmable power supply negative output terminal. Cables and devices that are connected to these pins must have a reinforced or double insulation with a capacity greater than or equal to the isolation voltage of the RMX programmable power supply. © National Instruments | 3-7... - Page 85 Chapter 3 External Control Figure 3-8. Output Terminal is Not Grounded (Floating) Because the output terminal is floating, the section shown on a gray background must have a reinforced or double Approximately the same insulation with a capacity potential as the negative greater than or equal to the output terminal RMX isolation voltage.
-
Page 86: When The Output Terminal Is Grounded
RMX programmable power supply. For safety reasons, connect one of the output terminals to the chassis terminal unless your application requires the output terminals to be floating. © National Instruments | 3-9... - Page 87 Chapter 3 External Control Figure 3-9. Output Terminal is Grounded Because the positive output terminal is at ground potential, the section shown on a gray background must have a reinforced or double insulation with a capacity Approximately the same greater than or equal to the potential as the negative maximum output voltage output terminal...
-
Page 88: Cautions When Controlling The Output With An External Voltage (Vext)
Figure 3-11. 2-core shielded wire Vext Approximately the same electric potential as – – the negative output terminal × Ground the Prohibited positive output terminal. – Output is shorted by the shield, causing current to flow. © National Instruments | 3-11... -
Page 89: Controlling The Output Voltage
Chapter 3 External Control Controlling the Output Voltage This section explains how to control the output voltage using an external voltage (Vext) or an external variable resistor (Rext) of approximately 10 kΩ. If no load is connected, it takes some time for the output voltage to decrease. There may be a delay between when you request a new voltage with Vext or Rext and when it shows up on the output terminals. -
Page 90: External Voltage (Vext) Connection
0 to 5 V (CF07: Lo) 0 to 10 V (CF07: Hi) Eo = Ertg × Vext/5 (in V) Eo = Ertg × Vext/10 (in V) Vext = 5 × Eo/Ertg (in V) Vext = 10 × Eo/Ertg (in V) © National Instruments | 3-13... -
Page 91: External Resistance (Rext) Connection
Chapter 3 External Control External Resistance (Rext) Connection For Rext, use a resistor that is rated at approximately 10 kΩ, 1/2 W or greater, that has a low temperature coefficient, and that will change little over time. Examples of such resistors are metal film or wire wound resistors. -
Page 92: Control Using An External Voltage (Vext)
Even if you use cables that are designed to suppress noise, the RMX programmable power supply may not operate properly. Figure 3-14. CC Vext Connection. 2-core shielded wire or twisted-pair wire Vext – Output terminals © National Instruments | 3-15... -
Page 93: Control Using An External Resistance (Rext)
Chapter 3 External Control If you use a shielded cable, connect the shield to the negative output terminal. Refer to Cautions When Controlling the Output with an External Voltage (Vext) if the shield needs to be connected to the Vext side. Use pins 21 and 23 of the J1 connector. Control Using an External Resistance (Rext) An external variable resistor (Rext) can be used along with the Reference Voltage Output (pin 20 on the J1 connector) to externally control the output current of the power supply. -
Page 94: Controlling The Output On And Off States
OUTPUT key on the front panel can still turn the output off and on. Refer to Figure 3-16 for more information about how a high signal is used to turn the output on. © National Instruments | 3-17... -
Page 95: External Contact Connection
Chapter 3 External Control Figure 3-16. Controlling the Output On and Off States. ▼ represents that the OUTPUT key has been pressed. H = On External contact L = Off Output The OUTPUT key is The external contact has To use the external contact to disabled. -
Page 96: Controlling Output Shutdown
6 and 19 is approximately 5 V. The short-circuit current across pins 6 and 19 is approximately 0.5 mA. Use external contacts that have a contact rating greater than or equal to 0.5 mA at 5 VDC. © National Instruments | 3-19... -
Page 97: Long-Distance Wiring
Figure 3-19. Output Shutdown Connection. 2-core shielded wire or twisted-pair wire Output terminals If two or more units are floating, and you are using a single external contact to turn output off for all the units, use a relay or similar device for the external contact signal to isolate the signal transmitted to each unit. -
Page 98: Alarm Clear Connection
If two or more units are floating, and you are using a single external contact to clear alarms, use a relay or similar device for the external contact signal to isolate the signal transmitted to each unit. © National Instruments | 3-21... -
Page 99: Long-Distance Wiring
Chapter 3 External Control Long-Distance Wiring When you are wiring over a great distance, use a small relay and extend the coil side of the relay. Figure 3-22. Long Distance Wiring. Relay Extend this line. External Monitoring The J1 connector has monitor outputs for the output voltage and the output current. Table 3-3. -
Page 100: External Monitoring Of The Operation Status
(PWR ON STATUS). This is the photocoupler open collector output. OUT ON STATUS This is set to low level when the output is turned on. This is the photocoupler open collector output © National Instruments | 3-23... -
Page 101: Parallel/Series Operation
You can switch the display so that it shows power. The master unit’s ammeter displays the sum of the power output of all the units connected in parallel. Each slave unit displays its own power. © National Instruments | 4-1... - Page 102 Chapter 4 Parallel/Series Operation If the number of units during master-slave parallel operation that has been specified in the CONFIG settings (CF01) does not match the actual number of units connected in parallel, the correct current will not be displayed. Figure 4-1.
-
Page 103: Connection (Master-Slave Parallel Operation)
PRL COMP OUT PRL COMP IN A COM PRL on COM PRL on OUT ON/OFF CONT I SUM I SUM Slave unit 2 PRL IN+ PRL IN– PRL COMP IN A COM OUT ON/OFF CONT I SUM © National Instruments | 4-3... -
Page 104: Connecting The Load (Parallel Operation)
Chapter 4 Parallel/Series Operation Decide which RMX programmable power supply to use as the master unit. Connect the J1 connector on the rear panel of the master unit to the J1 connector on the rear panel of the first slave unit. If you are using the optional parallel operation signal cable (PC01, PC02, or PC03-RMX), the connector is already assembled, so you can use it as is. - Page 105 Connect the same polarity output terminals on the master unit and slave units. If you are using the units under floating conditions, do not connect the terminals. Attach the OUTPUT terminal covers. If you have a third and fourth slave unit, connect them in the same manner. © National Instruments | 4-5...
-
Page 106: Settings (Master-Slave Parallel Operation)
Chapter 4 Parallel/Series Operation Settings (Master-Slave Parallel Operation) Setting the Master Unit, the Slave Units, and the Number of Units in Parallel Operation (Including the Master Unit) Turn the output off, and then configure the master unit (CF01: 2 to 4) and the slave units (CF01: SLAV) in master-slave parallel operation. -
Page 107: Starting Master-Slave Parallel Operation
POWER switch on and off at short intervals can cause damage to the inrush current limiter. In turn, this will shorten the service life of the POWER switch, internal input fuse, and other components. © National Instruments | 4-7... -
Page 108: Series Operation
Chapter 4 Parallel/Series Operation Series Operation The RMX-4123 and RMX-4127 cannot be used in series operation. If you Caution do, the output will exceed the isolation voltage resulting in a dangerous condition. Except for the RMX-4123 and RMX-4127, you can connect up to two units in series. You cannot perform master-slave series operation. -
Page 109: Remote Sensing
Figure 4-5. Connecting the Sensing Cables During Series Operation Unit 1 Output terminal Chassis terminal Sensing terminal Load – Unit 2 Connect an – Output terminal electrolytic capacitor across the load as Chassis terminal necessary. Sensing terminal © National Instruments | 4-9... -
Page 110: Alarm
Chapter 4 Parallel/Series Operation Alarm All the alarms that are detected on a single unit are also detected during series operation. You can use the CONFIG settings to specify what happens when the output is turned off because an alarm is detected. You can select to turn the output on automatically when the problem that caused the alarm is fixed (CF03: Auto) or to leave the output turned off when the problem is fixed (CF03: SAFE). -
Page 111: Settings (Series Operation)
In turn, this will shorten the service life of the POWER switch, internal input fuse, and other components. Turning the Output On and Off Press OUTPUT on unit 1 and unit 2 to turn the output on or off. © National Instruments | 4-11... -
Page 112: Maintenance
You can select an I/O interface from LAN and USB. Select one of interfaces, and an available VISA address string will be shown. Select it, and then click Proceed. The following main screen will appear: © National Instruments | 5-1... -
Page 113: Calibration Items
Chapter 5 Maintenance Calibration Items There are eight calibration items where you should do in the specified order: • VOLTAGE SET (OFST) • VOLTAGE SET (GAIN) • VOLTMETER SET (OFST) • VOLTMETER SET (GAIN) • CURRENT SET (OFST) • CURRENT SET (GAIN) •... -
Page 114: Basic Instructions
At this point of time, the calibration data is applied to the instrument, but not yet committed. So you need commit EEPROM for persistence. Revision History VER 1.0.0 (30 JULY 2016) • The first public edition VER 0.9.0 BETA (23 MAY 2011) • Evaluation Edition (developer use) © National Instruments | 5-3... -
Page 115: System Requirements
• Load wires that can flow the maximum DC current. Table 5-1. Recommended Shunt Resistor Model Rating Tolerance RMX-4120 100 A/50 mV (0.50 mΩ) < ±0.1% RMX-4121 30 A/50 mV (1.67 mΩ) < ±0.1% RMX-4122 10 A/50 mV (5 mΩ) <... -
Page 116: Connection
RMX Programmable Power Supplies User Manual Connection Figure 5-1. Voltage Calibration Output terminal Chassis terminal Figure 5-2. Current Calibration Shunt Output terminal Chassis terminal © National Instruments | 5-5... -
Page 117: Appendix A Specifications
Including the voltage drop in the load cables, the RMX output voltage must not exceed the maximum output voltage with rated output current. © National Instruments | A-1... - Page 118 Efficiency (MIN) ..........74% or more Hold-up time for power interruption (MIN) ..20 ms or greater DC Output Rating Output voltage RMX-4120 ........30 V RMX-4121 ........80 V RMX-4122 ........230 V RMX-4123 ........650 V Output current RMX-4120 ........75 A RMX-4121 ........28 A RMX-4122 ........10 A...
- Page 119 RMX Programmable Power Supplies User Manual Output power ..........750 W Voltage Setting range RMX-4120........0 to 31.5 V RMX-4121........0 to 84 V RMX-4122........0 to 241.5 V RMX-4123........0 to 682.5 V Setting accuracy........±(0.05% of setting +0.05% of rtg) Line regulation RMX-4120........
- Page 120 RMX-4122/RMX-4123 ....5 V Temperature coefficient (MAX) ....100 ppm/°C (during external control) Current Setting range RMX-4120 ........0 to 78.75 A RMX-4121 ........0 to 29.4 A RMX-4122 ........0 to 10.5 A RMX-4123 ........0 to 3.675 A Setting accuracy ........±(0.5% of setting +0.1% of rtg) Line regulation RMX-4120 ........±...
- Page 121 RMX Programmable Power Supplies User Manual Display Function Voltage display Maximum display RMX-4120/4121....... 99.99 (fixed decimal point) RMX-4122/4123....... 999.9 (fixed decimal point) Display accuracy........±(0.2% of rdng +5 digits) Current display Maximum display RMX-4120/4121/4122...... 99.99 (fixed decimal point) RMX-4123........9.999 (fixed decimal point) Display accuracy........
- Page 122 Overvoltage protection 2 (OVP2).....Turns the output off, displays OVP2, and lights ALARM Value (fixed) RMX-4120 ........36 V (120% of the rated output voltage) RMX-4121 ........96 V (120% of the rated output voltage) RMX-4122 ........276 V (120% of the rated output voltage) RMX-4121 ........780 V (120% of the rated output voltage)
- Page 123 J2 connector on the rear panel. Photocoupler open collector output; maximum voltage 30 V, maximum current (sink) 8 mA; isolated from the output and control circuits; status commons are floating (withstand voltage of less than or equal to 60 V); and status signals are not mutually isolated. © National Instruments | A-7...
- Page 124 Appendix A Specifications Control Features External control Output voltage control (VPGM) ....0 to 100% of the rated output voltage. Selectable control voltage range: 0 to 5 V or 0 to 10 V Accuracy ...........5% of rtg Output current control (IPGM) ....0 to 100% of the rated output current. Selectable control voltage range: 0 to 5 V or 0 to 10 V Accuracy ...........5% of rtg...
- Page 125 Program message terminator ....VXI-11 and HiSLIP: LF or END during reception, LF + END during transmission SCPI-RAW: LF during reception, LF during transmission This setting does not guarantee compatibility with all measuring instrument application software and drivers. Category 5; use a straight cable. © National Instruments | A-9...
- Page 126 Between input and FG ......±500 Vdc, 100 MΩ or more (70% or less) Between input and output RMX-4120/4121/4122......±500 VDC, 100 MΩ or more (70% or less) RMX-4123 ........±1000 VDC, 100 MΩ or more (70% or less) Between output and FG RMX-4120/4121/4122......±500 VDC, 40 MΩ...
- Page 127 RMX Programmable Power Supplies User Manual Figure A-1. RMX-4120/4121/4122/4123 Dimensions M3 screw holes × 4 Max. screw insertion depth: 8 mm (0.31 inches) 70 (2.76) 368 (14.49) 62 (2.44) MAX485 (19.09) 422.8 (16.65) MAX580 (22.83) MAX35 (1.38) 500 (19.69) 65.8 (2.59) 92 (3.62)
- Page 128 Appendix A Specifications RMX-4124/4125/4126/4127 AC Input Nominal input rating.........100 to 240 VAC, 50 to 60 Hz, single phase Input voltage range ...........85 to 265 VAC Input frequency ..........47 to 63 Hz Current (MAX) 100 VAC ...........21 A 200 VAC ...........10.5 A Inrush Current (MAX) ........70 A peak or less Power (MAX)
- Page 129 ± (0.1% +10 mV).” The load current fluctuation is 50% to 100% of the maximum current with the set output voltage. When the measurement frequency bandwidth is 10 Hz to 20 MHz. When the measurement frequency bandwidth is 10 Hz to 1 MHz. When the bleeder circuit on/off setting is on. © National Instruments | A-13...
- Page 130 Appendix A Specifications RMX-4126 ........150 ms RMX-4127 ........250 ms No load RMX-4124/4125.......800 ms RMX-4126 ........1500 ms RMX-4127 ........3000 ms Maximum remote sensing compensation voltage (single line) RMX-4124 ........1.5 V RMX-4125 ........4 V RMX-4126/4127.......5 V Temperature coefficient (MAX) ....100 ppm/°C (during external control) Current Setting range RMX-4124 ........0 to 157.5 A...
- Page 131 Preset memory ......... When a preset memory entry is being used, the PRESET A, B, or C LED lights in green. Press PWR DSPL to display the power on the ammeter. Each time you press this key, the display switches between power and current. © National Instruments | A-15...
- Page 132 Appendix A Specifications Protection Functions Overvoltage protection (OVP)......Turns the output off, displays OVP, and lights ALARM Setting range RMX-4124 ........3 to 33.6 V (10% to 112% of the rated output voltage) RMX-4125 ........8 to 89.6 V (10% to 112% of the rated output voltage) RMX-4126 ........23 to 257.6 V (10% to 112% of the rated output voltage)
- Page 133 J2 connector on the rear panel. Photocoupler open collector output; maximum voltage 30 V, maximum current (sink) 8 mA; isolated from the output and control circuits; status commons are floating (withstand voltage of less than or equal to 60 V); and status signals are not mutually isolated. © National Instruments | A-17...
- Page 134 Appendix A Specifications Control Features External control Output voltage control (VPGM) ....0 to 100% of the rated output voltage. Selectable control voltage range: 0 to 5 V or 0 to 10 V Accuracy ...........5% of rtg Output current control (IPGM) ....0 to 100% of the rated output current. Selectable control voltage range: 0 to 5 V or 0 to 10 V Accuracy ...........5% of rtg...
- Page 135 Program message terminator ....VXI-11 and HiSLIP: LF or END during reception, LF + END during transmission SCPI-RAW: LF during reception, LF during transmission This setting does not guarantee compatibility with all measuring instrument application software and drivers. Category 5; use a straight cable. © National Instruments | A-19...
- Page 136 Appendix A Specifications General Weight RMX-4124/4125........Approximately 9.5 kg (20.94 lb) RMX-4126/4127 ........Approximately 9.0 kg (19.84 lb) Environmental conditions Operating environment ......Indoor use, overvoltage category II Operating temperature ......0 to 50 °C (32 to 122 °F) Operating humidity ........20 to 85% rh (no condensation) Storage temperature ........-10 to 60 °C (14 to 140 °F) Storage humidity........90% rh or less (no condensation) Altitude .............Up to 2,000 m...
- Page 137 500 (19.69) 92 (3.62) 65.8 (2.59) 92 (3.62) 15 (0.59) #10-32 screw holes × 6 M4 screw holes × 4 Max. screw insertion depth: Max. screw insertion depth: 8 mm (0.31 inches). 6 mm (0.31 inches). © National Instruments | A-21...
-
Page 138: Electromagnetic Compatibility
Appendix A Specifications Safety This product is designed to meet the requirements of the following standards of safety for electrical equipment for measurement, control, and laboratory use: • IEC/EN 61010-1 • UL 61010-1 • CSA C22.2 No. 61010-1 For safety certifications, refer to the product label or the Online Product Note Certification... -
Page 139: Online Product Certification
At the end of the product life cycle, all products must be sent to EU Customers a WEEE recycling center. For more information about WEEE recycling centers, National Instruments WEEE initiatives, and compliance with WEEE Directive 2002/96/EC on Waste and Electronic Equipment, visit ni.com/environment/... -
Page 140: Troubleshooting
RMX programmable power supply. Check the voltage that is being applied. Has the overheat protection (OHP/ OHP2) function been activated? The internal temperature is abnormally high. Check the operating conditions. After you have removed the cause of the © National Instruments | B-1... - Page 141 Appendix B Troubleshooting abnormal temperature, turn the power switch on. The air inlet may be clogged, or the fan may be broken. Check them. Is a shutdown (SD) signal being applied? Set pin 6 of the J1 connector to HIGH (4.5 to 5 V) or open the pin, or eliminate the shutdown (SD) signal.
- Page 142 Is there a large amount of external voltage noise? Take measures against noise. The ripple increased when the load cable was changed. Are the remote sensing cables connected? When you are not using remote sensing, disconnect the remote sensing cables. © National Instruments | B-3...
- Page 143 Appendix B Troubleshooting ALARM LED Lights When the OUTPUT Switch is On The ALARM LED lights when the OUTPUT switch is turned on. Are the remote sensing cables and the sensing connectors connected? When you are not using remote sensing, connect the sensing connectors in local sensing mode. Are the polarities of the remote sensing cables connected in reverse? The polarities of the remote sensing cables may be connected in reverse, or the ends of the cables may be shorted.
- Page 144 The bleeder on/off function does not work. Are you using master-slave parallel operation or series operation? When using master-slave parallel operation or series operation, set the bleeder on/off settings (CF11) of all connected units to the same value. © National Instruments | B-5...
- Page 145 • System Integration—If you have time constraints, limited in-house technical resources, or other project challenges, National Instruments Alliance Partner members can help. To learn more, call your local NI office or visit ni.com/alliance © National Instruments | C-1...
- Page 146 Appendix C NI Services • Training and Certification—The NI training and certification program is the most effective way to increase application development proficiency and productivity. Visit for more information. ni.com/training – The Skills Guide assists you in identifying the proficiency requirements of your current application and gives you options for obtaining those skills consistent with your time and budget constraints and personal learning preferences.
- Page 147 CV, 2-7 measured value, 2-1 preset memory, 2-39 power, 2-1 protection functions, 2-11 setting, 2-2 remote sensing, 1-19 electromagnetic compatibility, A-22 RMX-4120 external control, 3-1 dimensions, A-11 specifications, A-2 RMX-4121 dimensions, A-11 factory default settings, 2-45 © National Instruments | I-A...
- Page 148 Index specifications, A-2 RMX-4122 dimensions, A-11 specifications, A-2 RMX-4123 dimensions, A-11 specifications, A-2 RMX-4124 dimensions, A-21 specifications, A-12 RMX-4125 dimensions, A-21 specifications, A-12 RMX-4126 dimensions, A-21 specifications, A-12 RMX-4127 dimensions, A-21 specifications, A-12 safety specifications, A-22 sensing cable connections, 1-18 local, 1-19 remote, 1-19 terminals and functions (table), 1-18...
Need help?
Do you have a question about the RMX-4120 and is the answer not in the manual?
Questions and answers