Table of Contents
Advertisement
Quick Links
Advertisement
Table of Contents

Subscribe to Our Youtube Channel
Related Manuals for CipherLab RS30


Summary of Contents for CipherLab RS30
- Page 1 RS30 Mobile Computer Android 4.4.2 Version 1.02...
- Page 2 CIPHERLAB and the client and remains the exclusive property of CIPHERLAB CO., LTD. If you find any problems in the documentation, please report them to us in writing. CIPHERLAB does not warrant that this document is error-free.
-
Page 3: Important Notices
IMPORTANT NOTICES FOR USA This equipment has been tested and found to comply with the limits for a Class B digital device, pursuant to Part 15 of the FCC Rules. These limits are designed to provide reasonable protection against harmful interference in a residential installation. This equipment generates, uses and can radiate radio frequency energy and, if not installed and used in accordance with the instructions, may cause harmful interference to radio communication. -
Page 4: For Product With Laser
The use of any batteries or charging devices, which are not originally sold or manufactured by CipherLab, will void your warranty and may cause damage to human body or the product itself. DO NOT disassemble, incinerate or short circuit the battery. - Page 5 If you want to put away the mobile computer for a period of time, download the collected data to a host computer, and then remove the battery pack from the mobile computer’s battery compartment. Store the mobile computer and battery pack separately.
-
Page 6: Europe - Eu Declaration Of Conformity
EUROPE - EU DECLARATION OF CONFORMITY This device complies with the essential requirements of the R&TTE Directive 1999/5/EC. The following test methods have been applied in order to prove presumption of conformity with the essential requirements of the R&TTE Directive 1999/5/EC: EN 60950-1: 2001 ... - Page 7 EN 300 440-2 V1.4.1: 2010 Electromagnetic compatibility and Radio spectrum Matters (ERM); Short range devices; Radio equipment to be used in the 1 GHz to 40 GHz frequency range; Part 2: Harmonized EN under article 3.2 of the R&TTE Directive. EN 300 328 V1.7.1: 2006 ...
-
Page 9: Release Notes
Change the options of Keyboard Emulation to None, InputMethod, KeyEvent Remove 2D Presentation Mode Add Security Level to GS1 Databar Limited (2D only) Add Battery Hot Swap to 2.1.3. Add a note of RS30 Charging Cradle to 1.2.1. 1.00 May 7, 2015 Initial release... -
Page 11: Table Of Contents
1.2.1. Charge Mobile Computer ..................12 1.2.2. Wired Data Transmission ..................15 1.2.3. Using Wireless Networks ..................15 USING THE RS30 MOBILE COMPUTER ................... 17 2.1. Battery ........................18 2.1.1. Battery Status Indicators..................19 2.1.2. Monitor Battery Level .................... 20 2.1.3. - Page 12 2.6. Language & Keyboard Input ................. 31 2.6.1. On-screen Keyboard ....................31 2.7. Sound and Volume ....................32 2.8. Programmable Keys ....................33 2.9. Data Capture ......................37 2.9.1. Barcode Reader ..................... 37 2.9.2. Digital Camera ....................... 37 2.10. Snap-on USB Charging Cable ................38 2.11.
- Page 13 4.3.7. Select Bluetooth Service ..................84 4.4. Use Near Field Communications ................85 USING THE PHONE.......................... 89 5.1. Phone Power ......................90 5.1.1. Turn On/Off Phone Power ..................91 5.1.2. SIM Card Missing ....................91 5.2. Phone Application ....................92 5.2.1.
-
Page 15: Introduction
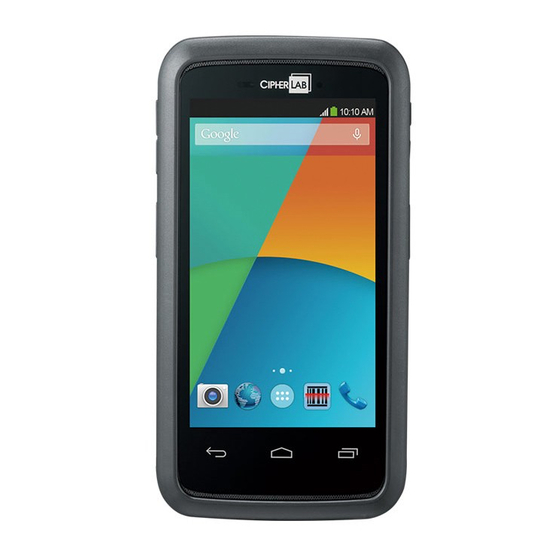
INTRODUCTION The RS30 Mobile Computer, powered by Android 4.4.2, is light-weight, easy to use, and provides more powerful and handy tools to delivering flexibility in customization. Specifically designed to work as an industrial PDA, the RS30 Mobile Computer provides rich options of data collection, voice and data communication, long-lasting working hours, and so on. -
Page 16: Features
RS30 Mobile Computer Reference Manual FEATURES Built tough to survive drop test and sealed against moisture/dust to industrial standard IP54 Android 4.4.2 operating system with a powerful Cortex 1.3 GHz Quad-Core processor 8GB eMMC flash memory to store OS and software programs ... - Page 17 Introduction Log in to GoBetween to access related documentation about the RS30 mobile computer from the CipherLab Central Service (CCS) platform. Download the GoBetween desktop or mobile device application, or launch the GoBetween Lite web application from the following site: http://ccs.cipherlab.com/.
- Page 18 RS30 Mobile Computer Reference Manual...
-
Page 19: Quick Start
Chapter 1 QUICK START 1.1. OVERVIEW... - Page 20 RS30 Mobile Computer Reference Manual Description Description Proximity+ALS Sensor Hole Receiver Status LED Touchscreen Power Button Micro USB Port Side Key Speaker Wristband Slot Charging Pins Headset Jack Scan Window Camera Flash Camera Battery Cover Latch Battery Cover NFC Detection Area...
-
Page 21: Installing Battery
Chapter 1 Quick Start 1.1.1. INSTALLING BATTERY For shipping and storage purposes, the mobile computer and the main battery are saved in separate packages. Note: Any improper handling may reduce the battery life. To install the main battery: 1) Push the battery lock at the top of the battery cover to the right in order to unlock. 2) The battery cover will open automatically. - Page 22 RS30 Mobile Computer Reference Manual Remove Battery 1) Unlock the battery lock and remove the battery cover. 2) Lift the battery up from its lower end. 3) Replace the battery cover and push the battery lock to the left.
-
Page 23: Installing Sim Card, Sam Card And Memory Card
Chapter 1 Quick Start 1.1.2. INSTALLING SIM CARD, SAM CARD AND MEMORY CARD The RS30 Mobile Computer is equipped with two SIM card slots, one SAM card slot and one memory card slot. To insert the cards: 1) Remove the battery cover as described in steps 1-3 of Installing Battery. -
Page 24: Installing Hardshell
RS30 Mobile Computer Reference Manual 1.1.3. INSTALLING HARDSHELL The Hardshell is a protective cover that shields the mobile computer from impact due to bumps, drops and scratches. To fit the mobile computer in the Hardshell: 1) Fix the upper end of the mobile computer in at a 45 degree angle. -
Page 25: Using Hardware Buttons
Chapter 1 Quick Start 1.1.5. USING HARDWARE BUTTONS On the bottom of the mobile computer are three hardware buttons that deliver the following functions: Button Function Description Returns to the previous screen or closes the Back button active window or keyboard. Displays the Home screen. -
Page 26: Charging & Communication
RS30 Mobile Computer Reference Manual 1.2. CHARGING & COMMUNICATION 1.2.1. CHARGE MOBILE COMPUTER The main battery may not be charged to full for shipment. When you first receive the kit package, you will need to charge the main battery to full before using the mobile computer. - Page 27 1) Fasten the Snap-on USB Charging Cable to the lower end of the mobile computer. 2) Connect the other end of the cable to the adapter. 3) Fix the adapter plug onto the adapter, and plug in into an electrical outlet. RS30 LED Indicator Status Description...
- Page 28 2) Connect the adapter to the Cradle, and plug the other end into an electrical outlet. Note: (1) The LED indicator on RS30 Charging Cradle shows the status of battery charging only; the status of terminal charging is shown on the device itself.
-
Page 29: Wired Data Transmission
Chapter 1 Quick Start 1.2.2. WIRED DATA TRANSMISSION Use the micro USB cable to connect the mobile computer to your PC for data transmission. 1.2.3. USING WIRELESS NETWORKS The mobile computer supports widely applied wireless technologies including Bluetooth v4.0 & v2.1+EDR, 802.11b/g/n and NFC, and is able to send/receive data in real time in an efficient way. - Page 30 RS30 Mobile Computer Reference Manual...
-
Page 31: Using The Rs30 Mobile Computer
Chapter 2 USING THE RS30 MOBILE COMPUTER This chapter explains the features and usage of the mobile computer. IN THIS CHAPTER 2.1 Battery ..............18 2.2 Memory ..............24 2.3 Touch Screen ............. 26 2.4 Notifications ............... 29 2.5 Date and Time ............30 2.6 Language &... -
Page 32: Battery
RS30 Mobile Computer Reference Manual 2.1. BATTERY Main Battery The mobile computer is powered by a rechargeable 3.7V / 2500mAh Li-ion battery pack, and it takes approximately 4 hours to charge it to full from the power adaptor. However, the charging time may vary by your working condition. -
Page 33: Battery Status Indicators
Chapter 2 Using the RS30 Mobile Computer 2.1.1. BATTERY STATUS INDICATORS The main battery pack is the only power source for the mobile computer to work. Therefore, when the main battery level goes low, you need to replace the battery pack with a charged one or charge it as soon as possible. -
Page 34: Monitor Battery Level
RS30 Mobile Computer Reference Manual 2.1.2. MONITOR BATTERY LEVEL MAIN BATTERY LEVEL The main battery is the only source that feeds the mobile computer to work. It also supplies the backup battery on the main board in order to retain the data stored in DRAM. When main battery level gets low, recharge it or replace it as soon as possible. - Page 35 Chapter 2 Using the RS30 Mobile Computer LOW BATTERY ALERT When the main battery level drops to 15%, the mobile computer prompts a warning reminding you to charge the main battery. Connect the mobile computer to an external power source, or replace the main battery pack as soon as possible.
-
Page 36: Replace Main Battery
RS30 Mobile Computer Reference Manual 2.1.3. REPLACE MAIN BATTERY When main battery level is low, follow the steps below to replace the main battery. 1) Press and hold the power button on the side of the mobile computer. 2) Tap power off in the pop-up menu. The mobile computer will power off. -
Page 37: Power Management
Chapter 2 Using the RS30 Mobile Computer 2.1.4. POWER MANAGEMENT For any portable device, power management is a critical issue especially when you are on the road. Below are some tips to help you save battery power. Warning: Using backlight, wireless connectivity, and peripheral devices while on battery power will substantially reduce battery power. -
Page 38: Memory
RS30 Mobile Computer Reference Manual 2.2. MEMORY Flash Memory (ROM) 8GB flash memory for storing the OS (Android 4.4.2) and custom application programs. Random-access Memory (RAM) 1GB RAM for storing and running programs, as well as storing program data. -
Page 39: Check Storage Space
Chapter 2 Using the RS30 Mobile Computer 2.2.1. CHECK STORAGE SPACE Tap Home | Settings | Storage to check usage of the internal and external storage spaces. -
Page 40: Touch Screen
RS30 Mobile Computer Reference Manual 2.3. TOUCH SCREEN The mobile computer comes with a 4.7” transmissive LCD with 960 by 540 pixels resolution (qHD). The LED backlight of the screen, which helps ease reading under dim environments, can be controlled manually and automatically. -
Page 41: Screen Timeout Settings
Chapter 2 Using the RS30 Mobile Computer 2.3.3. SCREEN TIMEOUT SETTINGS Tap Home | Settings | Display | Sleep. Select the time for screen timeout. -
Page 42: Text Size
RS30 Mobile Computer Reference Manual 2.3.4. TEXT SIZE Tap Home | Settings | Display | Font Size. Select the font size between Small, Normal, Large and Extra Large. -
Page 43: Notifications
Chapter 2 Using the RS30 Mobile Computer 2.4. NOTIFICATIONS 2.4.1. STATUS LED An LED indicators located above the touch screen provide information about charging status, scanner light beam, and scanner "Good Read" during data collection. Indicator Status Description Green, solid... -
Page 44: Date And Time
RS30 Mobile Computer Reference Manual 2.5. DATE AND TIME 2.5.1. SET DATE, TIME AND TIME ZONE By default, the mobile computer automatically synchronizes the date and time to the WWAN network (if connected). To set the data and time manually:... -
Page 45: Language & Keyboard Input
Chapter 2 Using the RS30 Mobile Computer 2.6. LANGUAGE & KEYBOARD INPUT Tap Home | Settings | Language & input to change the system language, default keyboard type, and configure keyboard input and speech settings. 2.6.1. ON-SCREEN KEYBOARD Tap a text input field to automatically open an on-screen keyboard. -
Page 46: Sound And Volume
RS30 Mobile Computer Reference Manual ENTER UPPERCASE LETTERS Tap and hold the Shift key, and tap a character key to enter an uppercase letter. The letters will return to lower case once an uppercase letter is entered. ENTER SYMBOLS to switch to a keyboard for entering numbers and symbols. On this keyboard, to open a keyboard for entering special characters. -
Page 47: Programmable Keys
Chapter 2 Using the RS30 Mobile Computer 2.8. PROGRAMMABLE KEYS Tap Home | Settings | Programmable Keys to assign specific functions to the four programmable keys: volume up, volume down, and the left and right function keys (side keys). After redefining the programmable keys, tap Apply to allow the changes to take effect. - Page 48 RS30 Mobile Computer Reference Manual ENABLE WAKEUP Select the Enable wakeup checkbox to enable pressing the key to wake the mobile computer from suspend mode. Note: This checkbox is automatically disabled if an application is selected for the key on the Apps tab page.
- Page 49 Chapter 2 Using the RS30 Mobile Computer ASSIGN APPLICATION Tap the key you would like to assign. Tap the Apps tab page to open a list of available applications. Scroll down to view the entire list of applications, and tap an application to apply.
- Page 50 RS30 Mobile Computer Reference Manual RESTORE FUNCTION To restore a key to its previously assigned function, tap the Restore button in the bottom right corner.
-
Page 51: Data Capture
Chapter 2 Using the RS30 Mobile Computer 2.9. DATA CAPTURE 2.9.1. BARCODE READER A selection of scan engines is available for delivering flexibility to meet different requirements. Depending on the scan engine integrated, the mobile computer is capable of scanning barcodes of a number of symbologies that are enabled by default while running the ReaderConfig.exe utility. -
Page 52: Snap-On Usb Charging Cable
RS30 Mobile Computer Reference Manual 2.10. SNAP-ON USB CHARGING CABLE The Snap-on USB Charging Cable provides a convenient way to charge your mobile computer. Click the Snap-on USB Charging Cable on to attach; pull either side outwards to detach Connect USB to PC or adapter to charge mobile computer... -
Page 53: Charging Cradle
Chapter 2 Using the RS30 Mobile Computer 2.11. CHARGING CRADLE The Charging Cradle charges your mobile computer and a spare battery at the same time. Presents charging compartment for mobile computer and spare battery Provides micro USB socket on the back for charging ... -
Page 54: Basic Operation
Chapter 3 BASIC OPERATION This chapter describes the basic skills to work with the RS30 Mobile Computer, for instance how to operate the home screen, check system statuses and manage notifications. The add-on utilities for applications regarding data collection, processing, and transmission are introduced in the following chapters. -
Page 55: Home Screen
Chapter 3 Basic Operation 3.1. HOME SCREEN When the mobile computer is fully charged, press the Power key for three seconds to turn on the mobile computer. A locked screen will appear. Slide the lock button in either direction to unlock the screen. The Home Screen appears showing a status bar, shortcut icons, and a dock bar containing an All Apps button. - Page 56 RS30 Mobile Computer Reference Manual Status bar Search bar Widget icons Shortcut icons Dock All Apps button...
-
Page 57: Customize Home Screen
Chapter 3 Basic Operation 3.1.1. CUSTOMIZE HOME SCREEN ADD APPLICATION SHORTCUT TO HOME SCREEN 1) On the home screen you would like to customize, tap 2) Locate the application to add. 3) Tap and hold the application icon. The home screen will appear. 4) Drag the application icon to your preferred position and release to have it placed. - Page 58 RS30 Mobile Computer Reference Manual 2) Tap Wallpapers in the menu that appears. 3) Select an image to apply as the wallpaper. 4) Tap Set wallpaper at the bottom of the wallpaper preview screen to apply it.
-
Page 59: Customize Wallpaper
Chapter 3 Basic Operation 3.1.2. CUSTOMIZE WALLPAPER 1) Tap and hold any empty area on the Home Screen. A settings menu for the Home Screen will open at the bottom. 2) Tap WALLPAPER in the settings menu. 3) A wallpaper selection screen opens. Scroll through the wallpapers to select a wallpaper to apply. -
Page 60: Widgets
RS30 Mobile Computer Reference Manual 3.2. WIDGETS Widgets are designed for easy control of settings and viewing of status. Enabled widgets will be displayed on the Home Screen. Widgets on Home Screen By default, two widgets are enabled, the power control widget and digital clock widget. -
Page 61: Add Widgets
Chapter 3 Basic Operation Screen brightness control. Tap to set the screen brightness profile between full, half, dim or auto. Shows the current time, date and the set alarm. Digital clock 3.2.1. ADD WIDGETS To add a widget: 1) Tap and hold any empty area on the Home Screen. A settings menu for the Home Screen will open at the bottom. -
Page 62: Remove Widgets
RS30 Mobile Computer Reference Manual 3.2.2. REMOVE WIDGETS To remove a widget: 1) Tap and hold a widget so it becomes highlighted. The widget is available for relocation. 2) Drag the widget to the top of the screen where a remove icon is located. The remove... -
Page 63: Status Bar
Chapter 3 Basic Operation 3.3. STATUS BAR The left side of the status bar shows notification icons, and the right side of the status bar shows status icons. Notification icons Status icons NOTIFICATION ICONS Icon Description More notifications are available, tap to show the Notifications Panel Upcoming event Data is syncing... - Page 64 RS30 Mobile Computer Reference Manual Text message is received Missed call Car mode is active Connected to/disconnected from VPN network Bluetooth tethering is active USB tethering is active Wi-Fi network is available Wi-Fi hotspot is active STATUS ICONS The icons at the top of the screen are explained below.
- Page 65 Chapter 3 Basic Operation Bluetooth is active Connected to a Bluetooth device Connected to a Wi-Fi network No Wi-Fi signal detected Signal strength of mobile network No mobile network signal Connected to 3G network Connected to HSPA network Connected to EDGE network Connected to GPRS network No SIM card installed...
-
Page 66: Notifications Panel
RS30 Mobile Computer Reference Manual 3.4. NOTIFICATIONS PANEL Use a downwards sliding motion from the top of the screen to open the notifications panel. To close the panel, slide the screen back upwards. VIEW NOTIFICATIONS Tap a notification message to enter a page for subsequent activity. The activity required for... - Page 67 Chapter 3 Basic Operation CLEAR NOTIFICATION Slide each notification sideways to have it cleared. Some notifications will require subsequent activity to be cleared; tap the notification to enter a corresponding settings page for taking further steps. CLEAR ALL NOTIFICATIONS on the status bar to clear all notifications. Ongoing notifications and notifications that require subsequent activity to be cleared will remain in the list.
-
Page 68: Applications Menu
RS30 Mobile Computer Reference Manual 3.5. APPLICATIONS MENU on the Home screen to open the applications menu. Icon Name Description Browser Accesses the internet or intranet. Calculator Performs mathematical calculations. Calendar Creates and manages events, meetings and appointments. Camera Takes pictures and shoots videos. - Page 69 Chapter 3 Basic Operation Places and receives calls, accesses voicemail, views call history, Phone manages phone contacts and adjusts phone settings. Sets scanner preferences, data output format and destination, Reader Config symbology settings, and reads barcodes. Searches the internet and mobile computer with the Google search Search engine.
-
Page 70: Manage Applications
RS30 Mobile Computer Reference Manual 3.6. MANAGE APPLICATIONS 3.6.1. CURRENT APPLICATIONS Tap and hold the Home button . The screen will show a list of recently used applications. Actions to taks on this screen include the following: SWITCH BETWEEN APPLICATIONS Tap one of the listed applications to open it on the screen. -
Page 71: Suspend & Lock
SUSPEND RS30 Press the power button to suspend the mobile computer. The mobile computer will... -
Page 72: Os Update
You may choose to update the system by establishing a wireless network connection to the Internet and downloading the update file from the OTA server. Or you may download the update file from CipherLab official website (http://ccs.cipherlab.com), and store it on an SD card. - Page 73 Chapter 3 Basic Operation 3) The mobile computer searches for the latest system update file on the server. Tap DOWNLOAD AND INSTALL to download the update file. Tap to refresh. When a new system update file is detected on the server, a notification icon will appear on the status bar, and a text notification will pop up in the notifications panel.
- Page 74 RS30 Mobile Computer Reference Manual If your mobile computer has the latest version installed already and there is currently no later version available, or if no wireless connection is established, the System updates screen will show the following message: 4) When the system update file has been downloaded, tap INSTALL to open an “Install update”...
- Page 75 Chapter 3 Basic Operation 5) Once complete, a notification will appear showing that the system has been updated successfully. Tap OK to show the Home screen. SD CARD UPDATE 1) Obtain the latest system update file, and copy the file onto the root storage of your SD card.
- Page 76 RS30 Mobile Computer Reference Manual A window pops up asking you to input the password for system update. Please contact with support@cipherlab.com.tw for the password. Enter the password and tap OK. 4) The mobile computer searches for an available system update file on the SD card.
- Page 77 Chapter 3 Basic Operation If there is a later version of the system update file available on the server, it will be listed on the screen along with the update file found on the SD card. Tap the update file you would like to use and proceed.
- Page 78 RS30 Mobile Computer Reference Manual 6) Once complete, a notification will appear showing that the system has been updated successfully. Tap OK to show the Home screen.
- Page 79 Chapter 3 Basic Operation...
-
Page 81: Wireless Radios
Chapter 4 WIRELESS RADIOS The Wi-Fi module integrated on the mobile computer lets you configure and connect to network wirelessly. IN THIS CHAPTER 4.1 Use Wireless Wide Area Network ........68 4.2 Use Wireless Local Area Network (Wi-Fi) ...... 73 4.3 Use Bluetooth ............. -
Page 82: Use Wireless Wide Area Network
RS30 Mobile Computer Reference Manual 4.1. USE WIRELESS WIDE AREA NETWORK The mobile computer will be automatically configured to connect to your wireless service provider’s network when you insert a SIM card and turn on data connection for the first time. -
Page 83: Share Wwan Data
Chapter 4 Wireless Radio EDIT ACCESS POINT NAME You may need to change the access point name according to the information obtained from your mobile carrier. 1) Tap Home | Settings | Mobile networks. 2) On the Network settings page, tap Access Point Names. , and tap New APN in the pop-up menu. -
Page 84: Data Usage
RS30 Mobile Computer Reference Manual 3) Tap the Wi-Fi hotspot label to manage Wi-Fi hotspot settings: set when to turn the Wi-Fi hotspot off, change SSID and security settings, select whether to minimize battery usage when Wi-Fi hotspot is enabled, enable WPS mode and adjust bandwidth, and view connected users. -
Page 85: Data Connection Settings
Chapter 4 Wireless Radio 3) A dialog appears confirming whether would like enable data auto-synchronization. Tap OK to confirm. Once auto-sync is enabled, any changes made to your personal account will be automatically reflected on the mobile computer. 4.1.3. DATA CONNECTION SETTINGS TURN ON/OFF DATA CONNECTION To manually turn on/off mobile data connection: 1) Tap Home... -
Page 86: Sim Card Settings
RS30 Mobile Computer Reference Manual 4.1.4. SIM CARD SETTINGS LOCK SIM CARD To lock the SIM card: 1) Tap Home | Settings | Security 2) Tap Set up SIM card lock. 3) Tap Lock SIM card. 4) Enter the PIN to enable SIM card lock. Once enabled, you are required to enter the PIN... -
Page 87: Use Wireless Local Area Network (Wi-Fi)
Chapter 4 Wireless Radio 4.2. USE WIRELESS LOCAL AREA NETWORK (WI-FI) 4.2.1. POWER ON/OFF WI-FI To power on Wi-Fi: 1) Tap the Wi-Fi icon on the power control widget. 1) Tap Home | Settings 2) Tap the Wi-Fi switch to turn on Wi-Fi power. Tap the switch once more to turn off Wi-Fi power. -
Page 88: Connect To Wi-Fi Network
RS30 Mobile Computer Reference Manual 4.2.2. CONNECT TO WI-FI NETWORK To connect to a Wi-Fi network: 1) Tap Home | Settings | Wi-Fi The Wi-Fi screen shows a list of available Wi-Fi hotspots. 2) Tap the network you would like to connect to. - Page 89 Chapter 4 Wireless Radio For WEP/WPA/WPA2 PSK connections: Enter the required password and tap Connect. For 802.1x EAP connections: Check the Show advanced options checkbox and select the EAP method in the drop-down box (PEAP, TLS, TTLS, PWD, SIM, AKA), and the Phase 2 authentication in the drop-down box (None, MSCHAPV2, GTC).
-
Page 90: Manually Add Wi-Fi Network
RS30 Mobile Computer Reference Manual 4.2.3. MANUALLY ADD WI-FI NETWORK If the network you would like to connect to does not broadcast its SSID, or if the network is out of range, you may add it manually. 1) On the Wi-Fi screen, tap the add button seated at the bottom. -
Page 91: Advanced Wi-Fi Settings
Chapter 4 Wireless Radio 4.2.4. ADVANCED WI-FI SETTINGS To configure advanced Wi-Fi settings: 1) On the Wi-Fi screen, tap the settings button seated at the bottom right. 2) Select Advanced in the pop-up menu. Available settings are as below: Icon Description Network notification Notifies when an open network is available. -
Page 92: Configure Proxy Server
RS30 Mobile Computer Reference Manual 4.2.5. CONFIGURE PROXY SERVER A proxy server acts as an intermediary between an endpoint device and another server from which the device is requesting a service. To change the proxy settings for a connection: 1) Tap a network in the available Wi-Fi hotspot list. -
Page 93: Disconnect Wi-Fi Network
Chapter 4 Wireless Radio 2) Tap Modify network in the pop-up menu. 3) In the dialog box that opens, modify the network settings, and tap Save. 4.2.9. DISCONNECT WI-FI NETWORK To disconnect a connected network: 1) Tap and hold a connected network in the Wi-Fi hotspot list. 2) Tap Forget network in the pop-up menu. -
Page 94: Use Bluetooth
RS30 Mobile Computer Reference Manual 4.3. USE BLUETOOTH The RS30 Mobile Computer lets you configure Bluetooth settings and manage Bluetooth services provided on remote devices. 4.3.1. BLUETOOTH PROFILES Bluetooth Profiles Supported Generic Access Profile (GAP) For device discovery and authentication. -
Page 95: Power On/Off Bluetooth
Chapter 4 Wireless Radio 4.3.2. POWER ON/OFF BLUETOOTH To power on Bluetooth: 1) Tap the Bluetooth icon on the power control widget. 1) Tap Home | Settings 2) Tap the Bluetooth switch to turn on Bluetooth power. Tap the switch once more to turn off Bluetooth power. Note: After turning on, Bluetooth power is maintained even when the mobile computer is suspended. -
Page 96: Set Bluetooth Visibility
RS30 Mobile Computer Reference Manual 4.3.3. SET BLUETOOTH VISIBILITY To pair Bluetooth devices: 1) Tap Home | Settings | Bluetooth 2) Tap Search For Devices at the bottom of the screen. The screen shows a list of Bluetooth devices nearby. -
Page 97: Change Bluetooth Name
Chapter 4 Wireless Radio 4.3.4. CHANGE BLUETOOTH NAME To change the Bluetooth name to make the mobile computer more: 1) On the available Bluetooth devices screen, tap in the bottom right corner. 2) Select Rename phone in the pop-up menu. Type a new name in the field and tap Rename. -
Page 98: Unpair Bluetooth Device
RS30 Mobile Computer Reference Manual 4) The Bluetooth pairing request window opens. Depending on the pairing settings of the Bluetooth device, you may need to enter a passkey, or confirm the assigned passkey on the device to pair if a smart pairing method is applied. -
Page 99: Use Near Field Communications
Chapter 4 Wireless Radio 4.4. USE NEAR FIELD COMMUNICATIONS Near field communications (NFC) uses close proximity (4 cm or less) to establish radio communication through electromagnetic fields. With NFC enabled, the mobile computer can collect information from NFC tags, exchange information with other NFC supported devices, and even change information on the NFC tag if authorized. - Page 100 RS30 Mobile Computer Reference Manual 2) Hold the mobile computer without covering the antenna area at the lower end of the battery cover. 3) Move the mobile computer in proximity with the device. A screen notification will appear to indicate that pairing is successful.
- Page 101 Chapter 4 Wireless Radio...
-
Page 103: Using The Phone
Chapter 5 USING THE PHONE The RS30 Mobile Computer allows making phone calls and connecting to the network over (WCDMA). Insert the SIM card before turning on Wideband Code Division Multiple Access the power. Refer to Inserting SIM Card. Note: If the SIM card is not in position, you may make emergency calls if the service is supported. -
Page 104: Phone Power
RS30 Mobile Computer Reference Manual 5.1. PHONE POWER The mobile computer accommodates two SIM cards and supports dual standby of two different networks. Both networks will be monitored at the same time, and the phone will dynamically switch between the two networks during usage. Calls will be placed with either one of the networks;... -
Page 105: Turn On/Off Phone Power
Chapter 5 Using the Phone 5.1.1. TURN ON/OFF PHONE POWER To power on the phone: 1) On the SIM management screen, tap the phone power switch to turn it on. Tap the switch once more to turn off Wi-Fi power. 5.1.2. -
Page 106: Phone Application
RS30 Mobile Computer Reference Manual 5.2. PHONE APPLICATION 5.2.1. PHONE INTERFACE 1) When a SIM card is installed on the mobile computer and the Phone Power is on, a signal icon appears on the status bar. The number of bars indicates the strength of the connection. - Page 107 Chapter 5 Using the Phone 4) Tap to open the dial pad. 5) Tap to open the dialer menu for setting speed dial numbers and opening the People application.
-
Page 108: Place Call
RS30 Mobile Computer Reference Manual 5.2.2. PLACE CALL Enter the phone number in the dial pad and tap to initiate the call. The phone keypad features the following buttons: Button Description Opens the dial pad. Turns on the speaker. Mutes the call. -
Page 109: Receive Incoming Call
Chapter 5 Using the Phone 5.2.3. RECEIVE INCOMING CALL When a call is incoming on the mobile computer, tap to pick it up. Incoming calls will be recorded in the Phone application; in the case of a missed call, a notification will be displayed. -
Page 110: Check Missed Calls
RS30 Mobile Computer Reference Manual 5.2.4. CHECK MISSED CALLS If you have a missed call, a notification icon will appear on the status bar, and a missed call icon will appear on the lock screen. The LED on the top of the screen will also blink red for notification. -
Page 111: View Call History
Chapter 5 Using the Phone 5.2.5. VIEW CALL HISTORY 1) On the Phone application page, tap the History button to open a list of history calls. 2) Use the tabs at the top of the screen to sort out the type of call. Button Description Lists all call history records. -
Page 112: Make Multi-Party Calls
RS30 Mobile Computer Reference Manual 5.2.6. MAKE MULTI-PARTY CALLS To make multi-party conference calls: 1) On the Phone application page, enter the first number to call and tap initiate the call. 2) After the call has begun, tap to add another member. The first call will be put on hold. -
Page 113: Audio Modes
Chapter 5 Using the Phone 5.2.7. AUDIO MODES The mobile computer offers three different audio modes for phone calls: HANDSET MODE This is the default audio mode which uses the receiver above the touchscreen for audio output during calls. SPEAKER MODE This mode uses the built-in speaker for audio output during calls. -
Page 114: Phone Settings
RS30 Mobile Computer Reference Manual 5.2.9. PHONE SETTINGS To open phone settings, tap the settings button to on the phone application. Indicator Status Description Sets the carrier for voicemail service and the number for Voicemail voicemail. IP prefix number Sets prefix number for IP dial. - Page 115 Chapter 5 Using the Phone TTY mode Sets teletypewriter (TTY) mode. International dialing Enables international dialing assistance assist...
-
Page 117: Using Reader Configuration Utility
Chapter 6 USING READER CONFIGURATION UTILITY The Reader Configuration utility allows you to manage the barcode reader integrated on the mobile computer. IN THIS CHAPTER 6.1 Configure Reader ............104 6.2 Read Printed Barcodes ..........124... -
Page 118: Configure Reader
The mobile computer is capable of reading printed barcodes. The reader module can be either a (laser) 1D reader or a 2D imager. The mobile computer is installed with a CipherLab utility Reader Config to configure the scan engine built inside. Use it to create a profile of settings that best suits your needs. -
Page 119: General Settings
Chapter 6 Using Reader Configuration Utility 6.1.1. GENERAL SETTINGS General Settings is where all reader settings are accessed from. Tap each item to enter its sub-menu. The functions under General Settings include: Scanner Preferences Data Output Enable Reader (enabled by default) ... - Page 120 RS30 Mobile Computer Reference Manual SCANNER PREFERENCES Options on the Scanner Preferences page differ according to the type of scan engine built within the mobile computer. To open Scanner Preferences page: 1) Open Reader Config as described in Launch Reader Config.
- Page 121 Chapter 6 Using Reader Configuration Utility 1D LINEAR IMAGER SETTINGS Setting Description Default Decode Timeout Sets the maximum time (configurable from 1 to 9 sec) for the 3 sec decoding process during a scan attempt. Redundancy Level Sets how many successful readings should be done before Level 1 linear barcodes such as Codabar, MSI, and Interleaved 2 of 5 can be decoded.
- Page 122 RS30 Mobile Computer Reference Manual 1D LASER READER SETTINGS Setting Description Default Decode Timeout Sets the maximum time for the decoding process during a scan. 3 sec Configurable between 1 sec to 9 sec. Redundancy Level Sets how many successful readings should be done before...
- Page 123 Chapter 6 Using Reader Configuration Utility 2D IMAGER SETTINGS Setting Description Default Decode Timeout Sets the maximum time for the decoding process during a scan. 3 sec. Configurable between 1 sec to 9 sec. Redundancy Level Sets how many successful readings should be done before Level 1 linear barcodes such as Codabar, MSI, and Interleaved 2 of 5 can be decoded.
- Page 124 RS30 Mobile Computer Reference Manual Display Mode Enable improved performance reading barcodes Deselected (Disabled) electronic displays and mobile phones. Inverse Type Decide whether to disable or enable decoding inverse barcodes, Regular or set as auto. only Addon Redundancy Functions when “auto-discriminate” is applied for UPC/EAN addons.
- Page 125 Chapter 6 Using Reader Configuration Utility HOW TO OUTPUT After the output destination is set, configure how to output decoded data, i.e. the “format” to present decoded data. Setting Description Default Auto Enter Adds an ENTER character before or after each string of Decoded data decoded data.
- Page 126 RS30 Mobile Computer Reference Manual Notification Settings enables audible, visible and tactile feedback for scanning good read, which helps notify the user of a successful decoding. To open Notification Settings page: 1) Open Reader Config as described in Launch Reader Config.
-
Page 127: Symbology
Chapter 6 Using Reader Configuration Utility 6.1.2. SYMBOLOGY The Symbology page sets the symbologies to read, and also enables/disables some feature(s) for a symbology to read, such as: Customize and transmit start/stop characters Verify/transmit check digits Enable/disable addon digits ... - Page 128 RS30 Mobile Computer Reference Manual To open Symbology settings page: 1) Open Reader Config as described in Launch Reader Config. 2) Tap 1D Symbologies or 2D Symbologies (in case of a 2D imager) to list all symbologies which can be decoded.
- Page 129 Chapter 6 Using Reader Configuration Utility ENABLE/DISABLE SYMBOLOGY Tap the label of each symbology to enable or disable it.
- Page 130 RS30 Mobile Computer Reference Manual SYMBOLOGY SETTINGS Tap the Detail label below each symbology to access detailed settings for the specific symbology. For details about the featured settings: See Appendix II: CCD Linear Imager Symbology Settings. See Appendix III: Laser Reader Symbology Settings.
-
Page 131: Miscellaneous
Chapter 6 Using Reader Configuration Utility 6.1.3. MISCELLANEOUS This section allows enabling code ID transmission for easy identification of the scanned barcode. Setting Description Default Transmit AIM Code ID Sets whether to include AIM code ID character in the Deselected decoded data. -
Page 132: Reader Config Option Menu
RS30 Mobile Computer Reference Manual 6.1.4. READER CONFIG OPTION MENU Reader Config provides an option menu which is accessible on the menu bar of the main settings page. This menu allows you to test scan barcodes, import/export all settings in a re-usable format, reset all settings back to factory default, and view copyright and version information. - Page 133 Chapter 6 Using Reader Configuration Utility SCAN TEST To test scan a barcode: 1) Open Reader Config as described in Launch Reader Config. 2) Tap the settings button on the menu bar to open the option menu. 3) Tap Scan Test in the option menu. A page opens for test scanning.
- Page 134 RS30 Mobile Computer Reference Manual IMPORT AND EXPORT Reader Config supports saving the settings and exporting them as an .xml file. Previously exported symbology and scanner settings can be imported again on the mobile computer. This can also be used to implement identical Reader Config settings on multiple devices.
- Page 135 Chapter 6 Using Reader Configuration Utility To export settings: 1) Open Reader Config as described in Launch Reader Config. 2) Tap the settings button on the menu bar to open the option menu. 3) Tap Export. An export page opens allowing you to enter the name and location of the profile to save. 4) Tap OK to export.
- Page 136 RS30 Mobile Computer Reference Manual RESET TO FACTORY DEFAULTS This function restores all settings in the Reader Config application to default. To enable Factory Reset: 1) Open Reader Config as described in Launch Reader Config. 2) Tap the settings button on the menu bar to open the option menu.
- Page 137 Chapter 6 Using Reader Configuration Utility ABOUT Tap About in the Reader Config option menu to display software version and copyright information.
-
Page 138: Read Printed Barcodes
RS30 Mobile Computer Reference Manual 6.2. READ PRINTED BARCODES Aside from output to destinations as per Keyboard Emulation settings, Reader Config provides a Scan Test feature for quick viewing of decoded data. To perform test scanning of barcodes: 1) Open Reader Config as described in Launch Reader Config. - Page 139 Chapter 6 Using Reader Configuration Utility The decoded data will appear on the page. When finished viewing, tap to leave the test scan page. To display more information such as barcode type and length, configure the reader as in Data Output.
- Page 140 RS30 Mobile Computer Reference Manual TEST SCAN MENU Tap the settings button on the menu bar to save the decoded data as a .txt file or clear all data on the screen.
-
Page 141: Specifications
SPECIFICATIONS PLATFORM, PROCESSOR & MEMORY Operating System & CPU OS Version Android 4.4.2 Cortex 1.3 GHz Quad-Core Processor Memory 8GB eMMC 1GB LPDDR2 RAM Expansion Slot One microSDHC card slot (up to 32GB) SDXC supported COMMUNICATION & DATA CAPTURE Communication USB Client USB 2.0 OTG WPAN... -
Page 142: Electrical Characteristics
RS30 Mobile Computer Reference Manual Data & Image Capture Digital Camera 8 Mega pixels with user-controllable flash Barcode Reader Ordering options include Linear Imager (SM1) 1D Laser (SE955) 2D Imager (SE4500) HF RFID Reader ISO14443A/B (Mifare), ISO15693 (Felica) Supports NFC (Peer-to-peer, Card reader, Card emulation) -
Page 143: Environmental Characteristics
Development Environment & Tools Integrated Development Visual Studio 2008 Environment Visual Studio 2005 Software Development Kit Microsoft SDK System API (DLL) for system configuration Reader API (DLL) for reader configuration Software & Utilities CipherLab Software Package Reader Configuration Third-party Software Kalipso... -
Page 144: Accessories
RS30 Mobile Computer Reference Manual ACCESSORIES Accessory Options Hardshell Charging Cradle... -
Page 145: Scan Engine Settings
Appendix I SCAN ENGINE SETTINGS The CipherLab developed utility Reader Configuration sets the following reader types: CCD (SM1) 1D Laser (SE955) 2D Imager (SE4500DL) Note: 1D and 2D scan engines don’t coexist on the mobile computer as they are both barcode readers and the mobile computer allows one barcode reader only. -
Page 146: Symbologies Supported
RS30 Mobile Computer Reference Manual SYMBOLOGIES SUPPORTED Depending on the scan engine integrated on the mobile computer, supported symbologies will differ as listed below. For details on configuring associated settings, refer to Appendix II, III, and IV. Laser Codabar ... - Page 147 Scan Engine Settings Netherlands KIX Code US Postnet US Planet UK Postal EAN/UPC EAN-8 EAN-8 Extend EAN-13 Bookland EAN (ISBN) ...
- Page 148 RS30 Mobile Computer Reference Manual...
-
Page 149: Ccd (Sm1)
Appendix II CCD (SM1) The tables below list the symbologies settings for CCD scan engine (SM1). SYMBOLOGY SETTINGS CCD Engine Description Default CODABAR Codabar Enable Codabar Switch to enable Codabar decoding. Enable Length option Sets the length of the Codabar symbols to decode. Max / Min Length One Fixed length (Length 1) - Page 150 RS30 Mobile Computer Reference Manual Code 32 Prefix Prefix character “A” to Code 32 barcodes. Disable “Convert to Code 32” must be enabled for this to function properly. Verify Check Digit Selects whether to verify the Modulo 43 check digit. If the Disable check digit is incorrect, the barcode will not be accepted.
- Page 151 CCD (SM1) Interleaved 25 Interleaved 25 Switch to enable Interleaved 2 of 5 decoding. Enable Length option Sets the length of the Interleaved 2 of 5 symbols to decode. Max / Min Length One Fixed length (Length 1) (4-55) Two Fixed lengths (Length 1>Length 2) Max / Min Length (range: 0-55;...
- Page 152 RS30 Mobile Computer Reference Manual Algorithm When two check digits are set for verification, two choices Double Modulo 10 are available for the pair of check digits. Modulo10 / Modulo11 Double Modulo 10 UPC/EAN EAN-8 EAN-8 Switch to enable EAN-8 decoding.
- Page 153 CCD (SM1) Preamble Decide whether include UPC-A/UPC-E/UPC-E1 Transmit System preamble System Character (and Country Code) in the data being transmitted. Character No transmit: transmits none of the above Transmit System Character: transmits system number only Transmit Sys. Character and Country Code: transmits system number and country code Transmit Check Digit Decide whether to include the UPC-A check digit (the last...
- Page 154 RS30 Mobile Computer Reference Manual Preamble Decide whether include UPC-A/UPC-E/UPC-E1 Transmit System preamble System Character (and Country Code) in the data being transmitted. Character No transmit: transmits none of the above Transmit System Character: transmits system number only Transmit Sys. Character and Country Code: transmits system...
-
Page 155: Laser (Se955)
Appendix III LASER (SE955) The tables below list the symbologies settings for 1D laser scan engine (SE955). SYMBOLOGY SETTINGS Symbology Description Default CODABAR CodaBar Enable Codabar Switch to enable Codabar decoding. Enable Length option Sets the length of the Codabar symbols to decode. Max / Min Length One Fixed length (Length 1) - Page 156 RS30 Mobile Computer Reference Manual Check Digit Option Sets whether to verify check digits according to the selected Disable option. If the check digits are incorrect, the barcode will not be accepted. Disable One Check Digit Two Check Digits Transmit Check Digit...
- Page 157 Laser (SE955) Length option Sets the length of the Code 93 symbols to decode. Max / Min Length One Fixed length (Length 1) (4-55) Two Fixed lengths (Length 1>Length 2) Max / Min Length (range: 0-55; Length 1<Length 2) Any Length CODE 128 Code 128 Enable...
- Page 158 RS30 Mobile Computer Reference Manual Transmit Check Digit Decide whether to include the check digit in the data being Disable transmitted. Convert To EAN-13 Convert a 14-character Interleaved 25 barcode into EAN-13 Disable if the following requirements are met: The barcode must have a leading 0 and a valid EAN-13 check digit.
- Page 159 Laser (SE955) EAN-13 Enable EAN-13 Switch to enable EAN-13 decoding. Enable Bookland EAN Checkbox to enable ISBN decoding. If enabled, select Enable Bookland ISBN Format in the drop-down box below. Bookland ISBN Format Select to decode Bookland data starting with 978 as 10-digit Bookland format along with the Bookland check digit, or decode ISBN-10...
-
Page 160: Miscellaneous
RS30 Mobile Computer Reference Manual Preamble Decide whether include UPC-A/UPC-E/UPC-E1 Transmit preamble System Character (and Country Code) in the data System being transmitted. Character No transmit: transmits none of the above Transmit System Character: transmits system number only Transmit Sys. Character and Country Code: transmits system... -
Page 161: Aim Code Id - Code Characters
Laser (SE955) Transmit AIM Code ID Decide whether to include AIM Code ID in the data. Disable Each AIM Code ID contains a three-character string “]cm”: ] = Flag Character (ASCII 93) c = Code Character (see below) m = Modifier Character (see below) AIM CODE ID –... - Page 162 RS30 Mobile Computer Reference Manual Code 128 Standard data packet. No Function Code 1“FNC1” in the first character position. Function Code 1“FNC1” in the first character position. Function Code 1“FNC1” in the second character position. Interleaved 25 No check digit processing.
- Page 163 Laser (SE955) Data packet containing the data following an escape mechanism character. The data packet supports the ECI protocol. EAN-128 emulation Data packet is a EAN-128 barcode (= data is preceded with “]JC1”). Note: UPC portion of composite is transmitted using UPC rules. PDF417, Scan engine is set to conform to protocol defined in 1994 PDF417 symbology specifications.
- Page 164 RS30 Mobile Computer Reference Manual Data Matrix ECC 000-140, not supported. ECC 200. ECC 200, FNC1 in first or fifth position. ECC 200, FNC1 in second or sixth position. ECC 200, ECI protocol implemented. ECC 200, FNC1 in first or fifth position, ECI protocol implemented.
-
Page 165: Imager (Se4500Dl)
Appendix IV 2D IMAGER (SE4500DL) The tables below list the symbology settings for 2D imager (SE4500DL). SYMBOLOGY SETTINGS 1D SYMBOLOGIES Symbology Description Default CODABAR CodaBar Enable Codabar Switch to enable Codabar decoding. Enable Length option Sets the length of the Codabar symbols to decode. Max / Min Length One Fixed length (Length 1) - Page 166 RS30 Mobile Computer Reference Manual Check Digit Option Sets whether to verify check digits according to the selected Disable option. If the check digits are incorrect, the barcode will not be accepted. Disable One Check Digit Two Check Digits Transmit Check Digit...
- Page 167 2D Imager (SE4500DL) Length option Sets the length of the Code 93 symbols to decode. Max / Min Length One Fixed length (Length 1) (4-55) Two Fixed lengths (Length 1>Length 2) Max / Min Length (range: 0-55; Length 1<Length 2) Any Length CODE 128 Code 128...
- Page 168 RS30 Mobile Computer Reference Manual Length option Sets the length of the Discrete 2 of 5 symbols to decode. Max / Min Length One Fixed length (Length 1) (4-55) Two Fixed lengths (Length 1>Length 2) Max / Min Length (range: 0-55; Length 1<Length 2)
- Page 169 2D Imager (SE4500DL) Composite CC-C Enable Composite CC-C Switch to enable Composite CC-C decoding. Enable Composite TLC 39 Disable Composite TLC 39 Switch to enable Composite TLC 39 decoding. Disable Composite General Preference UPC Composite Mode UPC barcodes can be "linked" with a 2D barcode during UPC always transmission as if they were one barcode.
- Page 170 RS30 Mobile Computer Reference Manual Korean 3 of 5 Disable Enable Switch to enable MSI decoding. Enable Length option Sets the length of the MSI symbols to decode. Max / Min Length One Fixed length (Length 1) (4-55) Two Fixed lengths (Length 1>Length 2) Max / Min Length (range: 0-55;...
- Page 171 2D Imager (SE4500DL) Addon 2 Decide whether to decode EAN-8 with addon 2. Ignore addon Ignore Addon Auto-discriminate Addon 5 Decide whether to decode EAN-8 with addon 5. Ignore addon Ignore Addon Auto-discriminate Transmit Check Digit Decide whether to include the check digit in the data being Enable transmitted.
- Page 172 RS30 Mobile Computer Reference Manual Transmit Check Digit Decide whether to include the UPC-A check digit (the last Enable character in the barcode) in the data being transmitted. Convert to EAN-13 Checkbox to enable converting EAN-8 to EAN-13 format. Disable...
- Page 173 2D Imager (SE4500DL) Coupon Code Coupon Code Switch to enable Coupon Code decoding. Disable...
-
Page 174: Symbologies
RS30 Mobile Computer Reference Manual 2D SYMBOLOGIES Symbology Description Default Aztec Enable Aztec Switch to enable Aztec decoding. Enable Data Matrix Enable Data Matrix Switch to enable Data Matrix decoding. Enable Decode Mirror Image Switch to enable decode mirror images. -
Page 175: Miscellaneous
2D Imager (SE4500DL) The first codeword of MicroPDF417 is 910 or 911: The original Code ID "]L5" will be changed to "]C0". MicroQR Enable PDF417 Enable QR Code Enable QR Code Switch to enable QR Code decoding. Enable MISCELLANEOUS 2D Engine Description Default Miscellaneous Options...
Need help?
Do you have a question about the RS30 and is the answer not in the manual?
Questions and answers