CipherLab CP30 Reference Manual
Windows ce6.5 mobile computer
Hide thumbs
Also See for CP30:
- Reference manual (186 pages) ,
- Reference manual (187 pages) ,
- Reference manual (107 pages)
Table of Contents
Advertisement
Quick Links
Download this manual
See also:
Reference Manual
Advertisement
Table of Contents

Related Manuals for CipherLab CP30


Summary of Contents for CipherLab CP30
- Page 1 Windows CE6.5 Mobile Computer CP30 Version 1.00...
- Page 2 Due to continued product development this information may change without notice. The information and intellectual property contained herein is confidential between CIPHERLAB and the client and remains the exclusive property of CIPHERLAB CO., LTD. If you find any problems in the documentation, please report them to us in writing.
-
Page 3: For Canada
IMPORTANT NOTICES FOR USA This equipment has been tested and found to comply with the limits for a Class B digital device, pursuant to Part 15 of the FCC Rules. These limits are designed to provide reasonable protection against harmful interference in a residential installation. This equipment generates, uses and can radiate radio frequency energy and, if not installed and used in accordance with the instructions, may cause harmful interference to radio communications. -
Page 4: For Product With Laser
DISPOSE OF USED BATTERIES ACCORDING TO THE INSTRUCTIONS. The use of any batteries or charging devices, which are not originally sold or manufactured by CipherLab, will void your warranty and may cause damage to human body or the product itself. -
Page 5: Release Notes
RELEASE NOTES Version Date Notes Initial release 1.00 Aug. 10, 2011... -
Page 6: Table Of Contents
Connecting Headset........................8 Charging & Communications......................9 Using Wireless Networks ......................10 Using Cable..........................10 Using Cradle ..........................11 USING THE CP30 MOBILE COMPUTER ..................... 13 1.1 Battery ............................13 1.1.1 Battery sTATUS INDICATIONS ..................14 1.1.2 Power Management......................15 1.2 Memory ............................. 16 1.2.1 Caution of Data Loss......................16... - Page 7 2.5 Suspend & Reset........................44 2.5.1 Suspend Mode .........................44 2.5.2 Software Reset (Warm Boot) ...................44 2.5.3 Hardware Reset (Cold Boot) ....................45 CONFIGURING CP30 MOBILE COMPUTER..................47 3.1 smart shell ..........................48 3.2 Settings ............................. 50 3.2.1 Connections........................52 3.2.2 Personal..........................53 3.2.3 System ..........................
- Page 8 CP30 Mobile Computer Reference Manual 4.2.2 RSSI Level......................... 69 USING BLUETOOTH..........................71 5.1 Bluetooth Power ........................72 5.1.1 Power On via Wireless Manager..................72 5.1.2 Changing Bluetooth Settings...................73 5.2 Search Devices ......................... 74 5.3 Pair Devices ..........................76 5.3.1 pair ............................ 76 5.3.2 Unpair ..........................
- Page 9 CP30 Mobile Computer Reference Manual MORE APPLICATIONS ........................127 9.1 Backup Utility ..........................128 9.1.1 Managing the Registry ....................128 9.1.2 Preparing for Backup .....................129 9.1.3 Backing up Files ......................130 9.1.4 Using Backups for Restore ....................132 9.2 Button Assignment Utility .......................134 9.3 Signature Utility........................136 9.3.1 Capturing a Signature ....................137...
-
Page 10: Introduction
INTRODUCTION The CP30 Mobile Computer, running Windows Mobile 6.5 in palm size, is our new product line of PDA-style Mobile Computer. Light-weight, easy to use, it adds even more powerful and handy tools to delivering the flexibility in customization. Specifically designed to work as an industrial PDA, the CP30 Mobile Computer provides rich options of data collection, voice and data communications, long-lasting working hours, and so on. -
Page 11: Features
CP30 Mobile Computer Reference Manual FEATURES Built tough to survive drop test and sealed against moisture/dust to industrial standard IP 42. Microsoft Windows Mobile 6.5 operating system with a powerful Qualcomm MSM7225 528 MHz processor. 512 MB NAND flash memory to store OS and software programs. -
Page 12: Inside The Package
INSIDE THE PACKAGE The following items are included in the package. Save the box and packaging material for future use in case you need to store or ship the mobile computer. CP30 Mobile Computer Rechargeable Li-ion battery pack Stylus USB & Micro USB cable... - Page 13 CP30 Mobile Computer Reference Manual...
-
Page 14: Quick Start
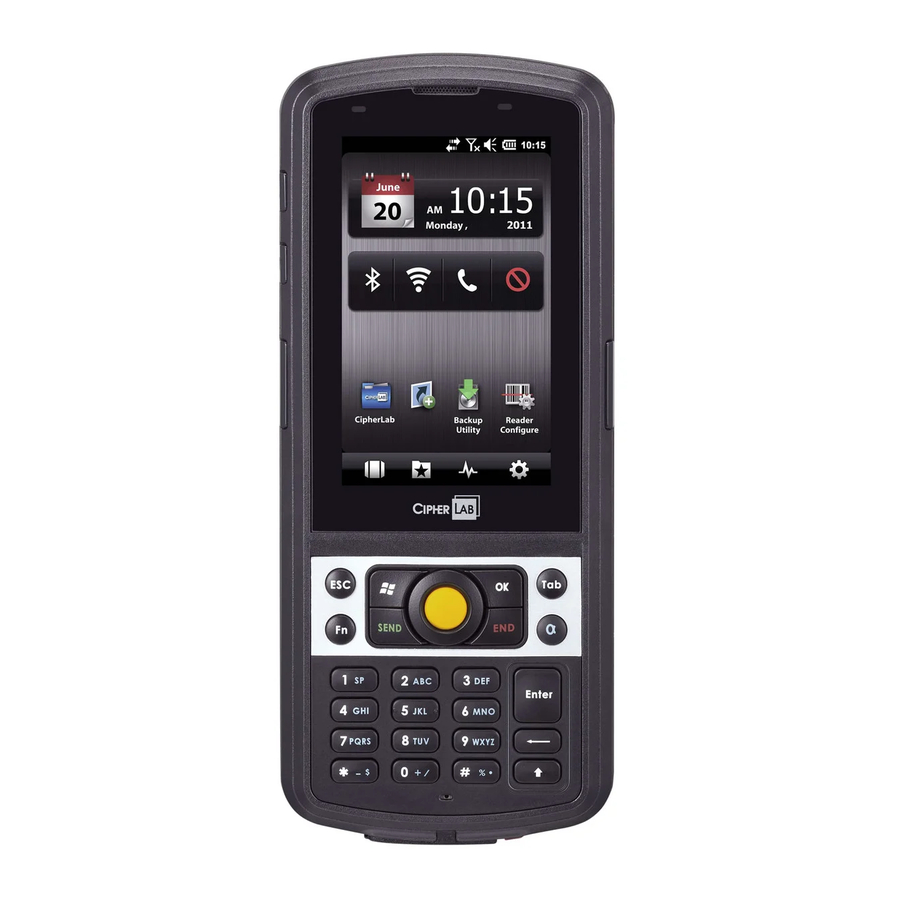
QUICK START OVERVIEW Description Description Receiver Status LEDs for Battery Charging / Good Read (left) and Messaging (right) Volume Buttons Side Triggers, user-definable Touch Screen Scan Key, user-definable Microphone Headset Jack I/O Connector & Memory Card Slot Power Key Digital Camera Scanning Window Stylus (to be tethered) Speaker... -
Page 15: Installing Battery
CP30 Mobile Computer Reference Manual INSTALLING BATTERY For shipping and storage purposes, the mobile computer and the main battery are saved in separate packages. Note: Any improper handling may reduce the battery life. Slide the battery cover latch to unlock the battery cover. -
Page 16: Inserting Sim Card
Quick Start INSERTING SIM CARD Slide the battery cover latch to unlock the battery cover. Remove the battery cover as well as the battery. Insert the SIM card to the SIM card slot, following the card orientation as shown. Replace the battery and battery cover. Slide the battery cover latch to lock the battery cover firmly. -
Page 17: Using Memory Card
CP30 Mobile Computer Reference Manual USING MEMORY CARD The SD card slot is at the bottom of the mobile computer, which allows microSD card. Inserting Card Flip up the rubber cover. Insert the memory card to the SD card slot. -
Page 18: Charging & Communications
Quick Start CHARGING & COMMUNICATIONS The main and spare batteries may not be charged to full for shipment. When you first receive the package, you will need to charge the main battery to full before using the mobile computer. Instead of direct charging, you may use a cradle or charger to charge the mobile computer or spare batteries. -
Page 19: Using Wireless Networks
CP30 Mobile Computer Reference Manual USING WIRELESS NETWORKS The mobile computer supports state-of-the-art wireless technologies, Bluetooth and 802.11b/g, so that it is able to send/receive data in real time in an efficient way. You may choose to have the GSM/GPRS module embedded for a total wireless solution for data and voice communications. -
Page 20: Using Cradle
Using ActiveSync. Note: Make sure that you have Microsoft ActiveSync installed on your computer before you connect the cable from the cradle to your computer. Status Description CP30 Indicator Charging Red, solid Charging the mobile computer Green, solid Charging done... - Page 21 CP30 Mobile Computer Reference Manual ActiveSync On Mode The mobile computer can transmit data via USB cable. The ActiveSync on your PC is enabled. Connect the USB cable from the cradle to your computer. Make sure the plastic bolt in front of the cradle has been pushed to upward for “ActiveSync On”...
-
Page 22: Using The Cp30 Mobile Computer
Chapter 1 USING THE CP30 MOBILE COMPUTER This chapter explains the features and usage of the mobile computer. IN THIS CHAPTER 1.1 Battery..............13 1.2 Memory..............16 1.3 Keypad..............17 1.4 Touch Screen ............21 1.5 Notifications.............. 23 1.6 Data Capture ............25 1.7 Cradle .............. -
Page 23: Battery Status Indications
CP30 Mobile Computer Reference Manual 1.1.1 BATTERY STATUS INDICATIONS The battery pack is the only power source for the mobile computer to work. Therefore, when the main battery charge goes low, you need to replace the battery pack with a charged one or charge it as soon as possible. -
Page 24: Power Management
Chapter 1 Using the CP30 Mobile Computer 1.1.2 POWER MANAGEMENT For any portable device, power management is a critical issue especially when you are on the road. Below are some tips to help you save battery power. Warning: Using backlight, keylight, wireless connectivity, and peripherals while on battery power will substantially reduce battery power. -
Page 25: Memory
CP30 Mobile Computer Reference Manual 1.2 MEMORY Flash Memory (ROM) 512 MB flash memory for storing OS (Windows Mobile 6.5) and custom application programs. Yet a portion of the memory is referred to as Flash Disk (folder), which can store data and programs that you wish to retain even after hardware reset. -
Page 26: Keypad
Chapter 1 Using the CP30 Mobile Computer 1.3 KEYPAD The Alphanumeric keypad includes alphanumeric, navigation, function keys, and so on. This keypad is set to numeric mode by default. -
Page 27: Keypad Settings
CP30 Mobile Computer Reference Manual 1.3.1 KEYPAD SETTINGS Go to Start | Settings | System, and tap Keypad to configure related settings. The LED backlight of keypad is turned off by default. It is suggested to turn on the keypad backlight while working in a dark area; however, using backlight while on battery power will substantially reduce battery power. -
Page 28: Alpha Key
Chapter 1 Using the CP30 Mobile Computer 1.3.2 ALPHA KEY This alphanumeric keypad is set to numeric mode by default. The Alpha key [α] serves as a switch key among numeric, alpha (lower-case alphabetic) input modes. Note: Press [α] key to switch the numeric and lower-case alphabetic modes. -
Page 29: Function Key
CP30 Mobile Computer Reference Manual 1.3.4 FUNCTION KEY The Function key [Fn] serves as a specified key, and the functionality of each key combination is application-dependent. 1) To enable this special key, press [Fn] on the keypad. Its icon will appear on the status bar. -
Page 30: Touch Screen
Chapter 1 Using the CP30 Mobile Computer 1.4 TOUCH SCREEN The mobile computer comes with a 3.2" TFT graphic LCD, 240 by 400 pixels resolution (WQVGA). The LED backlight of screen, which helps ease reading under dim environments, can be controlled manually and automatically. -
Page 31: Screen Settings
CP30 Mobile Computer Reference Manual 1.4.2 SCREEN SETTINGS This LCD is also a touch screen that can be calibrated through screen alignment. Go to Start | Settings | System, and tap Screen to configure related settings. You may re-calibrate the touch screen, smooth the font edges or adjust the text size displayed on the screen if necessary. -
Page 32: Notifications
Chapter 1 Using the CP30 Mobile Computer 1.5 NOTIFICATIONS 1.5.1 STATUS LED The two LED indicators on top are used to provide information on the charging status, scanner "Good Read" while collecting data, and messages. LED Indicators Status Description Top left... -
Page 33: Vibrator
CP30 Mobile Computer Reference Manual 1.5.3 VIBRATOR The mobile computer is integrated with a vibrator, which is software programmable for feedback. This can be helpful when working in noisy environments. Tap the top of the screen to invoke the title bar drop-down list, and then tap the volume setting icon to change the system volume or phone ring. -
Page 34: Data Capture
Chapter 1 Using the CP30 Mobile Computer 1.6 DATA CAPTURE 1.6.1 BARCODE READER A wide variety of scan engines is available for delivering flexibility to meet different requirements. Depending on the scan engine integrated, the mobile computer is capable of scanning barcodes of a number of symbologies that are enabled by default while running the ReaderConfig.exe utility. -
Page 35: Cradle
Reference Manual 1.7 CRADLE A specified cradle is supported for CP30; it can transfer data or charging via a Micro USB 2.0 cable. There is also a LED indicator in front of the cradle to indicate the charging status of battery. For plastic bolt switch that in front of the cradle information, please... -
Page 36: Car Charge
Chapter 1 Using the CP30 Mobile Computer 1.8 CAR CHARGE A car charger is a device plugged into the cigarette lighter outlet inside a vehicle, used to connect an electronic device such as mobile phone for charging battery. You can connect the car charger and phone through a USB or simple power cable. - Page 37 CP30 Mobile Computer Reference Manual...
-
Page 38: Learning Windows Mobile Basics
Chapter 2 LEARNING WINDOWS MOBILE BASICS This chapter mainly describes the basic skills to work with the CP30 Mobile Computer. The add-on utilities for applications regarding data collection, processing, and transmission, are introduced in the following chapters. The mobile computer is specifically designed for real-time data collection in the Windows Mobile 6.5 environment. -
Page 39: Getting Started
CP30 Mobile Computer Reference Manual 2.1 GETTING STARTED 2.1.1 HOME SCREEN When the mobile computer is fully charged, press the Power key for three seconds to turn on the mobile computer and wait for the Home Screen to come up. -
Page 40: Title Bar
Chapter 2 Learning Windows Mobile Basics 2.1.2 TITLE BAR The icons at the top of the screen are explained below. Icon Description External power source is connected. Battery power remaining: The more the white bars, the more power in the main battery. -
Page 41: Title Bar Drop-Down List
CP30 Mobile Computer Reference Manual 2.1.3 TITLE BAR DROP-DOWN LIST The title bar drop-down list is hidden at the top of the screen be showed below: Tap the title bar to reveal the drop-down list. Drag the drop-down list to left or right to view all the icons. - Page 42 Chapter 2 Learning Windows Mobile Basics Icon Description Tap it to view the reminder for an alarm or appointment. Tap it to receive incoming Bluetooth beams. Bluetooth A2DP profile is in use. Tap it to access the Bluetooth devices list. Tap it to overlook a missed call.
-
Page 43: Start Menu
CP30 Mobile Computer Reference Manual 2.1.4 START MENU to open the Start Menu. You can tap to access application programs, find useful utilities developed by CipherLab, or configure system settings. -
Page 44: Device Lock
However, on the Lock screen you can still monitor the device status on the title bar. If the Lock screen is enable, the Volume adjustment on the left side of CP30 will unavailable. Lock CP30 Go to Start Menu, and tap the lock icon on the soft key bar to protect your mobile computer. -
Page 45: Input Methods
Physical Keypad Type with the hardware keypad. Data Capture Scan barcode in applications, e.g. Notes, CipherLab's FORGE Application Generator, etc. Software Keypad Type or write using SIP (Soft Input Panel): Tap the SIP button on middle soft key bar to show or hide the input panel. -
Page 46: Managing Programs
Chapter 2 Learning Windows Mobile Basics 2.3 MANAGING PROGRAMS Tap the Start button to view the Start Menu. To quick launch a program, tap it. To add a new program or subfolder to the Start Menu, you can either use File Explorer or ActiveSync. -
Page 47: End A Program
CP30 Mobile Computer Reference Manual 2.3.4 END A PROGRAM In general, the system manages memory automatically, and there is no need to exit a program in order to open another or to conserve memory. However, random access memory (RAM) may be used up when running too many programs. As a result, it will slow down the operation or cause program errors. -
Page 48: Find A File
Chapter 2 Learning Windows Mobile Basics 2.3.5 FIND A FILE Tap Start | Search Phone. In the “Search for” box, enter the file name, word, or other information you want to search for. If you have looked for this item before, tap the drop-down list and select it. In the “Type”... -
Page 49: Using Activesync
CP30 Mobile Computer Reference Manual 2.4 USING ACTIVESYNC ActiveSync is used to synchronize information between the mobile computer and your desktop computer, to install programs on the mobile computer, and to backup and restore the mobile computer. The Microsoft ActiveSync program has to be installed on your desktop computer first. -
Page 50: Add/Remove Programs
Chapter 2 Learning Windows Mobile Basics 2.4.2 ADD/REMOVE PROGRAMS Click [Add/Remove Programs] from the Tools Menu so that you can proceed to install a program that is designed to be used on a mobile device running Windows Mobile. If a user program is no longer desired, you may remove it from the system. -
Page 51: Explore Device
CP30 Mobile Computer Reference Manual 2.4.3 EXPLORE DEVICE Add a Program to Start Menu When connected, open the Microsoft ActiveSync window on your desktop computer. Click the Explorer button from the toolbar. Navigate through file folders to find the program you desire. -
Page 52: Backup/Restore
Chapter 2 Learning Windows Mobile Basics 2.4.4 BACKUP/RESTORE To best protect your work, you should regularly back up information on your mobile computer. You can perform a backup by during the ActiveSync operation. The backup file is stored on your desktop computer. -
Page 53: Suspend & Reset
Reference Manual 2.5 SUSPEND & RESET Like your PDA, Pocket PC and most handheld devices, the CP30 Mobile Computer functions when it is turned on. This is because the Windows Mobile operating system eliminates the booting process and runs continuously. -
Page 54: Hardware Reset (Cold Boot)
Chapter 2 Learning Windows Mobile Basics 2.5.3 HARDWARE RESET (COLD BOOT) Hardware reset, also known as a cold boot, will restart the mobile computer and initialize RAM. Perform a hardware reset if software reset cannot be properly operated. Hardware Reset (= Cold Boot) Remove the battery cover and the main battery. - Page 55 CP30 Mobile Computer Reference Manual...
-
Page 56: Configuring Cp30 Mobile Computer
Chapter 3 CONFIGURING CP30 MOBILE COMPUTER In this chapter, a brief on the system settings is provided for your reference. IN THIS CHAPTER 3.1 smart shell..............48 3.2 Settings ..............50 3.3 Device Name & Configuration ........57 3.4 Upgrade OS Image ............ 59... -
Page 57: Smart Shell
Reference Manual 3.1 SMART SHELL CipherLab Smart Shell is a utility allows you to customize some settings and behavior(s). You can easy to employ and control the programs installed via Smart Shell utility. For more information, please refer to the CipherLab Smart Shell User Guide. - Page 58 Chapter 3 Configuring CP30 Mobile Computer Icon Description Tap it for a 3D carousel View. Provide a fast and convenient way to access your favorite or recently used items and services. Tap it to activate or close any listed program or enable any running programs.
-
Page 59: Settings
CP30 Mobile Computer Reference Manual 3.2 SETTINGS Bluetooth Refer to Using Bluetooth. Clock & Alarms Time tab: Change the date, time and time zone settings. By default, the time zone settings will be automatically synchronized and updated by notification. Alarms tab: You may set up at most three alarms to wake you up or as a reminder. - Page 60 Chapter 3 Configuring CP30 Mobile Computer Sounds & Notifications Refer to 1.5.2 Audio. Sounds tab: Configure sounds for specific actions, events, programs, etc. Notifications tab: Select to play sounds as notifications for some events. Connections Refer to 3.2.1 Connections. Personal Refer to 3.2.2...
-
Page 61: Connections
CP30 Mobile Computer Reference Manual 3.2.1 CONNECTIONS Go to Start | Settings | Connections. Beam Tap it to receive incoming Bluetooth beams. Connections Refer to 6.5 Configuring GPRS Network. Domain Enroll Tap it to connect to a SCMDM server with an enrollment ID and password, allowing company deployment on multiple mobile computers. -
Page 62: Personal
Chapter 3 Configuring CP30 Mobile Computer Wi-Fi Refer to Using 802.11 Radio. Wireless Manager Tap it to enable/disable the Wi-Fi, Bluetooth or Phone Power, related information refer to 4 .1.1 Power On via Wireless Manager 6.1.1 Wireless Manager (Phone). 3.2.2 PERSONAL Go to Start | Settings | Personal. -
Page 63: System
CP30 Mobile Computer Reference Manual 3.2.3 SYSTEM Go to Start | Settings | System. About Version tab: It displays information of OS software, processor, etc. Device ID tab: You may enter a name and description for identifying the mobile computer. - Page 64 Chapter 3 Configuring CP30 Mobile Computer Encryption You may encrypt files stored in the SD card. The encrypted files are read only on the mobile computer. Error Reporting You may determine whether to enable error reporting to help Microsoft improve Windows Mobile software.
- Page 65 CP30 Mobile Computer Reference Manual Remove Programs You may remove programs that are stored in RAM. Screen Alignment tab: You may align the screen for calibration. ClearType tab: You may apply Clear Type fonts. Text Size tab: You may use the slider to adjust the text size.
-
Page 66: Device Name & Configuration
Chapter 3 Configuring CP30 Mobile Computer 3.3 DEVICE NAME & CONFIGURATION 3.3.1 CHANGE DEVICE NAME Go to Start | Settings | System, and tap About to change the device name on the Device ID tab if necessary. -
Page 67: Understand Device Configuration
3.3.2 UNDERSTAND DEVICE CONFIGURATION Go to Start | Settings | System, and tap Device Information to view the device information. The device configuration of CP30 Mobile Computer is displayed in 7 digits: xxxxxxx Take the screenshot for example. Its device ID is “2057601”;... -
Page 68: Upgrade Os Image
Chapter 3 Configuring CP30 Mobile Computer 3.4 UPGRADE OS IMAGE You can upgrade the OS image on your mobile computer via ActiveSync and CP30 Software Update Tool. Please contact your sales representative for the OS upgrade utility. Warning: Do not press any key on the mobile computer while upgrading OS image and make sure the power cord is connected. -
Page 69: Os Update Tool
CP30 Mobile Computer Reference Manual 3.4.2 OS UPDATE TOOL 1) Run the CP30 software update Tool on your computer. Warning: It will erase all your personal information and contacts stored on your mobile phone during using Software Update Tool. Please back up all necessary data before updating. - Page 70 Chapter 3 Configuring CP30 Mobile Computer 5) After updating, in the Software Update Tool will show “Update process is completed successfully”. Click “Finish” or you want to update another phone, please click “Continue”. On the other hand, your phone will also restart after finishing OS update. Normally, your phone will ask you to set some basic settings just like align screen, date and time, password and so on.
- Page 71 CP30 Mobile Computer Reference Manual...
-
Page 72: Using 802.11 Radio
Chapter 4 USING 802.11 RADIO The Wi-Fi module integrated on the mobile computer lets you configure and connect to network wirelessly. IN THIS CHAPTER 4.1 Wi-Fi Power .............. 64 4.2 Wi-Fi Configuration ............ 68... -
Page 73: Wi-Fi Power
CP30 Mobile Computer Reference Manual 4.1 WI-FI POWER 4.1.1 POWER ON VIA WIRELESS MANAGER Go to Start | Wireless Manager as shown below. Tap [All] or [Wi-Fi] to turn on the power. -
Page 74: Wlan Connection
Chapter 4 Using 802.11 Radio When the Wi-Fi status is “Available”, it means it is turned on and Wi-Fi networks are available. 4.1.2 WLAN CONNECTION Tap Menu | Wi-Fi Settings to configure related settings. - Page 75 CP30 Mobile Computer Reference Manual On the Wireless tab, you may have a list of available Wi-Fi networks. Select one or tap [Add New…] and follow the on-screen instructions to configure related settings, such as the network name, authentication and encryption type, etc.
- Page 76 Chapter 4 Using 802.11 Radio Wait a few seconds for the mobile computer to connect to the preferred network you have configured. Tap [OK] to close the current window. Once connected successfully, the associated icon will appear on the title bar and the connected network name will be displayed for Wi-Fi status in Wireless Manager.
-
Page 77: Wi-Fi Configuration
Connected IP Address IP address of the mobile computer Signal Quality, Signal Strength, Channel Information on the wireless connection between the CP30 and AP, including bar indication of signal quality and strength BSSID MAC address of the access point (AP) -
Page 78: Rssi Level
Chapter 4 Using 802.11 Radio 4.2.2 RSSI LEVEL You may change the roaming and power settings on the Option tab. Roaming Whether to trigger the mechanism of roaming Enable (default) Disable RSSI Level RSSI stands for Received Signal Strength Indication. Use an RSSI value to determine when it comes below a certain threshold at which point the mobile computer will seamlessly switch the network connection, for example, while moving in and out of range between different access points (AP). - Page 79 CP30 Mobile Computer Reference Manual Auto Mode: Switches between the two modes described above, depending on network traffic. This mode switches to Always On mode when retrieving a large number of packets and switches back to Max. Saving mode after the packets have been retrieved.
-
Page 80: Using Bluetooth
Chapter 5 USING BLUETOOTH The CP30 Mobile Computer lets you configure Bluetooth settings and manage Bluetooth services provided on the remote devices. Bluetooth Profiles Supported Serial Port Profile (SPP) supports Server/Client Object Push Profile (OPP) supports Server/Client Dial-Up Networking Profile... -
Page 81: Bluetooth Power
CP30 Mobile Computer Reference Manual 5.1 BLUETOOTH POWER 5.1.1 POWER ON VIA WIRELESS MANAGER Go to Start | Wireless Manager as shown below. Tap [All] or [Bluetooth] to turn on the power. -
Page 82: Changing Bluetooth Settings
Chapter 5 Using Bluetooth When the Bluetooth status is “Visible”, it means it is turned on and deployment is enabled. 5.1.2 CHANGING BLUETOOTH SETTINGS Tap Menu | Bluetooth Settings to configure related settings. On the Mode tab, you may select to enable/disable Bluetooth function or whether hide the mobile computer from other Bluetooth devices. -
Page 83: Search Devices
CP30 Mobile Computer Reference Manual 5.2 SEARCH DEVICES In the Bluetooth configurations screen, on the Devices mode tab you can search for other Bluetooth device or go to Start | Settings | Bluetooth for the same settings. Tap [Add new device…] or Add on the soft key bar to search for other Bluetooth devices. - Page 84 Chapter 5 Using Bluetooth Wait for a few seconds, and it will list the discovered devices. If you do not see the devices that want to be connected, make sure it is set discoverable. Tap Refresh to search again.
-
Page 85: Pair Devices
CP30 Mobile Computer Reference Manual 5.3 PAIR DEVICES 5.3.1 PAIR Select a connected device and tap Next. If necessary, please enter the password that is specified on the remote device. Tap Next. - Page 86 Chapter 5 Using Bluetooth Tap Done. Once paired successfully, the device will appear in the device list. Tap it to view available Bluetooth services or modify its display name.
-
Page 87: Unpair
CP30 Mobile Computer Reference Manual 5.3.2 UNPAIR On the Devices tab, tap and hold the desired device to select [Delete] from the pop-up menu. Note: The mobile computer must be unpaired on the remote device as well. For example, also remove it from the device list on the remote device. (Both devices... -
Page 88: Serial Port Service
Chapter 5 Using Bluetooth 5.4 SERIAL PORT SERVICE On the Devices tab, tap and hold the desired device to select [Edit] from the pop-up menu. Make sure the Serial Port service is enabled for use on the remote Bluetooth device, then tap Refresh to select Serial Port check box, click Save. - Page 89 CP30 Mobile Computer Reference Manual On the COM Ports tab, tap [New Outgoing Port]. Select the remote device, and then tap Next.
- Page 90 Chapter 5 Using Bluetooth Select a COM port, and then tap Finish. (For Bluetooth, please select COM0 or COM3 for connection, refer to the COM Port Mapping in Appendix V - COM PORT MAPPING. Tap OK.
- Page 91 CP30 Mobile Computer Reference Manual In the Bluetooth configurations screen, on the Devices tab, tap and hold the connected remote Bluetooth device, select [Connect] from the pop-up menu. Alternatively, you may tap Connect on the soft key bar to access the remote service...
-
Page 92: Object Push Via Beam
Chapter 5 Using Bluetooth 5.5 OBJECT PUSH VIA BEAM 5.5.1 SEND A FILE Tap Start | File Explorer. Navigate through file folders to find the file you wish to send to the remote device. Tap and hold the file to select [Beam File] from the pop-up menu. Tap the required remote device to send the file via Bluetooth. -
Page 93: Receive A File
CP30 Mobile Computer Reference Manual 5.5.2 RECEIVE A FILE Tap Start | Settings | Connections | Beam, and make sure the Beam Mode is enabled in order to receive all incoming beams. On the remote device, send a desired file to the mobile computer via Bluetooth. -
Page 94: Active Sync Via Bluetooth
Chapter 5 Using Bluetooth 5.6 ACTIVE SYNC VIA BLUETOOTH You must configure Bluetooth settings correctly on your computer first. Configure Bluetooth settings for your computer, such as “Turn discovery on”, adding a COM port (Incoming), the COM port value depend on your computer active etc. Allow connections to the specified COM port in ActiveSync. - Page 95 CP30 Mobile Computer Reference Manual Deploy the mobile computer to your computer. Make sure the ActiveSync service is enabled for use on the remote computer. For the Bluetooth connection via ActiveSync, you have to take off the USB cable between mobile computer and remote computer so that it can release the ActiveSync check box as below for connection.
-
Page 96: Using The Phone
Chapter 6 USING THE PHONE The CP30 Mobile Computer allows making phone calls and connecting to network over General Packet Radio Service (GPRS). Insert the SIM card before turning on the power. Refer to Inserting SIM Card. Note: If the SIM card is not in position, you may make emergency calls if the service is supported. -
Page 97: Phone Power
CP30 Mobile Computer Reference Manual 6.1 PHONE POWER 6.1.1 WIRELESS MANAGER Phone power is turned on by default. If not, go to Start | Wireless Manager to access Wireless Manager. Wireless Manager Tap [All] or [Phone] to turn on the power. - Page 98 Chapter 6 Using the Phone When the power is turned on, the Phone status appears “On”, and an antenna signal icon will be displayed on the title bar. Tap Menu | Phone Settings to configure related settings if necessary. Note: Phone Settings is only available when the phone power has been turned on. You can find out the security setting, change PIN code on your SIM card and so on, if necessary.
-
Page 99: Sim Card Missing
CP30 Mobile Computer Reference Manual 6.1.2 SIM CARD MISSING On the Home Screen, the notification icon on the title bar show that the SIM card is missing. Tap Phone or press the [SEND] button on the physical keypad to access the phone... -
Page 100: Phone Application
Chapter 6 Using the Phone 6.2 PHONE APPLICATION 6.2.1 PHONE INTERFACE After the phone application is launched, the antenna signal icon the title bar indicates whether you are connected to your service provider’s network. As the strength of the signal diminishes, so will the number of bars be in the icon, ranging from no signal to excellence (four-bars). -
Page 101: Buttons
Tap the title bar and then the speaker icon on the title bar drop-down list to change the system volume or phone ring. You may mute it or have it vibrate instead. Note: Alternatively, you may press volume buttons at the left side of the CP30 touch screen. -
Page 102: Phone Settings
Chapter 6 Using the Phone 6.3 PHONE SETTINGS Menu | Options to configure phone settings if necessary. Sounds tab Tap the Sounds tab to adjust the ring type, ring tone, and the keypad sound. - Page 103 CP30 Mobile Computer Reference Manual Security tab Tap the Security tab to change SIM card security and PIN code setting. Note: The PIN verification on the mobile computer allows three chances to input the correct PIN code. If input fails three times, the PIN will be blocked, and you will need to obtain the PUK code from your network operator and unblock the SIM card on your cellular phone/mobile computer.
- Page 104 Chapter 6 Using the Phone Network tab Tap the Network tab to change phone network settings and edit your preferred networks. Others tab Tap the Others tab to configure GPRS authentication type, broadcast channels, and SMS transmission settings.
- Page 105 CP30 Mobile Computer Reference Manual Band tab Tap the Band tab to change the band type and the local band in your geographic region.
-
Page 106: Making Phone Calls
Chapter 6 Using the Phone 6.4 MAKING PHONE CALLS The phone features allow you to make or receive phone calls and assign a Speed Dial number to a contact. 1 means reserved Speed Dial number for Voicemail 6.4.1 DIAL A NUMBER You can dial a number in one of the following ways: Dialling Using the dial pad on the screen or the physical keypad –... -
Page 107: Make A Call
CP30 Mobile Computer Reference Manual 6.4.2 MAKE A CALL Dialling Out Tap the green [Talk] button on the phone keypad, or press [SEND] from the physical keypad. Hanging up Tap the red [End] button on the phone keypad, or press [END] from the physical keypad. -
Page 108: Answer A Call
Chapter 6 Using the Phone During a Call Tap the call status button on the soft key bar, and you may select to turn on the speaker, mute the receiver, or hold the line. 6.4.3 ANSWER A CALL Answering a Call Tap the Answer button or press [SEND] from the physical keypad. - Page 109 CP30 Mobile Computer Reference Manual Ignoring a Call Tap Ignore button or press [END] from the physical keypad. Viewing a Missing Call When the status icon is displayed on the title bar and tap it will see a missing call icon appears.
-
Page 110: Configuring Gprs Network
Chapter 6 Using the Phone 6.5 CONFIGURING GPRS NETWORK Tap Start | Settings | Connections and select Connections. Initially, you have to configure the GPRS settings. Tap [Add a new modem connection] and follow the on-screen instructions to enter the connection name and modem types. - Page 111 CP30 Mobile Computer Reference Manual Enter the connection name and select [Cellular Line (GPRS, 3G)] from the drop-down list. Tap Next. Specify the GPRS AP name for the mobile computer to connect to, for example, “internet”. Tap Next.
- Page 112 Chapter 6 Using the Phone Tap Finish. Note: You must connect to the GPRS modem specified by the mobile phone operator.
- Page 113 CP30 Mobile Computer Reference Manual...
-
Page 114: Using Reader Configuration Utility
Chapter 7 USING READER CONFIGURATION UTILITY Reader Configuration Utility is the tool that lets you manage the barcode reader integrated on the mobile computer. IN THIS CHAPTER 7.1 Run ReaderConfig.exe ..........106 7.2 Barcode Reader Settings..........107 7.3 Data Output .............108 7.4 Notifications (for Good Read)........110 7.5 Symbology Settings ..........111... -
Page 115: Run Readerconfig.exe
CP30 Mobile Computer Reference Manual 7.1 RUN READERCONFIG.EXE Go to Start | CipherLab Utilities| Reader Configuration to open the Reader Configuration Utility. Test the reader if necessary. You can view the barcode type and decoded data in the content field. -
Page 116: Barcode Reader Settings
Chapter 7 Using Reader Configuration Utility 7.2 BARCODE READER SETTINGS The barcode reader configurations depend on the scan engine(s) installed. You can detect which barcode type for scan currently in use and make necessary settings on the General tab. Barcode Reader Description Laser Reader If installed, tap the [Barcode Reader] button to configure the reader... -
Page 117: Data Output
CP30 Mobile Computer Reference Manual 7.3 DATA OUTPUT Tap the [Data Output] button in the General tab configuration to choose from the three options for data output after decoding as well as configure associated settings. Data Output Default Keyboard Data is emulated as typed text and sent to the active Window. - Page 118 Chapter 7 Using Reader Configuration Utility Note: (1) Refer to CP30 .NET or C/C++ Programming Guide for details on Windows Message and Windows Event. Sample programs are provided by request. (2) For the use of a different program rather than ReaderConfig.exe, a dynamic-link library (DLL) file is provided.
-
Page 119: Notifications (For Good Read)
CP30 Mobile Computer Reference Manual 7.4 NOTIFICATIONS (FOR GOOD READ) Tap the [Notifications] button in the General tab configuration to configure how you want to be notified of a successful decoding. Maximize the screen to fill the window Sound / Vibration... -
Page 120: Symbology Settings
Chapter 7 Using Reader Configuration Utility 7.5 SYMBOLOGY SETTINGS On the Symbologies tab, determine whether to enable or disable a specific symbology. Note: The symbology settings vary by the scan engine installed. Refer to Appendix I - Scan Engine Settings for the symbologies supported by a scan engine. - Page 121 CP30 Mobile Computer Reference Manual...
-
Page 122: Using Camera
Chapter 8 USING CAMERA The Camera utility allows acquiring still or continuous images from the built-in camera. Go to Start and tap Camera to open the image capture program. IN THIS CHAPTER 8.1 Camera Interface............114 8.2 Taking an Image............115 8.3 Shooting a Video ............117 8.4 Pictures &... -
Page 123: Camera Interface
CP30 Mobile Computer Reference Manual 8.1 CAMERA INTERFACE Still Mode Video Mode The icons on top of the screen are for camera status and image properties. Icon Description In Still mode: number of pictures can be taken In Video mode: available recording time... -
Page 124: Taking An Image
Chapter 8 Using Camera 8.2 TAKING AN IMAGE By default, the camera is set to Still mode for taking pictures, and a preview screen is displayed. Hold still and take aim at the object you want to take a still picture. You may drag the slider to zoom in (+) or zoom out (-) an image. - Page 125 CP30 Mobile Computer Reference Manual Before the camera utility is back to the preview screen, you may tap the advanced buttons at bottom of the review screen, which will be retained for five seconds by default. to return to the preview screen.
-
Page 126: Shooting A Video
Chapter 8 Using Camera 8.3 SHOOTING A VIDEO Switching to the Video mode, a preview screen will be displayed. Hold still and take aim at the object you want to take a moving picture. Available recording time Press [Scan] or [Enter] on the physical keypad to record a video. Each recording will be automatically saved under the directory “\My Device\My documents\My Videos\YYMMDD”... -
Page 127: Pictures & Videos
CP30 Mobile Computer Reference Manual 8.4 PICTURES & VIDEOS Go to Start and tap Pictures & Videos to open the default image folder “\My Device\My Documents\My Pictures”. 8.4.1 VIEW AN IMAGE Locate the target folder and the desired picture. The subfolders are named with the date YYMMDD (2-digit year, 2-digit month and 2-digit date) when images were taken. - Page 128 Chapter 8 Using Camera Select a desired picture and tap [View] on bottom of the screen. Tap Menu on the soft key bar right, you may adjust the zoom, start a slide show, beam pictures, edit or rotate pictures, etc. Refer to 8.4.3 Advanced Editing Settings.
-
Page 129: Playback A Video
CP30 Mobile Computer Reference Manual 8.4.2 PLAYBACK A VIDEO Locate the target folder and the desired videos. The subfolders are named with the date YYMMDD (2-digit year, 2-digit month and 2-digit date) when videos were recorded. Subfolders in date format Select a desired video and tap [Play] on bottom of the screen. -
Page 130: Advanced Editing Settings
Chapter 8 Using Camera 8.4.3 ADVANCED EDITING SETTINGS In My Video Configuration screen, tap Menu | Tools | Options; you may have more editing options. General tab When sending a picture by e-mail, it can be resized in favor of the transfer speed. You may tap the drop-down list to select a desired picture size if necessary. - Page 131 CP30 Mobile Computer Reference Manual Slide Show tab By default, slide shows are played in a Portrait view. You may change to use landscape view instead to make pictures properly fit the screen. If you select “Play screensaver when connected to my PC and idle for 2minutes”, pictures stored in the default image folder “\My Device\My Documents\My Pictures”...
- Page 132 Chapter 8 Using Camera Video tab While recording a video, audio will be included. You may disable the check box or set time limit for videos so that the file size can be reduced. Tap [OK] to save the current settings and return to the previous window.
-
Page 133: Camera Settings
CP30 Mobile Computer Reference Manual 8.5 CAMERA SETTINGS On the soft key bar, tap the button to configure camera settings if necessary. Mode By default, no special mode is applied. Icon Description Night mode Low light Backlight Outdoor Stabilize Effect By default, no special effect is applied. - Page 134 Chapter 8 Using Camera Timer By default, timer is disabled. You have to manually press [Scan] or [Enter] to take one picture at a time. “3 seconds” and “10 seconds” are supported to activate the timer and take one picture. This is only applicable in Still mode.
- Page 135 CP30 Mobile Computer Reference Manual...
-
Page 136: More Applications
Chapter 9 MORE APPLICATIONS The CP30 Mobile Computer provides more utilities and applications which are made accessible from Start | CipherLab Utilities. Backup Utility lets you manipulate the way to backup programs and data. Button Assignment Utility lets you assign a specific button as a hot key for launching a program or performing a certain action. -
Page 137: Backup Utility
Mobile Computers. 9.1.1 MANAGING THE REGISTRY Go to Start | CipherLab Utilities | BackupUtility to open the Backup Utility. If you are using this backup utility for the first time, you must manually save the system registry to the Windows folder first! Tap [Back up] now to save the current system registry to "\My Device\Windows\". -
Page 138: Preparing For Backup
Chapter 9 More Applications If you wish to reset the current system configurations and settings to defaults, tap [Restore] to delete the current system registry "\My Device\Windows\". It will then reload the default registry values after a warm boot. 9.1.2 PREPARING FOR BACKUP Tap the Backup tab and it will automatically start scanning the file system. -
Page 139: Backing Up Files
CP30 Mobile Computer Reference Manual 9.1.3 BACKING UP FILES 1) Select the items you wish to backup, and tap [Backup]. 2) Tap if you need to save the backup to a different root or file name (.bkp). By default, it will save the selected items to the Storage Card folder by the current date - the format of filename is "Backup_(4-digit year)(2-digit month)(2-digit date)". - Page 140 Chapter 9 More Applications 5) Tap [OK] to close the current window. Note: If you sure to backup files to this new root or file name in future runs, you must tap [OK] on the soft key bar to save the current settings and exit the application.
-
Page 141: Using Backups For Restore
CP30 Mobile Computer Reference Manual 9.1.4 USING BACKUPS FOR RESTORE After the backup operation, tap the Restore tab and it will automatically start scanning for any .bkp files. Specify how to use these backups for automatic or manual restore operation. - Page 142 Chapter 9 More Applications Full Restore Operation 1. Select a desired backup file from the list. 2. Tap [Restore]. 3. Tap [Start] to run the restore process. 4. Once the restore process is completed, you will be asked to perform a warm boot. Tap [No] if you wish to warm boot later.
-
Page 143: Button Assignment Utility
[ # ] (Hash) Note: By default, the two side triggers are programmed to serve as Scan keys. Go to Start | CipherLab Utilities to open the Button Assignment Utility. 1) Tap the label of one of these keys. For example, tap [L. Key] to configure the side trigger on the left. - Page 144 Chapter 9 More Applications F1 ~ F12 Start Menu OEM_Key1 (0xE9) OEM_Key2 (0xEA) OEM_Key3 (0xEB) OEM_Key4 (0xEC) OEM_Key5 (0xED) OEM_Key6 (0xEE) OEM_Key7 (0xEF) OEM_Key8 (0xF0) OEM_Key9 (0xF1) OEM_Key10 (0x2A) 3) Tap [OK] on the soft key bar for the change to take effect and save the current settings.
-
Page 145: Signature Utility
CP30 Mobile Computer Reference Manual 9.3 SIGNATURE UTILITY The Signature utility allows acquiring signatures and viewing signatures stored on the mobile computer. Go to Start | CipherLab Utilities | CipherlabSignature to open the signature capture program. Toolbar Signature Area The icons on the toolbar, from left to right, are for these functions —... -
Page 146: Capturing A Signature
Chapter 9 More Applications 9.3.1 CAPTURING A SIGNATURE 1) In the signature area, use the stylus to write a signature. 2) Tap to clear the entire signature and write a new one if necessary. 3) Tap to save the signature as an image file in BMP or JPEG format. 4) Tap [ ] to exit the program. -
Page 147: Viewing A Signature
CP30 Mobile Computer Reference Manual 9.3.2 VIEWING A SIGNATURE 1) Tap to load a signature image and it will be displayed along with a message asking whether you want to modify the signature. 2) Tap [Yes] to change the signature image if necessary. -
Page 148: Changing Signature Settings
Chapter 9 More Applications 9.3.3 CHANGING SIGNATURE SETTINGS to configure signature settings if necessary. Pen Width tab Set the pen width (1~5) in pixels for the signature writing. Pen Colors tab Set the pen color from the available samples or entering the RGB values (0~255) for your color. - Page 149 CP30 Mobile Computer Reference Manual Background Colors tab Set the background color from the available samples or entering the RGB values (0~255) for your color. Changing the background color will erase the signature you have captured in this file.
-
Page 150: Gps Viewer
More Applications 9.4 GPS VIEWER The CP30 Mobile Computer is equipped with a GPS receiver for obtaining location and time information from the Global Positioning System (GPS). Since the mobile computer does not come with any preinstalled navigation software, you may need to purchase third-party navigation software separately. - Page 151 CP30 Mobile Computer Reference Manual Note: Time To First Fix (TTFF) relies on environmental factors. Normally, it takes approximately 40 seconds for the receiver to locate the first satellite. However, it may take longer when satellite signals are blocked by tall vertical objects, such as...
-
Page 152: Receiving Gps Information
Chapter 9 More Applications 9.4.1 RECEIVING GPS INFORMATION The receiver will automatically start to scan available satellites, synchronize time, and get the current location. Information on time, location, the quality of the signal, and so on, will be displayed if available. On the satellite position graph (= the earth marked with N, E, S, W indicators for North, East, South and West), satellites in view are displayed in red and flash to get signal. -
Page 153: Data Of Nmea Format
CP30 Mobile Computer Reference Manual 9.4.2 DATA OF NMEA FORMAT The serial interface protocol is based on the national Marine Electronics Association’s NMEA 0183 ASCII interface specification. For details, please refer to NMEA 0183 Version 3.01, which may be obtained from NMEA, www.nmea.org. You may save the NMEA codes... -
Page 154: Specifications
SPECIFICATIONS PLATFORM, PROCESSOR & MEMORY Operating System & CPU Windows Version Microsoft Windows Mobile 6.5 Professional Qualcomm MSM7225 at 528 MHz Memory 512 MB NAND flash memory 256 MB DDR Expansion Slot One microSD card slot SDHC supported COMMUNICATIONS & DATA CAPTURE Communications USB Client USB Client 2.0 Specification... -
Page 155: Electrical Characteristics
CP30 Mobile Computer Reference Manual ELECTRICAL CHARACTERISTICS Batteries Main Battery Pack Rechargeable Li-ion battery – 3.7 V, 2200 mAh Power Adaptor Power Supply Cord with Input AC 100~240 V, 50/60 Hz Universal Power Adaptor Output DC 5 V, 1 A Charging &... -
Page 156: Environmental Characteristics
Microsoft SDK System API (LIB and DLL) for system configuration Reader API (DLL) for reader configuration Software & Utilities Reader Configuration Utility Cipherlab software package FORGE Application Generator MIRROR Browser for web application Navigation software Third-party software SOTI MobiControl for remote device control SOTI MobiScan Naurtech CETerm –... -
Page 157: Accessories
CP30 Mobile Computer Reference Manual ACCESSORIES Accessory Options Protective Cover LCD Protective Film Spare rechargeable battery pack Charging Cradle Car Charger... -
Page 158: Scan Engine Settings
Appendix I SCAN ENGINE SETTINGS The Reader Configuration Utility (ReaderConfig.exe) allows configuring the following reader types, depending on the module equipped on your mobile computer: 1D Laser (SE955) 2D Imager Note: (1) You cannot have 1D+2D scan engines installed on the mobile computer because they are both barcode readers! (2) You can run only one utility or application at a time to control the reader. - Page 159 CP30 Mobile Computer Reference Manual Chinese 25 Code 3 of 9 Code 39 Trioptic Code 39 Italian Pharmacode (Code 32) EAN/UPC EAN-8 EAN-13 Bookland EAN (ISBN) UPC-E0 UPC-E1 UPC-A GS1 DataBar (RSS) GS1 DataBar Omnidirectional (RSS-14) GS1 DataBar Truncated GS1 DataBar Stacked...
-
Page 160: Laser (Se955)
Appendix II LASER (SE955) The tables below list reader settings as well as symbology settings for the Laser (SE955) scan engine. READER SETTINGS TABLE Laser Engine Description Default 3 sec. Decode Time-out Set the maximum time for decoding to continue during a scan attempt. -
Page 161: Symbology Settings Table
CP30 Mobile Computer Reference Manual Timeout between When in Continuous mode, set the minimum time that 1.0 sec. same symbols must stop detect before the scan engine decodes a second same barcode. This reduces the risk of accidentally scanning the same barcode twice. - Page 162 Appendix II Laser (SE955) Interleaved 25 Enable Convert to EAN-13 Convert a 14-character barcode into EAN-13 if the following requirements are met: The barcode must have a leading 0 and a valid EAN-13 check digit. “Check digit verification” must be disabled. Check digit verification Decide whether to verify the check digit.
- Page 163 CP30 Mobile Computer Reference Manual Check digit algorithm One Check Digit Single Modulo 10 Mod 10/Mod 11 Two Check Digits Mod 10/Mod 10 Transmit Check Digit Decide whether to include the check digit in the data being transmitted. One or two fixed lengths...
- Page 164 Appendix II Laser (SE955) UCC coupon extended Read UPC-A barcodes starting with digit "5", EAN-13 code barcodes starting with digits "99", and UPC-A/GS1-128 Coupon Codes. UPC-A, EAN-13, and GS1-128 must be enabled first! “Addon Redundancy” control auto-discrimination of the GS1-128 (right half) of a coupon code.
-
Page 165: Miscellaneous
CP30 Mobile Computer Reference Manual MISCELLANEOUS Laser Engine Description Default Miscellaneous Options Transmit Code ID Decide whether to include AIM Code ID in the beginning of none data. none AIM code ID character Each AIM Code ID contains the three-character string “]cm”... - Page 166 Appendix II Laser (SE955) Check digit has been verified and stripped. Full ASCII conversion has been performed. Result of option values 1 and 4. Result of option values 3 and 4. Code 128 Standard data packet. No Function Code 1“FNC1” in the first character position.
- Page 167 CP30 Mobile Computer Reference Manual Data packet containing the data following an escape mechanism character. The data packet does not support the ECI protocol. Data packet containing the data following an escape mechanism character. The data packet supports the ECI protocol.
- Page 168 Appendix II Laser (SE955) Mode 4 or 5, ECI protocol implemented. Mode 2 or 3, ECI protocol implemented in secondary message. QR Code Model 1 Model 2, ECI protocol not implemented. Model 2, ECI protocol implemented. Model 2, ECI protocol not implemented, FNC1 implied in first position.
- Page 169 CP30 Mobile Computer Reference Manual...
-
Page 170: Imager
Appendix III 2D IMAGER READER SETTINGS TABLE The tables below list reader settings as well as symbology settings for the 2D scan engine. 2D Engine Description Default Decode Time-out Set the maximum time for decoding to continue during a 3 sec. scan attempt. - Page 171 CP30 Mobile Computer Reference Manual Level 4 All barcodes must be successfully read three times before being decoded. Security Level Select a decode security level appropriate for the barcode Level 0 quality when reading delta barcodes such as Code 128, Code 93, UPC/EAN.
-
Page 172: Symbology Settings Table
Appendix III 2D Imager SYMBOLOGY SETTINGS TABLE 1D SYMBOLOGIES 2D Engine Description Default Codabar Enable CLSI Editing When applied, the CLSI editing strips the start/stop characters and inserts a space after the first, fifth, and tenth characters of a 14-character Codabar barcode. The 14-character barcode length does not include start/stop characters. - Page 173 CP30 Mobile Computer Reference Manual ISBT Concatenation When “Auto-discriminate” applied, decide 10 times Redundancy concatenation redundancy (2~20 times). Industrial 25 (Discrete 25) Enable One or two fixed lengths Select Length 4~55 (min/max) Range (1~55) Interleaved 25 Enable Convert to EAN-13...
- Page 174 Appendix III 2D Imager Trioptic Code 39 Decide whether to decode Trioptic Code 39. Trioptic Code 39 is a variant of Code 39 used in the marking of computer tape cartridges. It always contains six characters. One or two fixed lengths Select Length 4~55 (min/max)
- Page 175 CP30 Mobile Computer Reference Manual Convert RSS to "Convert to UPC/EAN" only applies to GS1 Databar-14 and UPC/EAN GS1 Databar Limited barcodes not decoded as part of a Composite barcode. Convert to EAN-13 Strip the leading "010" from barcodes. "01" is the Application ID and must be followed by a...
- Page 176 Appendix III 2D Imager Transmit Check Digit Decide whether to include the UPC-A/UPC-E/UPC-E1 check digit in the data being transmitted. Convert to UPC-A The UPC-E0/UPC-E1 barcode will be expanded into UPC-A, and the next processing will follow the settings configured for UPC-A.
- Page 177 CP30 Mobile Computer Reference Manual Composite Codes Composite CC-C Enable Composite CC-A/B Disable Composite TLC-39 Disable GS1-128 Emulation Transmit UCC/EAN Composite Code data as if it was Disable Mode for UCC/EAN encoded in GS1-128 barcodes. Composite Codes UPC Composite Mode UPC barcodes can be "linked"...
-
Page 178: Symbologies
Appendix III 2D Imager 2D SYMBOLOGIES 2D Engine Description Default 2D Symbologies PDF417 Decide whether to use PDF417 barcode symbol format. Enable MicroPDF417 Decide whether to use MicroPDF417 barcode symbol Disable format. MicroPDF417 Code 128 Transmit data from certain MicroPDF417 barcodes as if it Disable Emulation was encoded in Code 128 barcodes. - Page 179 CP30 Mobile Computer Reference Manual Autodetect Decode both regular and inverse QR Code. MicroQR Decide whether to use MicroQR symbol format. Enable Aztec Decide whether to use Aztec symbol format. Enable Aztec Inverse Decide whether to decode Aztec Inverse. Regular Only Regular Only Decode regular Aztec barcodes only.
-
Page 180: Miscellaneous
Appendix III 2D Imager Note: When printing barcodes, keep each Macro PDF sequence separate, as each has a unique identifier. Do not mix barcodes from several Macro PDF sequences, even if they encode the same data. When you scan Macro PDF sequences, scan the entire Macro PDF sequence without interruption! MISCELLANEOUS 2D Engine... - Page 181 CP30 Mobile Computer Reference Manual...
-
Page 182: Key Reference Tables
Appendix IV KEY REFERENCE TABLES 28-KEY KEYPAD... -
Page 183: Use Of Alpha (Α) & Shift ( )
CP30 Mobile Computer Reference Manual USE OF ALPHA (α) & SHIFT ( ) Alpha Mode Alpha Alpha Shift Shift pressed pressed pressed pressed once twice once twice pqrs Pqrs PQRS wxyz Wxyz WXYZ... -
Page 184: Use Of Function (Fn)
Appendix IV Key Reference Tables USE OF FUNCTION (Fn) Function key pressed once... - Page 185 CP30 Mobile Computer Reference Manual...
-
Page 186: Com Port Mapping
Appendix V COM PORT MAPPING COM Port CP30 COM0 CL’s BT SPP COM1 FIH’s Data Port COM2 CL’s Scanner Port COM3 Reserved for CL’s SPP COM4 FIH’s Diag Task COM5 FIH’s X task COM6 FIH’s Diag Task COM7 FIH’s GPS Port COM8 FIH’s USB composite...
Need help?
Do you have a question about the CP30 and is the answer not in the manual?
Questions and answers